
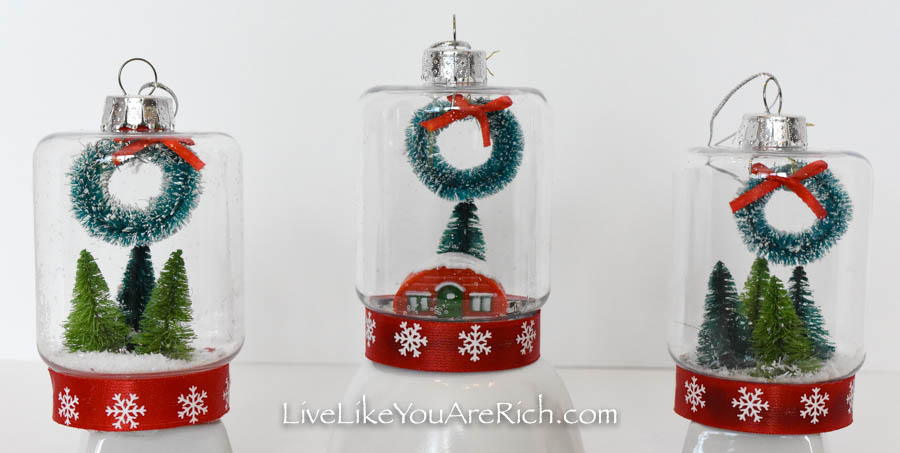
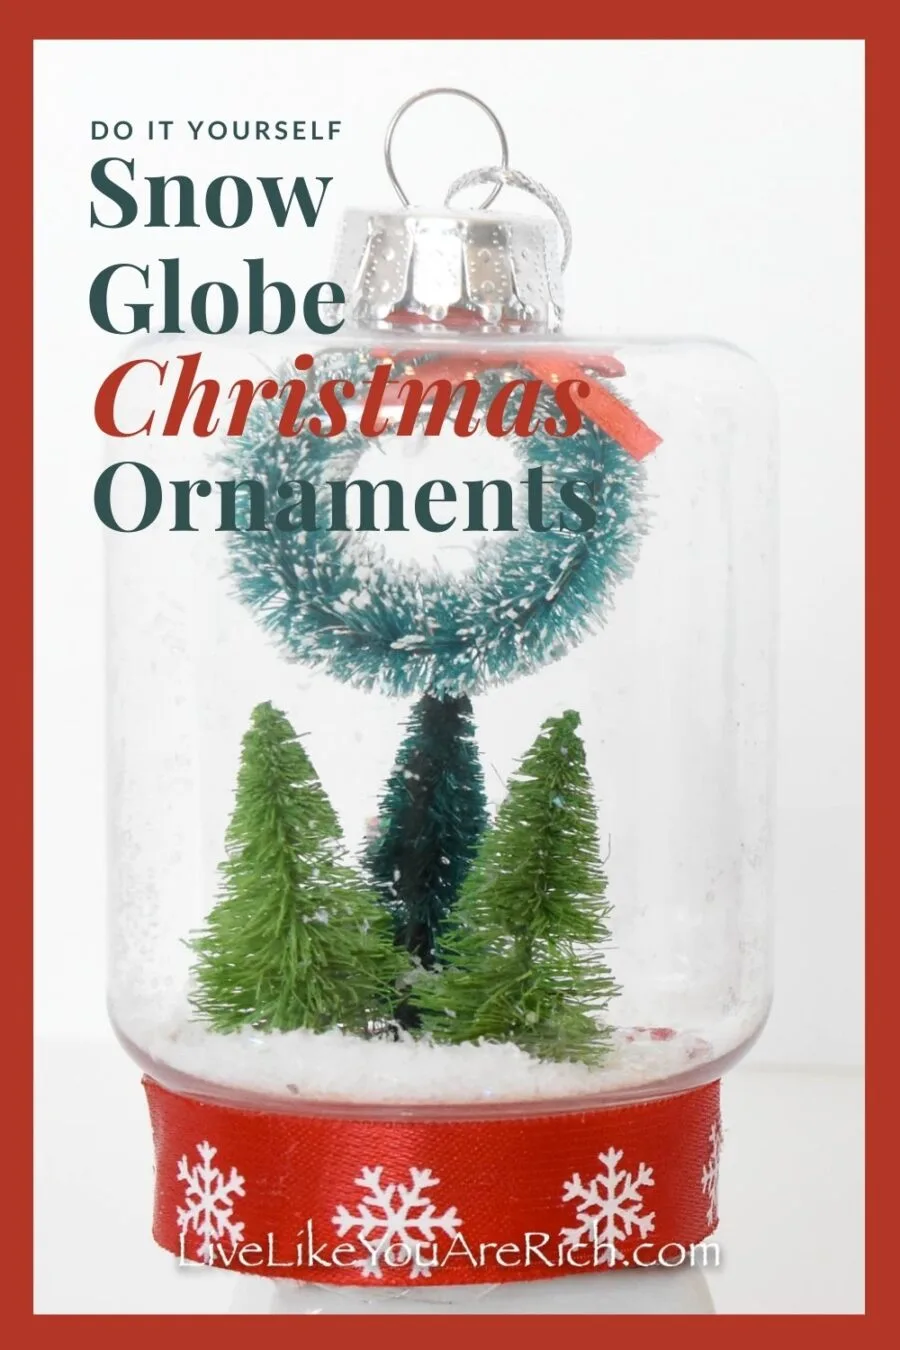
These DIY Snow Globe Christmas Ornaments were only about $3.00 each to make. They were super fun to put together and only took a few minutes each.

I love snow globes. They are so whimsical and nostalgic. These are a bit of a twist on the standard snow globe, they are not filled with water and they are also Christmas tree ornaments.
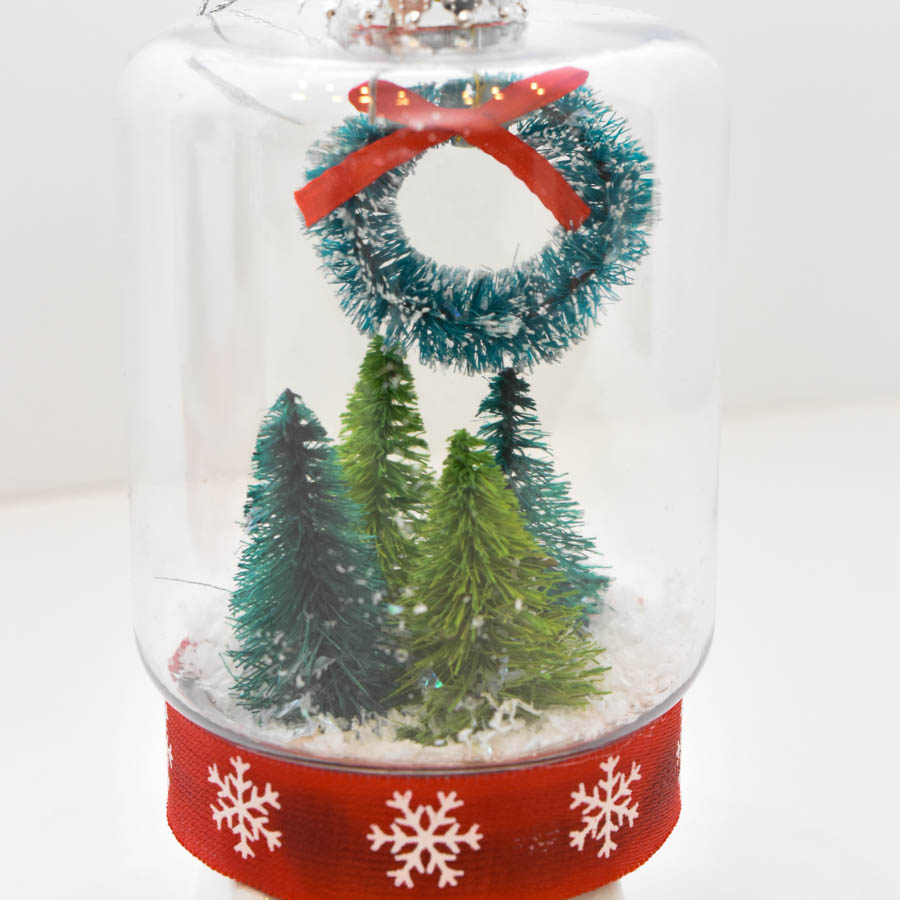
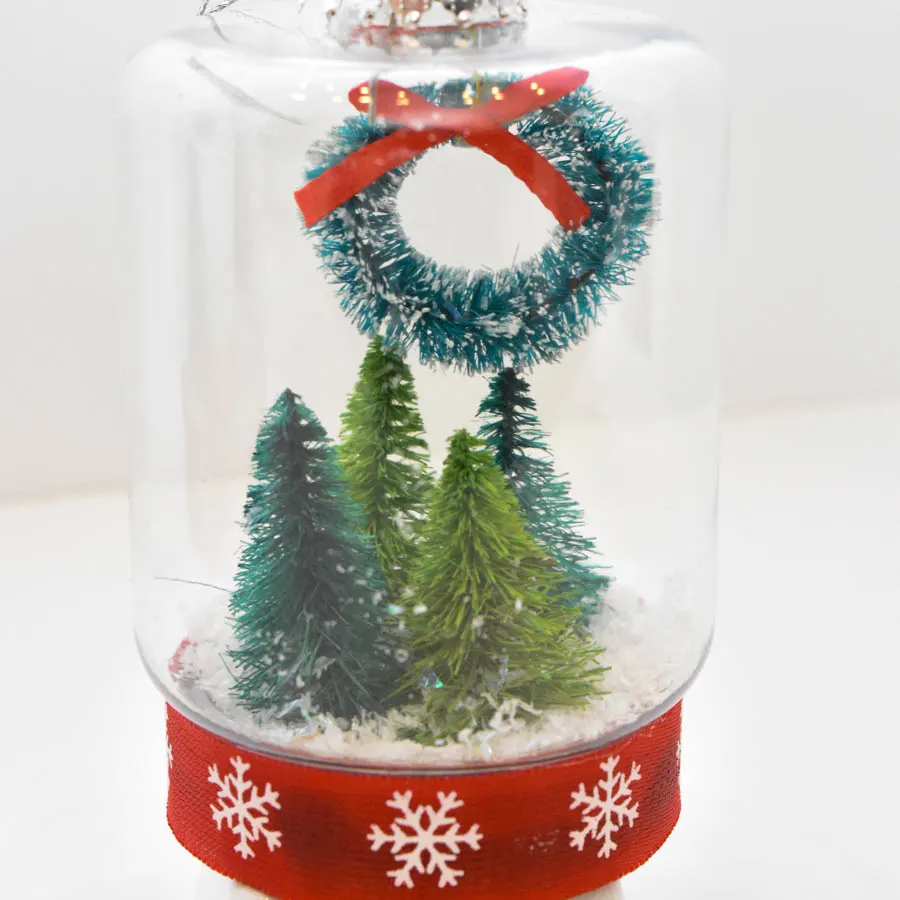
I added a cute mini wreath at the top of the ornament to fill up the space left over in these taller ornaments (found at Dollar Tree for $1.00 each).
After glueing down trees and a camper, I filled them with a mixture that I think looks pretty close to real snow.
Supply List for DIY Snow Globe Christmas Ornaments
Empty ornaments that are large enough to put items into. I found these at Dollar Tree for $1.00 each. Or here.
Mini sisal Christmas trees. I found these in packs of 4 for $1.00 in the seasonal bins at Target. Similar here.
Mini sisal wreath ornaments (or add a string to plain wreaths). These came in packs of 3 in the seasonal bins for $1.00 at Target. Similar here.
This pack on Amazon has both wreaths and trees.
Mini plastic camper figurine Dollar Tree pack of 2 for $1.00
Epoxy glue If you are not going to shake these at all, hot glue would work or super glue too.
Ribbon 5/8″ found at the Dollar Tree. Similar here.
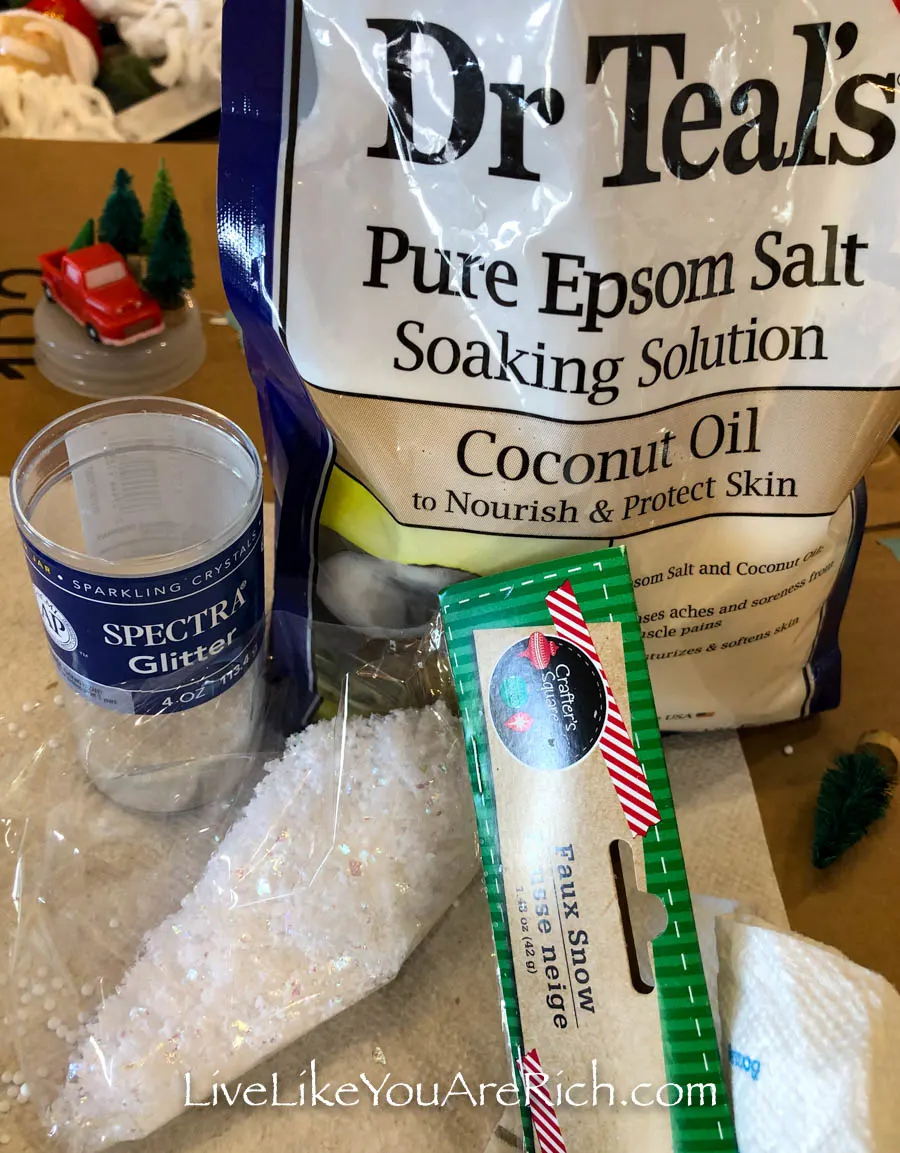
Fake snow mixture: 1 tsp of each
Epsom salt,
Spectra sparkling crystals/ white glitter,
faux snow flakes
Instructions on how to make DIY Snow Globe Christmas Ornaments

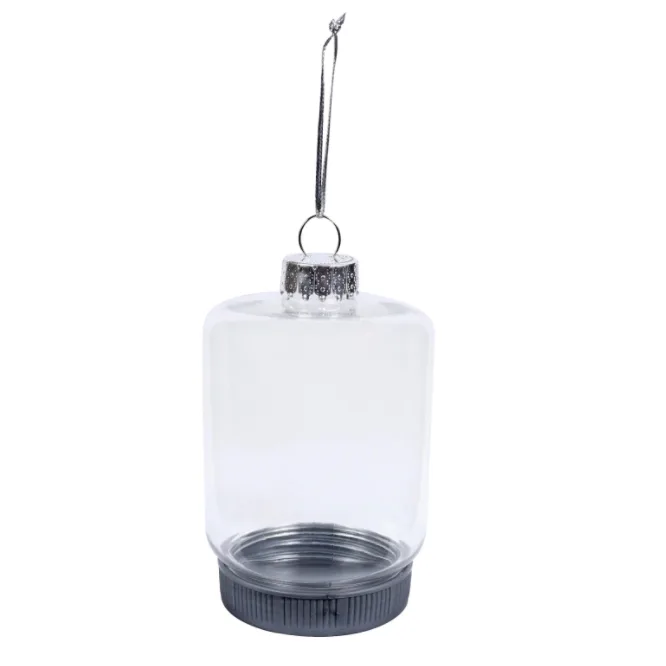
Start with an empty ornament. I found these at Dollar Tree for a dollar each.
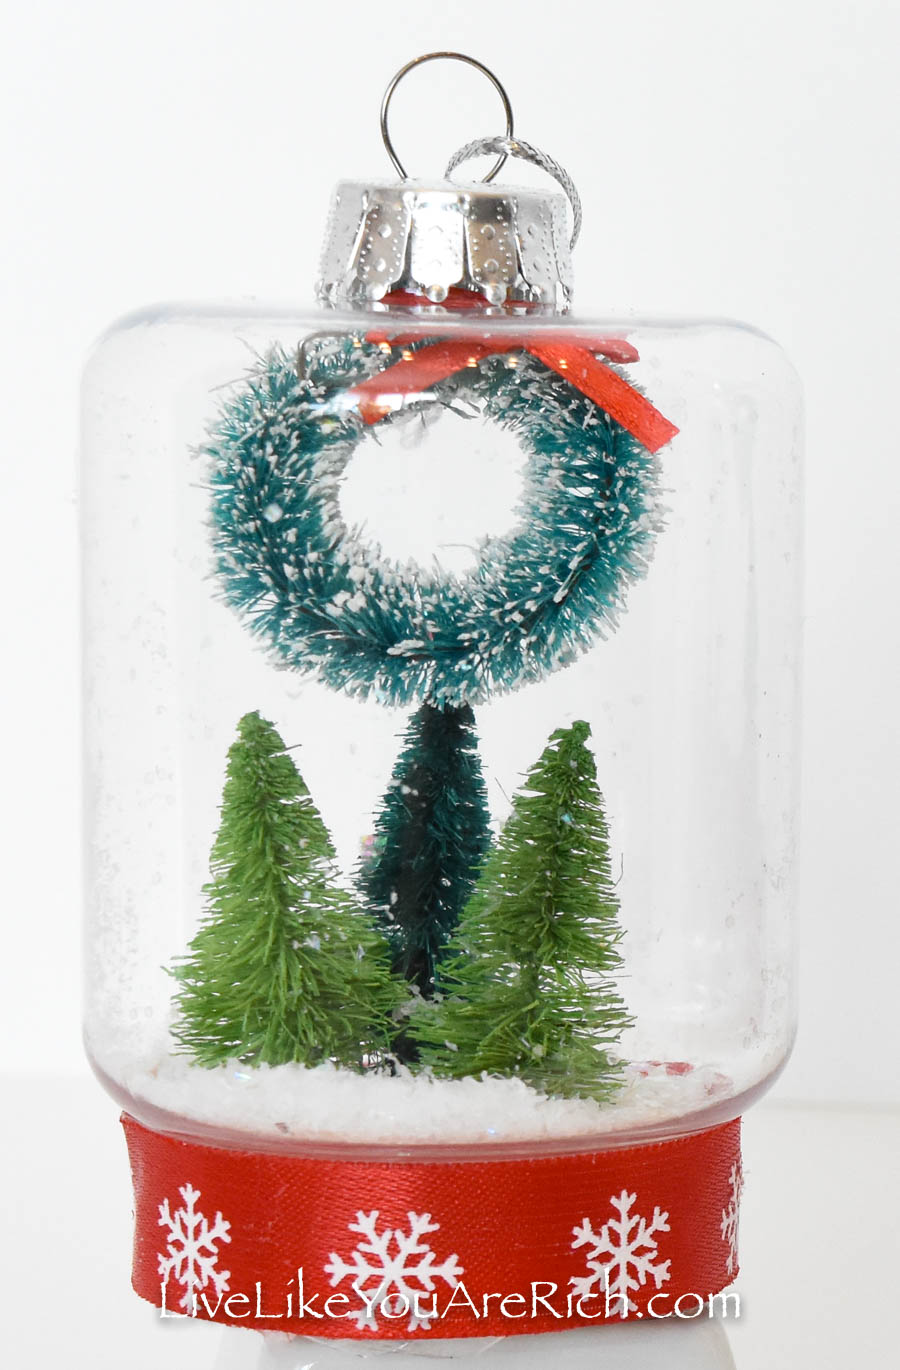
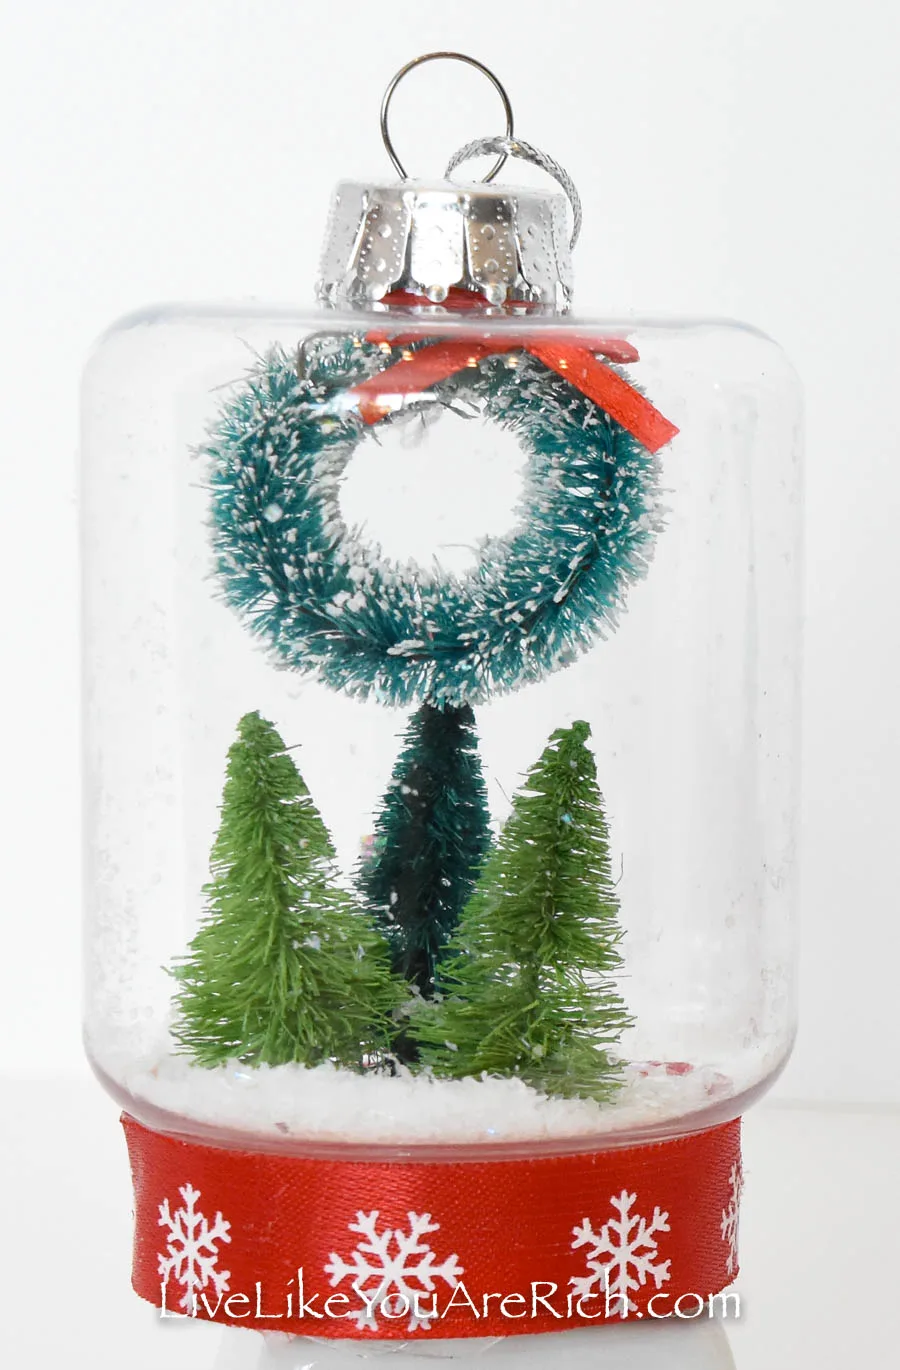
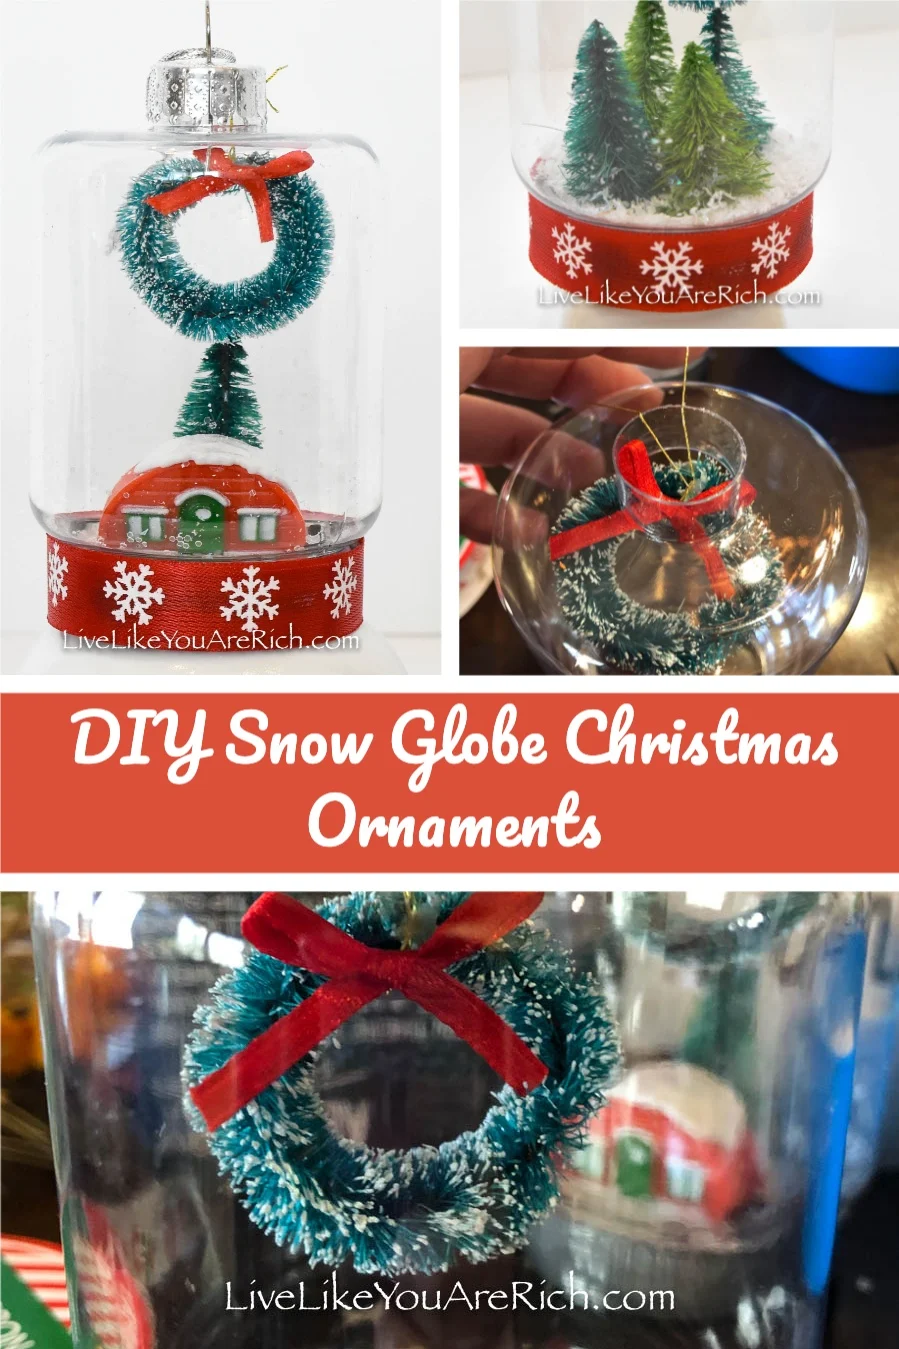
I did something a little different with these snow globes. I hung a little mini wreath at the top of each ornament. I found these wreath ornaments in the Target seasonal section. $1.00 for a 3 pack.
If you’d also like to hang a wreath in your DIY snow globe Christmas ornament, simply take the empty ornament top and bottom off.
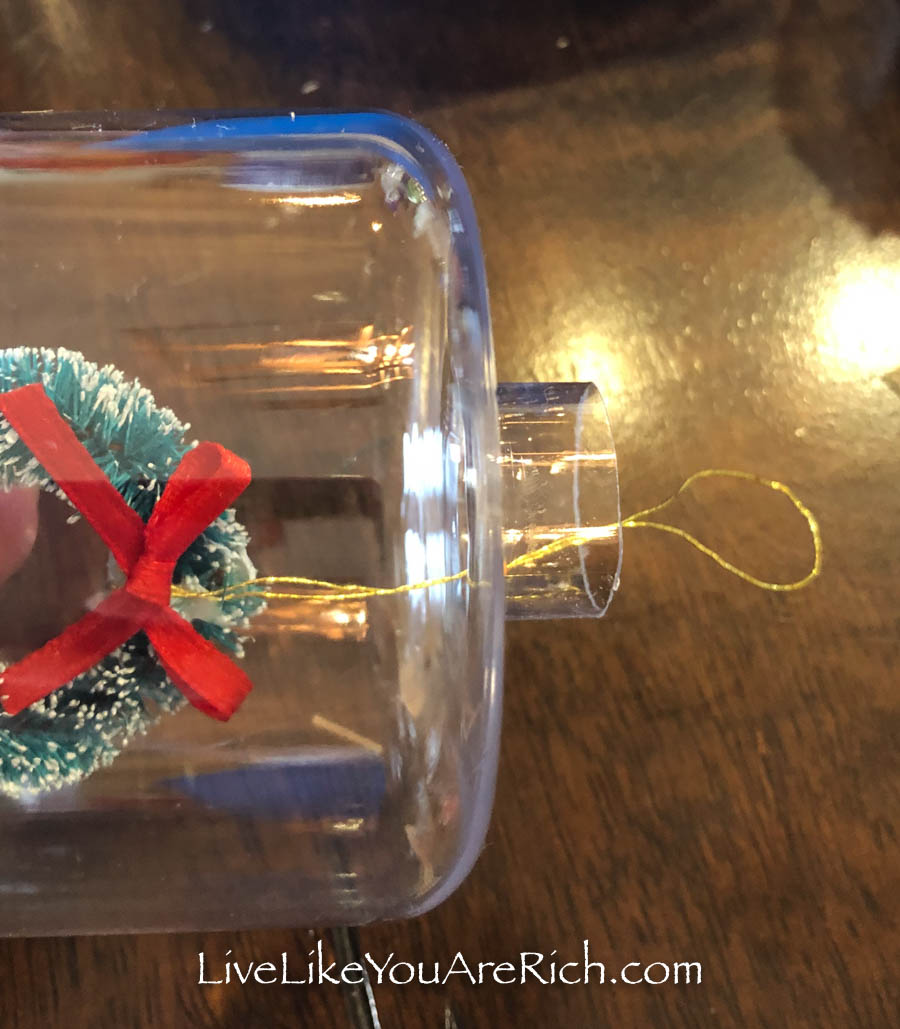

Fish the string through the top.
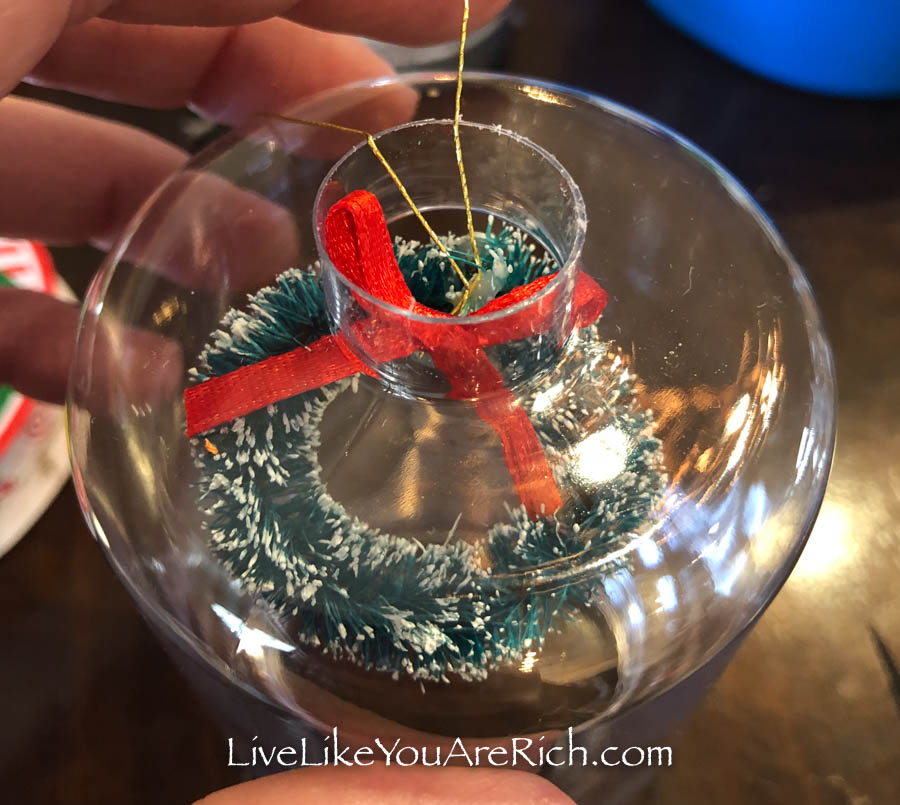

I kept the wreath string attached to the wreath and put the ornament top back on. If your wreath does not have a string, use dental floss, or a few strings of thread or embroidery floss to attach to the wreath.
Put the lid of the ornament on while pulling the string to keep the wreath and string taut. Once on, the lid should hold it in place. If for some reason it doesn’t. Use a little hot glue on the inside rim of the ornament to secure the string to it. If you do this, you need to make sure the wreath is in the correct orientation to the decor once you screw the bottom of the ornament on.
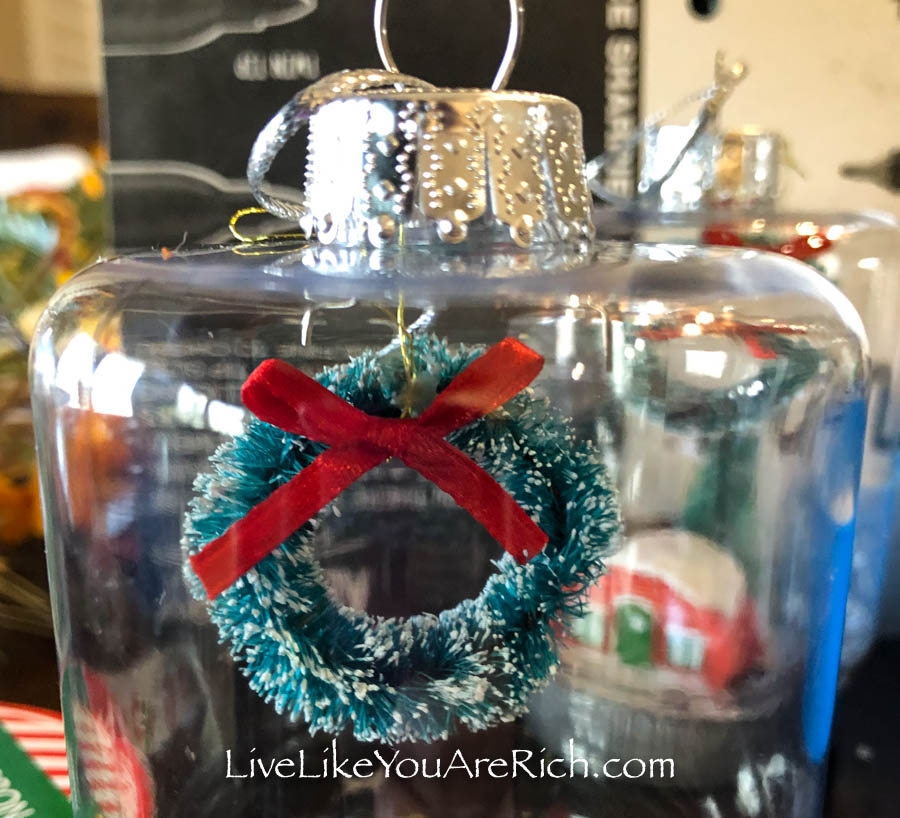

Next, I cut the ornament string leaving just a little bit left exposed, you can also leave it as is as I did, or glue the left over strands down. Since It’s hard to notice without a camera zoomed in it, I just left the wreath strands where they are.
To adjust the wreath orientation (as long as you haven’t glued it down), you just have to turn or adjust the ornament top.
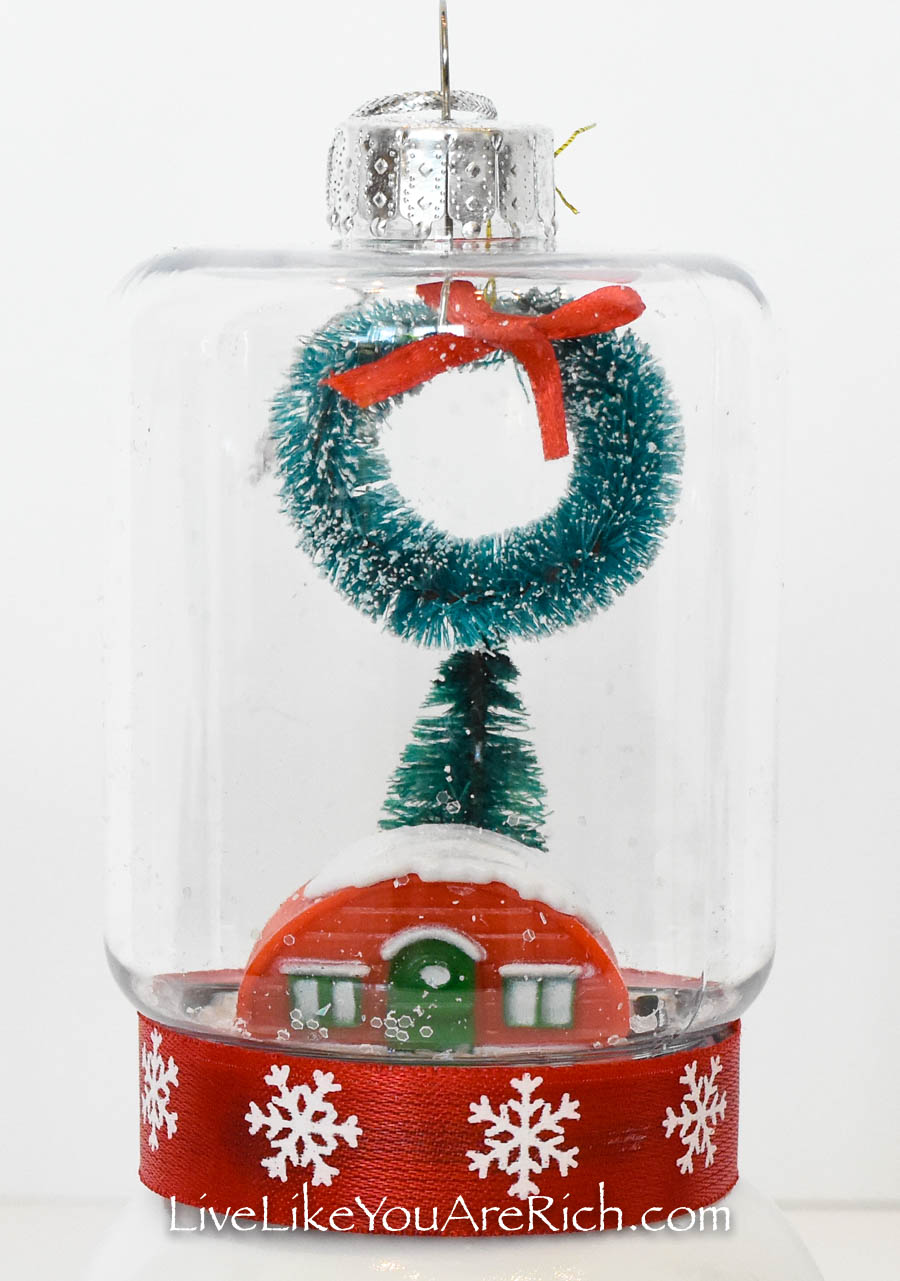
Next, using Epoxy glue or something of similar strength, glue down the little trees (Target seasonal selection $1.00 for a 4 pack) and the little camper trailer (Dollar Tree for $1.00 for a 3 pack) to the lids of the ornaments. Make sure that the ornament fits around the items on the lid before allowing the glue to set.


Depending on the glue used, give the items time to dry and set.
Pour a snow mixture into each ornament top.

This was my fake snow mixture recipe: 1 tsp of each
Epsom salt,
Spectra sparkling crystals/ white glitter,
faux snow flakes
You can use whatever you’d like to achieve a real snow look.

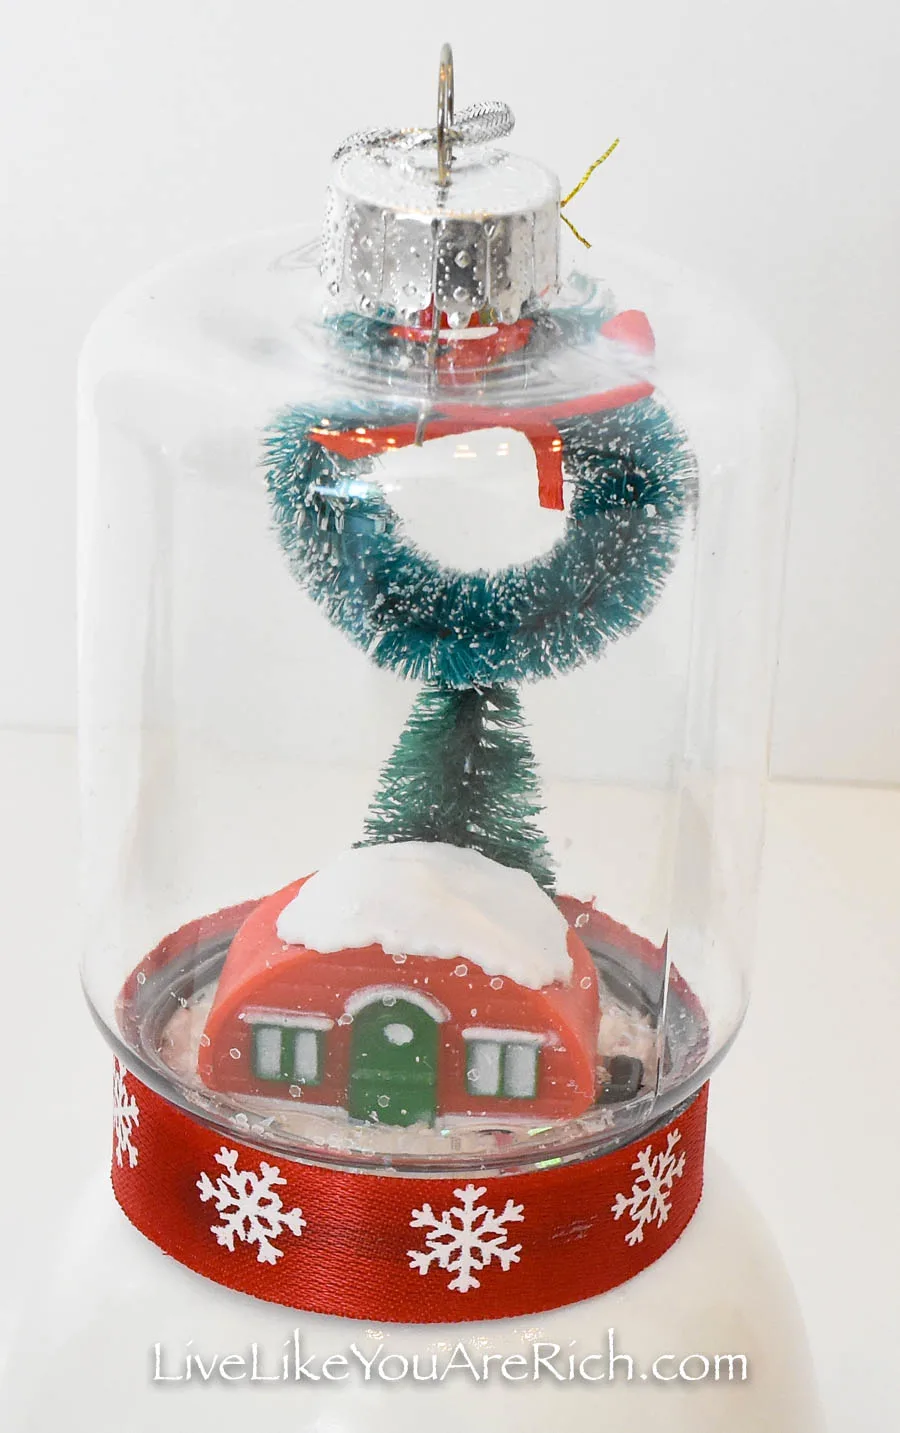
Tip, I wish I would have elevated the camper trailer so it could be seen better. I’ll likely do another DIY Snow Globe Christmas Ornament with the camper trailer so I can get it right… So, unlike me, keep the rim height of the ornament in mind when glueing these down.

Put the lid on tight.
Finally, hot glue ribbon around the lid edge.
Now you have your own DIY Snow Globe Christmas Ornaments to hang or display.
I hope you like these as much as I do!
Merry Christmas and a Happy New Year.
Supply List for DIY Snow Globe Christmas Ornaments
Empty ornaments that are large enough to put items in to. I found these at Dolllar Tree for $1.00 each. Or here.
Mini sisal Christmas trees. I found these in packs of 4 for $1.00 in the seasonal bins at Target. Similar here.
Mini sisal wreath ornaments (or add a string to plain wreaths). These came in packs of 3 in the seasonal bins for $1.00 at Target. Similar here.
This pack on Amazon has both the wreaths and trees.
Mini plastic camper figurine Dollar Tree pack of 2 for $1.00
Epoxy glue If you are not going to shake these at all, hot glue would work or super glue too.
Ribbon 5/8″ found at the Dollar Tree. Similar here.
Fake snow mixture: 1 tsp of each
Epsom salt,
Spectra sparkling crystals/ white glitter,
faux snow flakes


For other ‘rich living’ and D.I.Y. decor tips please subscribe, like me on Facebook, and follow me on Pinterest and Instagram.


Ella
Saturday 28th of November 2020
Hello! I wonder if the bottom of the wine glass could be glued to the rim instead of the cardboard to make the bottom of the snowglobe. I may have to try it. 🙂 Thanks for sharing this cute idea!
Thanks
Anita
Monday 15th of March 2021
Great idea! Thanks for visiting.