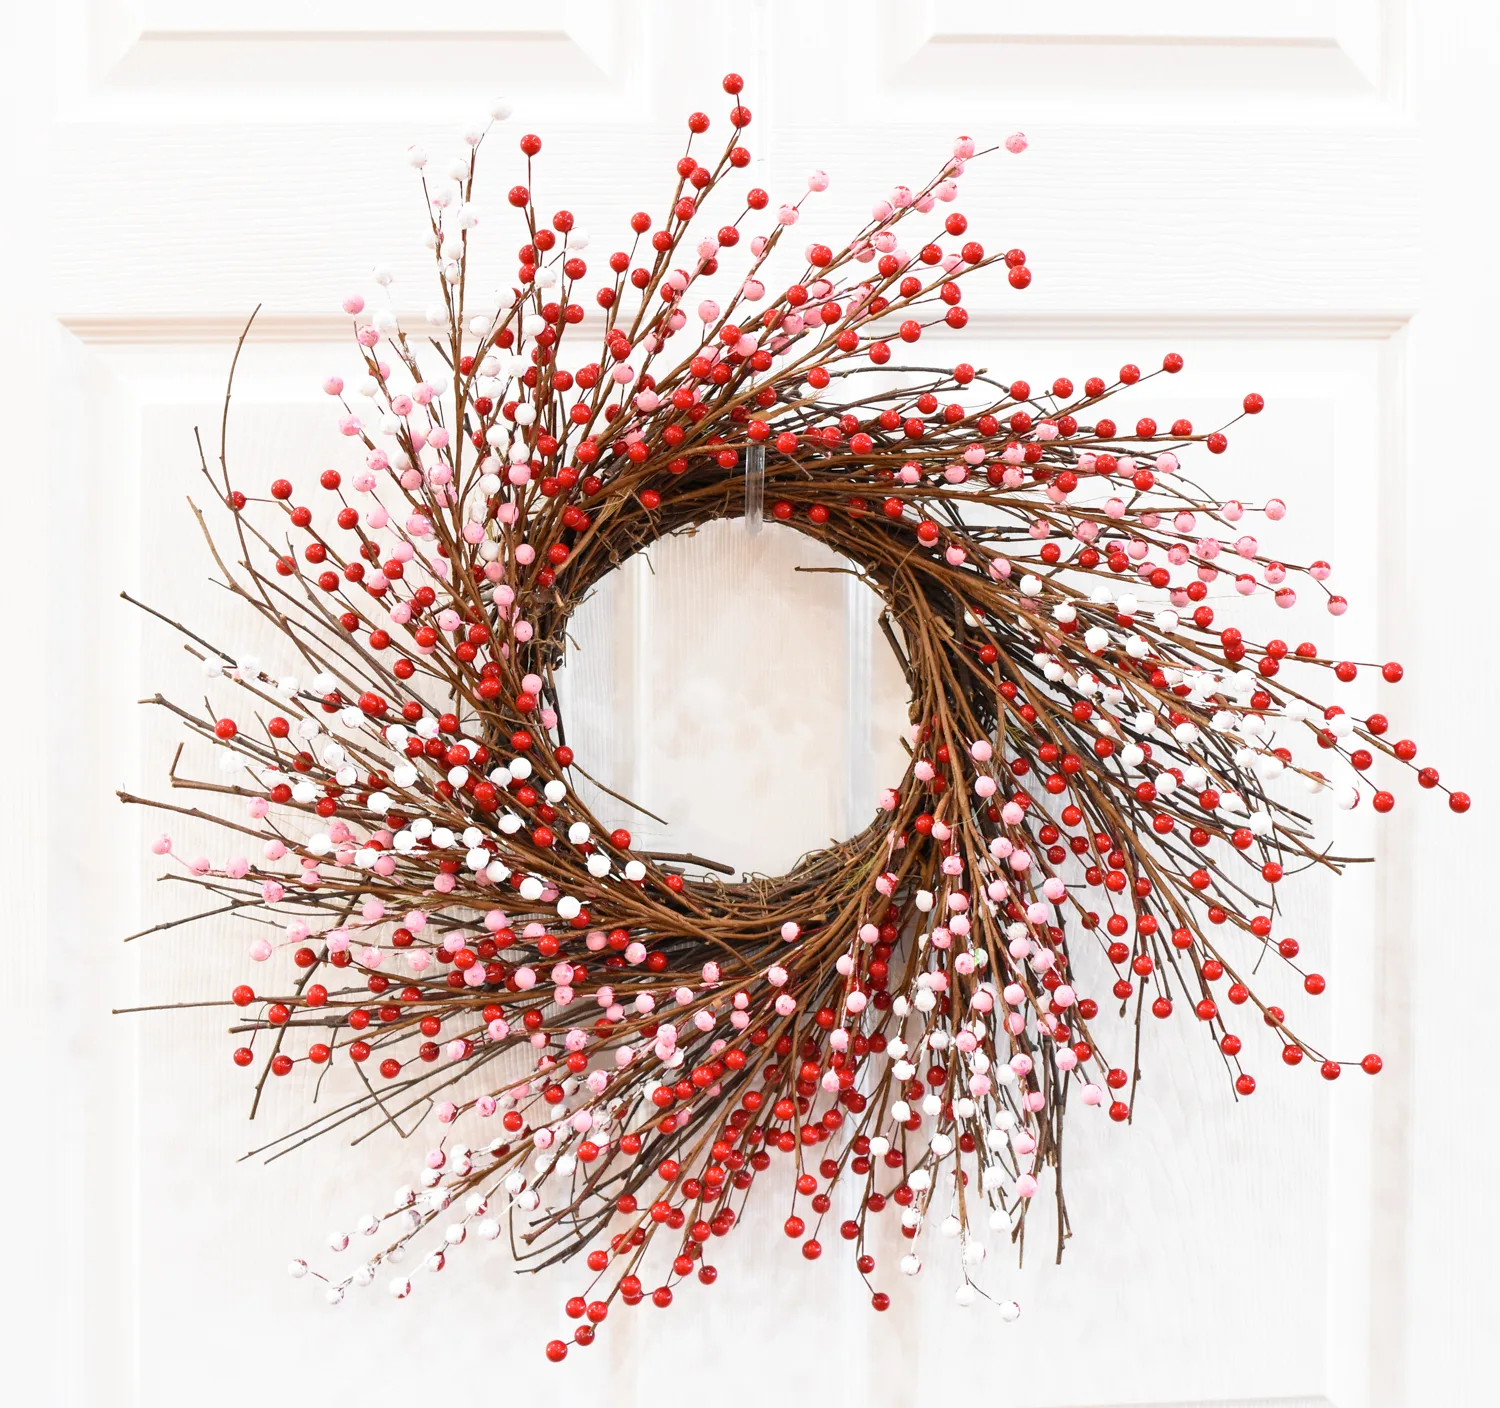
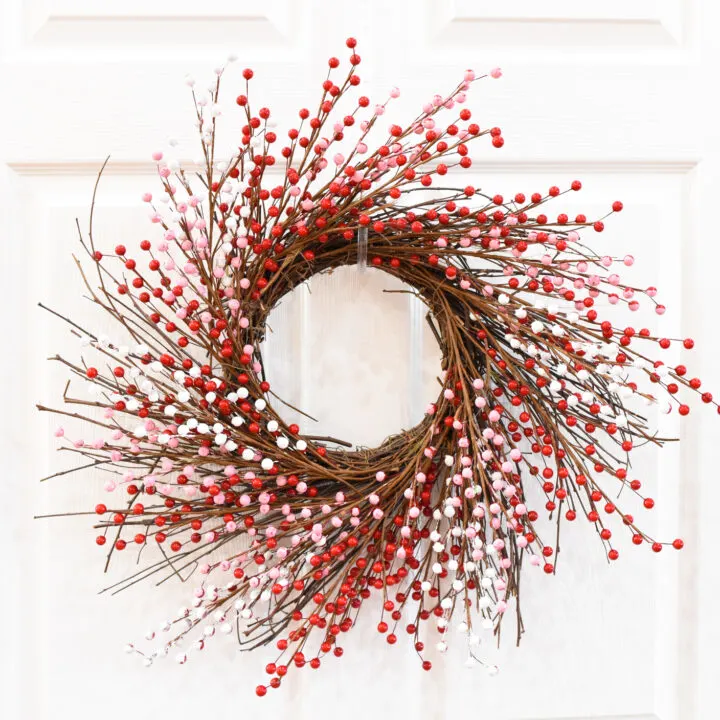
Valentine’s Day Red, Pink, and White Berry Wreath.

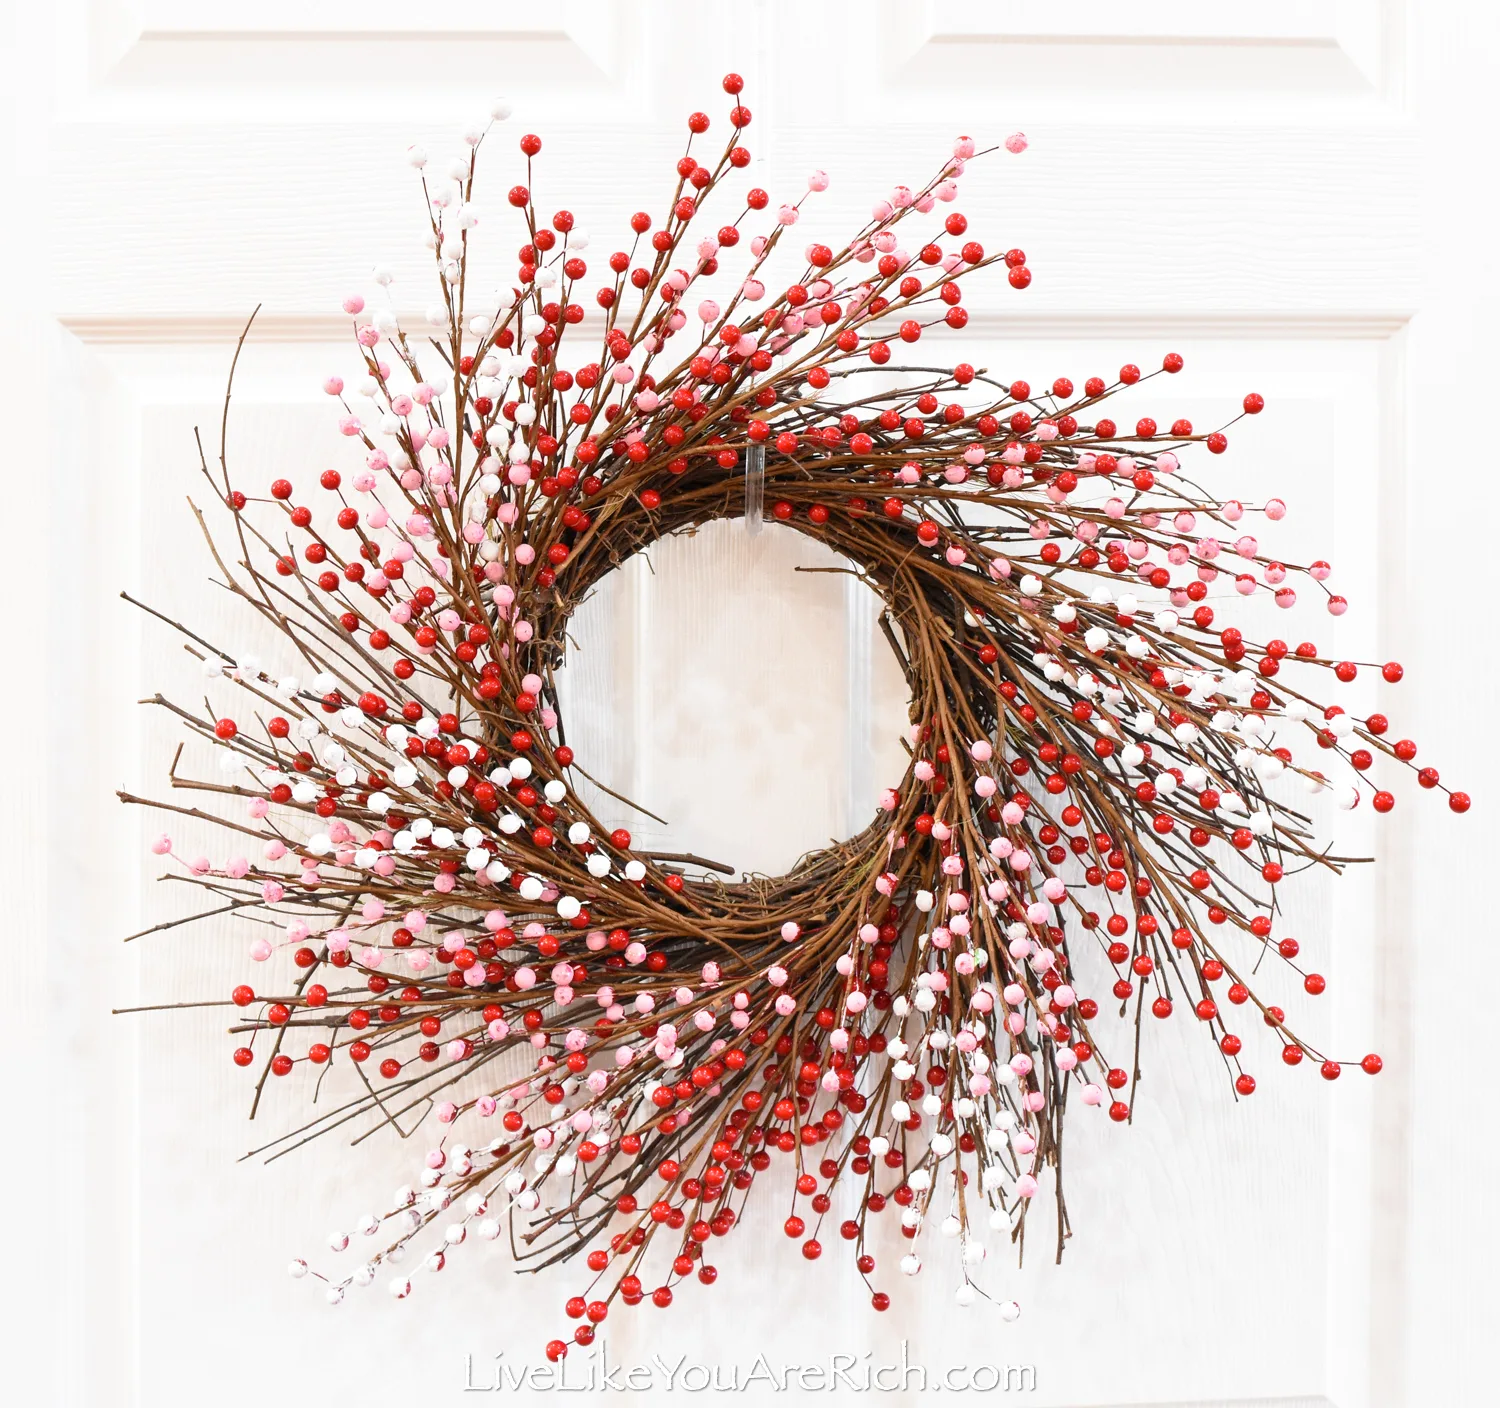
I love this wreath’s shape and simplicity. Sometimes Valentine’s Day decor is a little overly plastic and cheesy. I really like subtleness of this wreath.
Plus, it was fairly inexpensive and quick to make! My daughter and I put this together in about 45 minutes and it only cost me $15.
That said, I did have the paint, brushes, glitter, door hanger and repurposed the wispy twine wreath I had had for years so that helped keep costs down.
This simple wispy twine wreath’s inside diameter measures 8″. The outer edge diameter measures 24″.
Supply List for Valentine’s Day Red, Pink, and White Berry Wreath
Acrylic craft paint (I used Titanium white and Think Pink)
glitter (I used white and pink)
at least 24 red berry stems,
door wreath hanger (this is the one I use and love it)
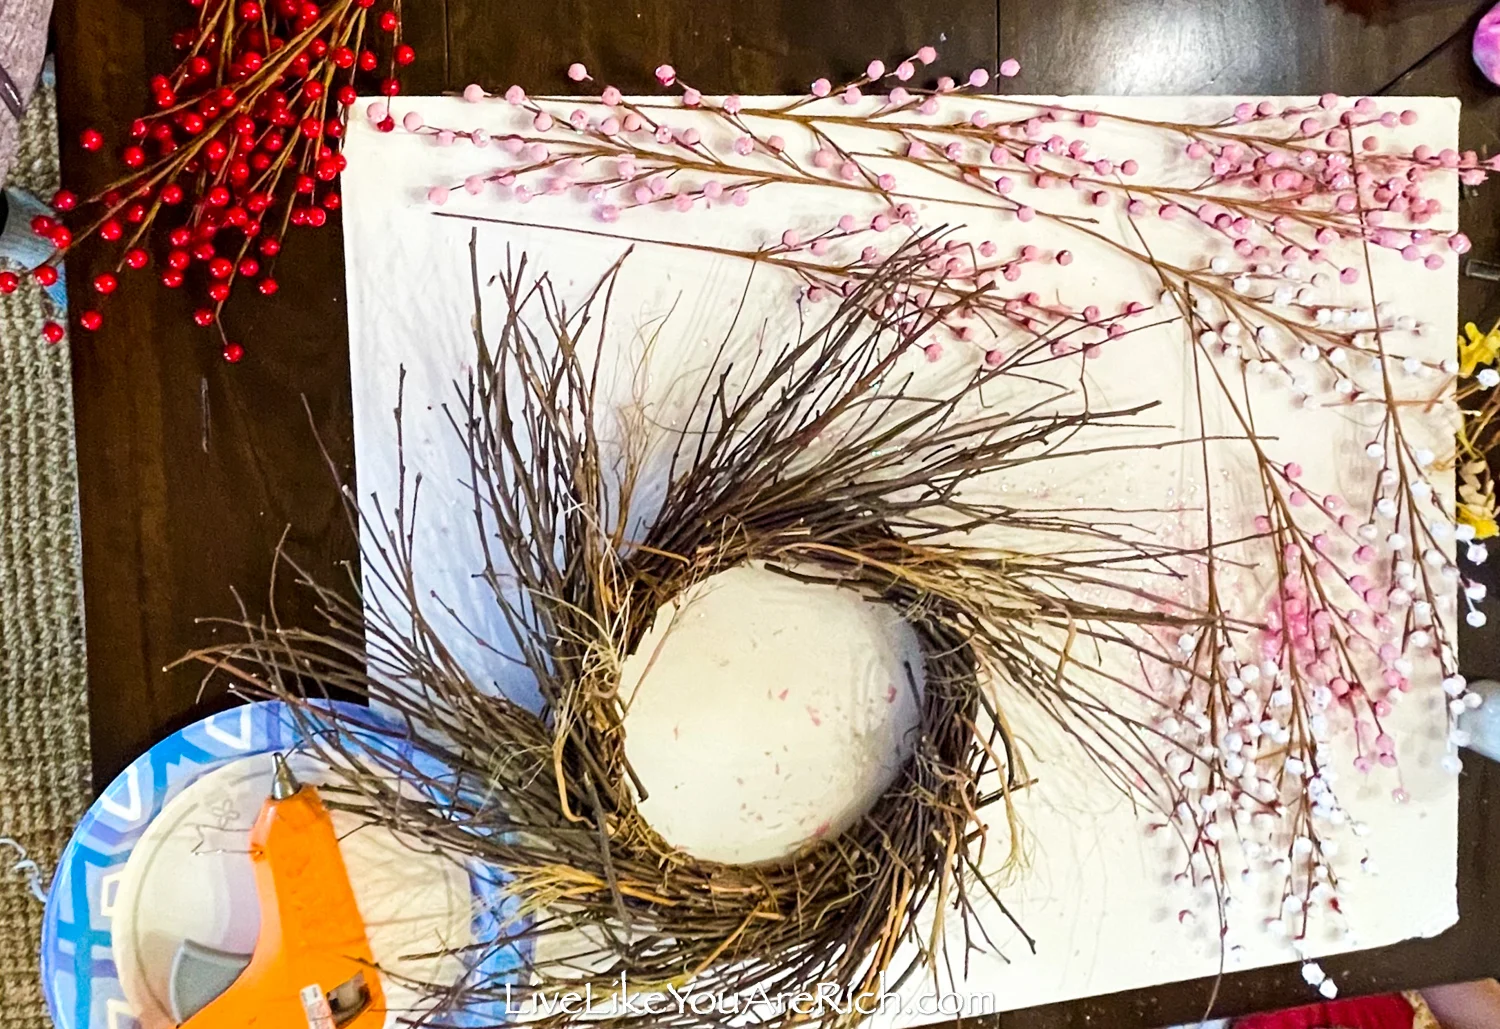
wispy round twine wreath a wreath like this one or this one—using just red and pink berries, may work too. (I have had this wreath for years and just cut off the fall decor that was on it so finding an exact match was not possible). The wreath’s inside diameter measures 8″. The outer edge diameter measures 24″.

How to Make this Valentine’s Day Red, Pink, and White Berry Wreath
Continue reading and/or watch the video on this page to see how to make it.
I have owned this wispy twine wreath for years. It had fall decor on it and I was wanting to repurpose it. I did so by using wire cutters to cut all the old decor off and start anew.
- Paint 6 artificial berry stems pink and paint 6 white. Sprinkle with glitter or rub them in a pile of glitter while still wet.
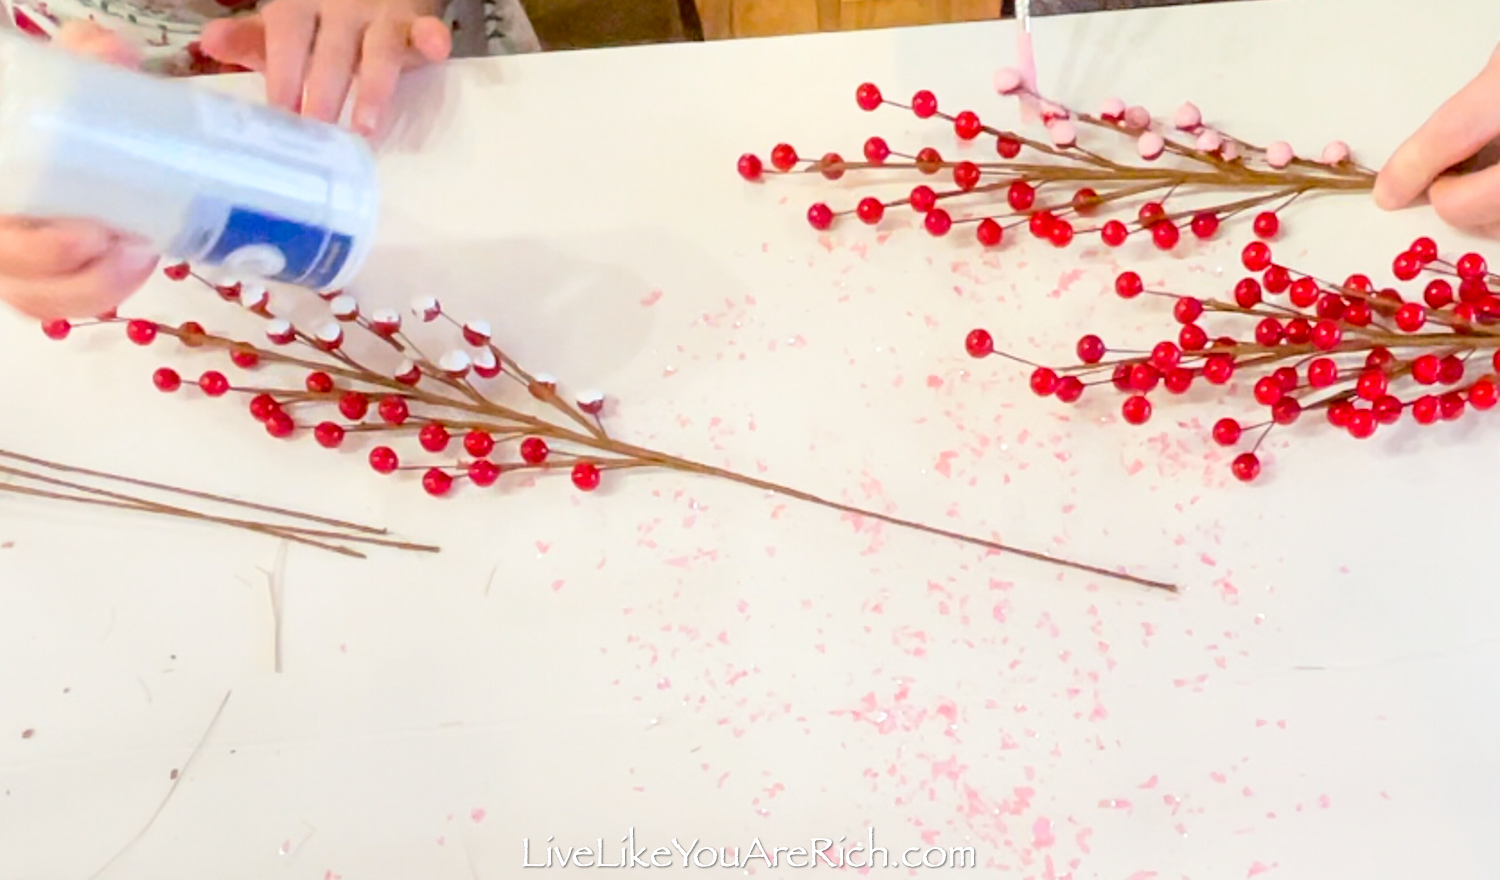
 I found it best to paint only 1/3 or 1/2 of the berries on one stem and then add glitter while the paint is still wet. Then paint the rest and dip in glitter. Acrylic craft paint dries very quickly.

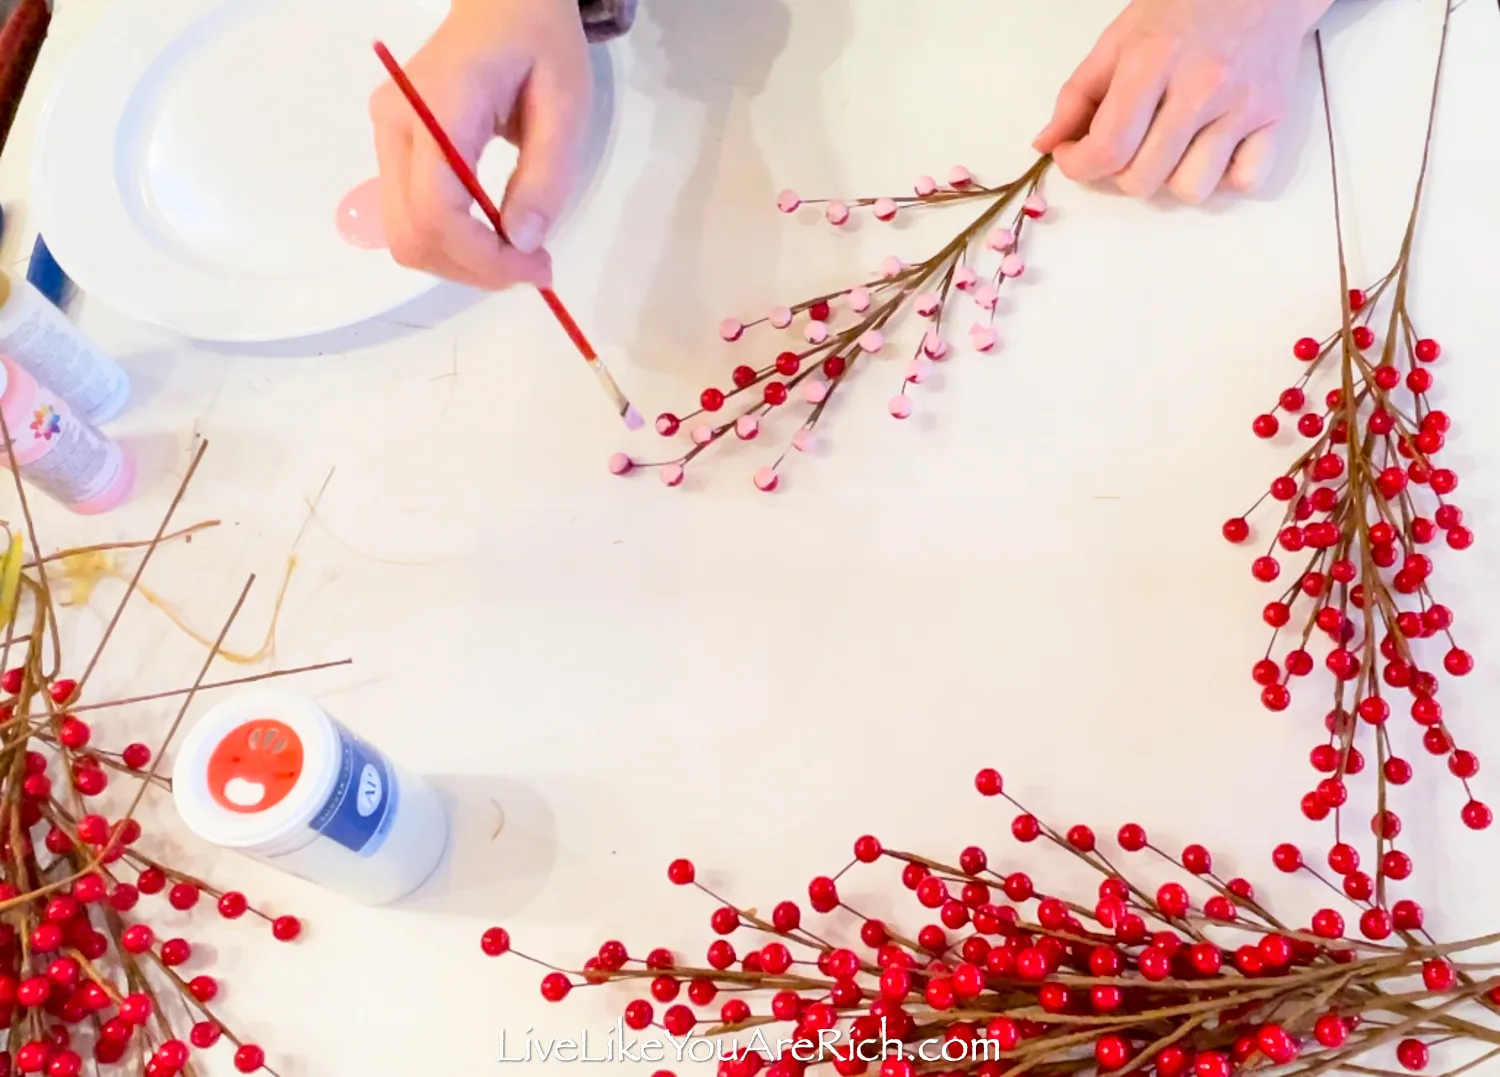
Note—We did not paint the back of the berry stems. We just painted the front and sides of the berries as it was faster and requires less paint. Plus, any remaining red gets camouflaged with the other red berry stems and it gives it a little bit of a distressed look that I like. - Once completely dry, you will place the stems into a wispy twine round wreath. Before placing the stems into the wreath, make sure there is an existing craft wire that you can use to anchor the stems. This wire should have been used to hold the wreath together. If no wire is there, or if not enough is there, wrap craft wire around the inner wreath every 1/2 inch or so.
- Place 24 stems of artificial berries into the wreath going in the same direction as the wispy twine; alternate stems red, pink, red, white.
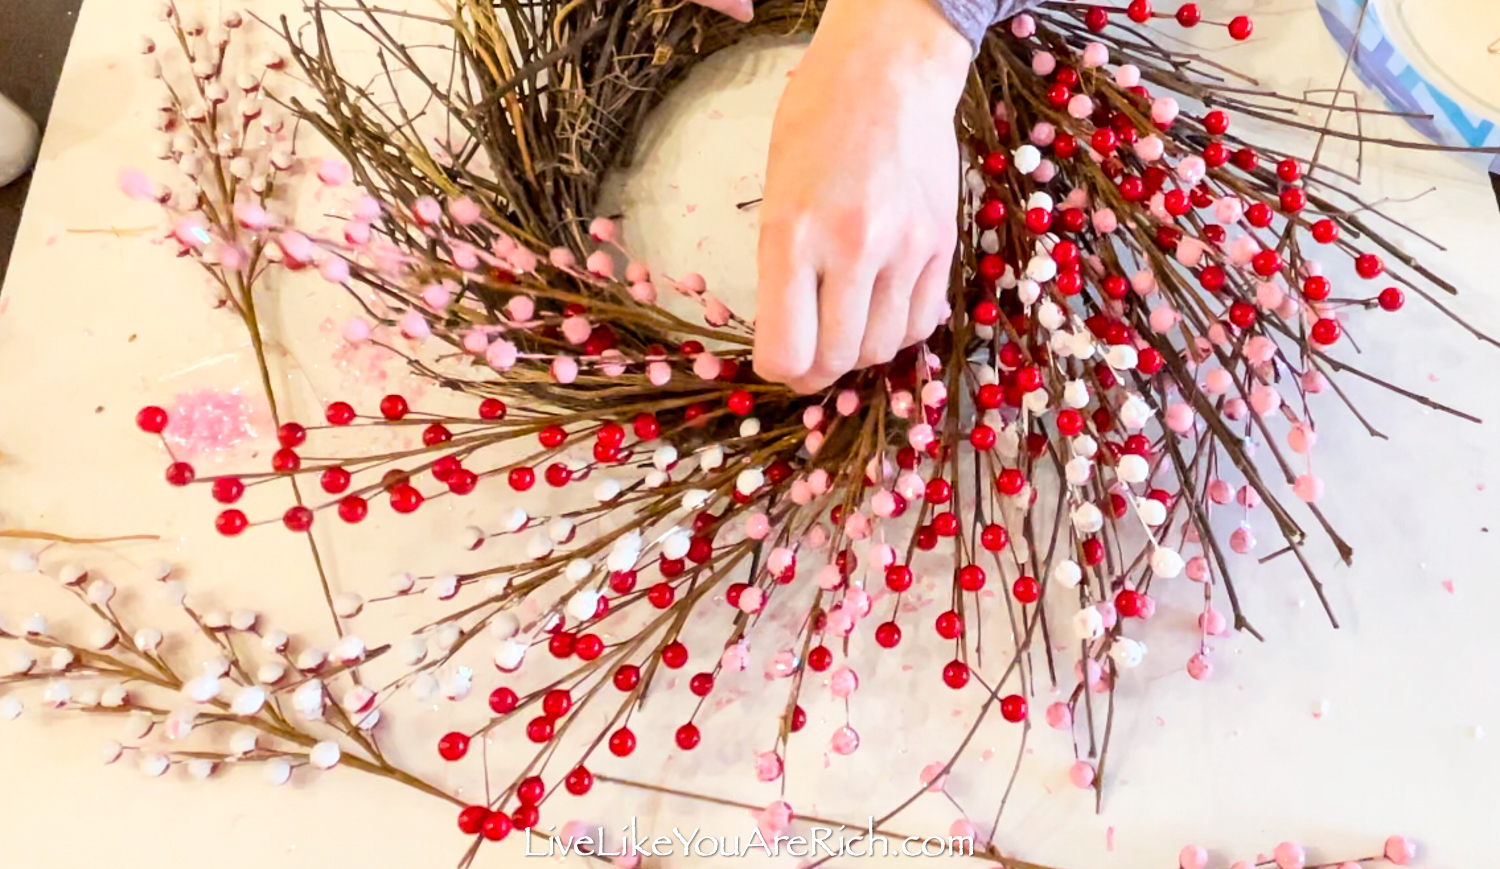

- Once you have the stems secured, take a hot glue gun and test each stem. If it is loose, glue it to the twine in the wreath.
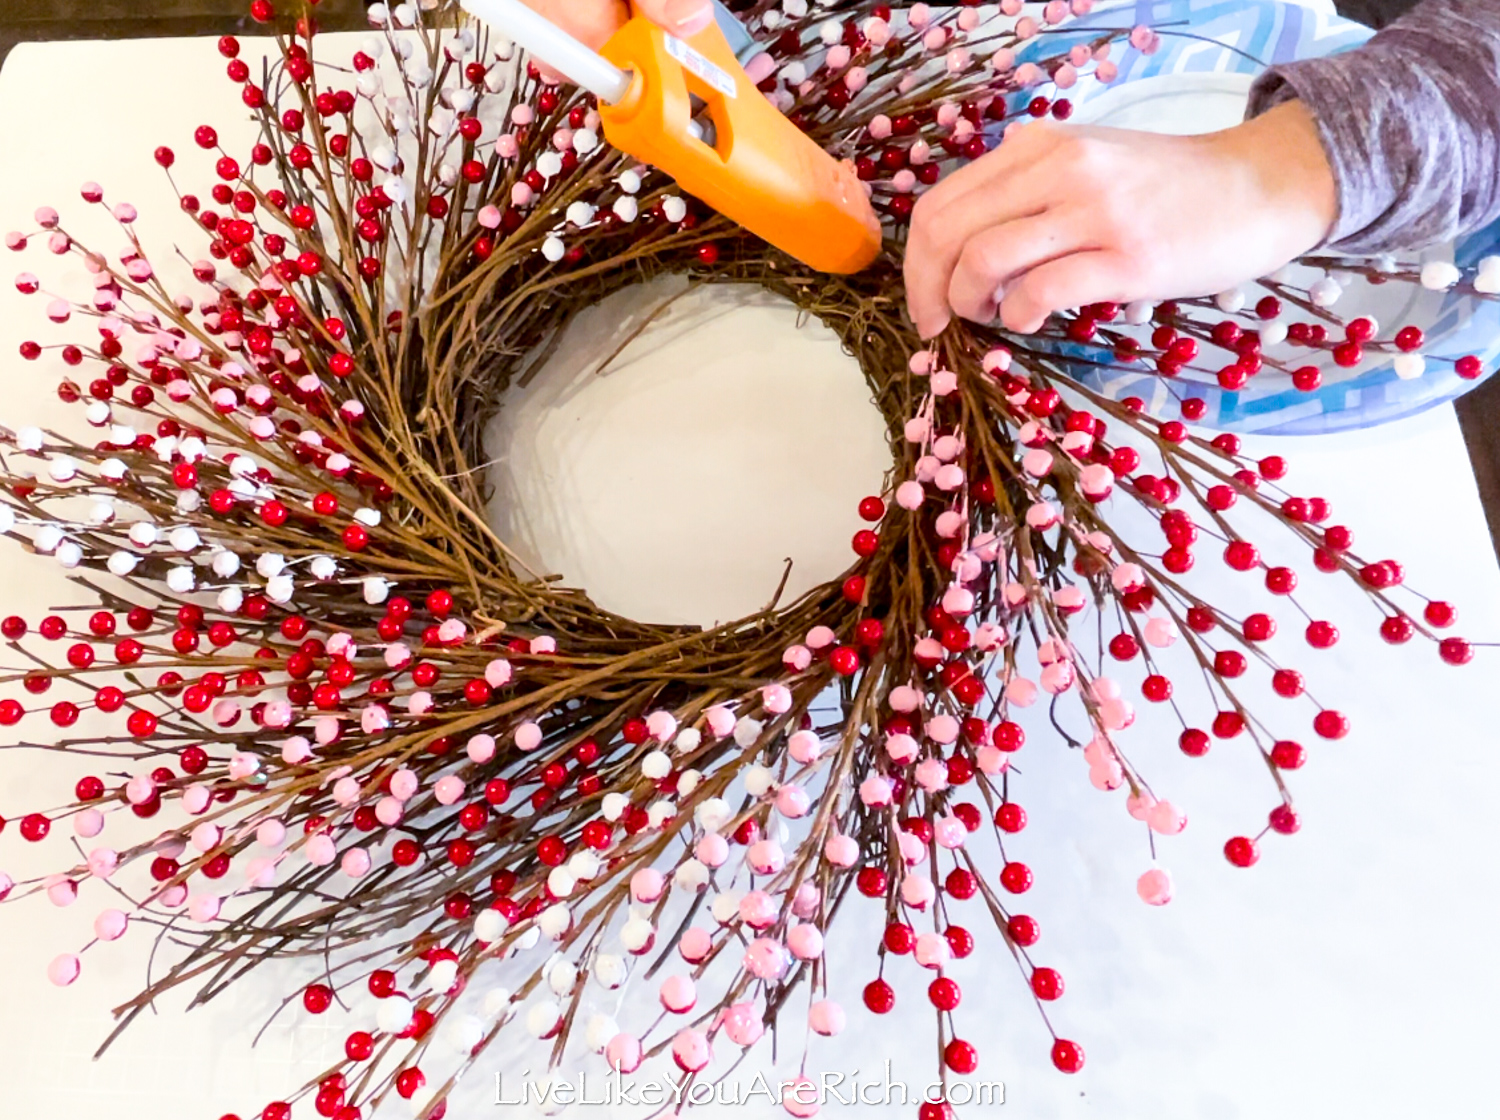

- Pick up the wreath and shake it. If stems are loose, use either hot glue or craft wire to secure them.
- Fluff the wreath up and arrange things nicely.
- Display using a door wreath hanger.
Video with step-by-step instructions on how to make this Valentine’s Day Red, Pink, and White Berry Wreath
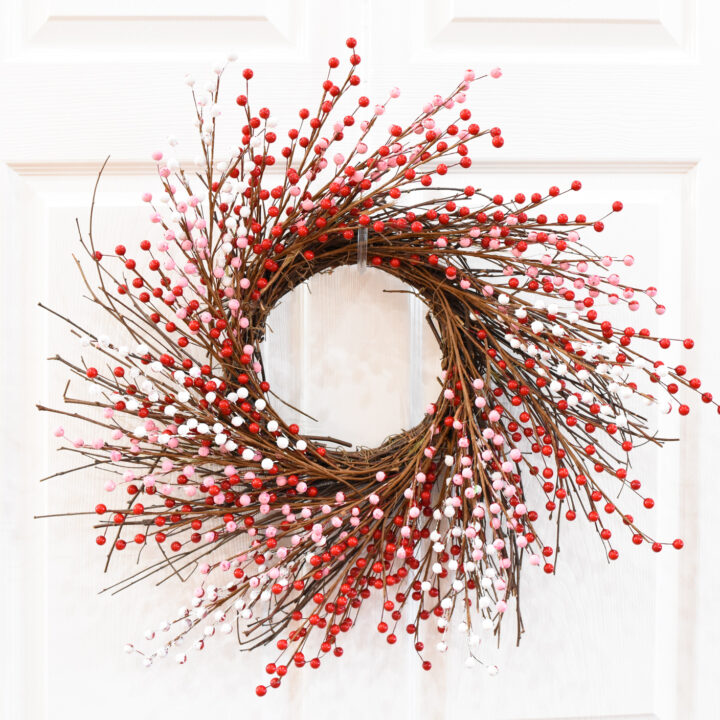
Valentine's Day Red, Pink, and White Berry Wreath
A beautiful Valentine's Day wreath made out of a twine wispy wreath with added red, pink and white artificial berry stems.
Materials
- Acrylic craft paint (I used Titanium white and Think Pink)
- Paint brushes
- Glitter (I used white and pink)
- 24 red berry stems,
- Craft wire
- Door wreath hanger
- Wispy round twine wreath a wreath
Tools
- Hot glue gun
- Wire cutters
Instructions
- Paint 6 artificial berry stems pink and 6 white. Sprinkle with glitter or rub them in a pile of glitter while still wet.
I found it best to paint only 1/3 or 1/2 of the berries on one stem and then add glitter while the paint is still wet. Then paint the rest and dip in glitter. Acrylic craft paint dries very quickly.
Note—We did not paint the back of the berry stems. We just painted the front and sides of the berries as it was faster and requires less paint. Plus, any remaining red gets camouflaged with the other red berry stems and it gives it a little bit of a distressed look that I like. - Once completely dry, you will place the stems into a wispy twine round wreath. Before placing the stems into the wreath, make sure there is existing craft wire that you can use to anchor the stems.
This wire should have been used to hold the wreath together. If no wire is there, or if not enough is there, wrap craft wire around the inner wreath every 1/2 inch or so. - Place 24 stems of artificial berries into the wreath going in the same direction as the wispy twine; alternate stems red, pink, red, white.
- Once you have the stems secured, take a hot glue gun and test each stem. If it is loose, glue it to the twine in the wreath.
- Pick up the wreath and shake it. If any stems are still loose, use either hot glue or craft wire to secure them.
- Fluff the wreath up and arrange things nicely.
- Display on the door using a door hanger

For other inexpensive D.I.Y. and craft ideas please subscribe, like me on Facebook, follow me on Pinterest and Instagram.