• Skip to primary navigation
  • Skip to main content
  • Skip to primary sidebar
  • Skip to footer

Live Like You Are Rich

on any income...

  • Finances
    • Save Money
    • Make Money
    • The Credit Game
    • Couponing
    • Tips & Warnings
    • Financial Fitness Bootcamp Course
  • LOVE with Family
    • Love
    • Pregnancy & Postpartum
    • Parenting
    • Faith
    • The Random & Important 
  • Home Improvements
    • Preparedness
    • Organization & Cleaning
    • Efficiency
    • Interior Design
    • Home Updates
    • Home One
    • Home Two
    • Home Three
  • DIY & Crafts
    • DIY’s & Crafts
    • Holidays
    • Valentines
    • Easter
    • 4th of July
    • Halloween
    • Thanksgiving
    • Christmas
  • Our Favorite Recipes
    • Quick and Easy Family Favorites
    • Breakfast
    • Lunch
    • Starters, Soups & Salads
    • Dinner
    • Desserts
    • Smoothies & Drinks
  • Hosting
  • My Book

How to Install an Inground Trampoline

April 13, 2020 By: Anita

Share to Your Social Media

  • Share
  • Tweet

Ever since I was a kid I’ve loved inground trampolines. We had them at my grandparent’s house and at their cabin. They were so easy to run on and off of, take turns on, and were super convenient for us as kids.

When I was a teenager, we had an above-ground trampoline at our house. I was in charge of mowing our home lawn for years. It was tedious and annoying having to recruit one or two family members to help me move the trampoline halfway through my lawn mow so I could mow under it.

My brother had an above ground trampoline with a net. His kids sometimes play with it. Then he had it installed inground and now the kids never stop playing with it. They don’t need help getting on or off, and there are fewer injuries and less fighting.

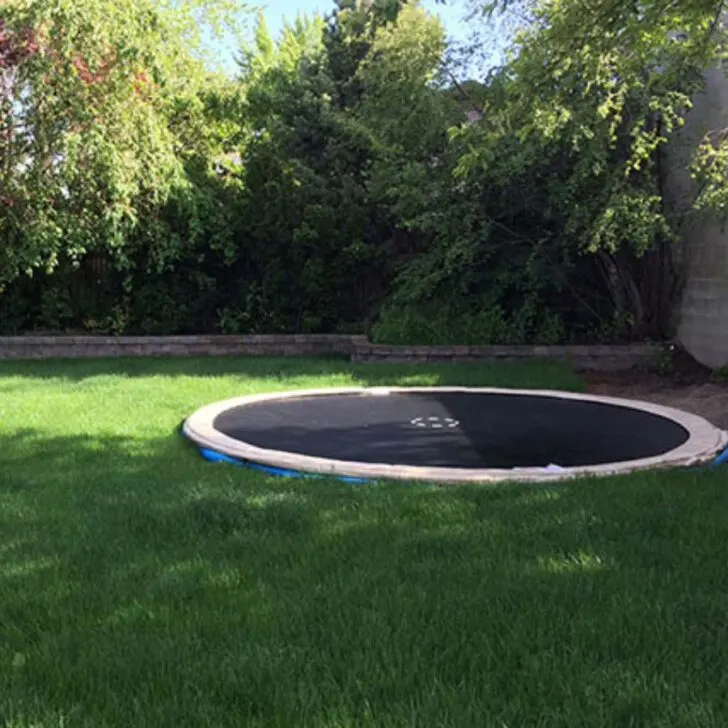
For these reasons, I decided we would have our trampoline installed inground.

I got two quotes for it and was shocked when it came to $1,500.00 for one and $2,000.00 for the other. Because we were already paying for new sod we didn’t have enough saved to also pay an additional 2k for an inground trampoline install.

I did some Google searching and came across this great tutorial on AllThingsThrifty-awesome site by the way- and followed it (for the most part). We had to use some different materials and made a mistake along the way—our fault. I’ll tell you the mistake we made and how we ended up fixing it in the steps below.

It cost us about $375 to install our in-ground trampoline. So by doing it ourselves, we saved $1,125!

Plus, I got a great deal on the trampoline itself. I saved $117.00 (got it for $150.00) at Walmart the day after Thanksgiving!

How to Install an Inground Trampoline- Step-by-step easy to follow instructions. Makes trampolines easier to access and safer for yours kids.

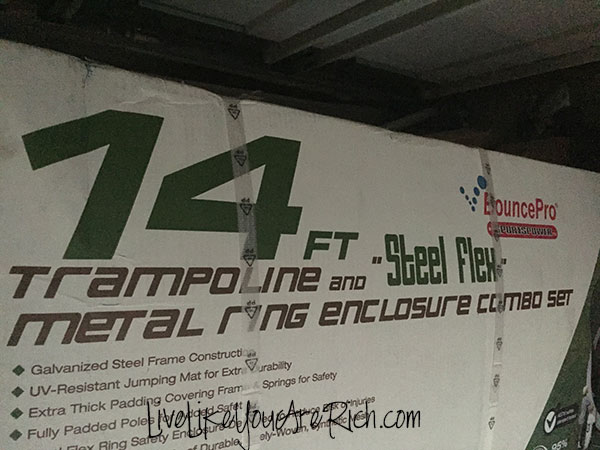
It is the BouncePro 14′ trampoline. It has almost 500 reviews which I read very carefully and almost 5 stars. It is really a quality trampoline for a very reasonable price—even at its retail price. You can find it at Walmart here, or Amazon here.

The supplies we used are listed below.

IMPORTANT- Before starting a digging project you’ll want to call your city service ‘call before you dig’ (usually it is free in most cities). Google yours. They usually require 48 hours notice and will mark major things that you don’t want to hit and break while digging. Most backyards do not contain major pipes like water, sewer, etc. but to be sure just call them, it will bring you peace of mind and prevent a potential issue.

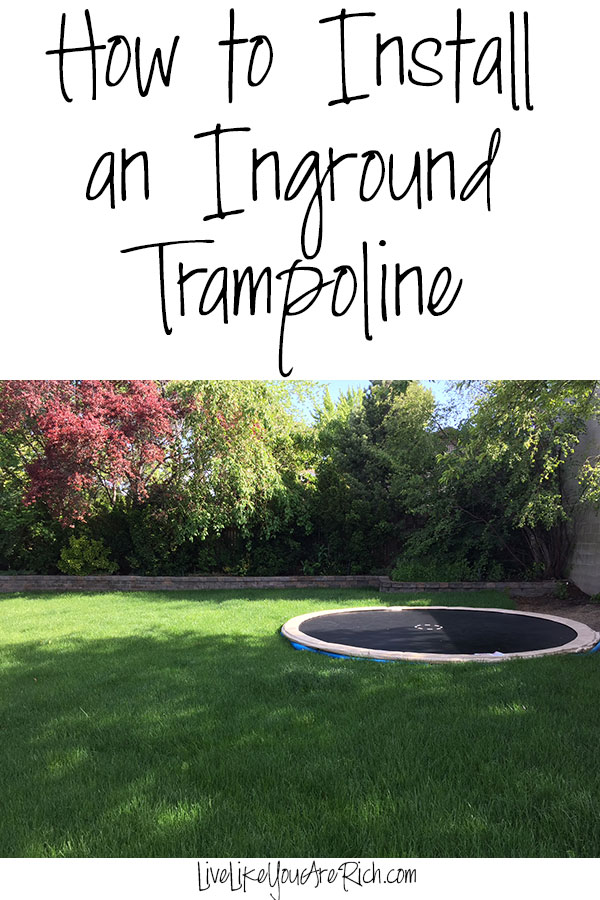
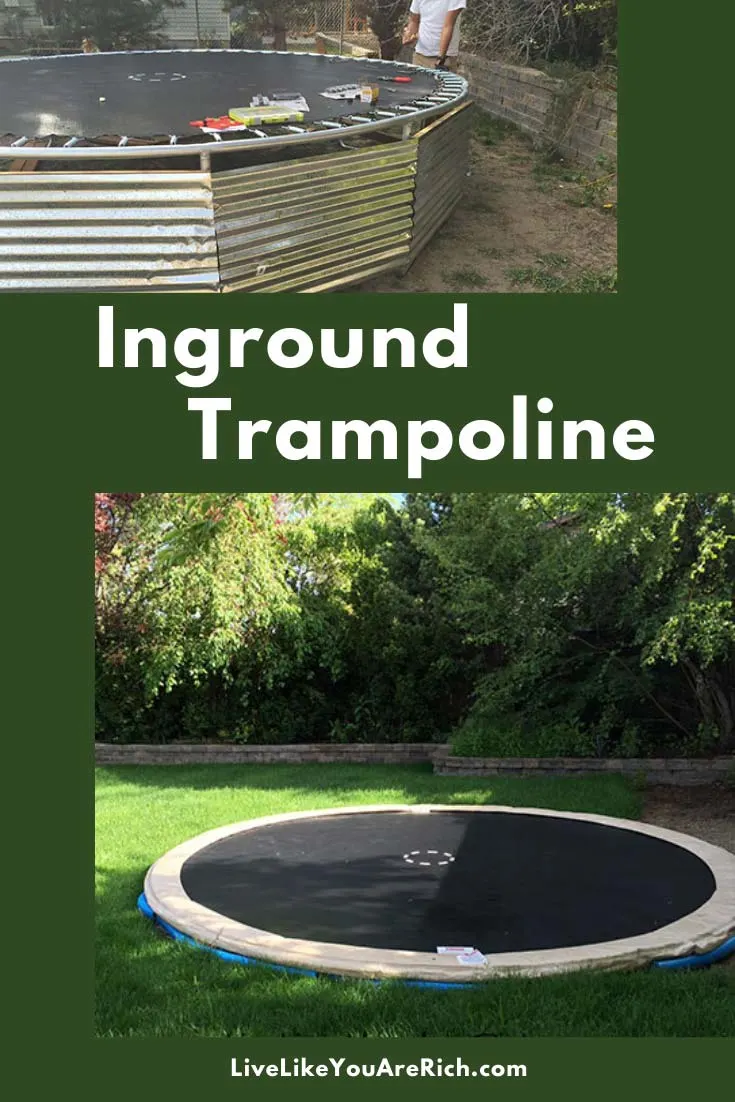
Here’s how we installed our inground trampoline.

Instructions

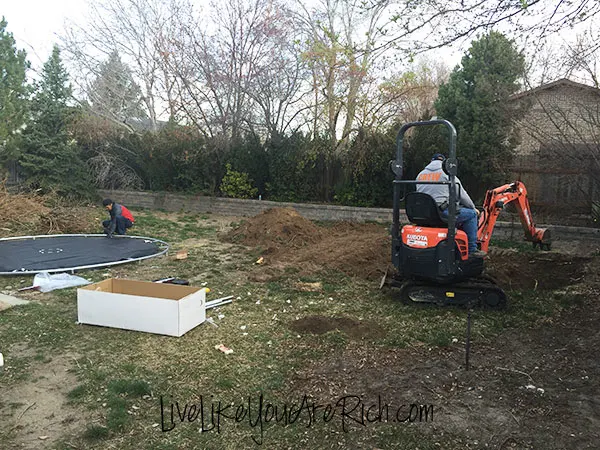
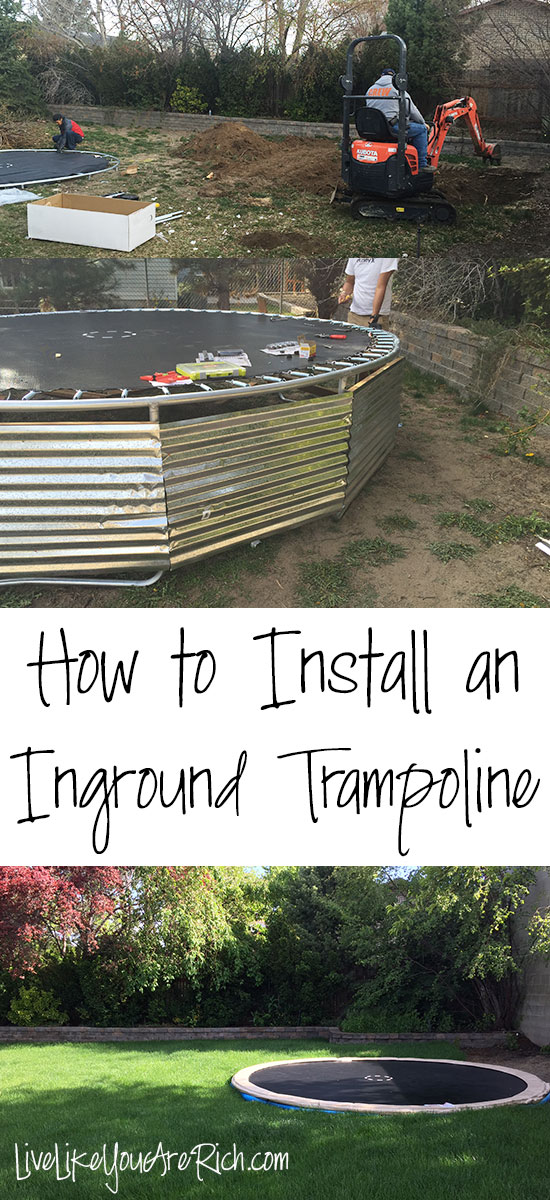
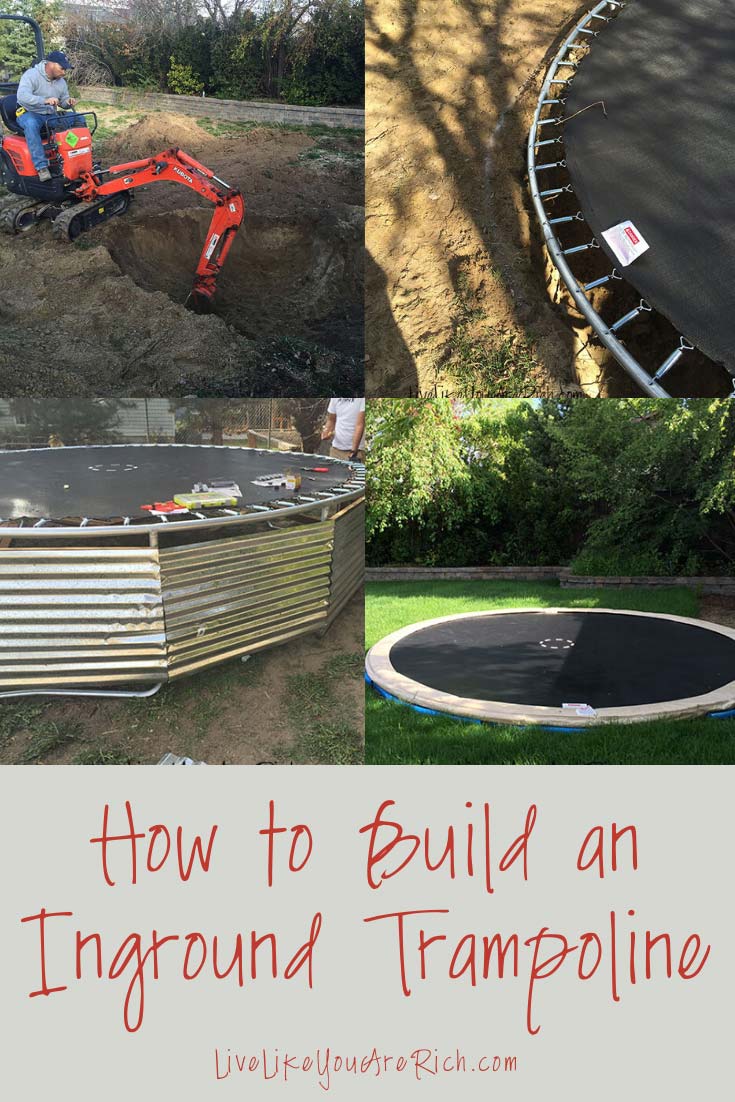
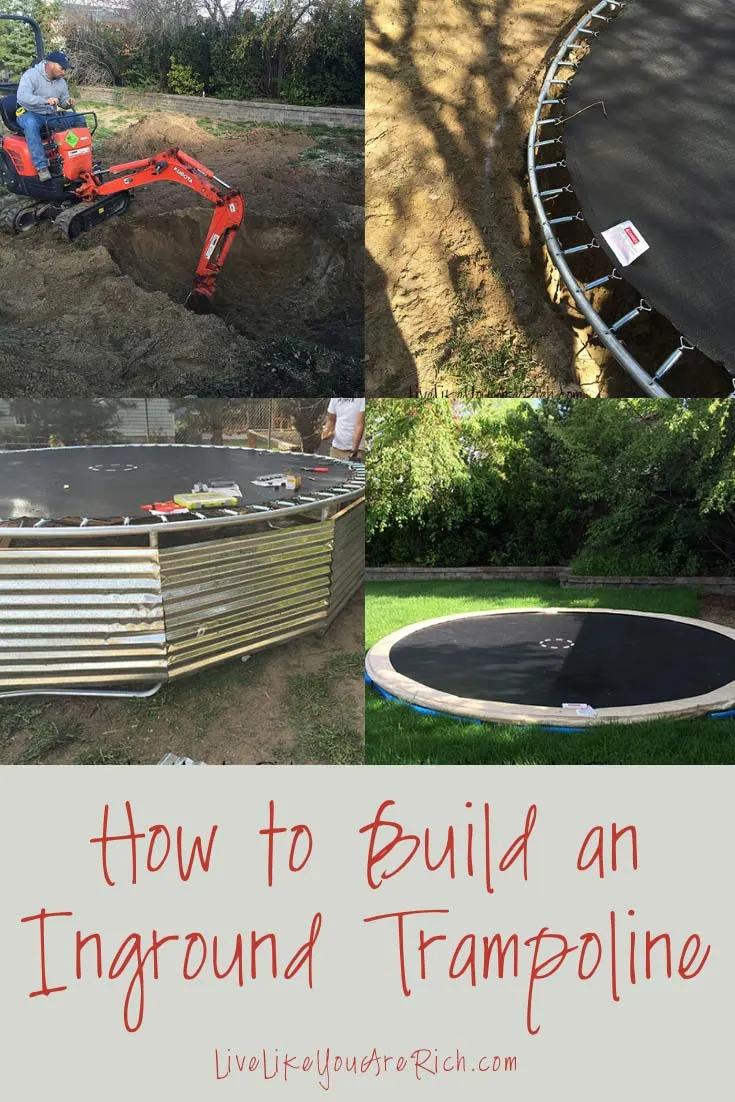
First, we rented a little excavator from HomeDepot. We rented the largest one they had but it was still pretty small… which worked great because we didn’t have to take down our fence to get it into the backyard. My brother-in-law who is a heavy equipment driver said he’d dig the hole for us. It was so funny seeing him on this tiny machine. Since he is used to much larger machines he said he felt like he was digging out a teaspoon of dirt at a time. We had a good laugh about that.

How to Install an Inground Trampoline- Step-by-step easy to follow instructions. Makes trampolines easier to access and safer for yours kids.

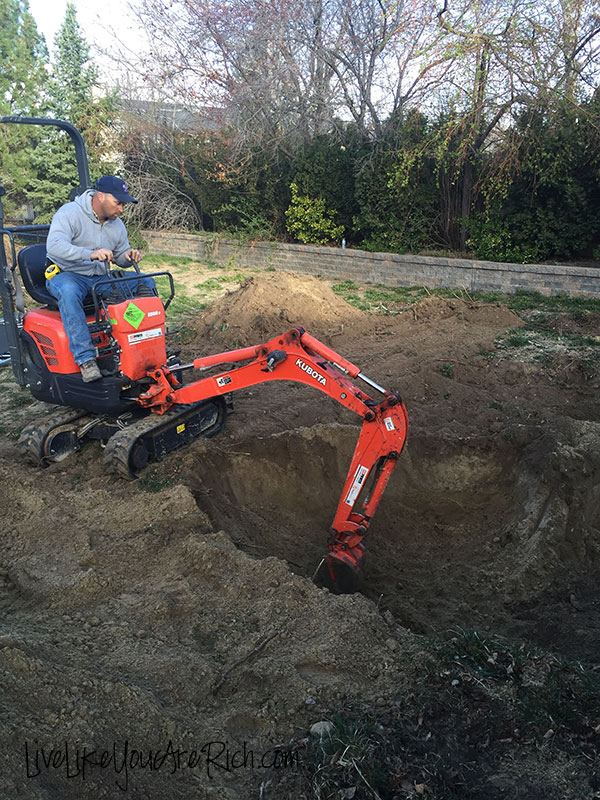
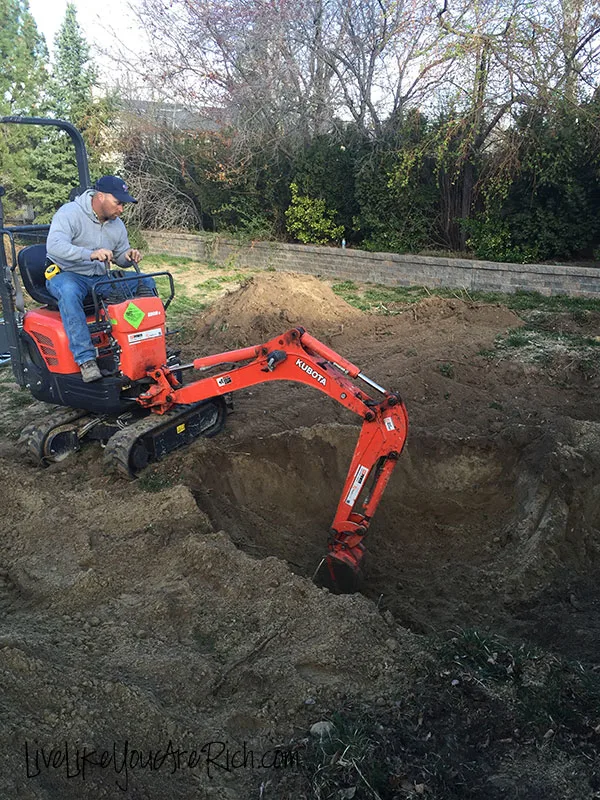
Before he began we laid the trampoline down where we wanted it and spray painted on the ground around it; then he worked his magic. In about 3-3.5 hours we had a perfectly sized hole. If you don’t have a gate to worry about, I’d recommend renting from another heavy equipment rental place so you can get a bigger machine and the digging goes faster.

How to Install an Inground Trampoline- Step-by-step easy to follow instructions. Makes trampolines easier to access and safer for yours kids.

While he was digging the hole we set the entire trampoline up. We made sure to put the trampoline mat and springs on it (so that it would make it sturdy and the correct shape).

How to Install an Inground Trampoline- Step-by-step easy to follow instructions. Makes trampolines easier to access and safer for your kids.

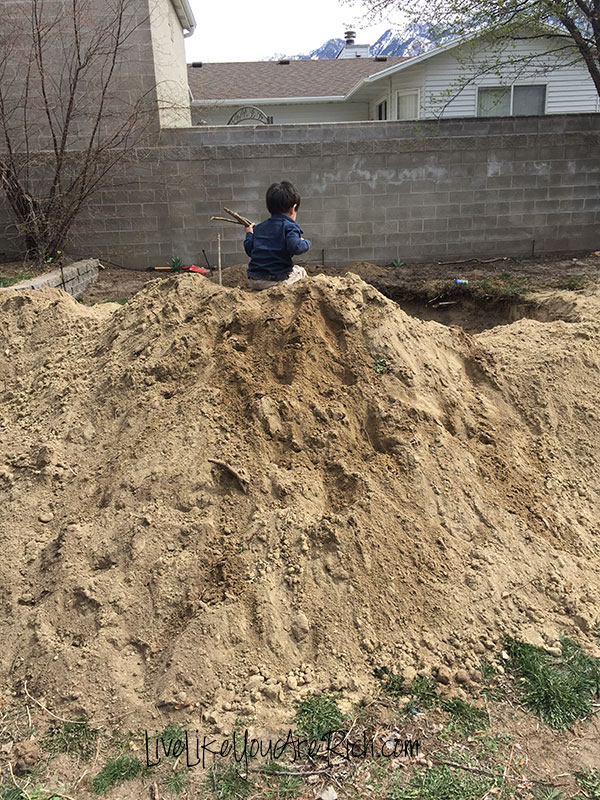
After the digging, my son had a super fun time sliding down the sand mound.

How to Install an Inground Trampoline- Step-by-step easy to follow instructions. Makes trampolines easier to access and safer for your kids.

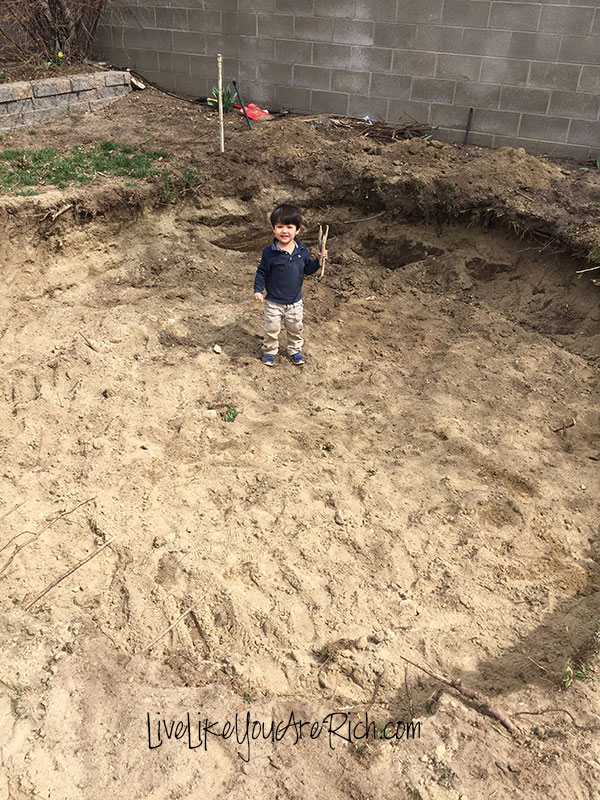
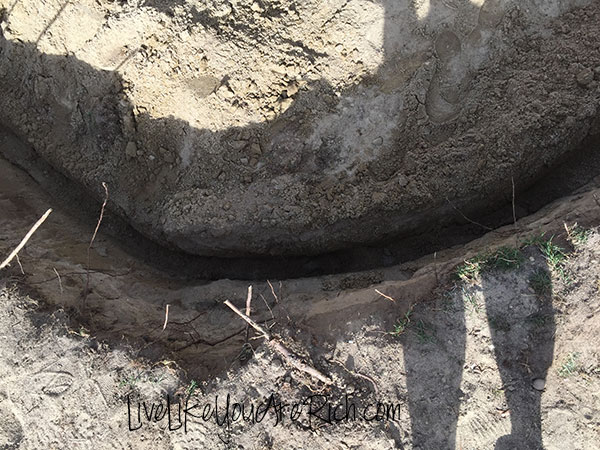
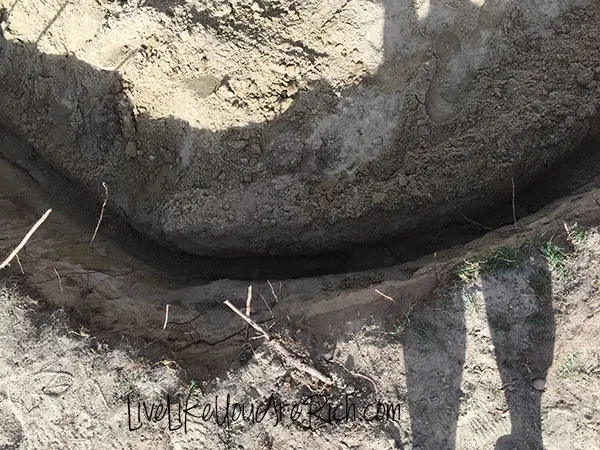
Completed hole. It is deeper than it looks. My son is over 3′ tall. For those worried about drainage. We have sandy soil and the water drains very well. It has rained 45 times in the last 60 days and we have not had any water pool. IF you have clay or other tough soil I have read to dig a bit deeper and fill in a few inches deep with gravel and rocks for drainage. But if you have normal or sandy soil it will drain just fine without.

How to Install an Inground Trampoline- Step-by-step easy to follow instructions. Makes trampolines easier to access and safer for your kids.

Then, we cut pressure treated 2×4’s to size (two for each section) This is a 14′ tramp with twelve sections so we had to have 24 cuts of wood.

How to Install an Inground Trampoline- Step-by-step easy to follow instructions. Makes trampolines easier to access and safer for your kids.

Then we predrilled the wood so that drilling into the legs of the trampoline would go more quickly. Pre-drilling saved time, but drilling at an angle was tricky. Be sure to do this part carefully so you don’t waste the semi-expensive wood.

How to Install an Inground Trampoline- Step-by-step easy to follow instructions. Makes trampolines easier to access and safer for your kids.

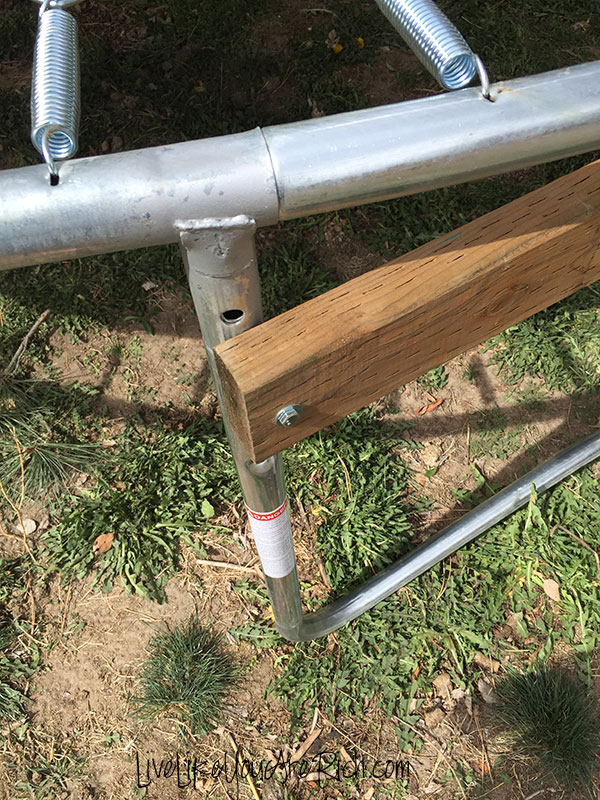
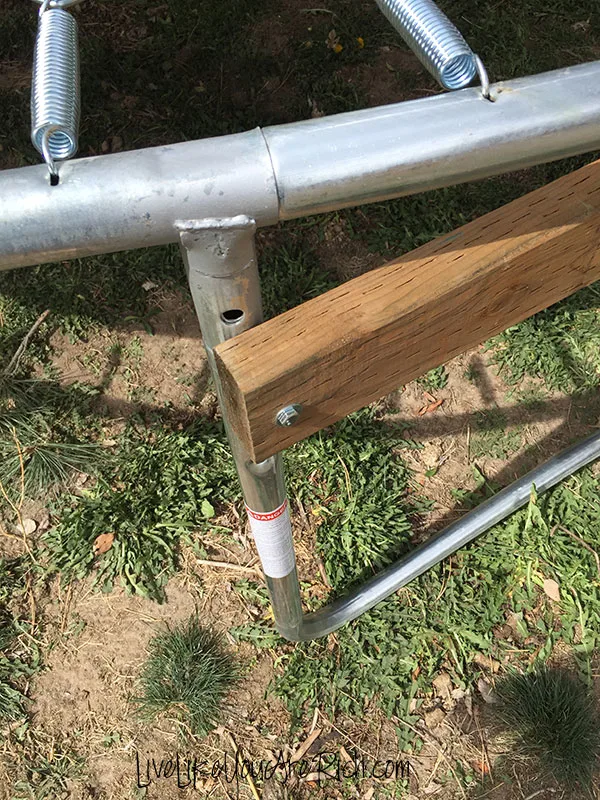
As we went along drilling holes into the trampoline we put the bolts, washers, and nuts on. We knew that jumping on a tramp is likely to rattle the frame so we got self-locking nuts and washers. We installed the bolts in the following formula:

Bolt-washer-wood-trampoline leg-washer-nut

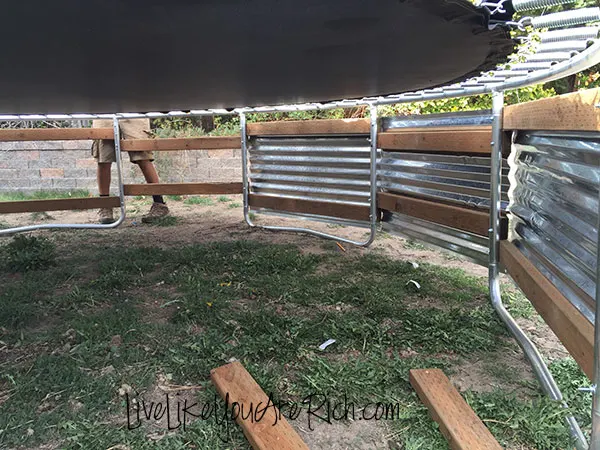
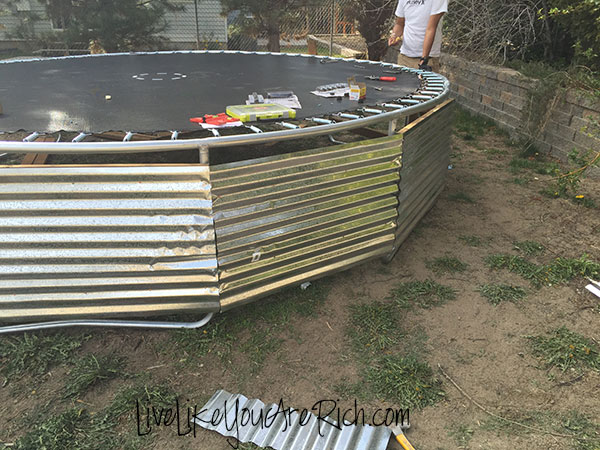
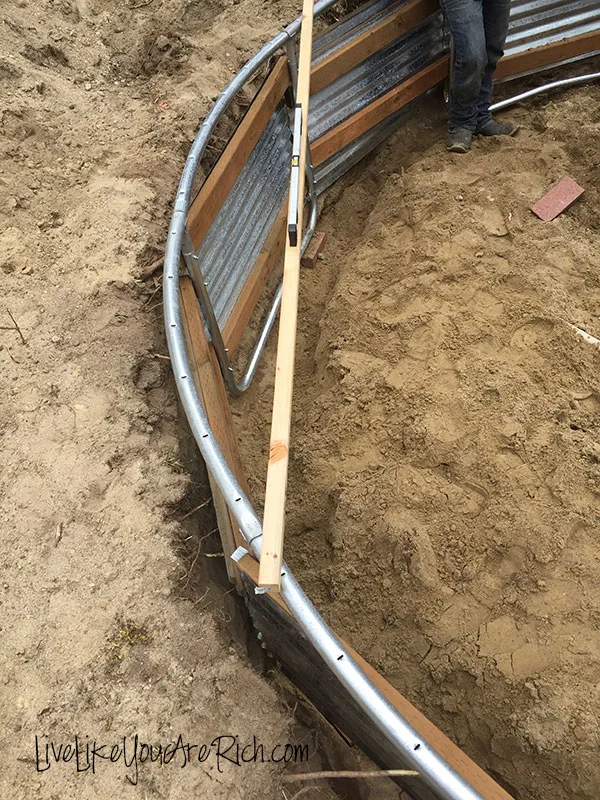
Then we measured and cut the sheet metal accordingly. We screwed the metal onto the wood. The mistake we made was not following the advice from the allthingsthrifty tutorial to fold the metal over… After the tramp was installed, we found out why the metal should be folded over… the sheet metal could cut someone’s foot if they hit it just right.

How to Install an Inground Trampoline- Step-by-step easy to follow instructions. Makes a trampoline easier to access and safer for your kids.

Then we took off the trampoline mat off so that we could easily lift and place the tramp in the ground.

How to Install an Inground Trampoline- Step-by-step easy to follow instructions. Makes trampolines easier to access and safer for your kids.

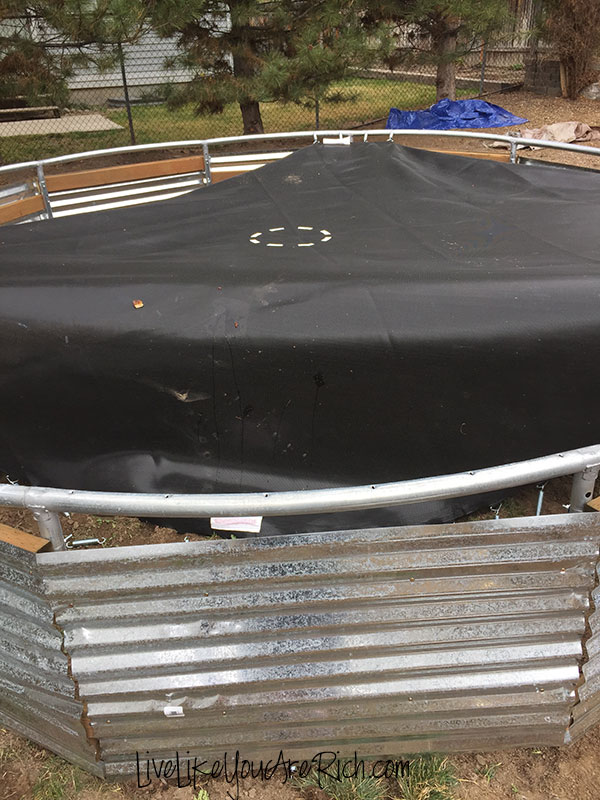
We did shovel/trench out the dirt a little deeper for the legs and bricks.

How to Install an Inground Trampoline- Step-by-step easy to follow instructions. Make a trampoline easier to access and safer for your kids.

We used bricks, dirt, a long 1×2 and a level to get it just right.

How to Install an Inground Trampoline- Step-by-step easy to follow instructions. Make a trampoline easier to access and safer for your kids.

Once it was right we filled the dirt up to the sides of the outside walls and installed the trampoline mat. I had my landscapers who were installing the sod move the sprinklers so that they wouldn’t spray the tramp and waste water.

How to Install an Inground Trampoline- Step-by-step easy to follow instructions. Make a trampoline easier to access and safer for your kids.

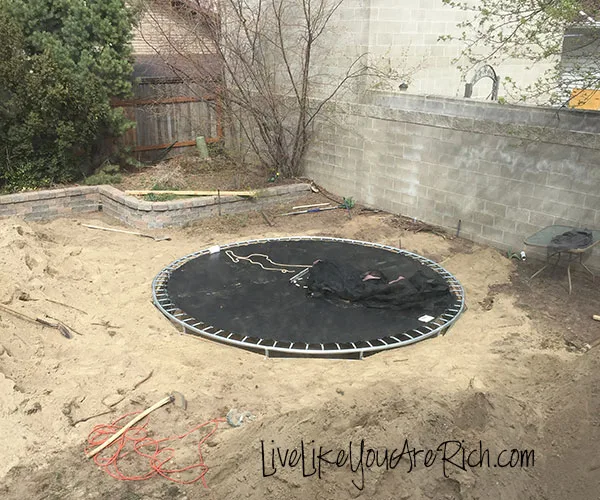
Then the sod was installed. You can do this even if you have existing sod. My brother did it and it worked out great.

How to Install an Inground Trampoline- Step-by-step easy to follow instructions. Make a trampoline easier to access and safer for your kids.

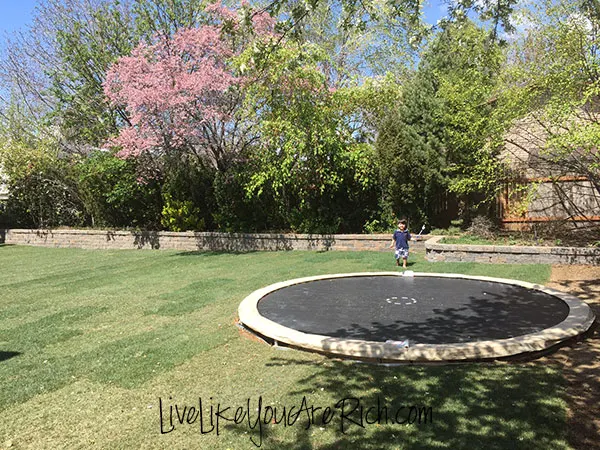
Like the tutorial we used, we installed the tramp so that there was a bit of a gap between the frame and the grass (about 2 inches). In the first few days, we had several birds get trapped under it. We had to undo the springs, crawl under, catch them and let them loose!

How to Install an Inground Trampoline- Step-by-step easy to follow instructions. Make a trampoline easier to access and safer for your kids.

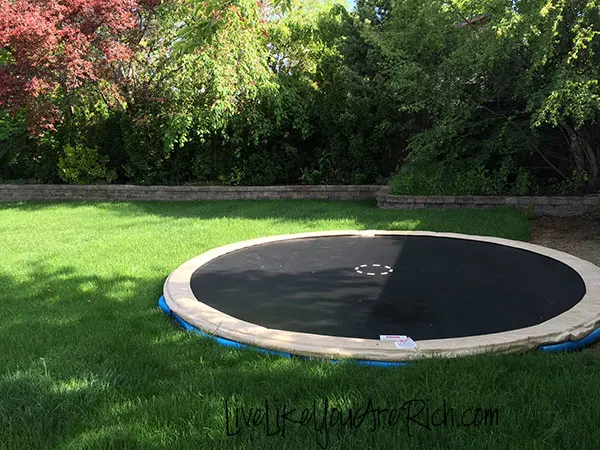
After that happening twice we got pool noodles and stuck them under each side. This prevents the birds and other animals getting in, my kids and their friends from putting stuff down into the hole, and prevents anyone from stepping on the sheet metal that sticks up a tad. With just a few bucks spent on pool noodles, both problems have been solved.

How to Install an Inground Trampoline- Step-by-step easy to follow instructions. Make a trampoline easier to access and safer for your kids.

A Saturday project, a few trips to HomeDepot, and my brother-in-law’s digging skills saved us $1,125!

Foamswordfightsontrampoline

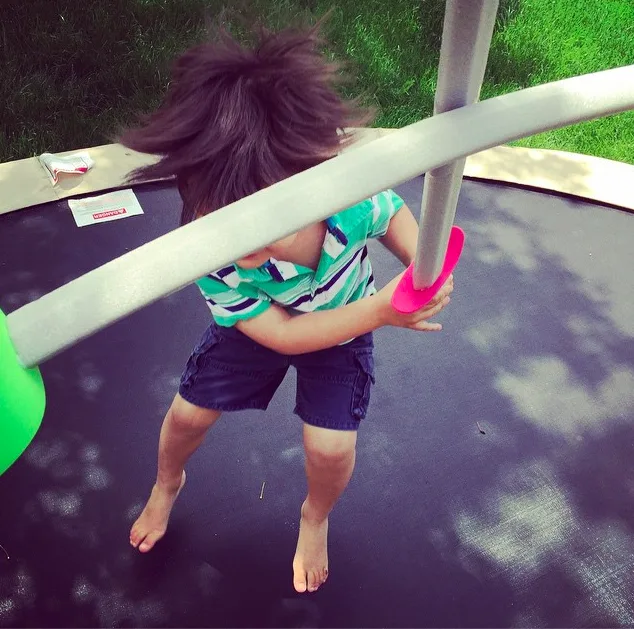
My son LOVES the trampoline. He runs on and off it without any trouble. I don’t have to worry about him falling off. It entertains him for hours. I don’t have to help him or his friends who come to play on and off it either. I also don’t have to move the tramp when we mow. It has been a huge blessing and so much fun!

We have trampoline sword fights with these amazing and durable—yet inexpensive foam swords pretty much every day the weather is good. I actually love to jump on it too. I am still a kid at heart I guess.

Supplies:

  • Twelve 2X4X8 of pressure treated wood – in order to calculate this we measured the distance between the two legs on each section which was just over 3.5′ for one edge and almost 4′ for every other edge. We wanted 2 pieces of wood on each section so we went with an 8′ long 2×4. There were 12 sections on our tramp so we bought 12 of them.
  • Six 24″x8′ Roof panel galvanized metal sheeting- We cut these down to the correct length (getting two walls for each piece).
  • Roofing screws (to screw the metal onto the wood). 8-12 per section.
  • Bricks or cinder blocks (a few for each leg/section). We used bricks.
  • Bolts (4 for each section) We used bolts that were 5″ long with about 1.5 of thread (so the bolt could go through the 2×4 and trampoline leg)
  • Self-Locking Nuts- so they don’t come loose with the jumping on the tramp (1 for each bolt)
  • Self-Locking Washers– so they don’t wiggle loose (2 for each bolt)
  • Optional- pool noodles (see above for the reason why)

Tools:

  • Excavator
  • Spray Paint
  • Shovel
  • Level
  • Tin Snips
  • Two wrenches that fit the bolts and nuts
  • Hammer
  • Drill
  • Pencil/Pen
  • Measuring tape
  • Extra 2×4 or 1×2 to set the level on

Please ask if you have any questions about this project.

Have fun!

Anita

For other ‘rich living’ and money-saving tips, please subscribe, like me on Facebook, and follow me on Pinterest and Instagram.

How to install an Inground Trampoline.

How to Install an Inground Trampoline- Step-by-step easy to follow instructions. Make a trampoline easier to access and safer for your kids.
Step-by-step easy to follow instructions. Inground trampolines are jumped and used more by children than above ground tramps. They are also safer, more convenient for parents of younger kids, and really are not that hard to install. #trampoline #ingroundtrampoline #diy #backyardideas

Related posts:

How to Install Under-Mount Lights on Your Hutch, Cabinets, Desk, etc. How to Spray Paint a Mailbox Christmas Present Wood Craft
Previous Post: « 11 Pregnancy Tips that Will Save You Thousands
Next Post: 7UP Grilled Chicken Recipe »

Reader Interactions

Comments

  1. Chelsea @ Life With My Littles says

    May 21, 2015 at 7:39 pm

    This looks so fun! My son would’ve loved having a digger in our backyard (if we had a backyard haha). I am definitely saving this for the future!!

    Reply
    • Anita Fowler says

      May 22, 2015 at 12:25 pm

      Thanks Chelsea! you are always so kind to stop by. It was a very fun project.

      Reply
  2. justjayma says

    May 23, 2015 at 7:05 pm

    Did you do any thing under the tramp for drainage of water?

    Reply
    • Anita Fowler says

      May 23, 2015 at 7:08 pm

      No we have sandy soil and the water drains very well. It has rained 45 times in the last 60 days and we have not had any water pool. IF you have clay or other tough soil I have read to dig a bit deeper and fill in a few inches deep with gravel and rocks for drainage. But if you have normal or sandy soil it will drain just fine without.

      Reply
    • Randy weber says

      April 23, 2021 at 2:44 pm

      what purpose does the sheet metal serve?

      Reply
      • Anita says

        November 12, 2021 at 8:47 am

        It keeps the dirt from coming in under the trampoline. Essentially it creates a wall so dirt cannot fill in under the tramp.

        Reply
  3. Brandi Wilson says

    June 2, 2015 at 11:19 am

    This looks like so much fun! I will have to consider doing something like this for Boyd one day soon. He would love it!

    Reply
    • Anita Fowler says

      June 2, 2015 at 8:50 pm

      Thank you Brandi, good to have you stop by! Yes this has been so much fun for the whole family!

      Reply
  4. torontomum says

    June 12, 2015 at 6:34 pm

    Hi,
    This looks great, thanks. A couple of questions — any injuries from jumping on the springs? i know that is a common cause of injuries. Do you let more than one child at a time on the trampoline?
    Finally, what do you do in winter? do you cover it?
    thanks!

    Reply
    • Anita Fowler says

      June 16, 2015 at 10:07 pm

      No injuries from the springs they are covered well. I let multiple kids jump at the same time and thus far no accidents. we will just leave the cover on in the winter. Most people around here do and despite lots of snow the tramps still last a long time.

      Reply
  5. Dustin says

    May 16, 2016 at 1:42 am

    How have the walls been holding up against the dirt? I think a lot of guys do circular retaining walls for this. The sheet metal looks cheaper though, I’m just worried about liability since I’ll be doing this for a customer.

    Reply
    • Anita Fowler says

      May 22, 2016 at 4:06 am

      The walls have held up great. We use the trampoline daily. If anything we should have dug the hole just a bit deeper as the trampoline has settled in. But its plenty deep for little kids. Teenagers may need a deeper hole.

      Reply
  6. Jackie Oliver says

    May 23, 2016 at 1:12 pm

    It looks like your little boy had just as much fun playing on the pile of dirt, so cute! I really look how you drill the wood directly into the legs of the tramp, that way it is nice and secure. It’s also a really smart idea to put the metal around, so that you don’t have to worry about stuff getting in underneath it.

    Reply
    • Anita Fowler says

      May 25, 2016 at 7:53 pm

      Thanks Jackie! Yeah he did love playing in the dirt :).

      Reply
    • Diana says

      May 6, 2020 at 7:42 pm

      How much did the excavator cost?

      Reply
      • Anita says

        May 13, 2020 at 4:40 pm

        We rented it for four hours. I would recommend a full day if you aren’t very familiar with using one. 1/2 day at Home Depot rentals in Utah was $125.00 full day is about $225.

        Reply
  7. Amy says

    July 20, 2016 at 2:27 am

    How did you fold the sheet metal so that there’s no sharp edges? Is it easy to fold sheet metal? Don’t have any experience with sheet metal so that’s why I’m asking 🙂 Also, do you think sheet metal is the best material to use to retain the wall? Any other material that you think would work?

    Reply
    • Anita Fowler says

      December 29, 2016 at 5:31 pm

      The sheet metal works great. Over time the sheet metal has become covered by dirt, but for the first two years we used pool noodles to protect the edges. We didn’t follow the original instructions to fold the sheet metal over but using a set of heavy duty pliars and sheet metal cutters it should be fairly easy to do.

      Reply
  8. Nic says

    December 6, 2016 at 4:32 pm

    I’ve heard that in ground trampolines suffer from not having any place for the air to escape. The theory is that when someone jumps on the tramp they are pushing air down. Without an air escape vent the air becomes pressurized and the tramp doesn’t feel as bouncy. Have you experienced this? As the grown-up child I am, I want to jump on the tramp! How does your tramp work for adults? Any air pressure issues?

    Reply
    • Anita Fowler says

      December 29, 2016 at 4:28 pm

      There have been absolutely no pressure issues. I jump on our tramp in spring and summer daily with my children and absolutely LOVE it! It is used way more because it is so easy to get on and off! Highly recommend this and have experienced no issues.

      Reply
  9. Daniel Garza says

    March 28, 2017 at 4:55 am

    does water affect the walls and the bottom of the whole? I’m looking into this idea and in my area during the winter in rains pretty bad.

    Reply
    • Anita Fowler says

      April 3, 2017 at 9:00 pm

      It rains and snows a ton in my area too. So far so good and its been a few years. The tramp has ‘settled a little’ but it is perfect because I felt like it was an inch or two too high anyway. Best of luck. P.S. my dirt is sandy no clay. If you have clay you may want to put gravel down.

      Reply
  10. Emily says

    June 1, 2017 at 8:25 am

    A very detailed guide on how to put a trampoline in the ground

    Reply
  11. Tara says

    April 26, 2018 at 5:04 am

    Were the trampoline legs difficult to drill through? We are preparing to start this project and I’m wondering if I need a special drill bit? Also, are the bricks/cinderblocks necessary? I’m trying to figure out their purpose.

    Reply
    • Anita says

      May 28, 2018 at 8:08 pm

      Sorry this comment got lost in a pile of spam. Did you complete the project? With a drill bit and drill the legs were easy to drill through. The bricks were to prevent the tramp from settling so much into the sand. It worked.

      Reply
  12. Heather says

    September 14, 2018 at 11:09 pm

    May be a silly question but I was wondering how you’ve actually put the pool noodles around, have you fed them all the way round so there are no gaps, and are they fed in and out of the trampoline legs? Also is there still space for air flow with the pool noodles.
    Great instructions thank you.

    Reply
    • Anita says

      September 27, 2018 at 5:51 pm

      The pool noddles were stuck in between the sheet metal and the top frame of the tramp. There was air flow through the springs and cover. It was fine. Thank you for the feedback and good luck!

      Reply
  13. Kim says

    September 18, 2019 at 8:27 pm

    I would love to do this with our trampoline.
    What is the point of adding wood and sheet metal to the frame?

    Reply
  14. Casdale says

    February 2, 2020 at 10:49 pm

    Inground trampoline is believed by many to be the safest. How youu install it will go a long way to determine how safe it will be.

    Thanks for a detailed installation guide.

    Reply
  15. Careema says

    May 9, 2020 at 1:08 am

    Hello im looking at following your instructions, im not use to all the types of bolts, self locking nuts and washers, roofing screws and does it matter on the type of metal. Im on Home Depot making a list of what I need. Im more of a visual learning so what why im asking for my detail. Thank you.

    Reply
    • Anita says

      May 13, 2020 at 4:38 pm

      Just take the list to Home Depot and ask a worker in the hardware department they will find it all for you! Good luck!

      Reply
  16. David Walker says

    May 10, 2020 at 4:21 pm

    What a great idea!! You guys made it look so easy. I think this is an awesome way to put in a trampoline. Much safer than regular. Thank you so much for sharing this 🙂

    Reply
    • Anita says

      May 13, 2020 at 4:36 pm

      Thanks!

      Reply
  17. Rick Patterson says

    May 18, 2020 at 7:32 pm

    Question – what did you do with all the dirt? We’d like to do something like this, but we don’t have a big backyard, and the dirt seems to be an issue.
    Thanks!
    Rick

    Reply
  18. Rick Patterson says

    May 18, 2020 at 7:52 pm

    Question – what did you do with all the dirt? We’d like to do something like this, but we don’t have a big backyard,
    Thanks!
    Rick

    Reply
    • Anita says

      May 21, 2020 at 4:26 pm

      we put it in our lawn because we needed to resod. So we just built up our lawn, we also made a dirt box/sand box for the kids. A lot of local classifieds offer free soil/dirt for people to come get and amazingly, if you do this in spring or summer, a lot of people are looking for free dirt and soil so that is an option too. They can just wheel barrow it away.

      Reply
  19. Drew S. says

    February 17, 2021 at 8:34 am

    We own a company that rents mini excavators (Patriot Rentals). Our customers ask all the time if we have any experience digging holes in the backyard for trampolines. I will give them this link. Thanks.

    Reply
    • Anita says

      March 15, 2021 at 9:22 pm

      Thank you for referring my blog post!

      Reply
  20. Health And Fitness Tips says

    April 11, 2021 at 2:40 pm

    Some very nice info in your post I will put to use for my
    upcoming plans. Thanks for finding the time to post this,
    I’m certain this can help other individuals as it has helped me personally.

    Reply
  21. Terri says

    December 5, 2021 at 1:14 pm

    Do you have a problem with vegetation growing under the trampoline at all? Wondering if I should lay some sort of liner to prevent weeds etc.

    Reply
    • Anita says

      December 11, 2021 at 4:19 pm

      We didn’t have much, but I would recommend using tar paper and weed barrier as I did on our beds I posted about it here. That is weed proof for sure

      Reply
  22. Fred Barden says

    August 15, 2022 at 5:09 am

    Nice idea, but how do you make sure water doesn’t pool under the jumping pad? What type of drainage system is required and estimated effort and cost?

    Reply
    • Anita says

      October 1, 2022 at 11:23 pm

      I had no issues with soil drainage as our soil was porous and sandy. sorry for not having further info for you.

      Reply

Trackbacks

  1. 5 Steps to Prepare Your Yard for Winter | Live Like You Are Rich says:
    October 19, 2015 at 9:14 pm

    […] the spray nozzle that I plan on using to spray the toys down outside. I’ll throw them on our D.I.Y. In-Ground Trampoline to dry and then come and collect the the toys I want in a black bag with my trusty and […]

    Reply
  2. In Ground Trampoline - A Complete Guide says:
    August 27, 2021 at 7:01 pm

    […] ground trampoline costs depend on the type you buy and what kind of installation you […]

    Reply

Leave a Reply Cancel reply

Your email address will not be published. Required fields are marked *

Primary Sidebar

Anita Fowler
Pinterest Facebook Twitter Youtube Gmail Gmail RSS

Most Popular


Footer

anita_livelikeyouarerich

How to live a rich life on any income. Stay-at-Home Mom to 4. 👦🏻👩🏻👧🏼👶🏻Wife 👩‍❤️‍👨Author 📖. Blogger 💻. Christian 🌟. #livelikeyouarerich #LivingRichTips

Family & Finances & Food-Anita
Say hello to your new favorite breakfast or snack Say hello to your new favorite breakfast or snack - these delicious and fluffy banana bread muffins! 🙌 Try out my recipe and thank me later.

Tag someone who might need this.

The Recipe is in the link in bio.

https://livelikeyouarerich.com/banana-bread-muffins/

#bananabread #muffins #bananamuffins #recipe #recipes #breakfast #snacks #easyrecipes #recipeoftheday
Who knew zucchinis could taste this good? 😍 Try Who knew zucchinis could taste this good? 😍 Try this easy roasted zucchini recipe for a healthy and delicious meal! 

INGREDIENTS
* 2 medium zucchini
* 2 Tablespoons olive oil (or 2 Tablespoons butter—melted)
* 1 teaspoon dried oregano
* 1/2 teaspoon dried parsley
* 1/4 teaspoon garlic powder
* 1 pinch of salt
* 1 pinch of pepper
* 1/3 cup fresh parmesan

Get the recipe in the link in bio.

https://livelikeyouarerich.com/roasted-zucchini-recipe/

#foodie #healthyeating #zucchinirecipes #snacks #healthysnacks #roastedzucchinirecipe
February was full of amazing audiobooks! From thri February was full of amazing audiobooks! From thrillers to memoirs, here are my top picks. 🎉 

Share this with someone who might need it.

Link in bio.

https://livelikeyouarerich.com/audiobooks-i-listened-to-in-february-2023/

#audibooks #bookrecommendations #audiobooklove #bookworm #storytelling
Who says a trip to Great Wolf Lodge has to break t Who says a trip to Great Wolf Lodge has to break the bank? 🤑 My money-saving hacks will help you enjoy all the fun without the high price tag! 

Check out money-saving hacks in the link in the bio.

https://livelikeyouarerich.com/how-to-save-money-at-the-great-wolf-lodge-in-grapevine-tx/

#FrugalFamilyFun #GreatWolfLodge #TravelTips #familyvacation #travelwithkids #staycation #familystaycation
May your day be filled with pots of gold and rainb May your day be filled with pots of gold and rainbows 🌈🍀 Happy St. Patrick's Day!

#stpatricksday #stpatricksgreeting #greenday #irishluck
If you're expecting a boy and need some travel-the If you're expecting a boy and need some travel-themed nursery decor inspiration 🌏🌎👂☀️

I decorated this travel-themed boy nursery for my baby boy because I love to travel and I hope he has the wanderlust bug as well.

Tag a friend who needs this.�

Details are in the link in bio.

https://livelikeyouarerich.com/travel-themed-boy-nursery/

#travelthemednursery #babynursery #babynurserydecor #babynurseryideas #travelnursery #babyboynursery #babyboyroom #babyroomdecor #babyroomdecoration #babyroomideas #nurseryinspiration #nurseryideas #livelikeyouarerich #livingrichtips
Load More... Follow on Instagram

Links

  • About Me
  • Contact Me
  • Privacy Policy
  • Advertising/Media/Marketing Opportunities on LiveLikeYouAreRich.com

Disclosure Policy

Affiliate links may be used in this post. Printing a coupon or ordering a product through this link may result in a commission, which helps pay for the cost of running this site and keeps the content free. Read my full disclosure policy here.

Copyright © 2023