
How to Make a Crib or Toddler Blanket.
![]()
![]()
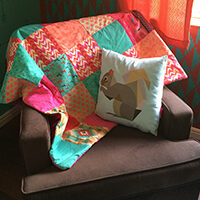
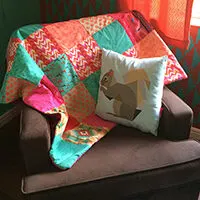
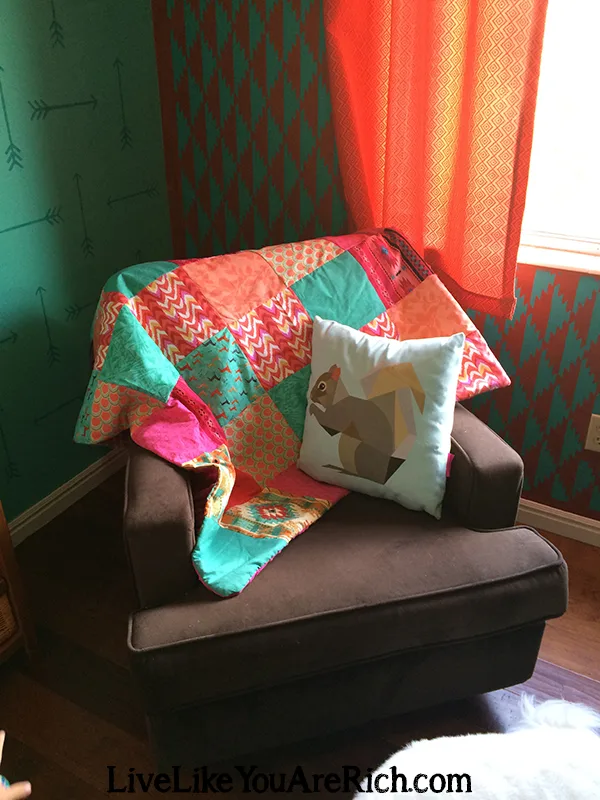
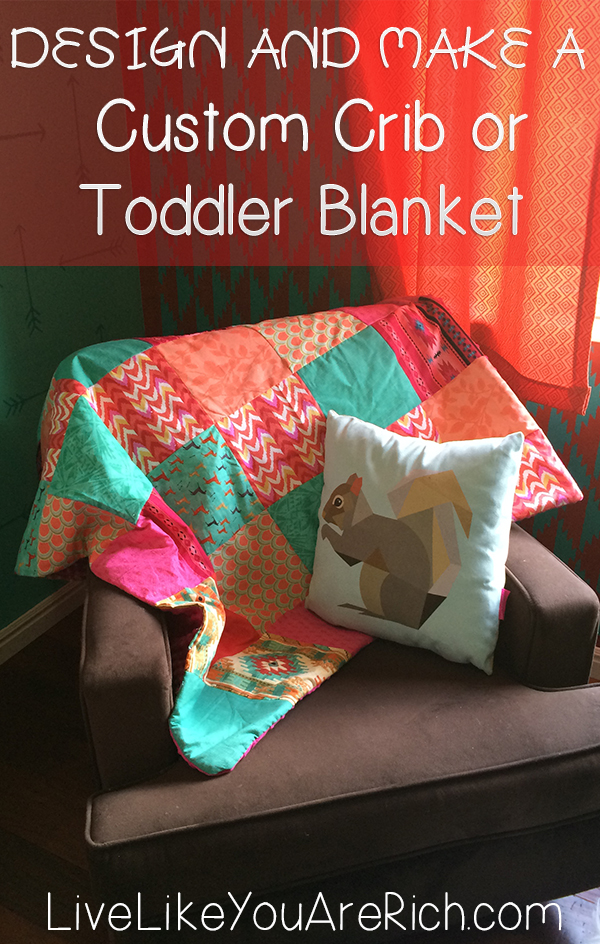
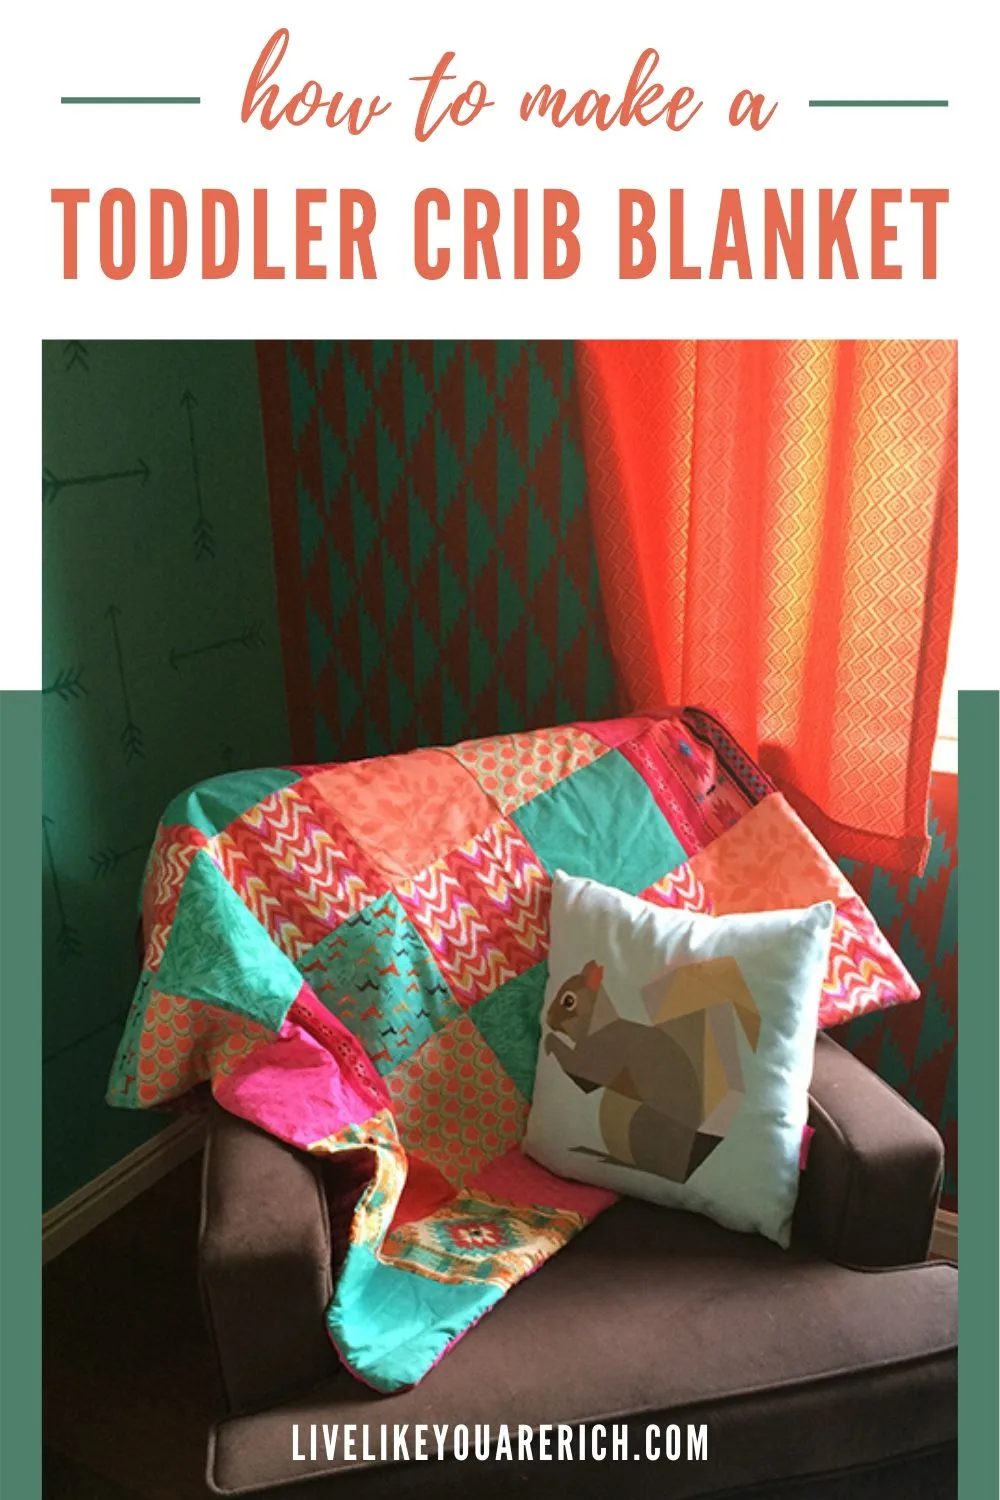
For both my son’s and daughter’s nurseries I’ve wanted to make custom crib blankets to match the color scheme, theme, and decor. I’ve been very happy with the crib/toddler blanket I made for my son so I wanted to make a very similar one for my daughter.
It doesn’t take very much skill to make a custom blanket for your baby, crib, and/or toddler. All you need to know is how to do a little math, how to cut, and how to sew a straight line. You don’t need a fancy machine either! I just use this very basic one that is around $70.00 and it has held up very well!
Obviously, you don’t use a thicker bigger blanket when they are newborns, but it worked great for me to keep warm during night feedings. It also added to the decor. It worked as a play mat when my son was little and since he has been older he has been making great use of it. I assume I’ll use the blanket I make in a very similar way with my daughter as well!
So here is how to complete a project like this.
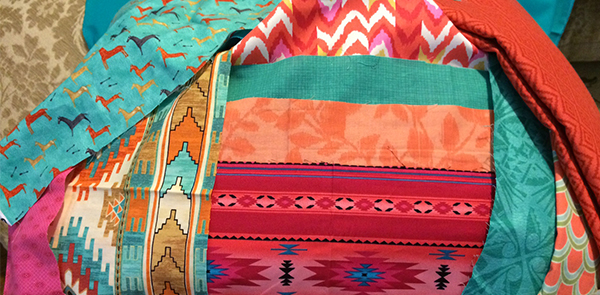
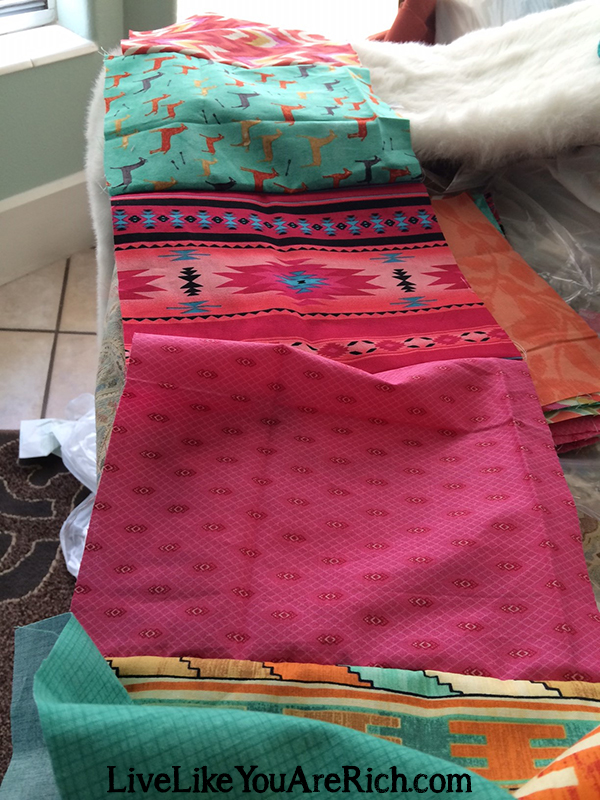
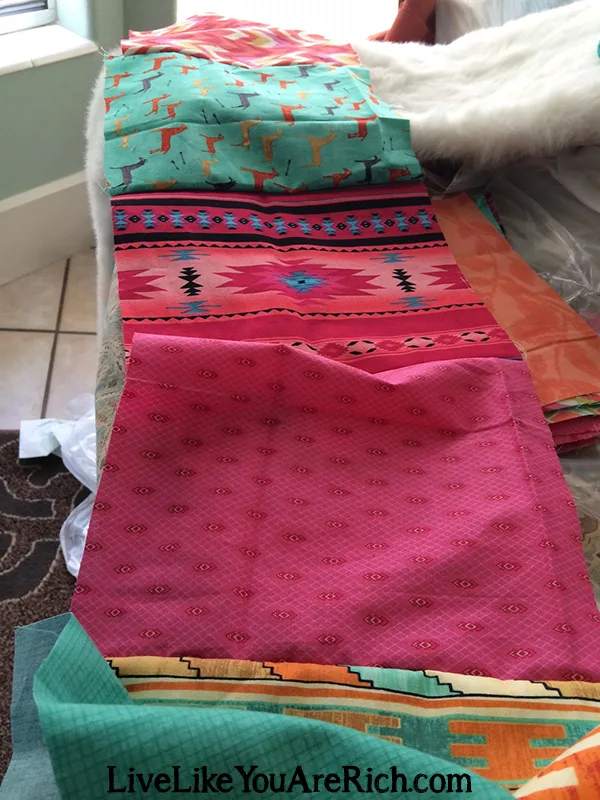
 First, choose fabrics that you love and that look well together. If you can’t choose a color scheme, here is a way that I find really helps (click here for tutorial).
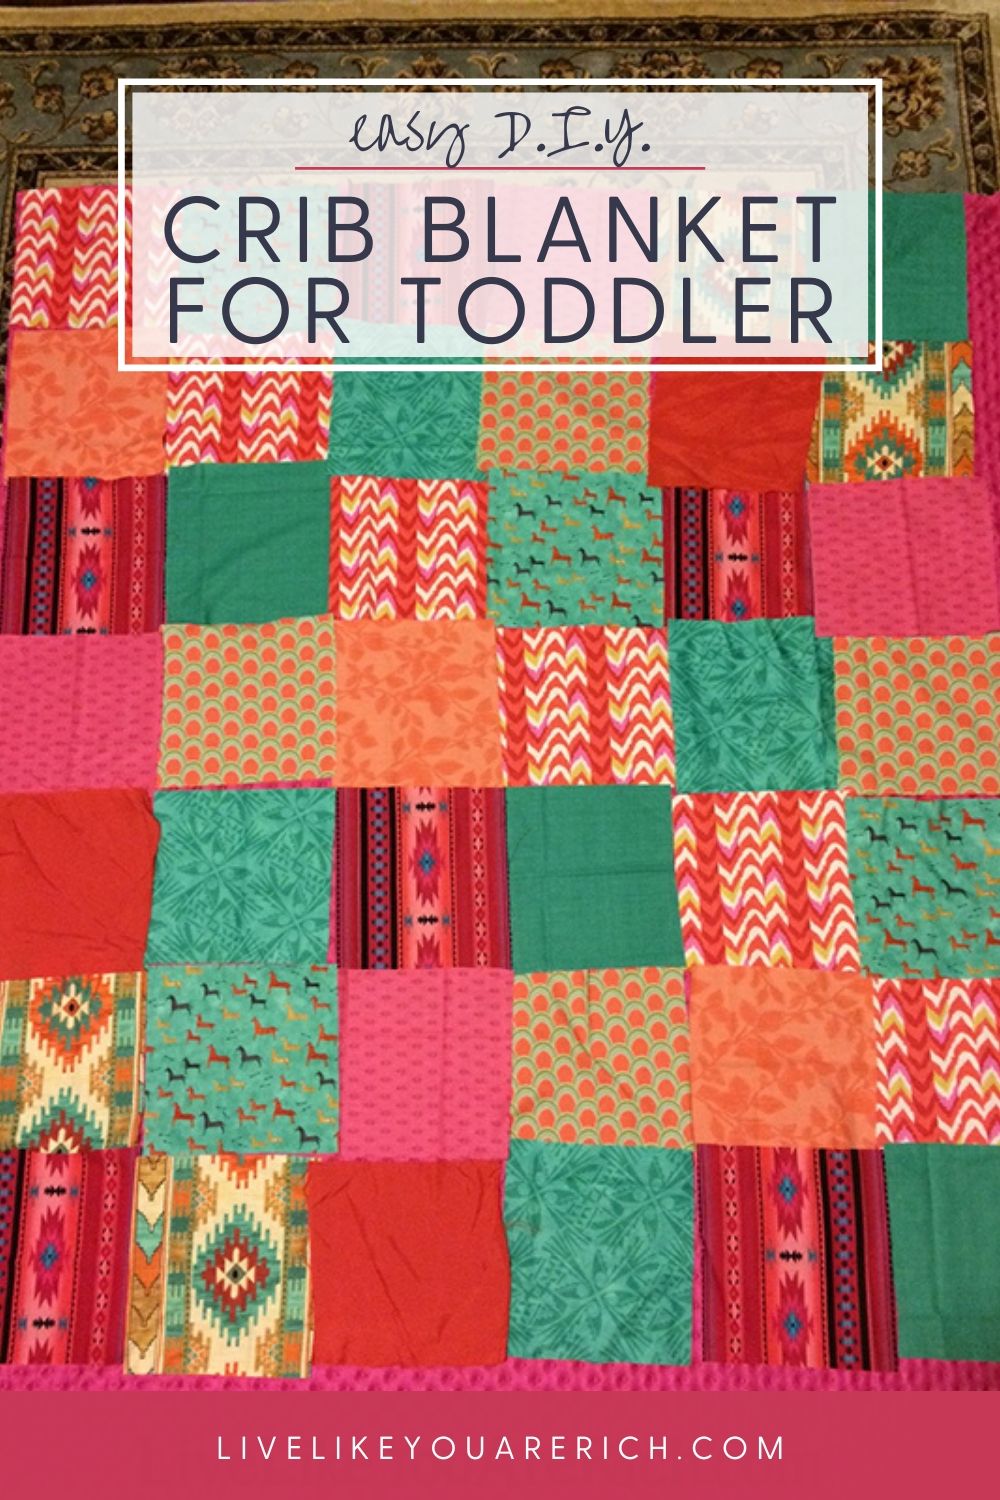
An average sized toddler blanket is (40″ x 60″). A cut of fabric is usually 40-42 inches wide — so 1 2/3 yards of a 40-42 wide fabric is a great size.
Cut the fabric into squares. The size depends on how many different blocks of material you want. Once you know how much fabric you want and how many blocks just calculate the sizes by using division.
I find cutting them in equal sizes (true squares) helps make this project less complicated but it may not work the best with a traditional toddler sized blanket. So on both blankets, I didn’t cut the fabric in true squares. So if you aren’t going to cut the pieces into true squares, make sure the pattern of the material is going in the direction you want it to before you cut it. This ensures the long and short sides will match in the pattern you desire.
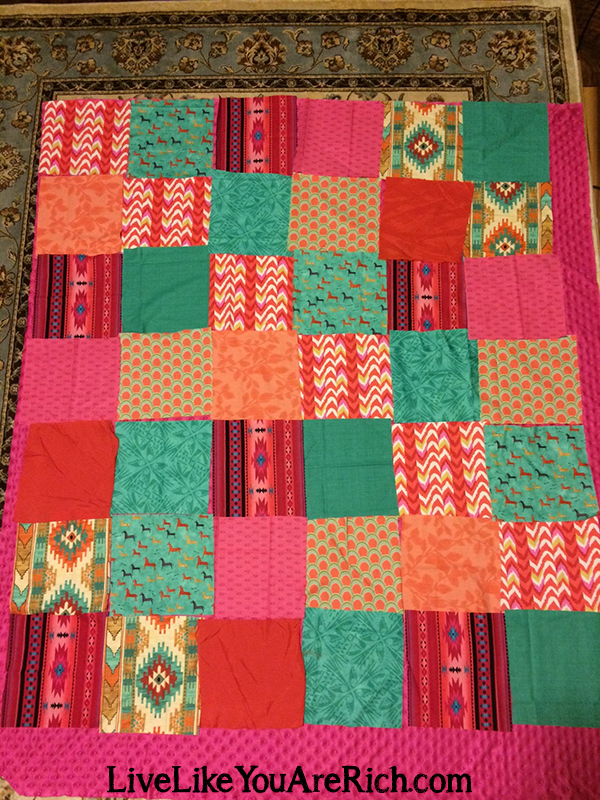
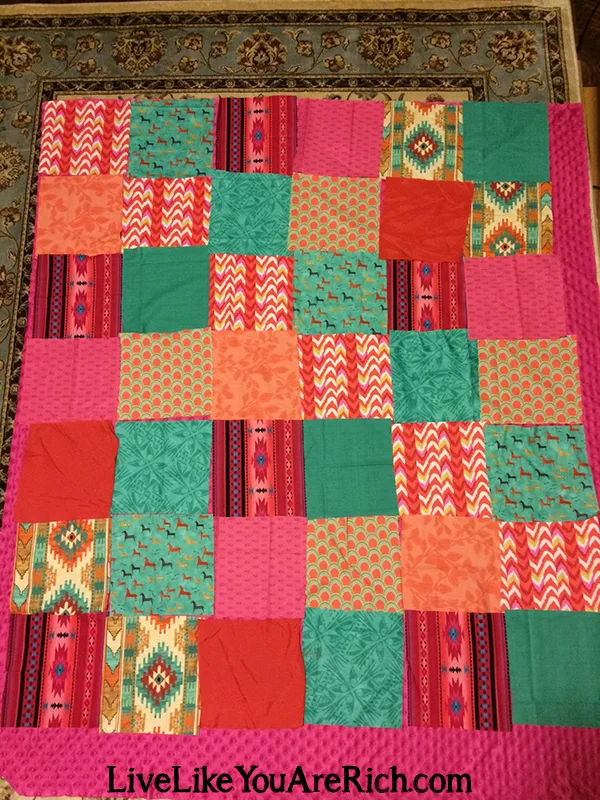 Then lay the fabric out in a pattern you love. It took me a good while to this pattern just how I wanted it. Take your time on this step.


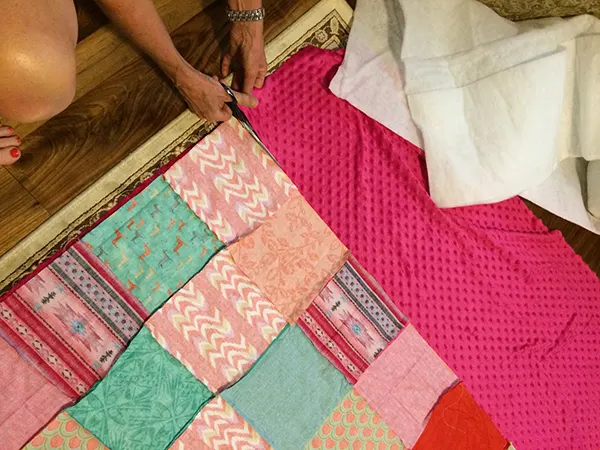
After you have your pattern stack the fabric in the way you want it as to keep the order. Be consistent for each row so you don’t mess up the pattern.
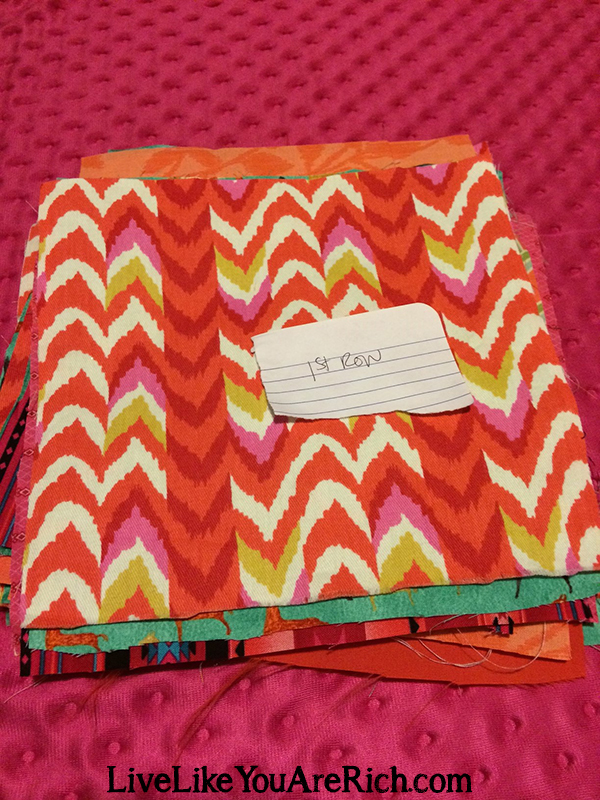

Label each row so you can keep track of them.
Next, begin sewing the rows of fabric to each other. Sew on the wrong sides of the fabric so you can”t see the stitching.

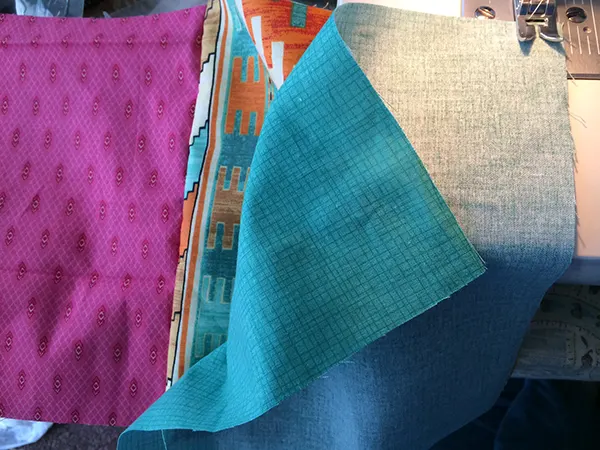
Once you have all of the blocks sewn together, pin and sew the rows to each other on the wrong sides. Again, so you can’t see the stitching. I find it useful to match up the blocks of fabric while I’m pinning the rows to each other so the sewing goes fast.
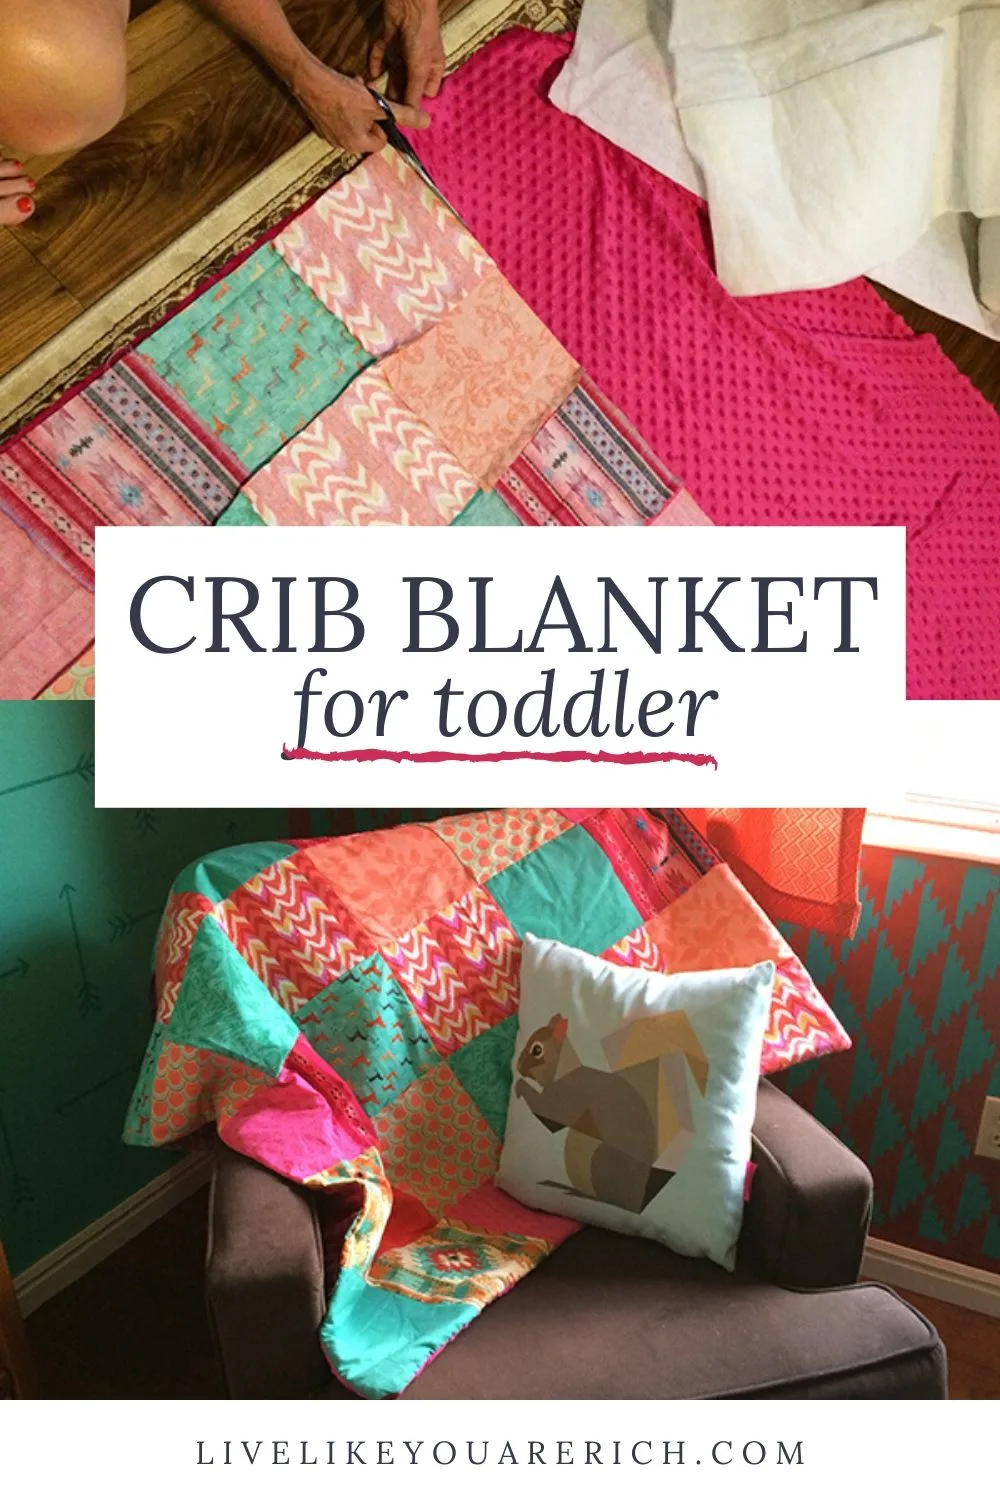
Once you are complete, you should have the entire front of the blanket sewn together. Trim the excess fabric off near the areas where you did the sewing. I try to get close to the stitching, but not close enough that I could cut it. Be careful when trimming the excess fabric away not to cut into the stitches.

Lay the blanket on the backing. I choose hot pink minky fabric found here for the backing. I used brown minky fabric found here for my son’s quilt and it has stayed very soft and is durable so I decided to go with it again for this one.
Next, you will sew the batting, the front, and the back of the blanket all together. This is a tad bit tricky.
Lay the batting on top of the blanket and trim it to fit the front and back of the blanket.
Then MAKE SURE you are sewing this like you would a pillow case (plus the batting). You will sew the three outer edges while it is inside out. After the batting is secure to both layers you will trim off the excess batting and material and then turn the blanket right-side out.
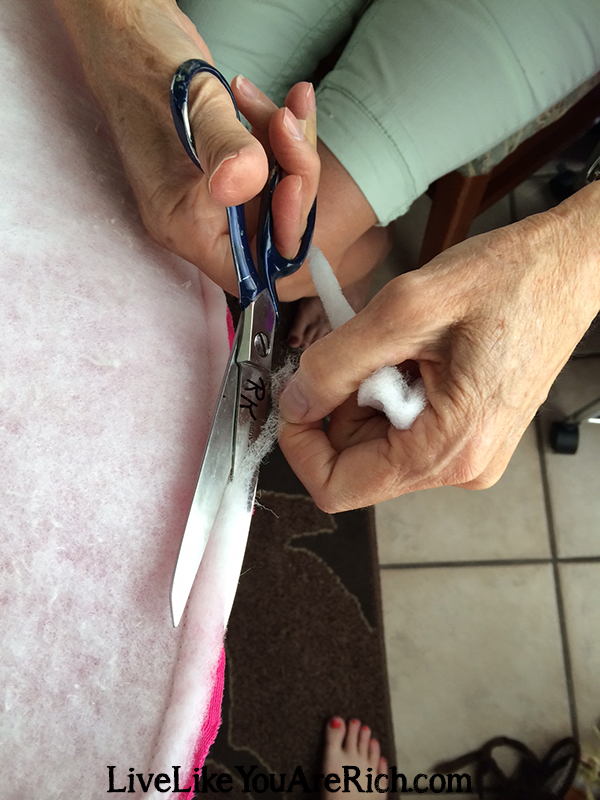

In order to accomplish this, my mom and I put the right sides of the minky and the block fabric together, wrong sides facing out. Then we put the batting on top of the wrong side of minky. We then sewed down three edges with the batting facing up. We were cautious that the sewing machine pressure foot didn’t catch on the batting as we did this and sewed slowly. Once finished, we trimmed the edges. Then we turned the blanket right-side out and made sure everything looked good.
To finish the fourth edge we pinned the top edges inward together (so that no unsewn edges were facing out) and then sewed down the top side. You can also hand stitch the remaining edge if desired.
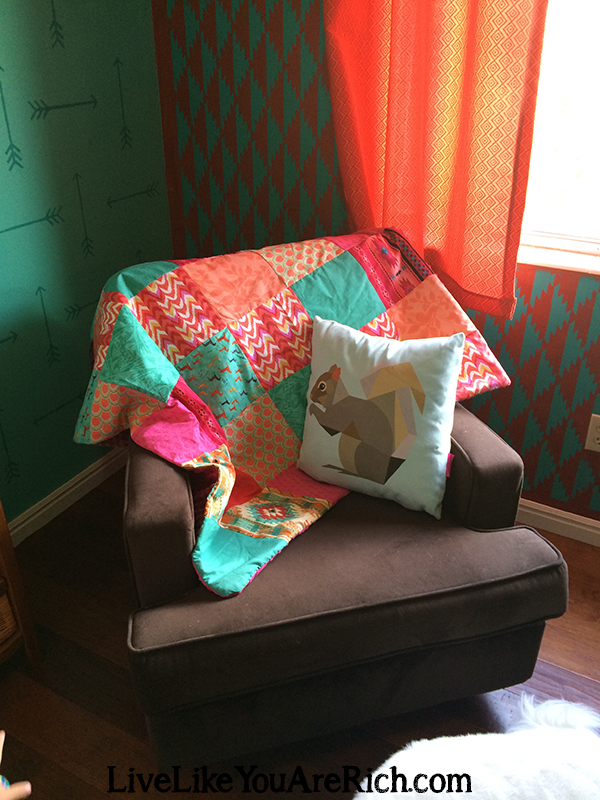
And the crib blanket was complete!
With my son’s blanket, we choose to use a quilt frame, stretch it, and tie it. Then we added edging down the sides (because after you tie it you can’t turn it inside out).
Please ignore the wrinkles, this blanket has been heavily used for 2 years and had just gotten out of the dryer.
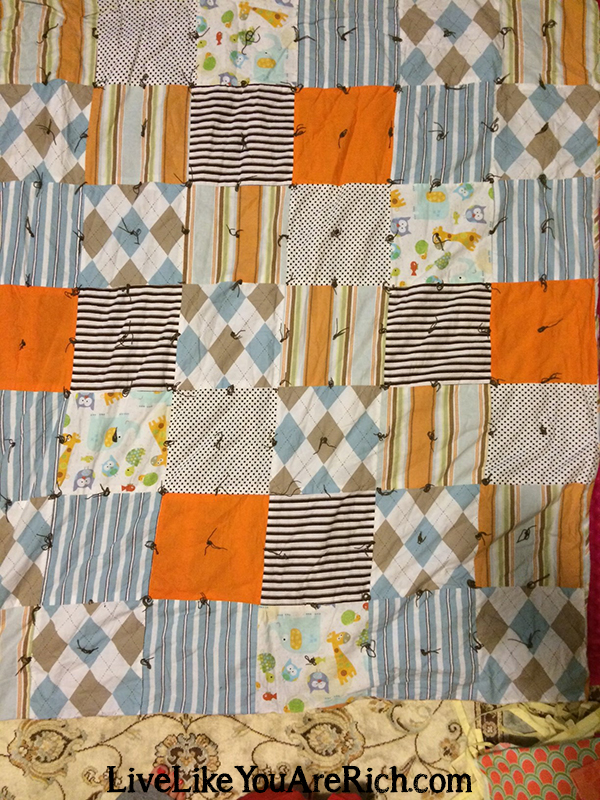
 Tying it and adding binding took much longer than the brighter blanket that I made for my daughter…and I love both!

So if you love a tied quilt look you can tie it. If you want to make a binding/edging you can do that as well! If you just want the easiest way to make a block blanket follow this tutorial.
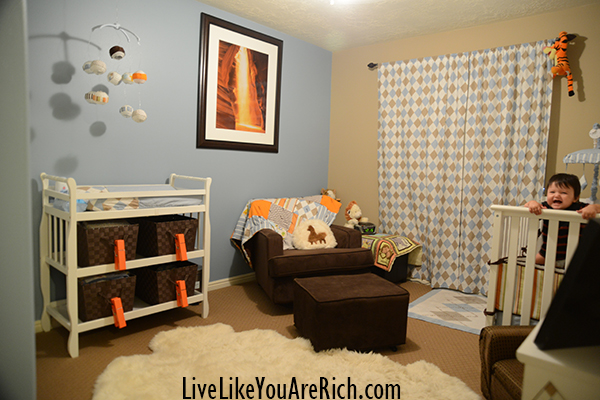
If you are curious to see my daughter’s nursery the post is here. Or if you’d like to see more of my son’s the post is here.


For other ‘rich living’ and D.I.Y tips please subscribe, like me on Facebook, and follow me on Pinterest, and Instagram.


Best Toddler Blanket 2023 And Buyers Guide
Sunday 18th of December 2022
[…] blankets are designed to be lightweight and breathable, so they’re perfect for use during the warmer […]
Debbie Mattos
Saturday 20th of June 2020
Hi. I am wondering on the baby quilt to make it is 1 an 2/3 yrs of material all you have to buy for the bottom And the top square's? This is my 1st attempt at making a quilt and at sewing. This is all. New to me. Thank you for your help Debbie
Anita
Monday 15th of March 2021
Yes you'll need about 2 yards for both sides if you are going to make the blanket as large as I did. Sorry this took so long for me to respond... the comment got lost in the shuffle. I hope it turned out well!!!
17 Darling, Practical, & Custom Handmade Baby Gifts | Live Like You Are Rich
Friday 24th of July 2015
[…] Crib or Toddler Blanket – It doesn’t take very much skill (just knowledge of how to sew in a straight line) to […]