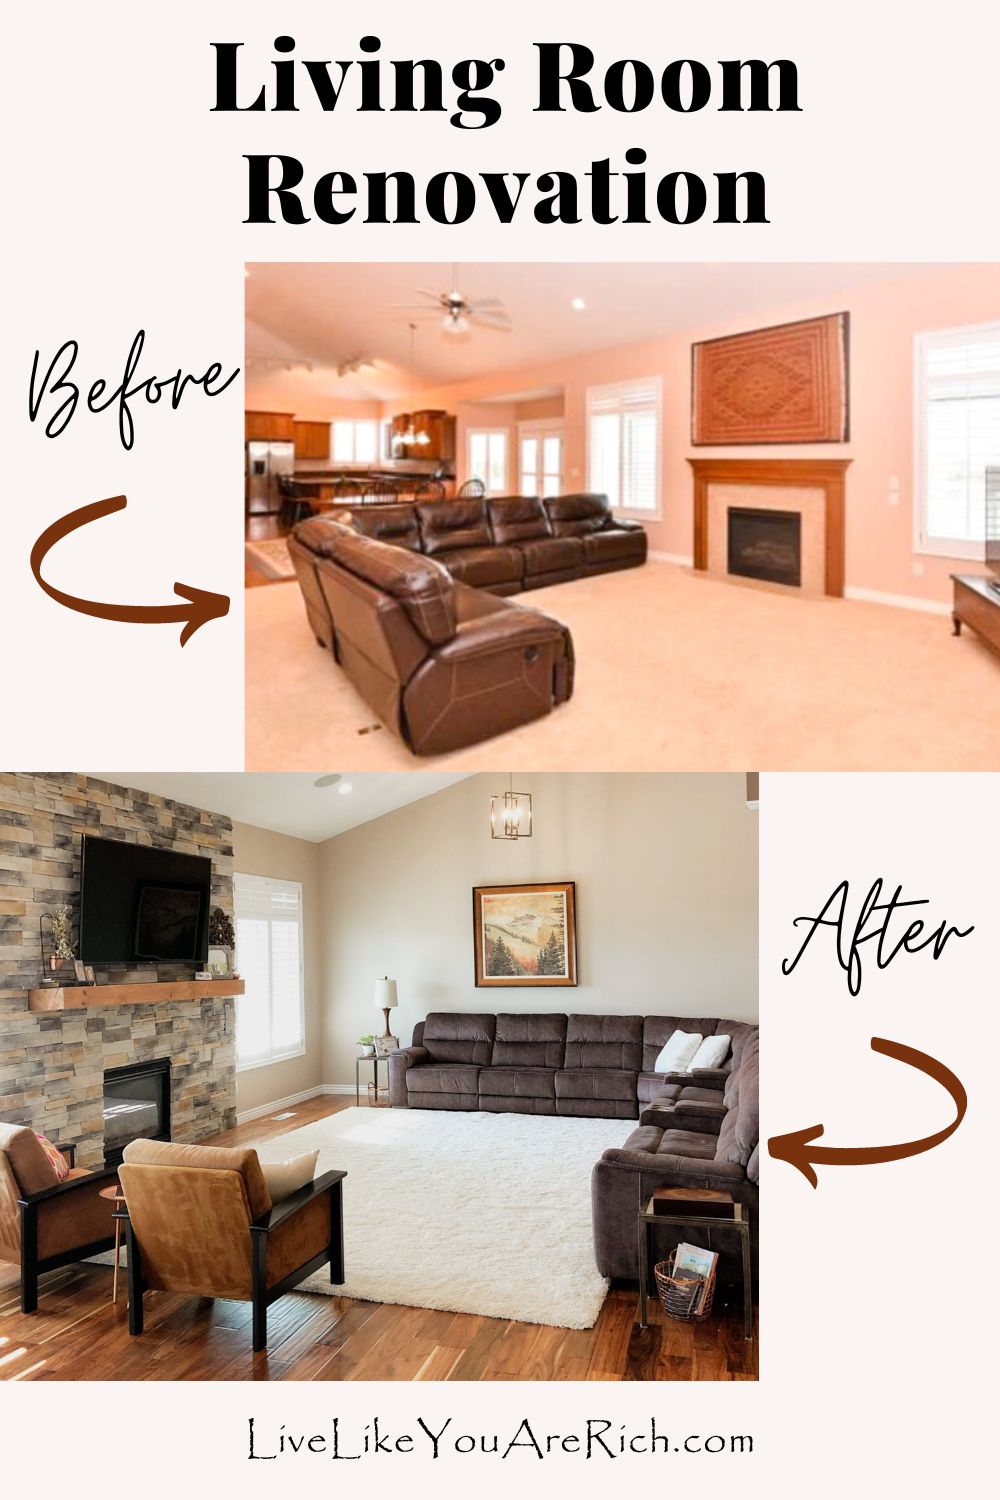
This is the Before and After of our living room in home 3. I’ve labeled it home 3 as it is the 3rd home I’ve renovated and decorated.
This house is our current home and despite us having lived here for a while, I’m just getting around to posting more of our renovation progress. In order to see other renovation posts for our home 3, click here.
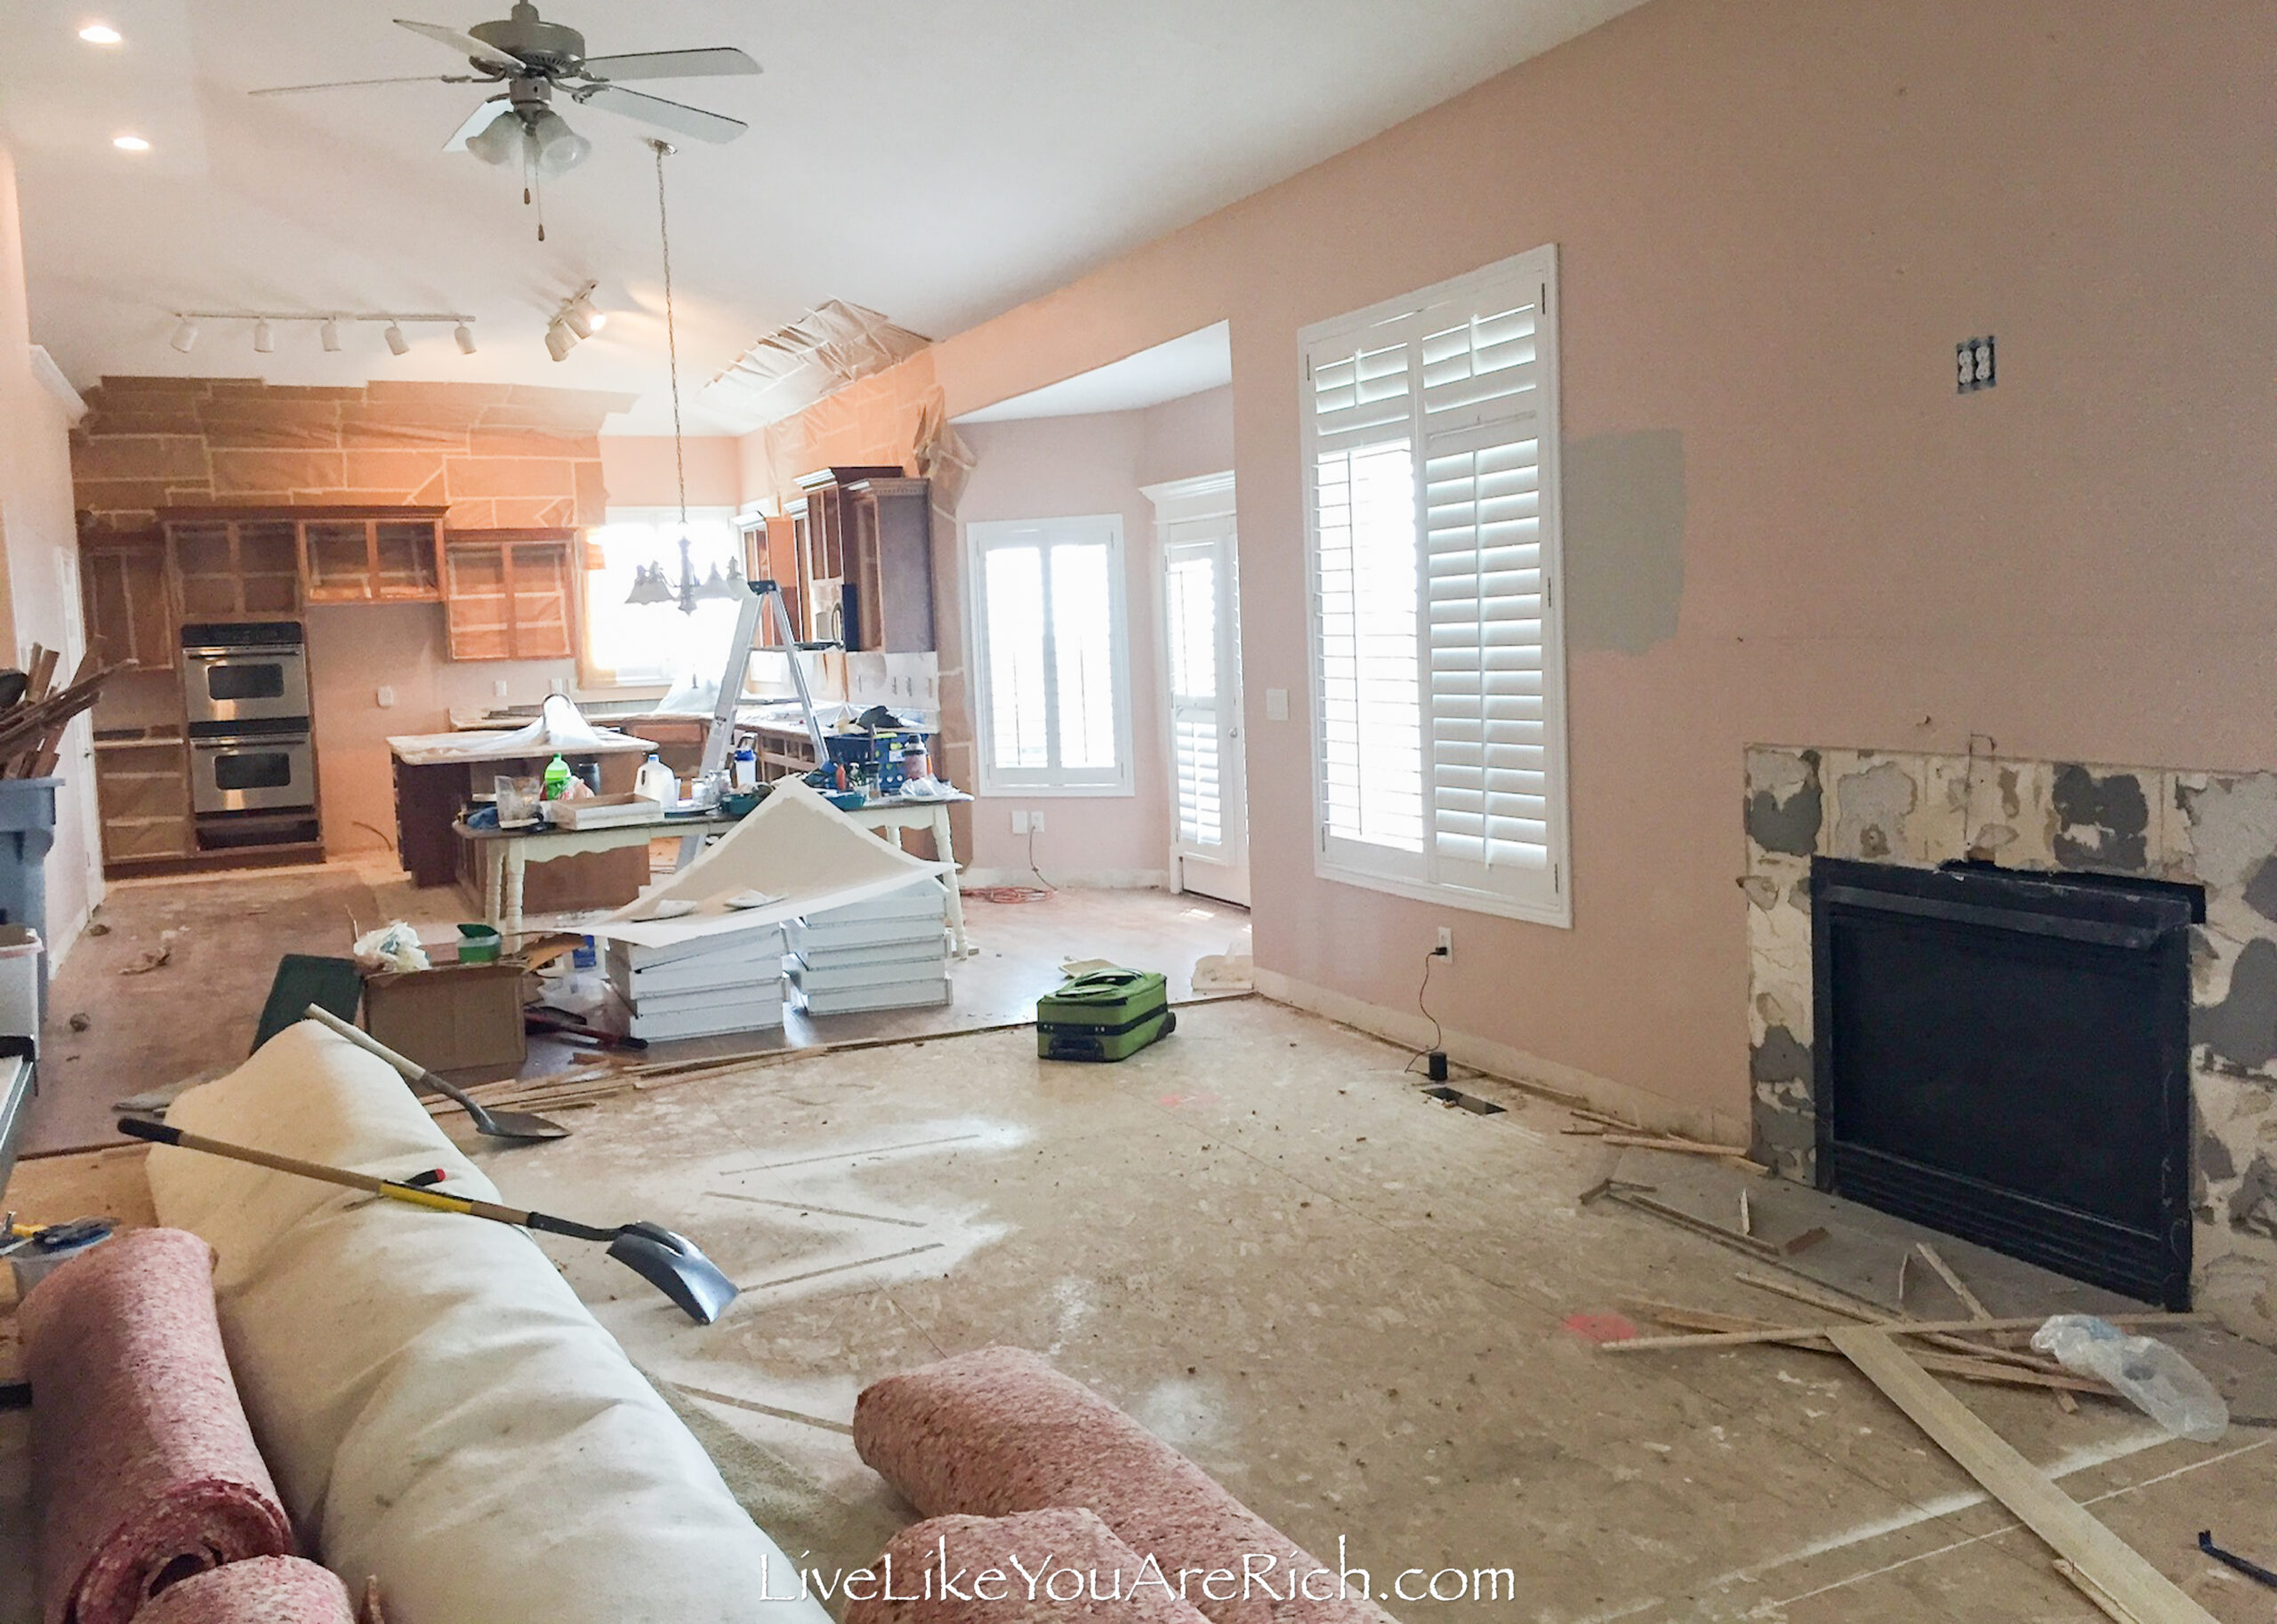
BEFORE
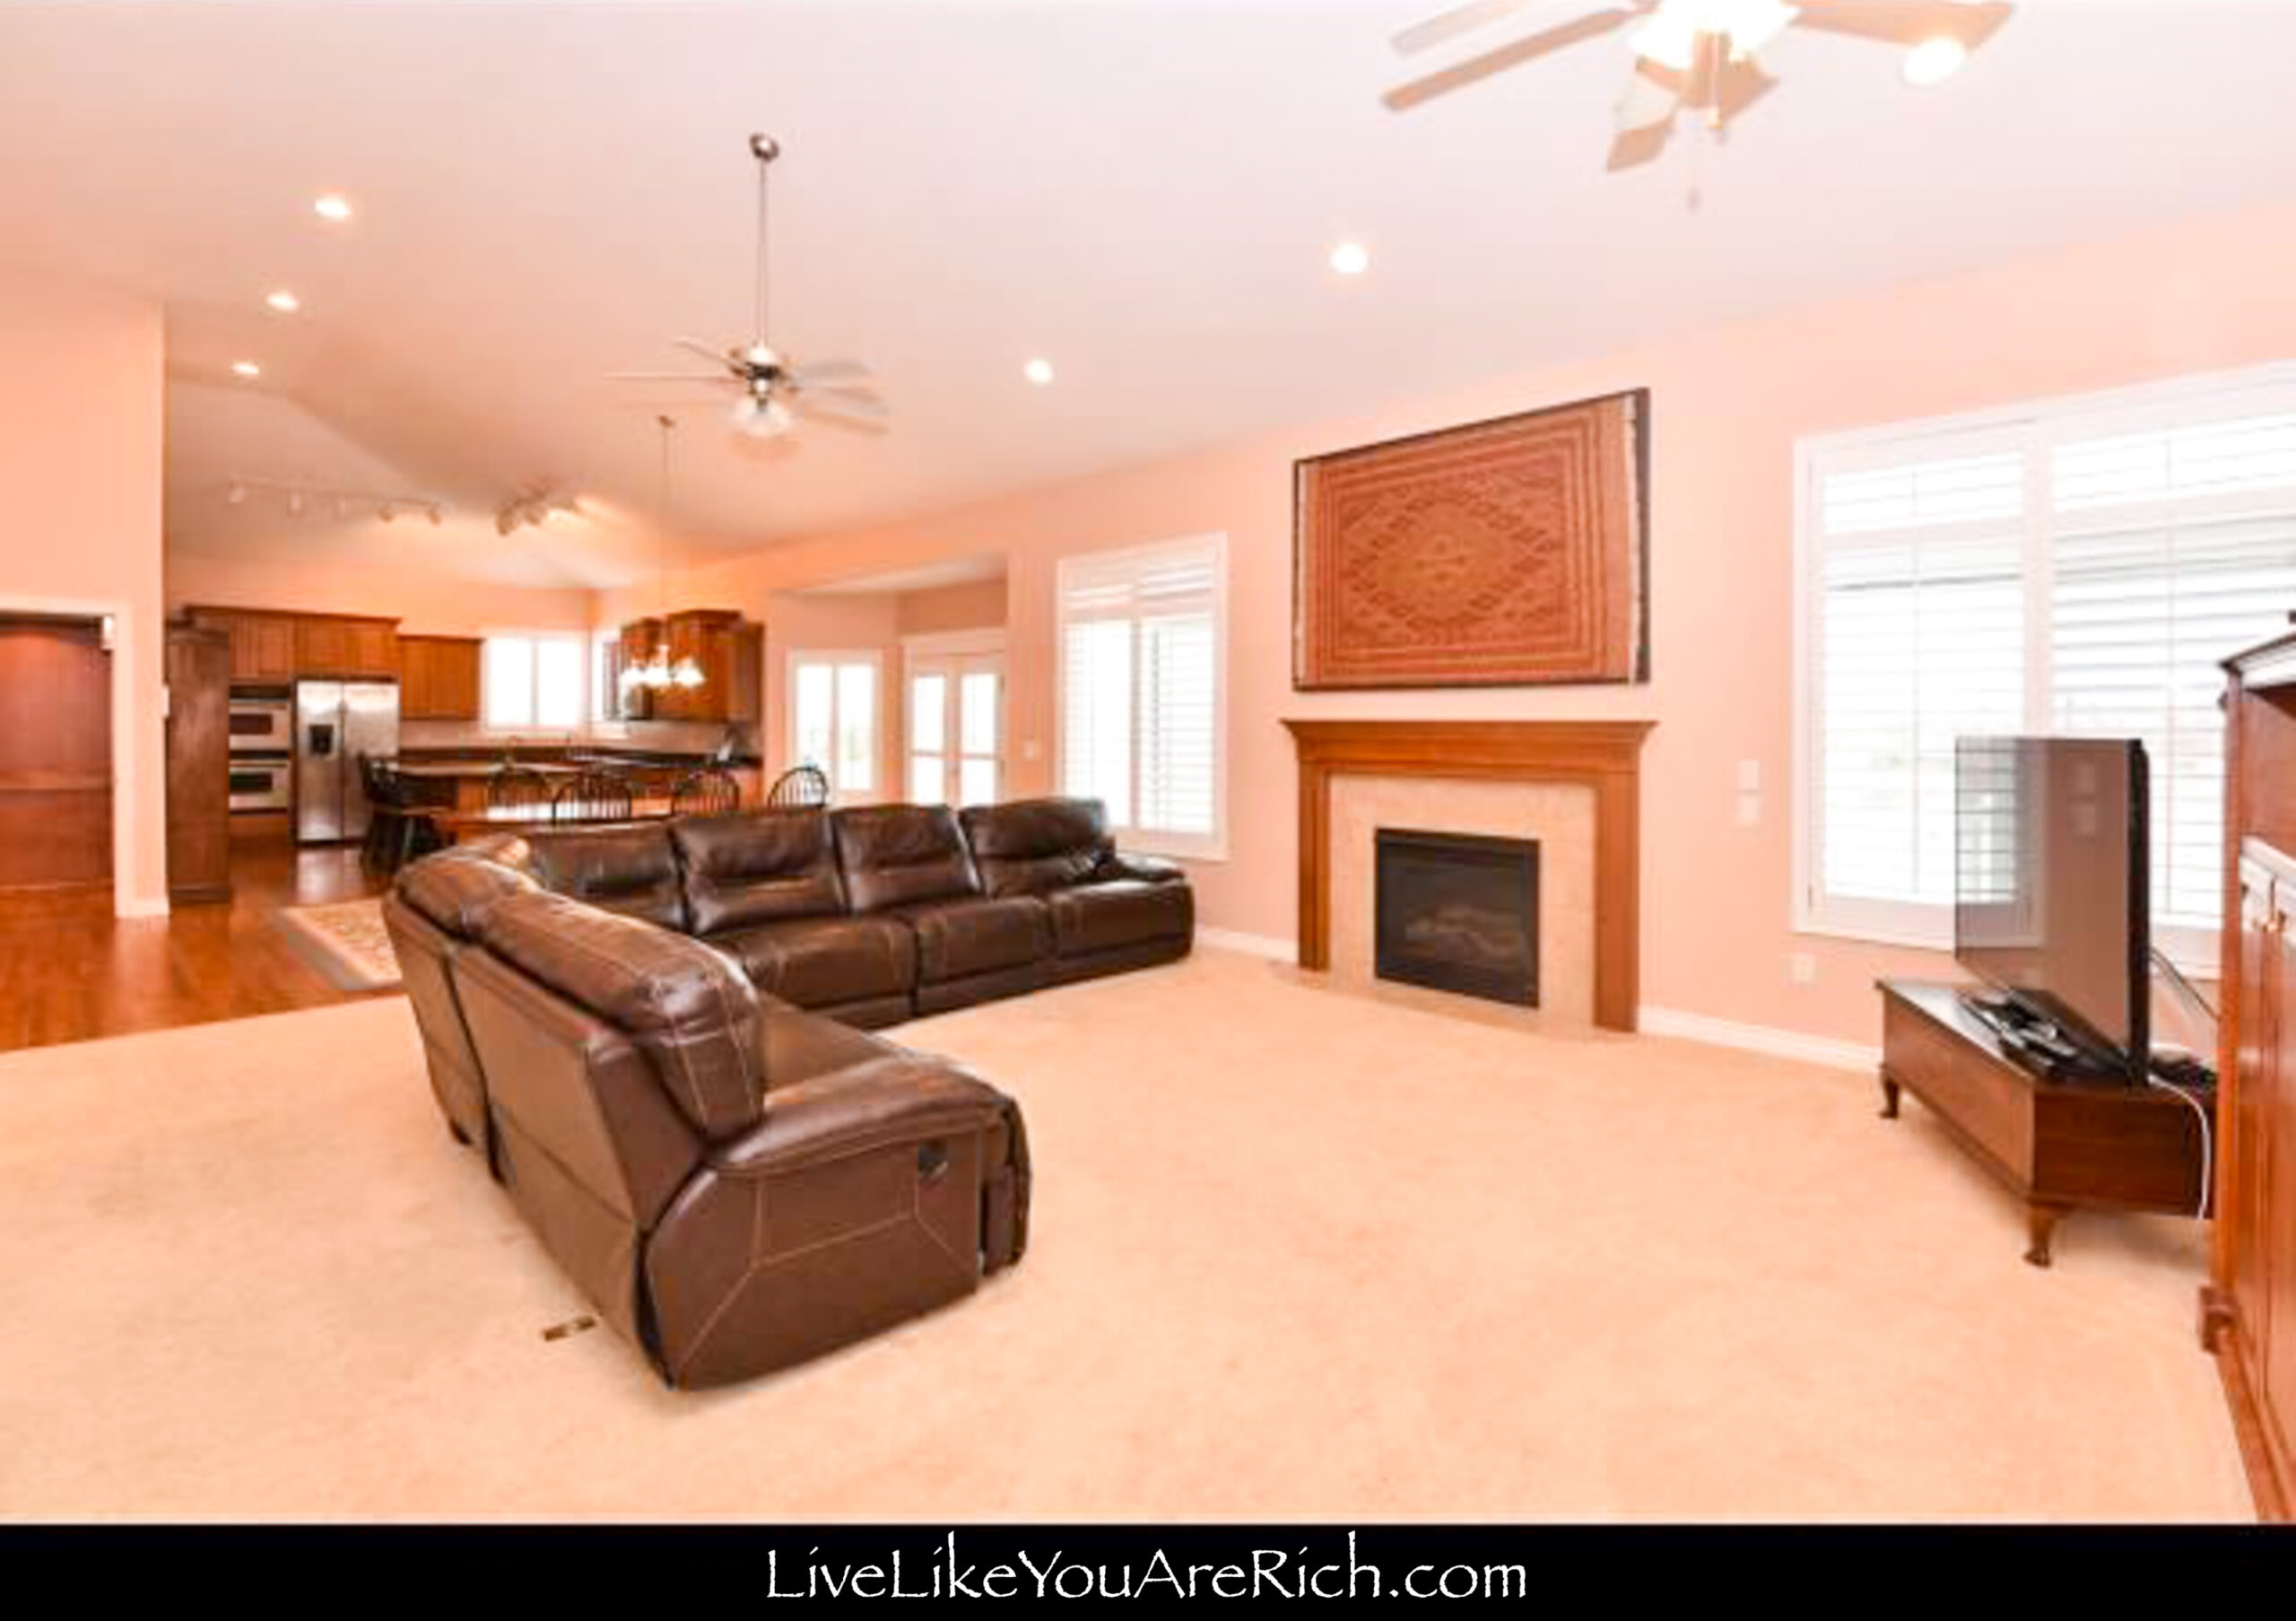
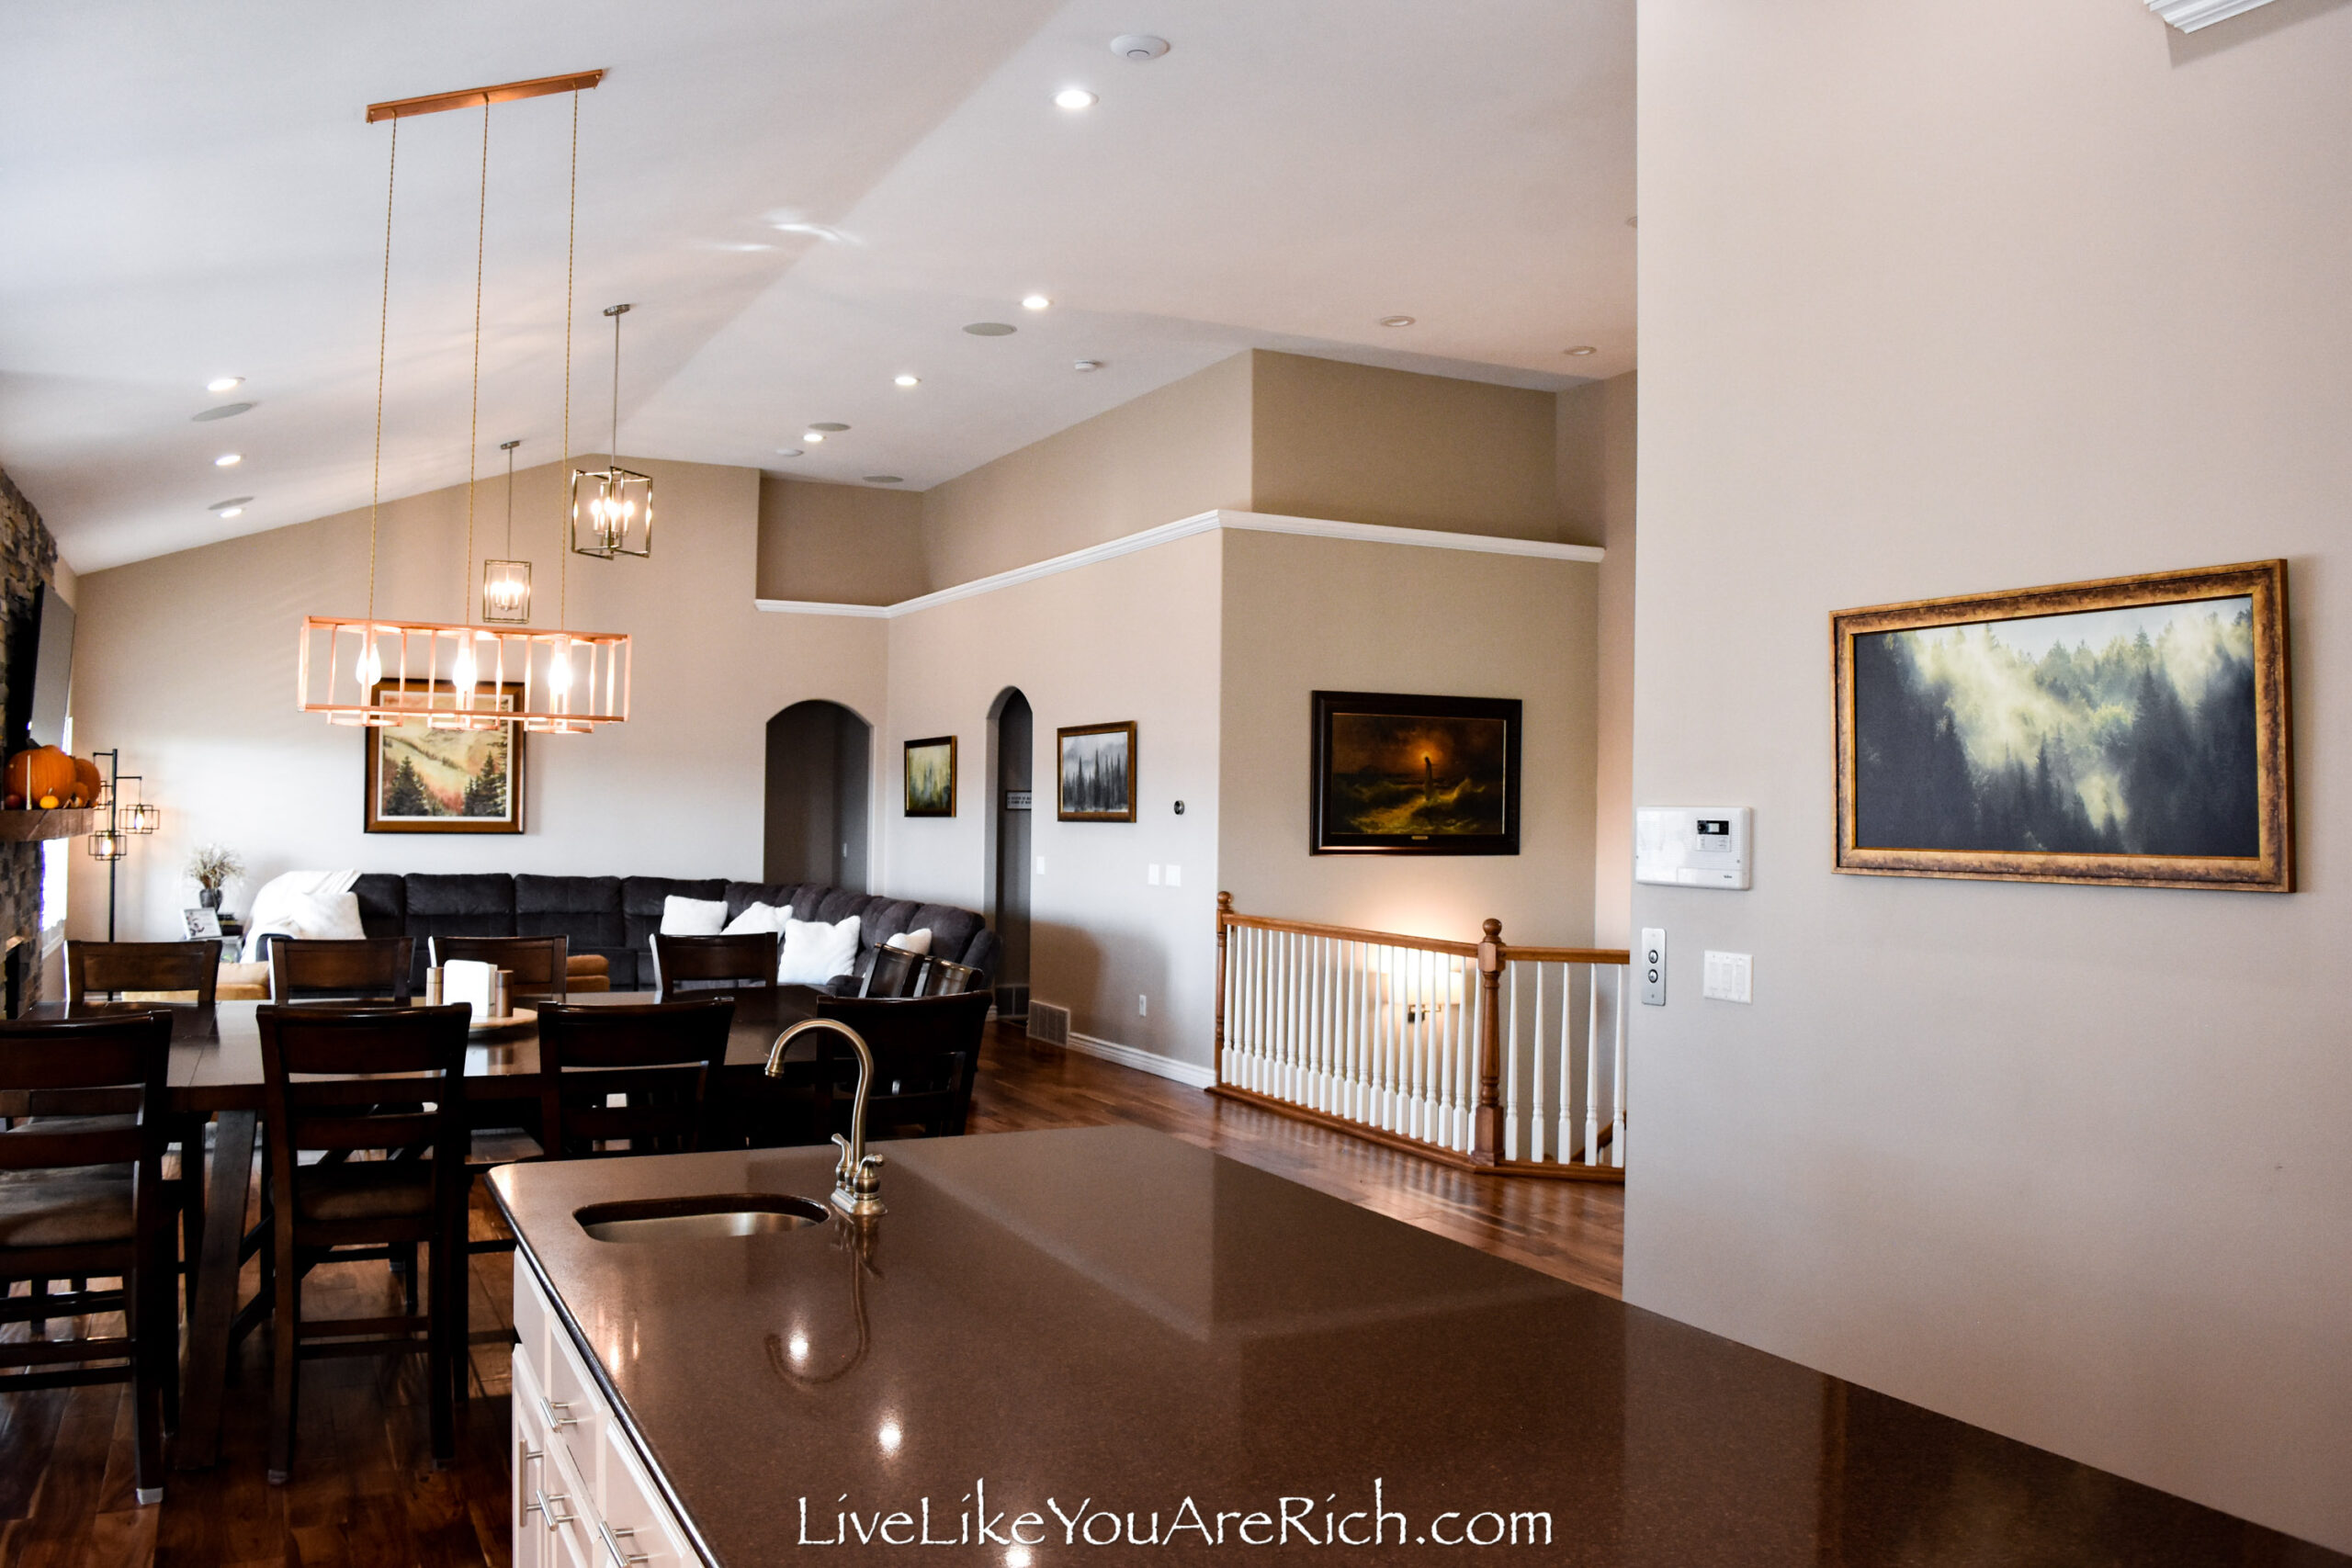
In this home, we have a formal sitting room near our entryway (post coming soon), so the living room is where we mainly hang out as a family.
If we have guests for dinner or larger parties, it is where we visit as it flows from the kitchen to the living room.
KITCHEN BEFORE

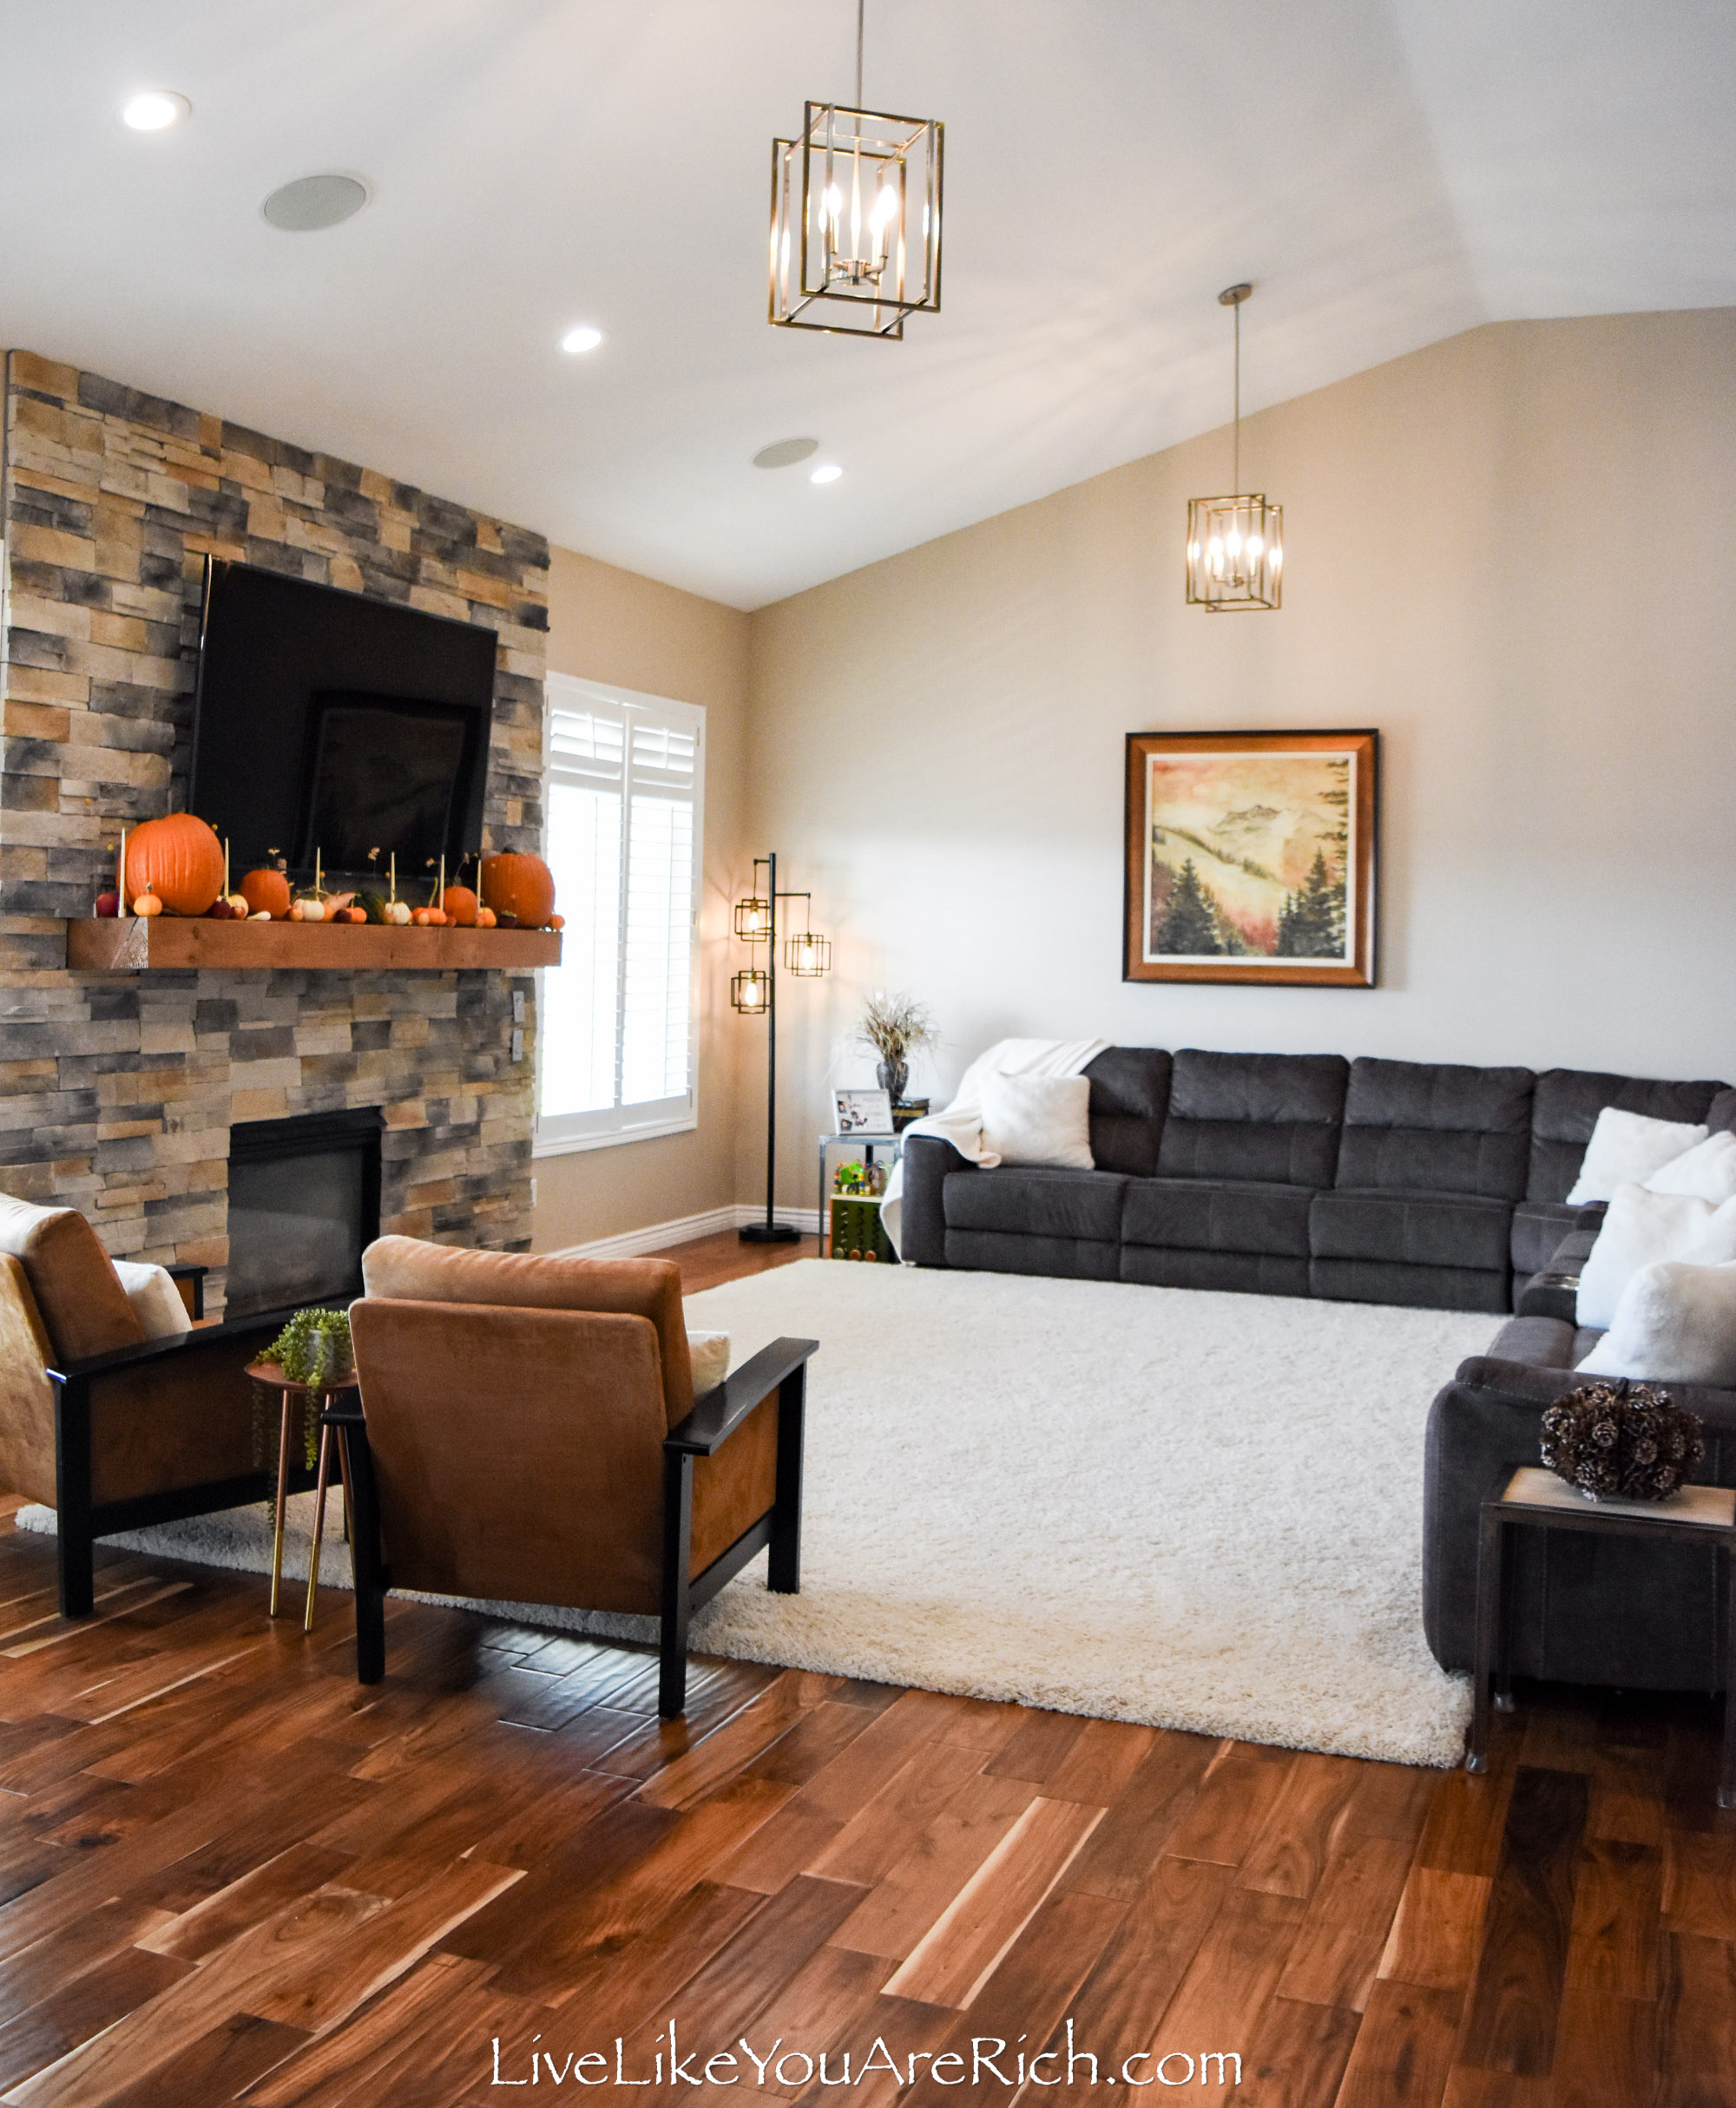
AFTER
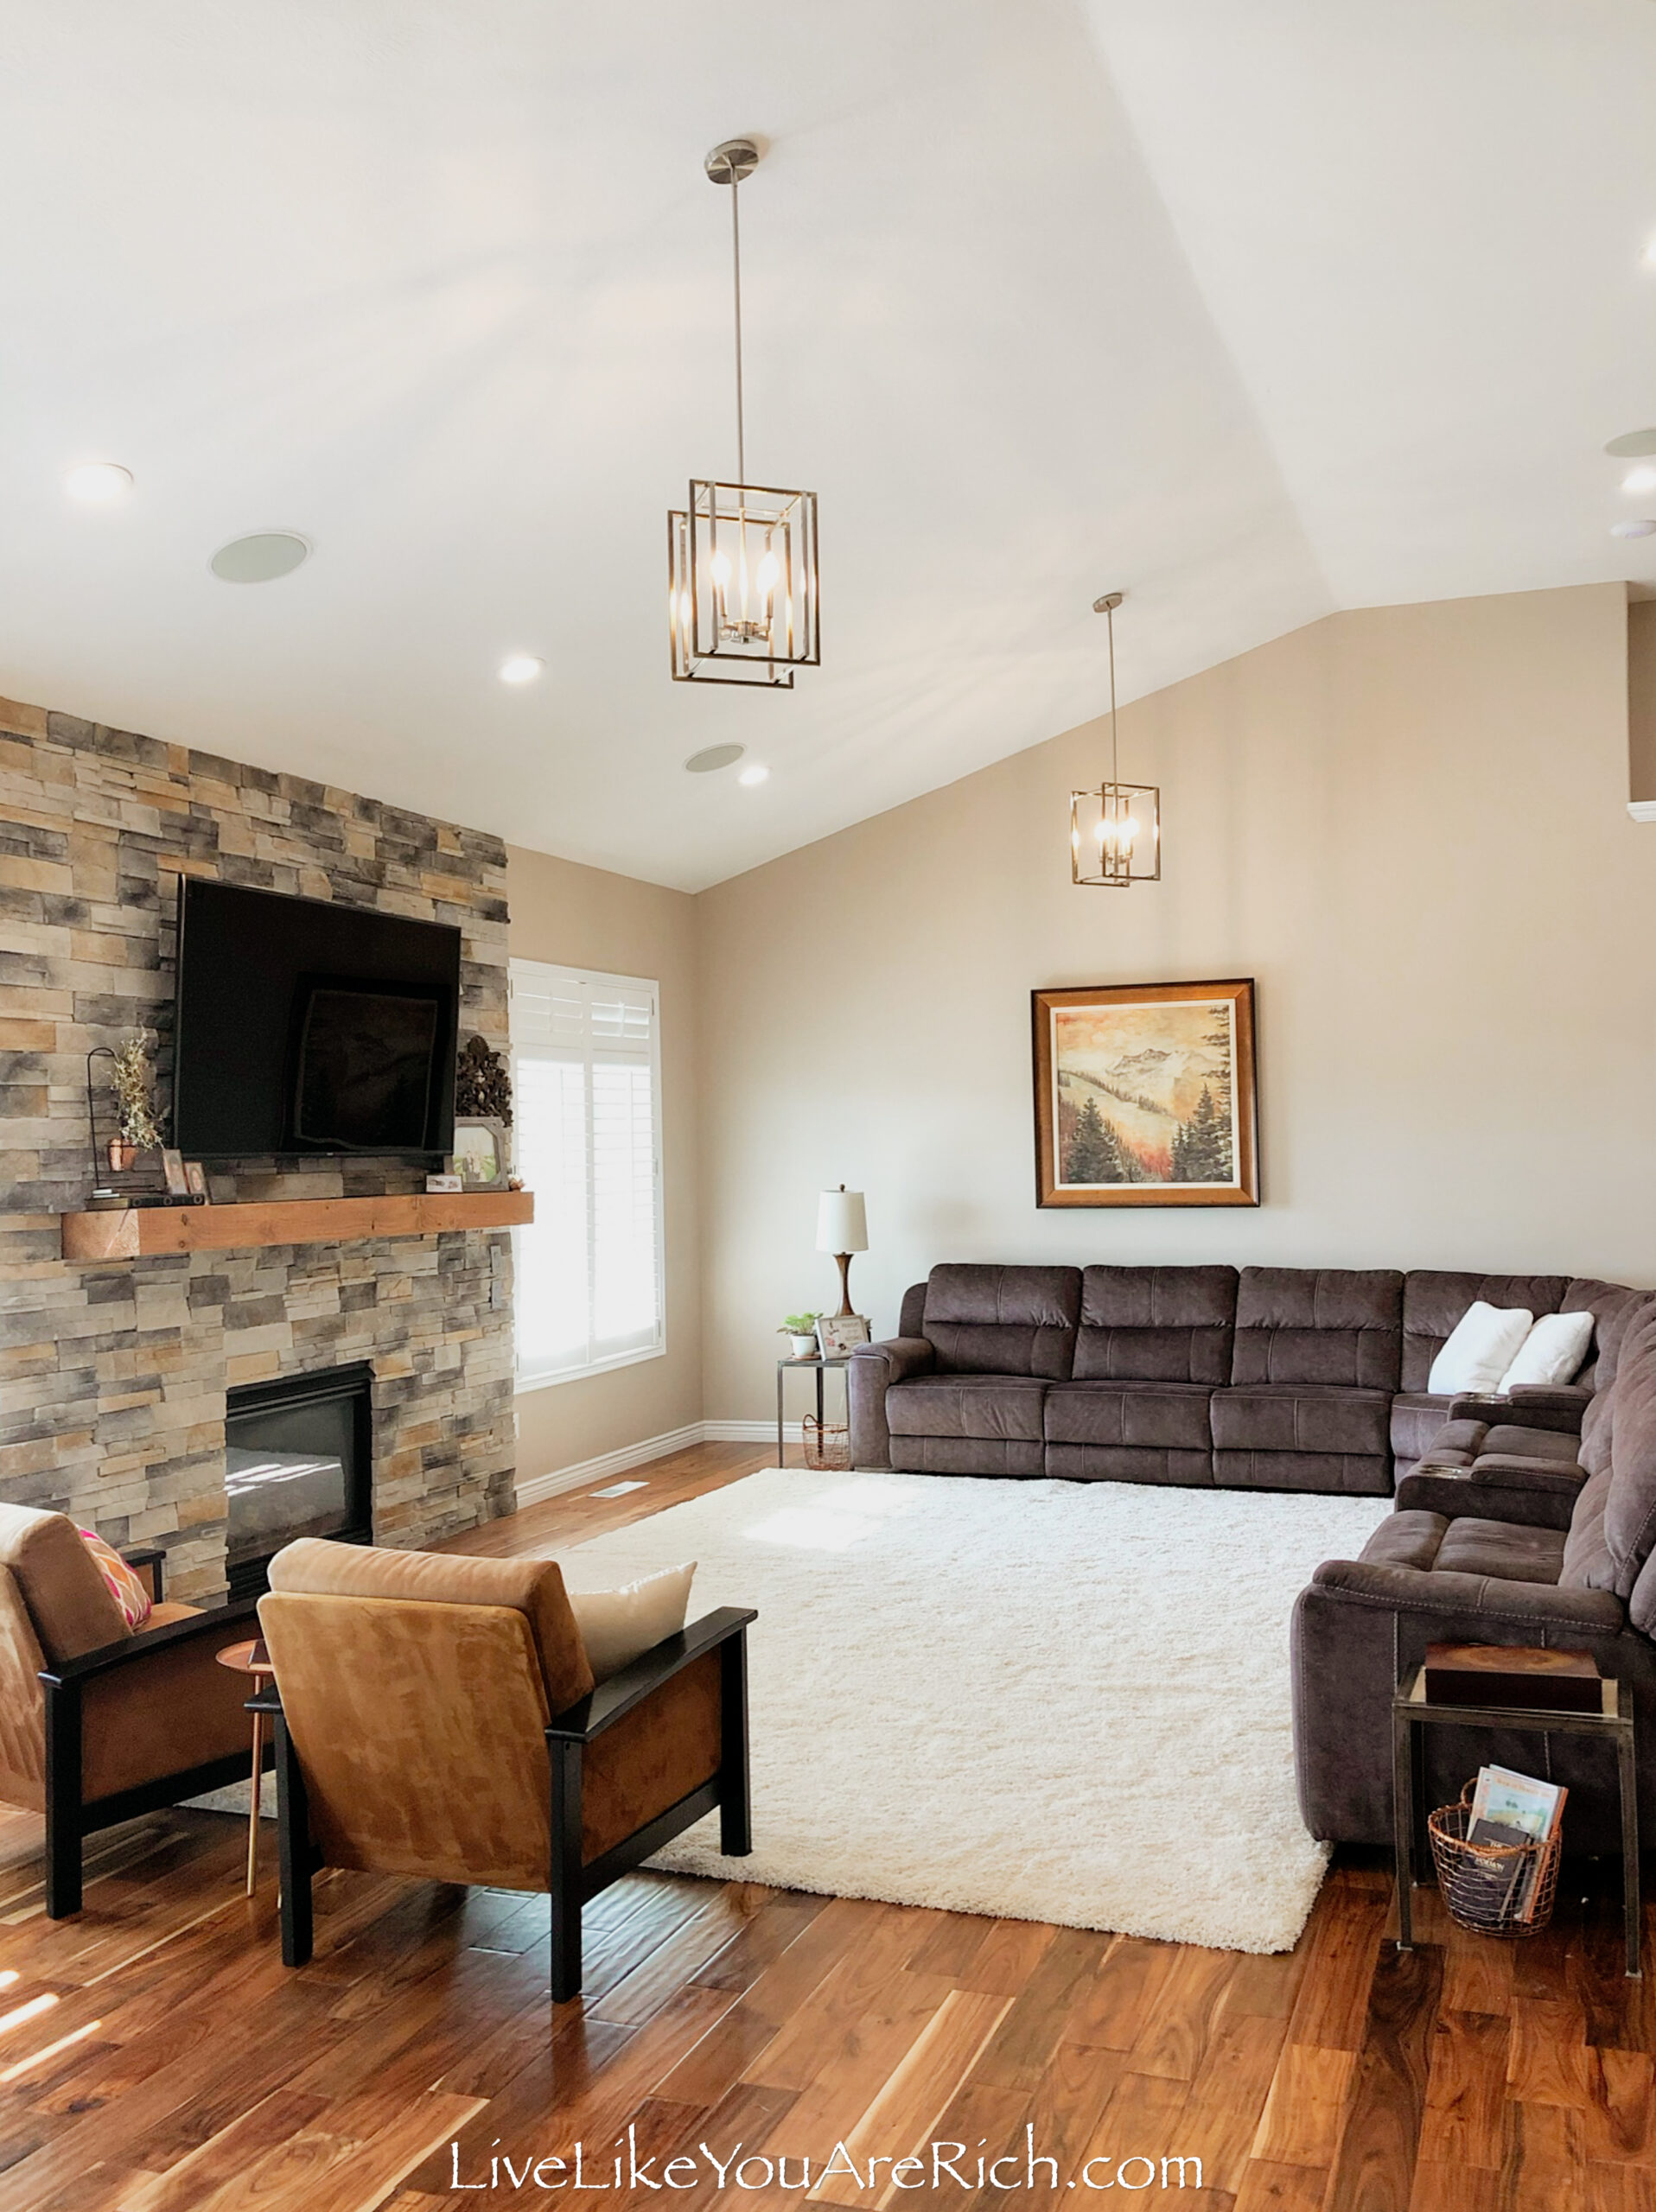
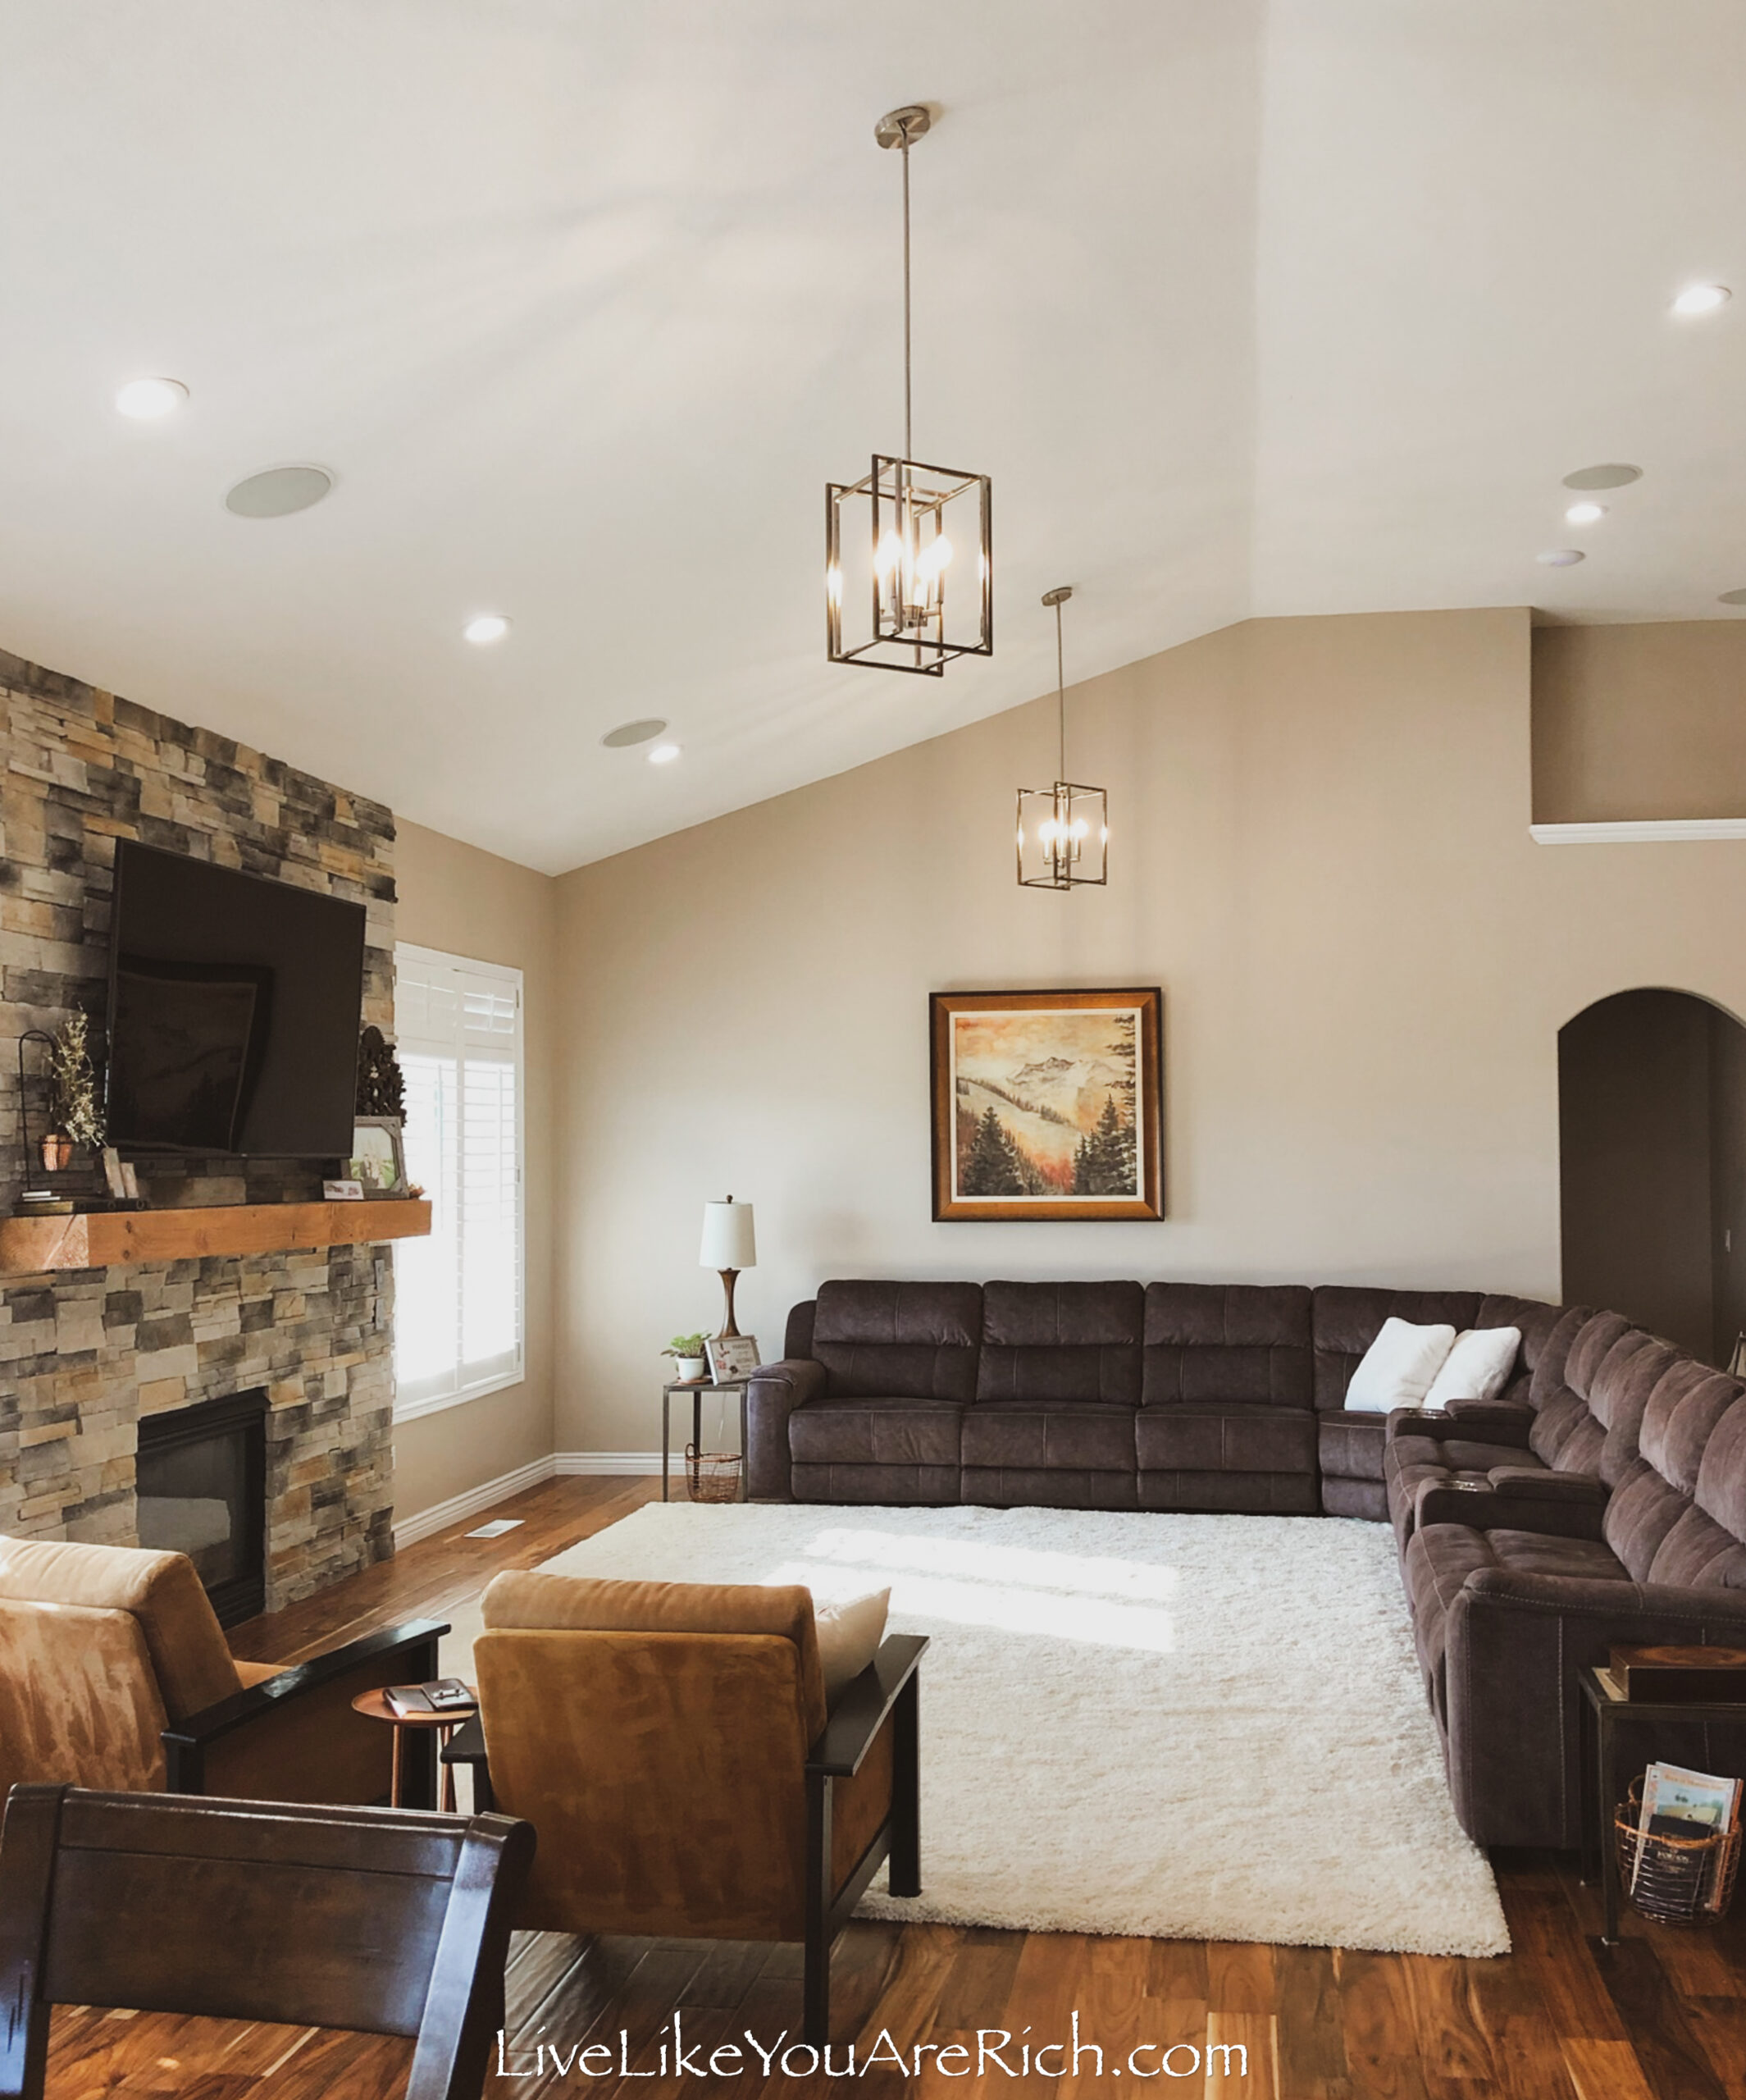
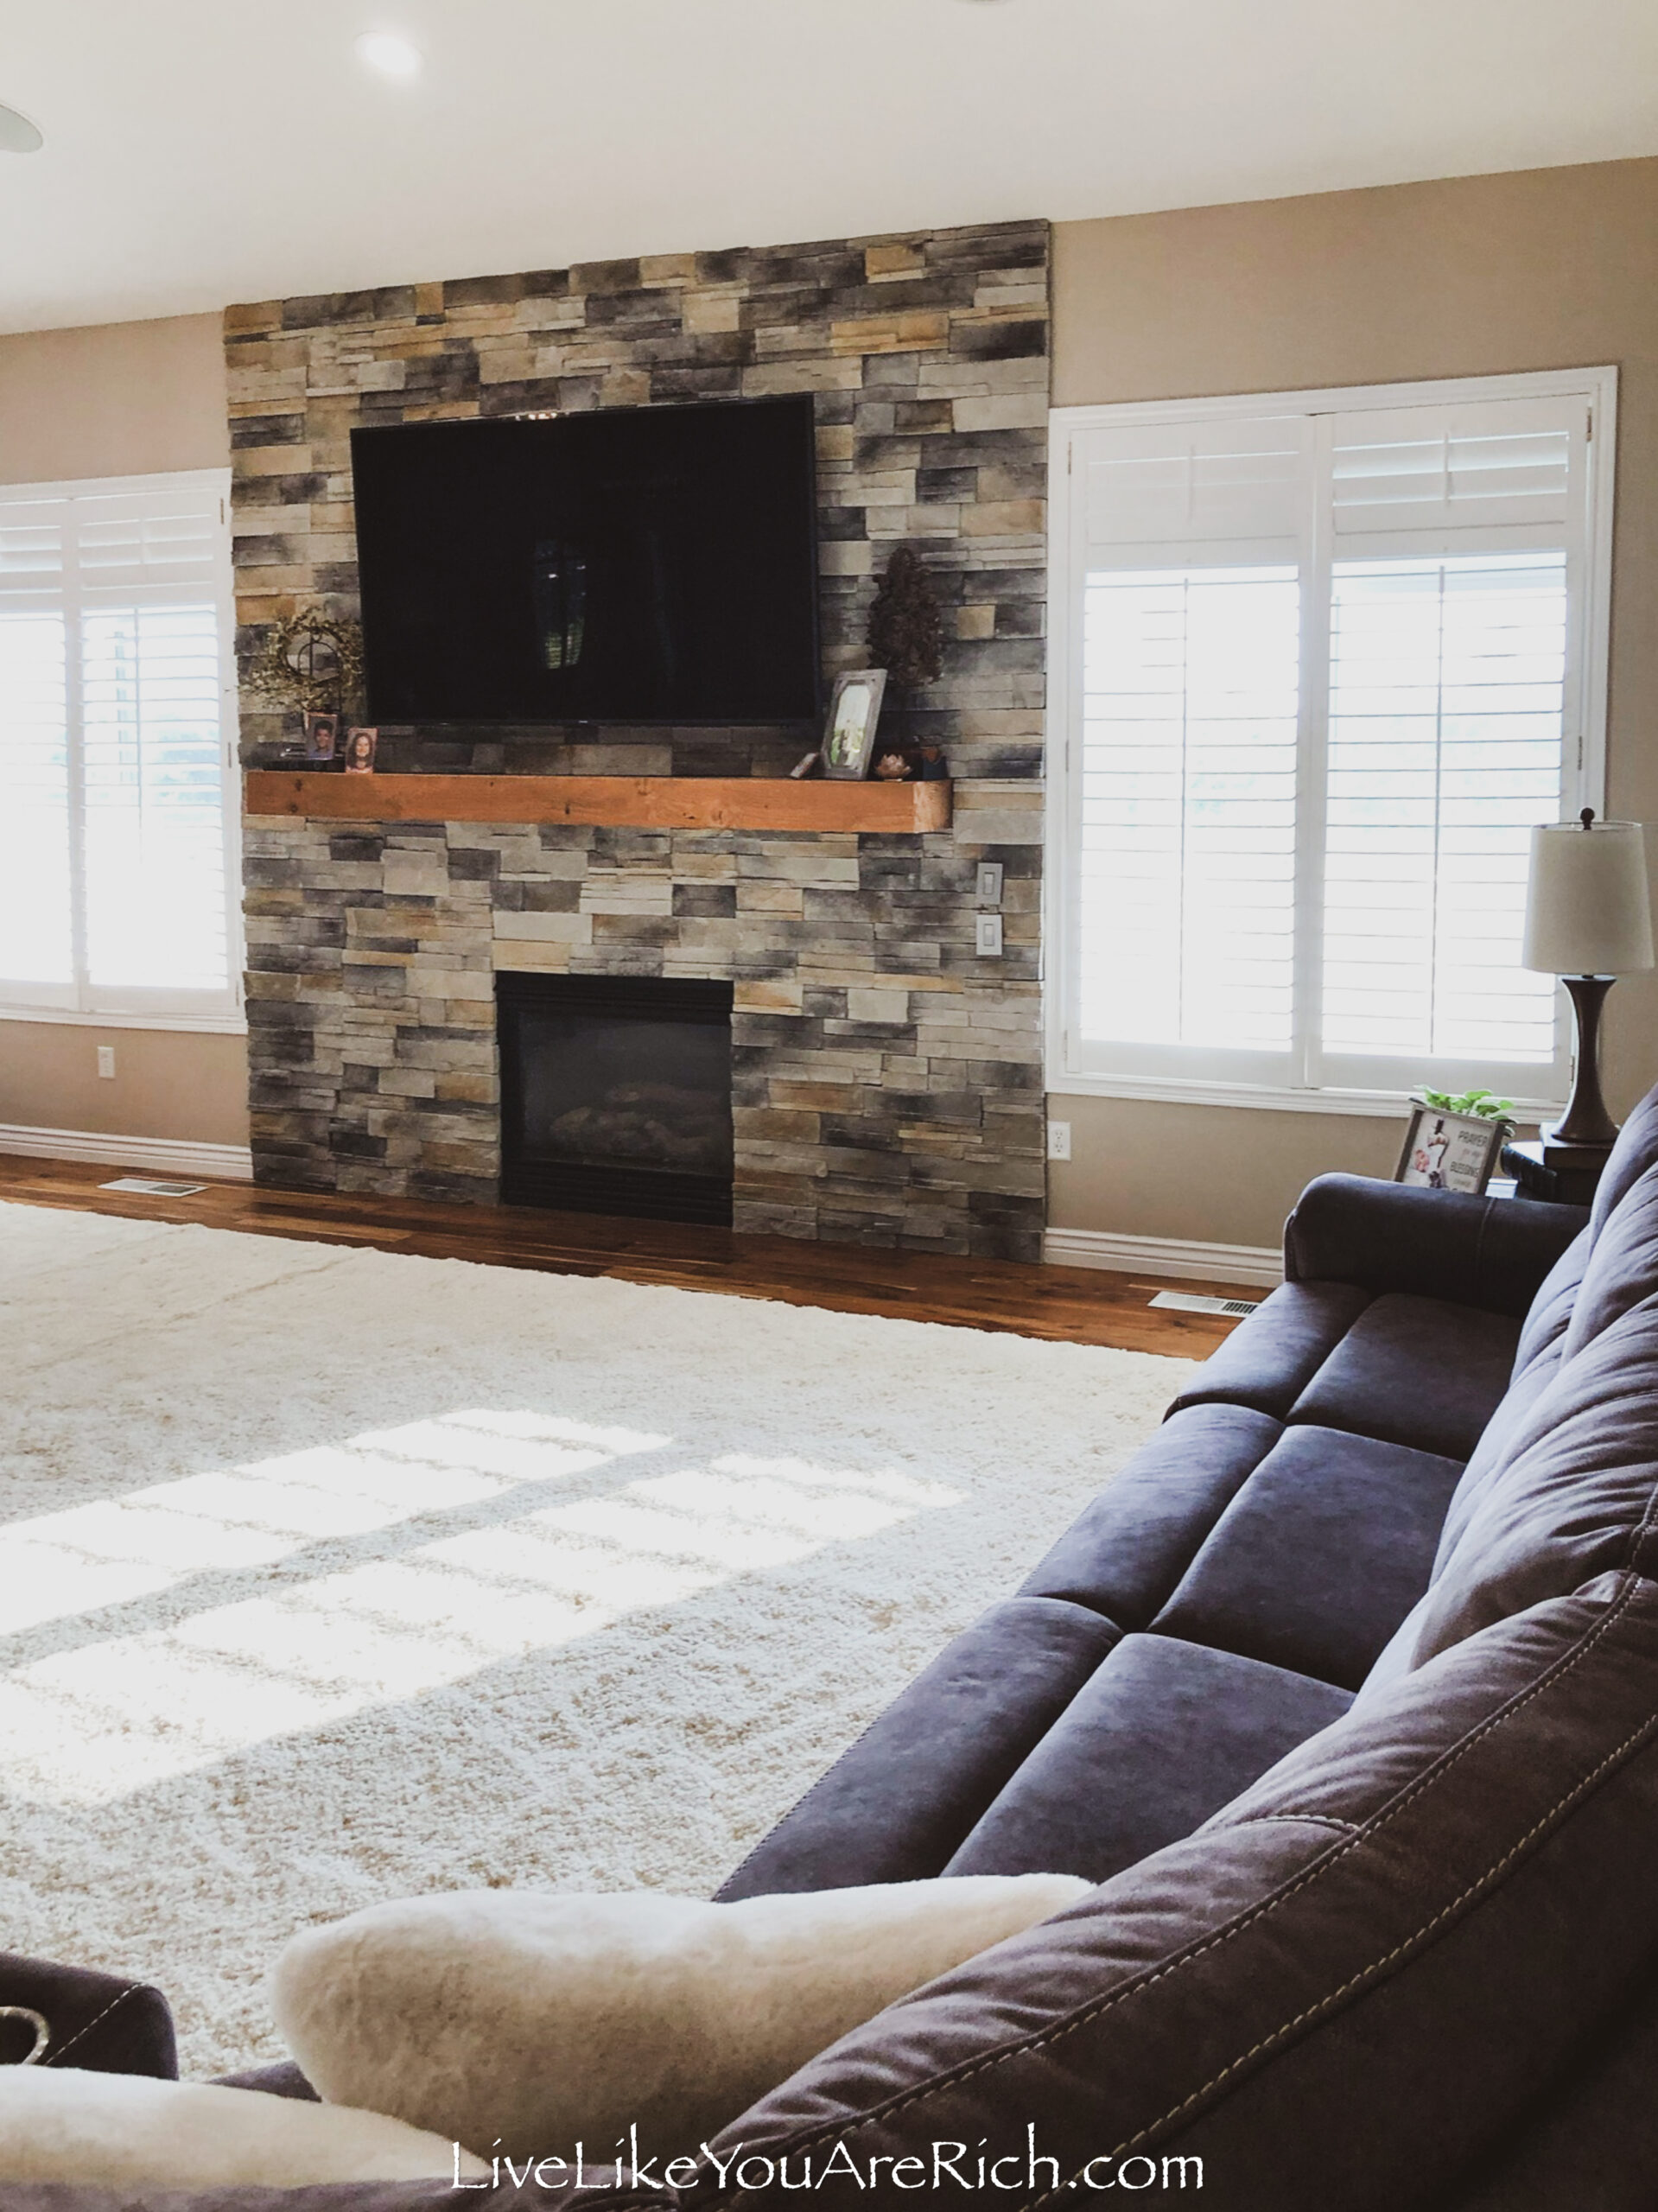

Comfort is what we were going for when we were designing this room.
Here’s how we renovated and decorated the room for under $13,500.00 (including hardwood floor, mantel, drystack wall, TV, and decor, and furniture.
First, I took out the baseboards, making sure to mark each so we could put them back where they belonged. Reusing them saved us a few hundred dollars.
Next, we pulled up the carpet and tack strip. We re-used the carpet for the downstairs theater room because it is slightly smaller than this room and was perfect for that purpose.
Originally the top floor was a patchwork of hardwood flooring and carpet. We wanted hardwood floors throughout the first floor (minus tiled laundry, mudroom, and bathrooms.) So, the carpet got torn up.
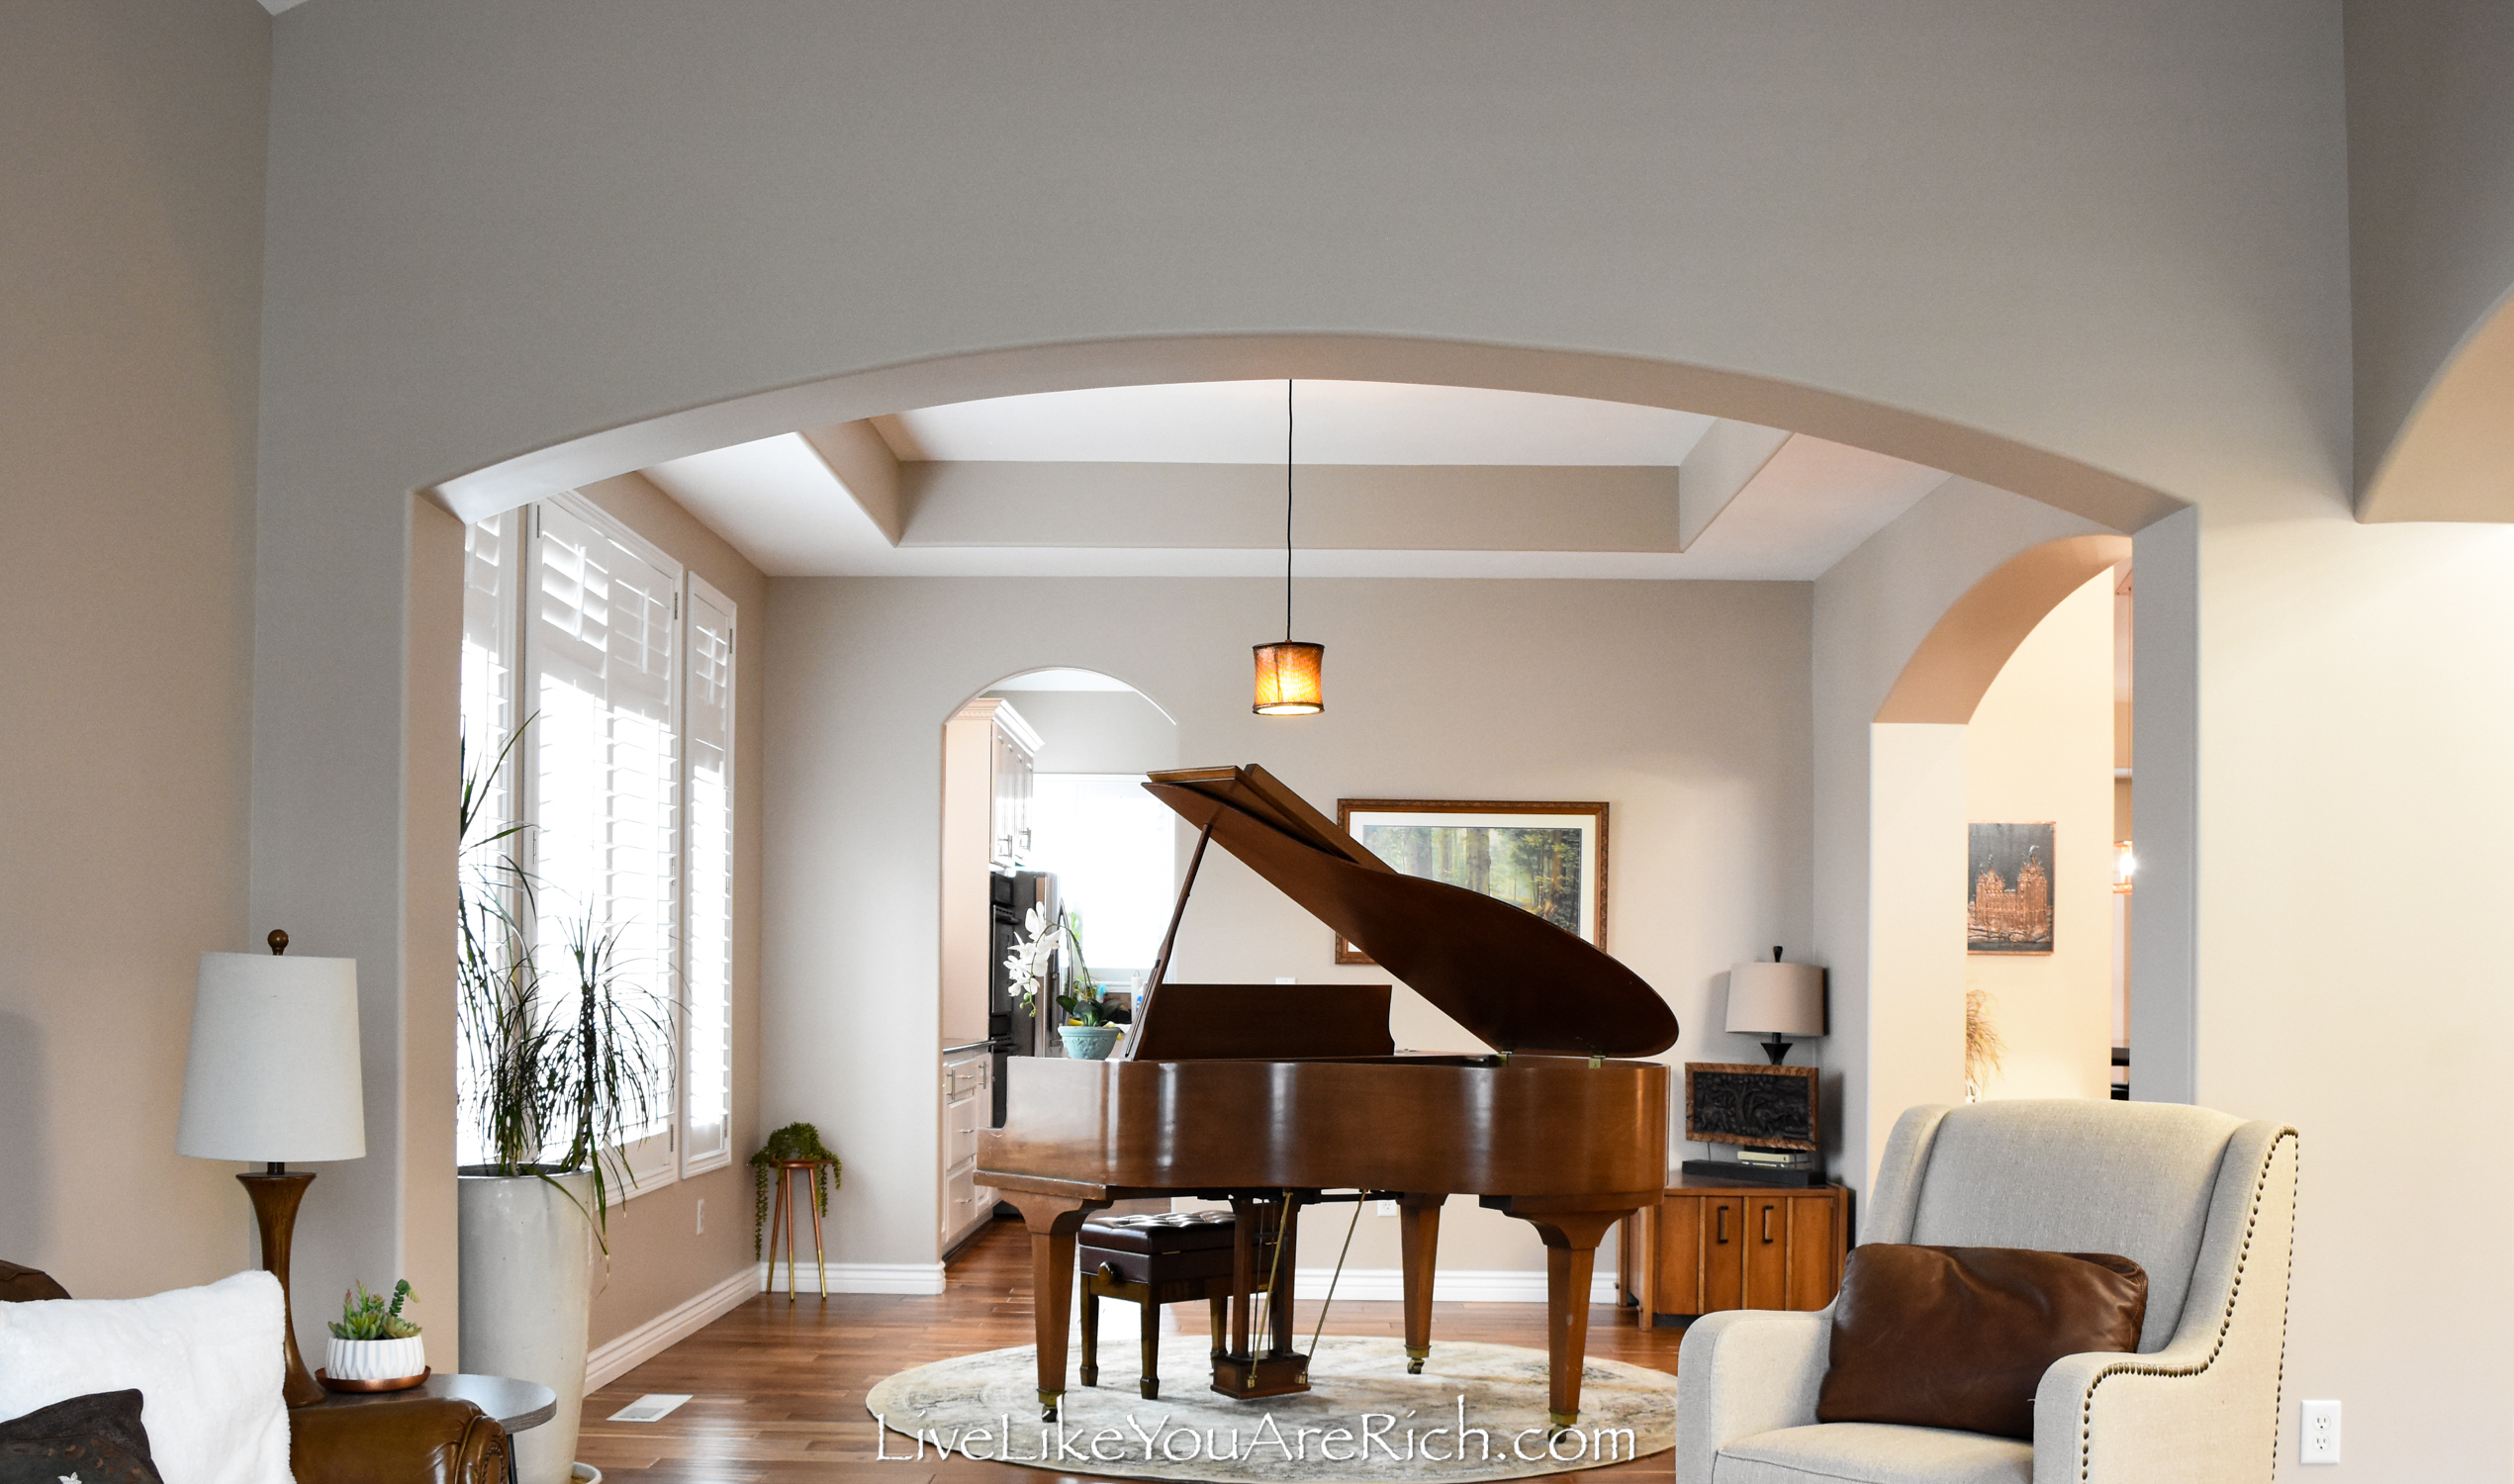
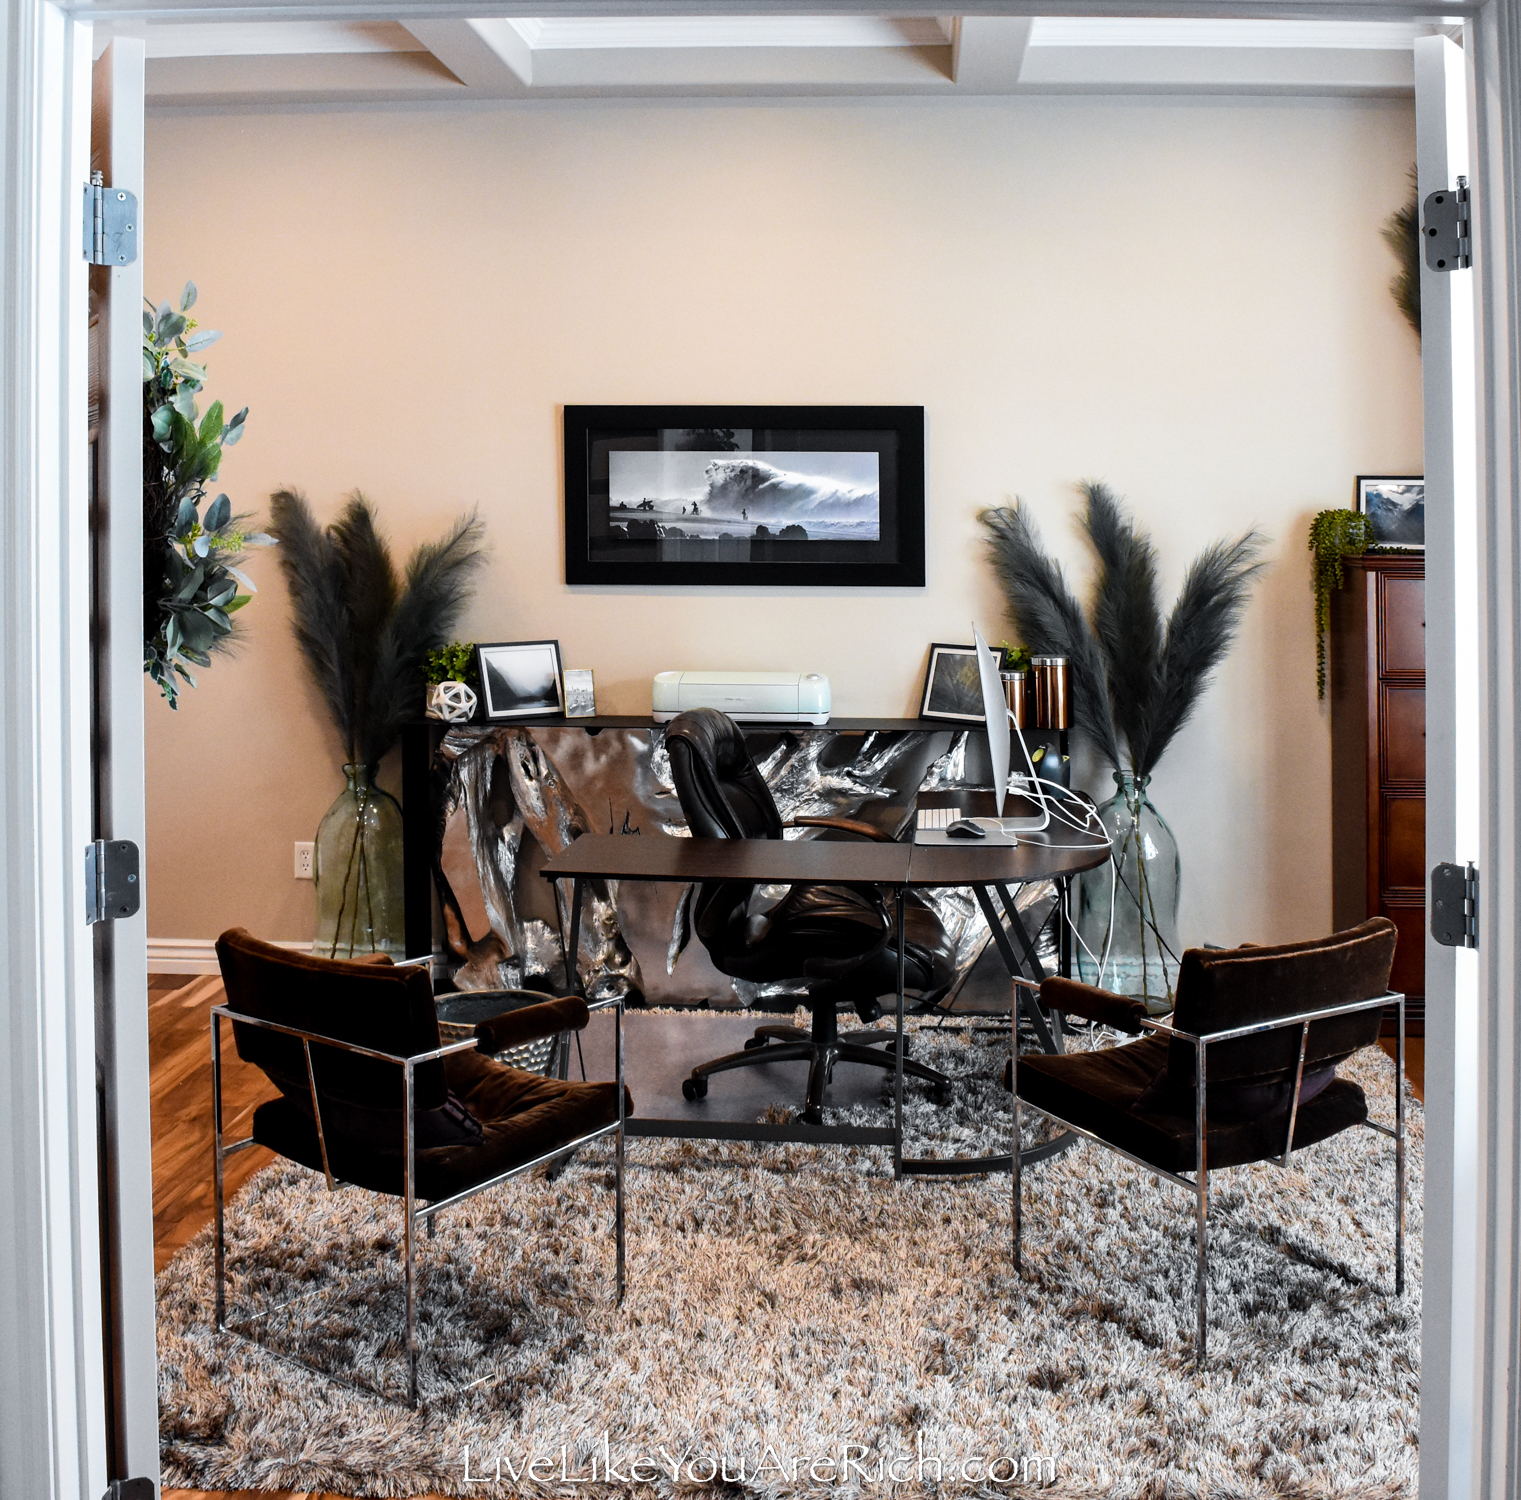
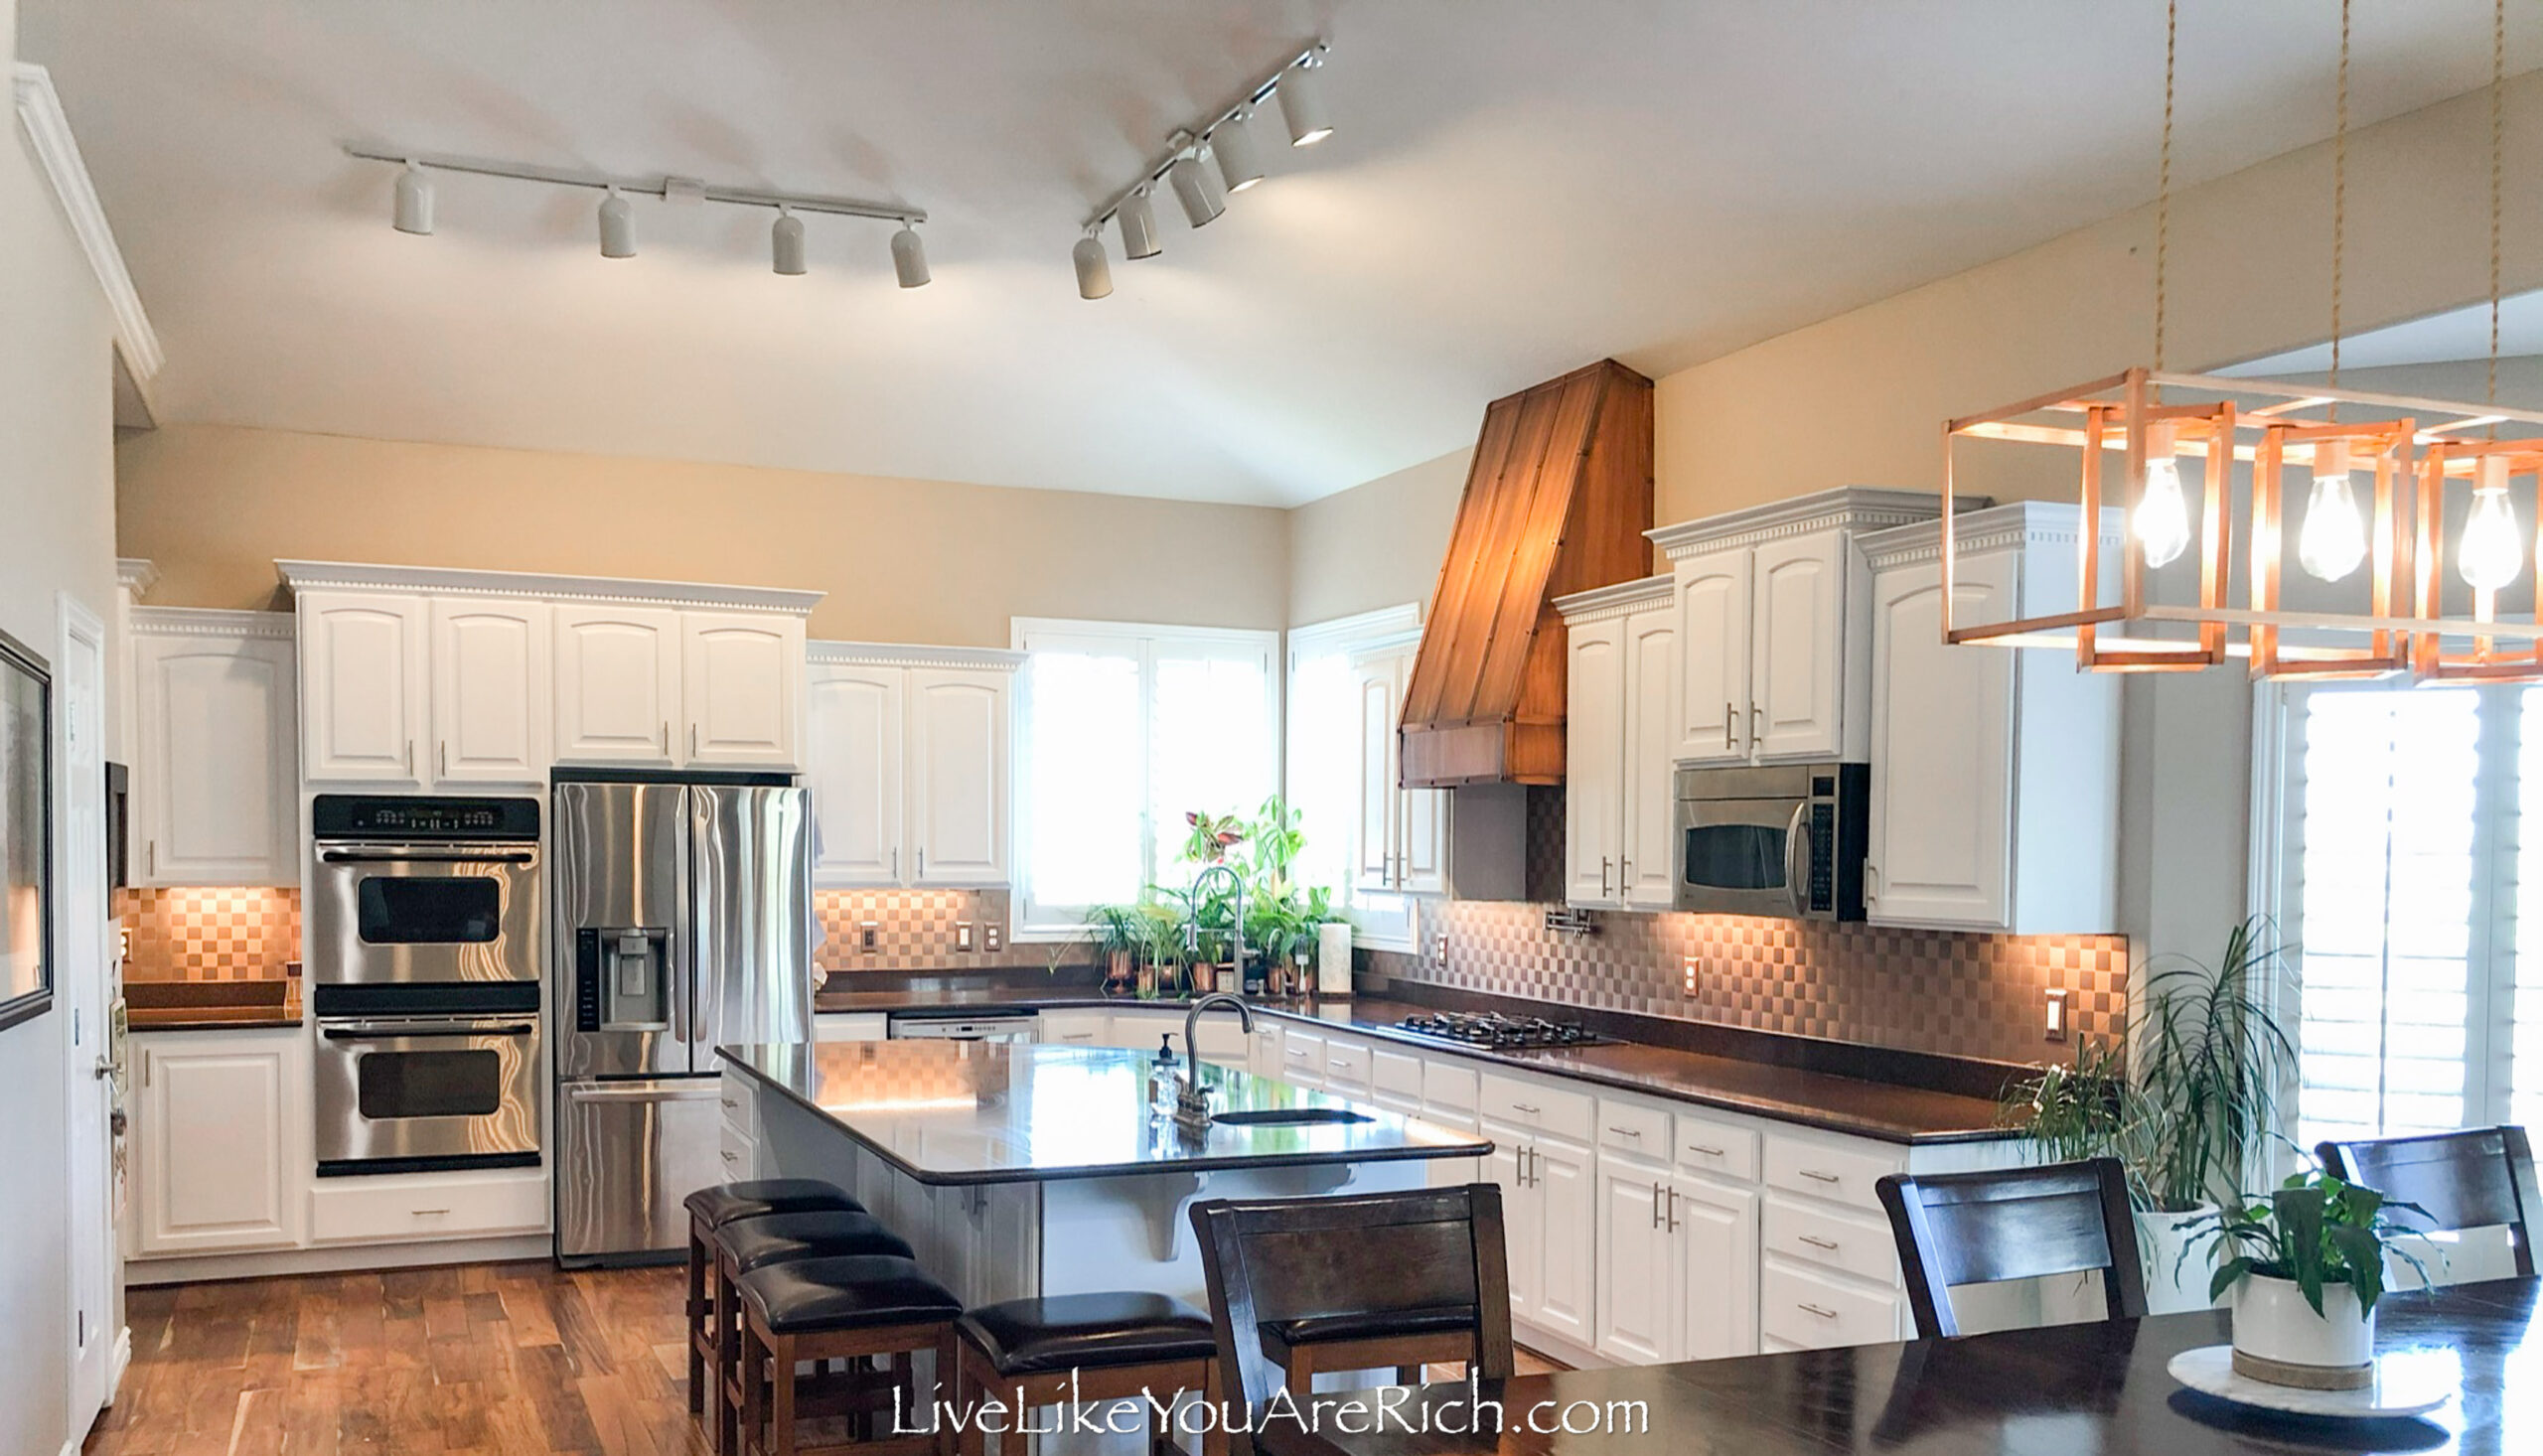
I looked around for a paint color that would go well with everything. Although whites are in right now, I knew that the color had to work for many spaces: our kitchen, piano room, sitting room, my office, and entryway are all conjoined and it is best to have the same color flow throughout areas that are open to one another.
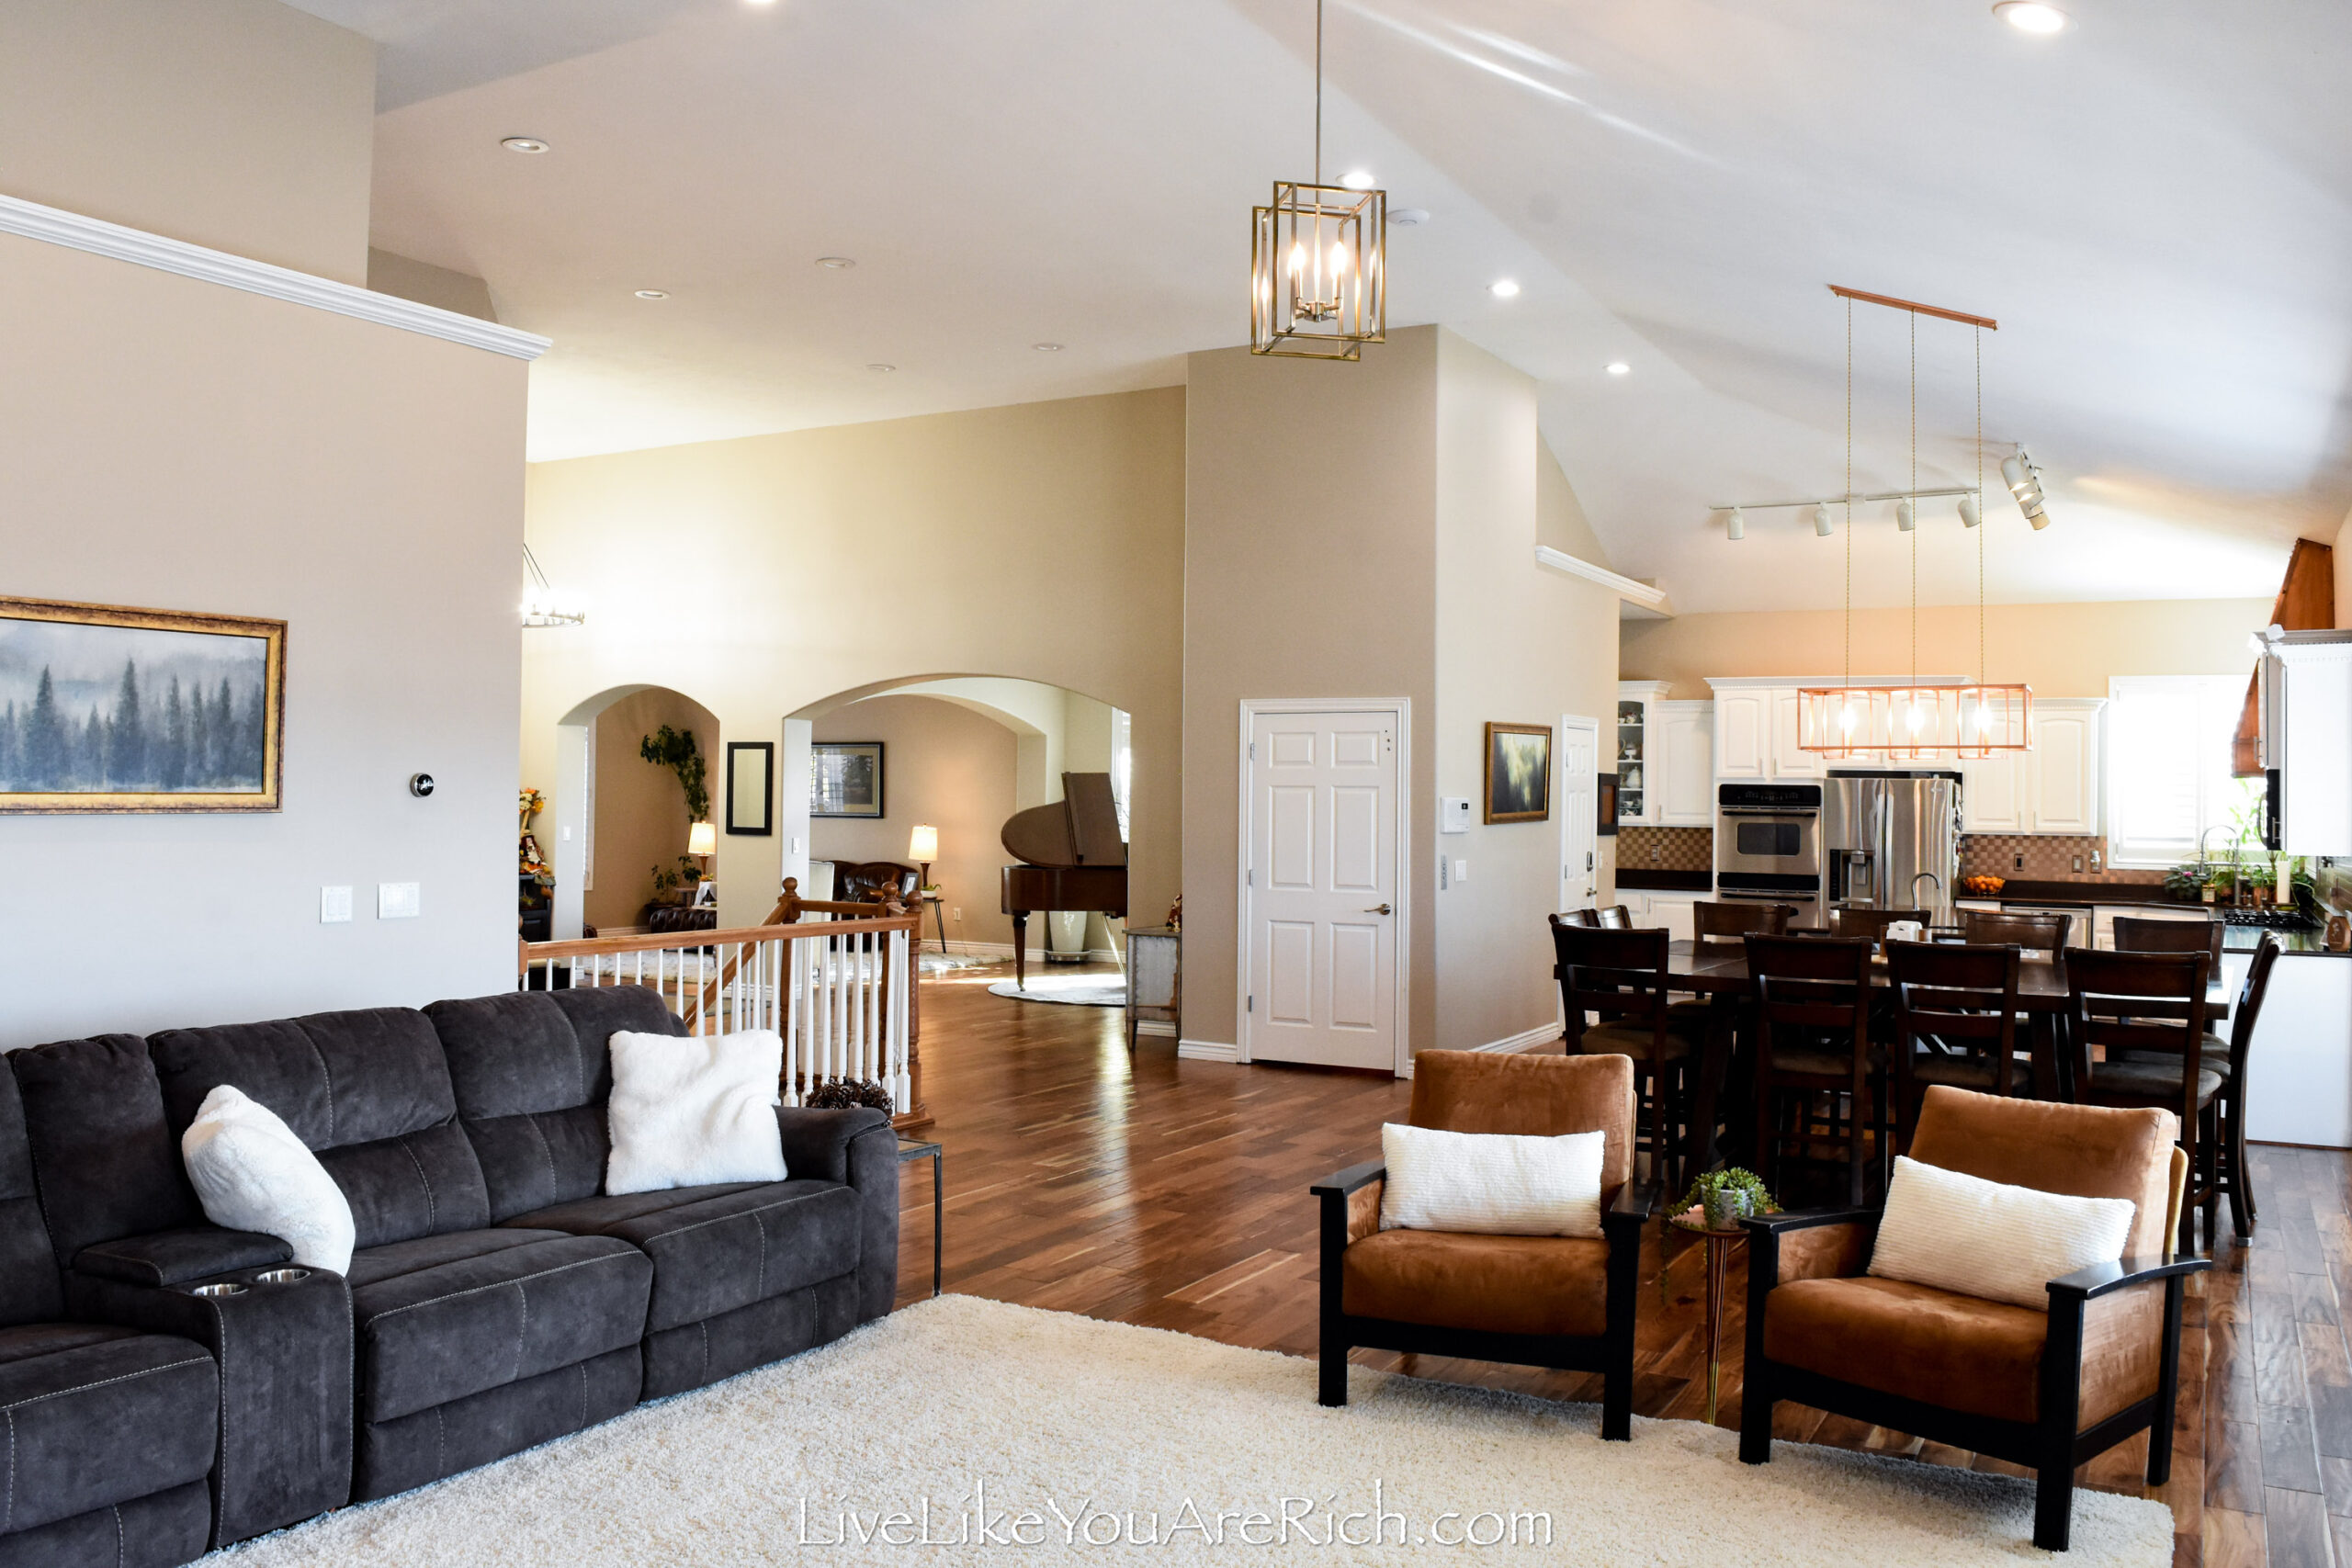
Since our first floor is a large open-concept floorplan, I wanted a paint color with a bit of depth to it to avoid a stark hospital look—so white was out.
I wanted to find a light greige or beige that would work in the multiple rooms we planned to use it for.
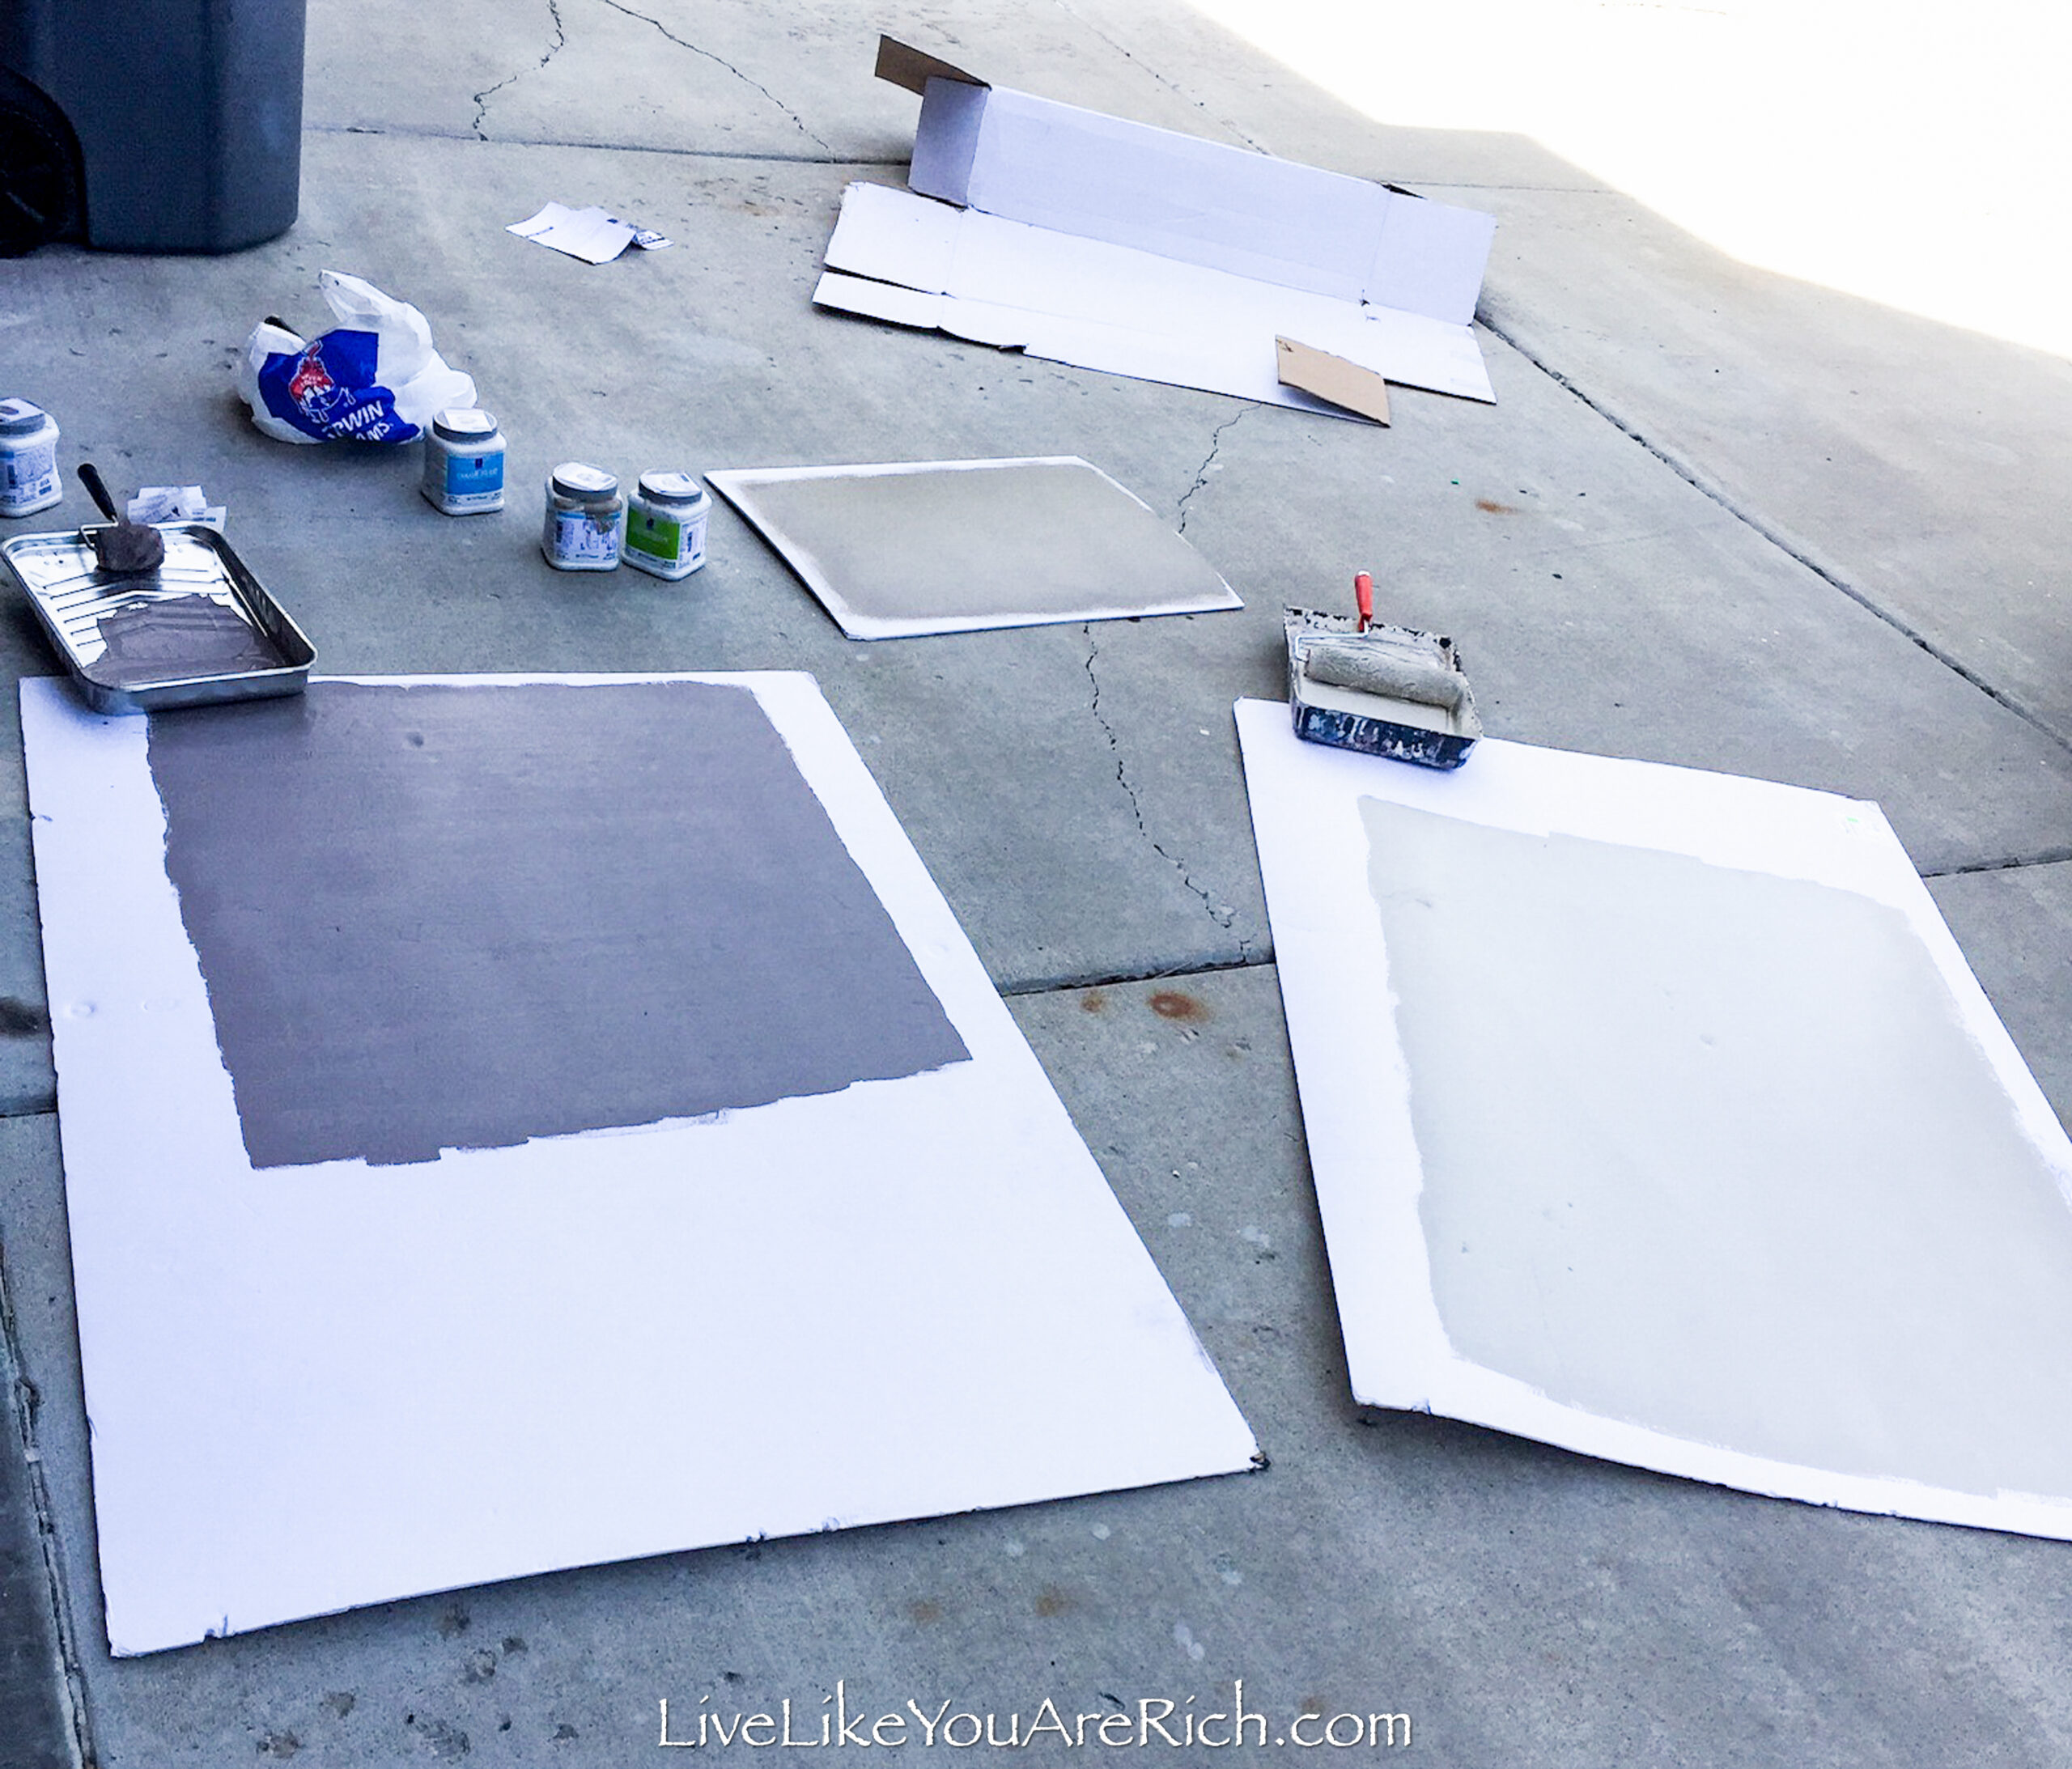
I found many Sherwin Williams colors that I liked and then painted them on large poster boards and took them around to all of the rooms in the morning, afternoon, evening, and night to see how the colors worked in the 6 rooms at each time of day.
I ended up ruling one after the other out until I ended up with Bungalow Beige SW 7511.
It was the only color that looked good in the various rooms at various different times of the day.
It has been a very good color for our home.
You can see it here in our sitting room and our piano room.
in my office,
and in our kitchen.
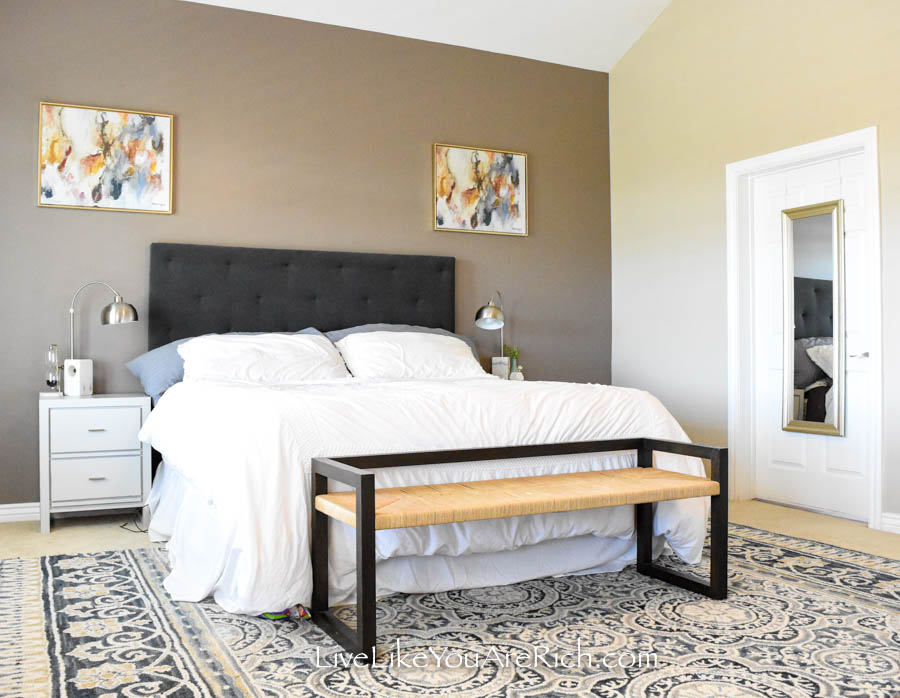
We’ve even used it in our master bedroom which is seen below opposite of the paint used on our accent wall (Poised Taupe).
We have also used it in our master bathroom, and basement living room (post coming soon).
It looks great in each of these rooms at most times of the day. I’ve been really happy with it.
Although we could have painted the main room ourselves, we knew that it would be quite difficult to do due to the vaulted ceilings.
So, we paid a company to paint the main room instead. With a coupon, they were very reasonable. They painted all 5 rooms and all of our kitchen cabinets for $4,500. This room breaks down to $700 to paint it.
We carefully removed the fireplace mantel and sold that for about $75.00.
After the walls were painted, we began installing the hardwood flooring ourselves (saving about $10.00 sq foot). We used LL floorings Tobacco road hand scraped acacia hardwood floor. On sale with a coupon, it was $5.50 an sq foot. The hardwood flooring and underlayment cost about $3,500 for this space.
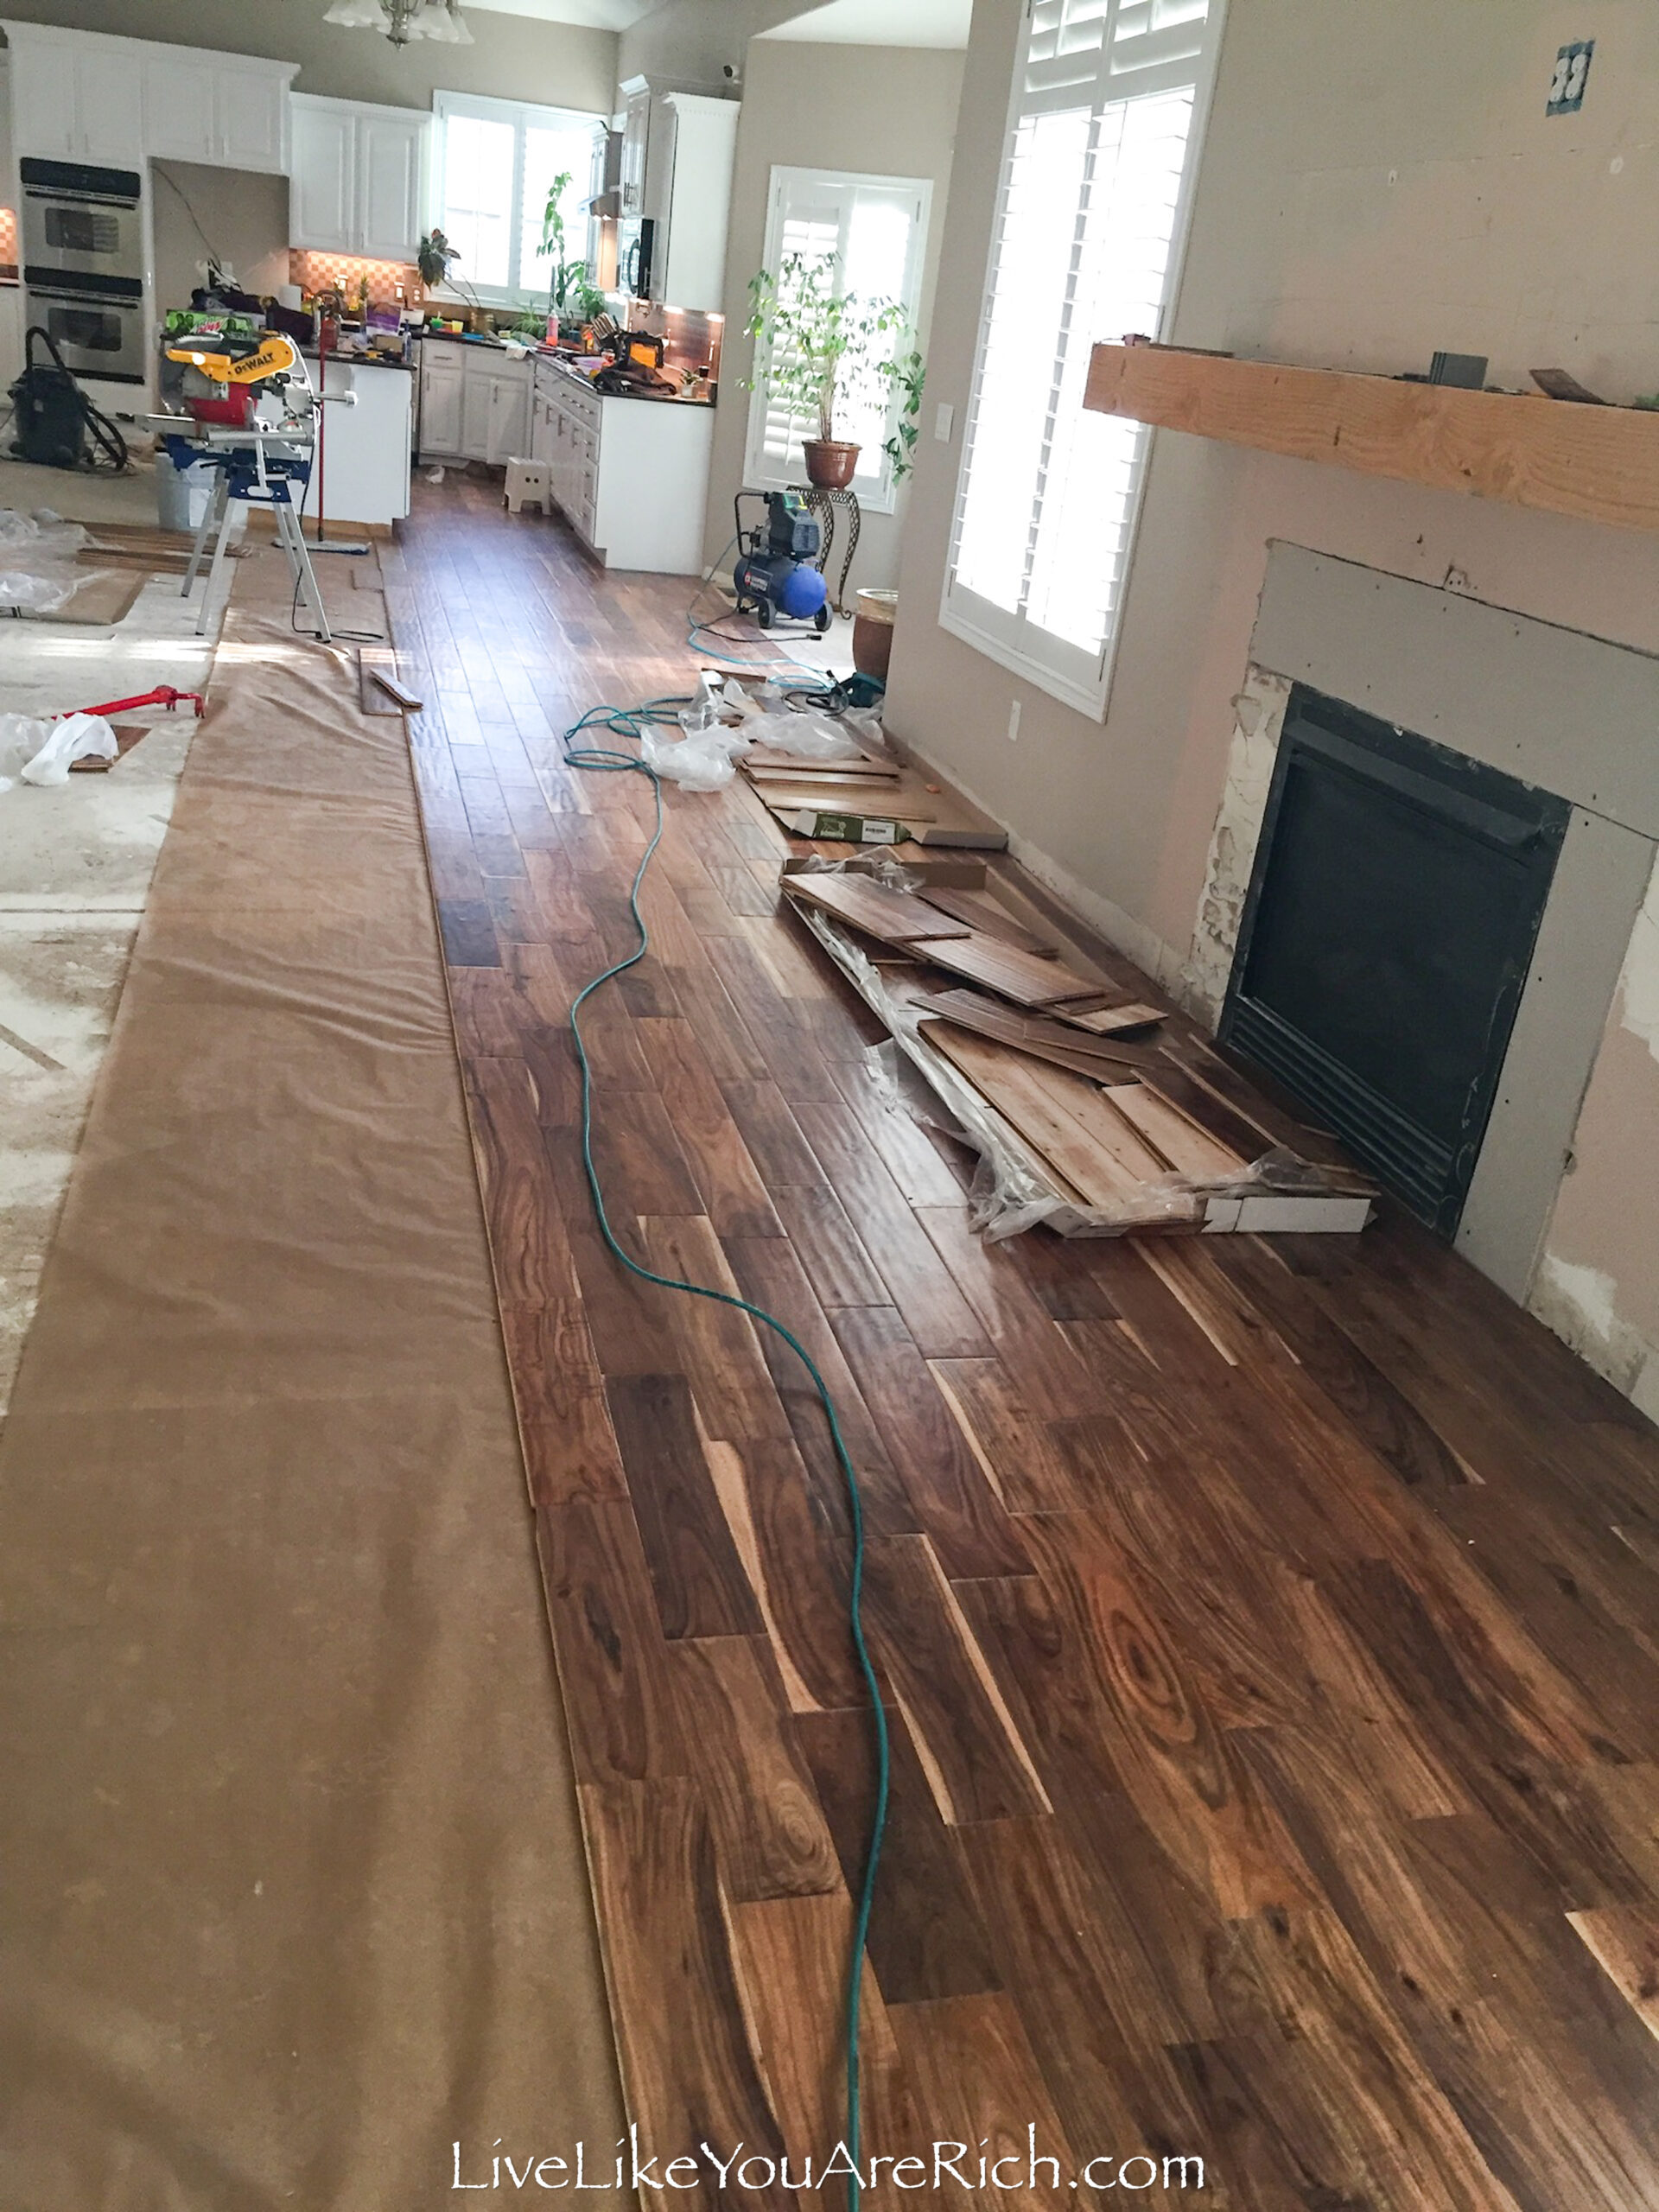
This hardwood flooring is real acacia wood that is pre-finished. Acacia has a variety of warm browns and tans in it. I love it! The acacia ties into so many items throughout our home and is easy to decorate with as almost everything matches.
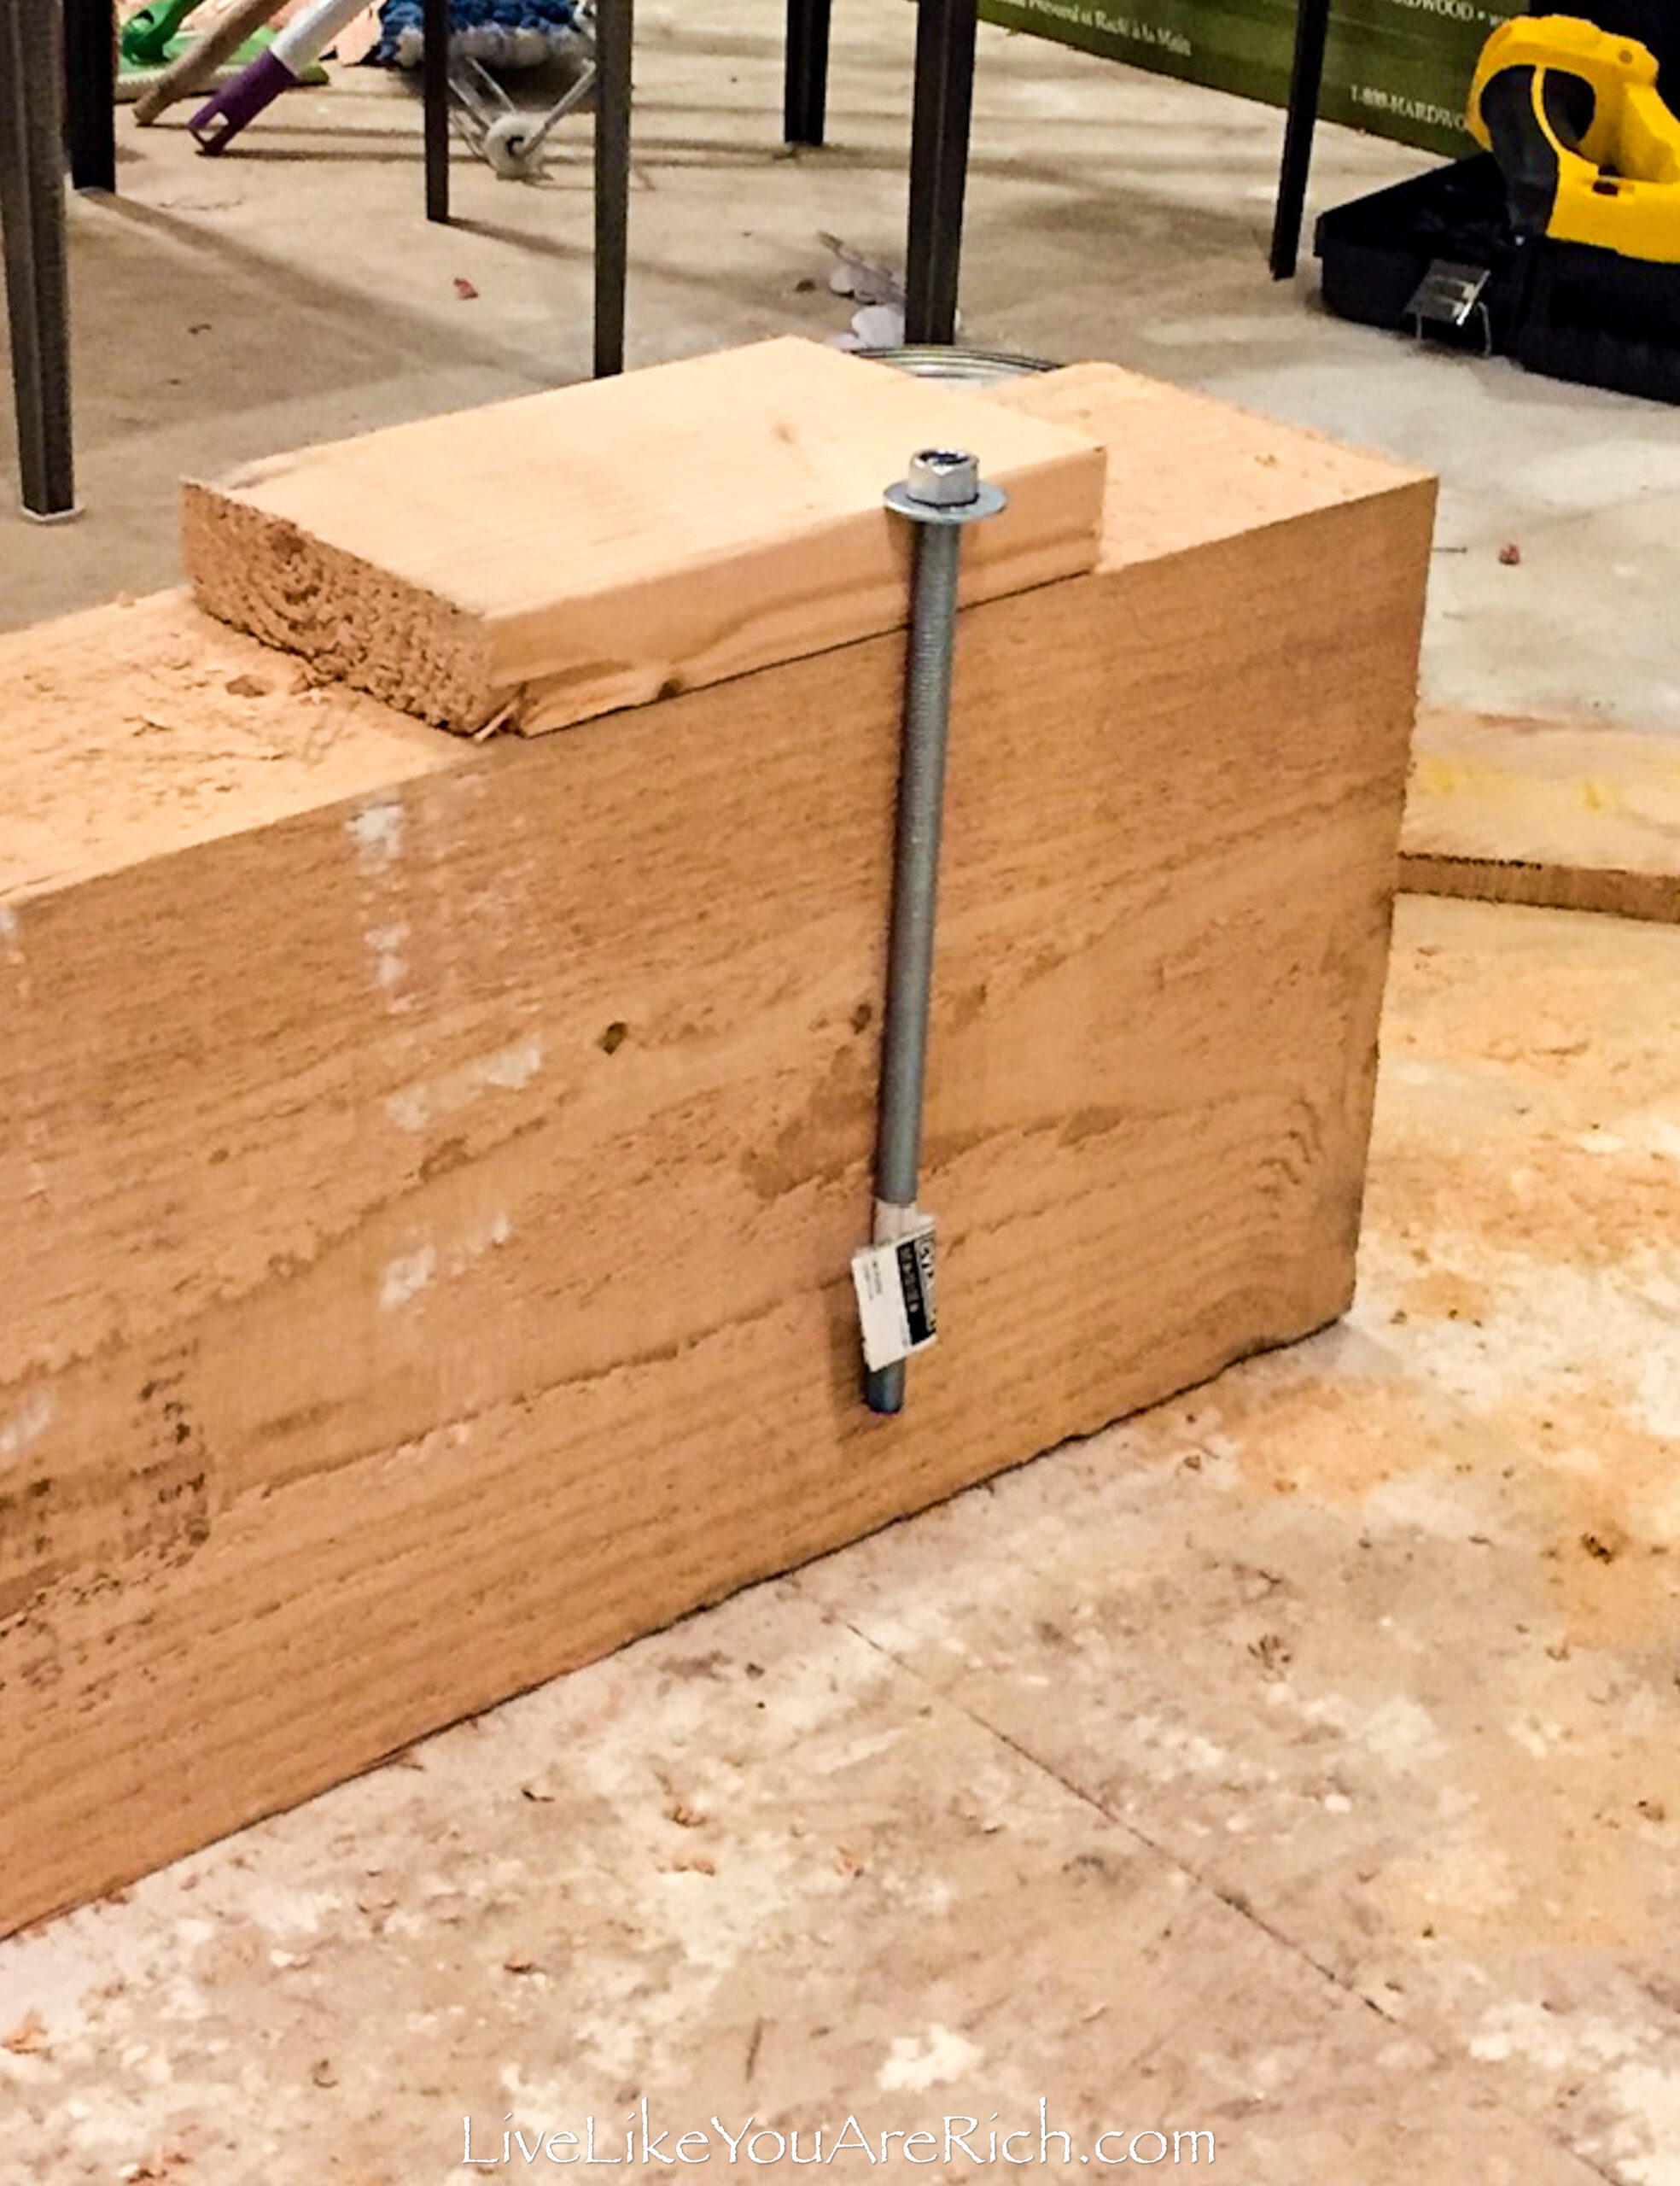
For our mantelpiece, we wanted a simple wood beam. I got many bids on a 9′ wood beam mantelpiece. They all came in well over $1,000.
So, I had an idea to get a beam from Burton Lumber for $150.00 and we installed it ourselves.

Once it was up (I’ll post how we did this soon), I tested out different stains and stained the mantelpiece.
I did a few coats of stain until I achieved the color I was wanting.
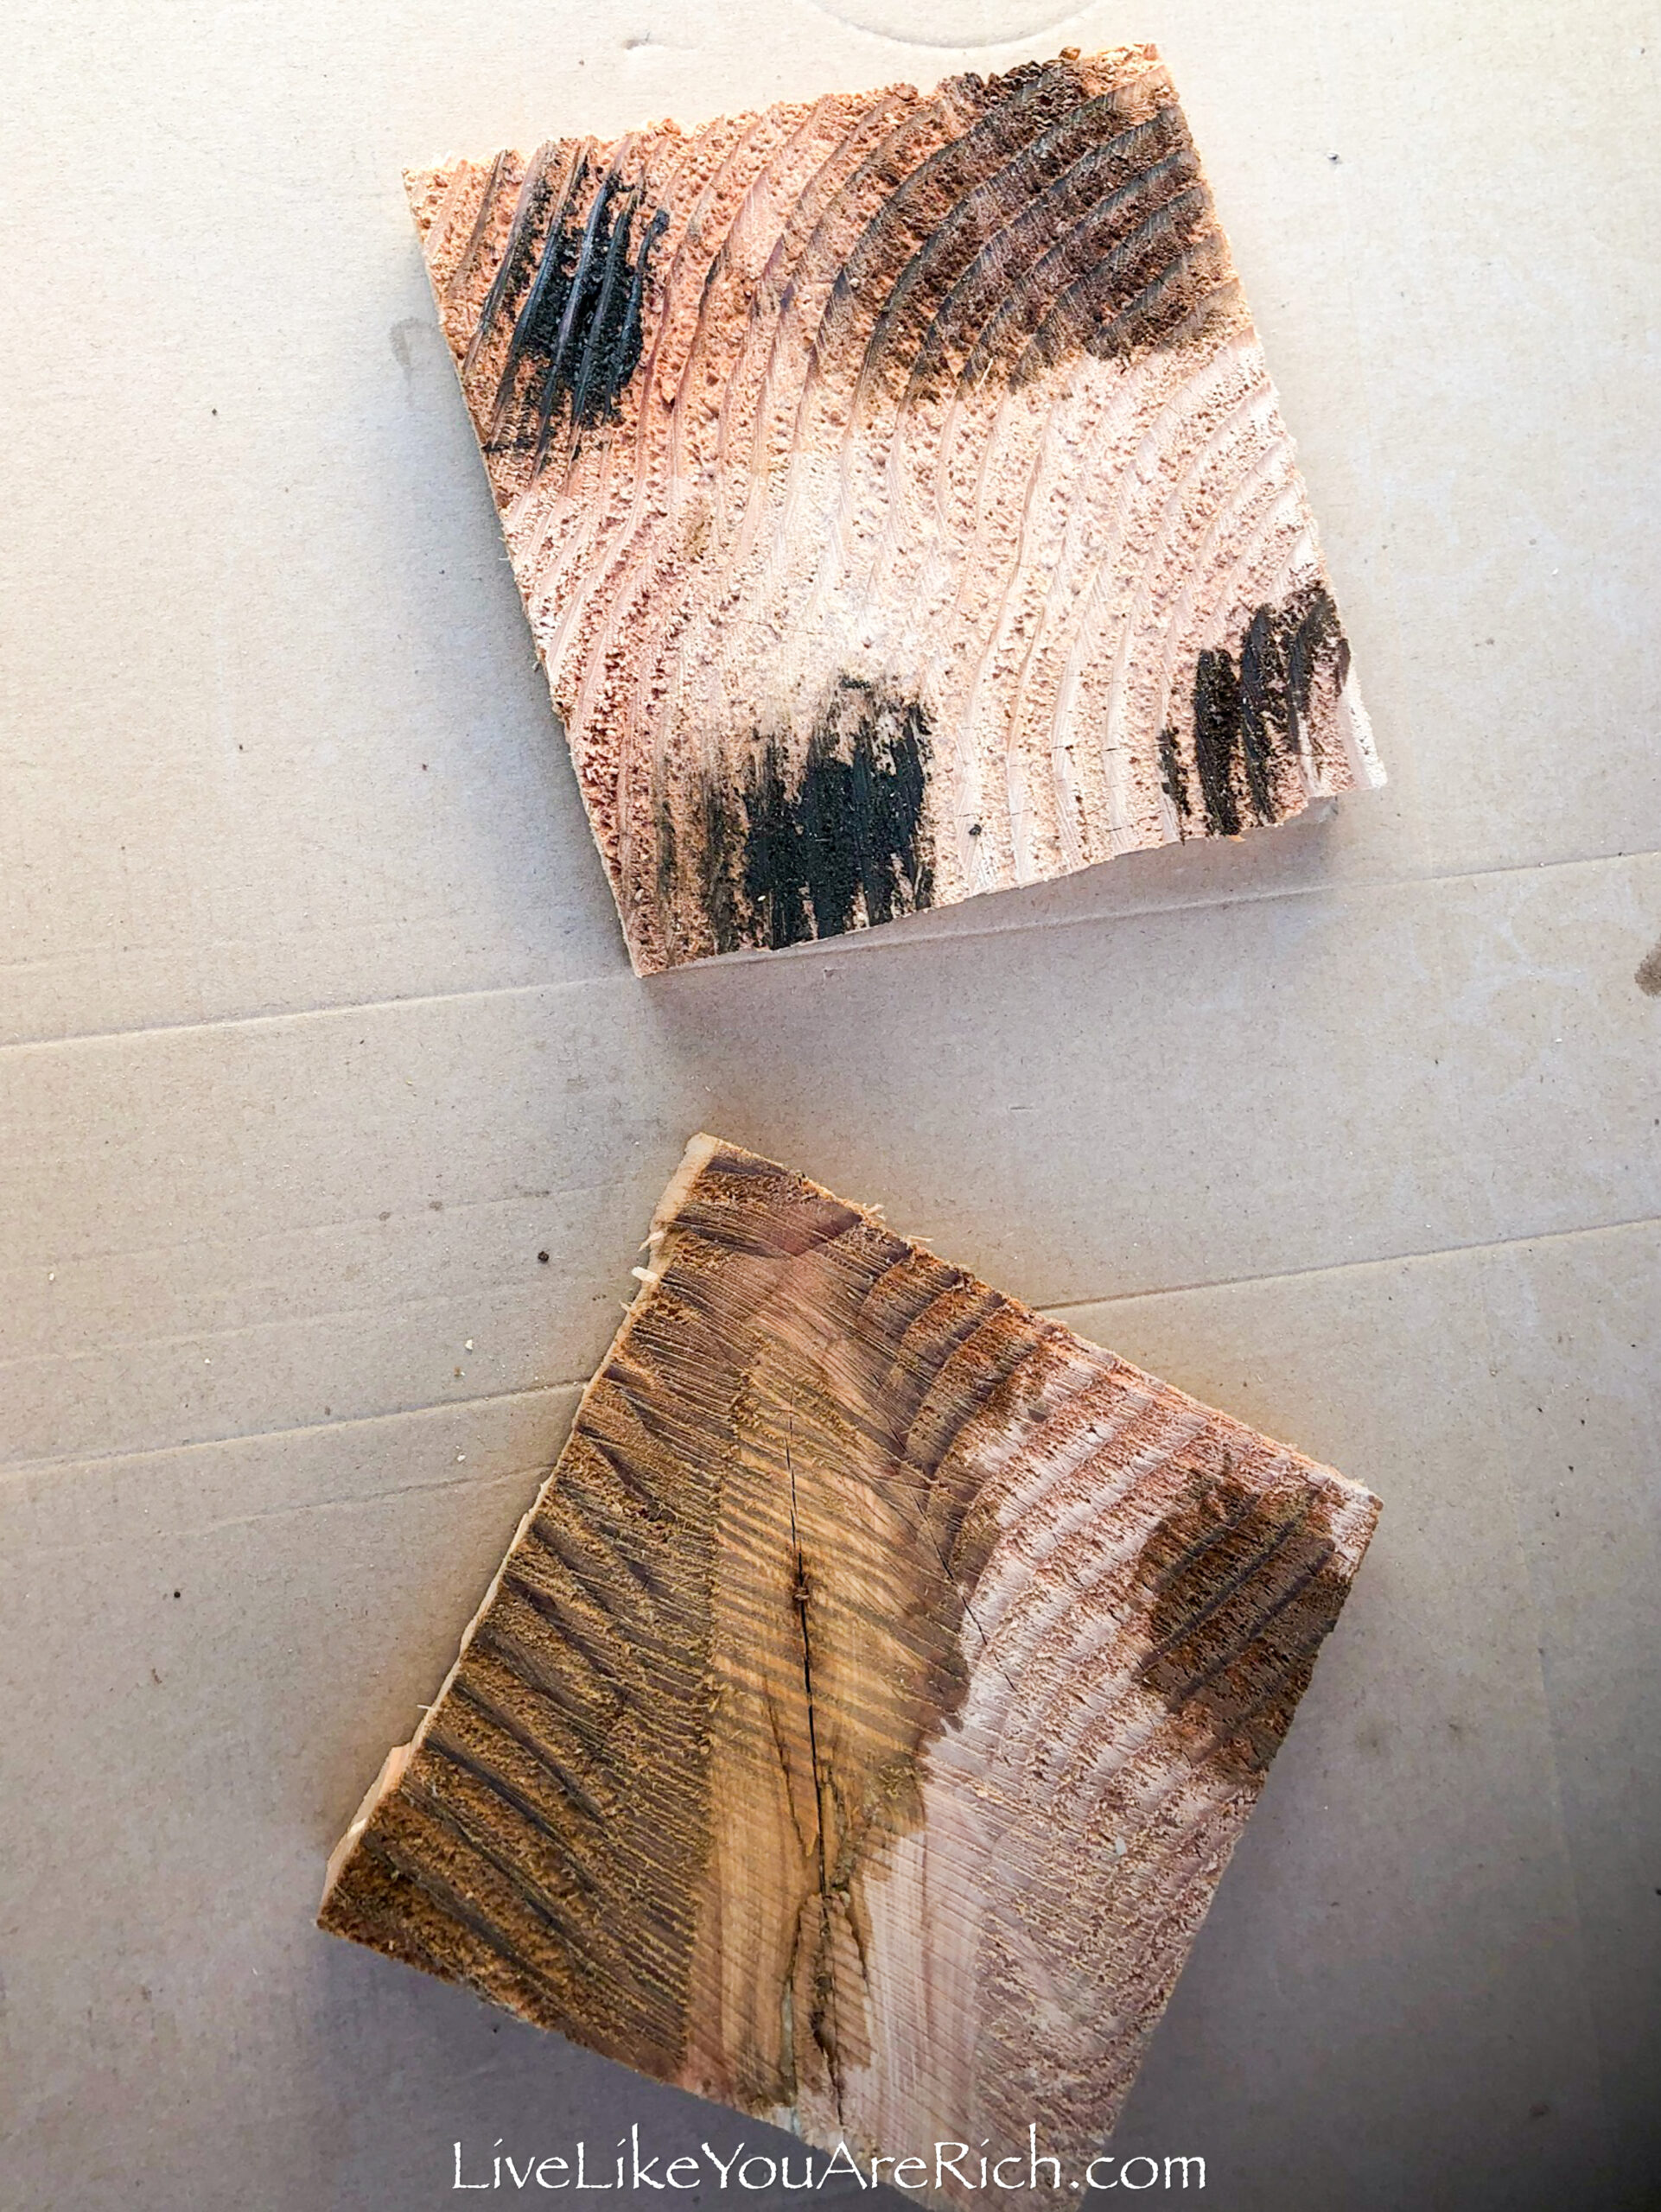
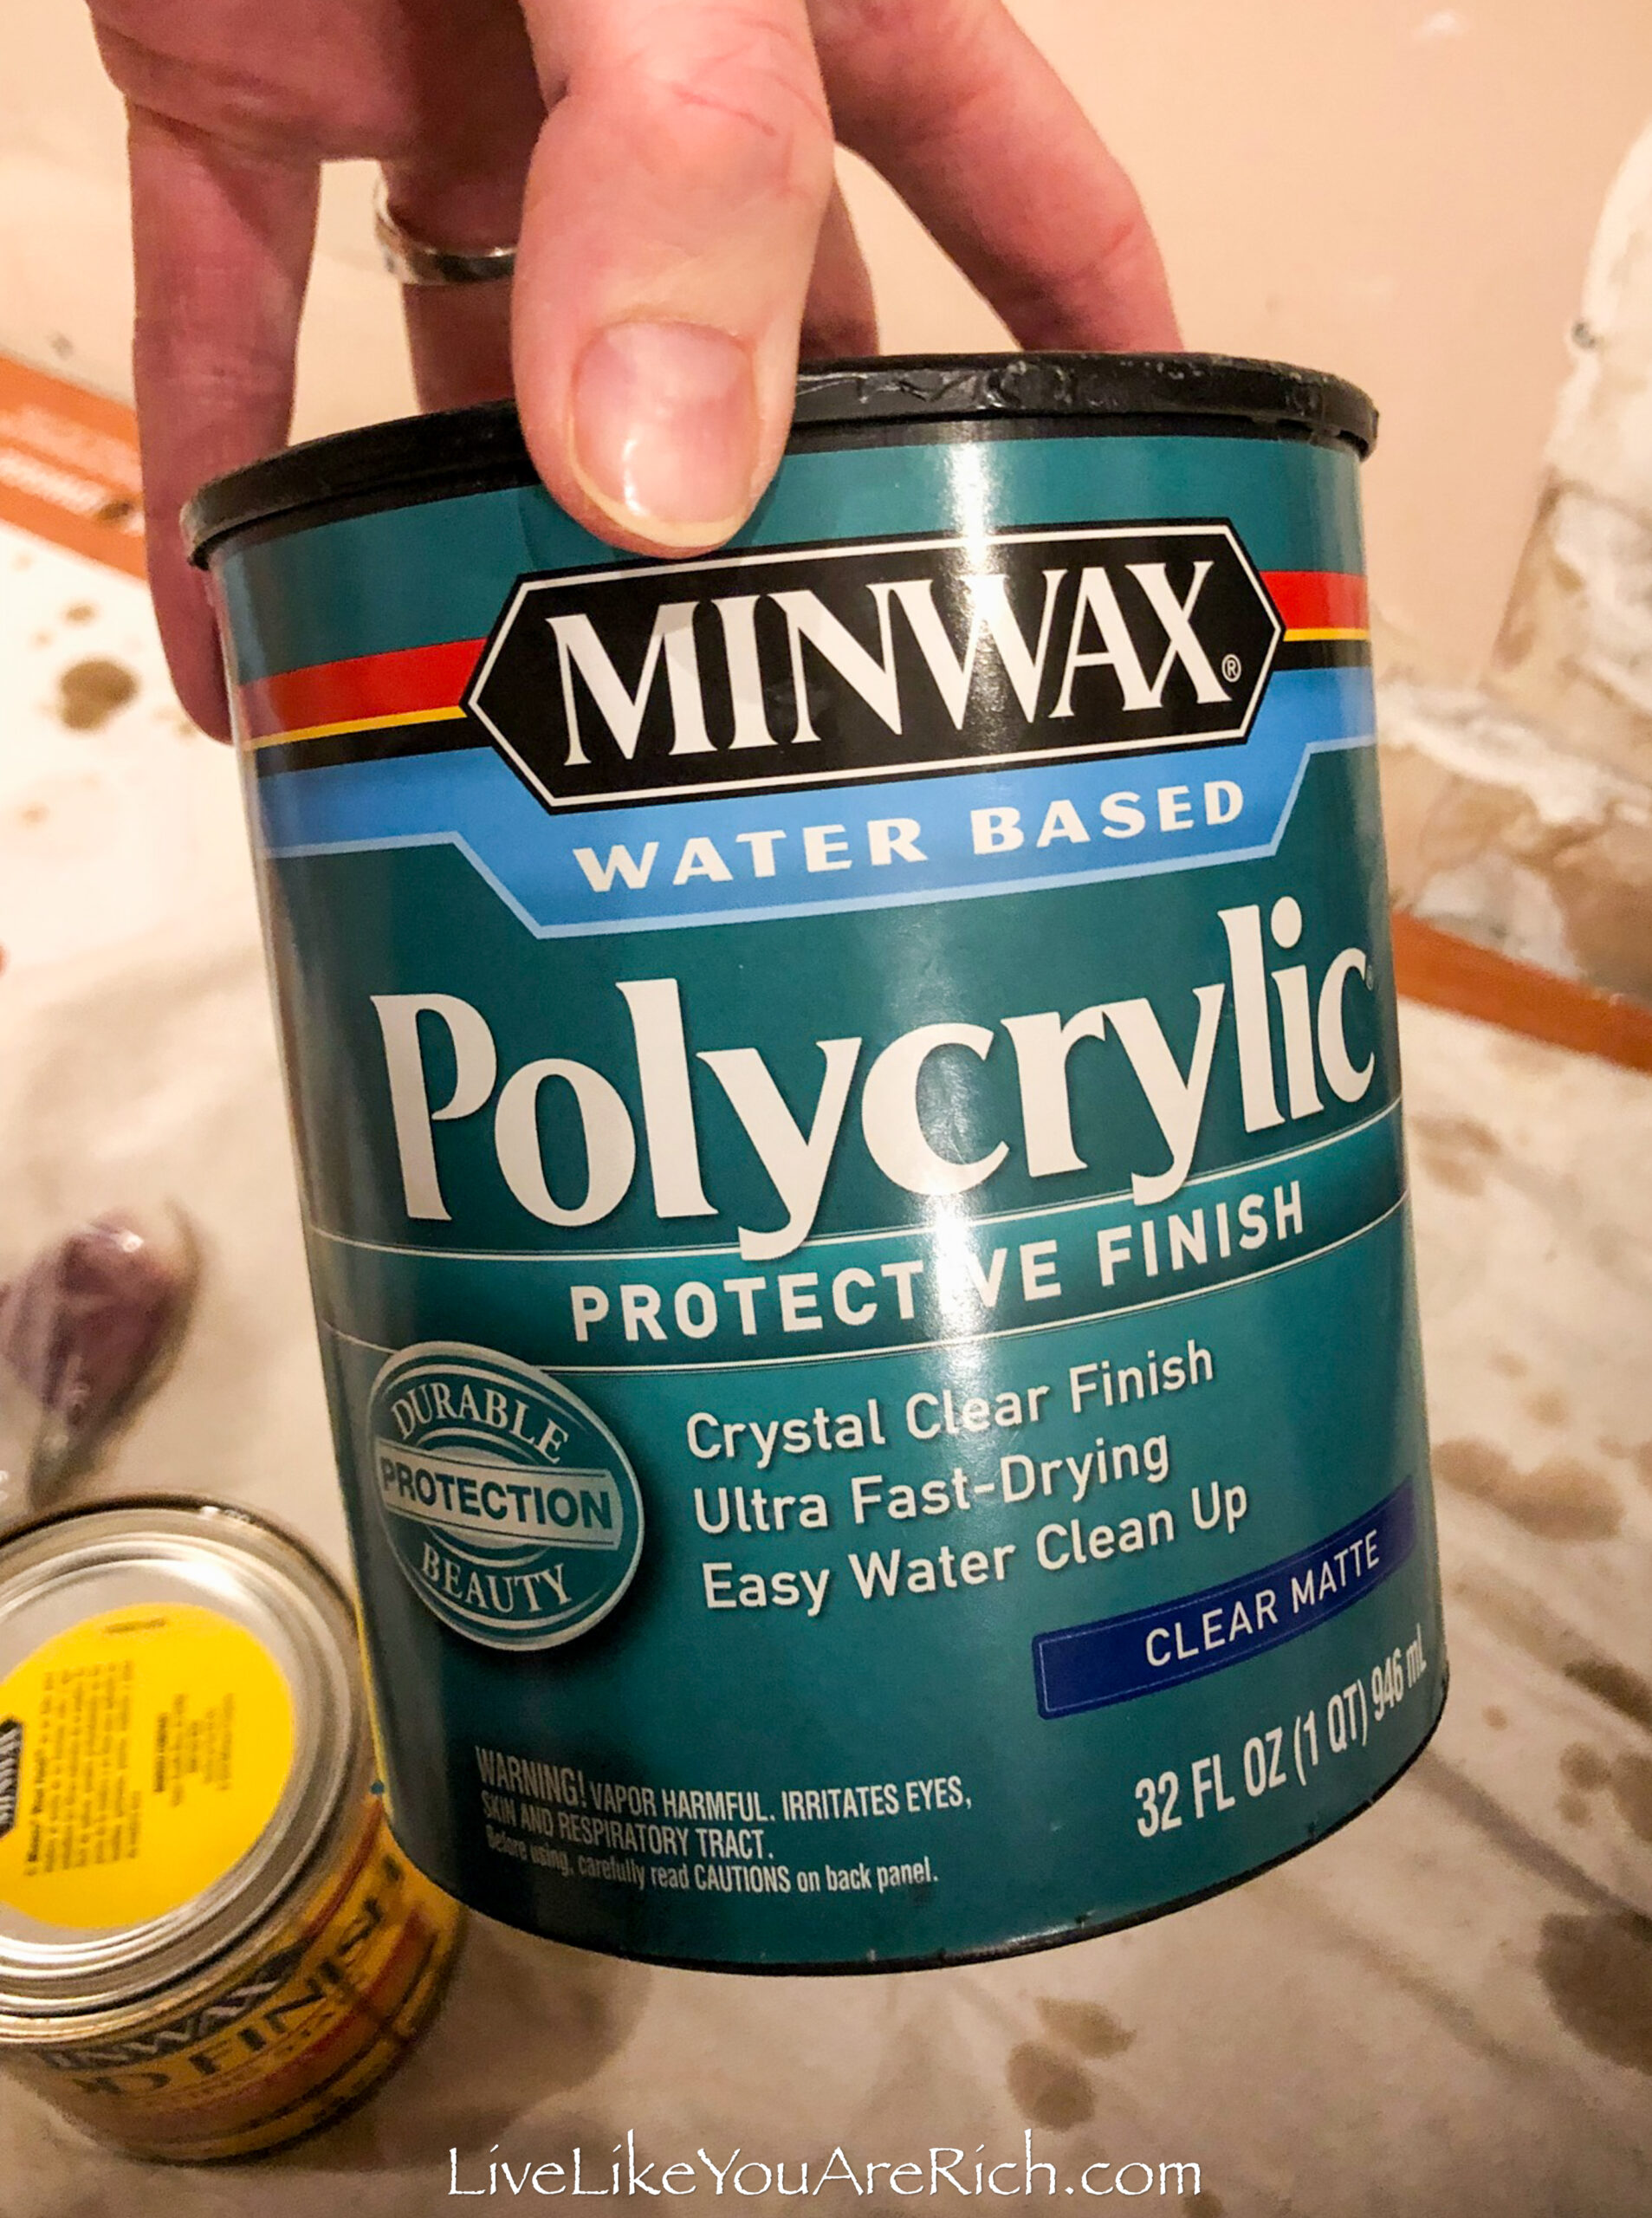
Then I sealed it with poly finish.
The total for the mantel was $200. It is so sturdy and I love decorating it for the holidays.
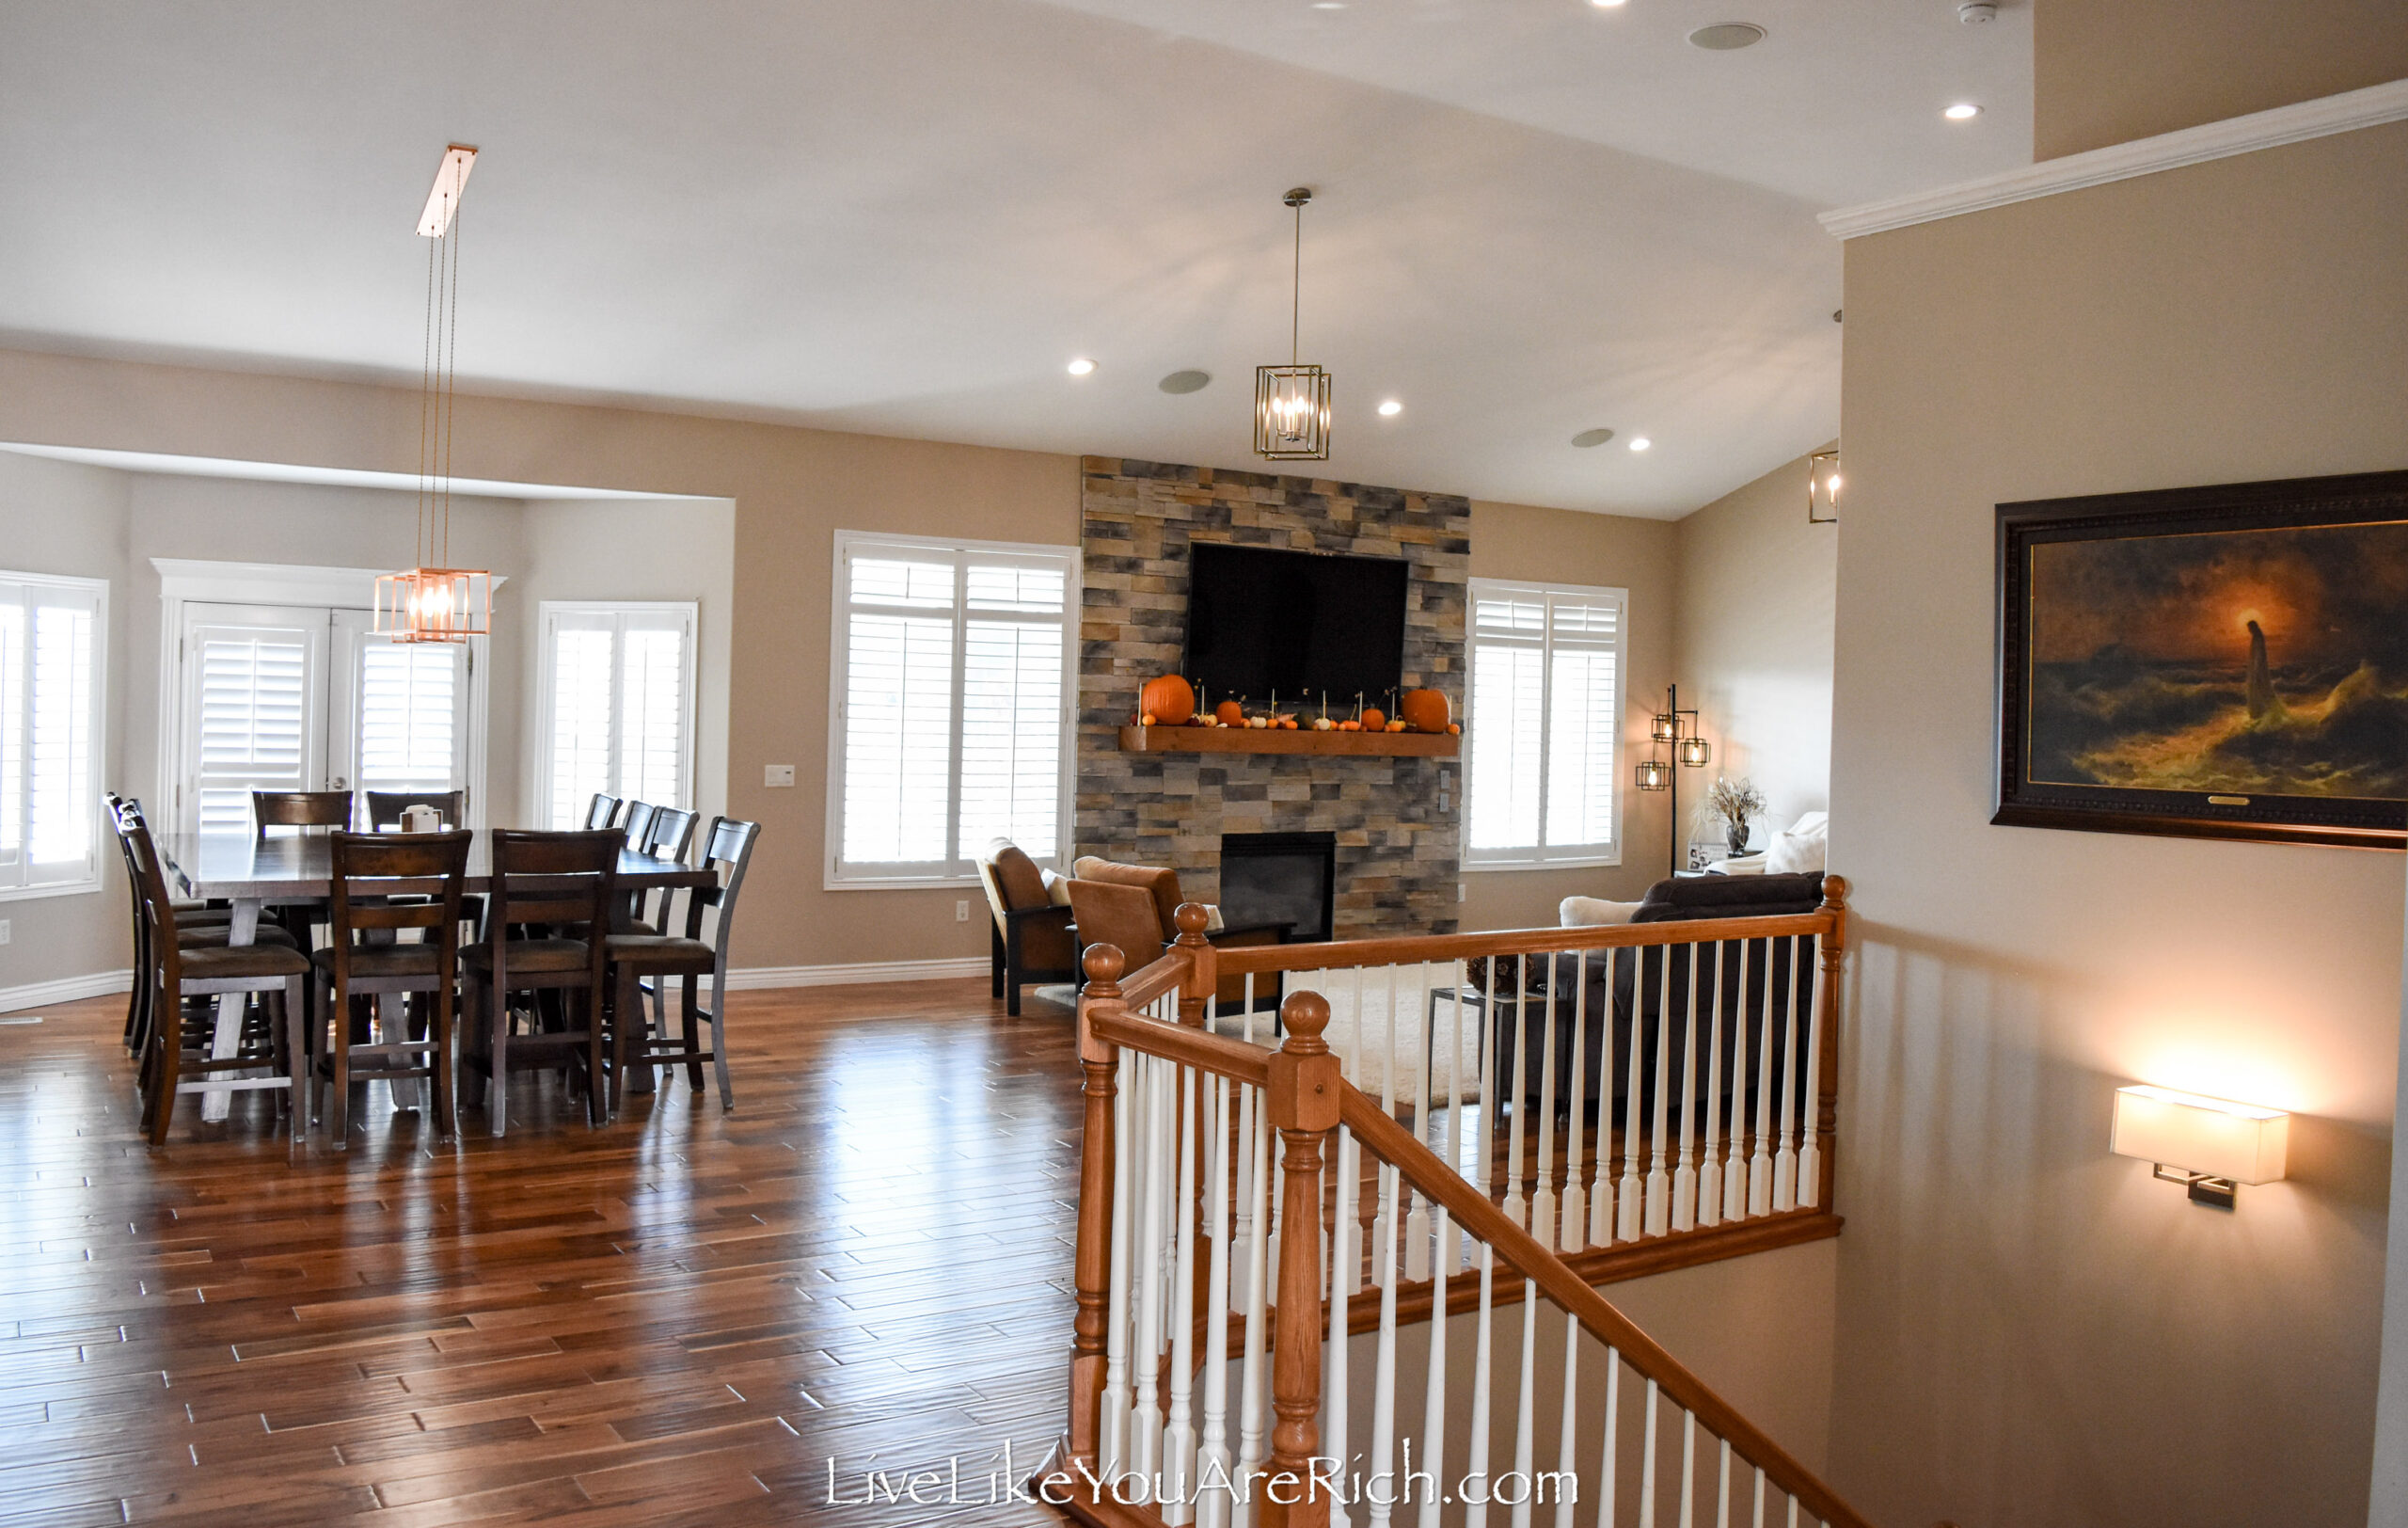
I have our Thanksgiving decor up in this photo below. As you can see it was installed very securely. It can hold quite a bit of weight—those pumpkins are not light!
I found a few boxes of dry stack brick on a local classified for $125 in total. It almost amounted to what we needed… I only had to add two boxes at full price (which I found at the place the seller on the classifieds told me to go to) to make up the rest (at $125.00) the dry stack cost us only $250.00.
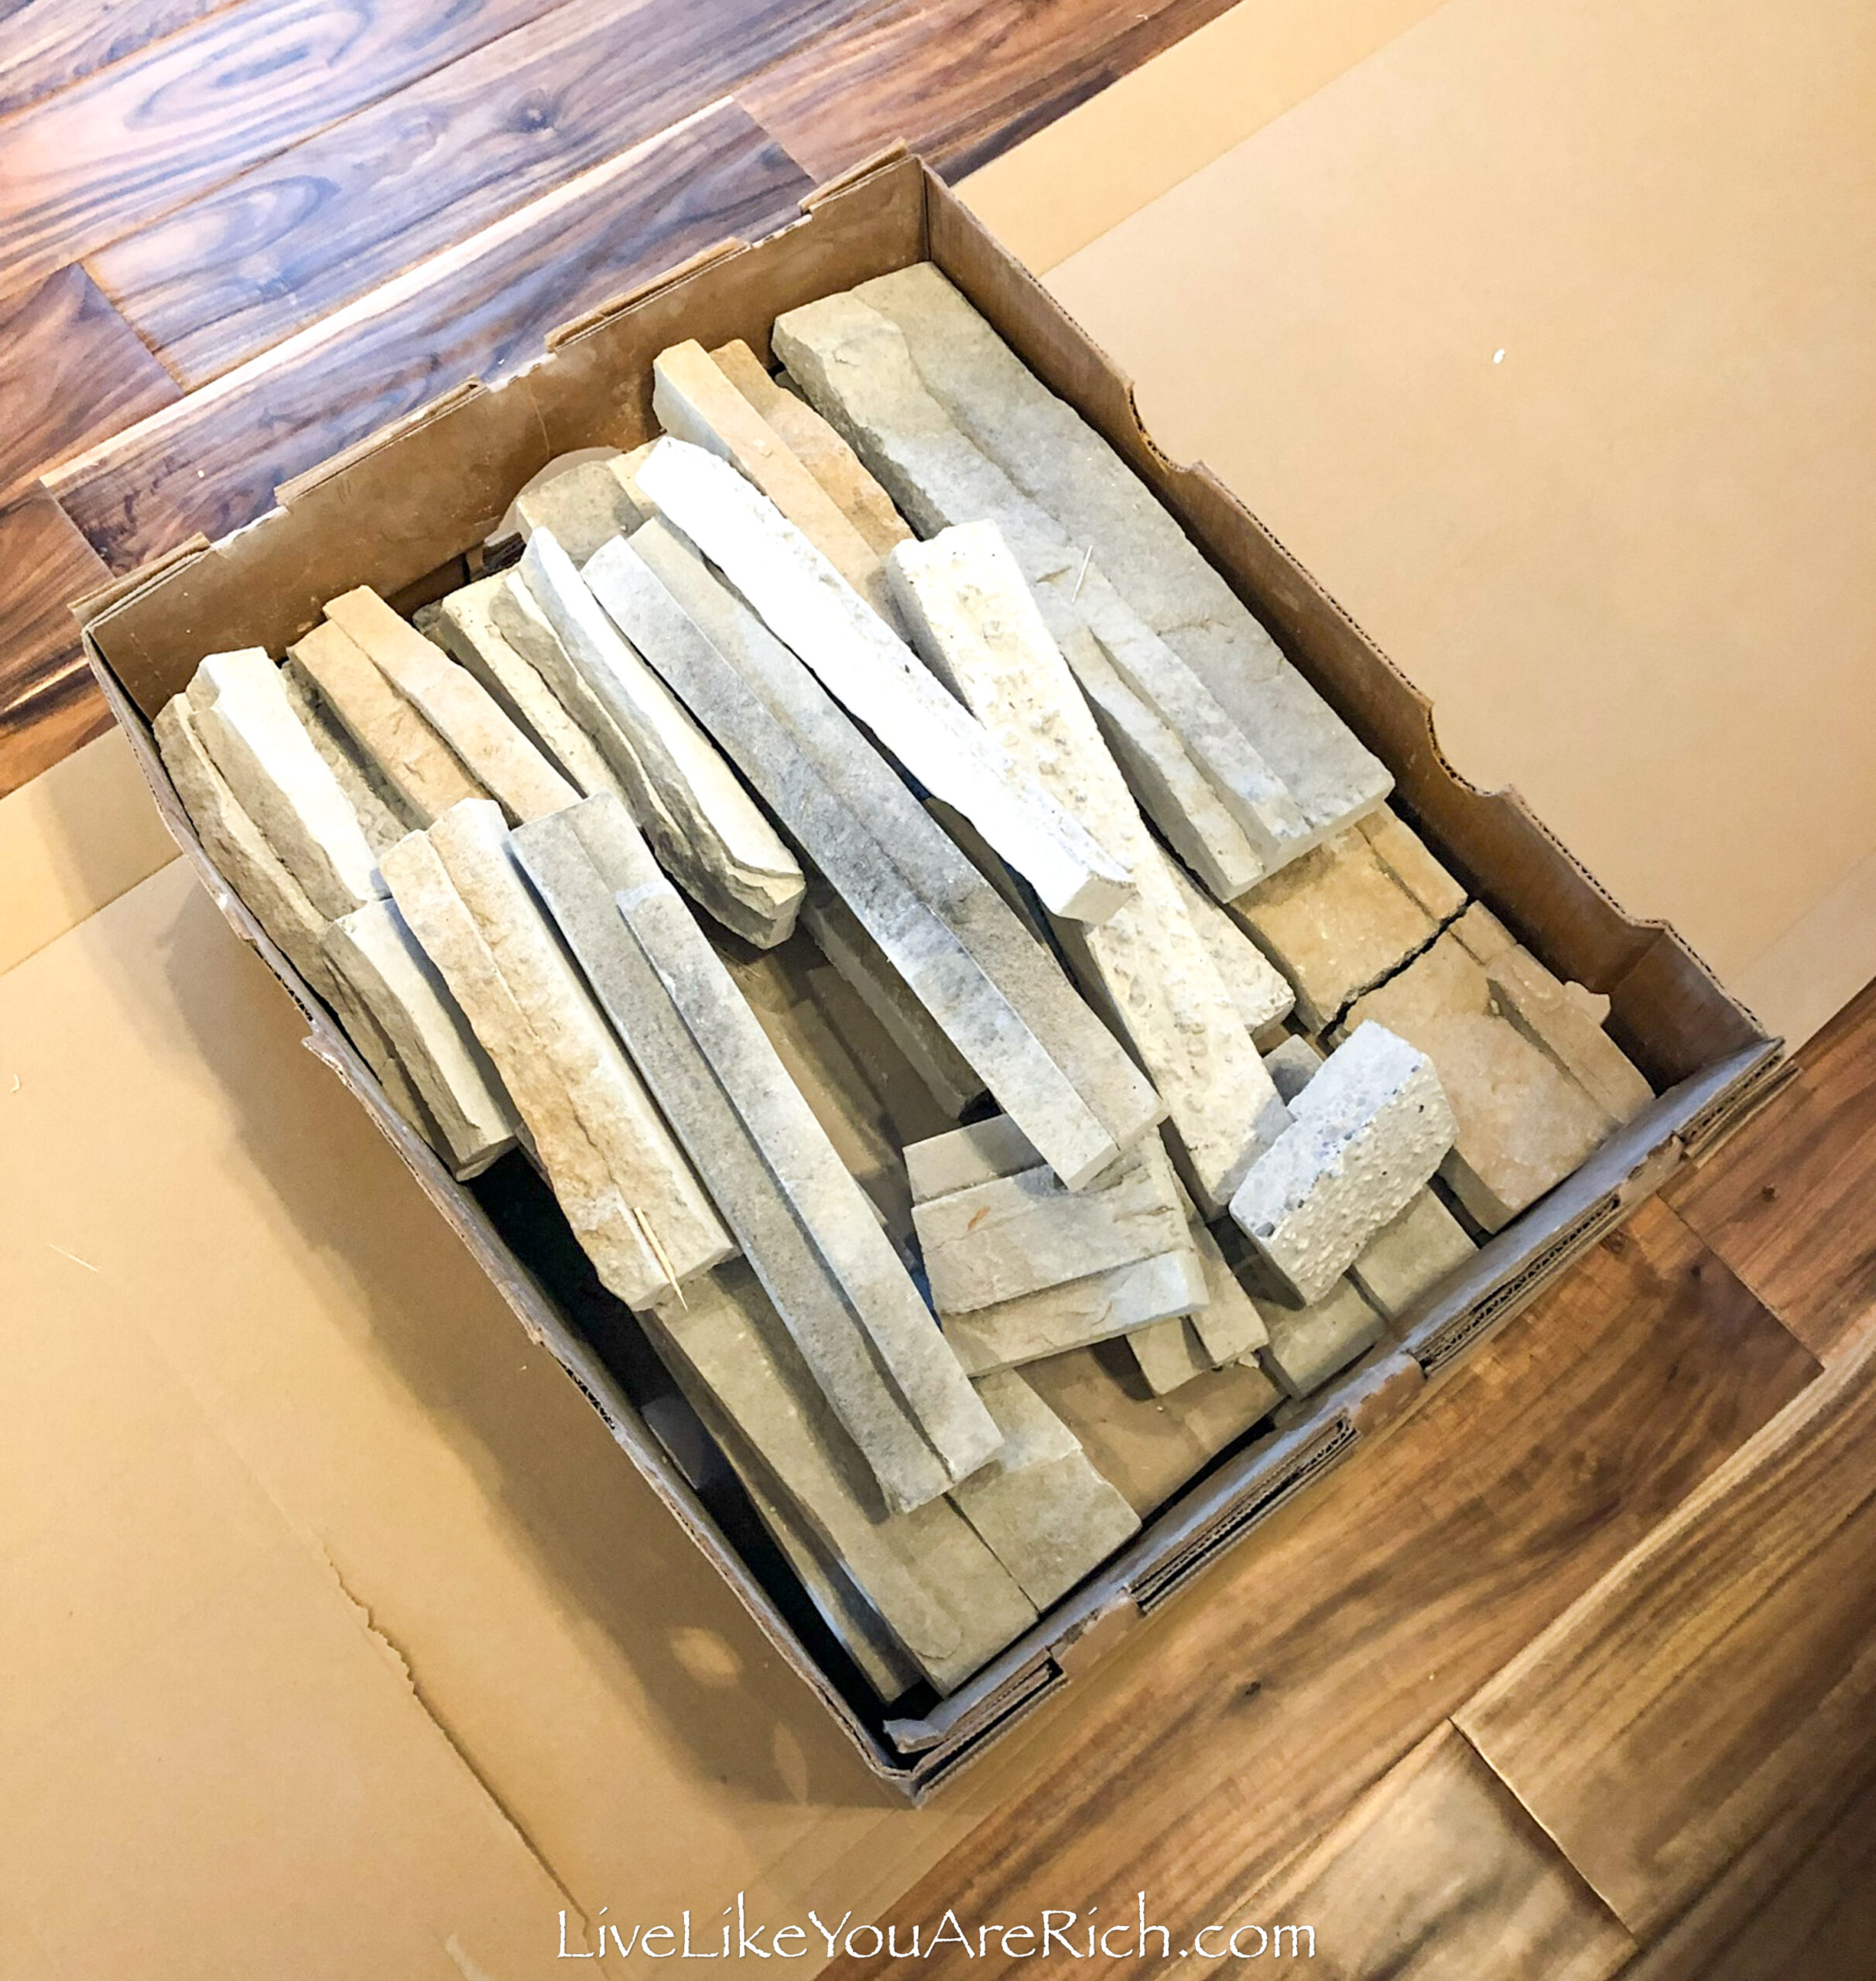
I installed our basement fireplace dry stack and realized just how hard a large wall would be, so, we paid a company to do it for $500. They got it done, a few guys working on it, in about four hours. Total for the brick wall $750.00
Then, I put the baseboards back on and caulked and painted them, equalling $30 in supplies.
My husband Shane put the electrical covers on the fireplace in silver to blend in with the dry stack. He also switched out the fans to the new lighting.
I purchased the chandeliers at a discount barn for $40 each.
My husband is a professional at audio-visual installations. He installed the speaker and surround sound in the ceiling for free. He had the speakers and bass and all of the wiring and equipment from his house (house 2). We knew we wouldn’t get what they were worth out of the sale of his home, so we decided to move them to this one.
The flush mount can lights cost about $90.00 to replace the bulb LED ones.
The next step was to decorate with furniture and artwork—which is honestly one of my favorite things to do!
The TV was a Black Friday Samsung 80″ for $1,800 and has held up really well these five+ years.
I love the artwork that I was able to find for this room.
We are located very close to the Rocky Mountains and are surrounded by either mountains or lakes on all sides (within a few miles), so I went for a mountainous theme.
We also have a river and wooded area in our backyard so I thought trees and mountains would bring the outside landscape inside for a continuous feel.
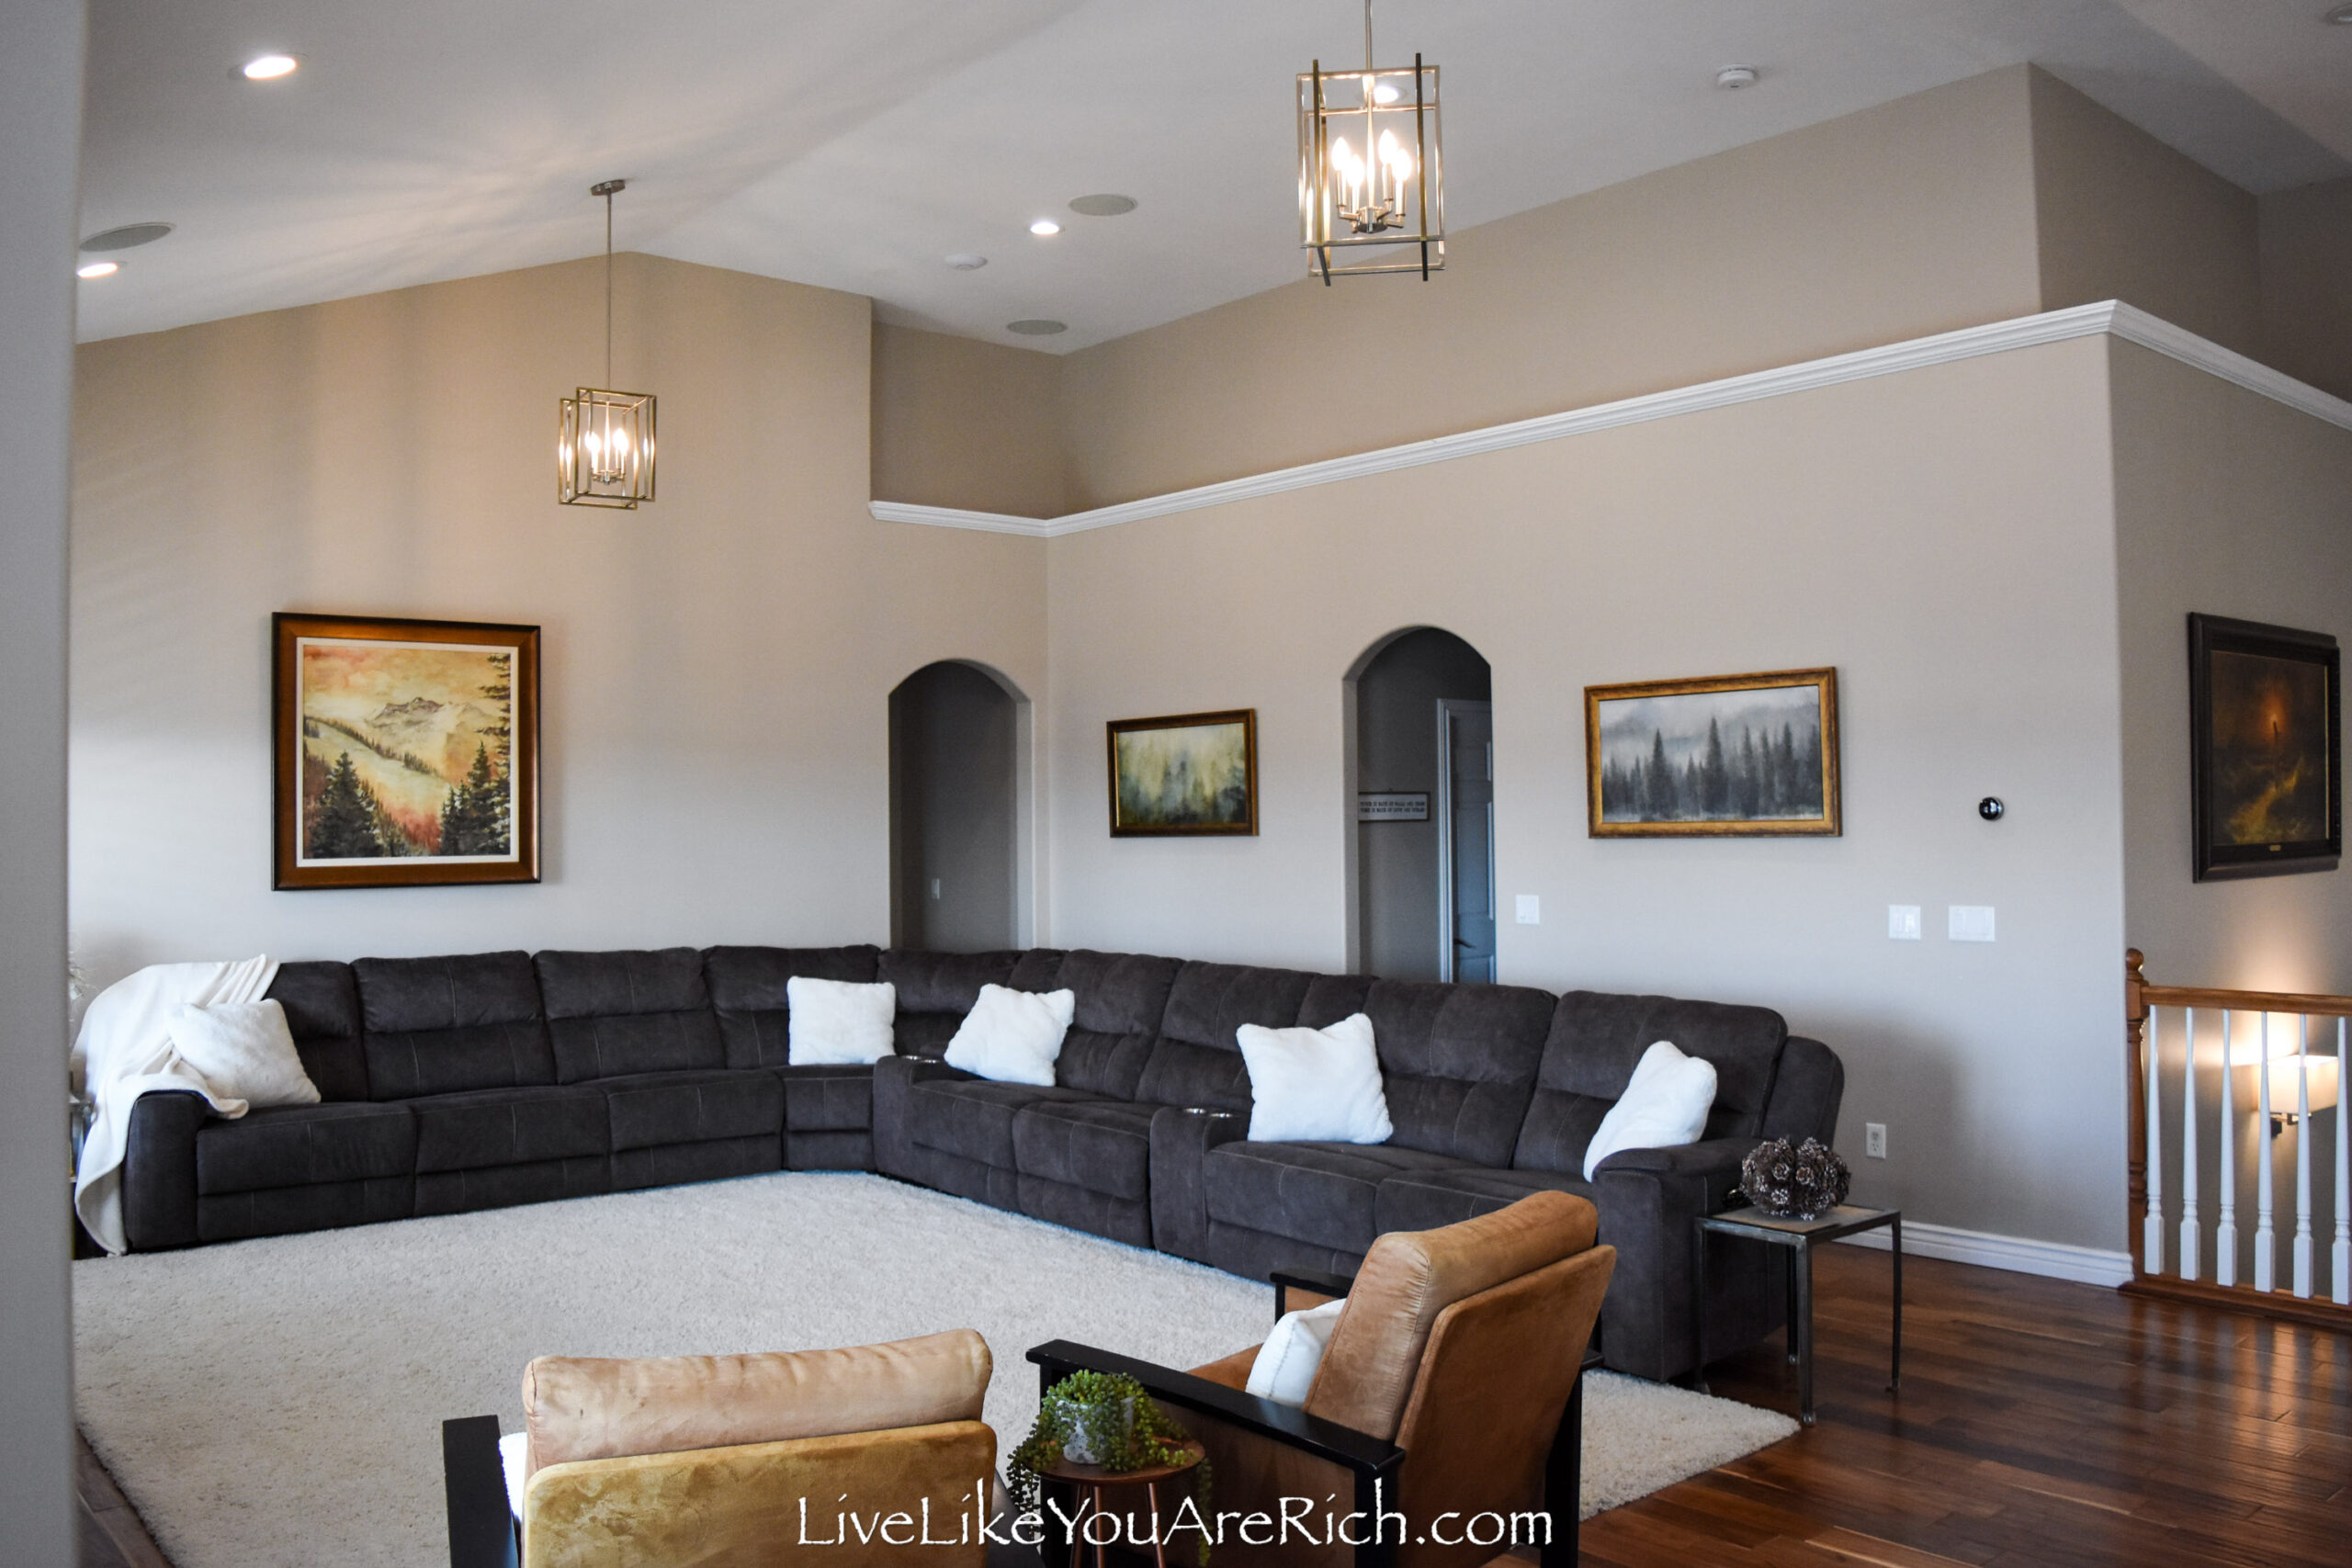
These three pieces of artwork came from Photowall.com.

They are very high-quality prints on canvas.


I really like canvas art on walls because if you use glass you almost always have a glare.
I have a few pieces of artwork covered in museum-quality glass and even though it’s excellent glass, I still can’t really see what the image is unless I get close enough and stand at a good angle.
Canvas art has the benefit of looking good all day every day despite differences in lighting and perspective.
I bought all three canvases’ in the same size and with the same frame so they matched—size and frame-wise.

I got the antique gold frames from Pictureframes.com and was happy to get them on sale with a coupon for a reasonable price of about $100.00 a frame.
The larger wall art was found used on local classifieds for $45.00. This was a great find as it is so large and fills up the wall. It also matches my wall art from Photowall.

Together these four pieces of art give the home a mountain vibe.
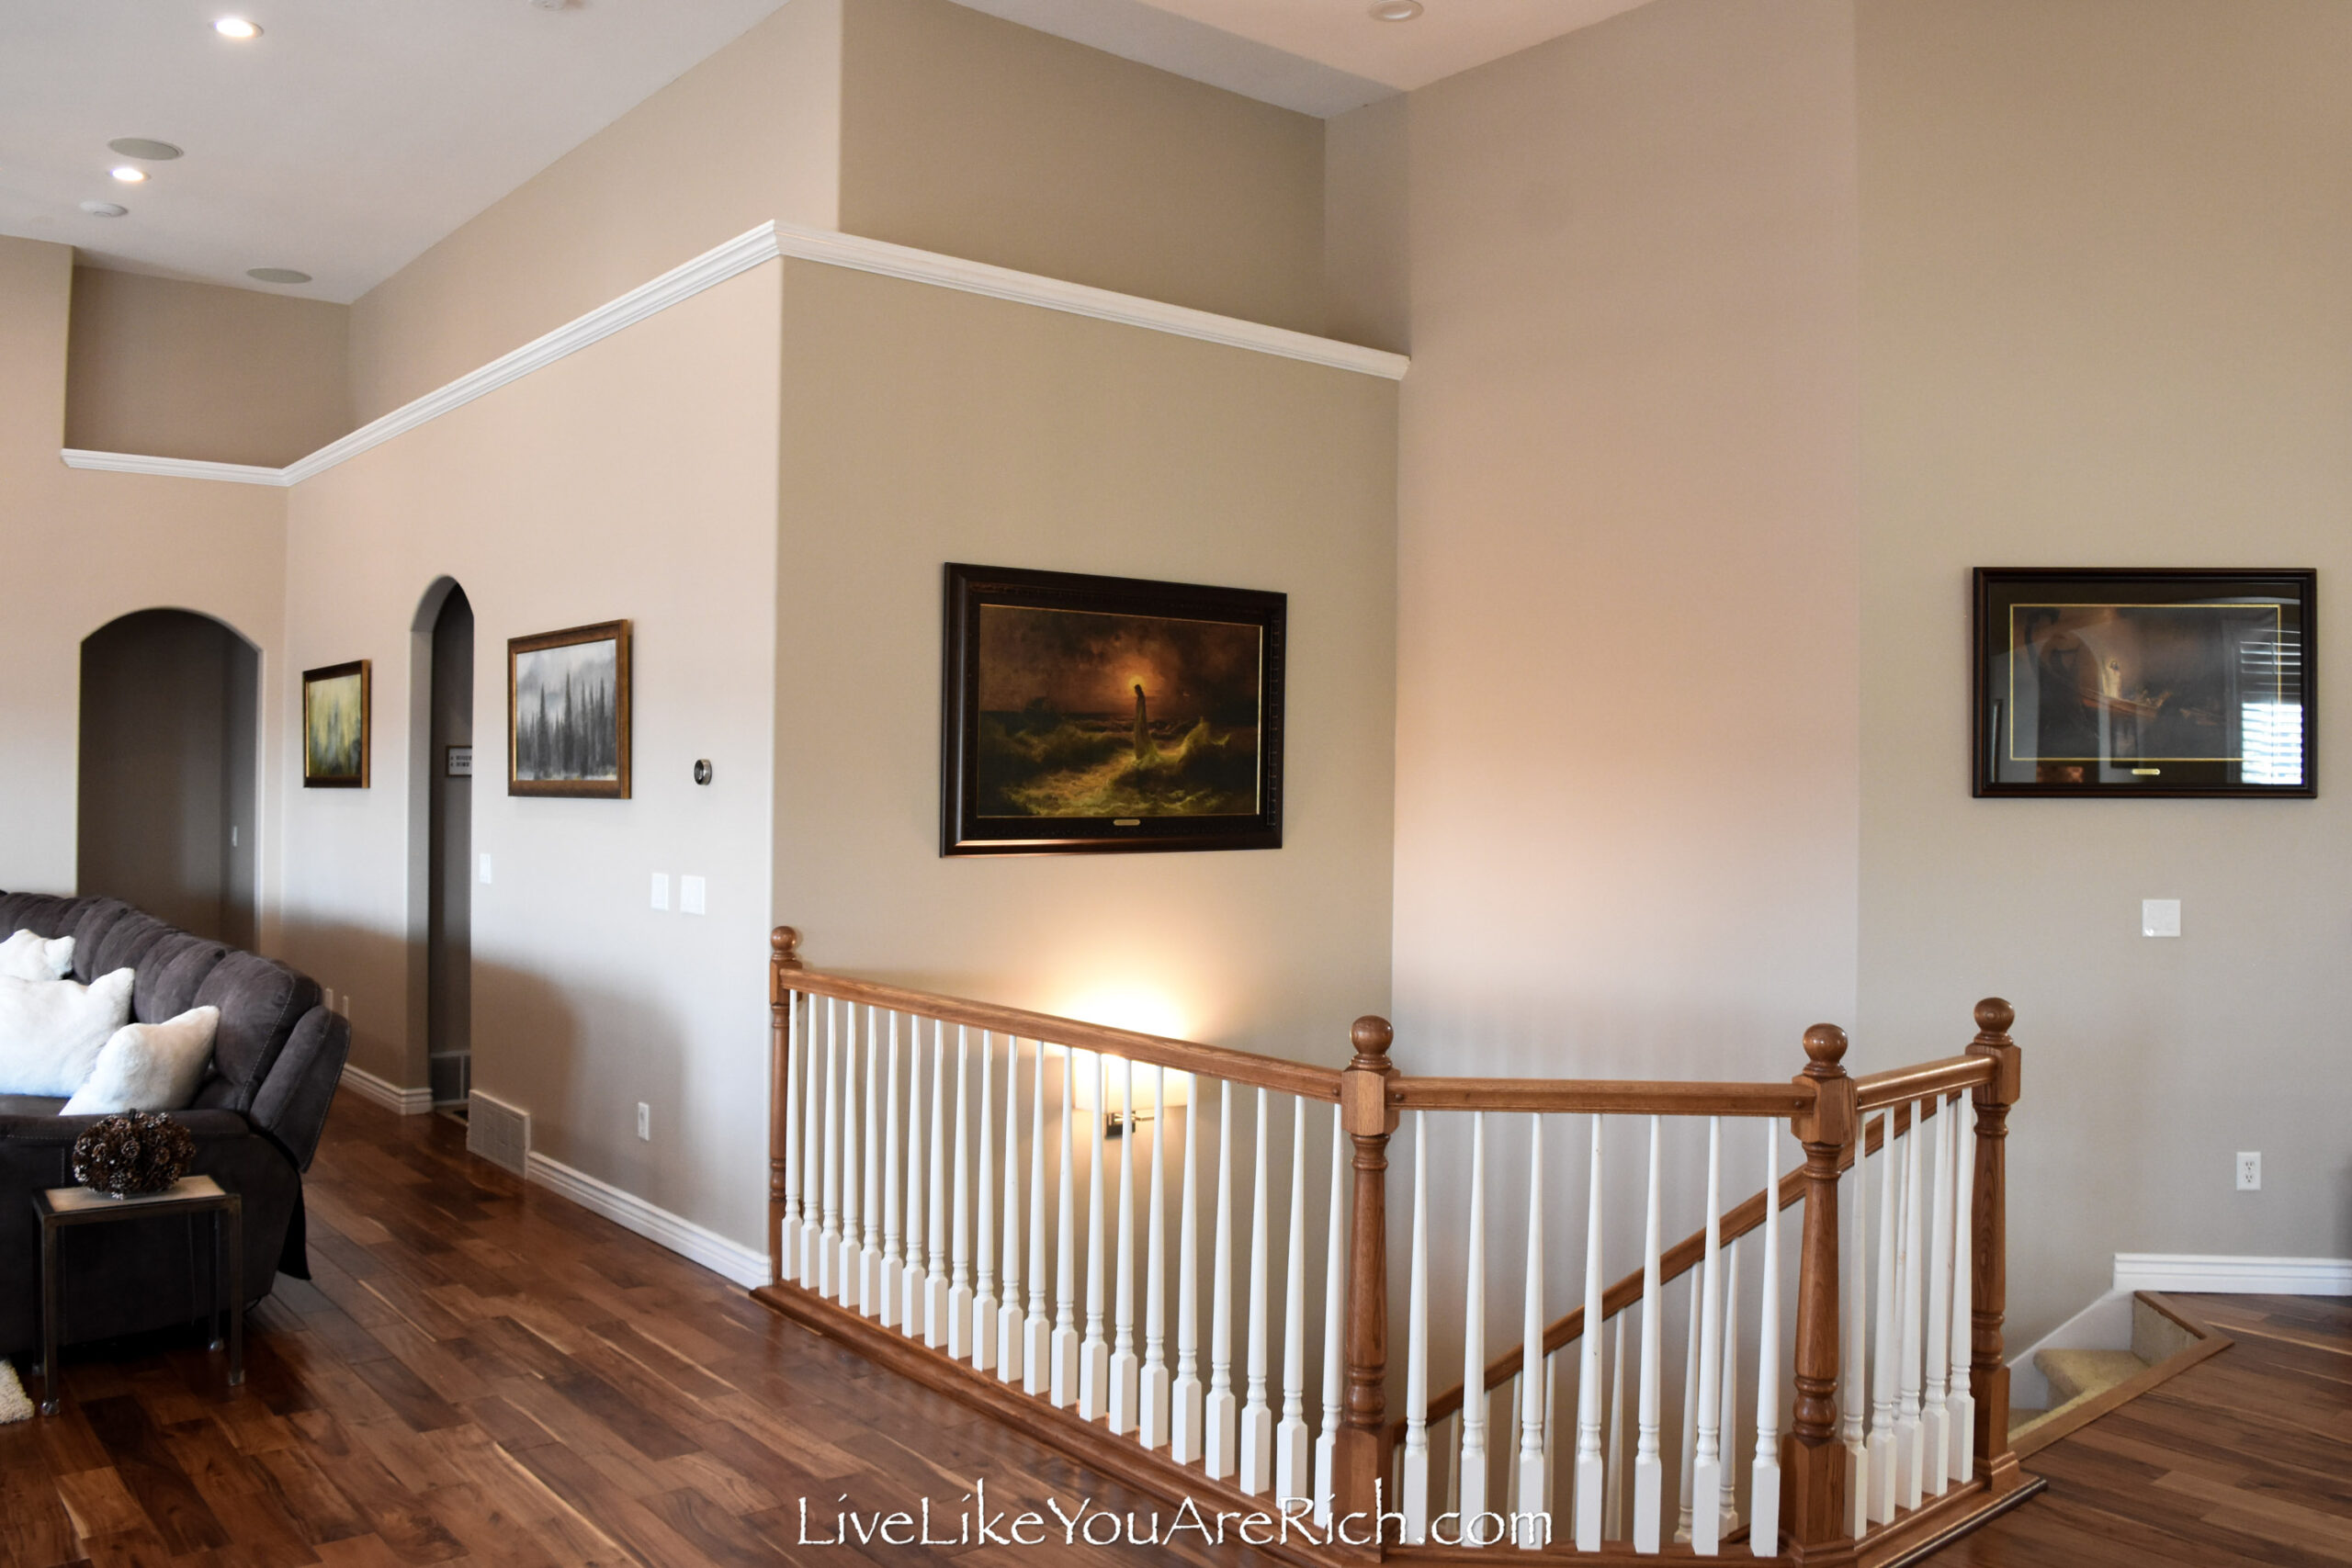
Above the stairway, I hung a large-framed painting of, ‘Christ Walking on The Water’, by Julius Sergius von Klever bought off local classifieds for $350.00
The colors go with our home and since we are Christian, I like that part of us being represented in our artwork as well.
Another piece adjacent to it is called, ‘Peace Be Still’, by Arnold Friberg. I purchased this from local classifieds for $400.00 as it is certified, signed, limited edition.

These two paintings with Christ have copper, orangey hues which go well with the rest of the house.
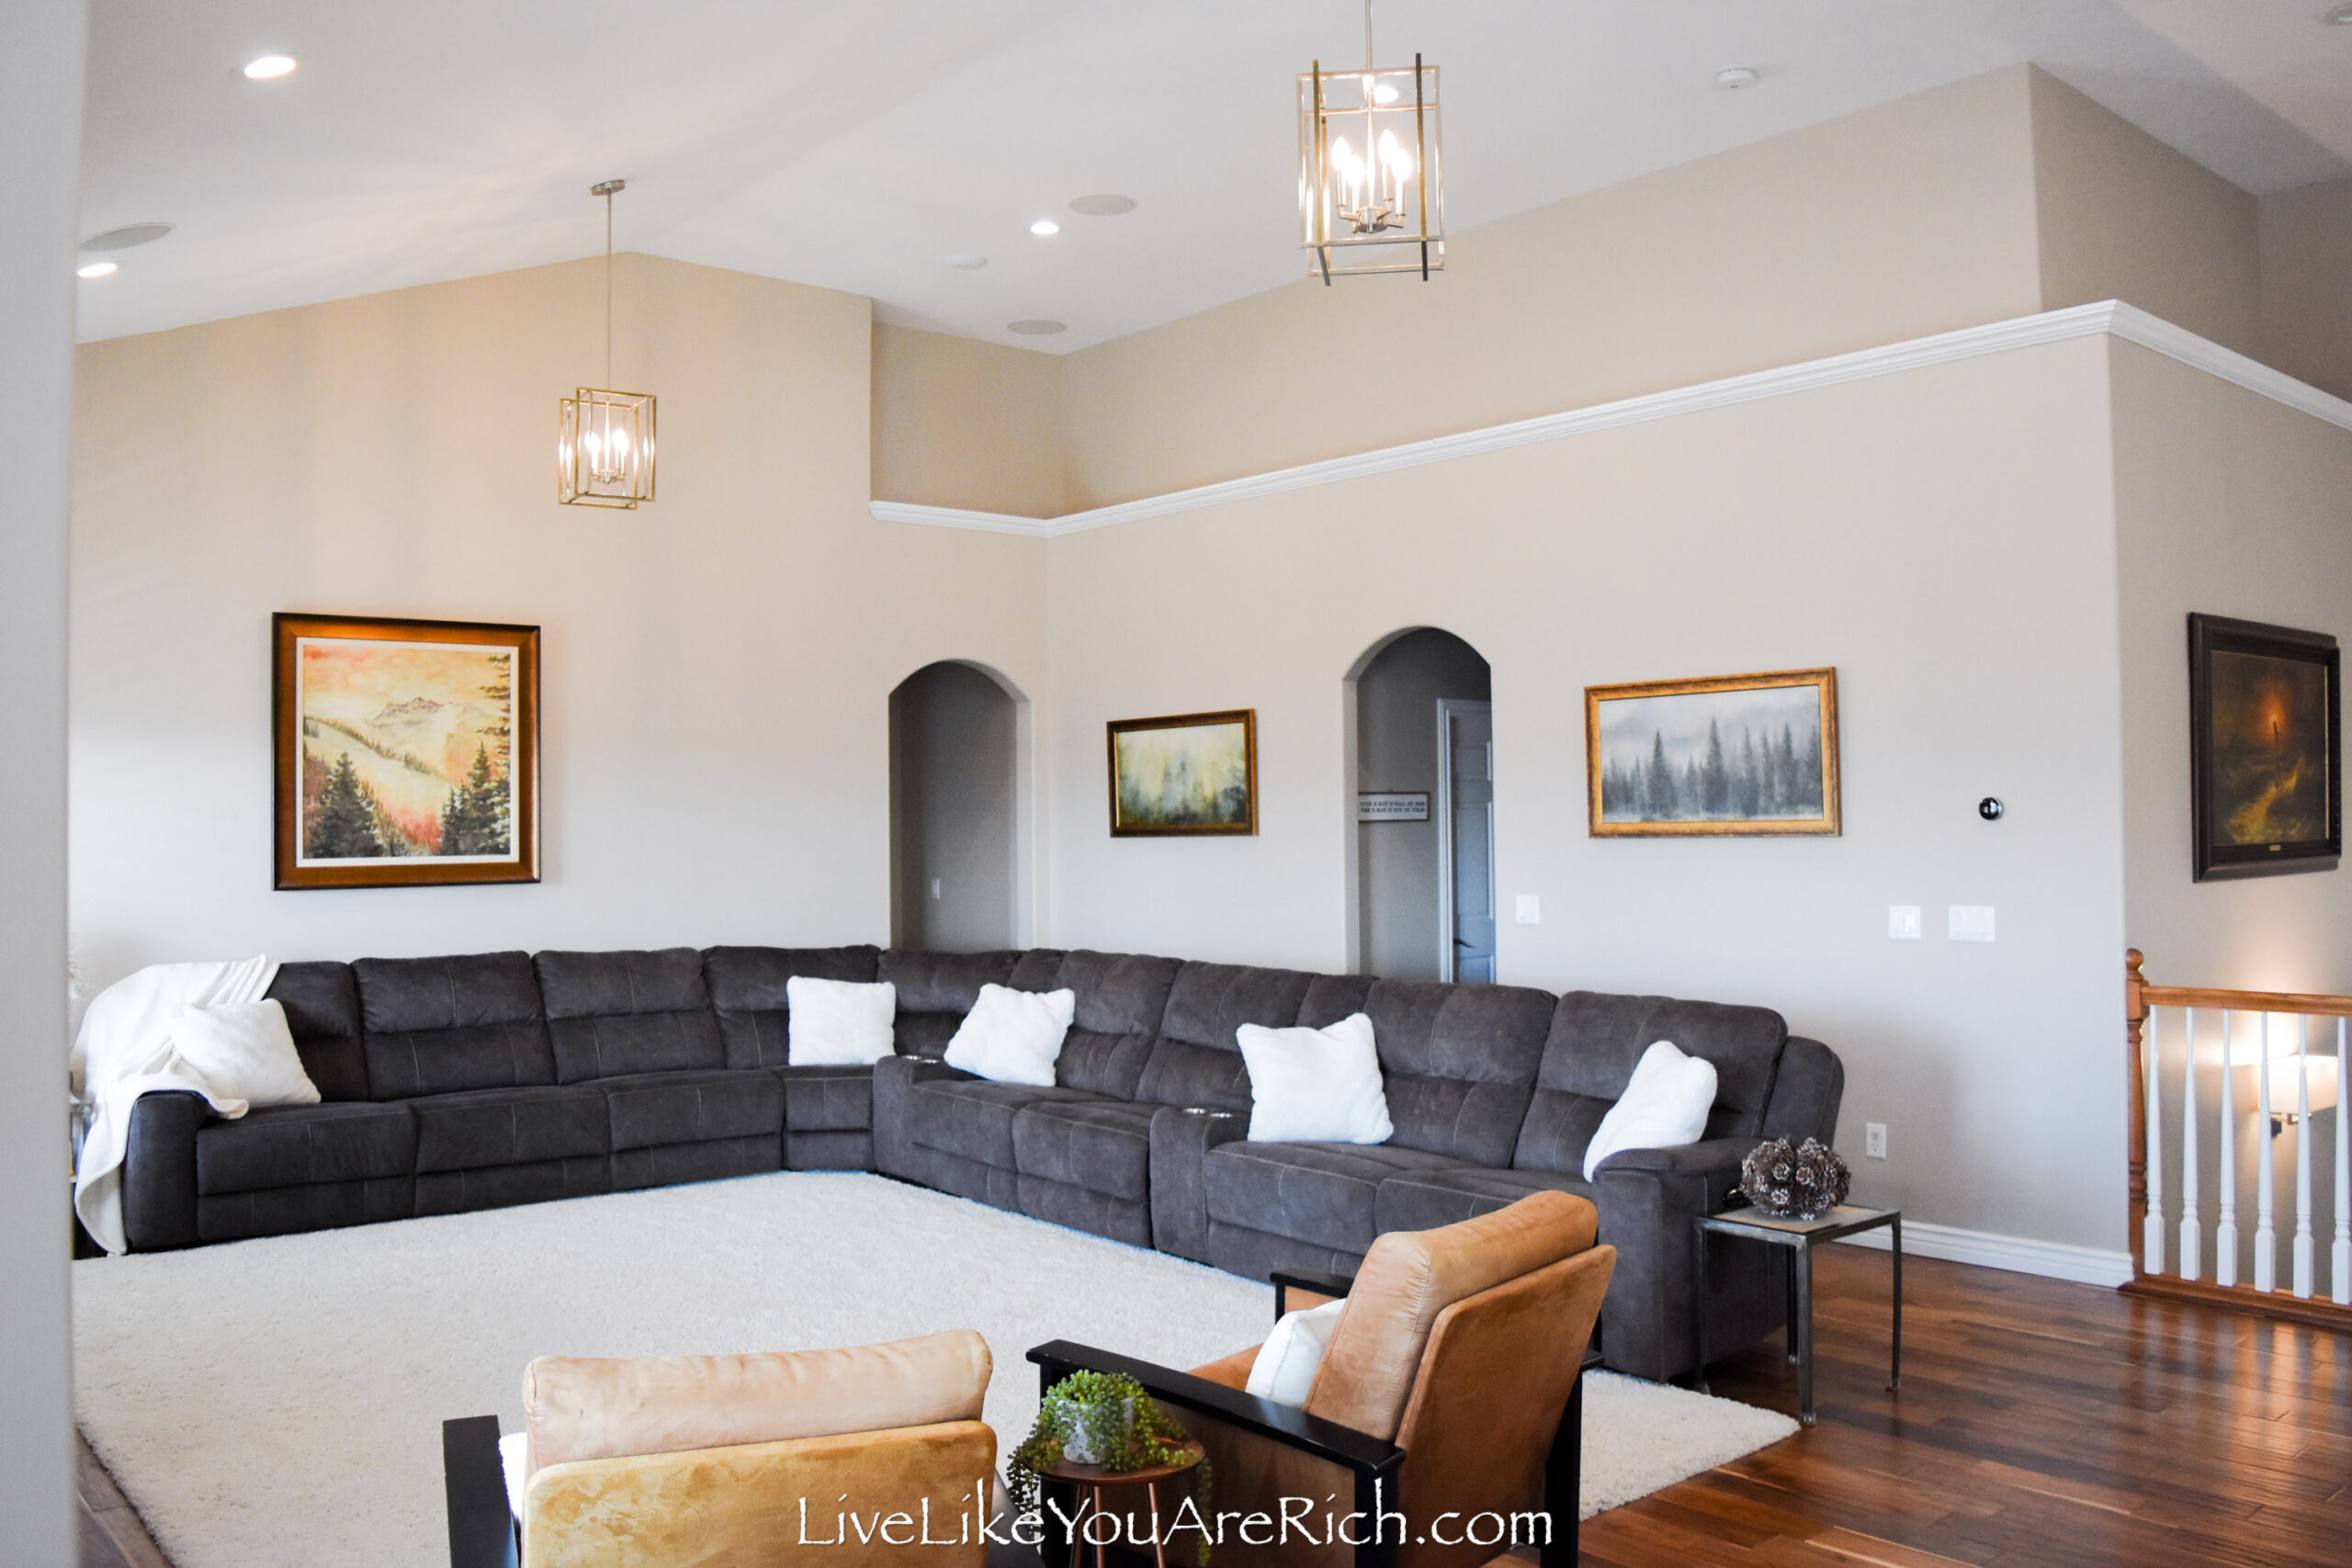
Another item that I absolutely love in our living room is our couch.
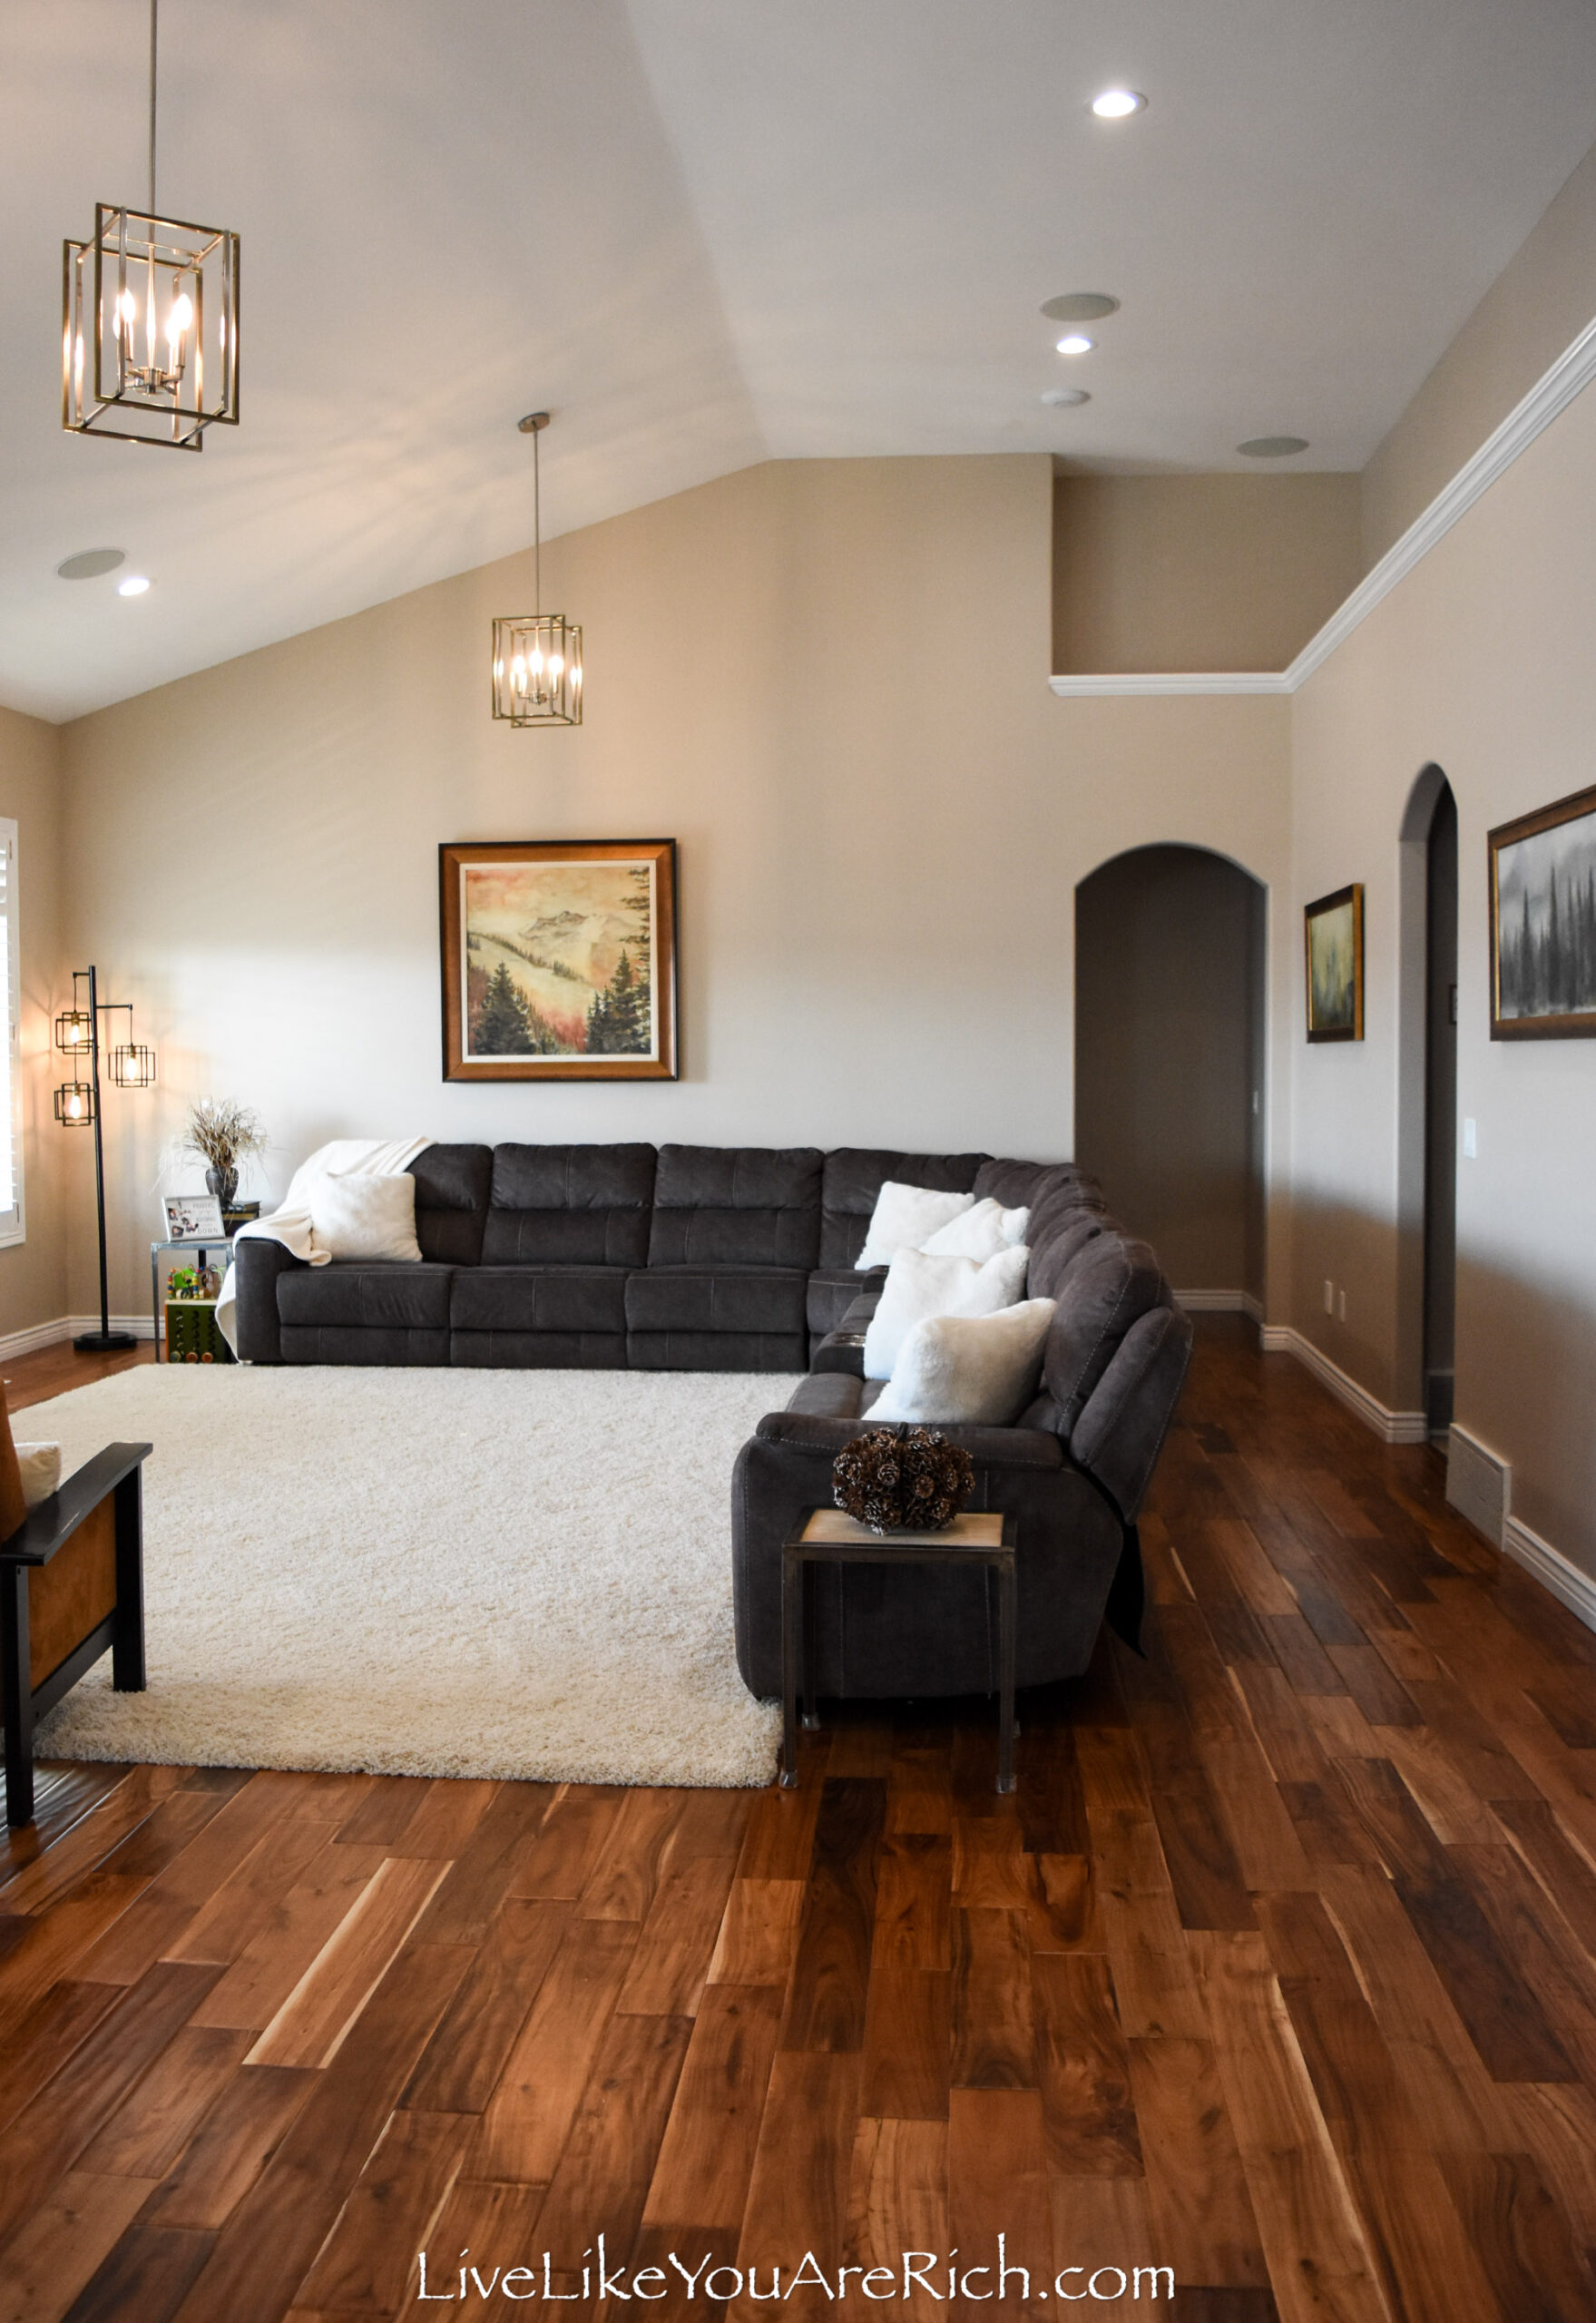
While it may not be “on trend”, it is incredibly comfortable and functional which is what we wanted in our space.
Shane and I bought the couch from RC Wiley four years ago and despite daily and rough use from a family of six, it still looks new. I took the photos in this post just yesterday (four years from when we bought it).
We custom-ordered the couch plus additional pieces to make the couch fit the space just the way we wanted. We ended up with 8 seats and two consoles. 5 seats recline and have powered head tilt rests. It cost $4,200.
I love that I can clean the upholstery on this couch well at least once a month with our upholstery cleaner.
Because we went with an easy-to-clean type of polyester upholstery, despite it being 4 years old and daily used, it still looks new.
We got the two copper-colored sitting chairs used on our local classifieds for $40.00 each.
They are extremely stable, and comfortable. The color brings out the other copper elements in the room. The two pillows were bought at a discount sale for $5.00 each and the copper table in between them was $25.00 found at a local boutique.
We bought the rug from Amazon (Tip- I have found though that Walmart is an even better place to buy large Safavieh rugs in case you have to return them—they don’t fine you for the return. All you have to do is just take them to a local store).
I have had multiple Safavieh rugs and I love them all.
We wanted something to fit the size of the sectional and our space and my four kids wanted something comfy to play on. A rug should go under the front feet of your furniture in a room. In order to make this happen, we bought the ivory Safavieh Milan shag rug in 11’x16′ for $625.00 on sale. The kids LOVE this rug and sit and roll and lie on it often.
I was hesitant to buy it in ivory but I needed a light neutral color for the space and although it is a shade darker now that it is a few years old, I still like the light airy feel the color of it gives the room.
The kids have dropped so many things on it and despite its being white, it cleans up pretty well. I use either our carpet cleaner or our upholstery cleaner. Tip- we have a few carpet/industrial fans that we put on it and blow under it each time I carpet clean it to prevent water from ruining our wood or the rug from molding.
The Milan shag is one of Safavieh’s premium rugs so drying takes time; if you don’t run air over and underneath it and water gets trapped the moisture can mold.
We put a rug pad underneath it for additional comfort and to protect the wood floors from the bottom of the rug scratching/wearing the finish. I purchased 8×10 rug pads on sale at Downeast for $10 each so I bought a bunch of them (knowing this was a crazy-good deal). I’ve used each one and cut them to the size of the rug I have. I used 1 1/2 rug pads for this rug.
I purchased the two side tables from someone on our local classifieds for $30.00 ($15.00 each). I really like these industrial tables with real wood tops. They are so simple and work really well in the space.
I purchased the pillows on sale at Costco for $10.00 each. The throw blanket was $7.00. They match the rug and are super comfortable.
The stand-up lamp, a recent addition, was $99.00 purchased at Costco.
The other decor items were about $30.00 in total.
So taking the room from this:

To this:
Cost just $13,342.00
$13,342 is really reasonable considering the upgrades the room got.
The couch, seats, carpet, and pillows are so comfortable and inviting.
We have had so much fun visiting with family and friends in this room while the kids play on the rug with toys.
As a “wanna-be interior designer”, I know that you should have a coffee table next to a couch. I have actually rarely seen a living room without a coffee table in it.
However, there are always times when interior design rules can be broken. In my opinion, this is one of those times and I’ll explain why…
With the room being so large, having a large couch with so many recliners, and knowing that my four young kids just want to roll, cartwheel, etc. on the rug, we decided against having a coffee table in the room.
Plus, coffee tables are supposed to supply the person seated with a place to put a drink. So, with us having side tables and couch consoles near each seat, I decided breaking this rule was just fine.
Maybe in the future when my kids are not so rambunctious, we will add a large coffee table to the room, but for now, this is how we have it set up and we really like its functionality.
So, the moral to our living room decor story is to decorate for you and your family’s needs and wants and not necessarily what is or is not ‘on-trend’… at least that is what we decided to do and we have been very happy with that decision.


For other ‘rich living tips’ please subscribe, like me on Facebook, and follow me on Pinterest and Instagram.