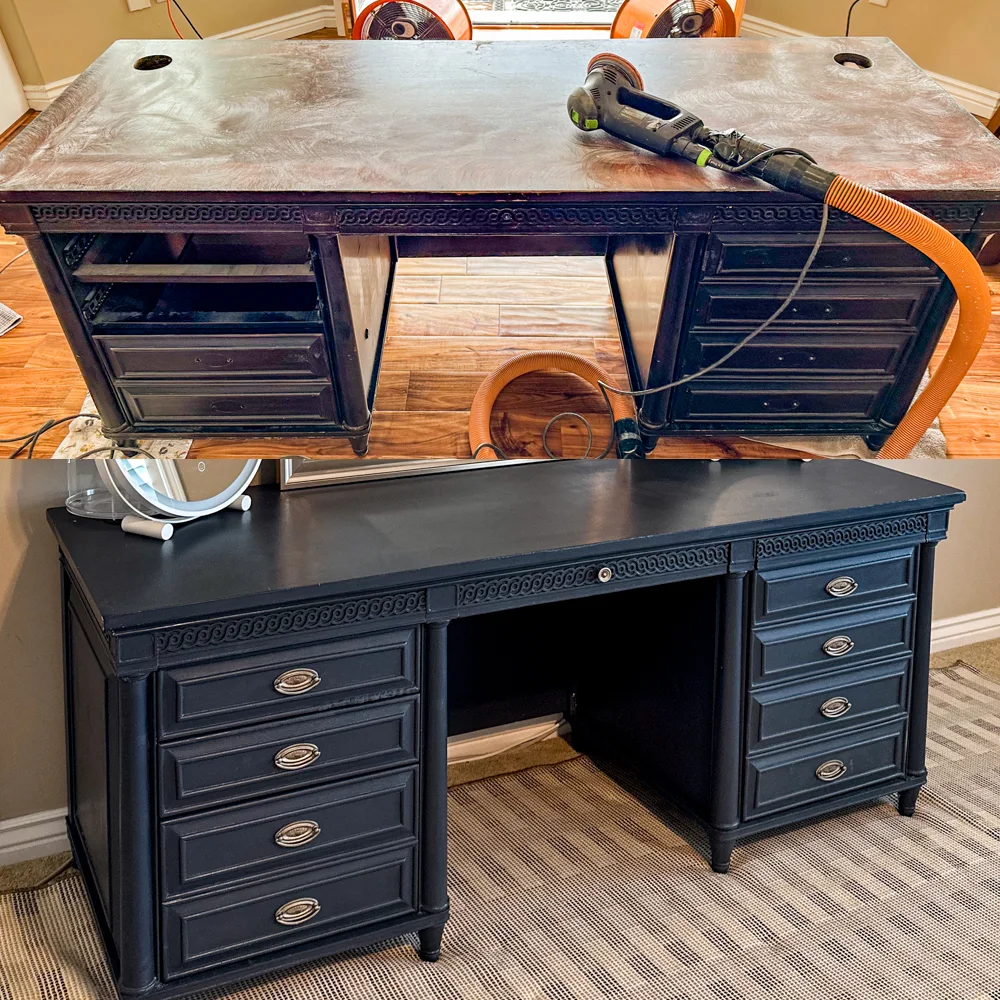
DIY Desk to Vanity Transformation.
We used to have a nursery in our room, but now that our son is older, we no longer have the nursery stuff in it.

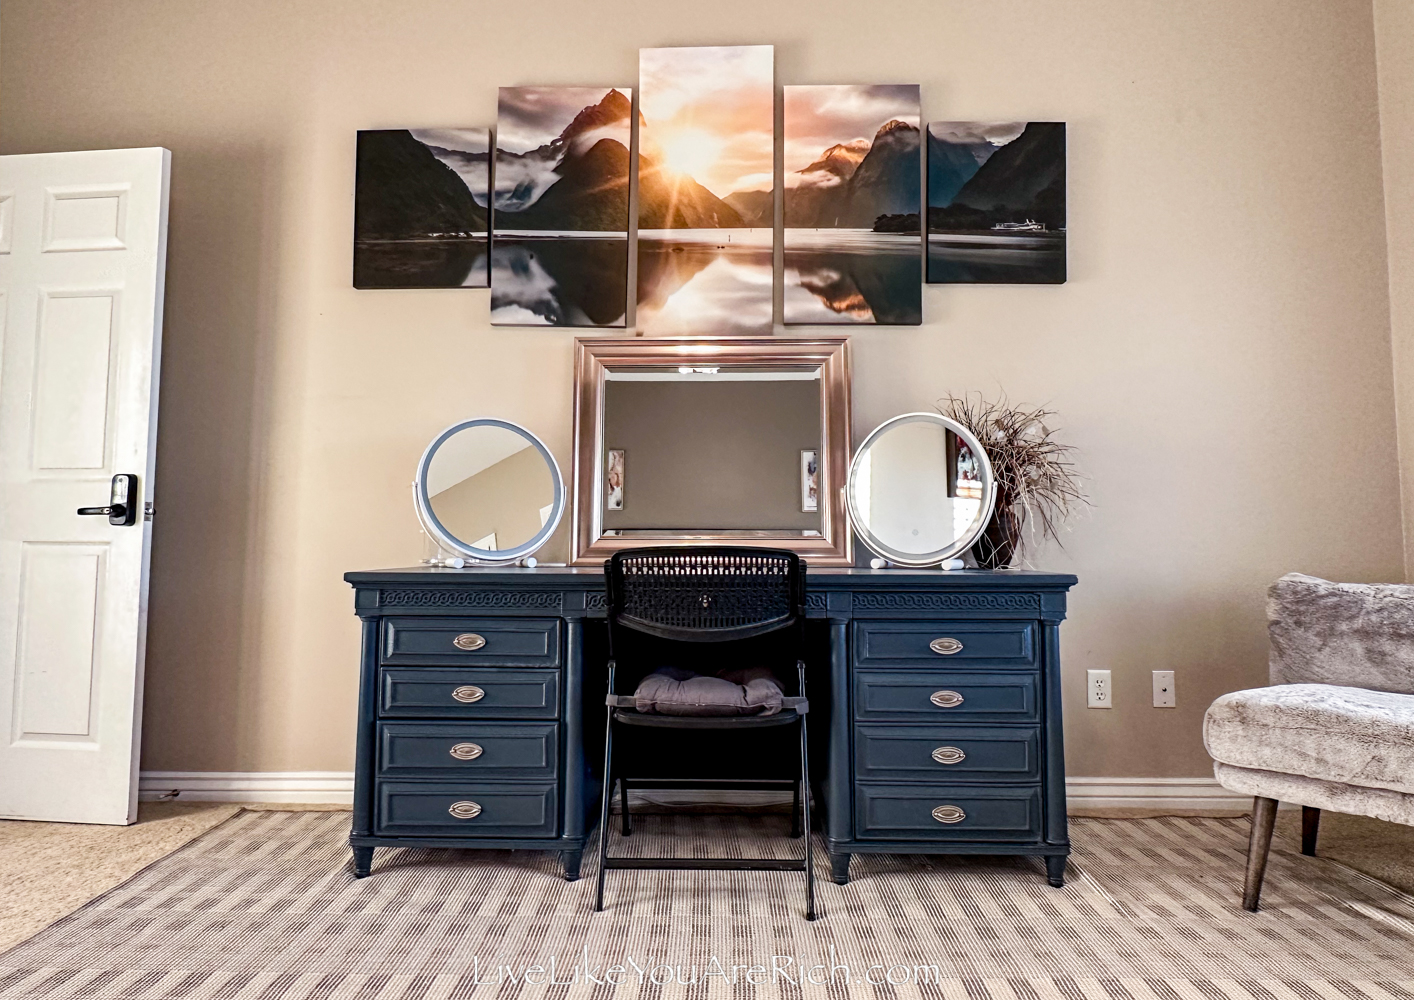
I thought the space would be best filled with a vanity.
I’ve never owned a vanity and I have always stood up while getting ready.
I thought it may be nice to sit while putting makeup on, doing my hair, etc. and as it’s turned out, once I turned this desk
into a functional vanity, I found that I do like to sit while getting ready.
I also do my nails on this vanity.
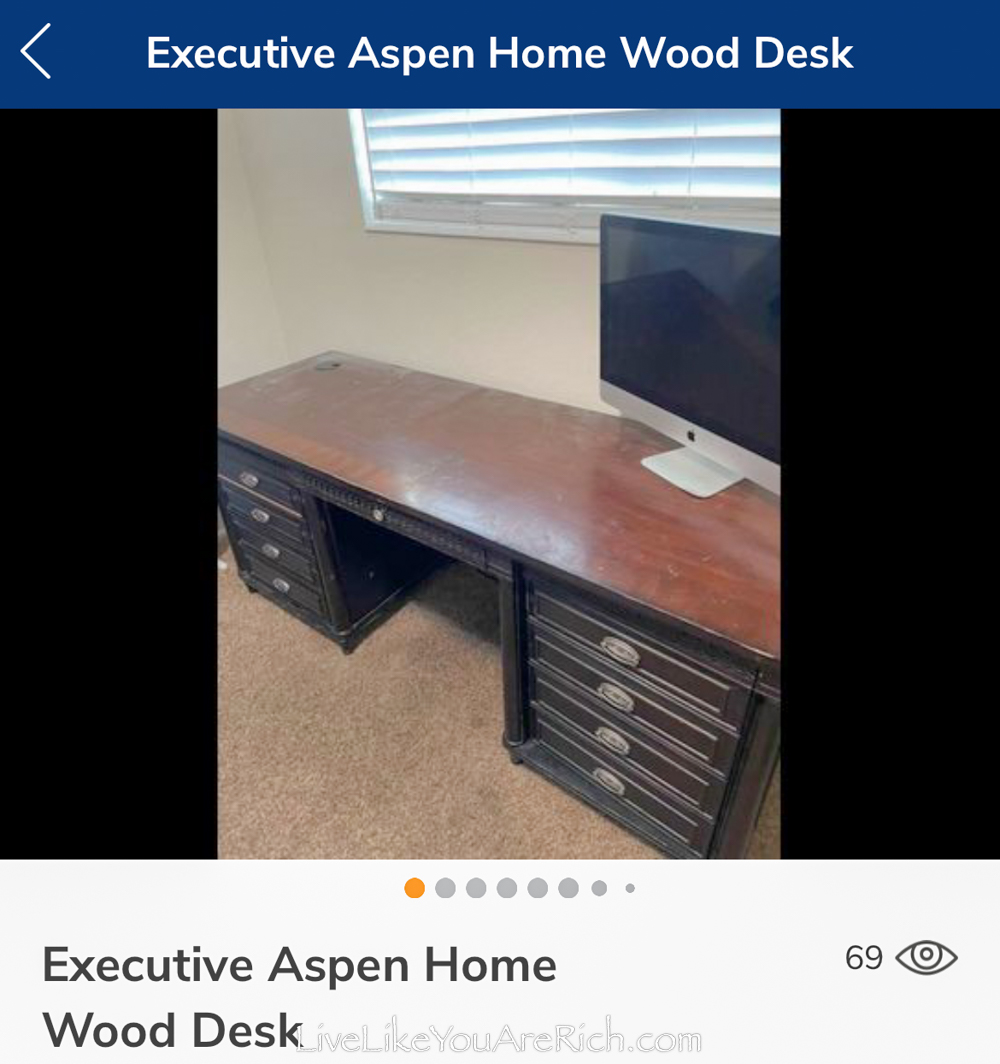
Here’s how I transformed this ugly $50.00 classified desk into a functional custom vanity.
Supplies Needed for this Desk to Vanity Transformation
Desk- Look for a high-quality wood desk with drawers that will work for a vanity.
Hand sander (or you can just use sandpaper and sanding blocks if you don’t have one). My husband had this festool handsander when we got married and I’ve loved using it.
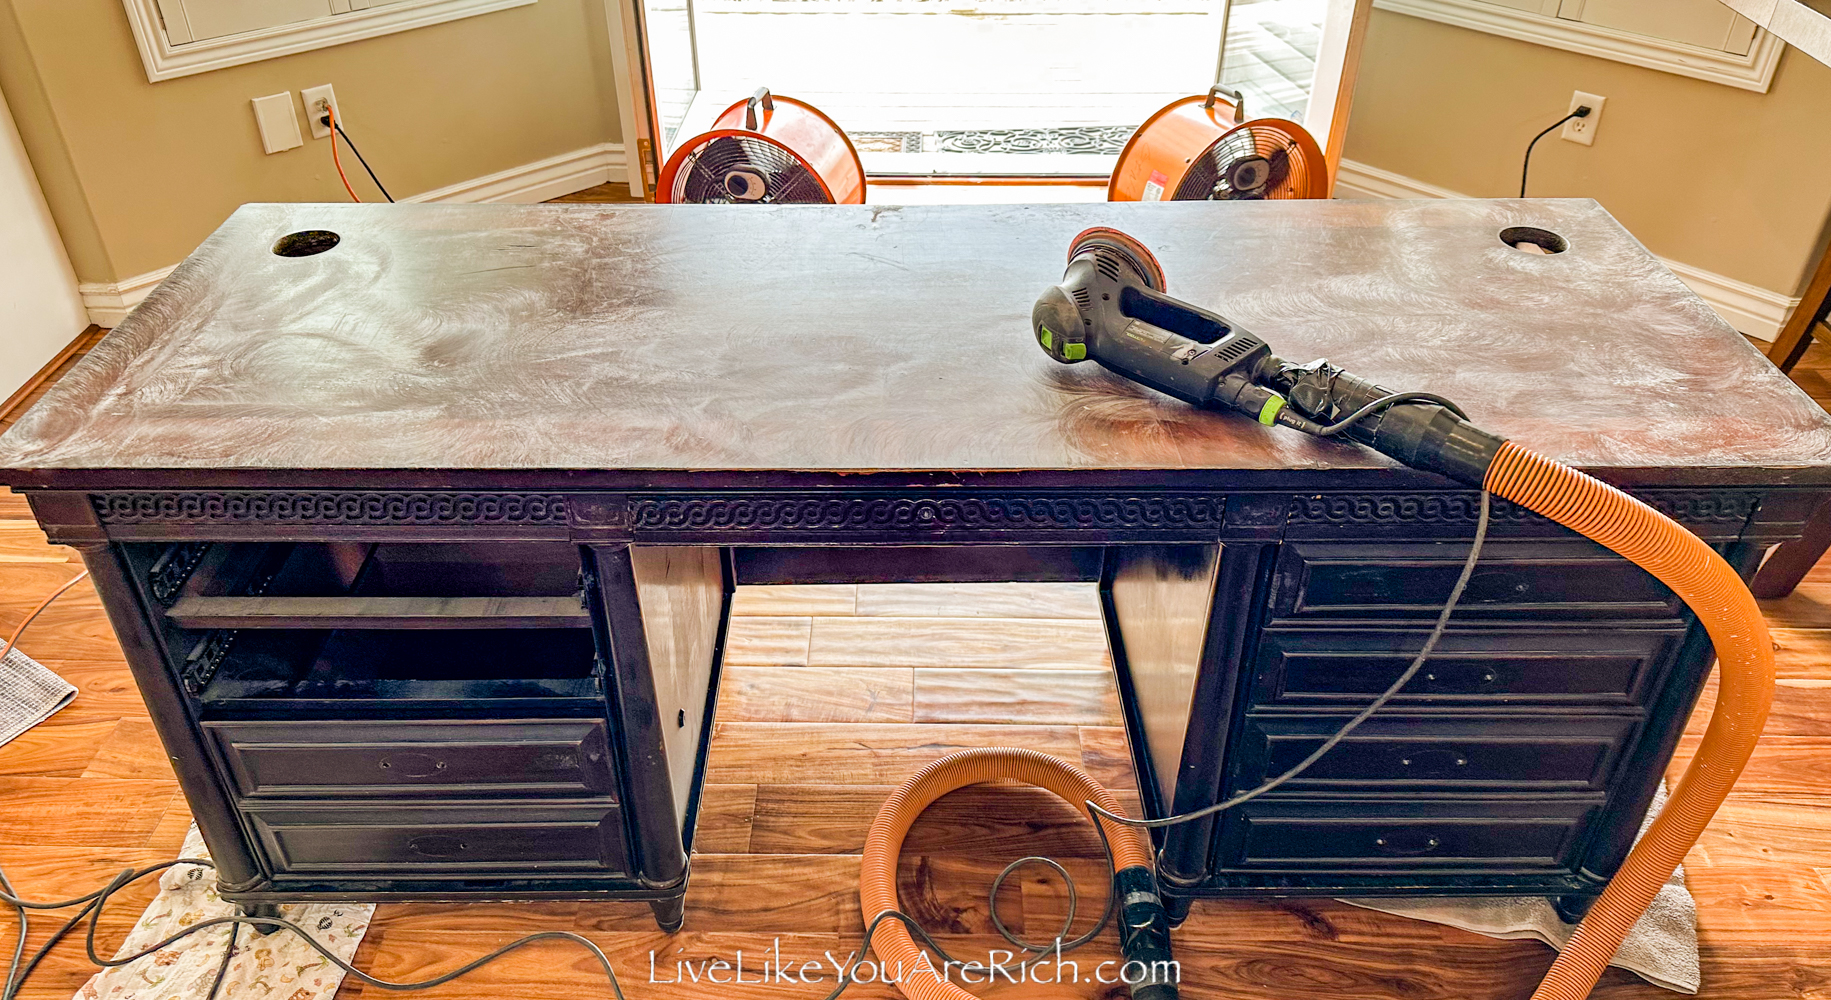
Shop Vac– If you use a hand sander inside, it’s almost necessary to have a shop vac hooked up to it so that you do not get dust in your home. A few fans pushing air outside is also a good thing to use in conjunction with the shop vac. If your hand sander does not have this option (to hook a shop vac up to it) do not sand inside—trust me on this.
Sandpaper for the hand sander you’ll want an 80, 120, and 220
Fans for ventilation (optional but recommended)
Zibra round brush—if you have rounded areas to paint like I my vanity does.
sanding blocks 120 for scuff sanding before adding primer and 220 in between coats
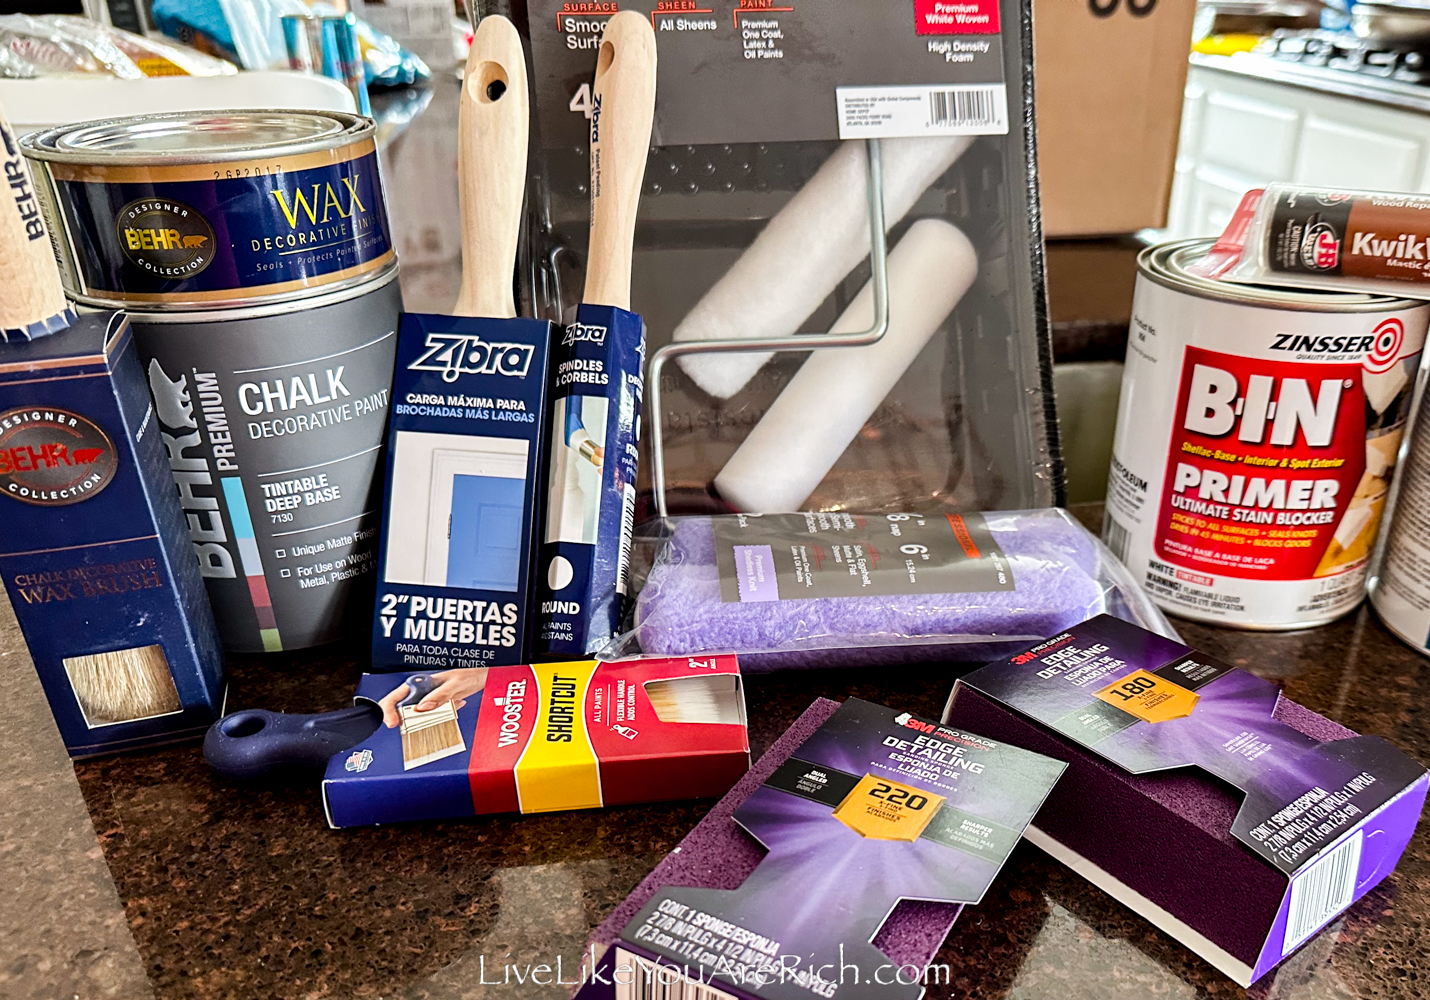
6″ long 3/8 nap roller pad
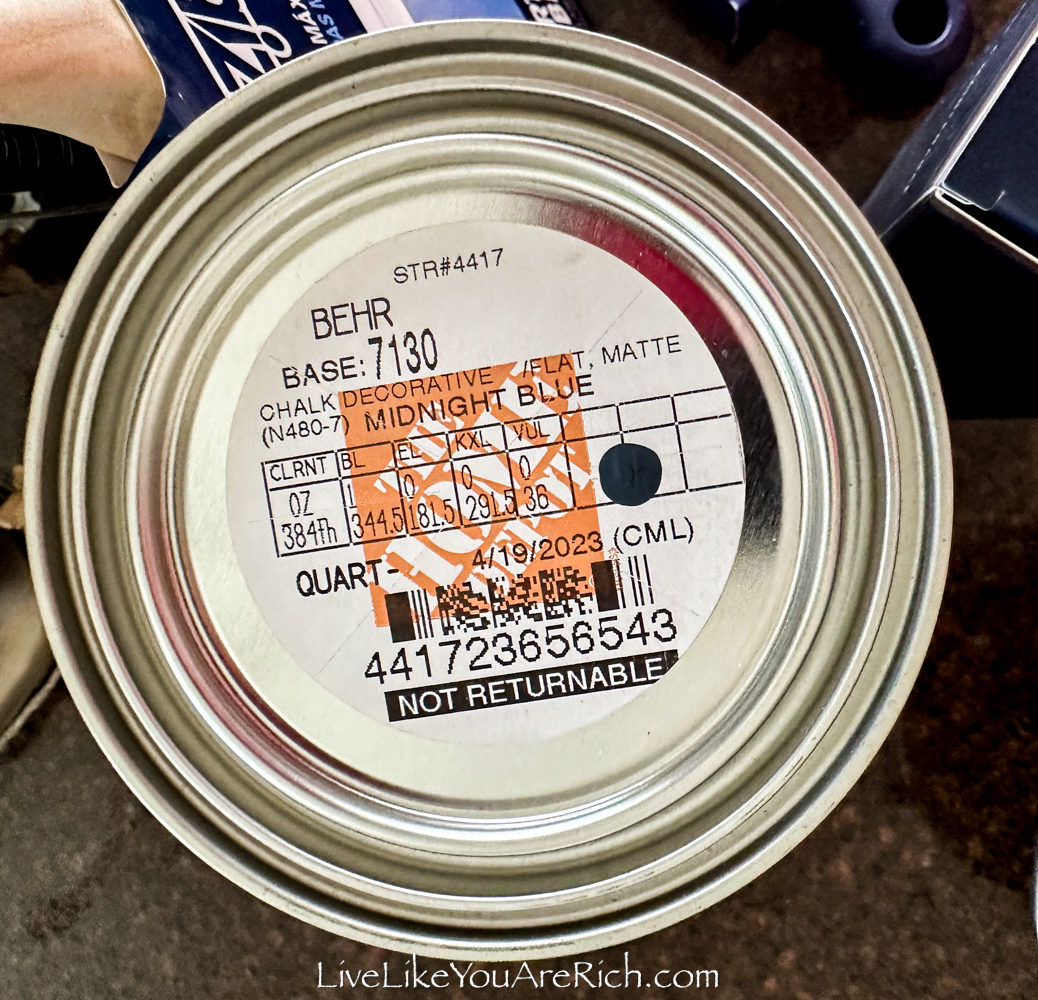
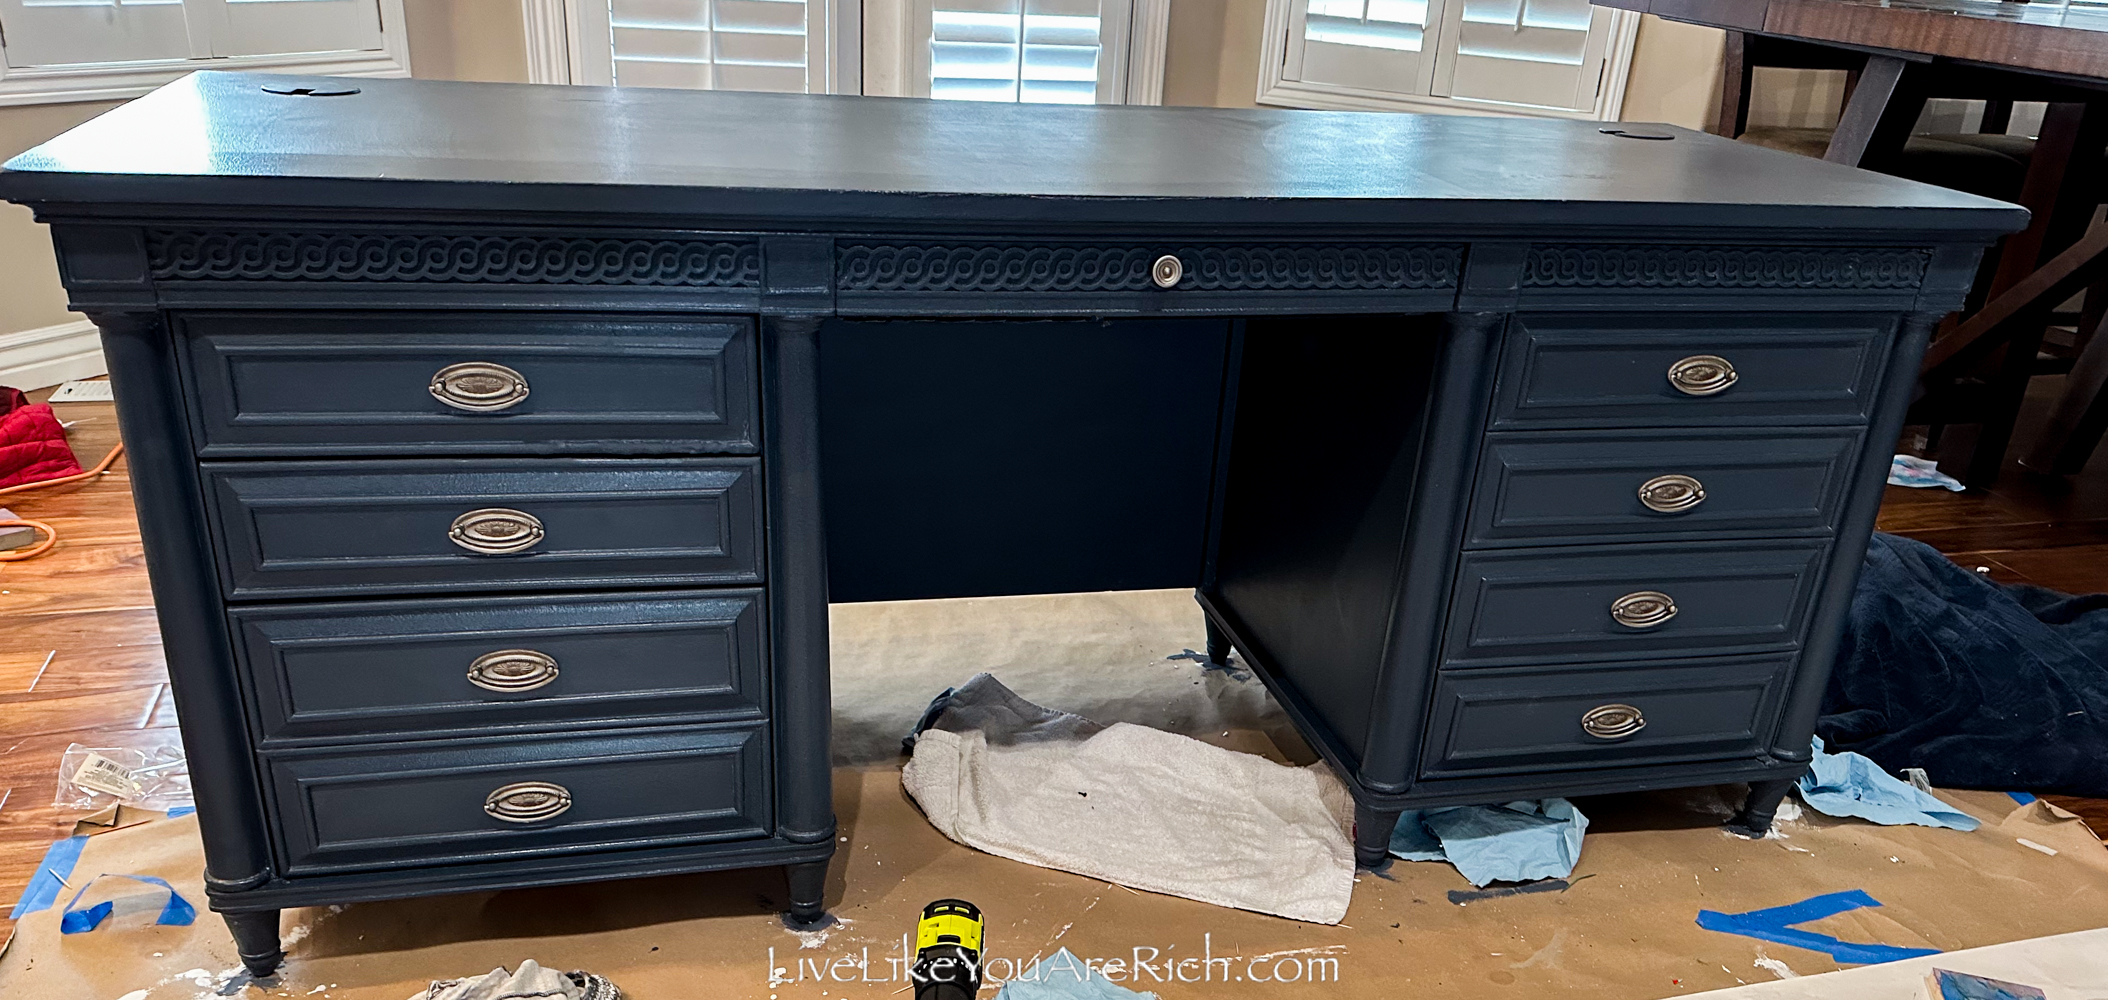
Behr chalk paint with a dark tintable base of Midnight blue
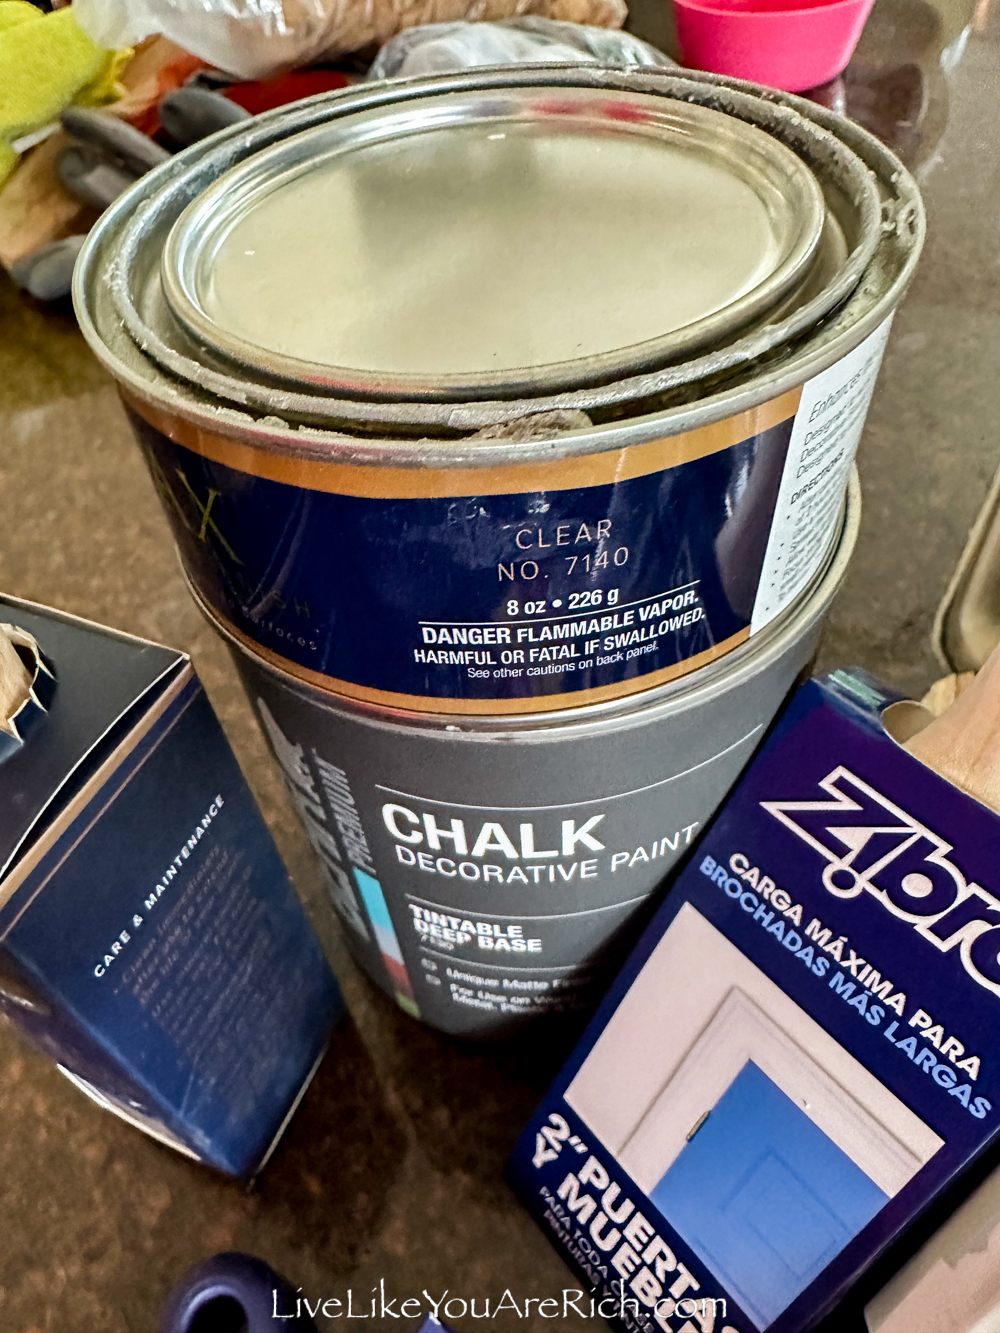
Wax decorative finish Behr clear
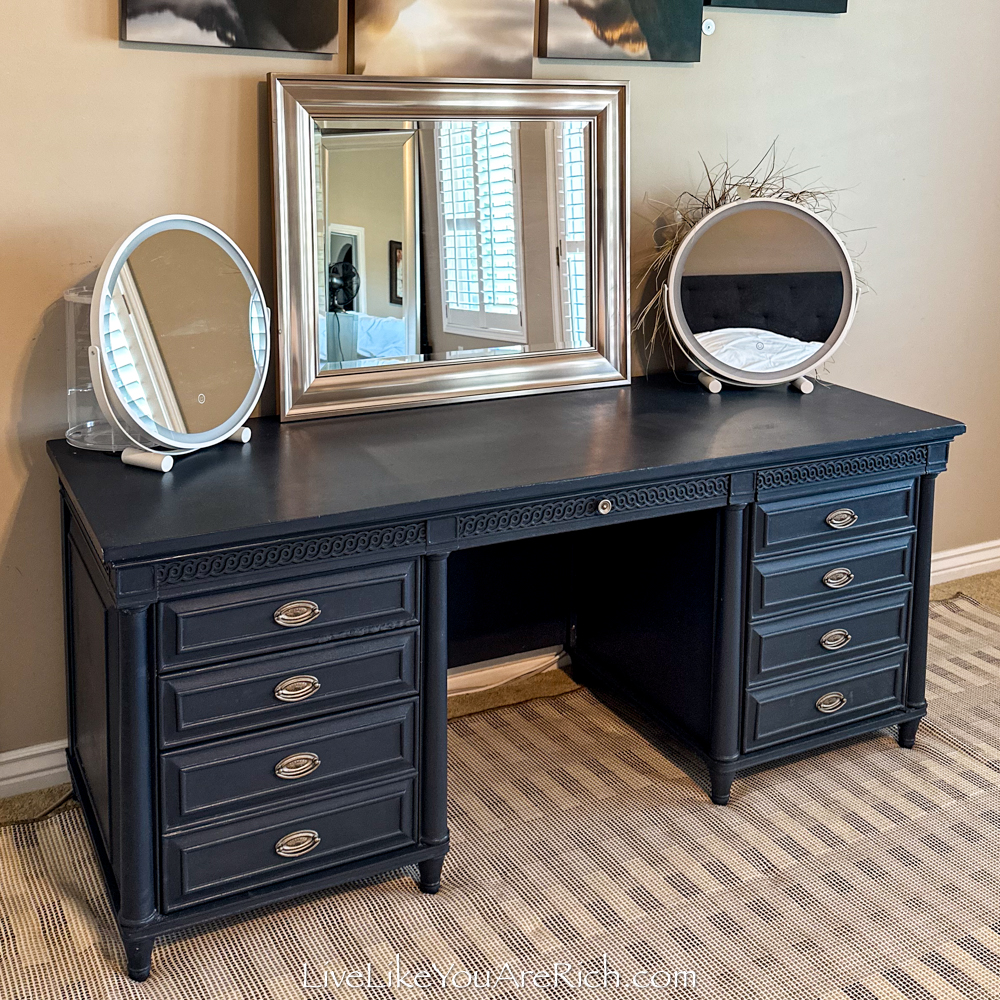
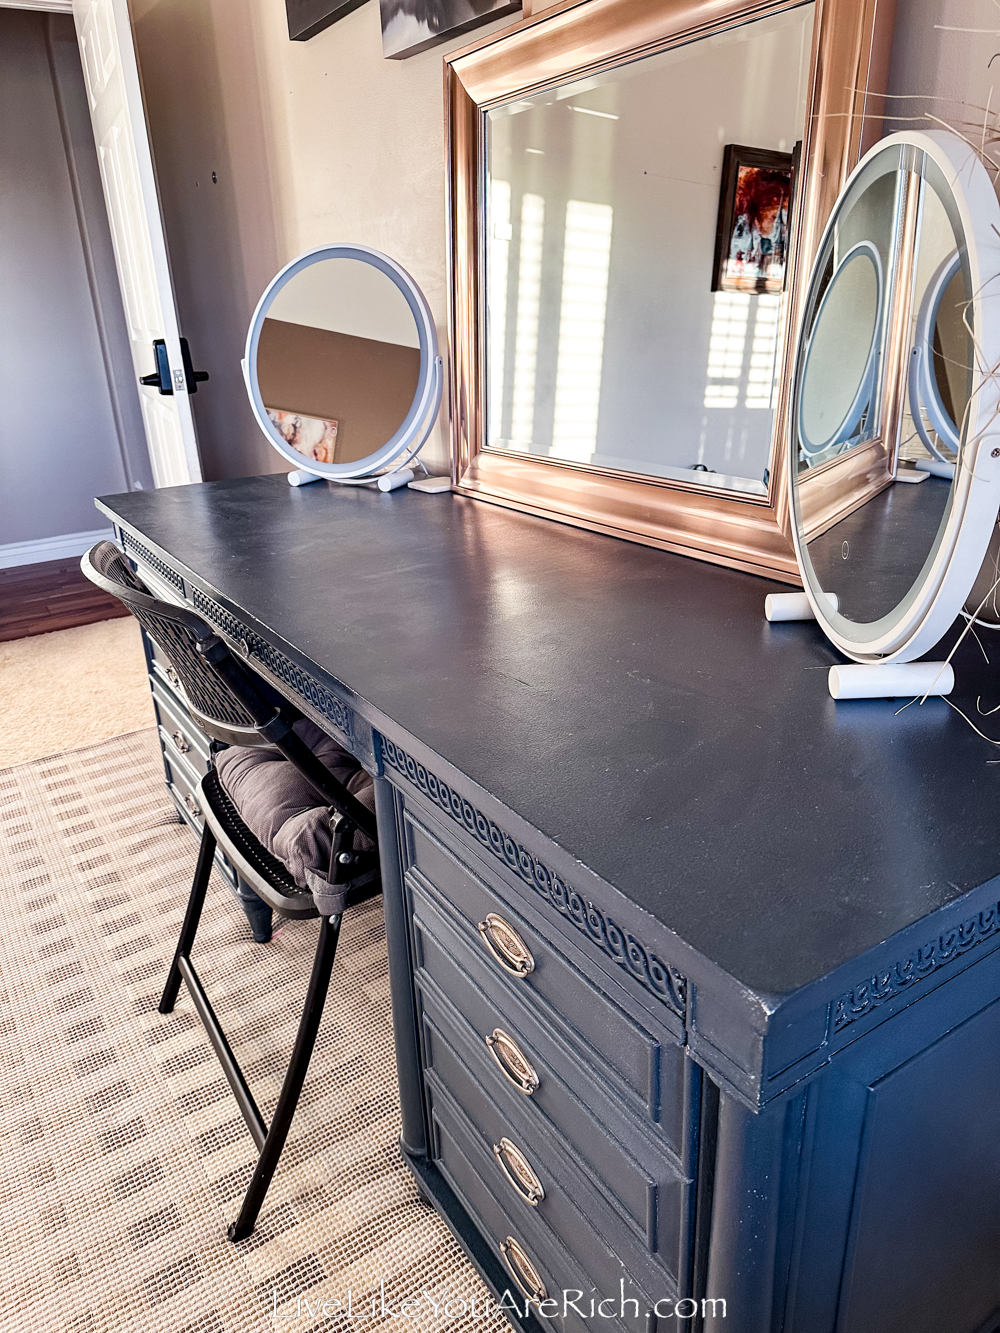
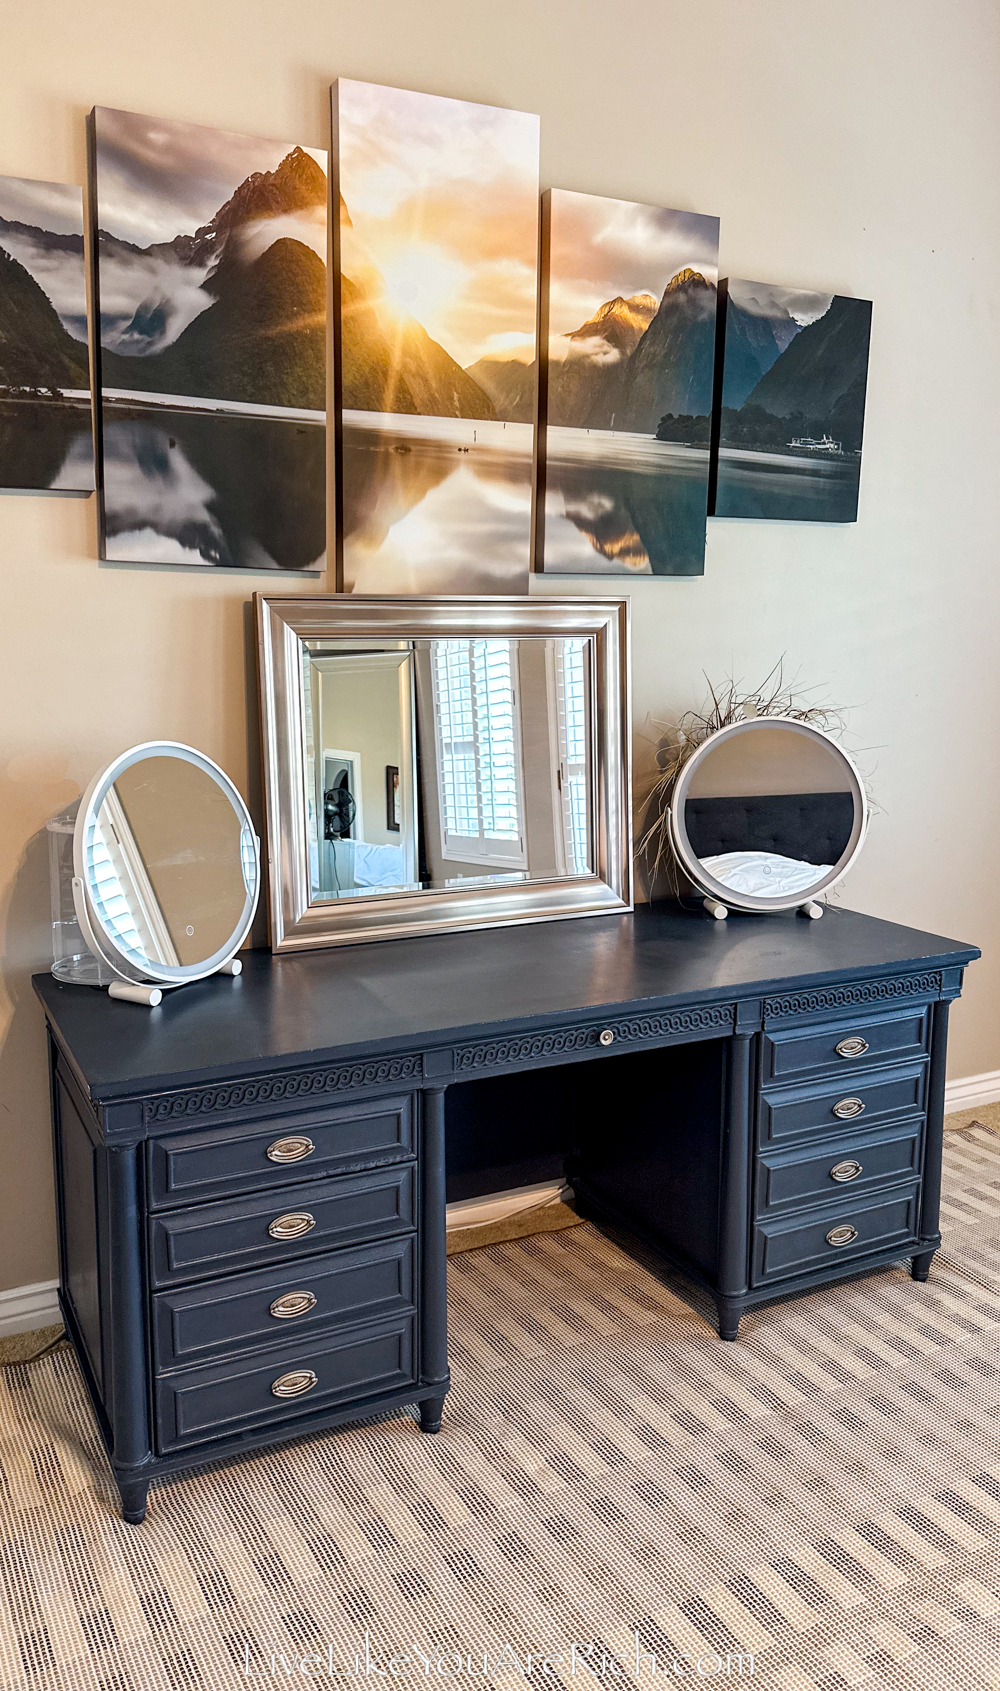
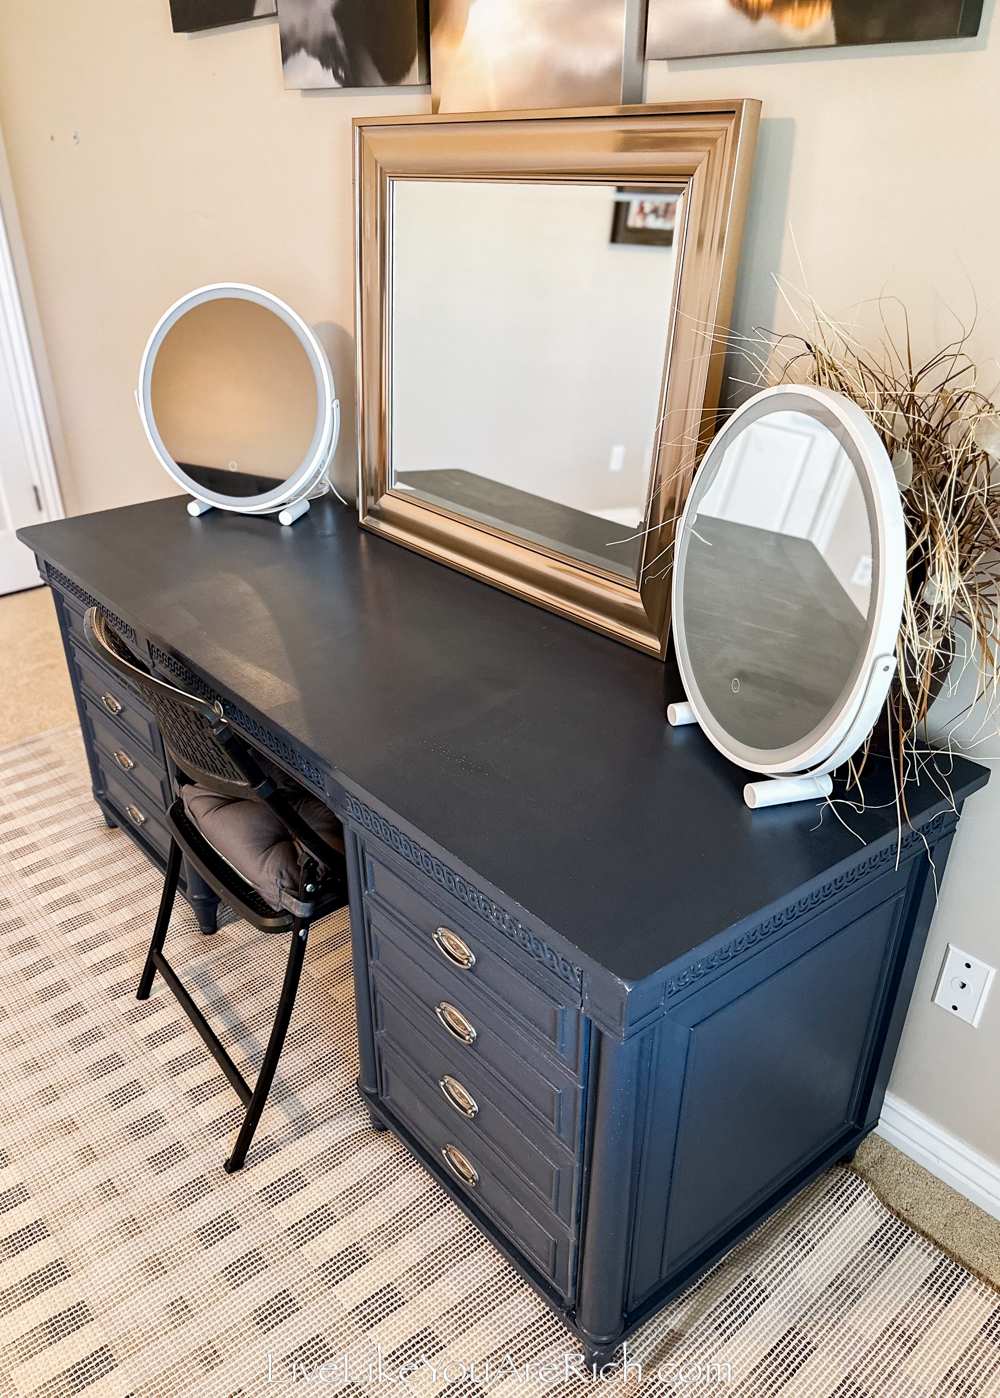
mirror large rectangular (had)
circular LED mirrors were $50 a piece and were purchased for my bathroom.
shop cloths for buffing wax out
drop cloth, paint sticks, etc.
screwdriver to remove the hardware
TSP cleaner
baking soda
pan to soak the hardware
Dawn dish detergent
Steps for this Desk to Vanity Transformation
Watch the video and/or read on. Normally I narrate my videos but I have a terrible flu/cold and my voice is raspy so this video highlights the steps I took in writing.
1-Find a desk/vanity.
You’ll want to look for a desk made of wood. This is a very, very heavy desk as it is made from solid wood. It also has great drawers and hardware. I searched for a few weeks on classified ads to find something of high quality at a low price point with drawers that would work for makeup, hair dryers, etc.
This desk has three shallow drawers for makeup, and one large drawer for nail and hair supplies, lotions, hairspray, etc.
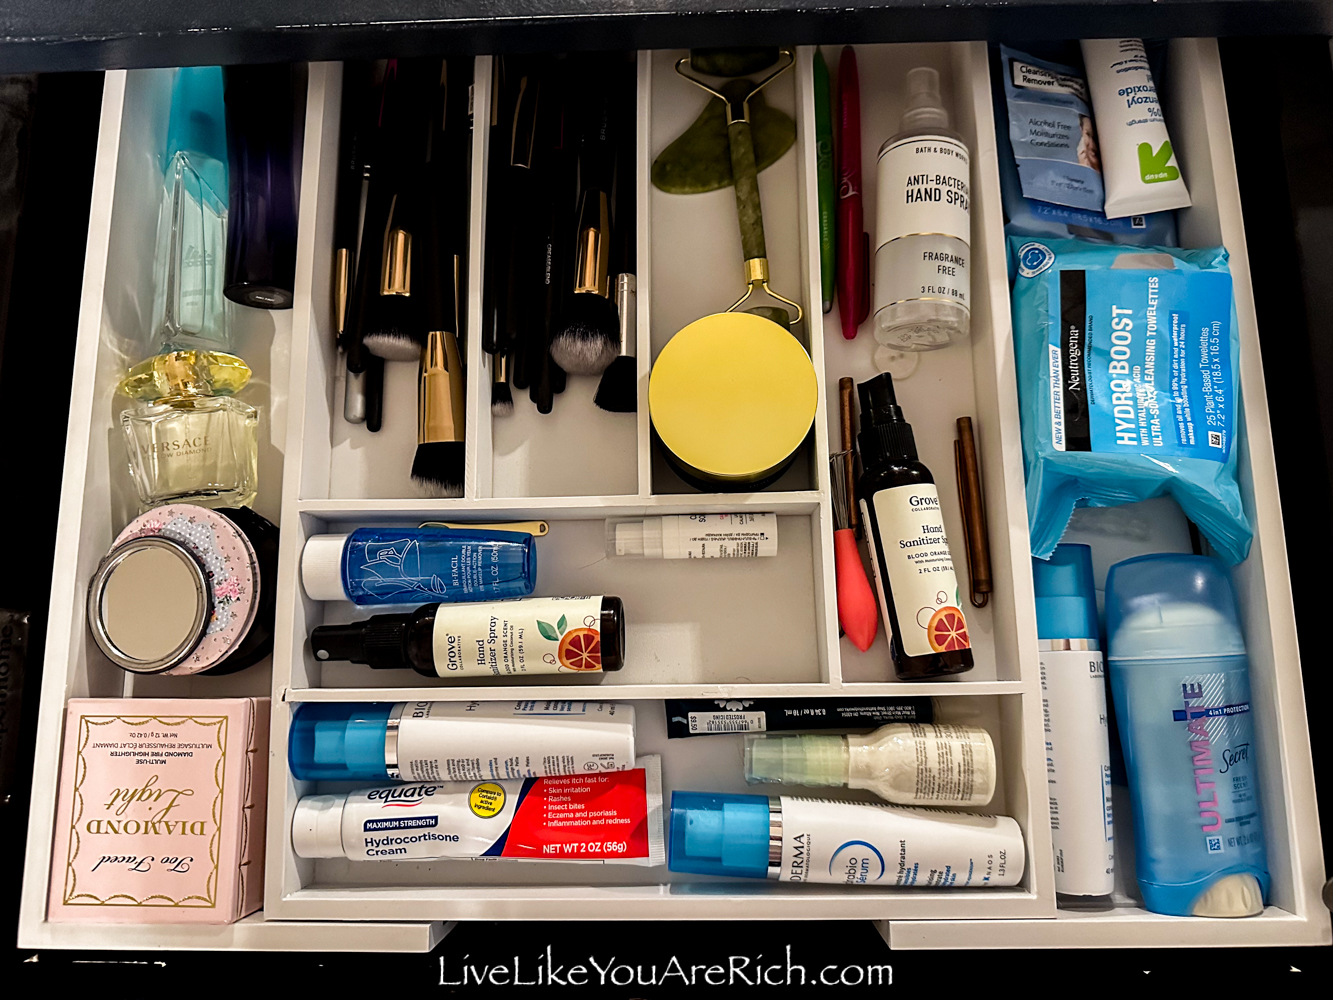
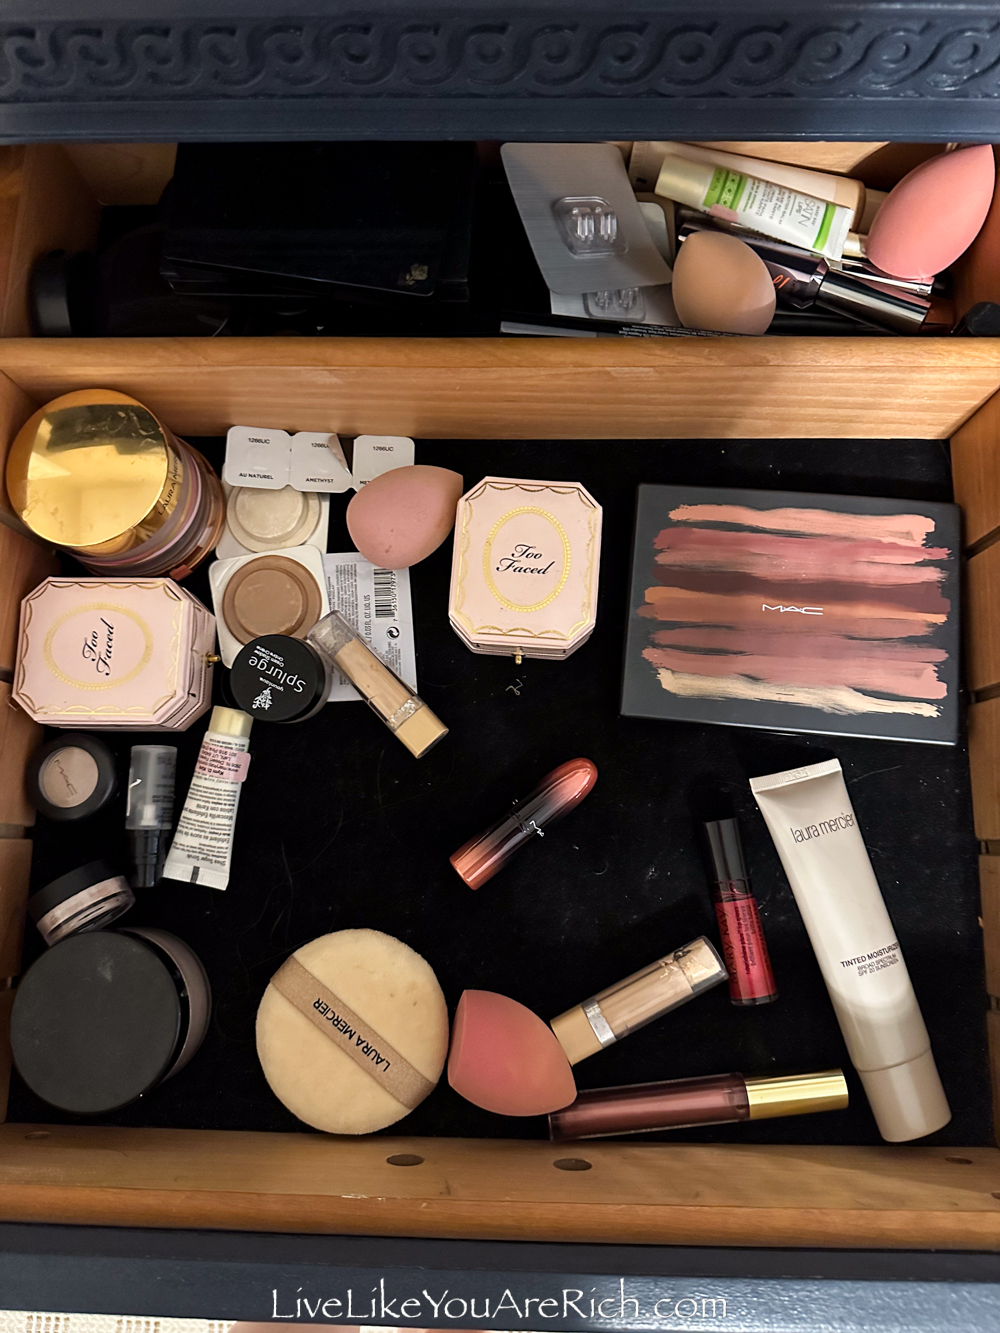
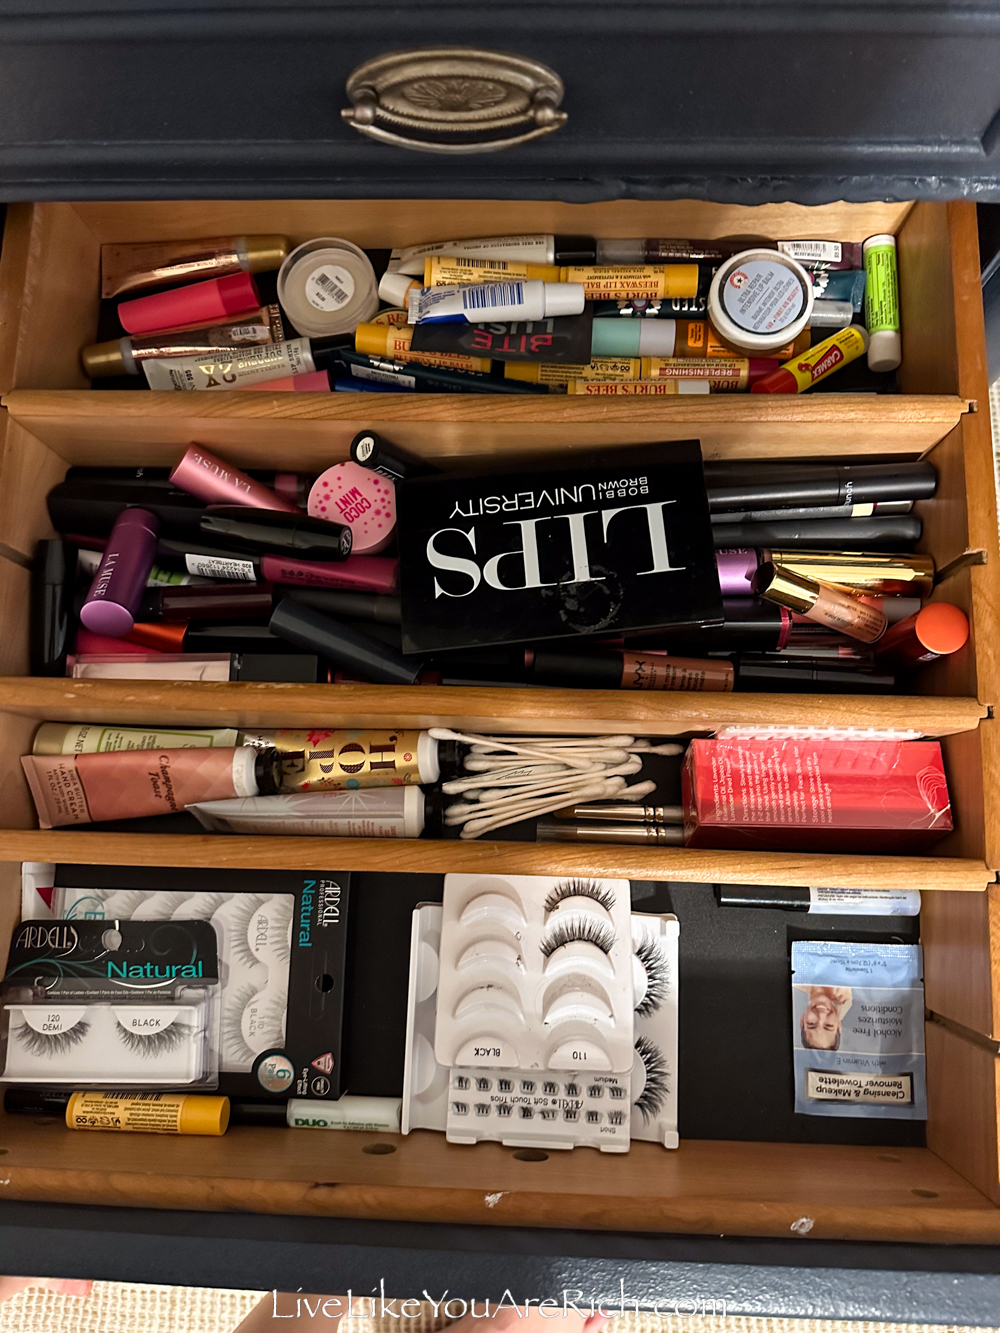
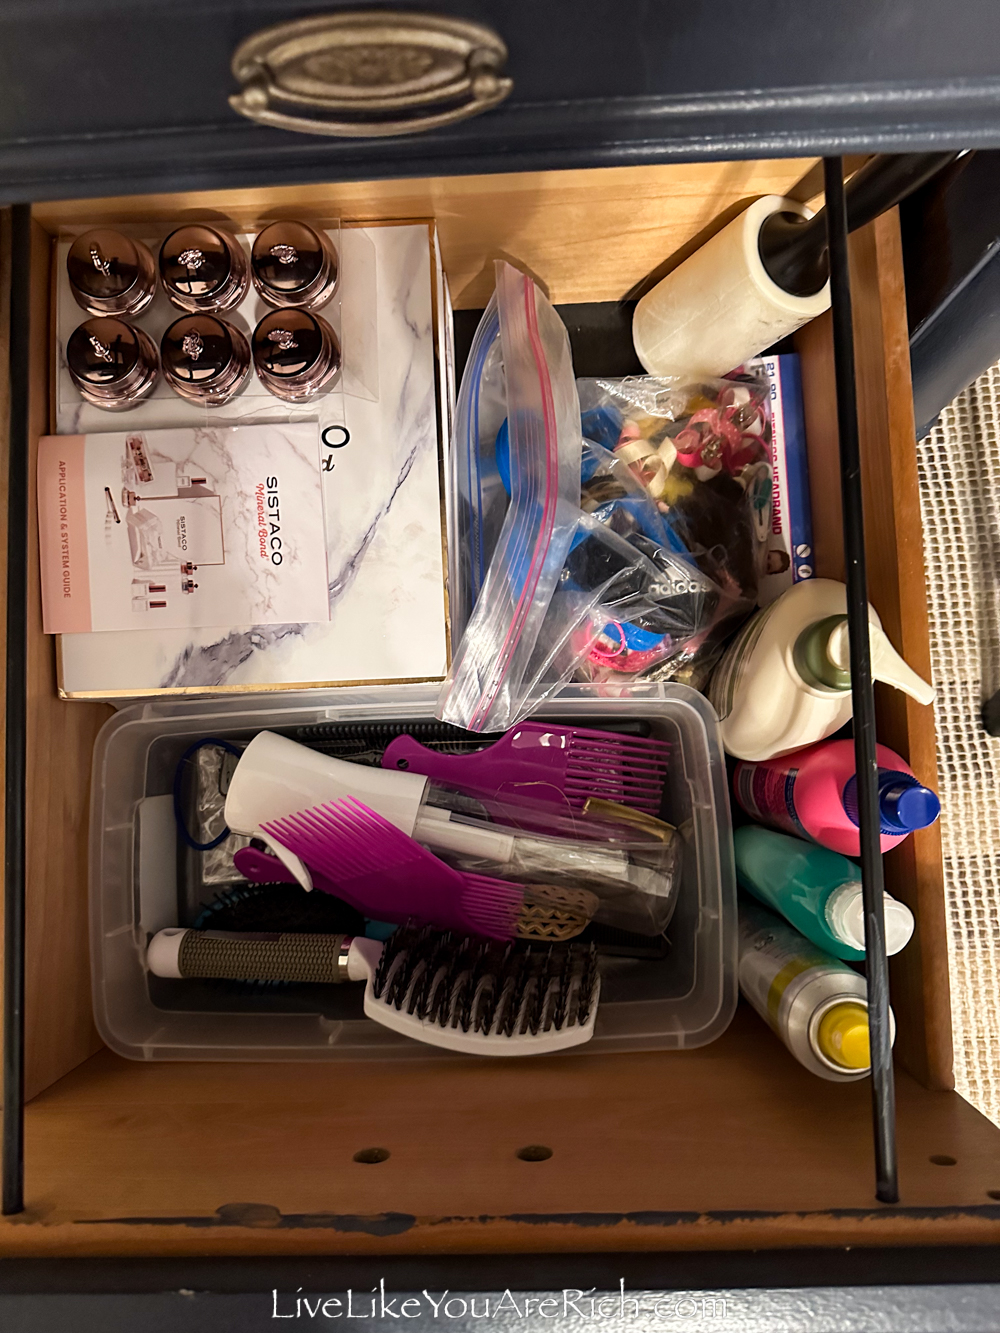
The other side of the vanity has a pull-out drawer in which I can put my electrical strip, and basket for my hair dryer, curling iron, flat iron, etc.

It holds everything so well, I don’t have to leave anything out on top.
So #1 is to look for a high-quality desk/vanity with great drawers and is made of wood.
Don’t try to refinish something made from flimsy materials that will not stand the test of time. Avoid laminate, composite, or vinyl.
Next, determine the type of paint you want to use.
I did a lot of research on chalk paint as I had never used chalk paint and I wanted to challenge myself and try something new.
I also chose chalk paint for this vanity because vanities get a lot of wear and tear on their surfaces. In my research, I found that wax topcoats are fairly forgiving because you can just give the furniture another coat of wax in a year or two with little to no prep and have it look new—I’ve read this is true, time will tell if it is.
I also liked the matte-looking finish that the wax gives the furniture.
As it turns out, I love it! It turned out really nice… I just wouldn’t recommend chalk and wax for a piece of furniture with a lot of nooks and crannies and a wood appliqué as my vanity has as it was tedious getting the wax in and buffed out of the nooks and crannies.
Other than that, I was happy with the results and I think it should be pretty durable. It’s held up really well the past 6 months.
Also, a few times hot tools have touched the surface and it just seems to seal the wax and not burn it so that’s another plus.
Next, choose the color or colors for your piece.
Although we no longer needed my son’s nursery for this space I still wanted to keep this canvas image of Fiordland National Park Milford Sound in New Zealand.

New Zealand on the whole is one of the most scenic places I’ve been to. I will never forget the beautiful views and especially Milford Sound.
I wanted to leave the artwork, so, I matched the vanity to it and the other blues we have in our master bedroom.

I chose Behr Chalk Midnight Blue with a dark tintable base.
I chose Behr because I had a coupon, I’ve read good things about it, and I didn’t really feel like I needed to spend a lot on high-end chalk paint. I think most chalk paints will do just fine.
Prep. Do not skip the prep. I know its tedious but if you want a long-lasting paint job, take the time to do proper preparation.
I removed the hardware and soaked it in water with baking soda and Dawn dish detergent.
I gave the top pretty thorough sand with 100 grit sandpaper to see where it needed patching.
Next, I used Kwikwood to patch the divits. One of the drawers was missing a piece of molding so I used Kwikwood to form a piece. Had I known that the Kwikwood would dry so fast and so hard I would have taken the time to make the patch look a little better, but you live and learn. If you use Kwikwood just know that it dries very quickly so beware when you use it to work fast wear gloves and eye protection. Also, try to get it really nice looking before it sets as it’s hard to sand large patches of it.
Third, I sanded the top and patches again with 120. I used a Festool hooked to a shop vac to sand the top and sides and flat surfaces and then used sandpaper to sand the groves and rounded areas of the desk.
Fourth, I cleaned off the vanity with some TSP and a microfiber cloth. Then I went back over it with a cloth with just water and let it air dry.
Fifth, I painted it with Bin Zinsser primer.
Six, I gave it a second coat of primer.
Seventh, Once the primer was dry, I lightly sanded the coat of Kilz with about 180 grit to prep it for the paint. I wiped the sanded primer dust off with a microfiber cloth before moving on.
Eighth, I painted it. I rolled and brushed the paint. I rolled the flat surfaces, brushed the rounded surfaces, and then used a tiny brush to get into the groves of the intricate woodwork.
In order to avoid brush strokes you’ll want to use the brush for the cracks and crevices and then pause before the paint dries and get the roller and roll the paint so that it blends well and you don’t have brush strokes.
Ninth, When I was done with the first coat where I had started to paint was already dry so I gave it a second coat right away. Then I let it dry for the recommended 24 hours.
Tenth, I lightly sanded the second coat of chalk paint with about 300 grit or higher.
Eleventh, I wiped it clean with a microfiber cloth.
Twelveth, I put a coat of wax on it using a wax brush and brushed it on in a circular manner then, using clean cloths I buffed it off.
Thirteenth, I put a second coat of wax on it and buffed it off. I used a toothpick to get the wax out of the crevices and appliqué as best as I could.
Fourteenth, I put the drawers back on, hardware, etc.
Fiftheeth, I allowed it to cure for about a week before I set stuff on top of it.
That’s it!
Time
It took about 14 hours from start to finish including prep and clean up. Obviously, this does not include curing or drying time. I worked on it for about 5 hours a day for three days. It was not life-disrupting as I did everything inside my home in my dining room area. So, my kids napped or painted on their own little pieces of wood from Dollar Tree or played, etc. while I worked on it and my older kids were in school.
Cost
The dresser was $50 and the supplies were a little less than $100.
I had the chair and the rectangular mirror. I had bought the circular mirrors previously months before this but I did buy them for a soon-to-be vanity. So adding that to the total would be about $250.
While this was a pretty big project, I would definitely refinish a new piece of furniture again. I’d also use chalk paint again.
It is hard to find a custom (size, color, and purpose) quality piece of furniture for less than $500.00. So, yes, if I knew we’d use it for years, I’d refinish another piece of furniture using chalk paint and wax.

For other ‘rich living tips’, please Subscribe Here or connect with me on these other platforms: