


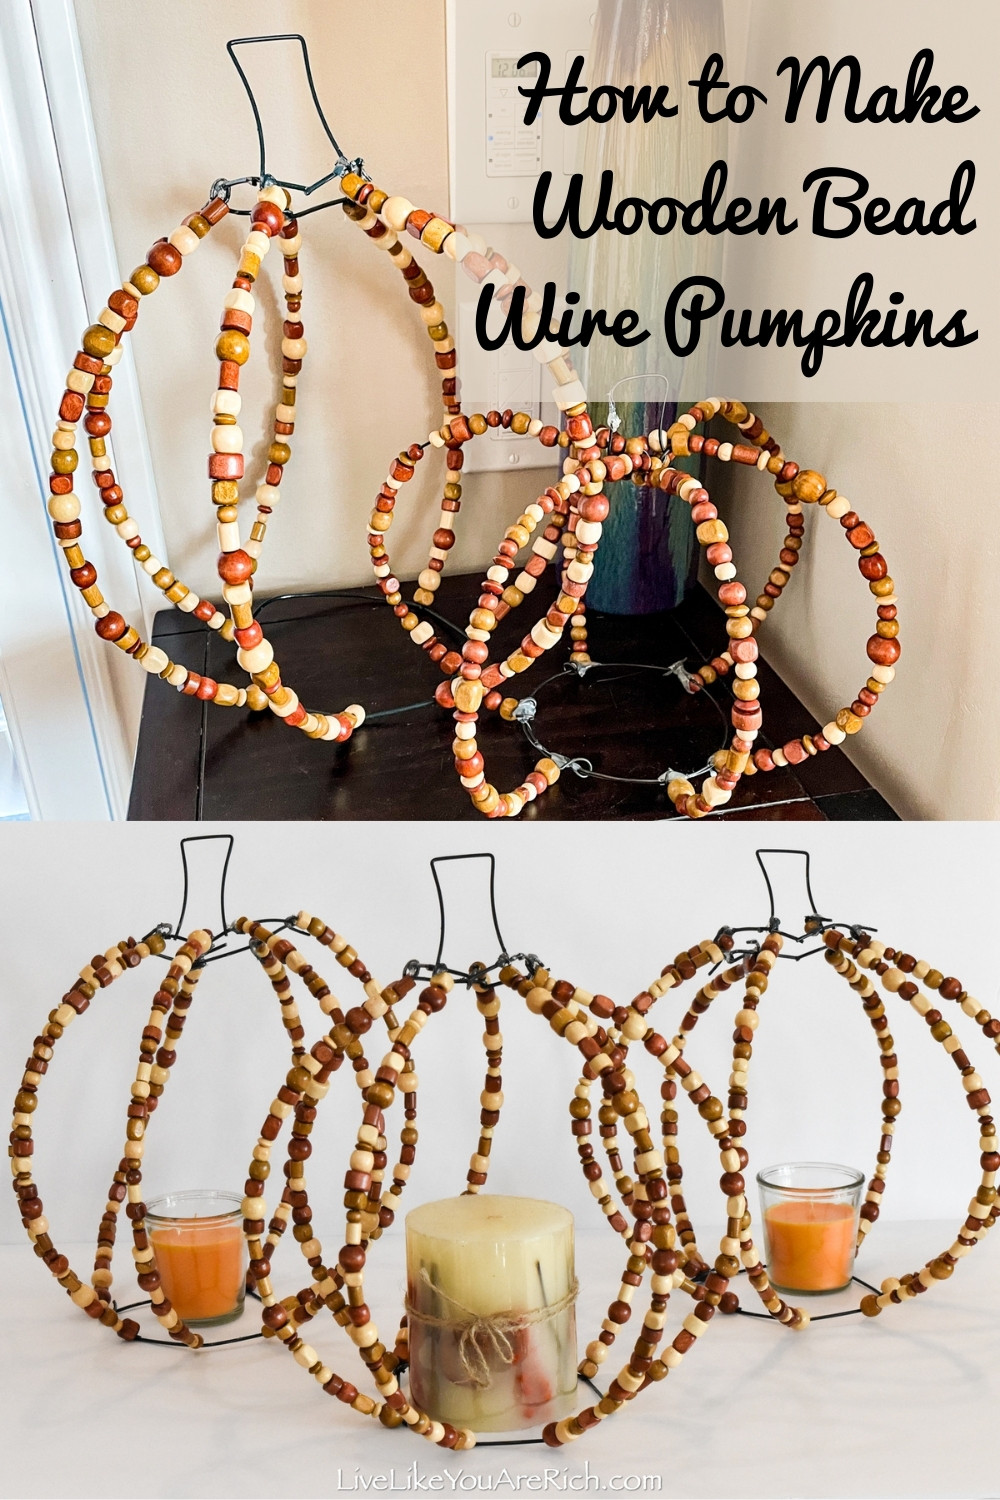
How to Make Wooden Bead Wire Pumpkins
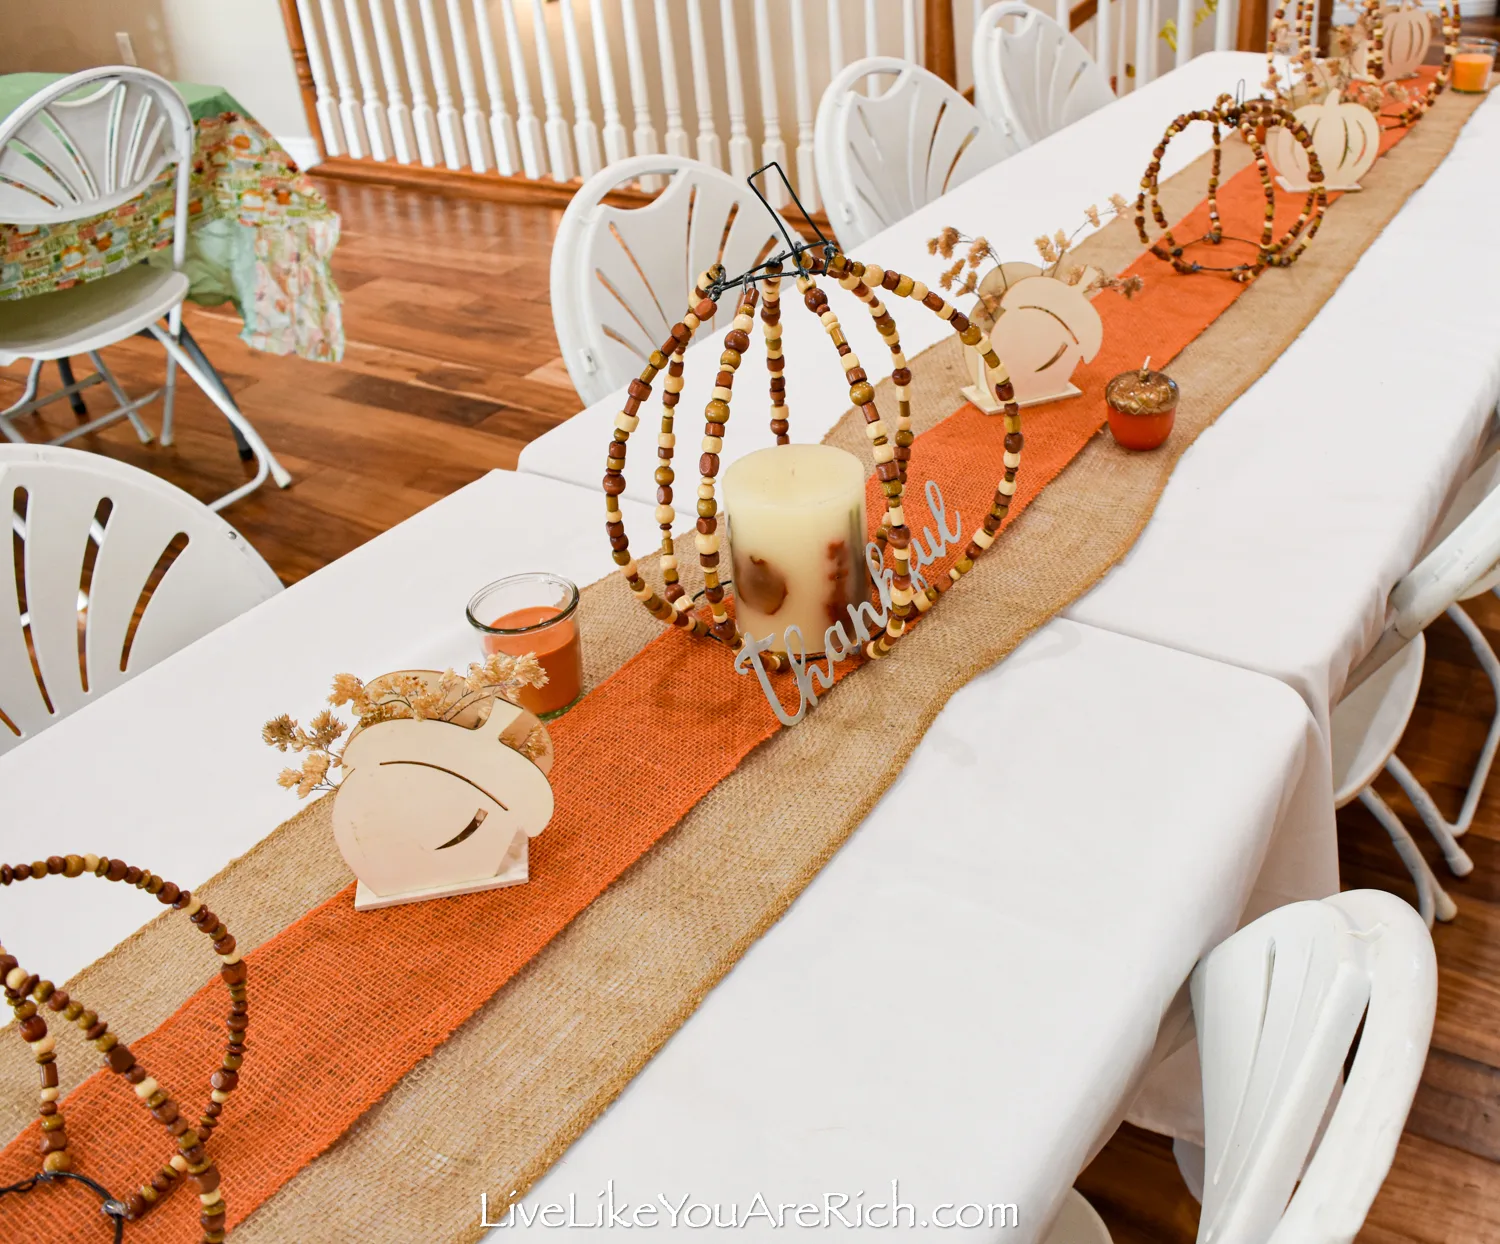
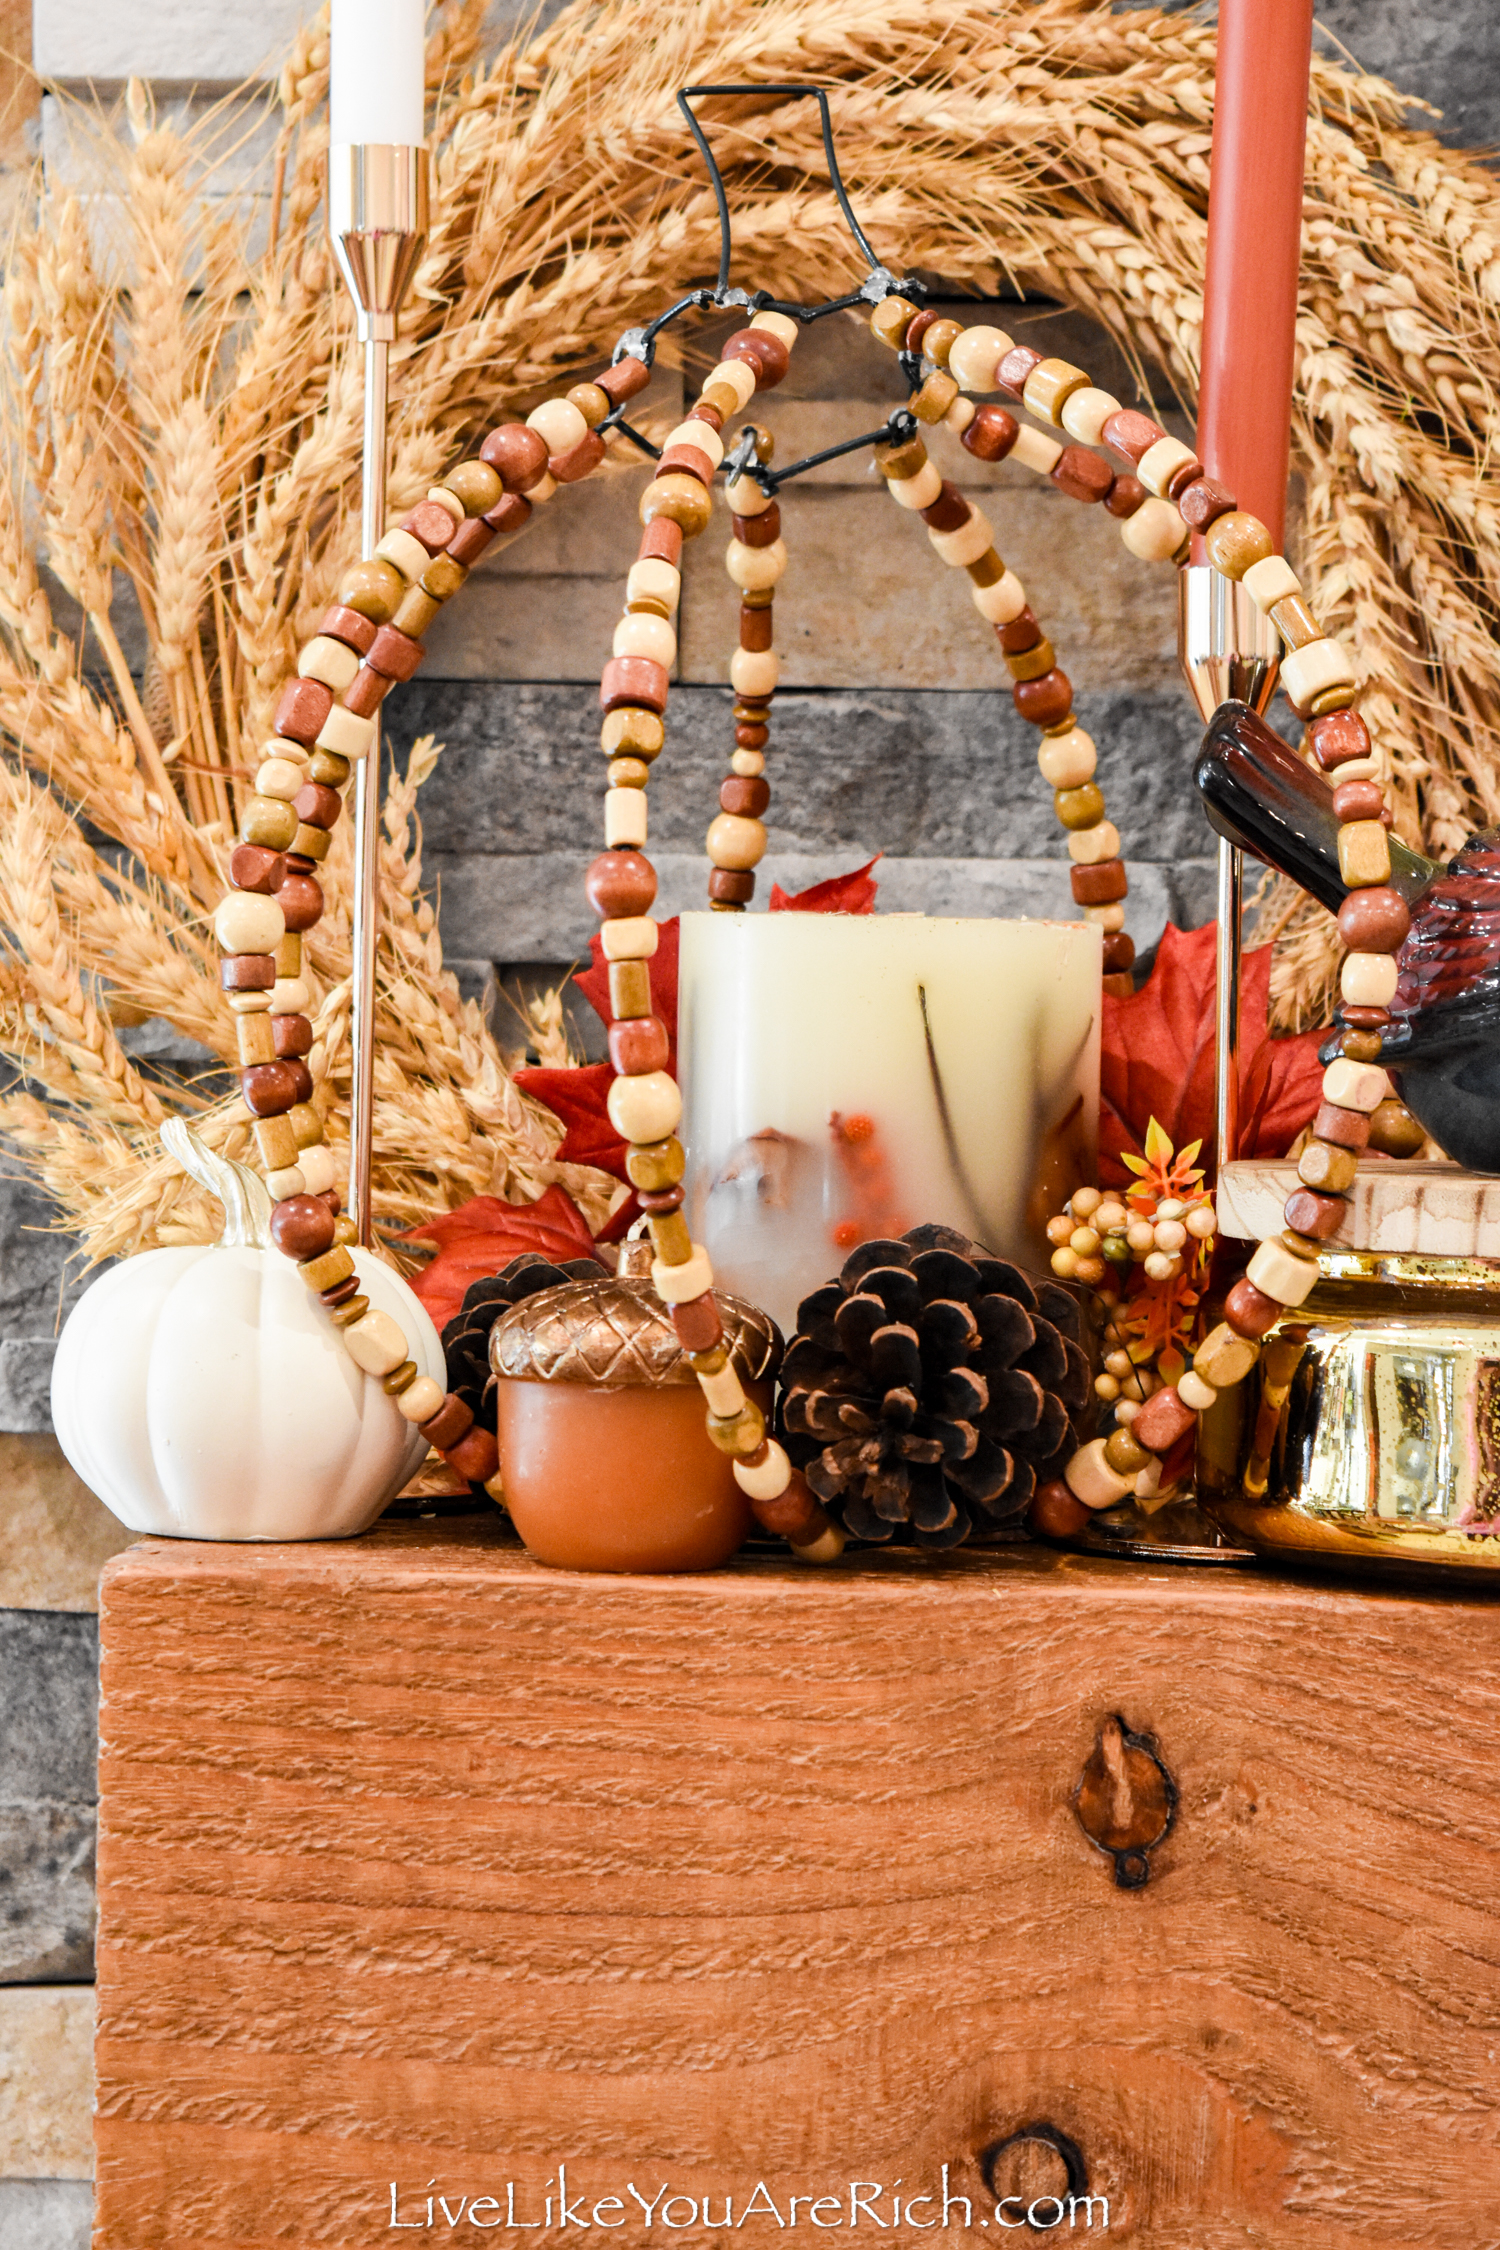
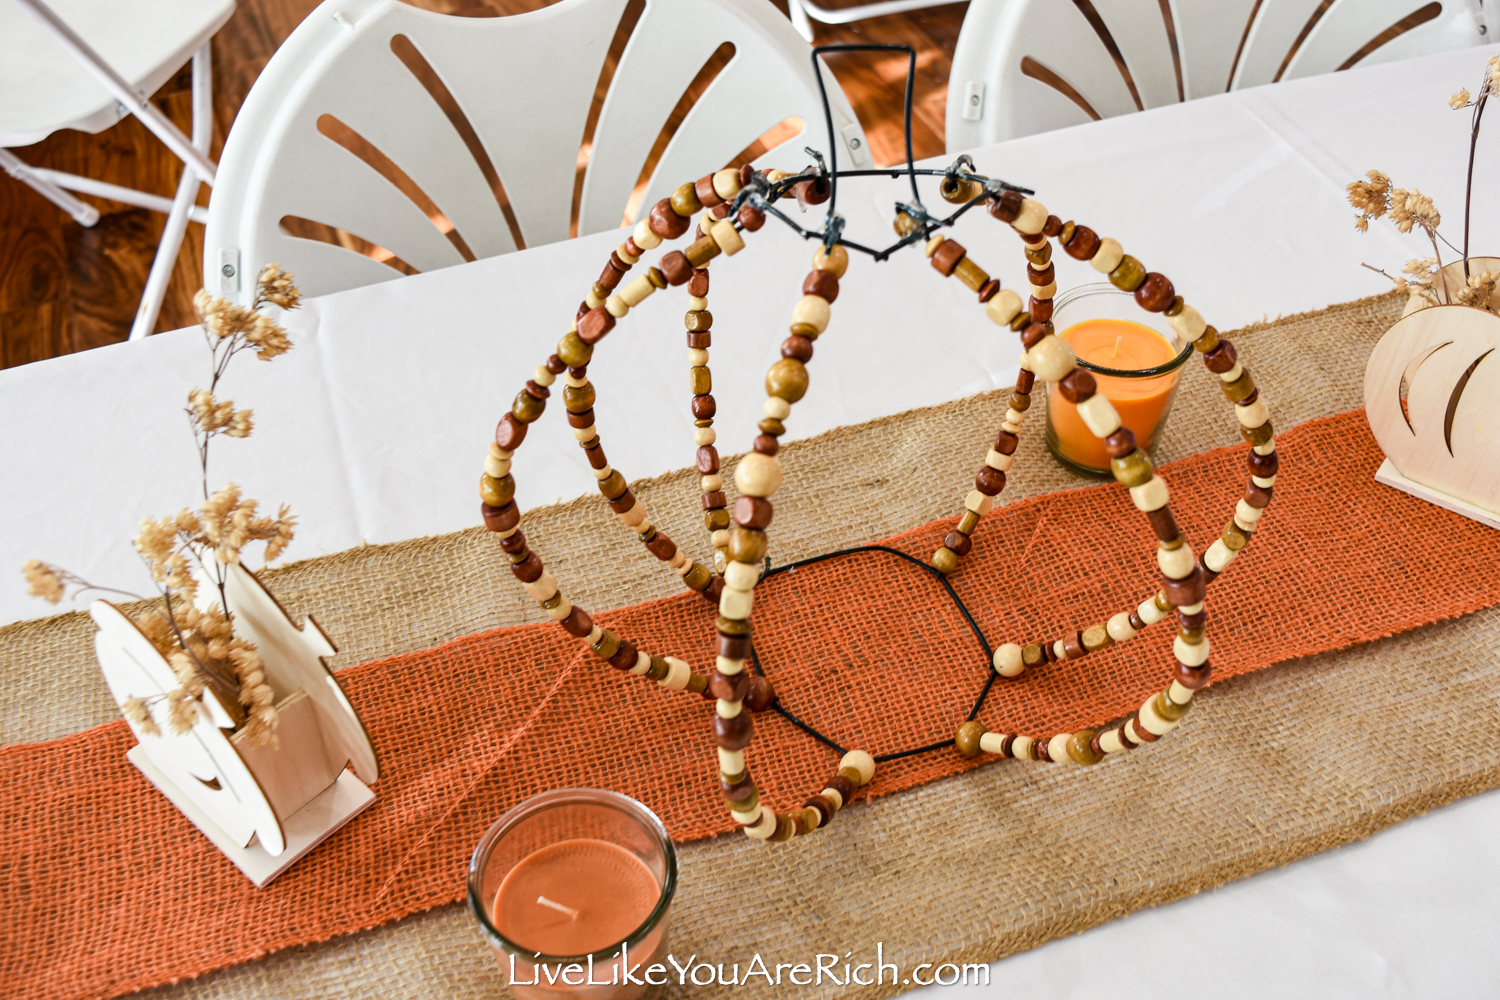
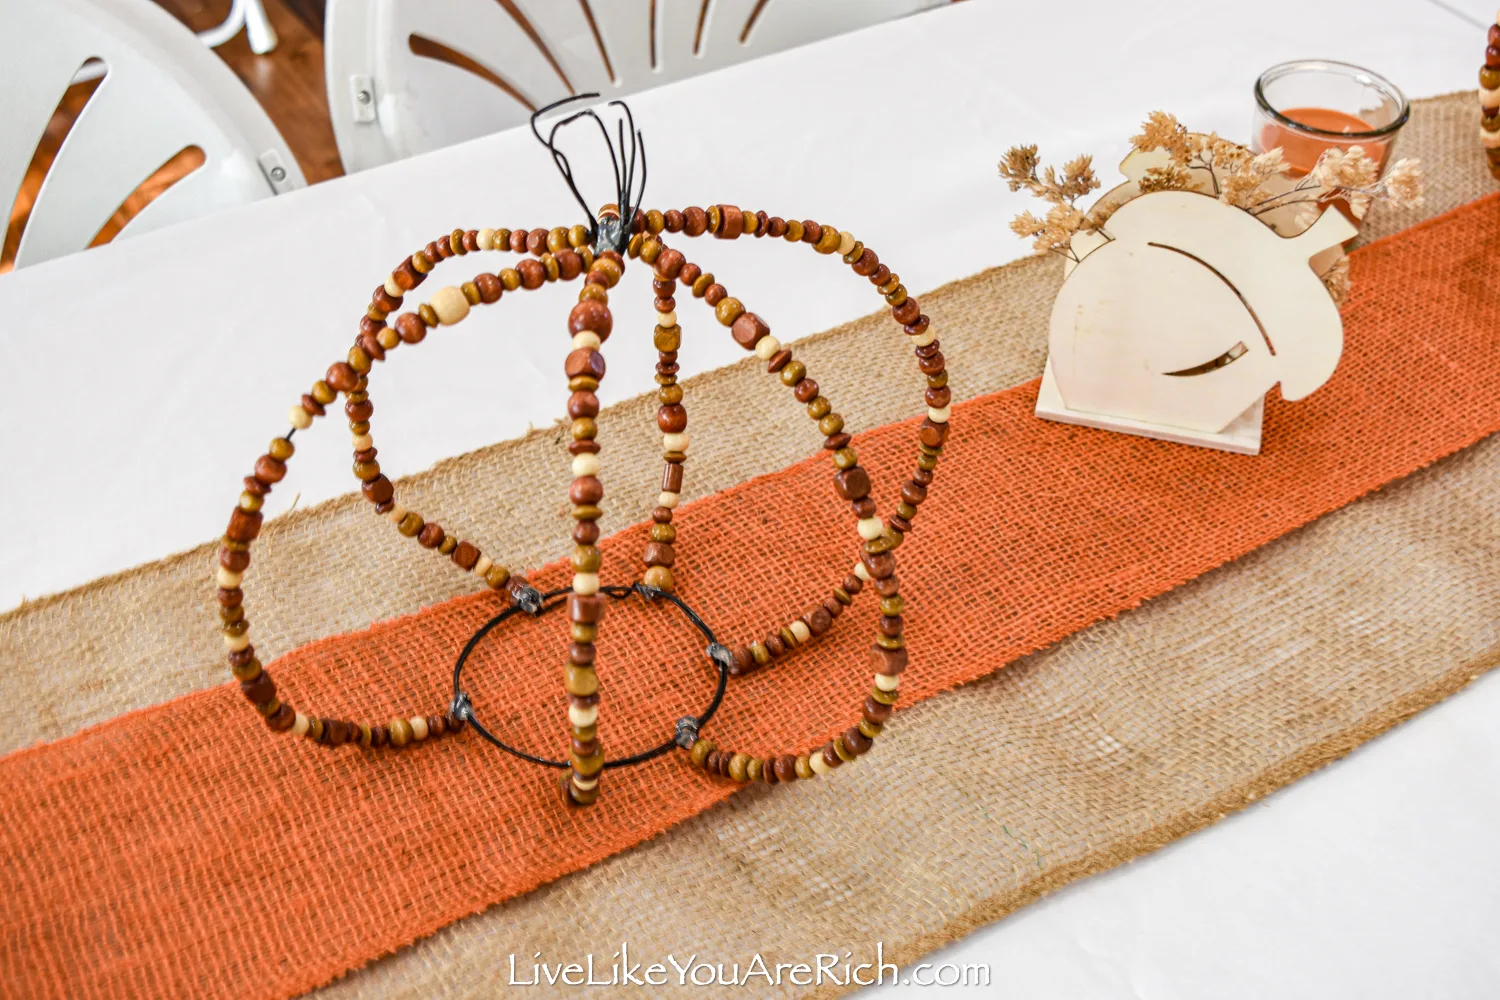
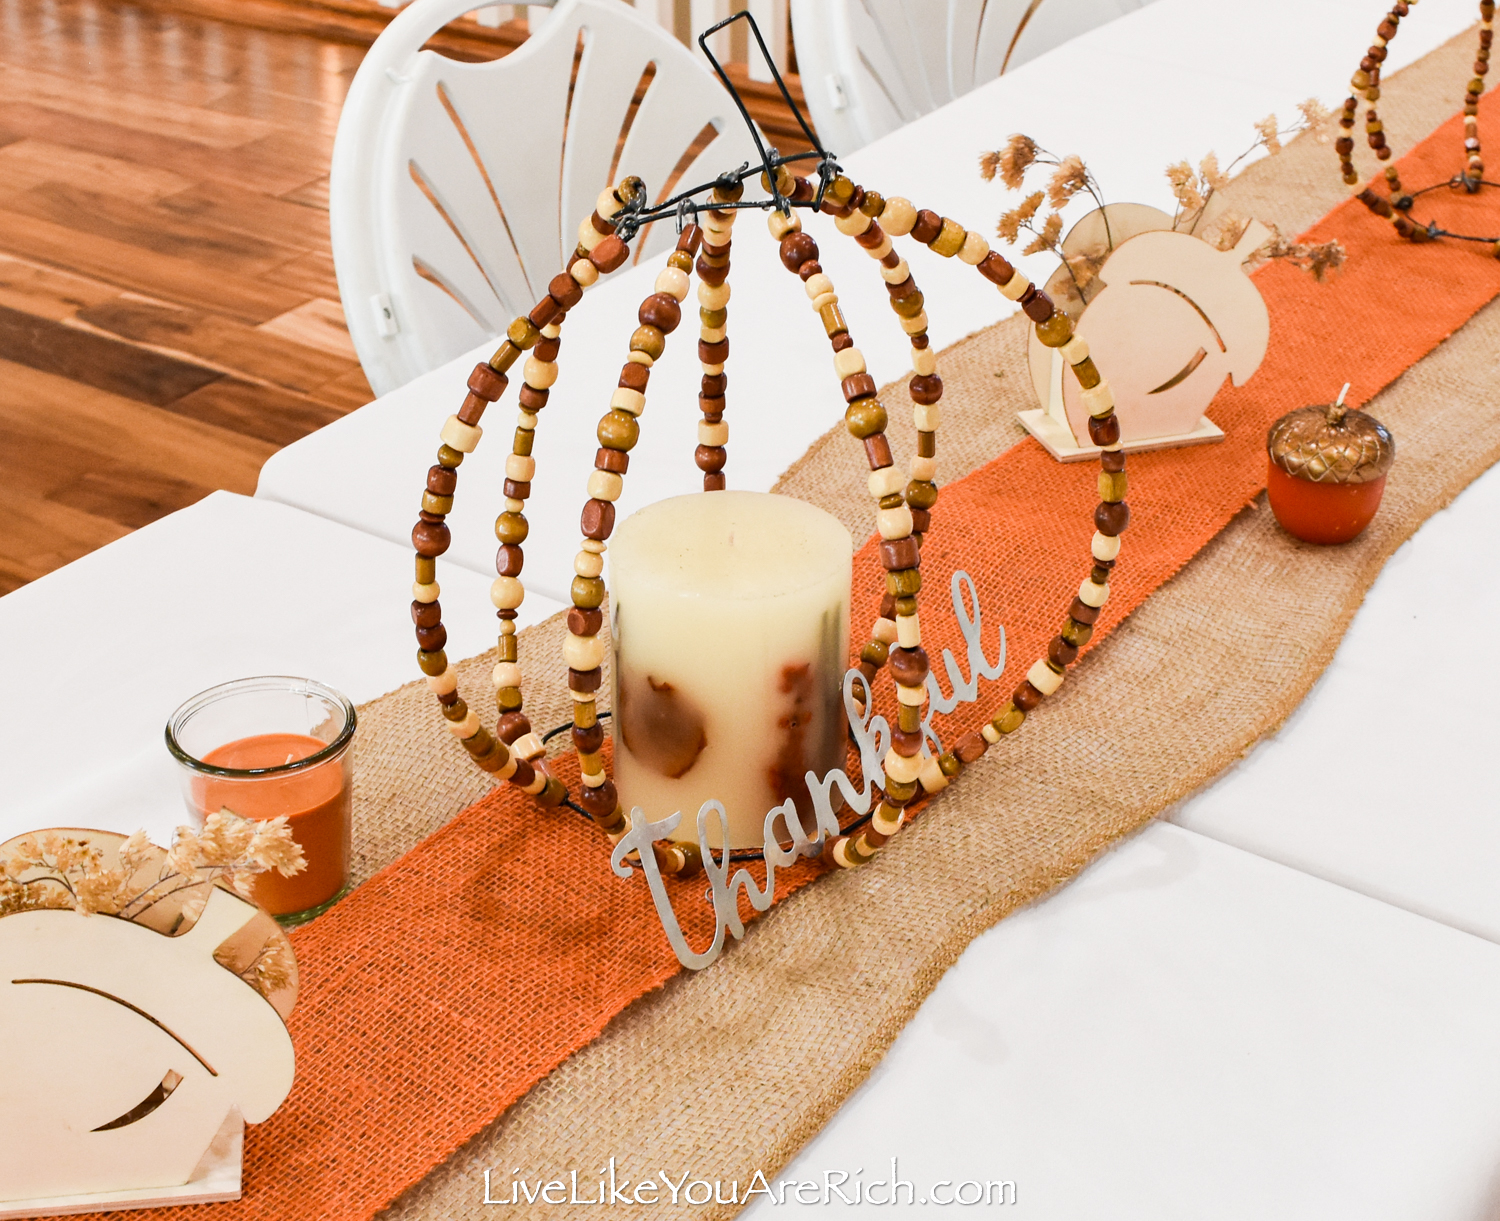
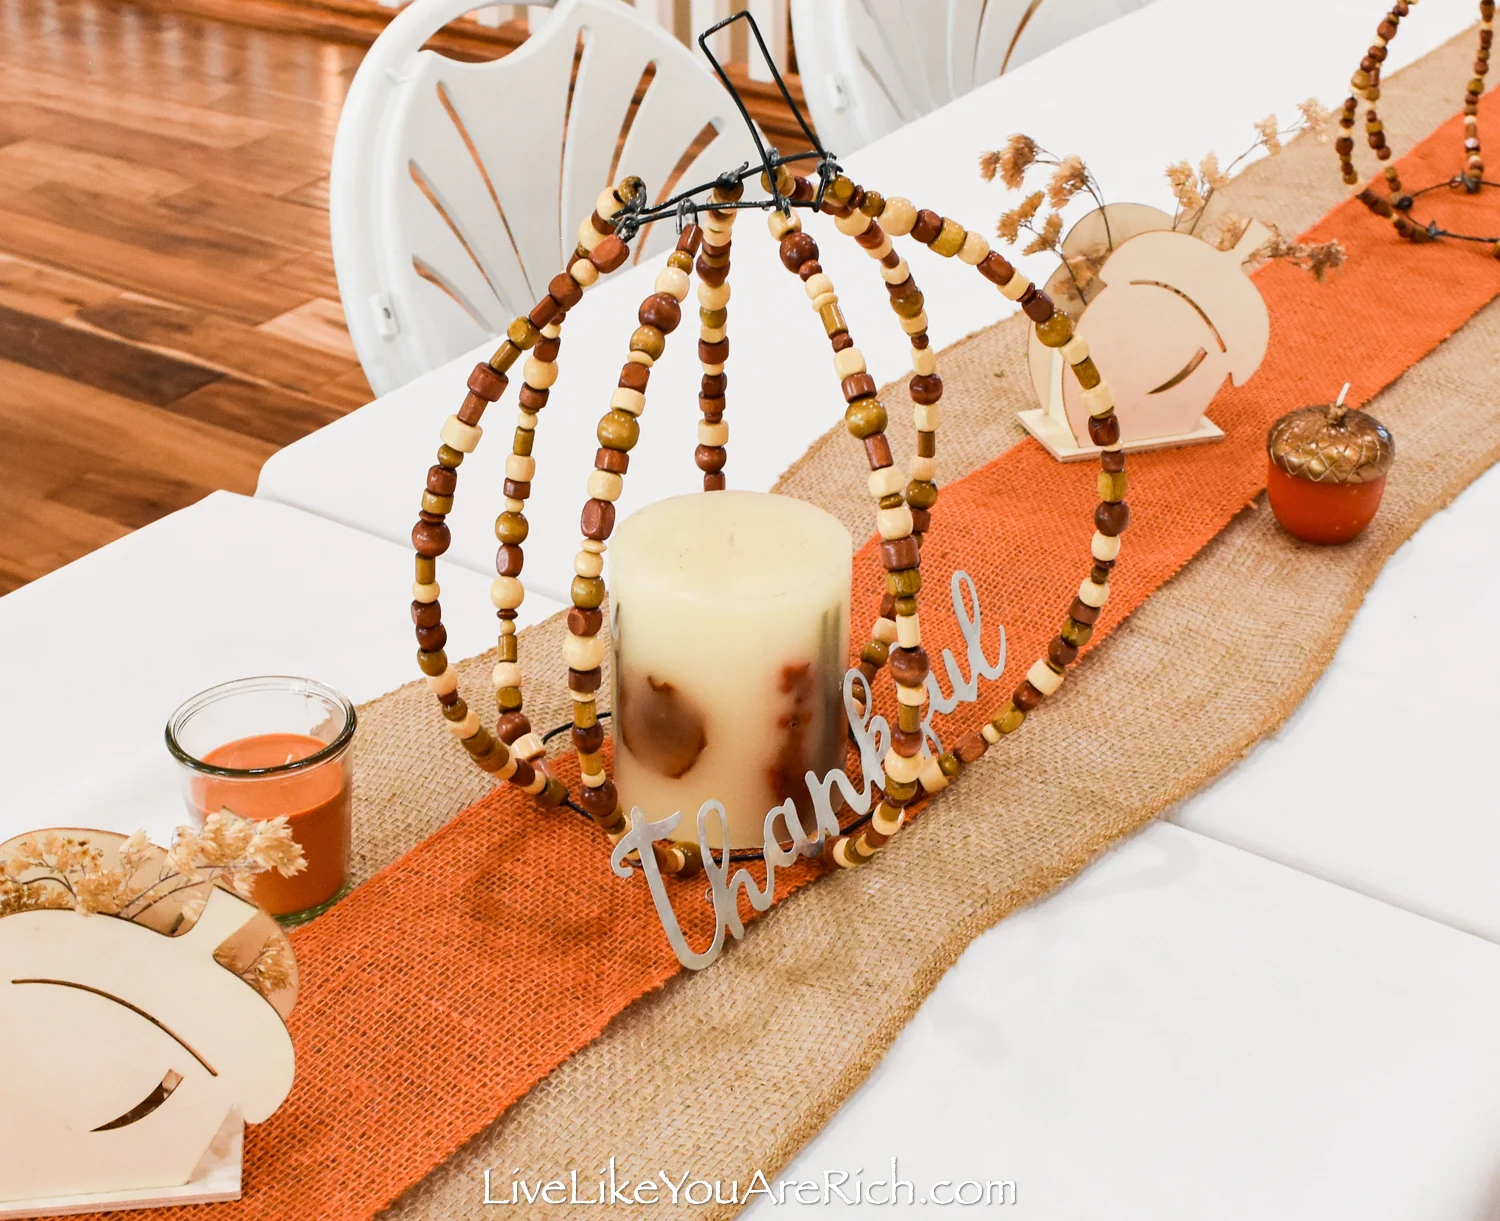
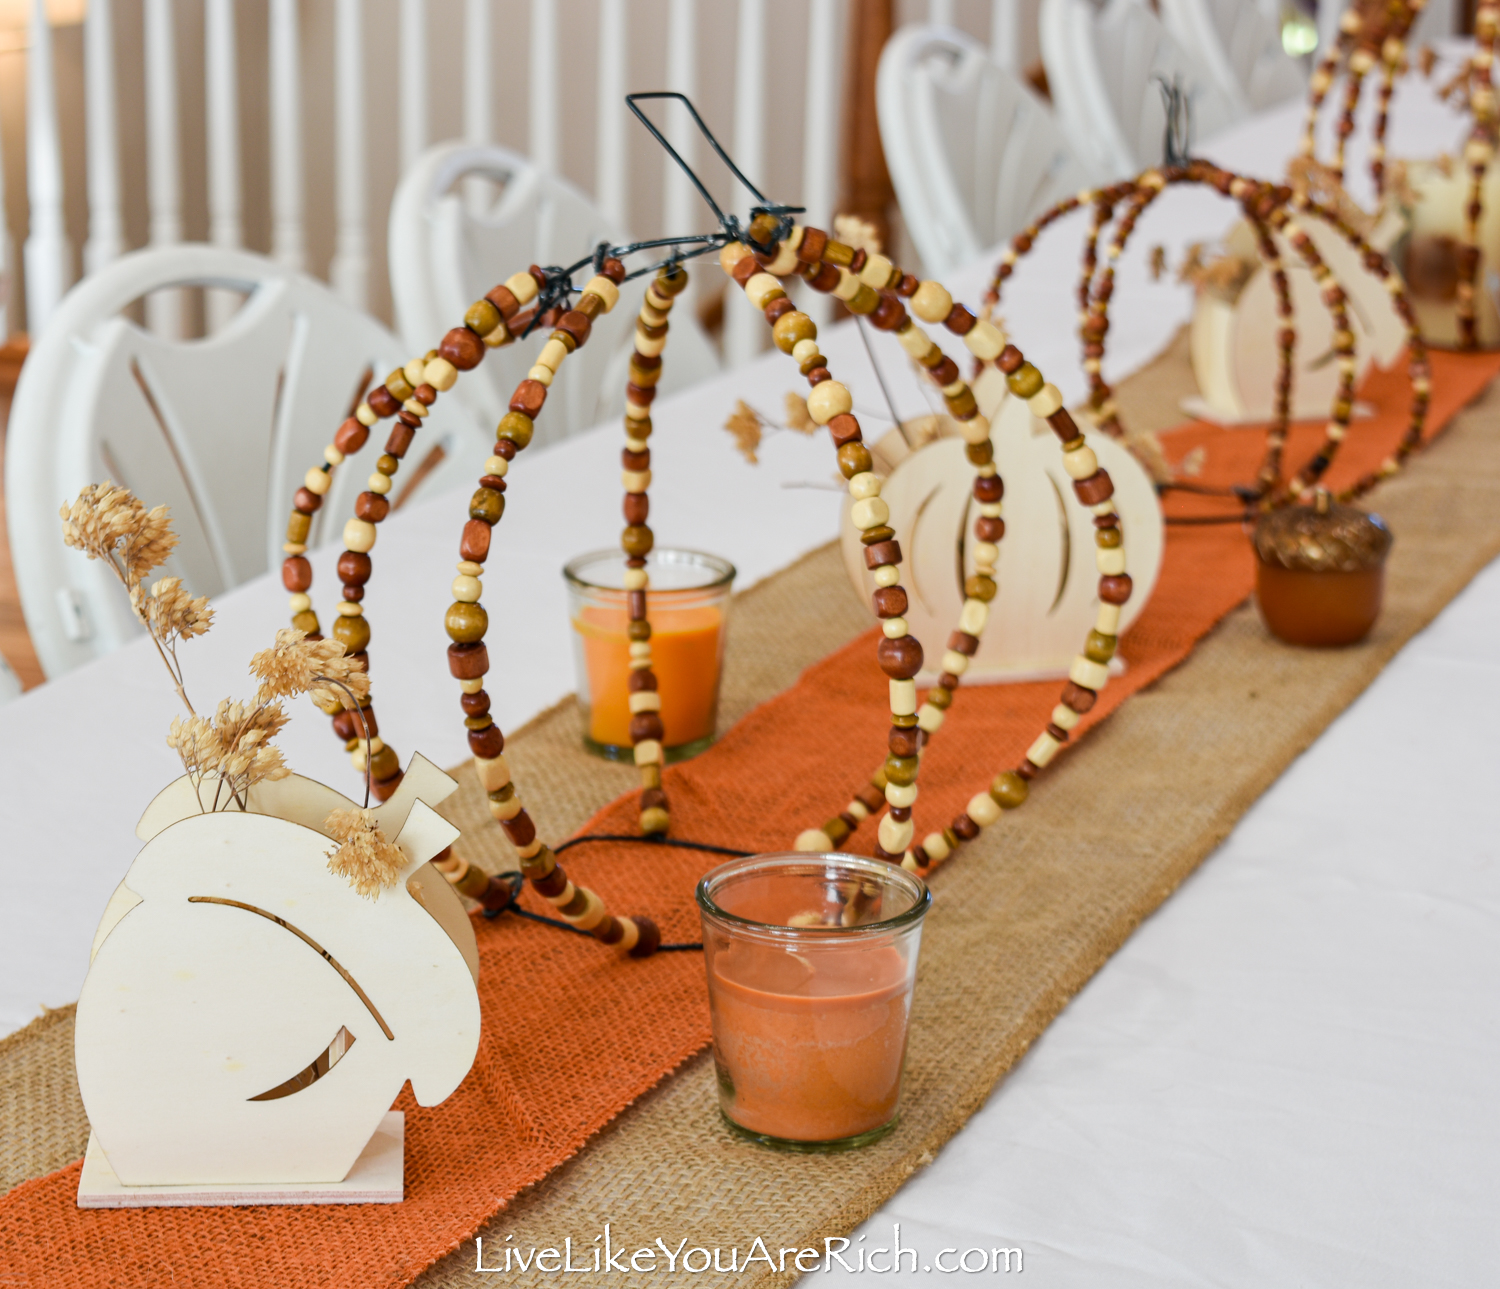
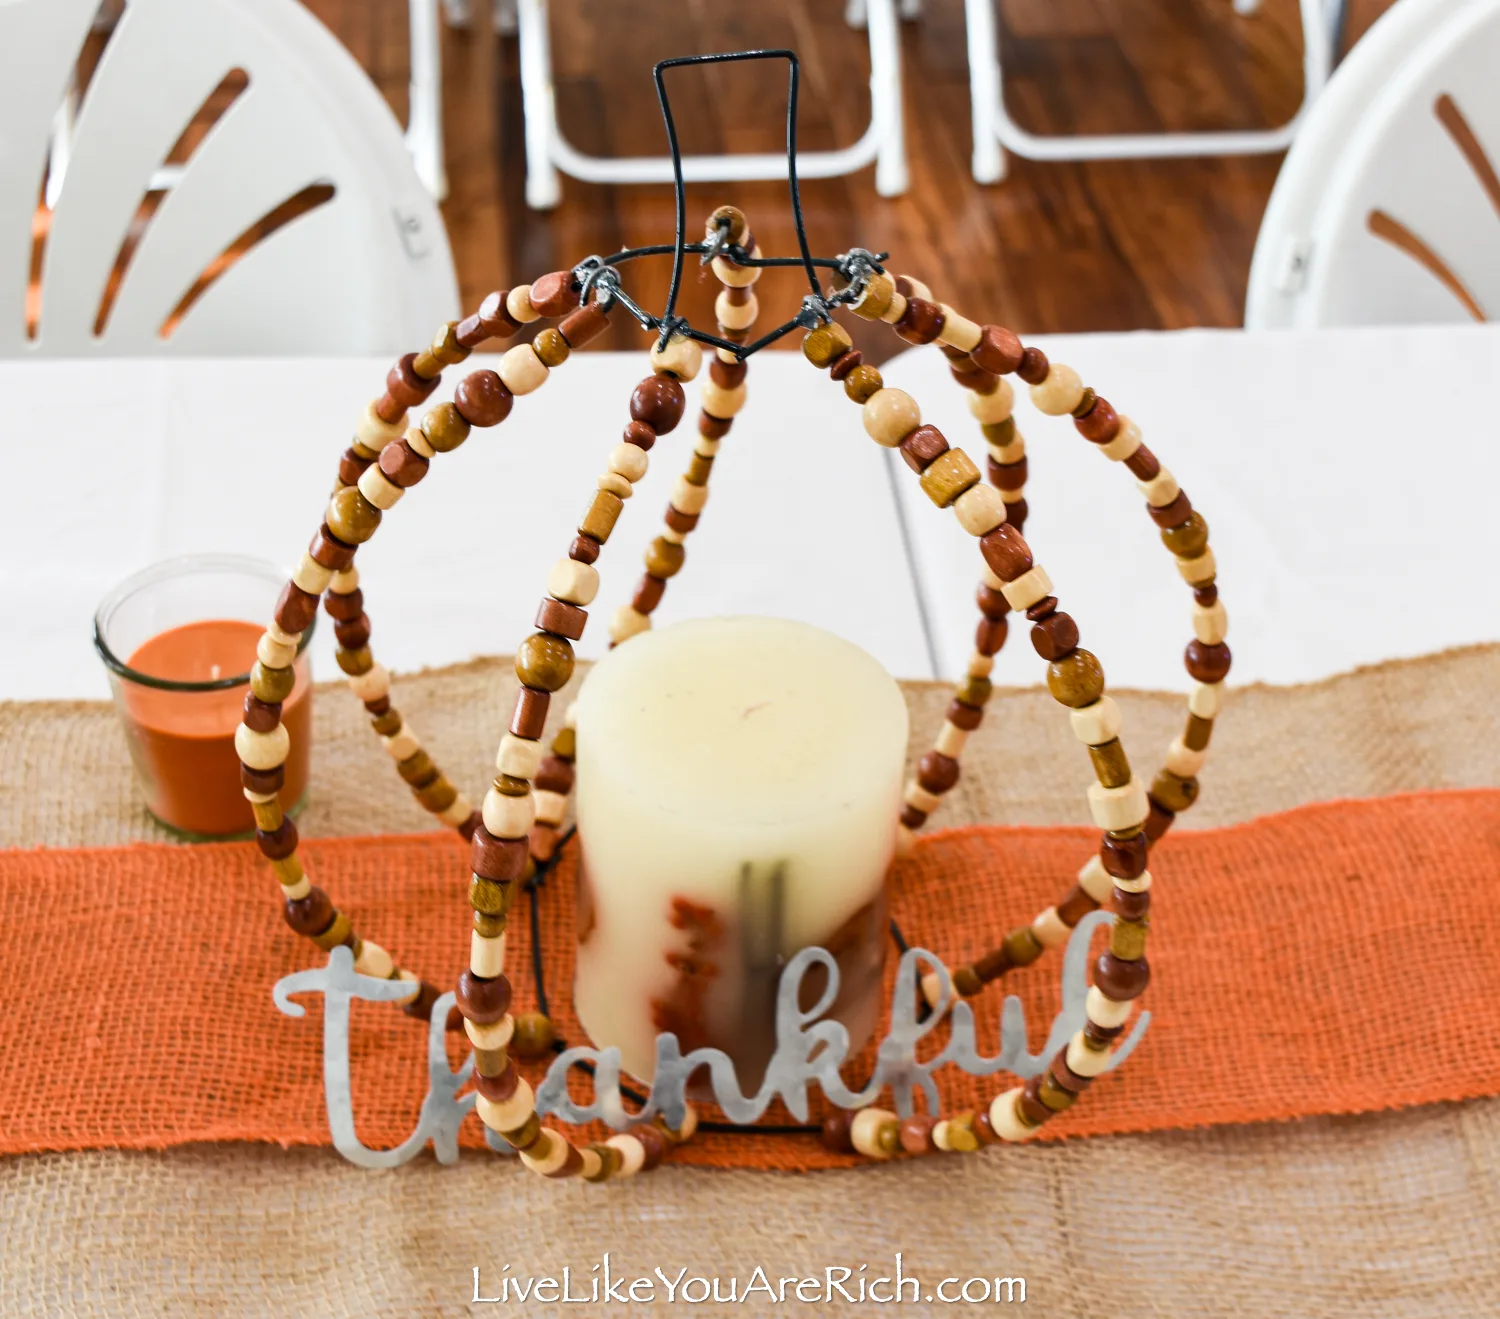
I used these pumpkins for fall decor and my Natural and Simplistic Thanksgiving tablescape. You can decorate with them in multiple ways. You can also add candles, signs, and other decor inside the pumpkins if desired.

Supply List for How to Make Wooden Bead Wire Pumpkins
wire (20 gauge or lower/thicker)
Pumpkin wire wreaths (I found mine at Dollar Tree)

Instructions on How to Make Wooden Bead Wire Pumpkins with wreath forms—See Video or continue reading.
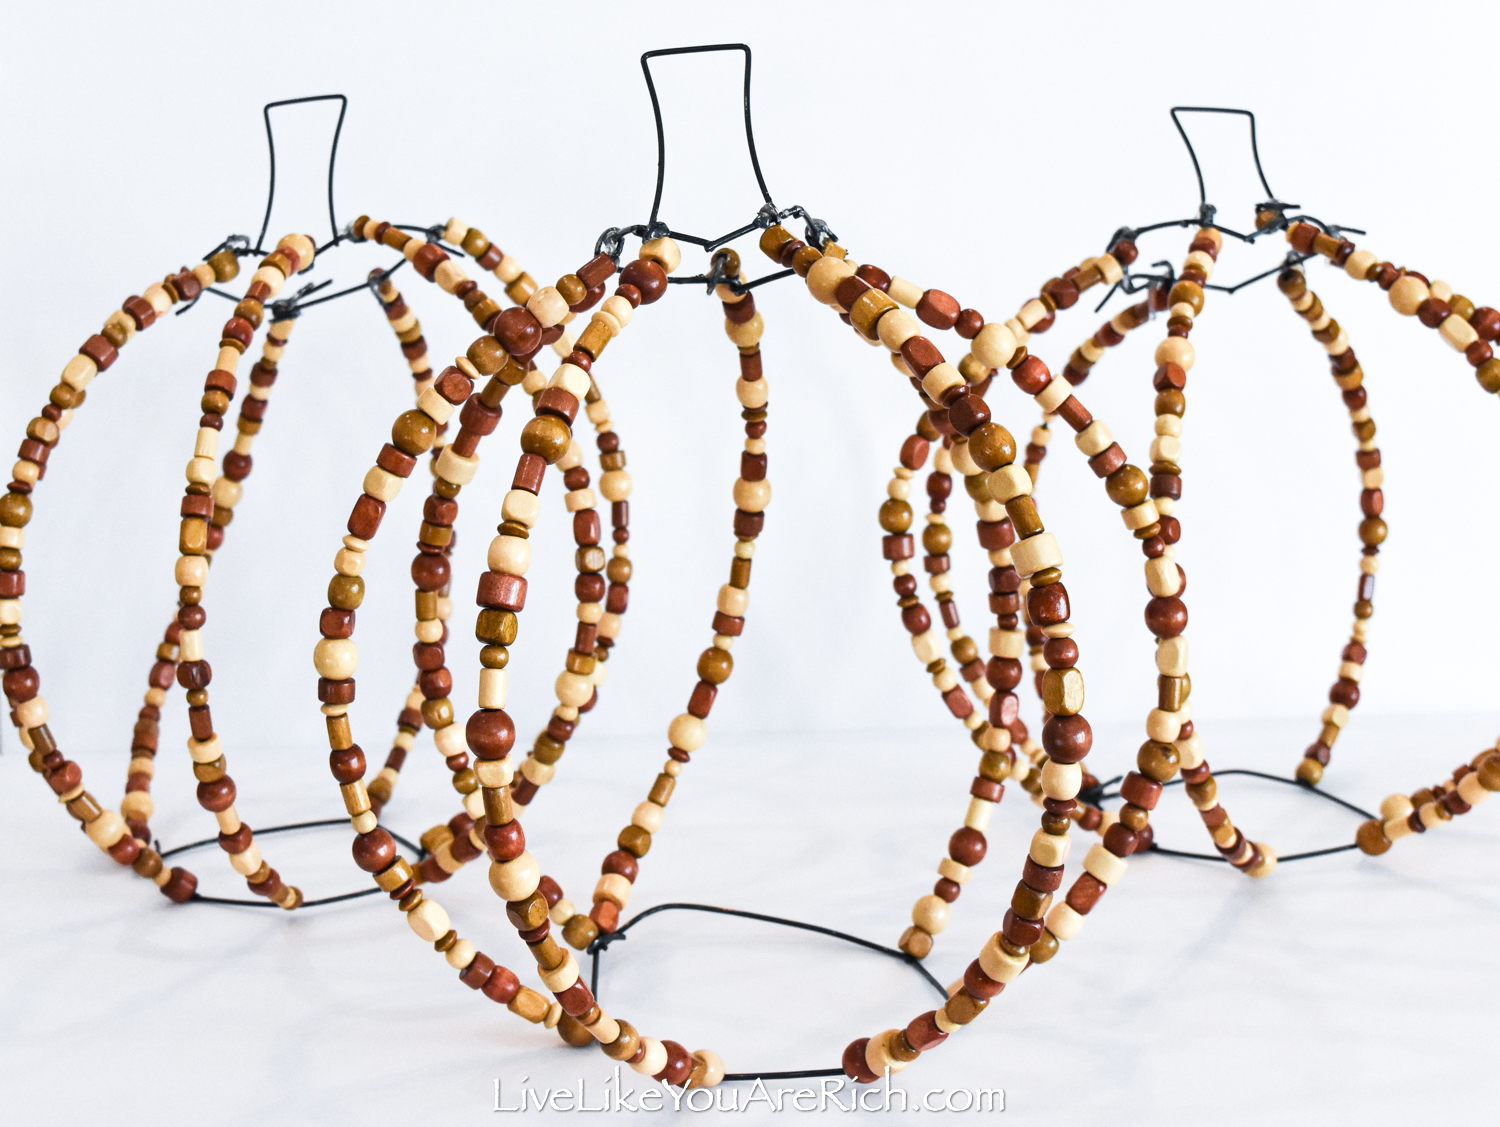
First, you’ll get a wire pumpkin wreath form. I got mine at Dollar Tree, but I’ve also seen them at craft stores and on Amazon. You’ll want to fold it in half and shape it. Work with the wires, gently pulling and pushing, until the form can stand alone.
Once the form is stable and will stand on its own, you’ll begin by cutting one wire at a time at the top of the form so you can put the beads on.
Bead by alternate colors and shapes of beads (if using a mixed variety like I used) to create dimension.
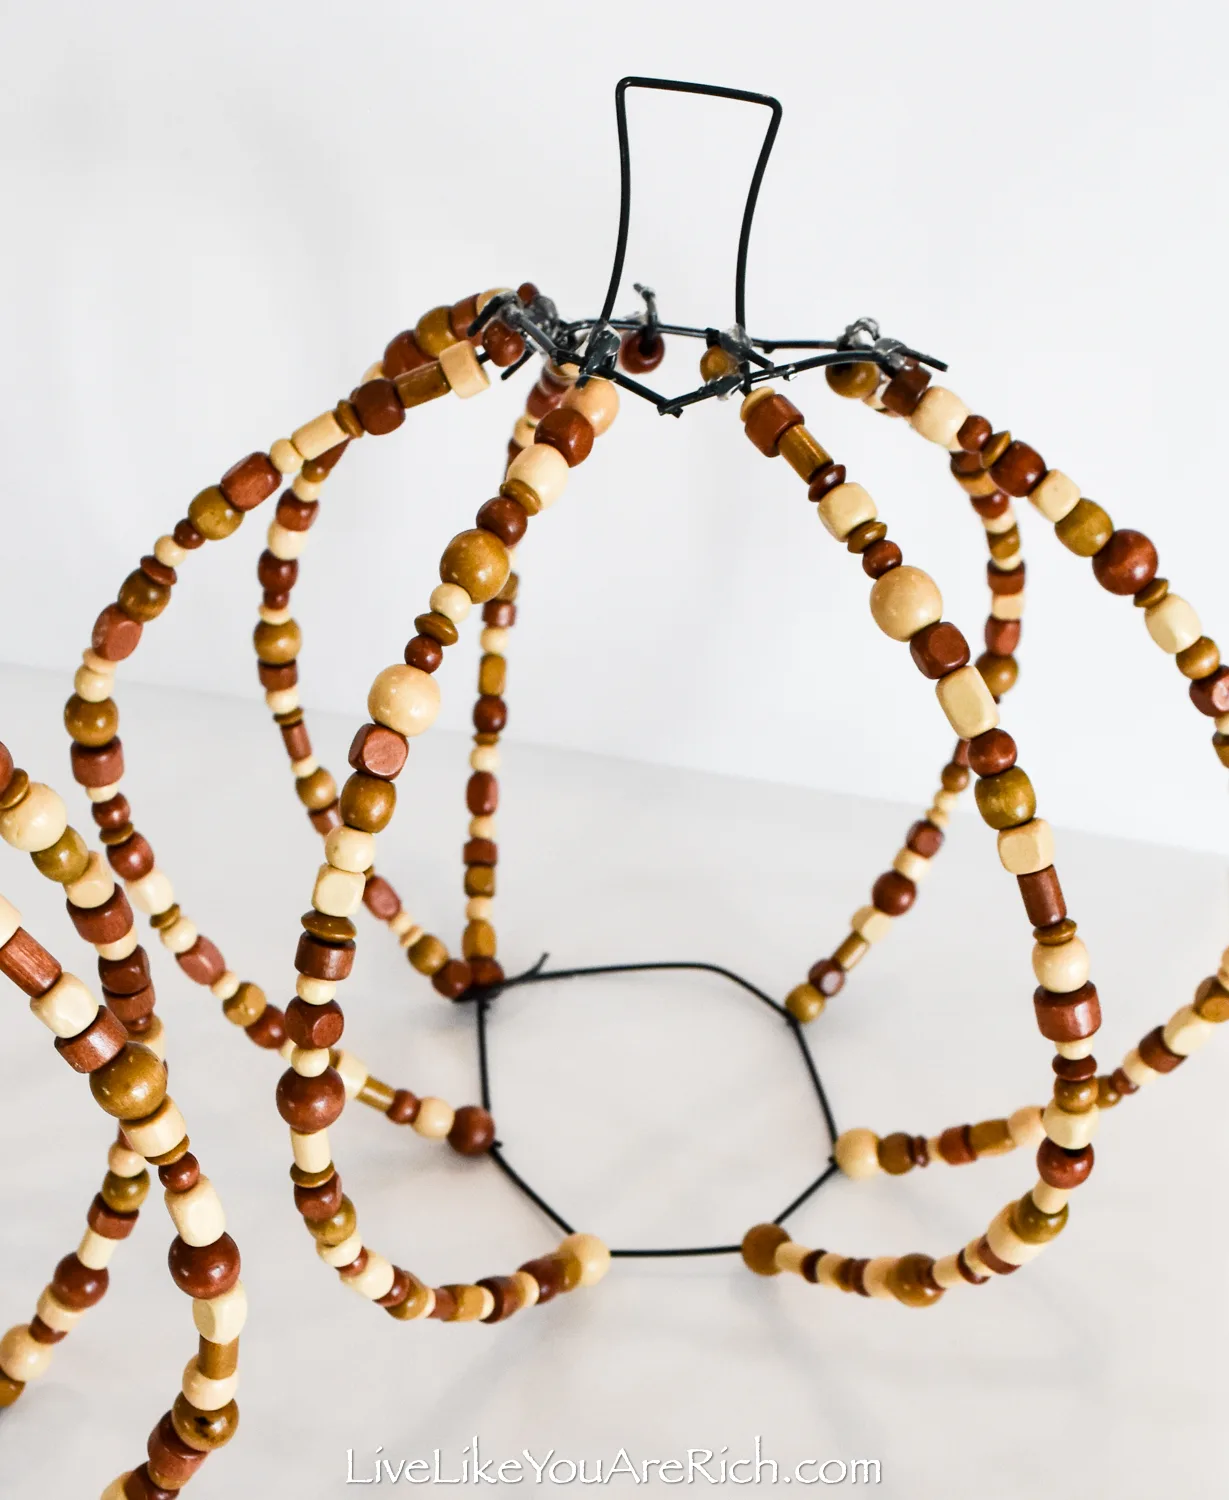
Once the leg is beaded, you’ll take needle nose pliers and you’ll create a hook at the top and hook it onto the top of the pumpkin wire form.
Clamp it down onto the wire but don’t glue it yet. You’ll need to manipulate and move the legs before glueing.
You’ll bead 7 of the 8 legs and the reason for this is that you’ll use the 8th leg (the back short leg) to close the top and bottom of the wooden bead wire pumpkin.
You’ll cut the 8th leg and cut 2/3rds of the wire to close the top of the pumpkin. The remaining 1/3 of the 8th leg closed off the bottom of the pumpkin.
Wrap the bottom wire around the bottom of the adjoining leg to form a closed based on the pumpkin. Clamp it down together so it stays and then trim the remainder wire.
To close the top wire, using needle nose pliers make a hook on both ends. Hook them together and clamp down. You can take it off the legs if needed to make sure the hooks are clamped down tight.
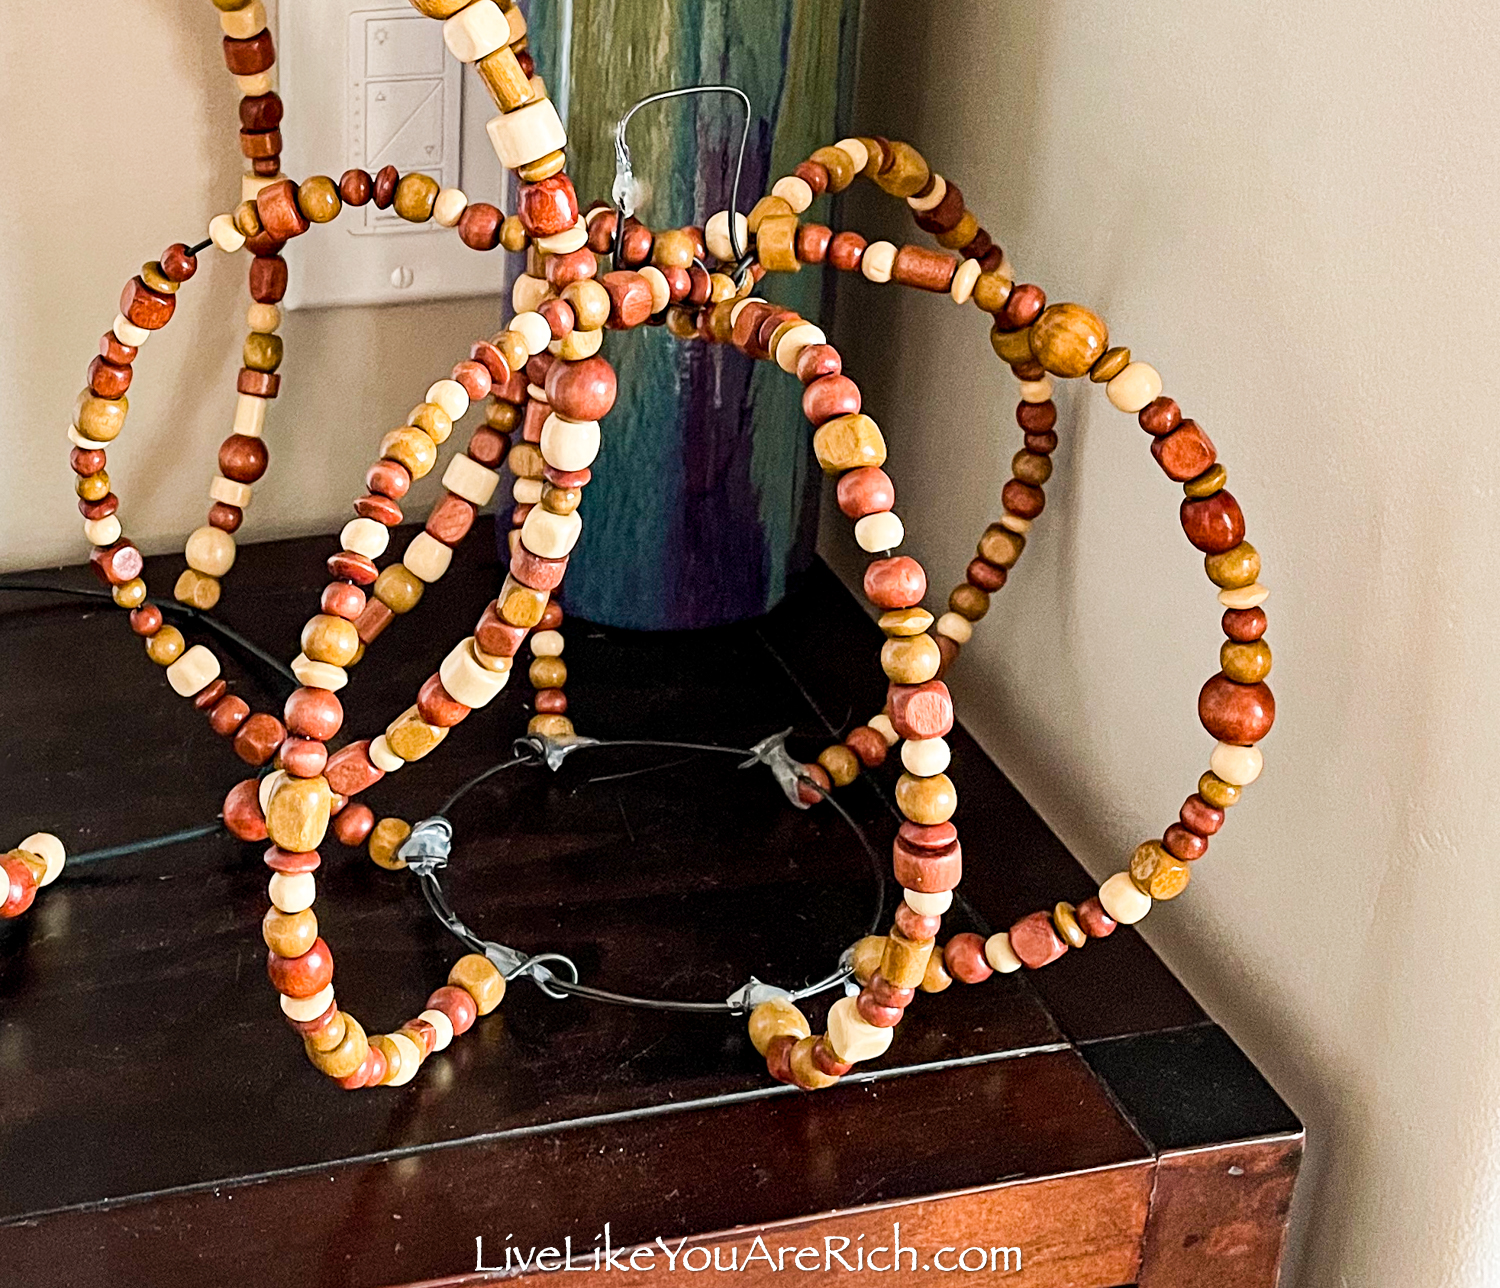
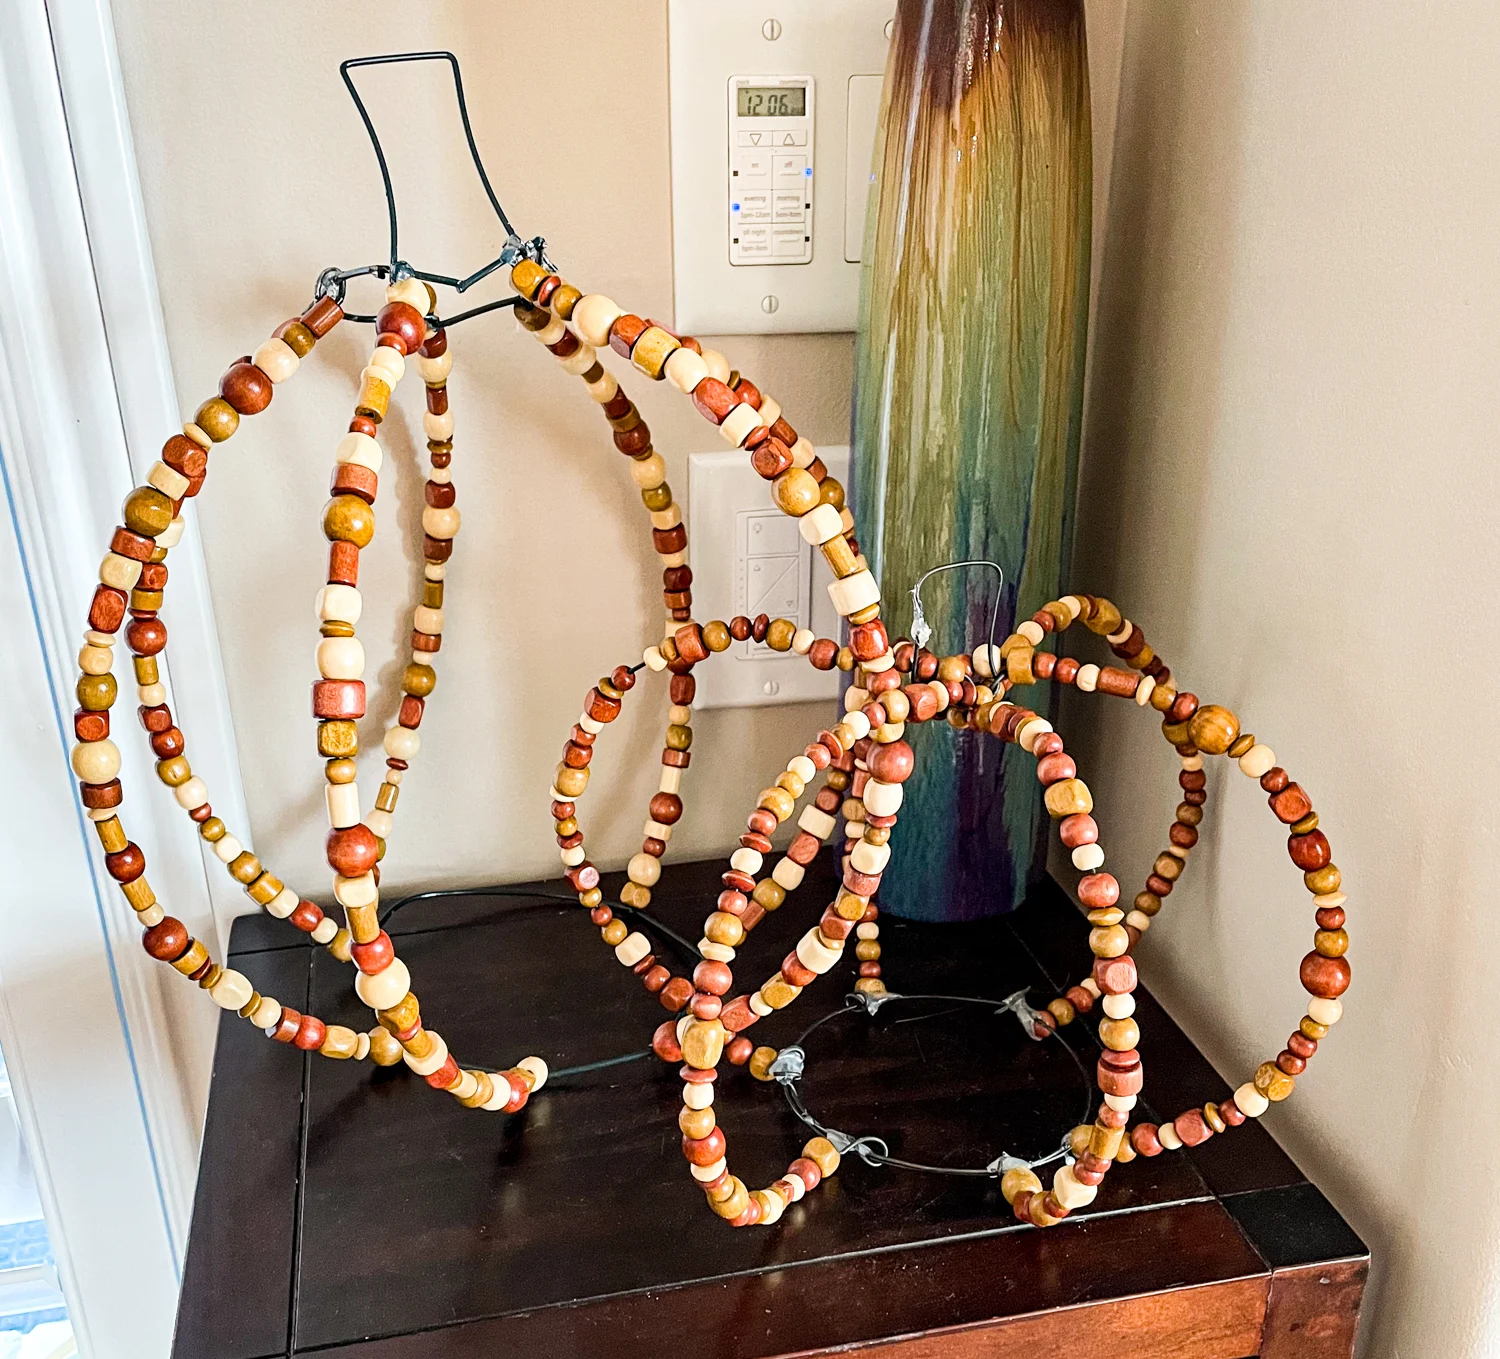
Add the legs to the top form and move and shape them to make a nice shape.
Glue the legs to the wire pumpkin top with hot glue and allow it to dry.
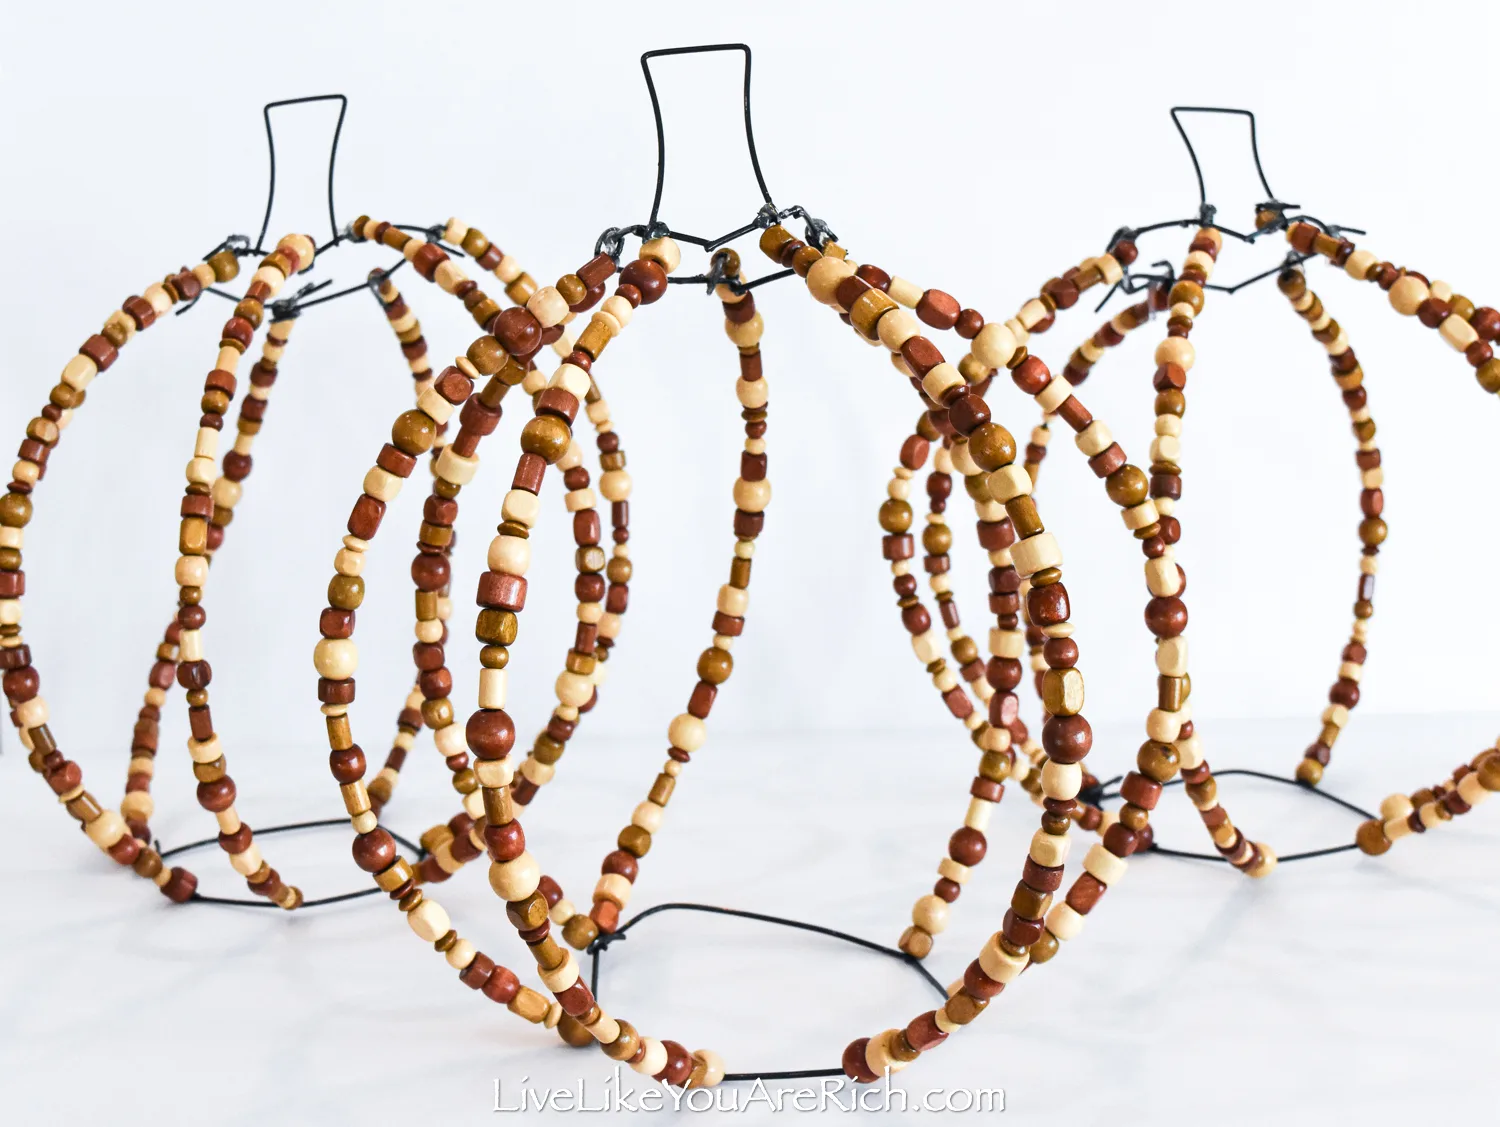
Instructions on How to Make Wooden Bead Wire Pumpkins with wreath forms
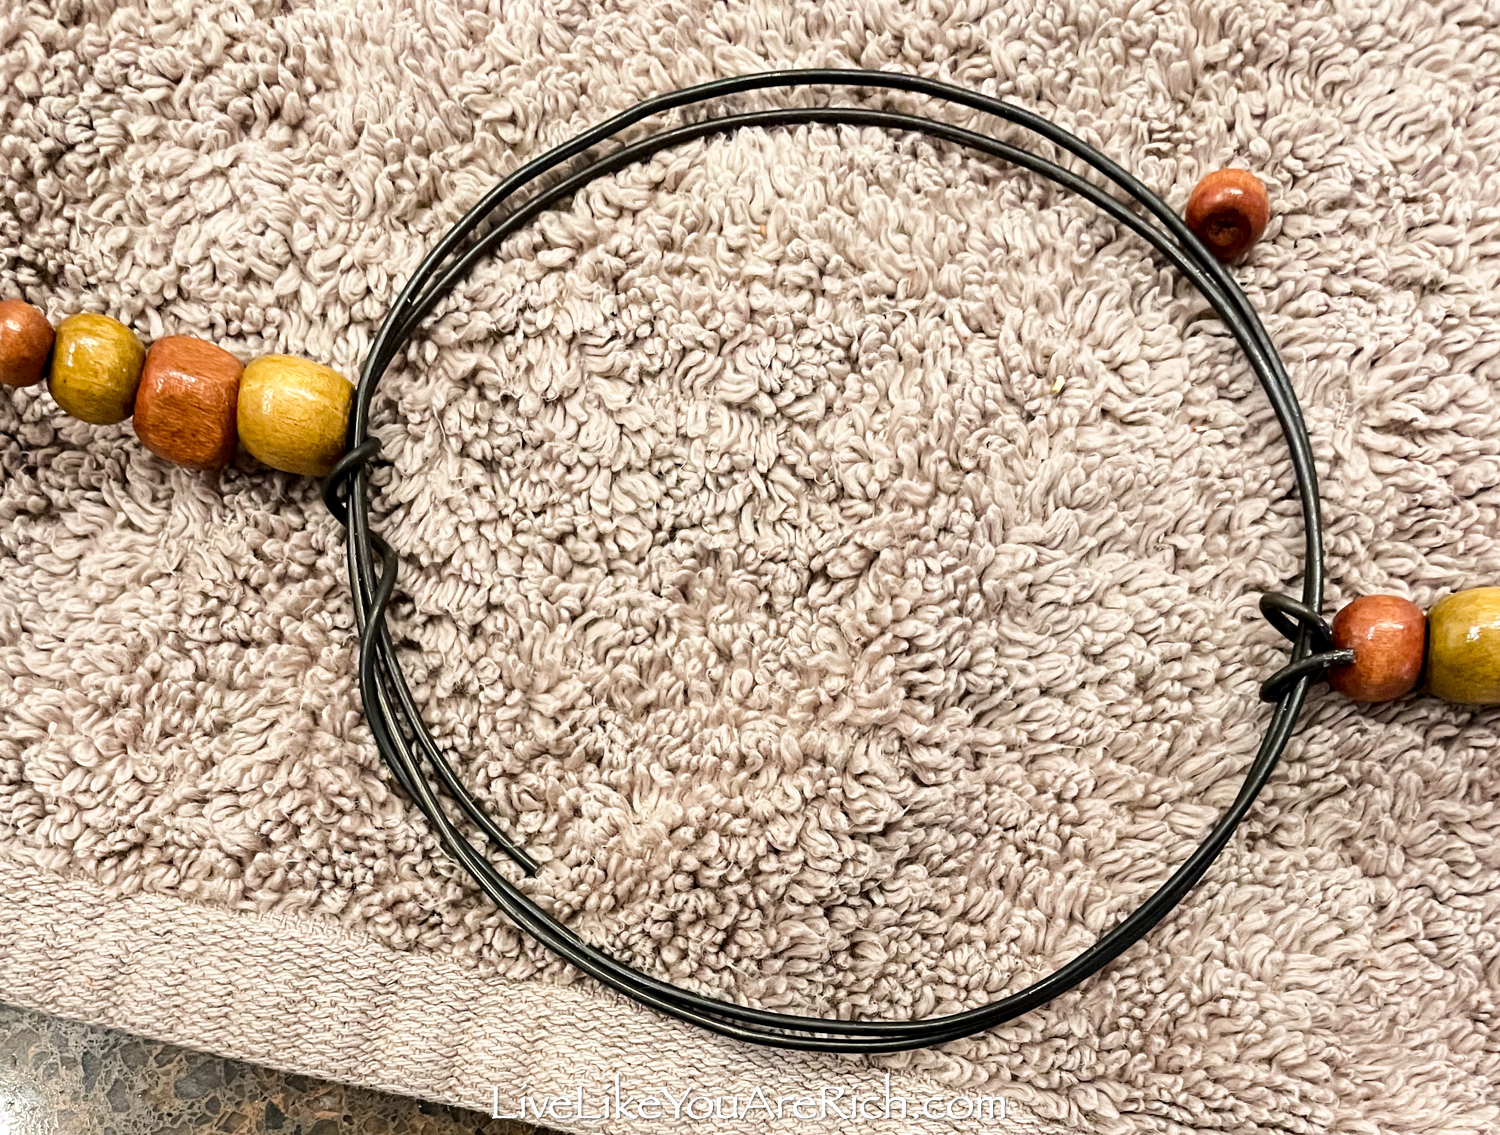
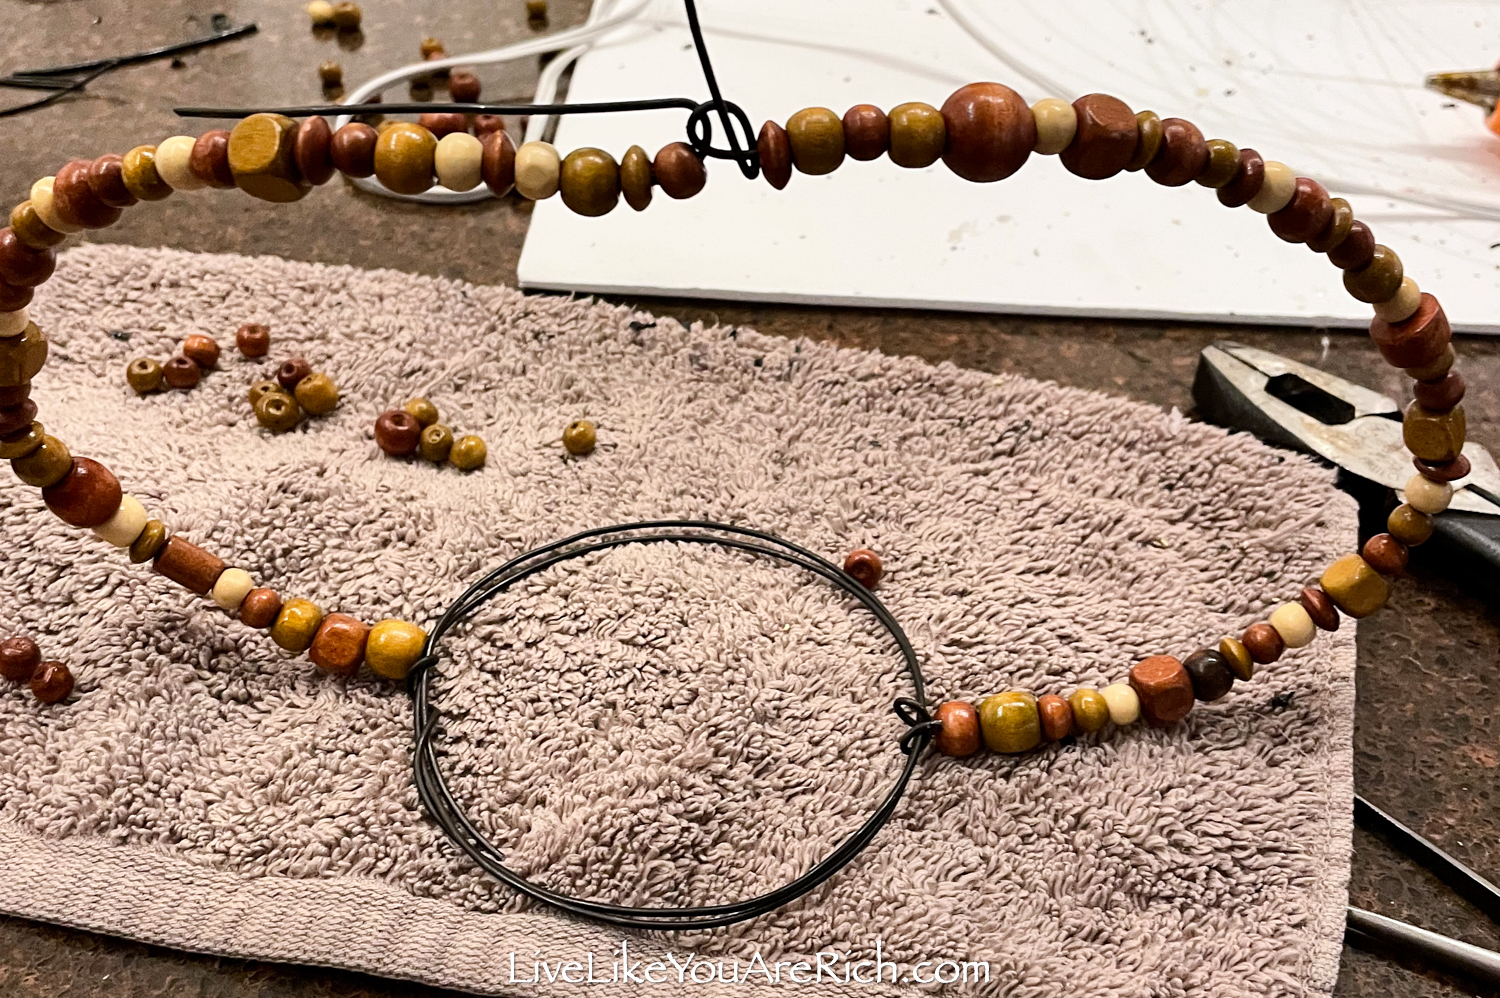
Take 20 gauge or stronger/thicker wire and form a circle shape (I doubled up the circle for strength).
Connect 2 same-length wires to the base/circle. Connect them by wrapping the wire around and clamping them on.
Bead these wires alternating colors and shapes of beads (if using a mixed variety like I used) to create dimension.

Connect the wires at the top.

Make another two legs following the aforementioned steps.
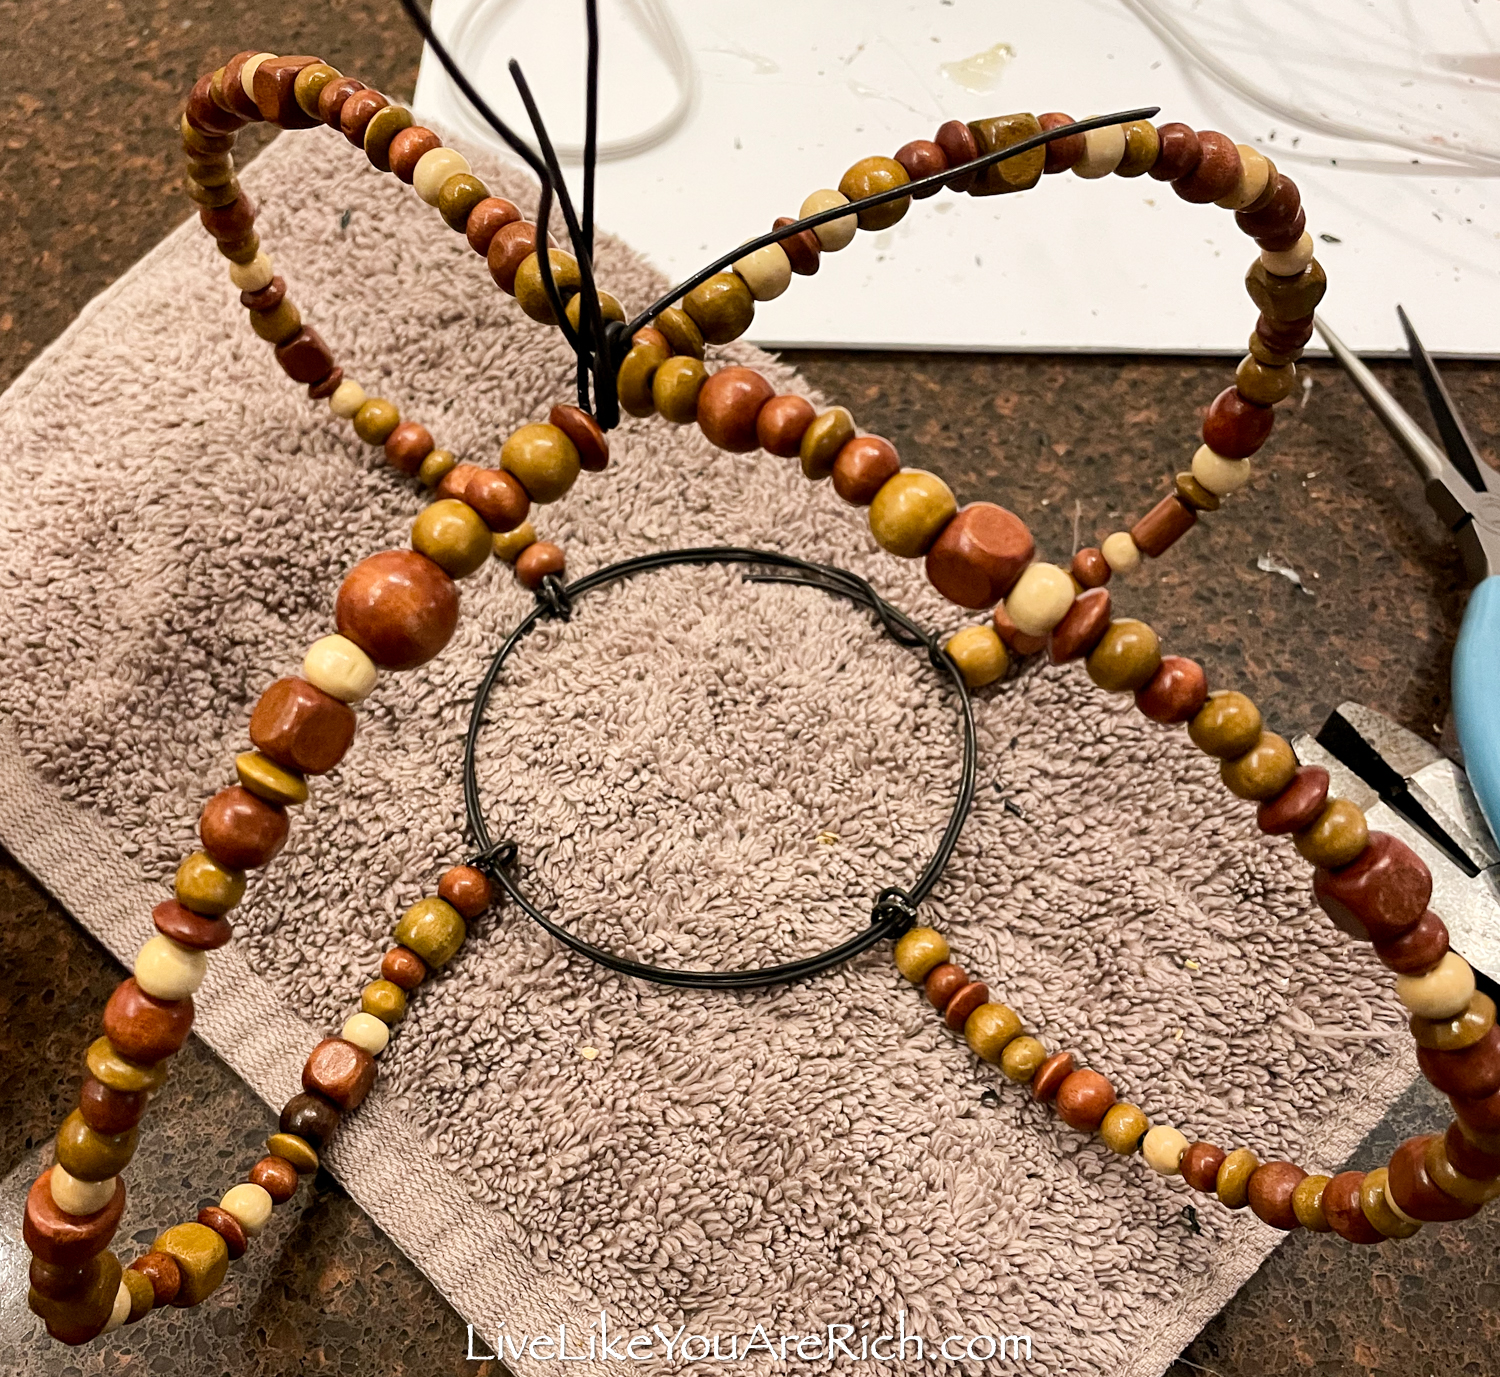

Add two more beaded wires—making 6 legs on the pumpkin.
You can even add another 2 (making 8 legs) but I choose to do only 6 as I was running out of beads.

Using wire, shape a pumpkin stem at the top and glue it with a glue gun or clamp it in place with pliers.

That’s it.
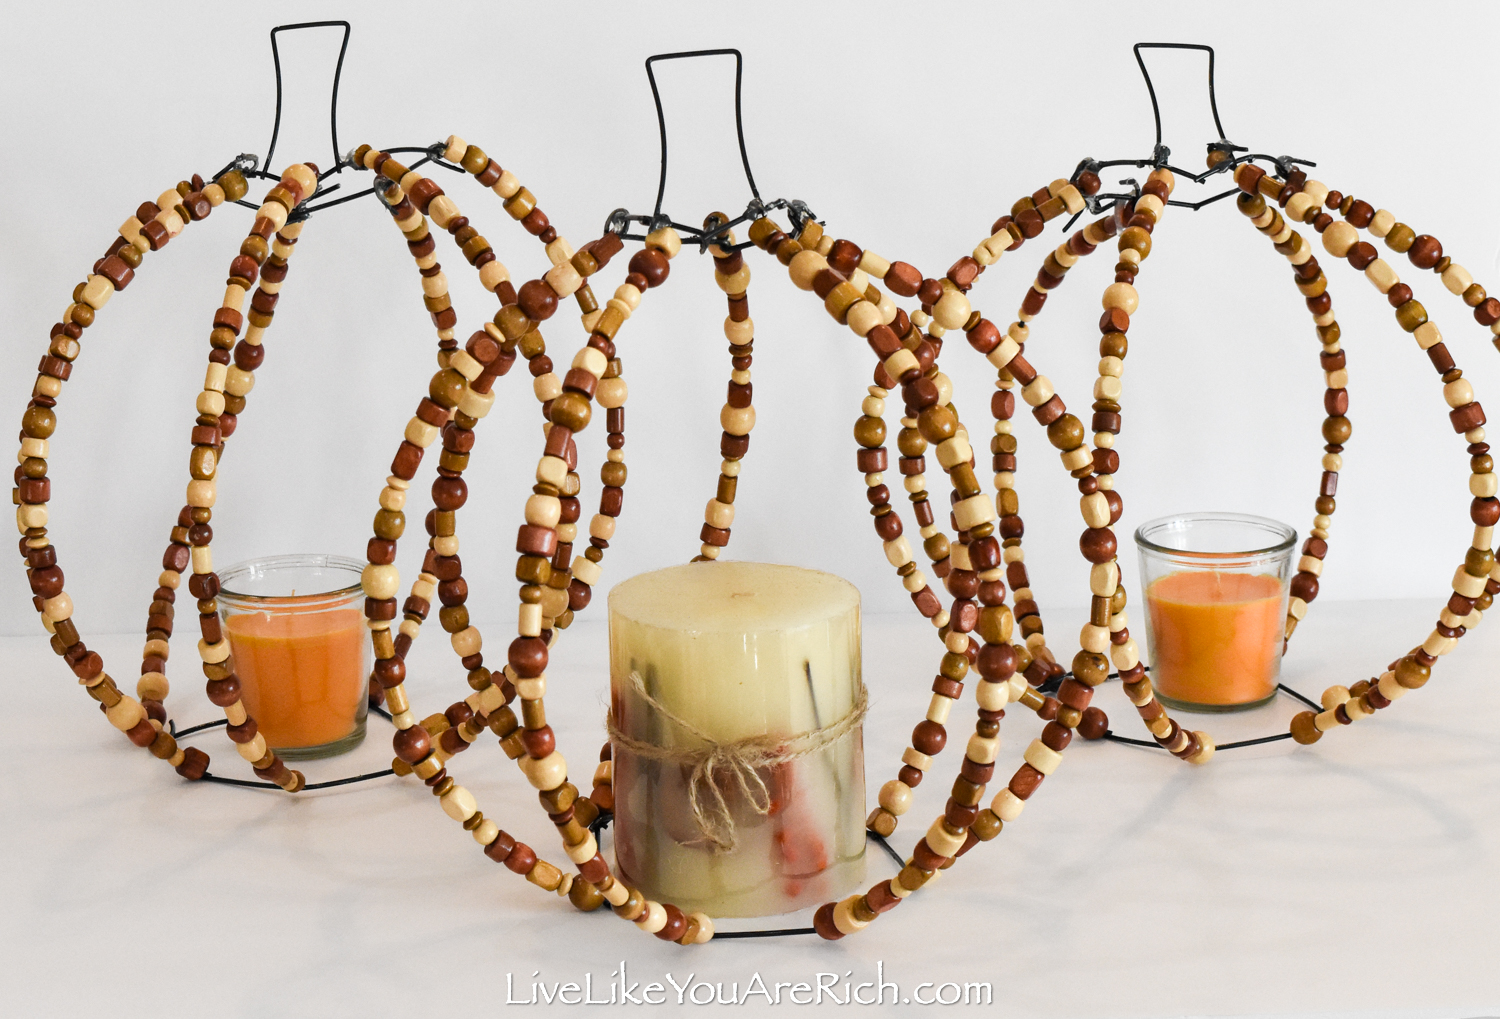
Both designs were simple to make and I love the way they turned out.

I used them on a Thanksgiving tablescape and added a fall candle and thankful sign in my centerpiece pumpkin.
These Wooden Bead Wire Pumpkins were very inexpensive—each pumpkin cost me $2.80 a piece to make.

It was a total of $14.00 for beads (bought on sale with 2 coupons at Michaels), wire (my husband had the wire), and 3 pumpkin wire wreath forms (Dollar Tree).

I hope this tutorial: How to Make Wooden Bead Wire Pumpkins was helpful for you if you want to try to make them as well.

Let me know in the comments below if you give this a try and how it turns out!

Happy fall crafting!


For other ‘rich living tips’, please Subscribe Here or connect with me on these other platforms:

Dorothy Boucher
Monday 22nd of November 2021
I think these are wonderful! and can't believe how easy they are to put together for the table. @tisonlyme143