
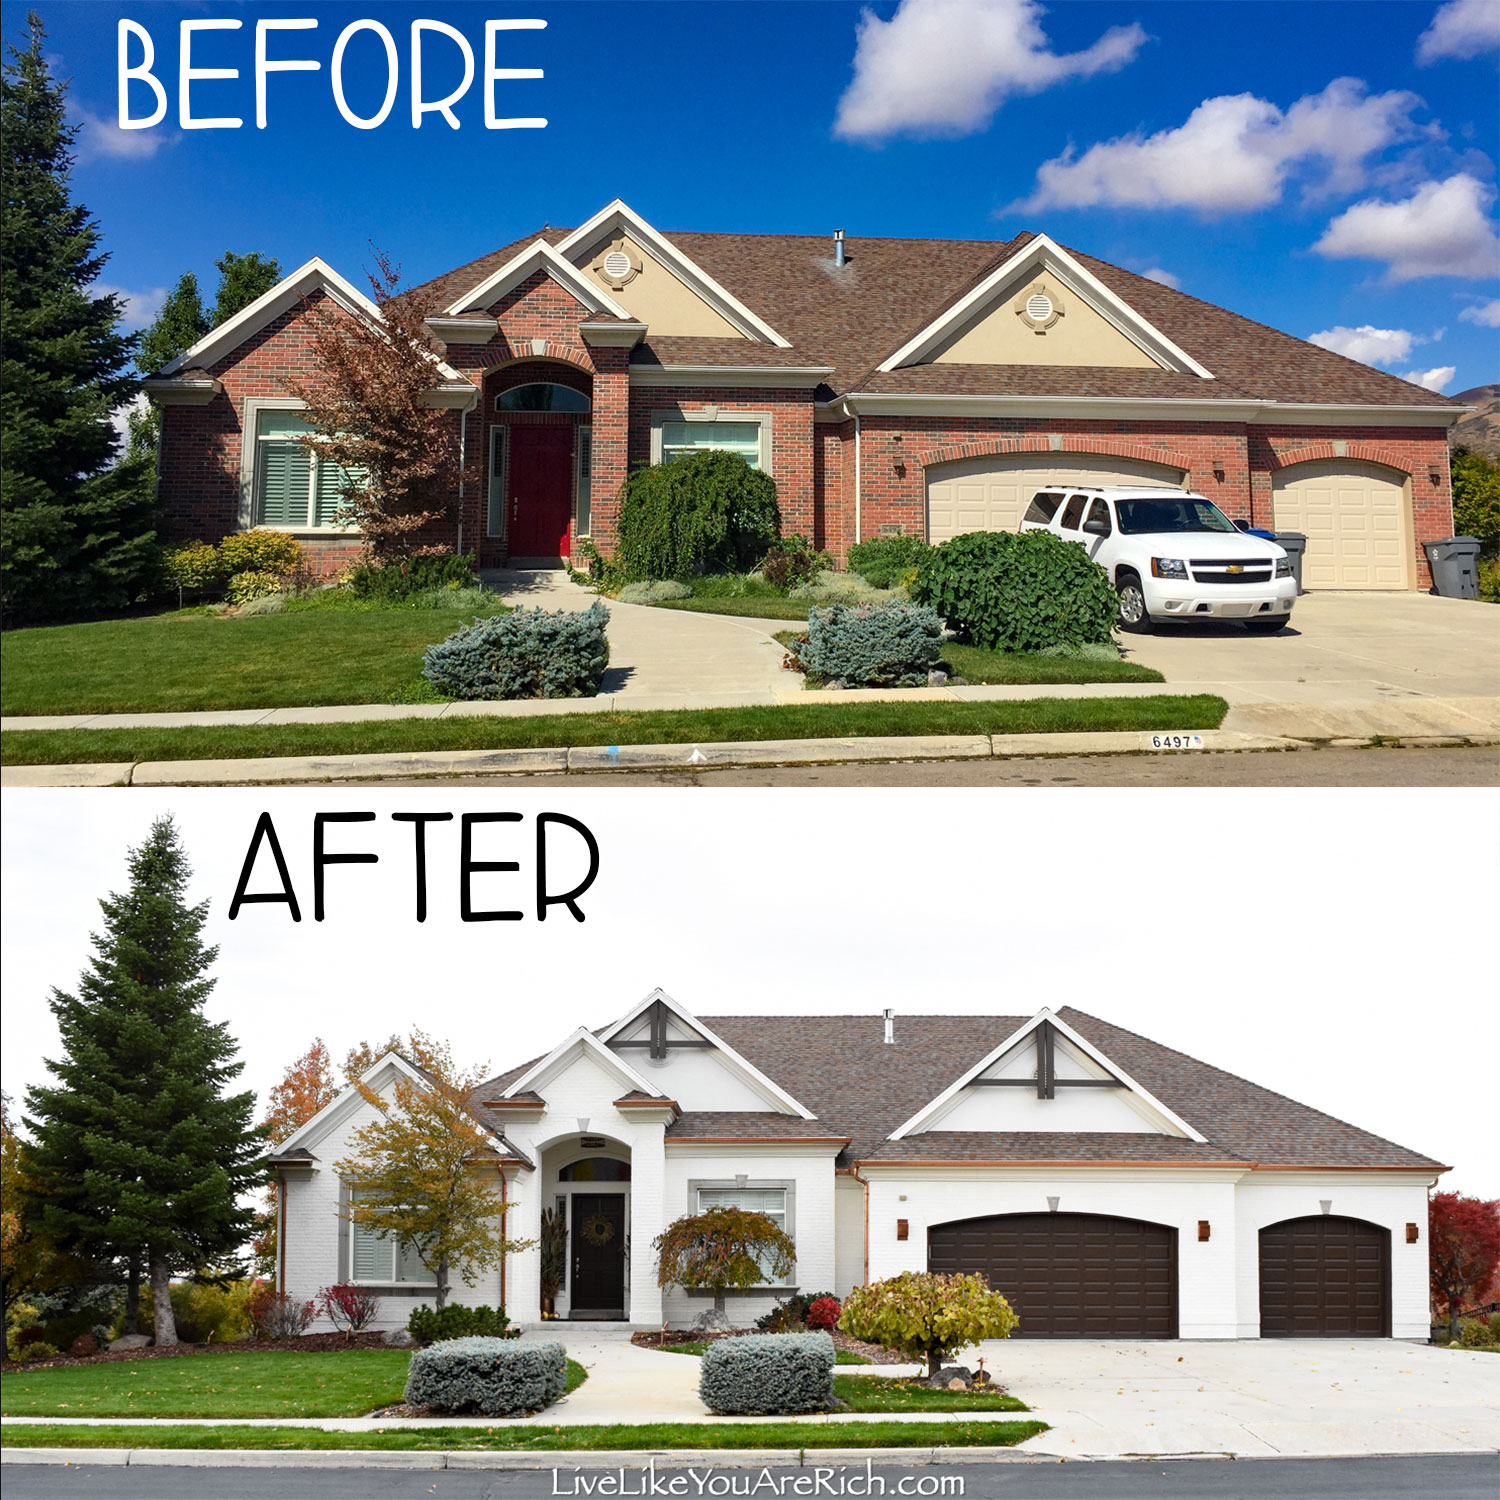

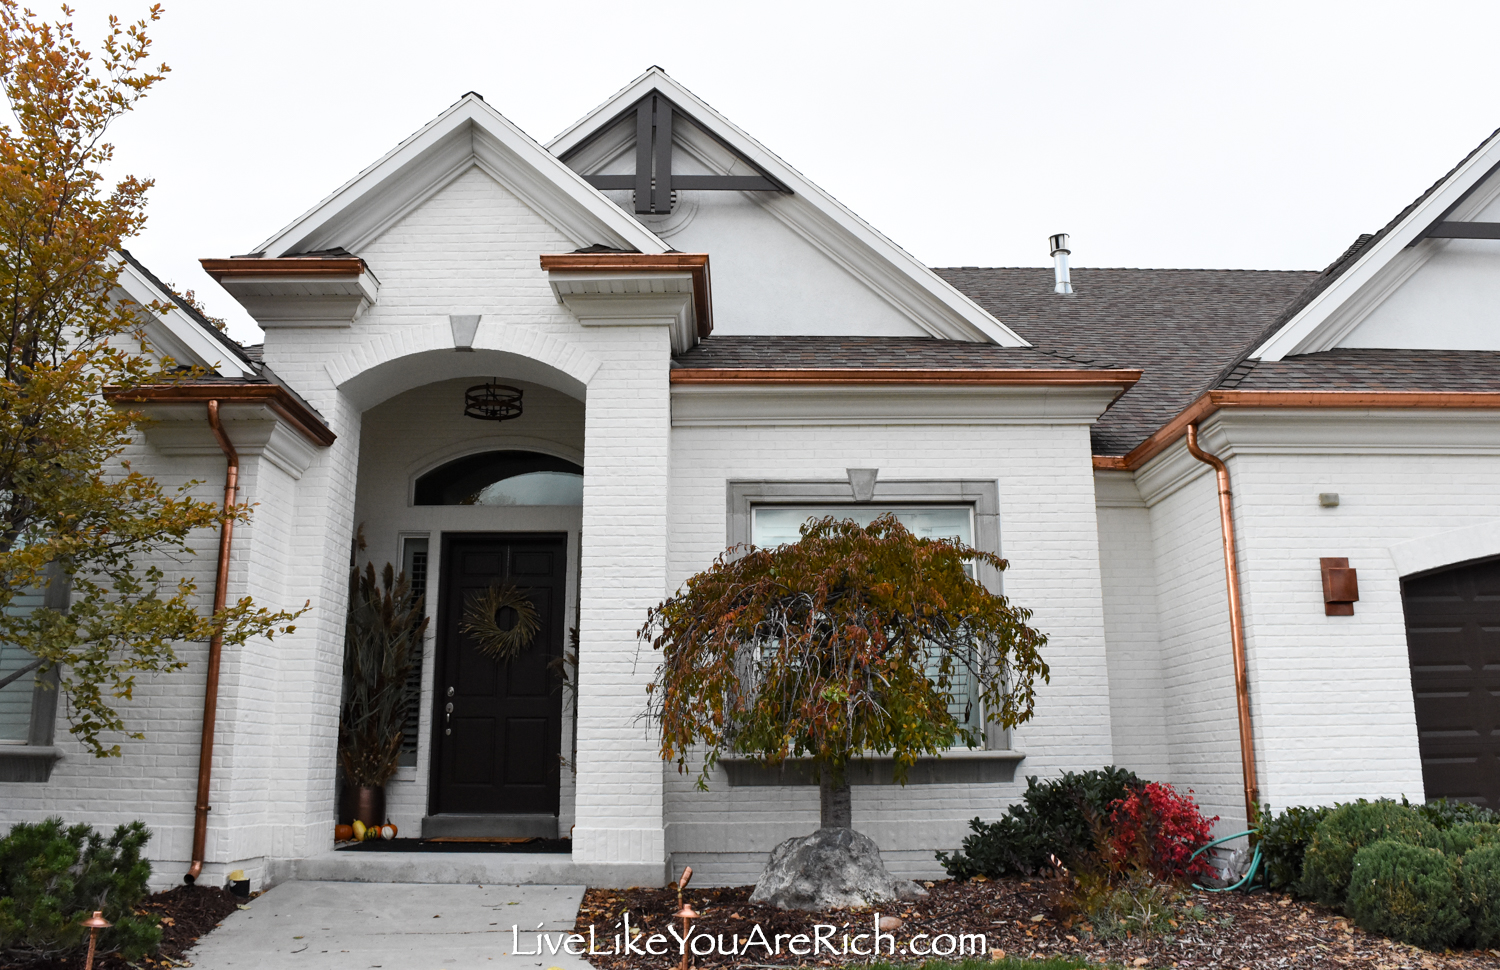
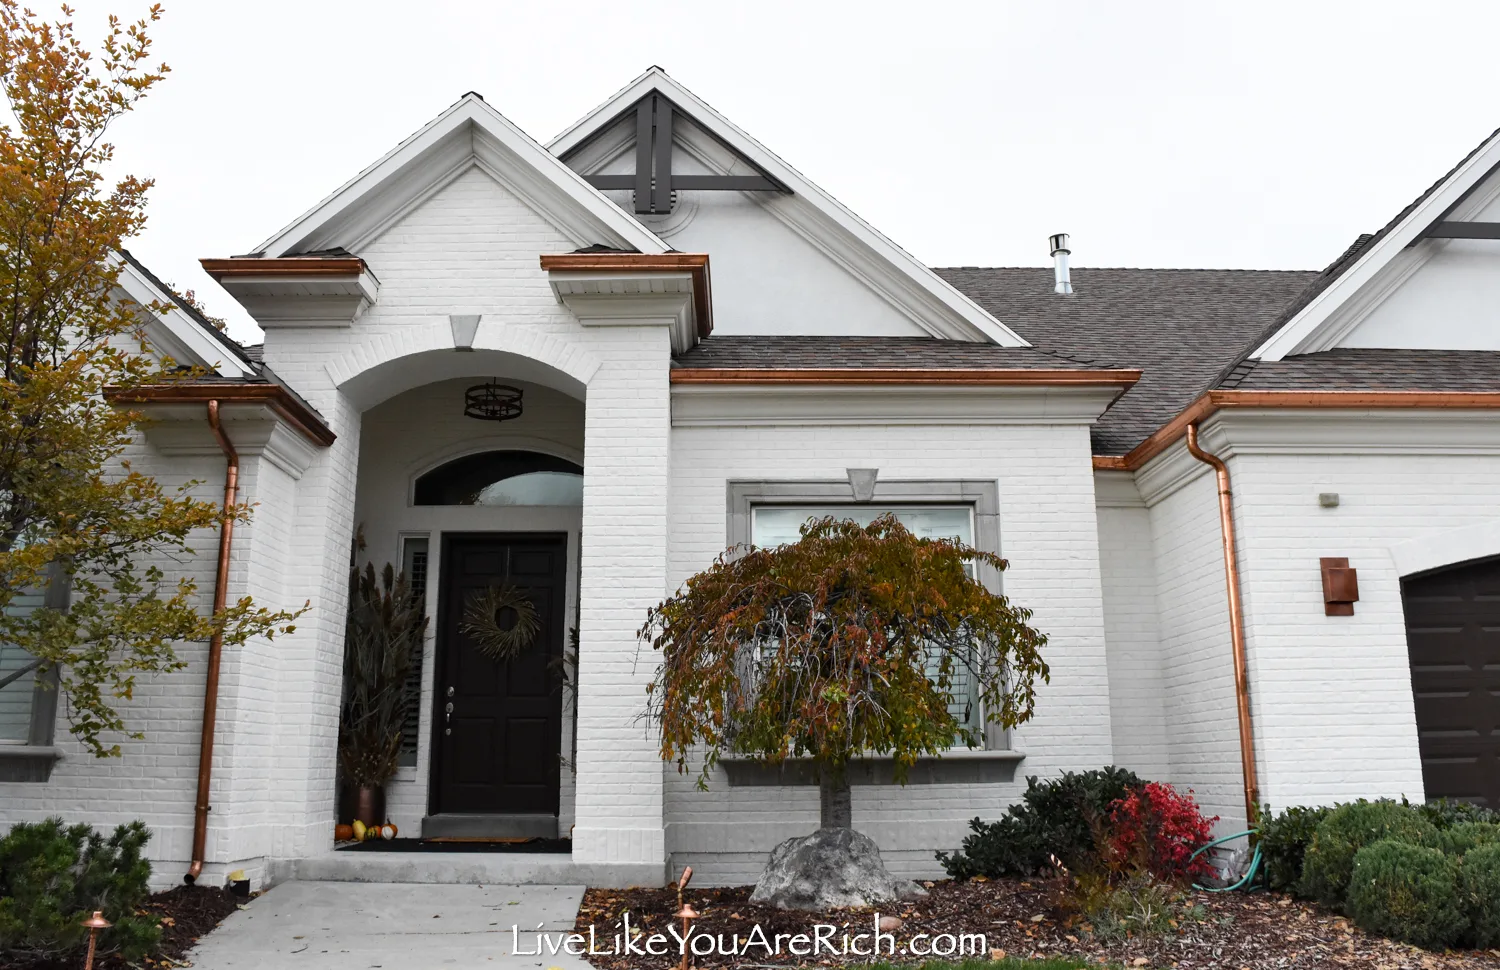
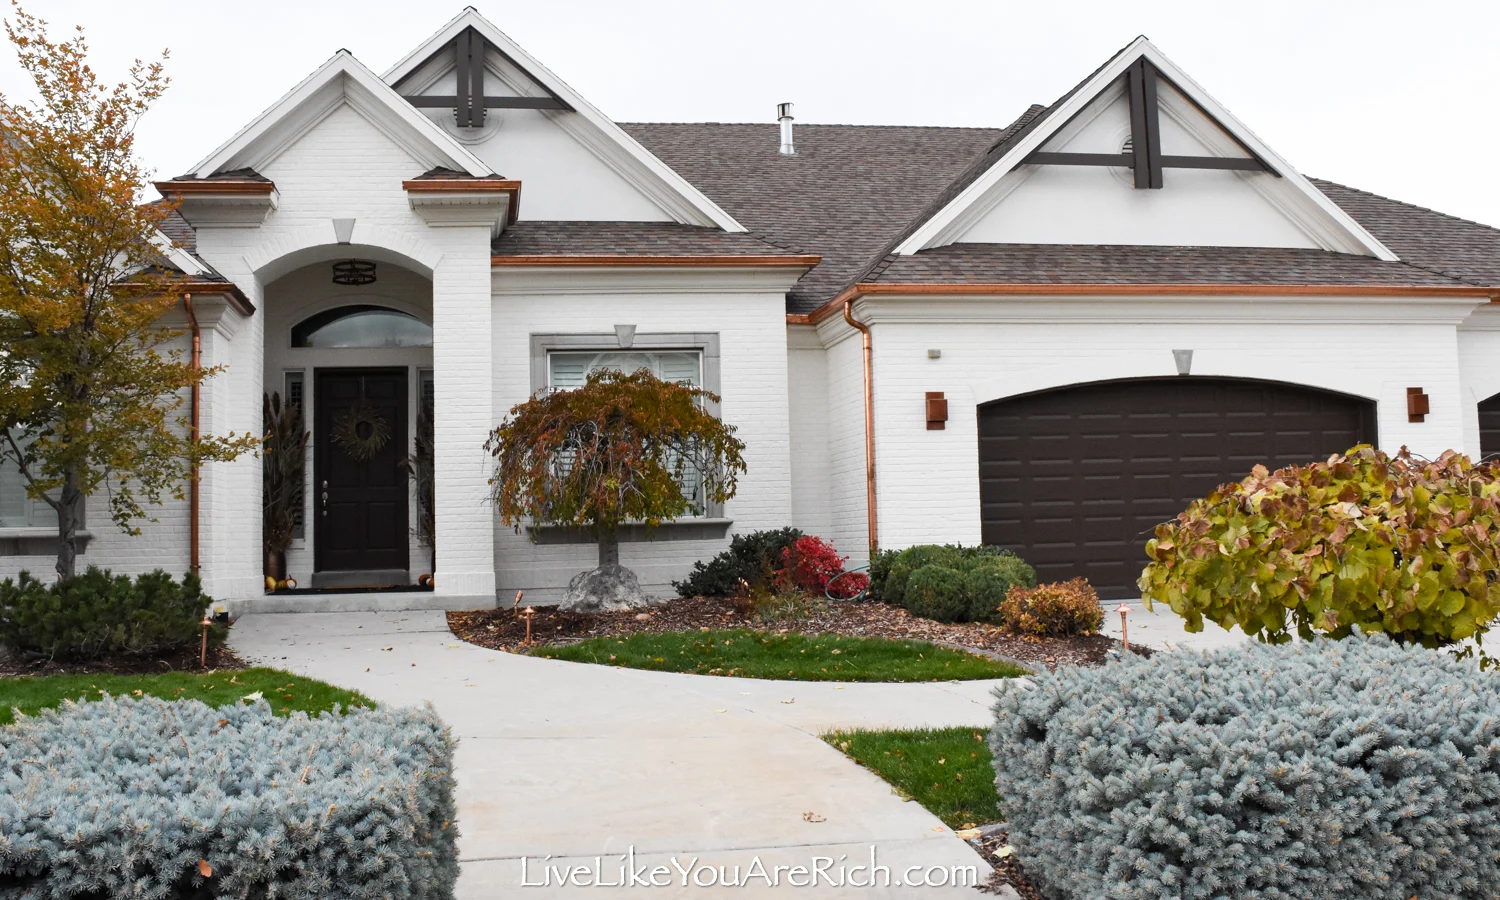
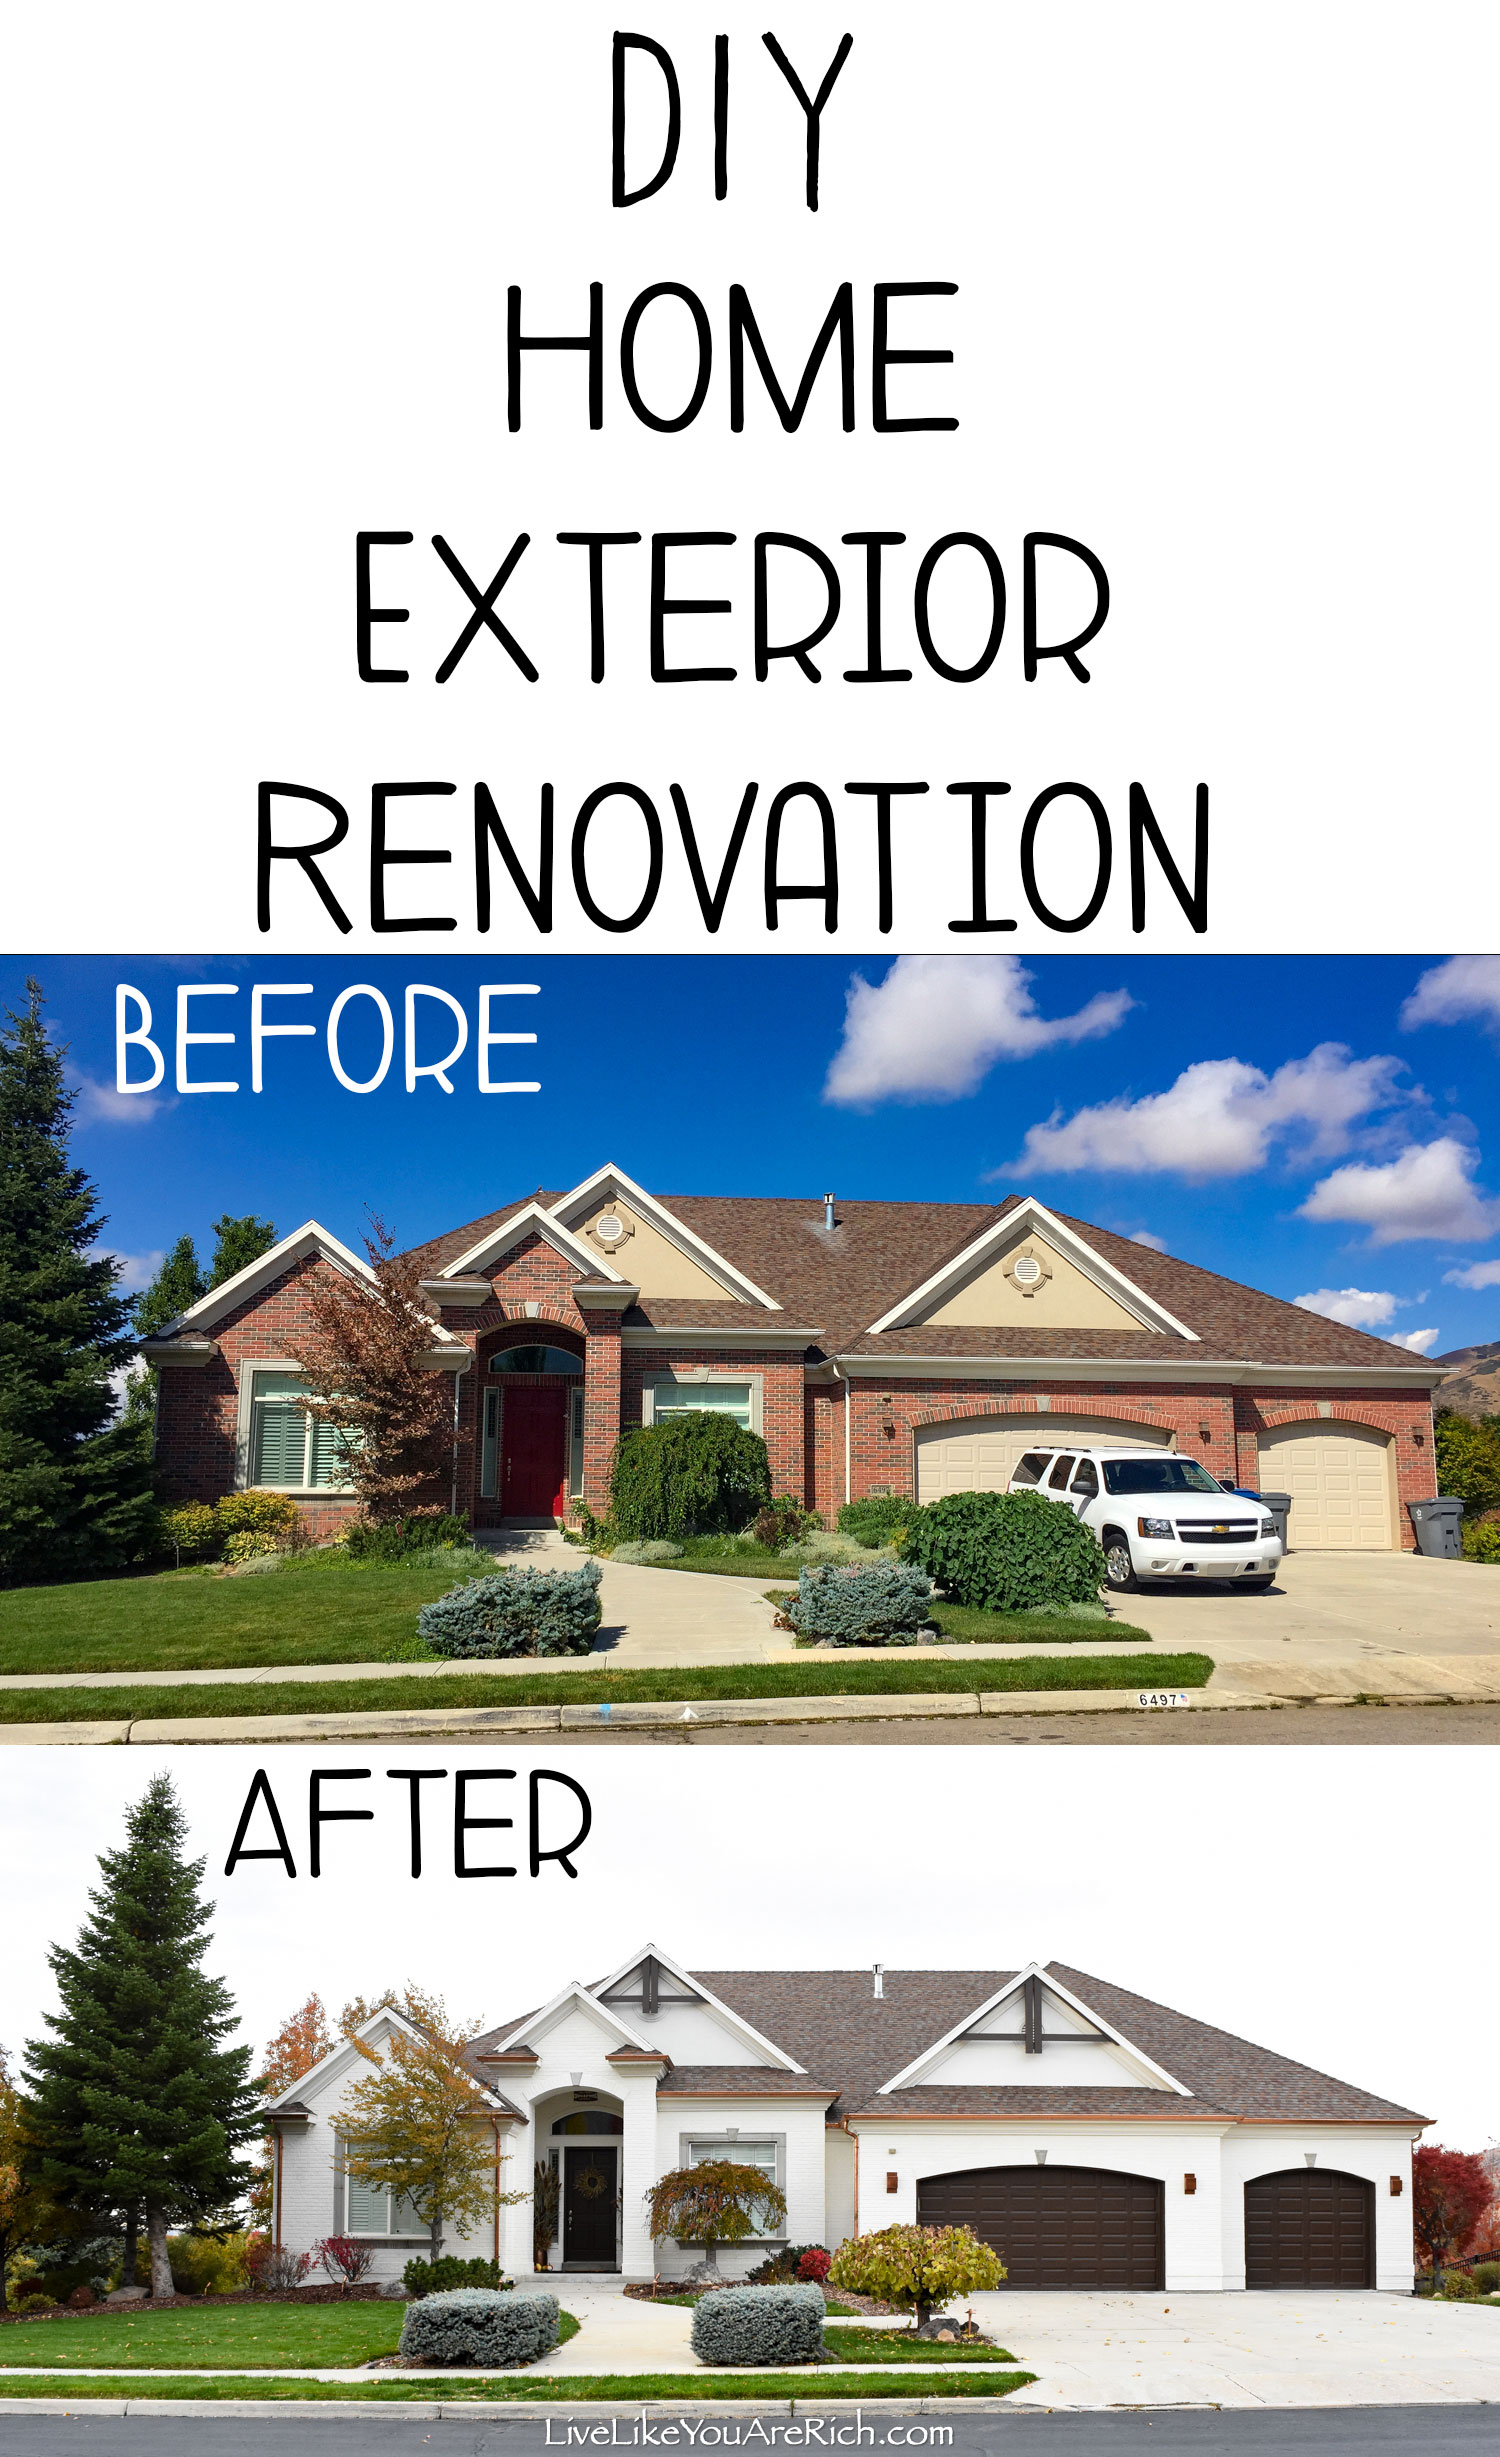
Below you will see the before and after on our white brick lime wash with copper gutters and lights— exterior home renovation.
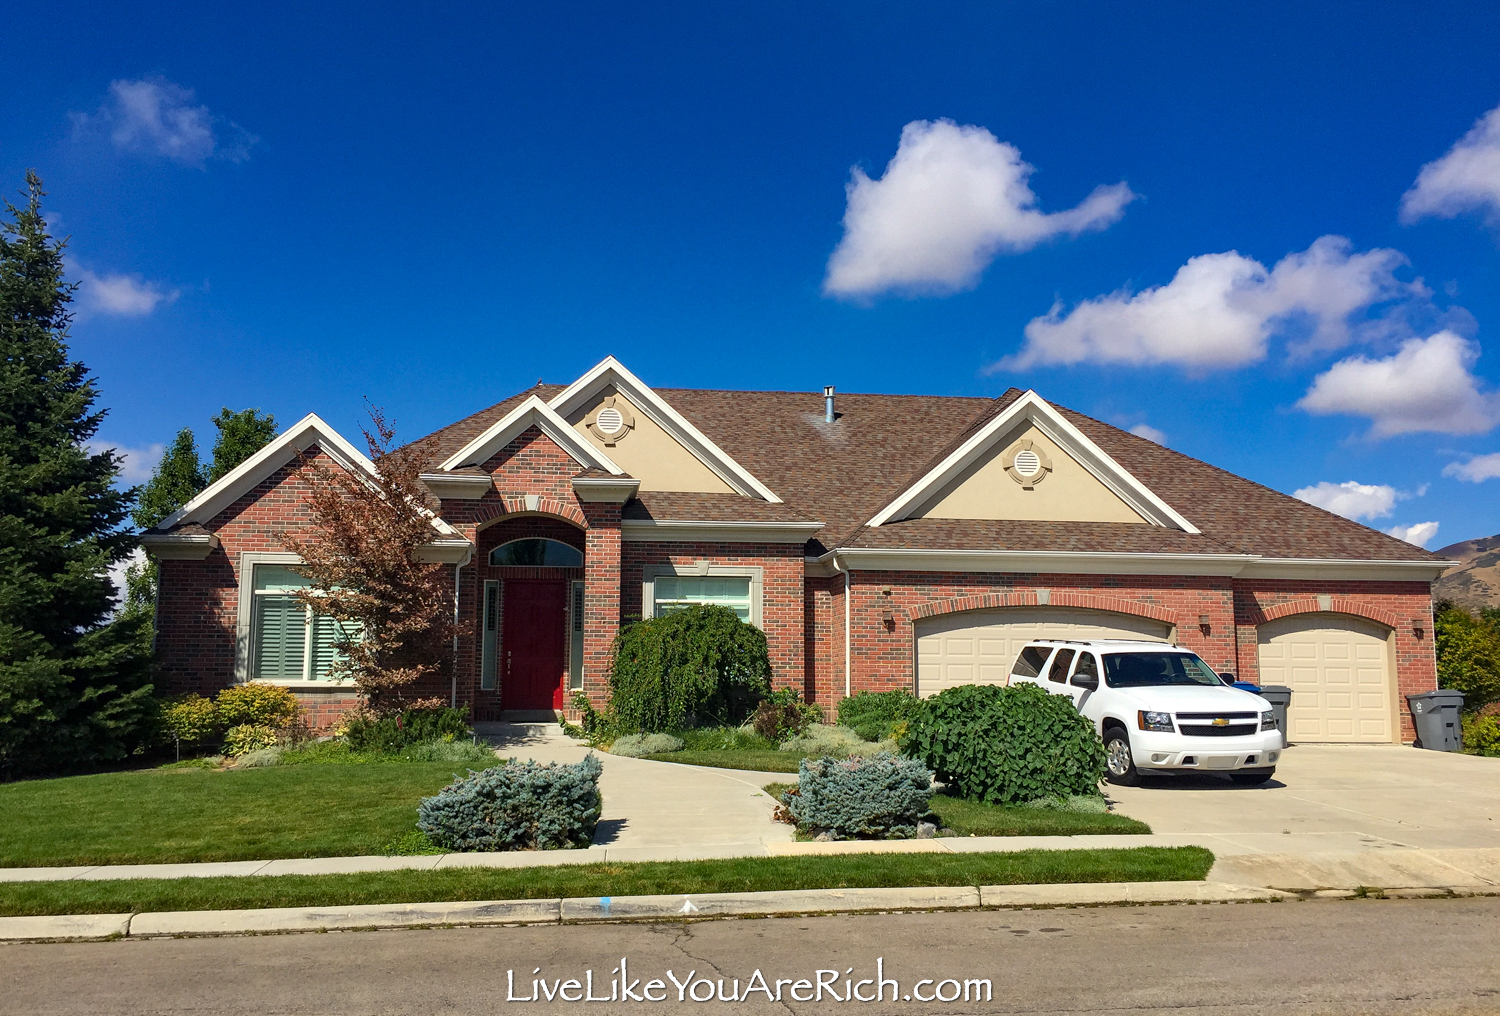
I bought this home 4 years ago and have been wanting to remodel the exterior ever since.
In the first year, the interior underwent a lot of remodeling. You can see many of the interior renovation posts here.
The second year, my husband, Shane, and I fixed a lot of the landscaping (as there was overgrowth in all the beds).
We made the beds become fairly maintenance-free by doing some things my neighbor recommended.
Now, we have much cleaner flower beds with very little weeding to do each year.
Check out how we did our weedless landscaping ourselves here.
In year three, we worked on our backyard and the kids’ rooms.
This summer, in year four, we did a playground in the backyard for the kids and remodeled the front exterior of our home.
We finished up this exterior renovation this fall (2021)…
After:

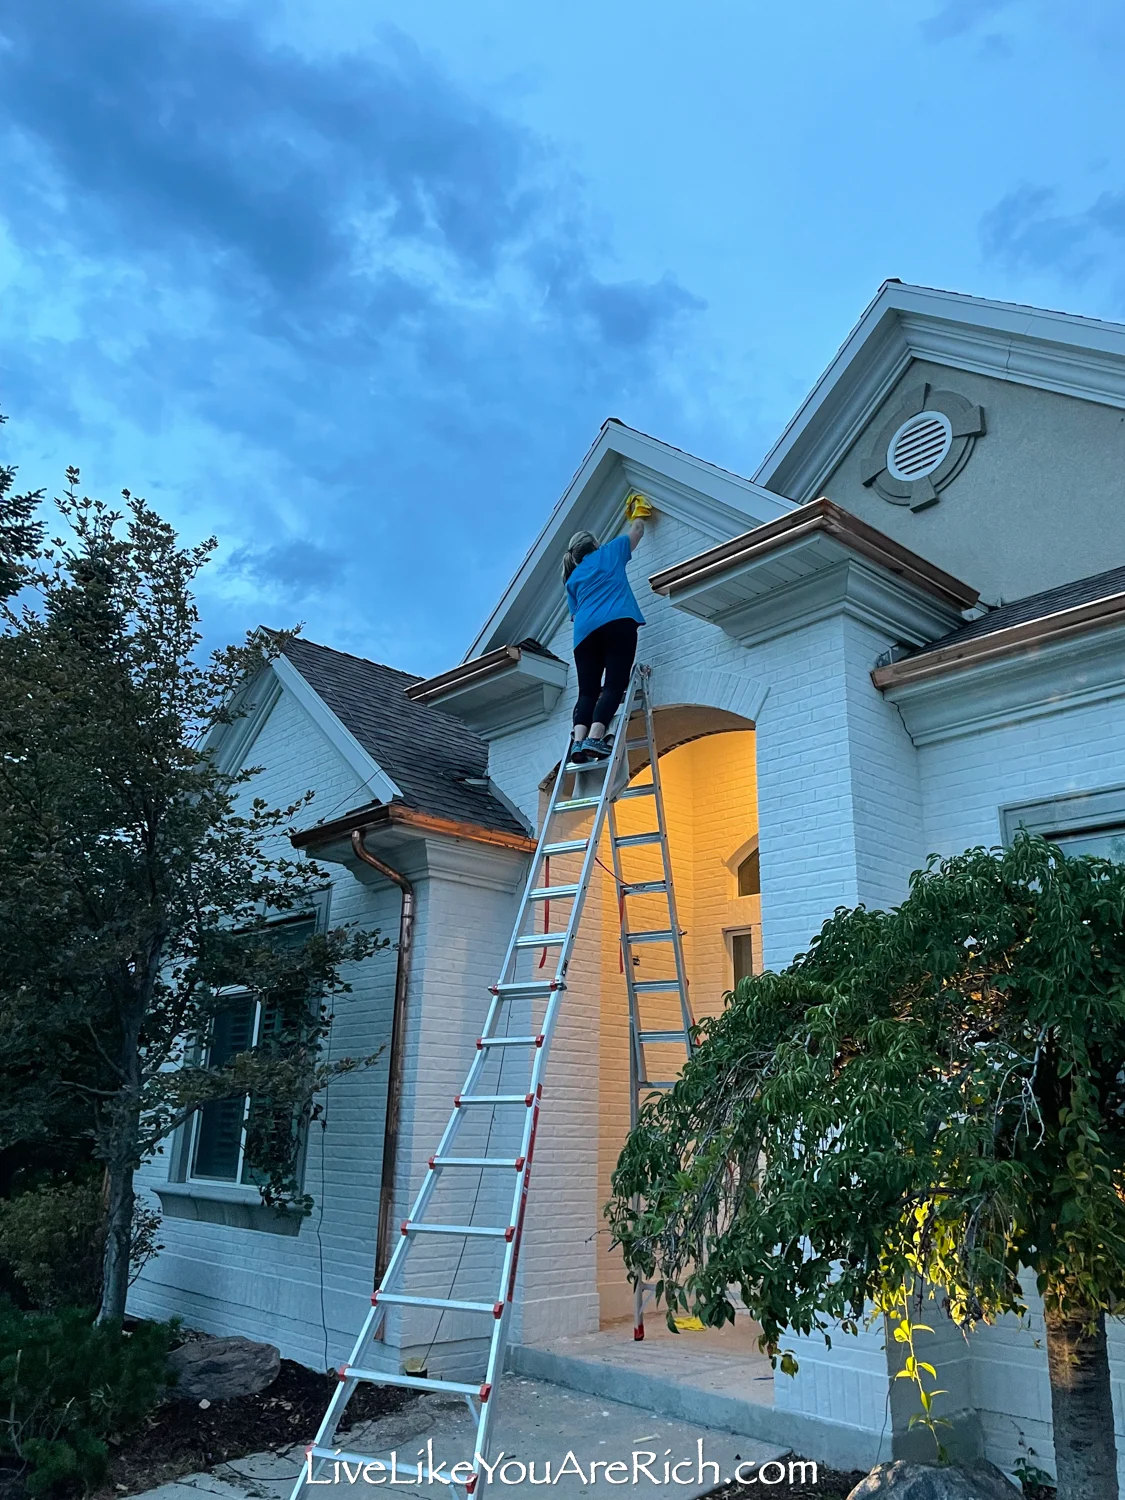
My husband and I worked on this all summer.
However, I did the vast majority of it myself because he was working out of town a lot.
I hired babysitters some days so I could work on the home renovation.
Doing it ourselves saved us a lot of money.

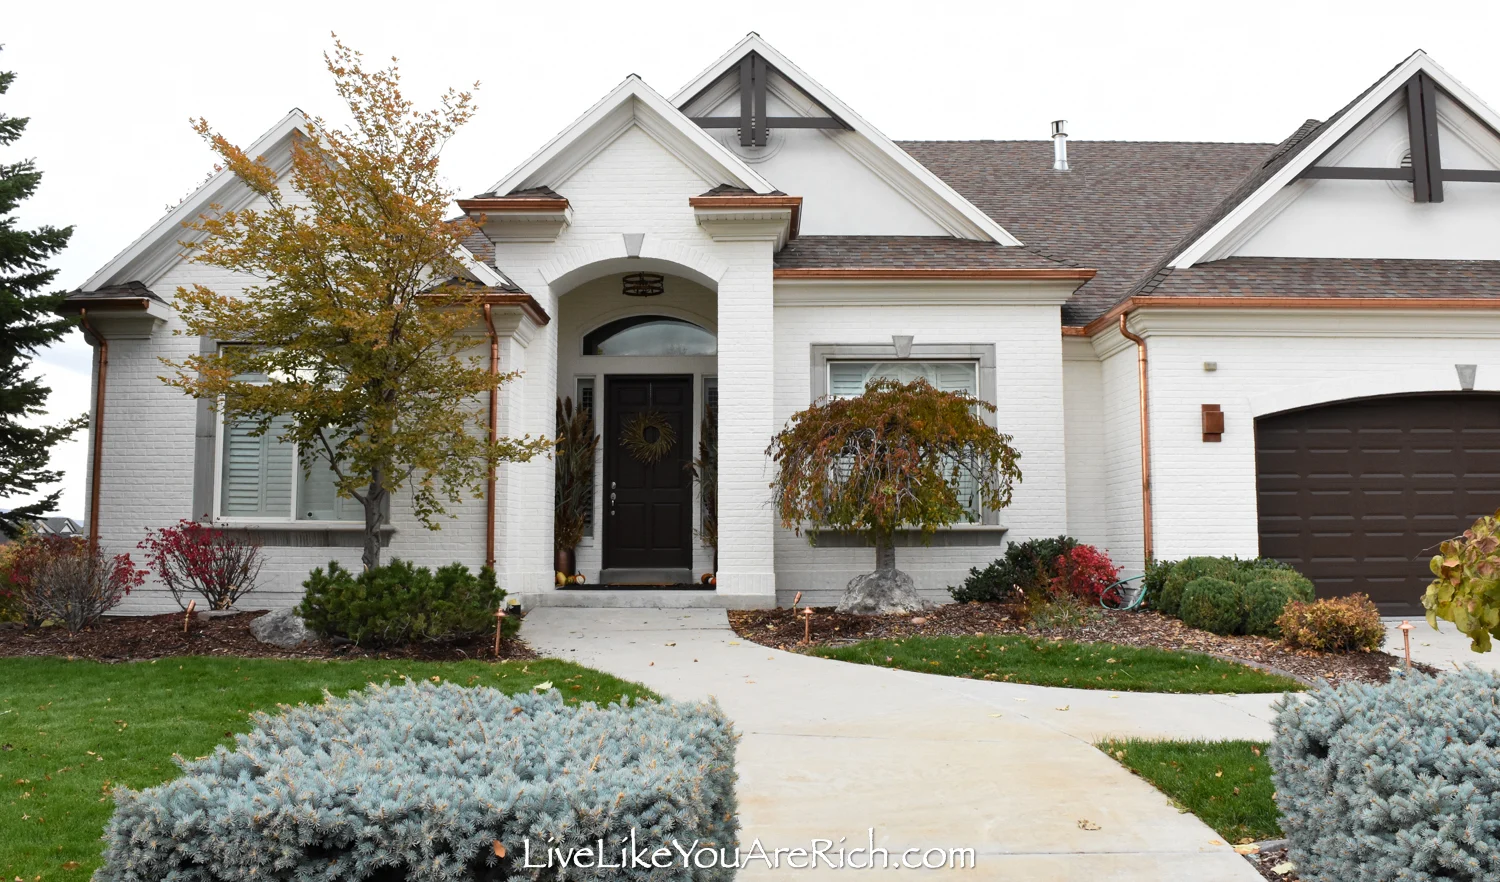
First, we lime-washed the home using Romabio in Avorio white.

I’m planning to do a post on the tips we learned with a video—coming soon.
We were going to do a patina lime wash (where you spray some off to see the brick underneath) but decided—after painting sample squares on our brick— to do a full-coverage lime wash.
Over many years it should start to patina; we are definitely okay with it developing a natural-looking lime wash over time though.
The supplies and lime wash cost $600.

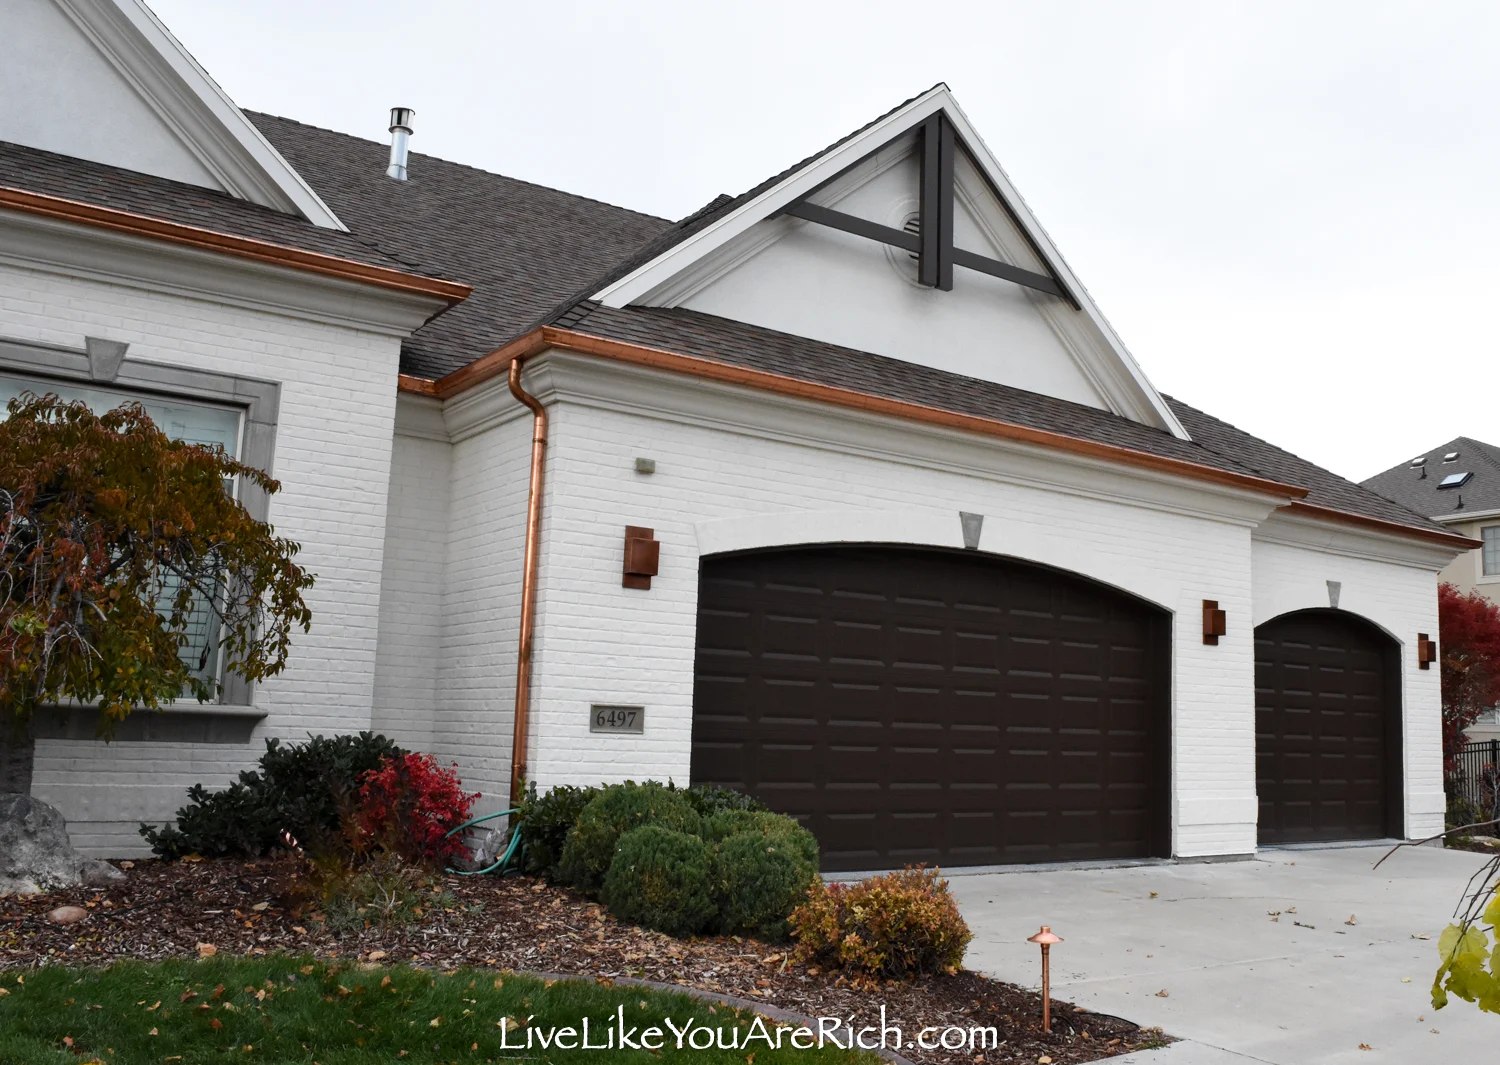
I painted the garage doors Mink by Benjamin Moore (a tutorial on how to choose a paint color for a garage door can be found here).
A tutorial on how to paint a garage door can be found here.
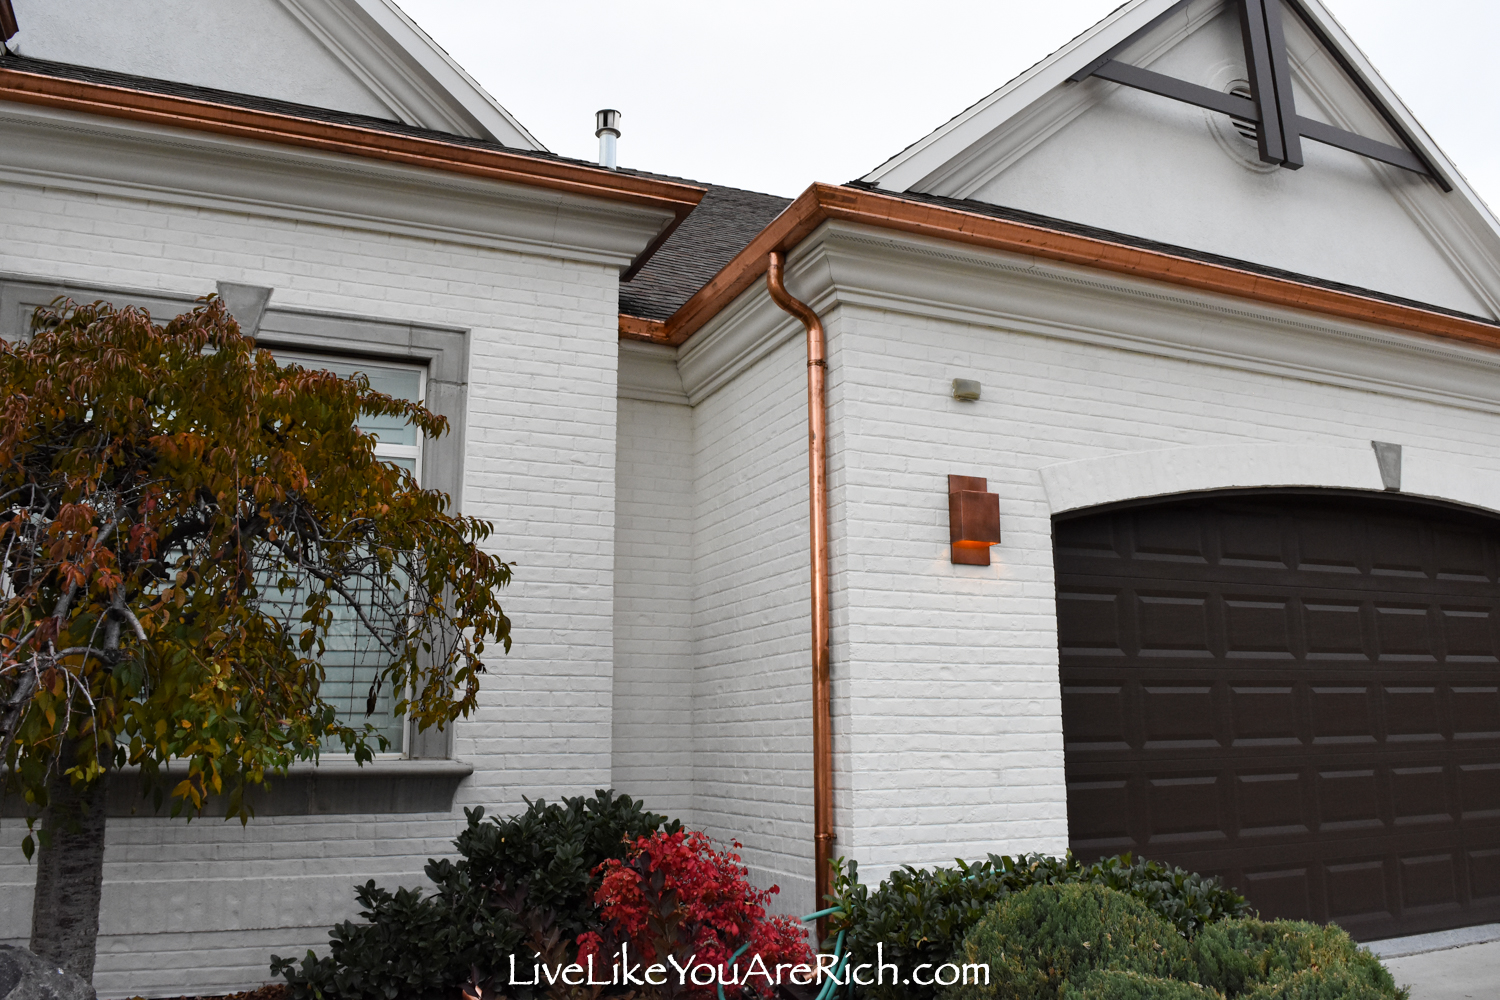

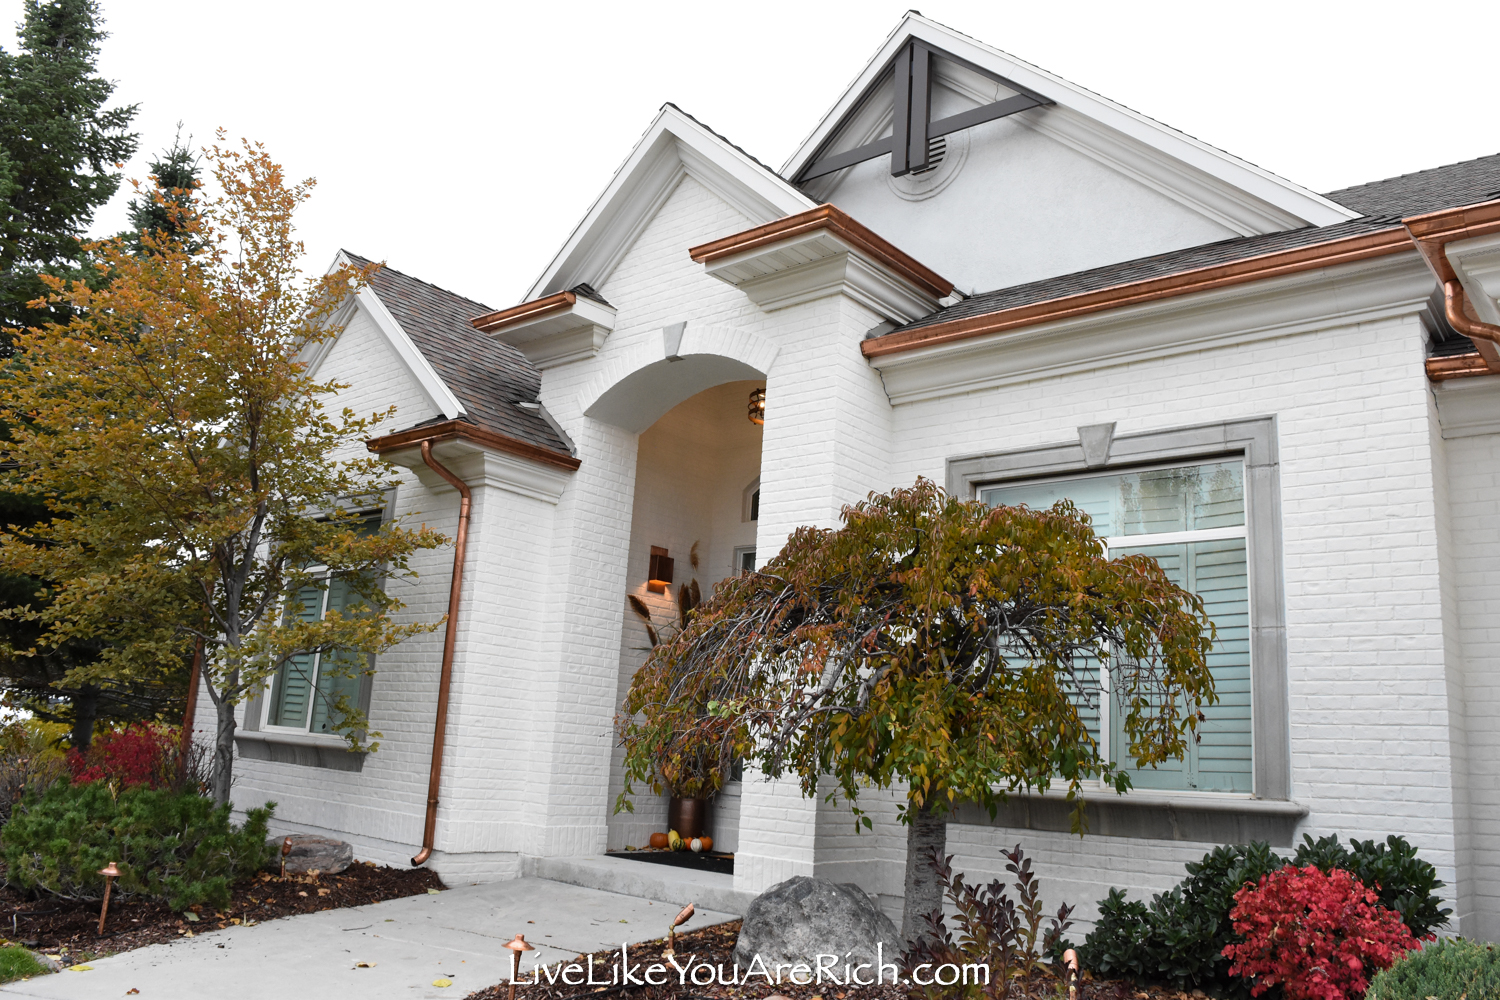
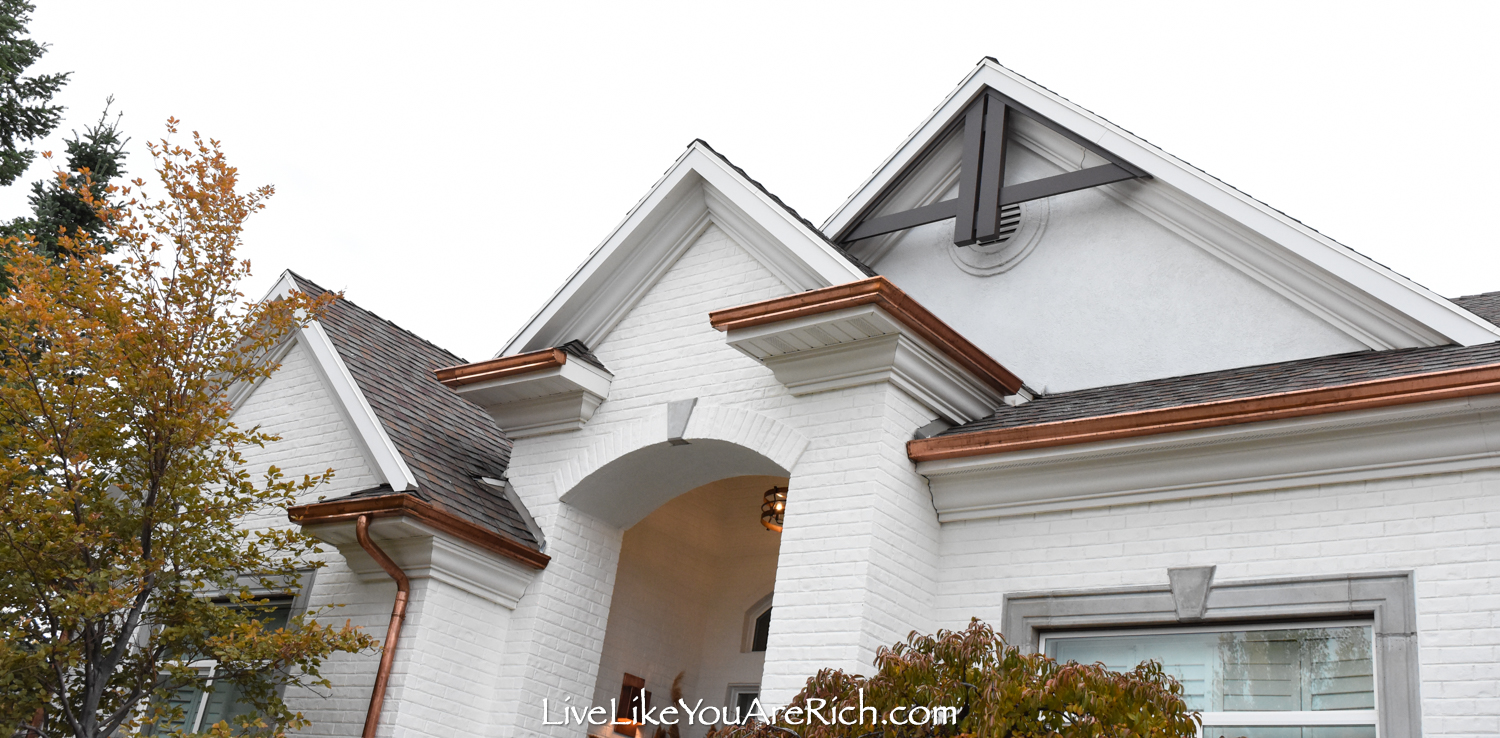
Next, we had copper gutters put on. The installation of the copper gutters was the only thing we hired out.
We got bids from 4 different companies and went with the most reasonable. This is where the majority of our $10K budget went. The gutters cost $4,500. installed.
I selected K style gutters (as they matched the crown molding) and round downspouts.
Copper gutters last for decades so we felt like it was a worthy investment.
After the gutters had time to patina, I sealed them with Everbrite, a clear protective coating.
You can see the video tutorial or read the written one on how to seal copper gutters to keep them from turning brown here.
The reason for sealing copper is so that it will stay this gorgeous warm copper and won’t turn brown.
Next, my husband and I installed the exterior lights.
I got the modern square mount lights off Etsy here: Total $850.00
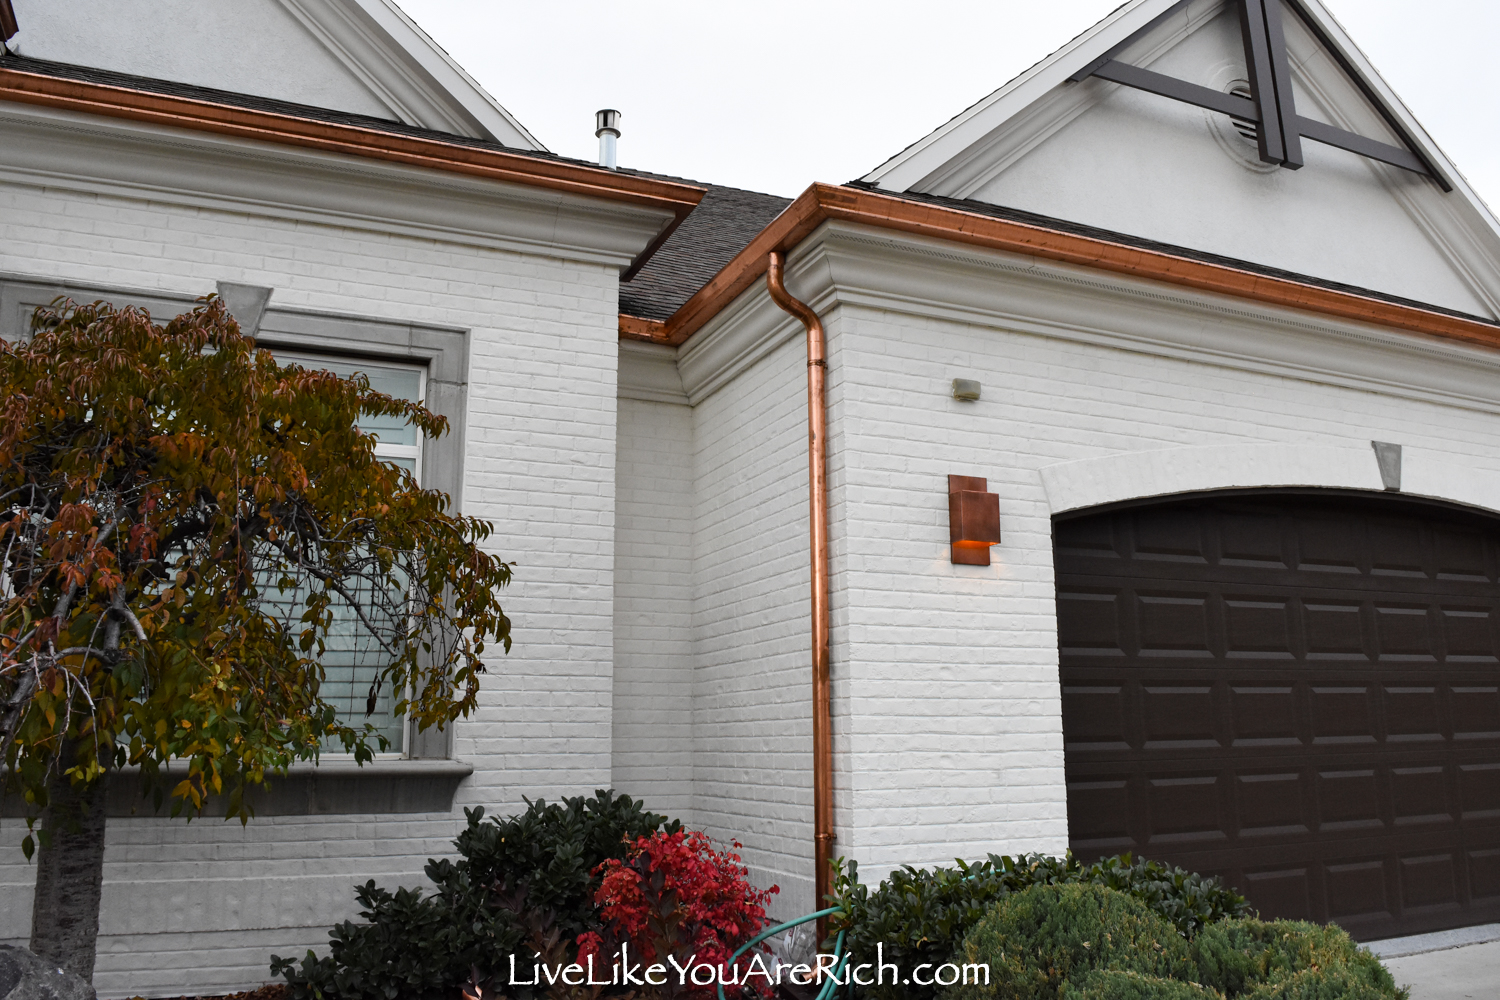

We purchased copper landscape lights from Costco (on sale) brand P.M. Lighting. $525.00


Reading Costco reviews, I learned something really neat about P.M. Lighting. I read that they will do a free virtual consultation on where to place the lights you have bought.
I sent them an email with photos of my home and a week or so later I got a design back specifying the best places to put the lights I bought. I found it helpful and was happy this service was free.
I also sealed the yard lights and mounted lights with Everbrite after they had time to patina a bit through a few rainstorms.

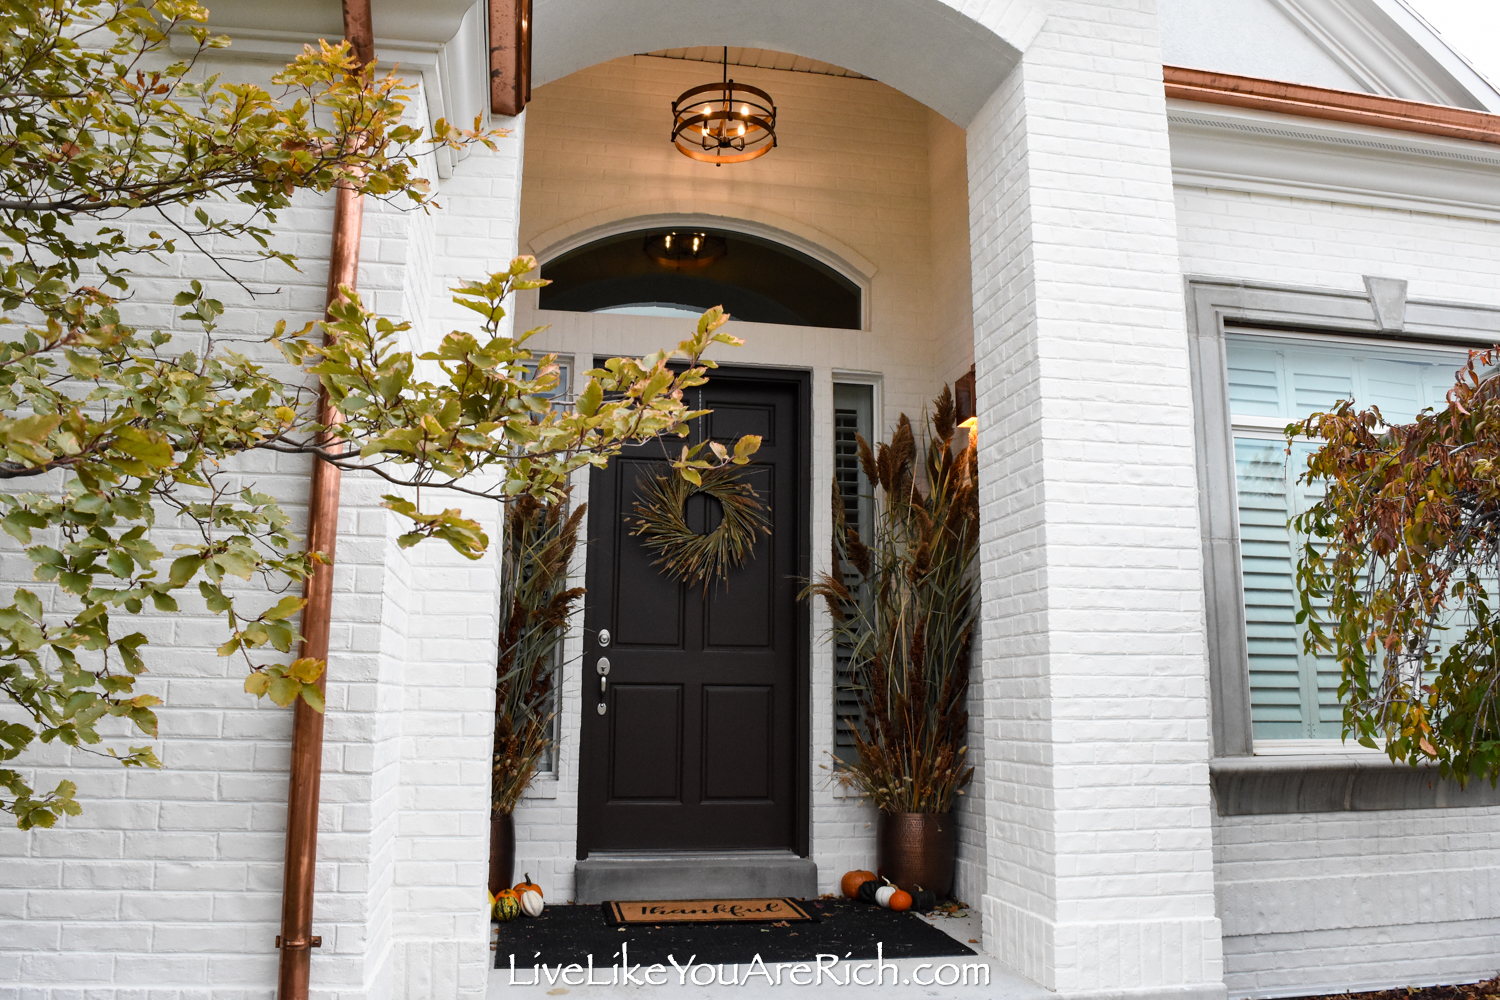
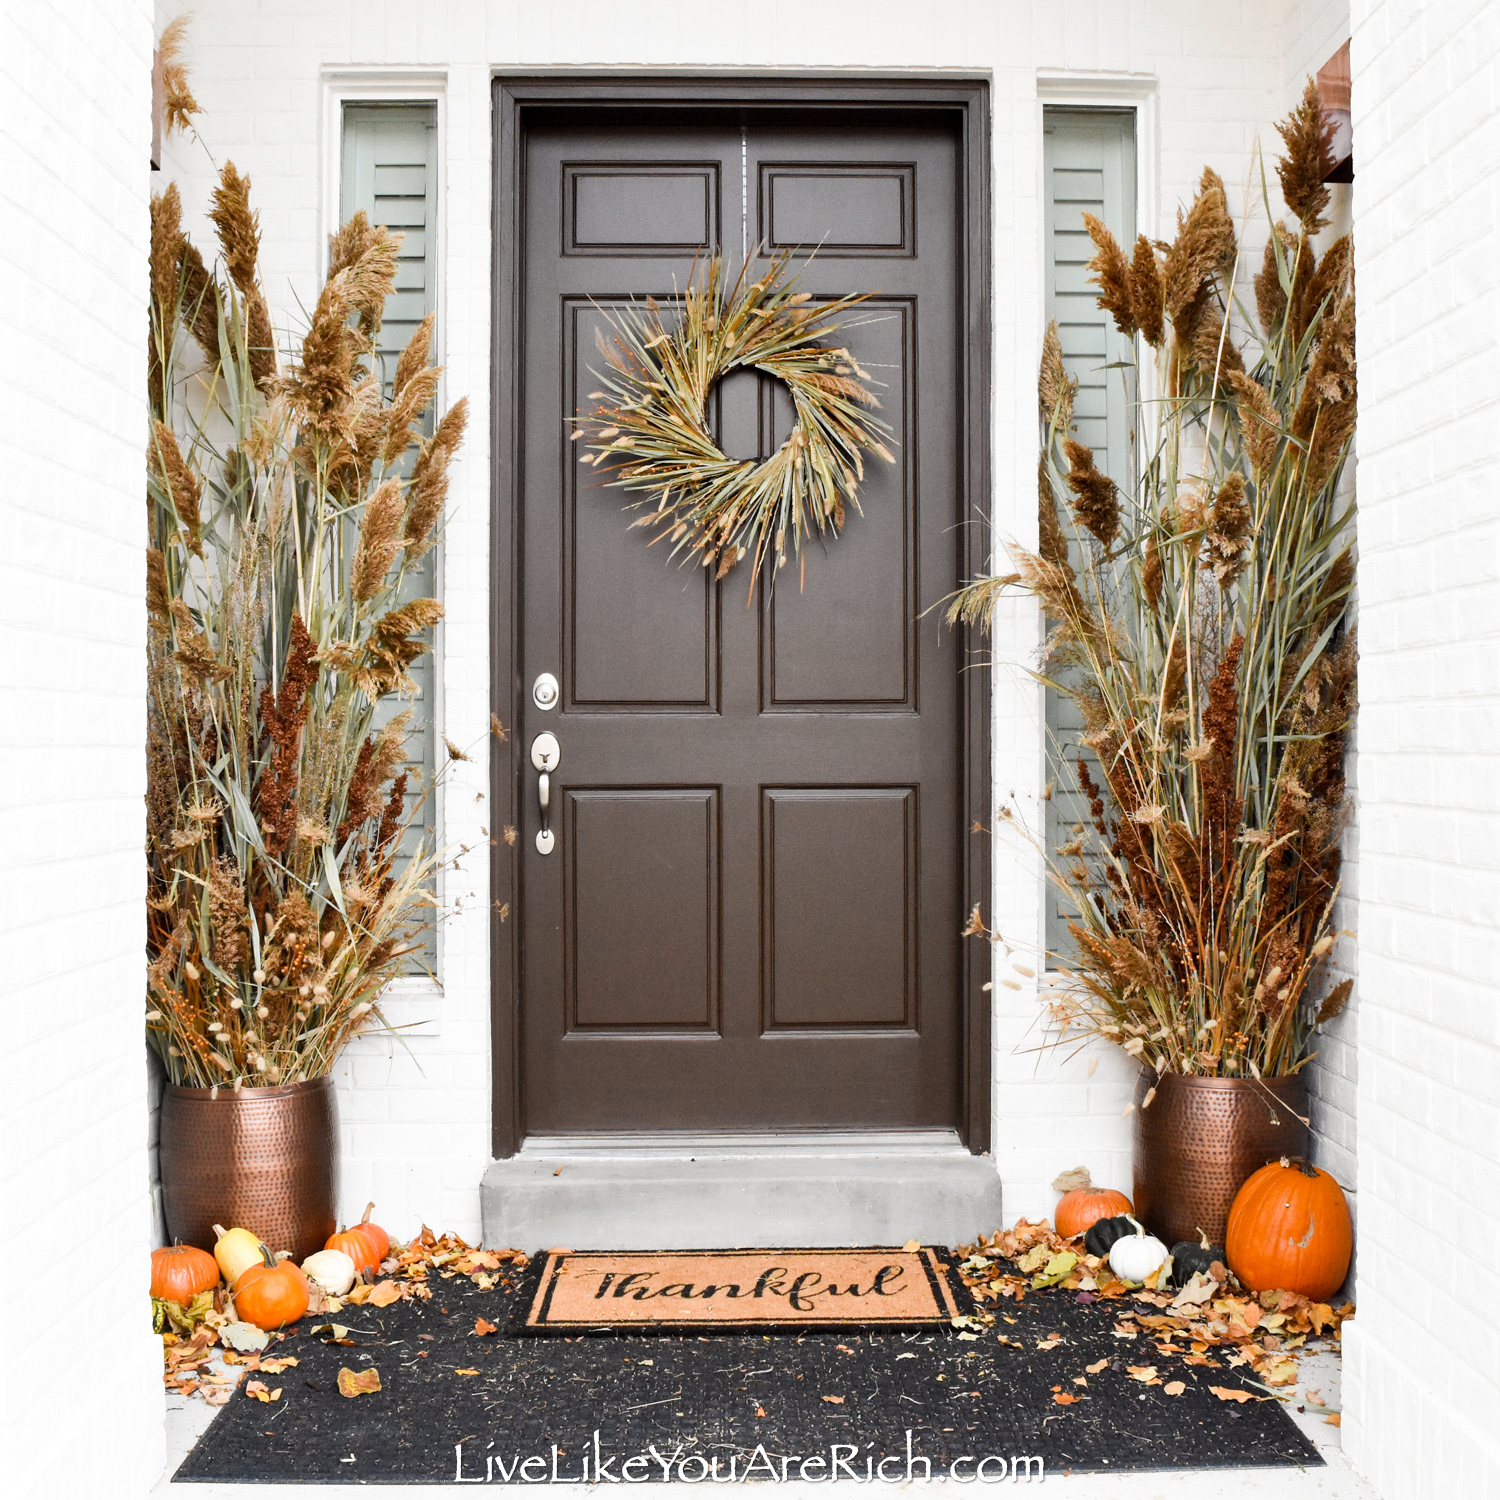
I bought the front door chandelier on Amazon here. I purchased the chandelier as an open box yet a new item. It was only $70.00 shipped.
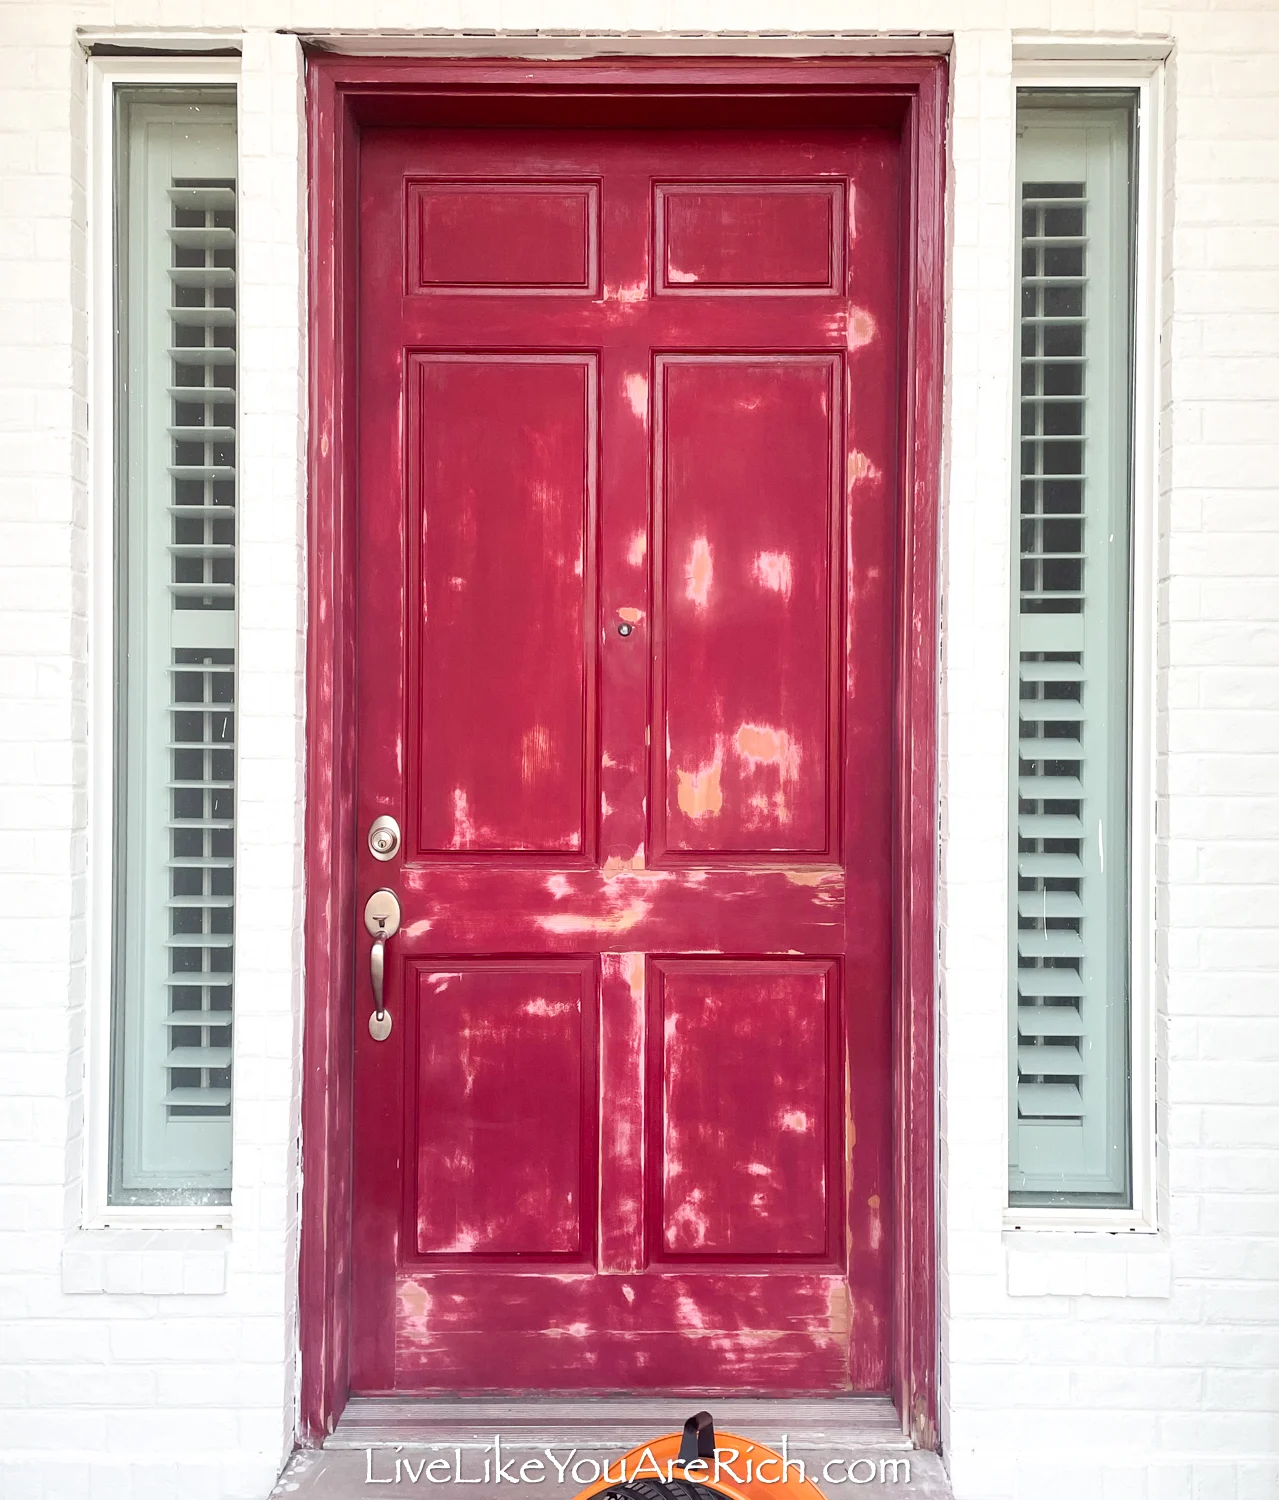
Our door was a carnival red and I really did not like it.


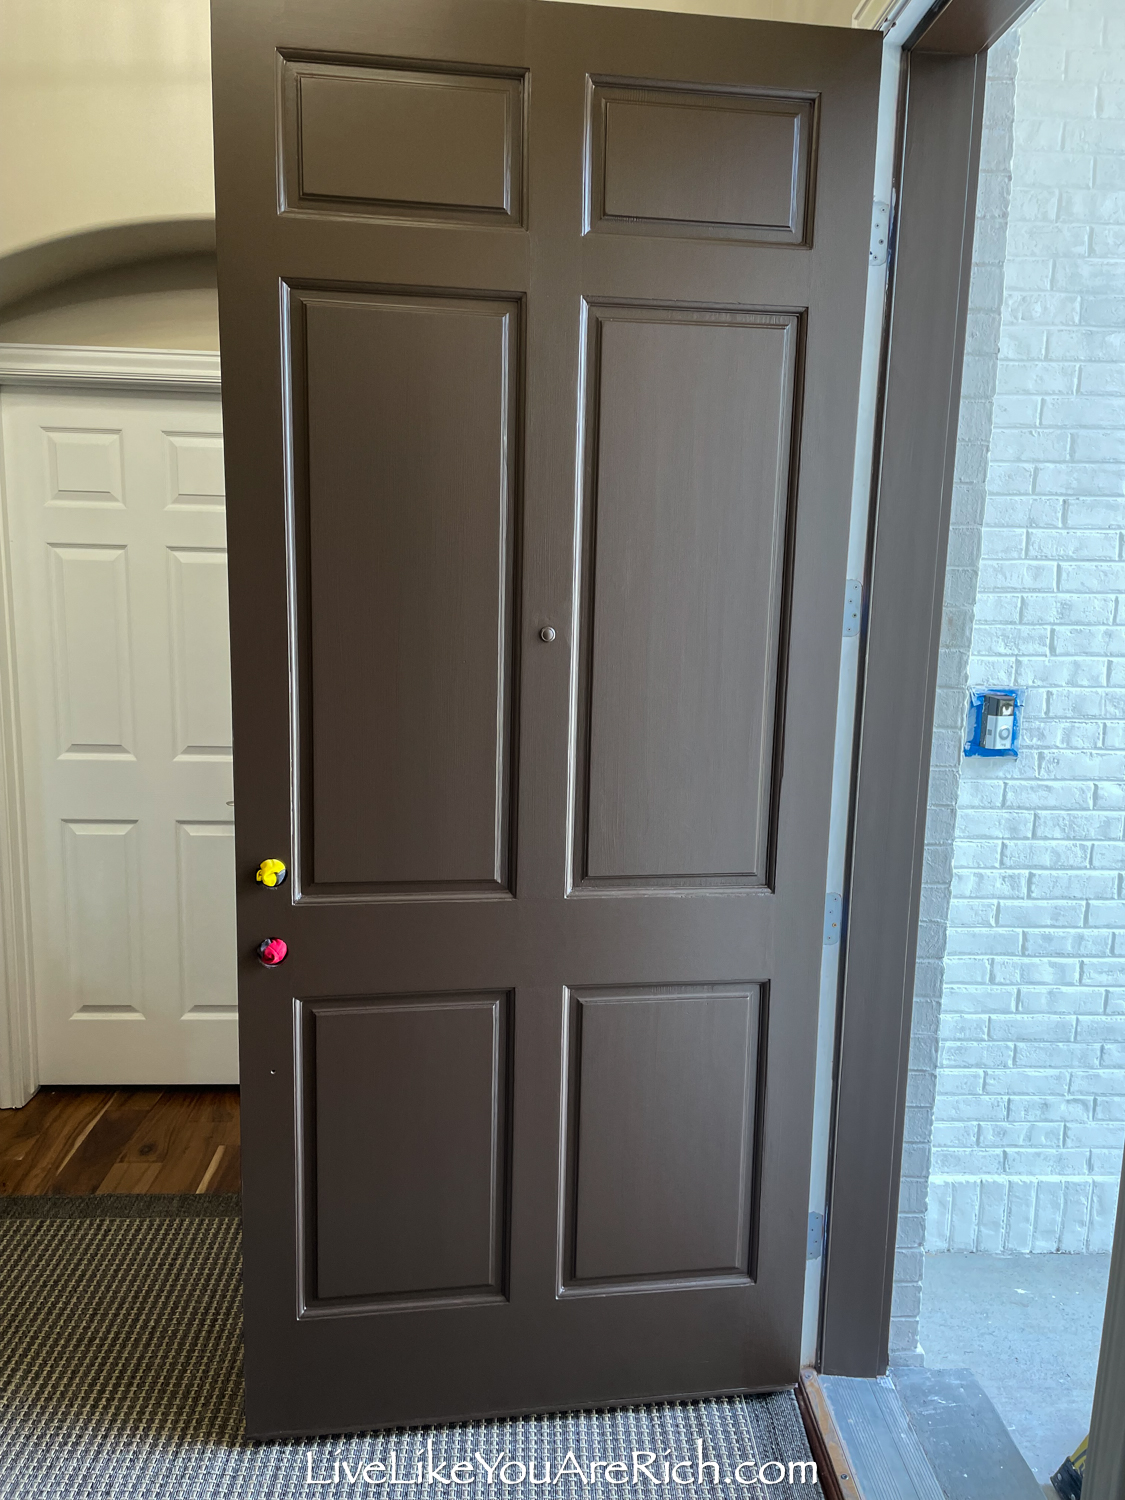
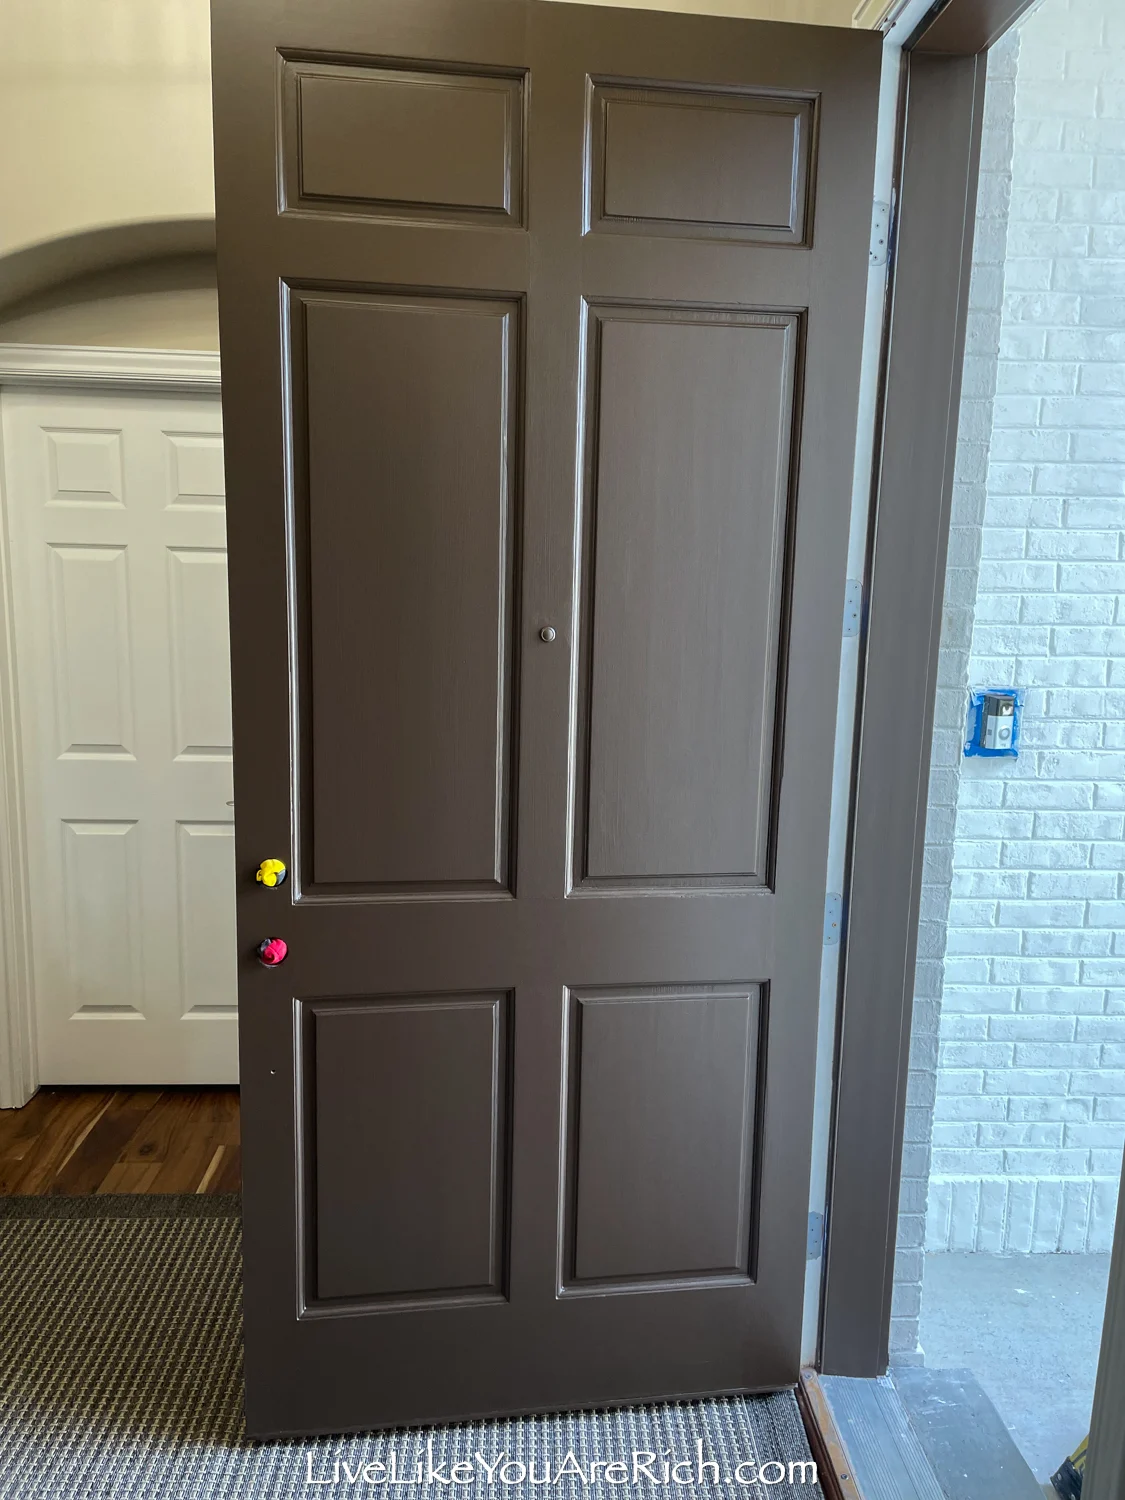
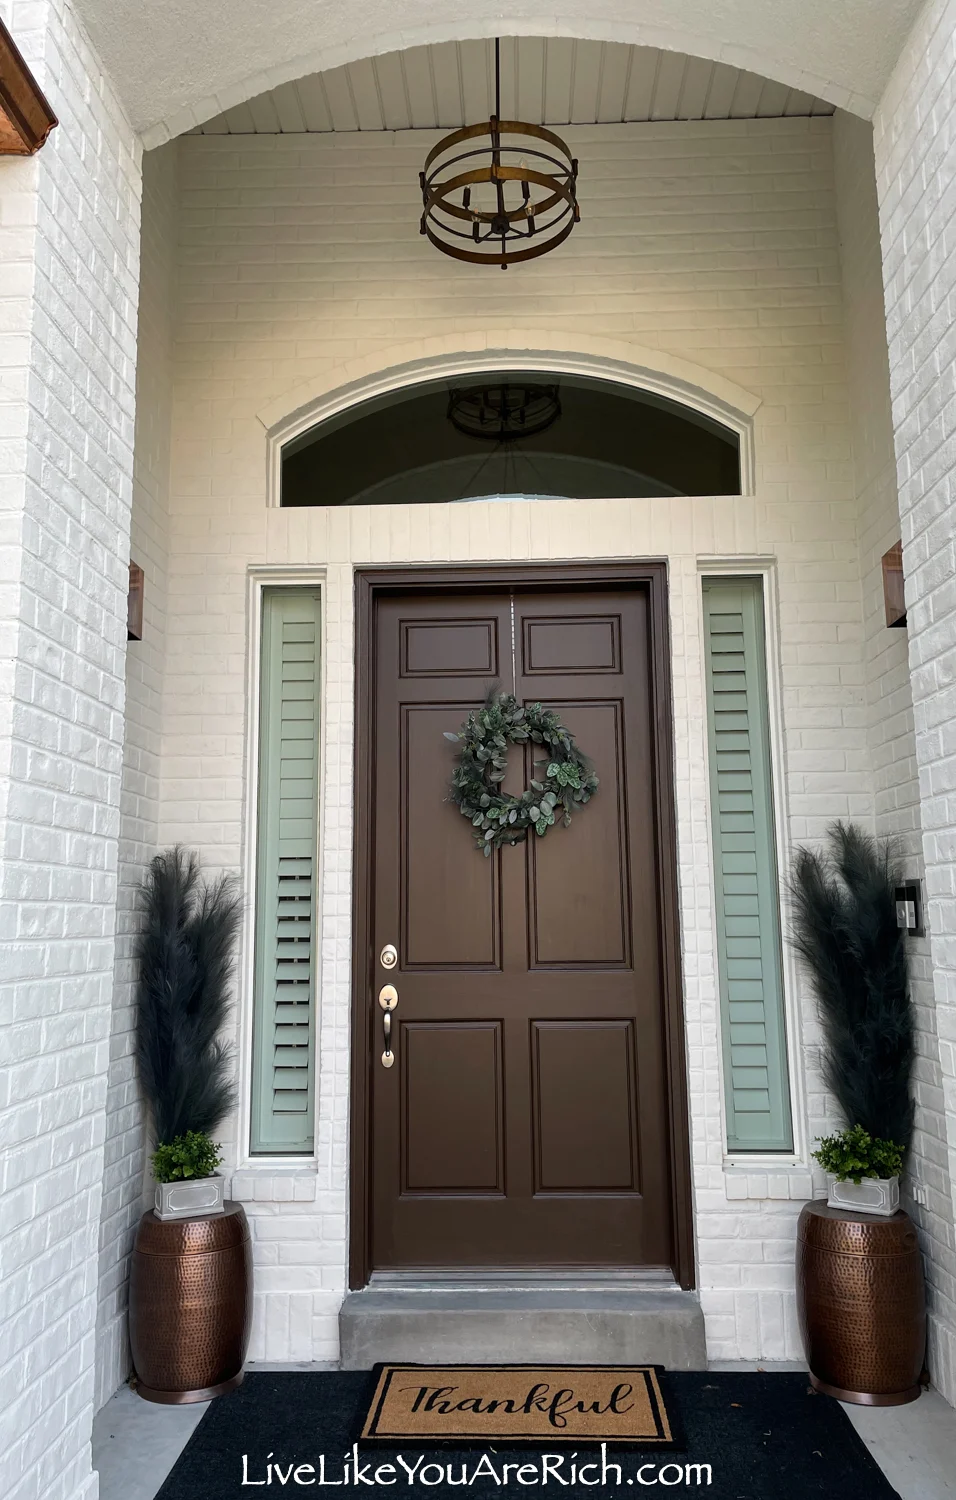
So, I sanded, patched, and painted the front door in Mink (BM 2112-10) exterior latex paint.

I rolled it and brushed it lightly to add texture.
I caulked around the windows and casing to make things look fresh.

I used a wire brush and Jasco to scrub any paint spills off the cement—it worked like a charm!

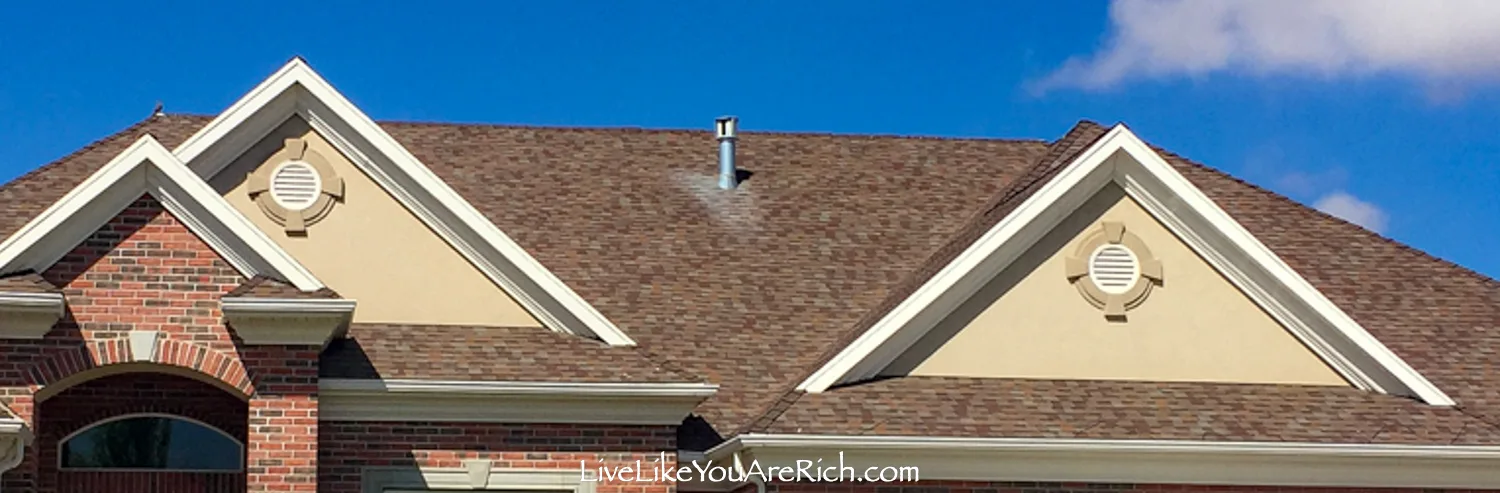
I was so stumped with what to do with my gables. I went back and forth on different options and ideas.
I even got bids for cedar shake shingles and board and batten. The bids were outrageously expensive and blew past our budget.
So, I decided that I would try to do it myself.
I wanted to get rid of the keystones (stucco designs) and paint the gables.
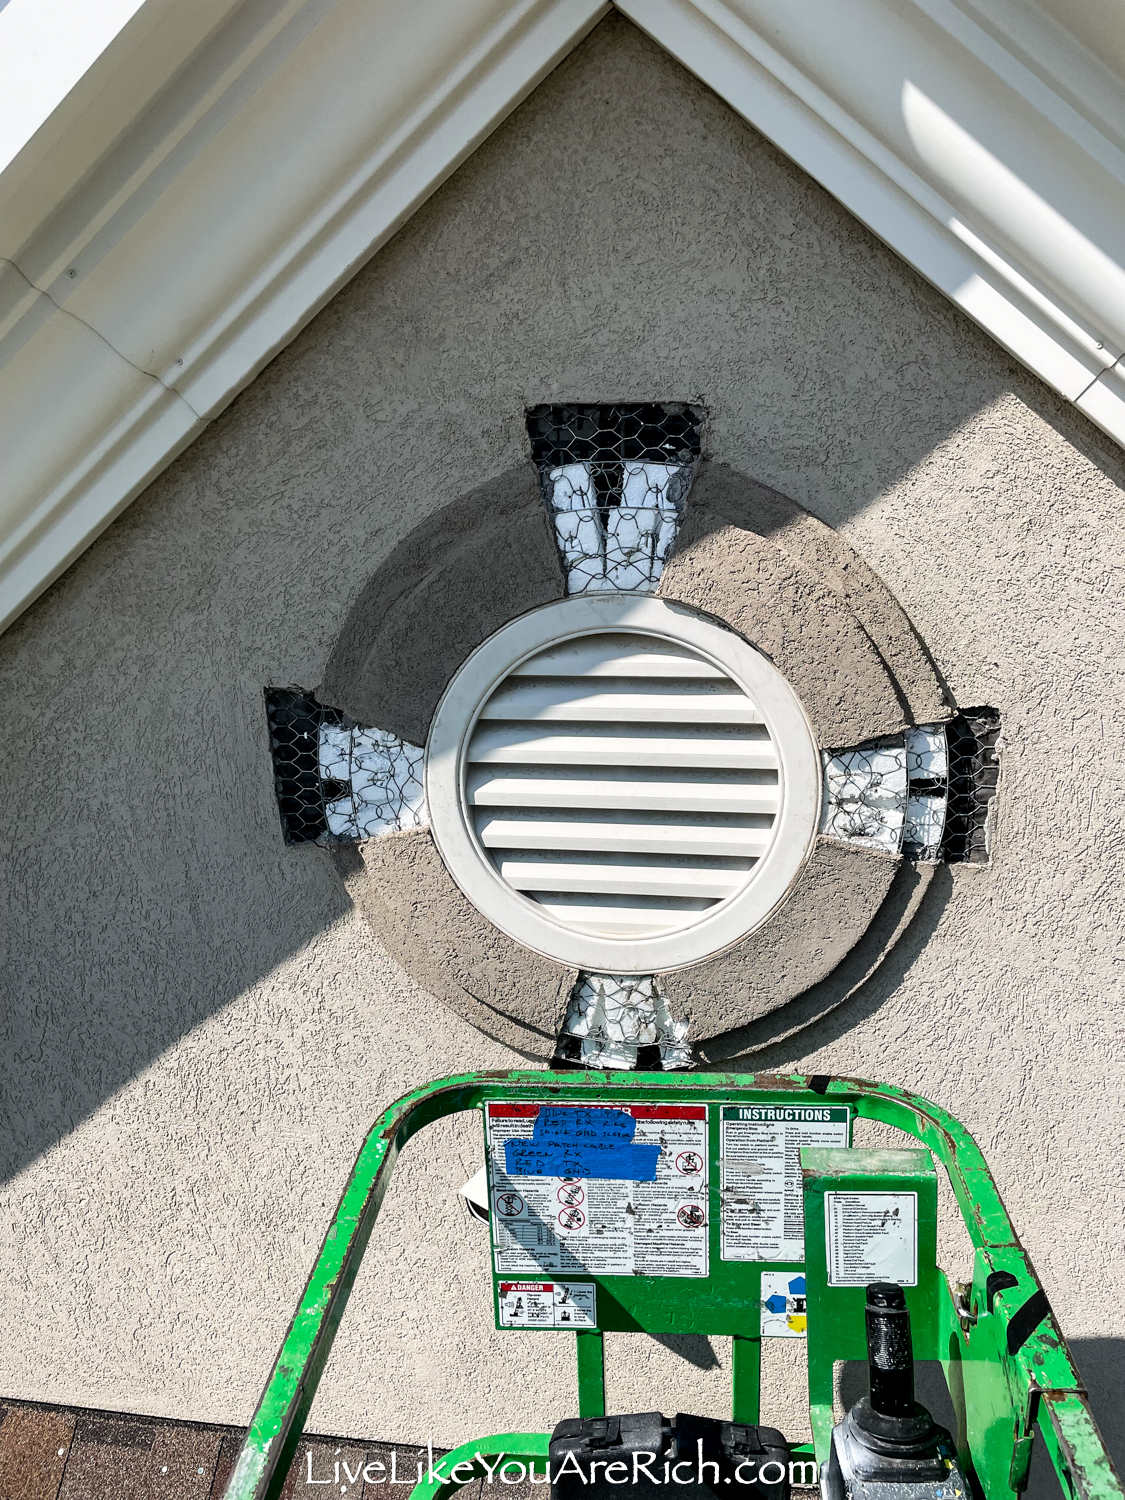
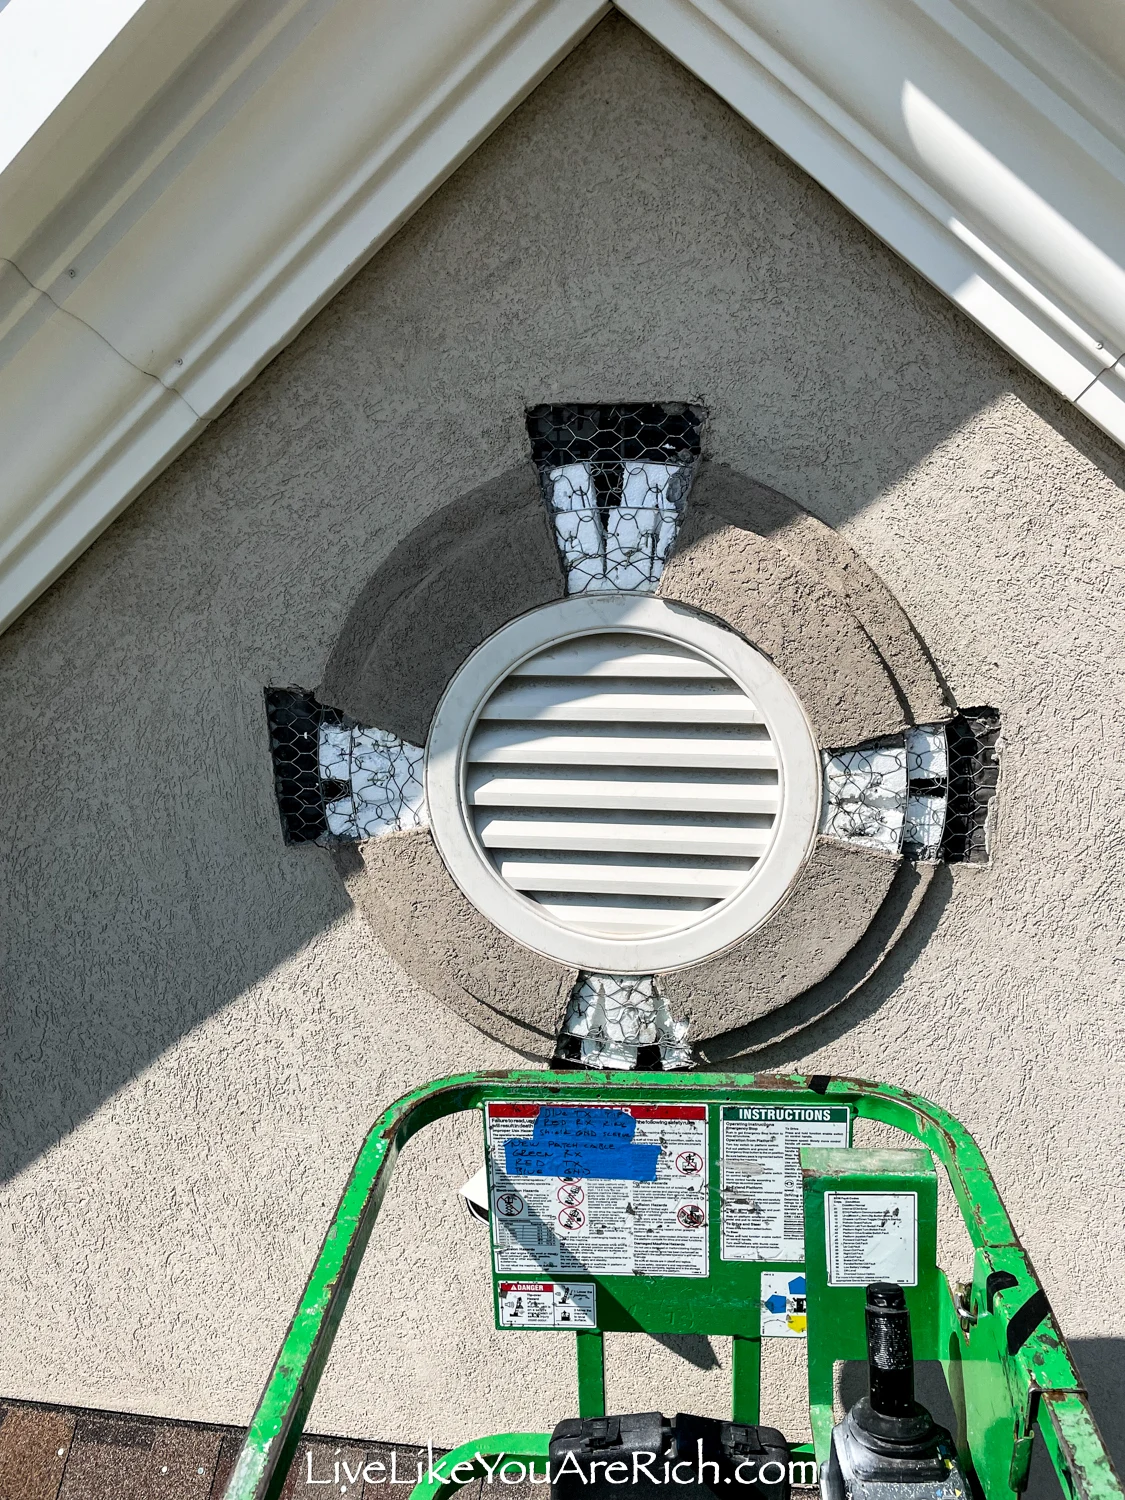
So we rented some equipment and I went to work. I could not find much information on how to do this, however, a pry bar and hammer did the trick. I just scored the edges, pried them up, and knocked out the keystones.

I patched the stucco, primed it, and painted it. It took multiple layers of stucco patch. The top layer had to be textured to match the existing texture.

I ‘jimmy rigged’ an umbrella to shade me on hot days and keep me dry from rain on wet ones.
As I was researching gable ideas. I saw these modern gable arches on the internet and fell in love with them. I love the unique look of them, the fact that I could custom order them, and the price ($1,200 shipped from Canada).

Shane, my husband, and I installed the gable arches and I caulked and did touch-up paint on them.
I did pay an extra $200 to have the gable company match the paint that I used on the garage doors and front door (Mink) Benjamin Moore.
I washed the windows using my favorite window cleaner, microfiber towels, and a 4″ scrapper blade. Note- Do NOT try using a blade to clean glass unless you know how to do it without scratching the window. I was able to remove years of hard water buildup with this technique.


I took out the old window screens (we don’t often open our front windows). I loved the fresh clean look this gave the home.
And that’s about it.
I made some autumn front door decor arrangements and this wreath (for under $35.00 total)…. but am soon to swap it out with Christmas/winter decor.

I love the way our home turned out! I especially love the accomplishment I felt to have done most of it myself. I am grateful for Shane’s help too though… he is very handy and did some things I just did not know how to do let alone do alone.
White Brick Lime Wash With Copper Gutters and Lights— Exterior Home Renovation Total Cost
Limewash $600
Copper gutters $4,500
Lights (mounted) $855
Light (chandelier) $70
Stucco patch and paint including $185
Equip rentals $700
Paint, Primer, supplies (garage doors, front door) $120
Caulk $15
Misc supplies $60
Gable Arches $1,200
Total: $8,930.00
Doing this ourselves saved a ton of money! Yes, it did take us 3-4 months and lots of free time, but the savings and the experience were definitely worth it.
Have you done a similar remodel to this White Brick Lime Wash With Copper Gutters and Lights? If so, please share any tips you may have for other readers in the comments below.
Thanks!
Posts in this Series
Before and After…WHITE BRICK LIME WASH WITH COPPER GUTTERS AND LIGHTS— EXTERIOR HOME RENOVATION
How to Choose an Exterior Garage Door Paint Color
How to Paint Exterior Garage Doors
Posts to Come
How to Patina Copper Quickly
Tips and Tricks on Applying Romabio Lime Wash With Video
How to Remove Stucco Key Stone Decals
DIY Gable Arch Install
Paint Code for Exterior Paint on Stucco that Matches Avorio Lime Wash by Romabio


For other ‘rich living’ and D.I.Y. decor tips please subscribe, like me on Facebook, and follow me on Pinterest and Instagram.

Linda
Friday 9th of February 2024
Beautiful job! I especially love the copper gutters.
It looks like you replaced the roof as well — or is the lighting just different? I'm wondering if you know what roof tiles (brand and color) you have. It looks like they may be an Owens Corning shingle.
Anita
Saturday 10th of February 2024
Thank you, that's so nice of you to say. The lighting is just different they are 30 year shingles that were on the home when we bought the home; so I don't know. I'm sorry I'm not more help.
Jenna
Thursday 28th of April 2022
I’ve you written the post on how you painted your garage doors? I’ve not been able to find it. :) Thanks much Great job!!
Anita
Friday 20th of May 2022
Jenna,
Here is the post on how I painted the garage doors here. I also posted how to choose a garage door paint color here.
Anita
Saturday 7th of May 2022
Jenna, Thanks for checking in, I will put this on my list to post about in the next week or two. I was thinking to continue my home exterior renovation series in spring and here we are, so I need to get it done. Thanks for the reminder!