


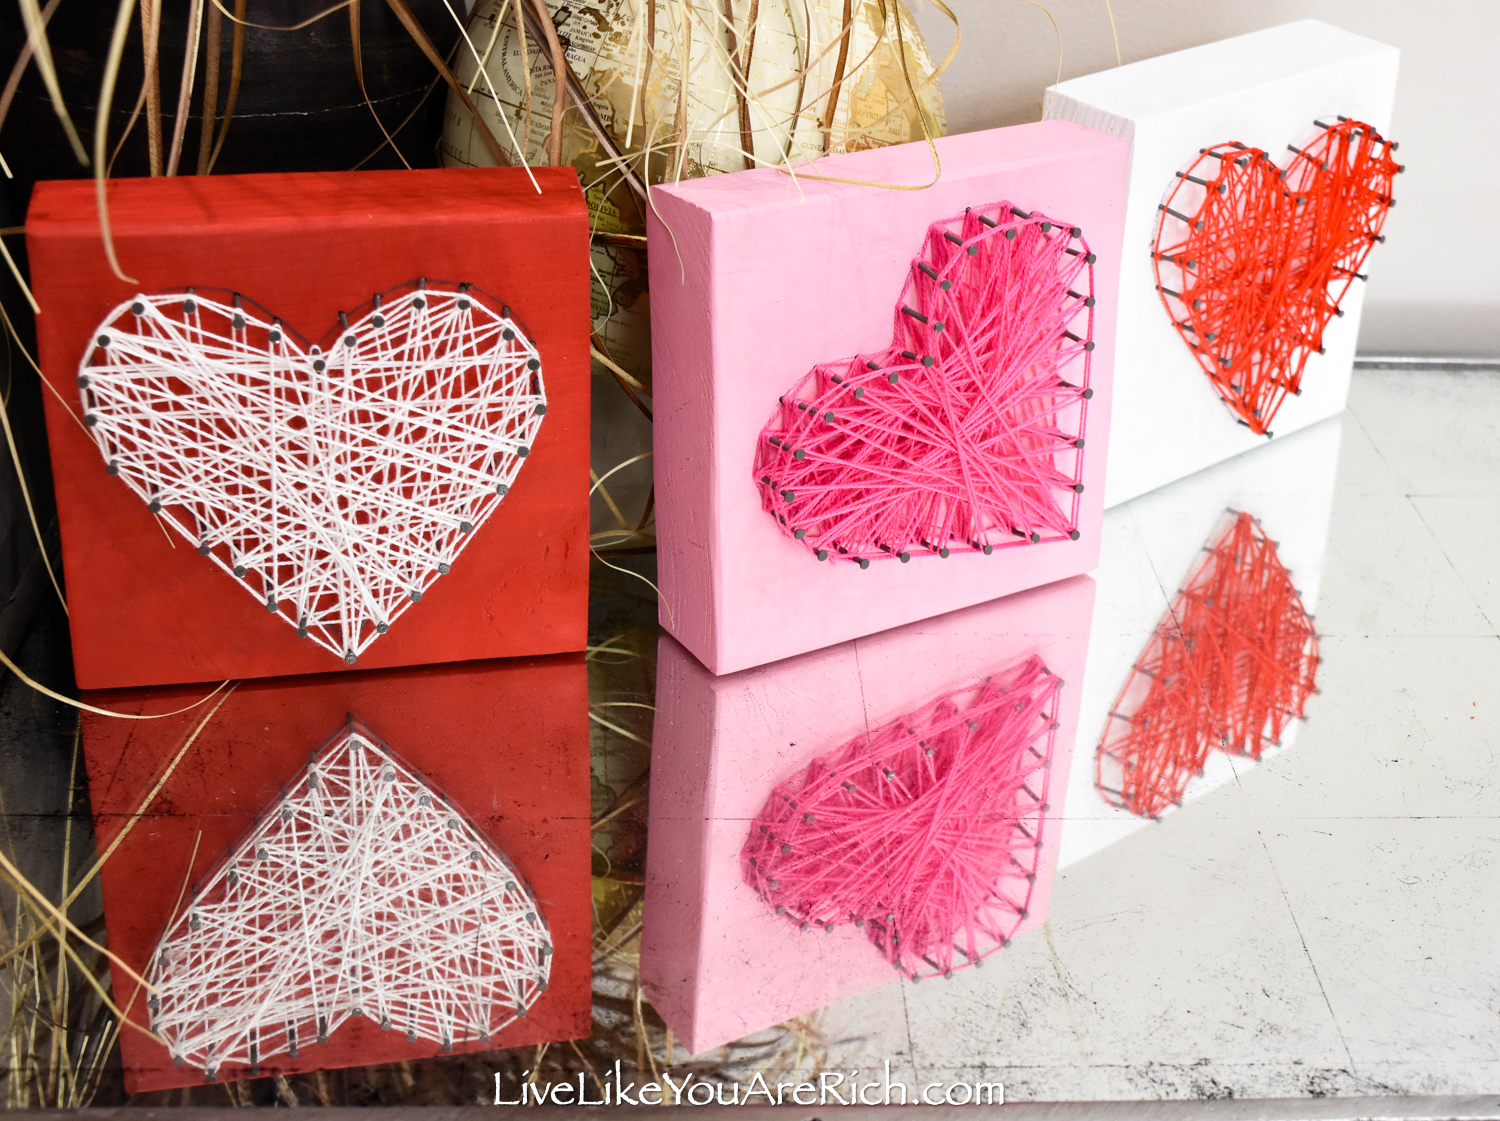
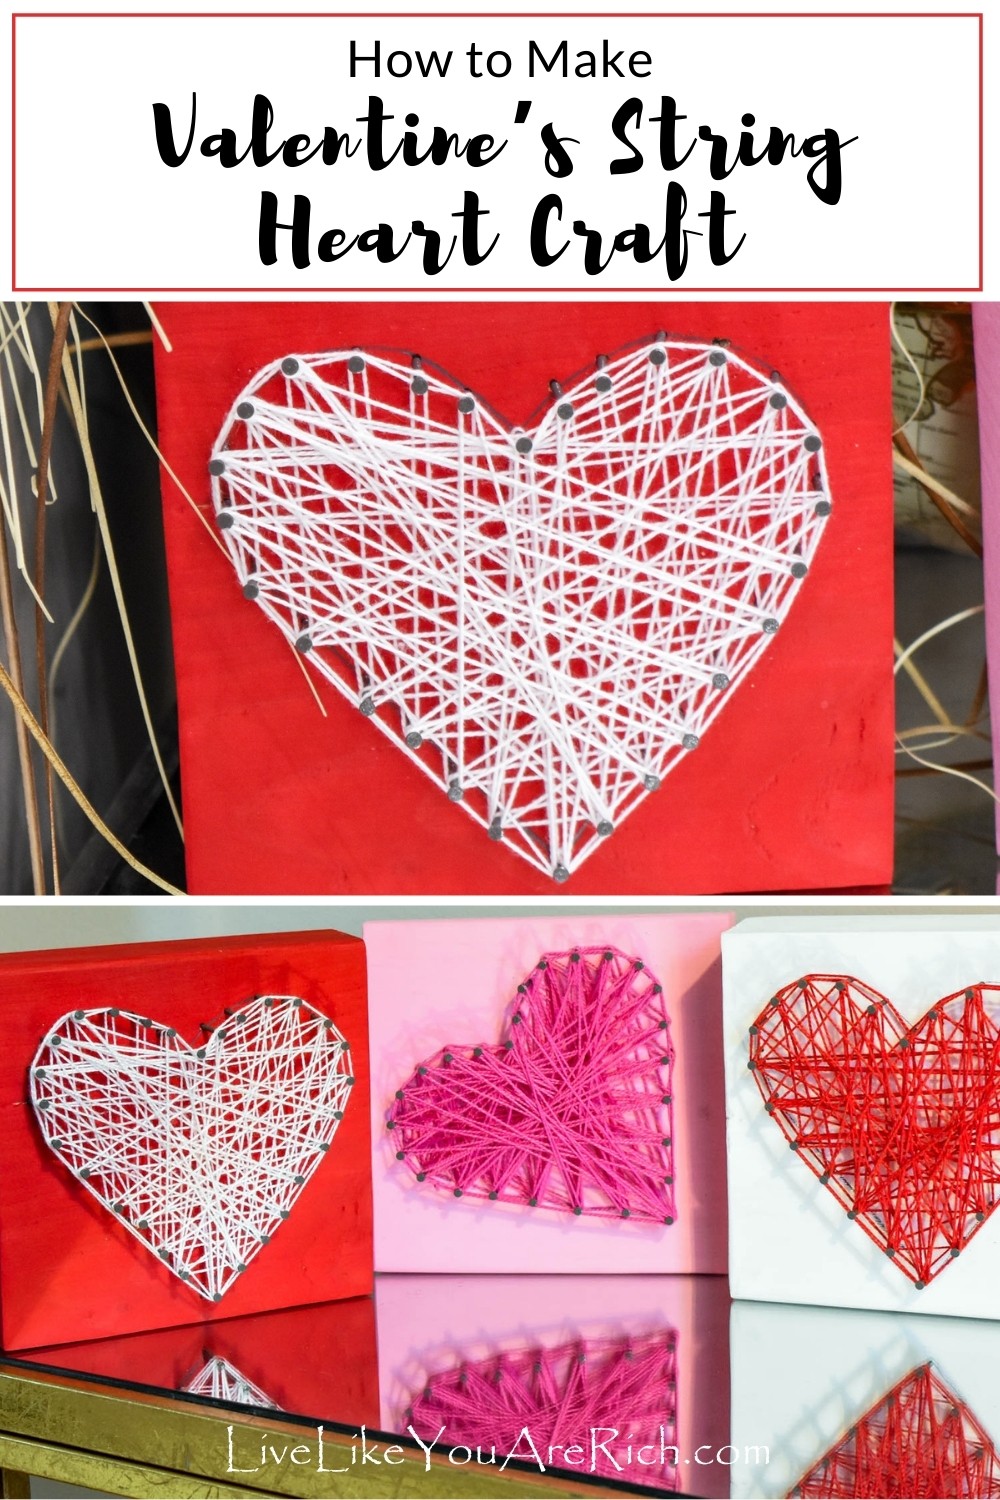
These Valentine’s String Heart Crafts were simple, inexpensive and are fun to make with kids.
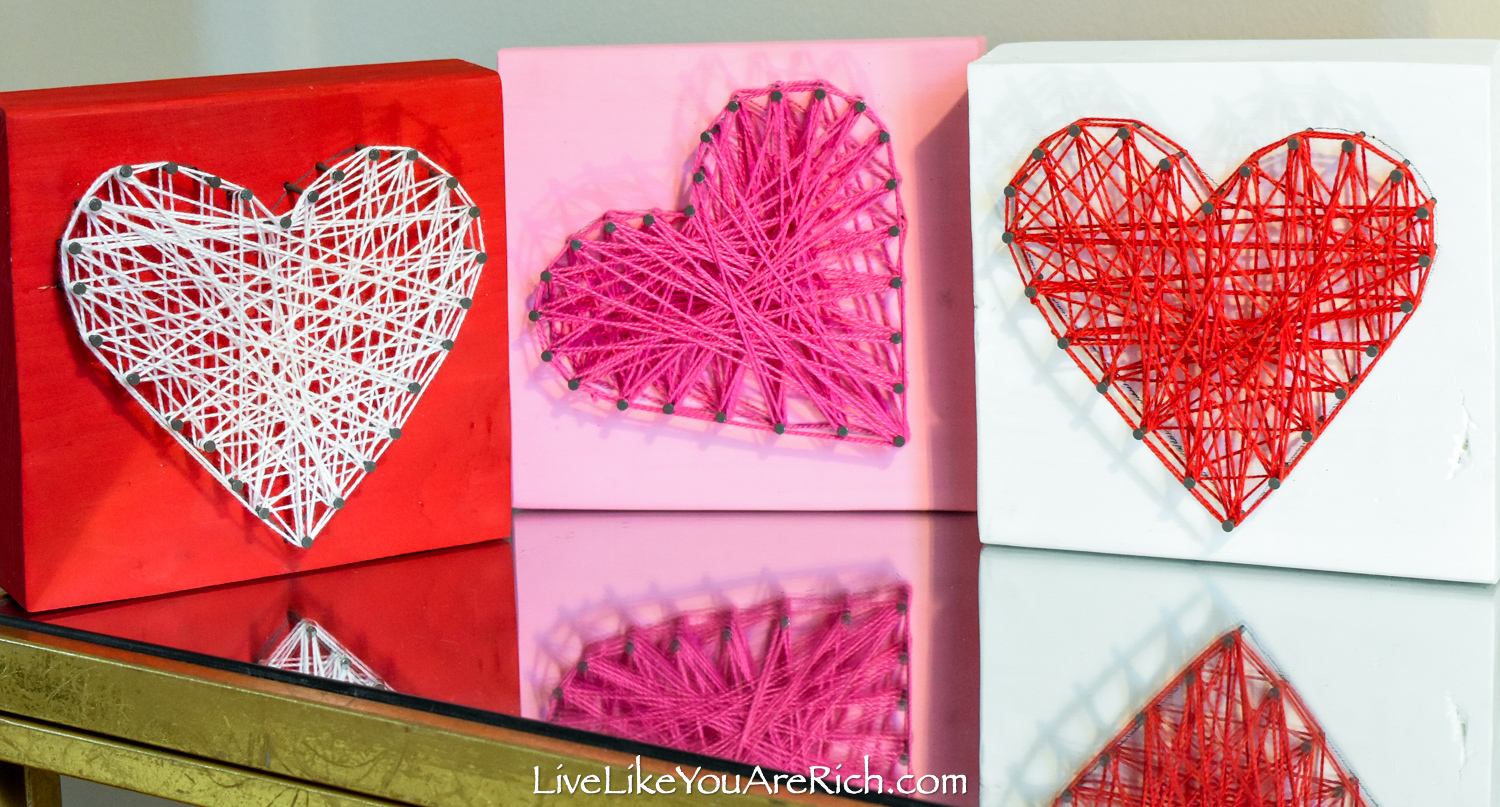

I’m always looking for cute Valentine’s decorations (personally I think Valentine’s decor is hard to find). So, I decided to make some this year. I made these wood heart blocks and put them on my Valentine’s mantel.
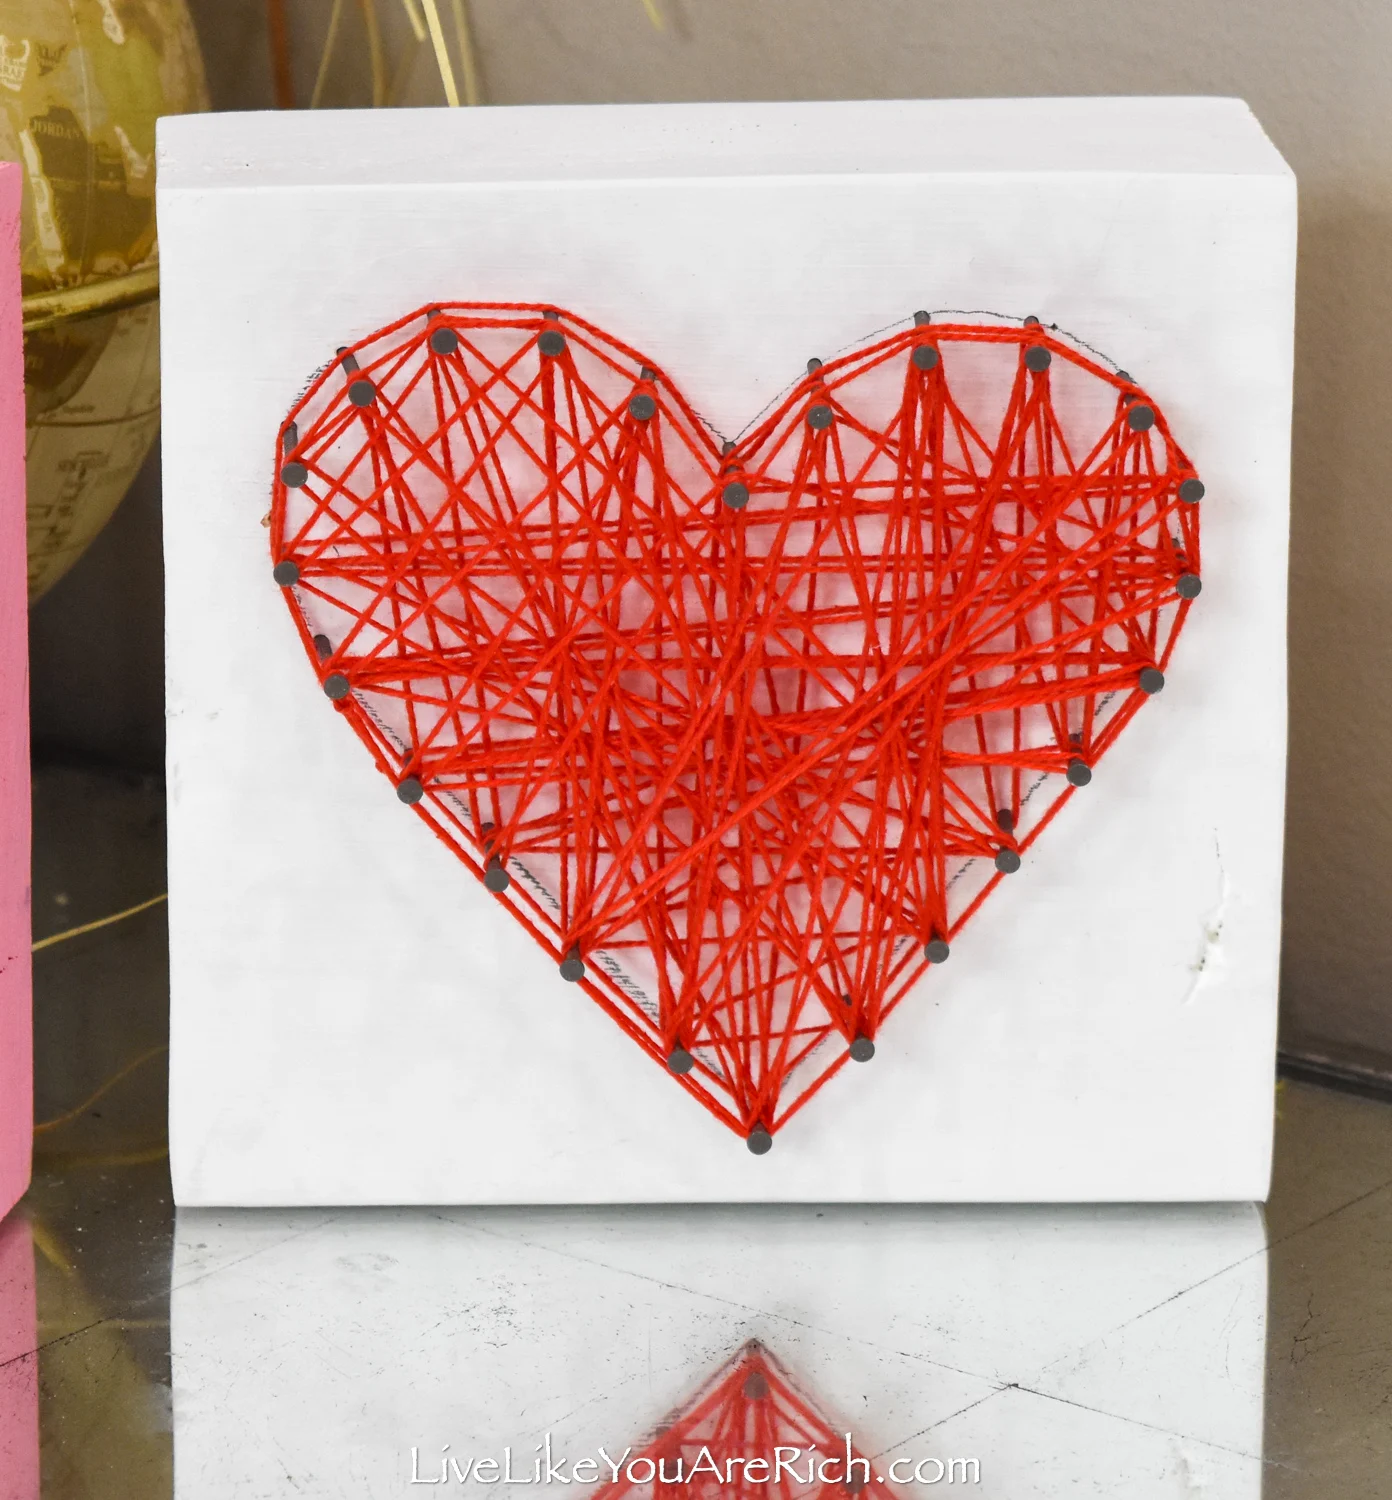
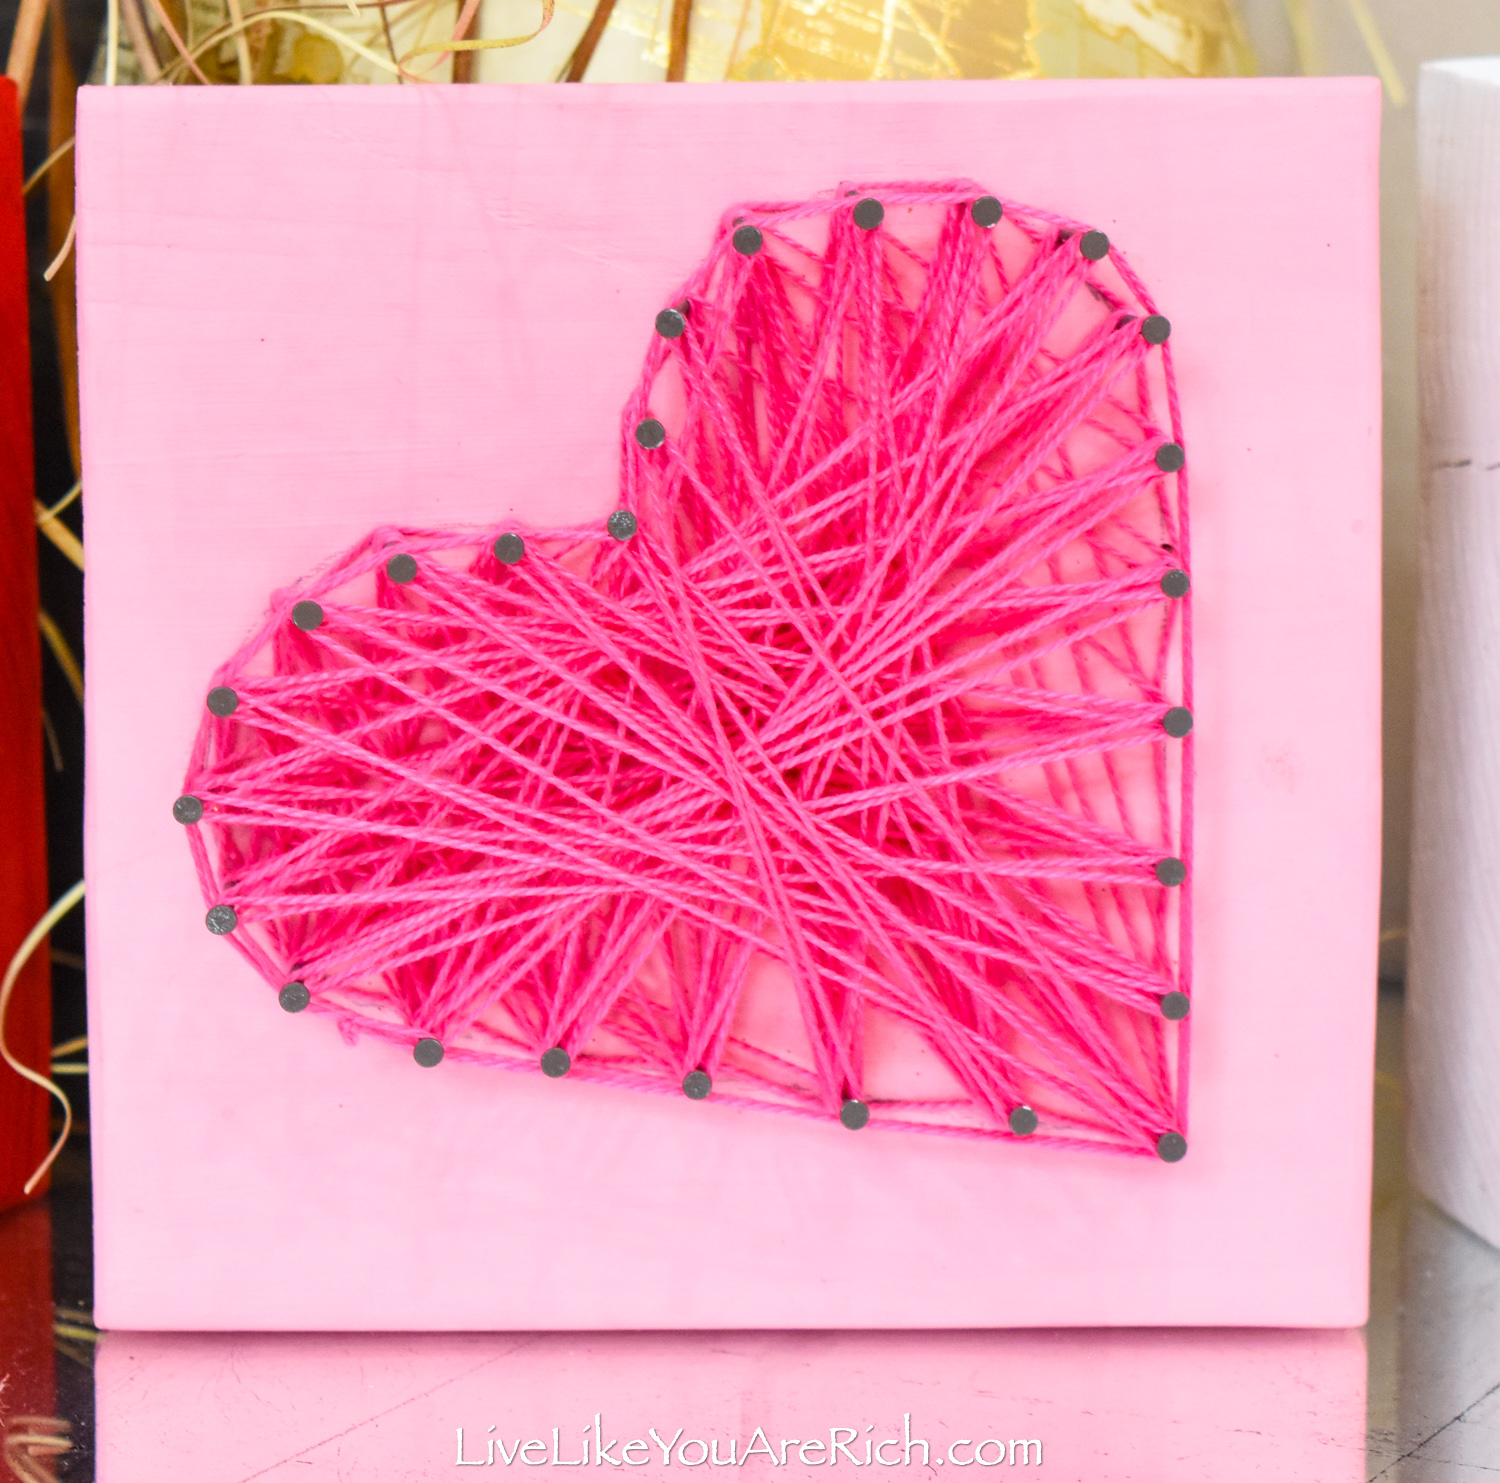
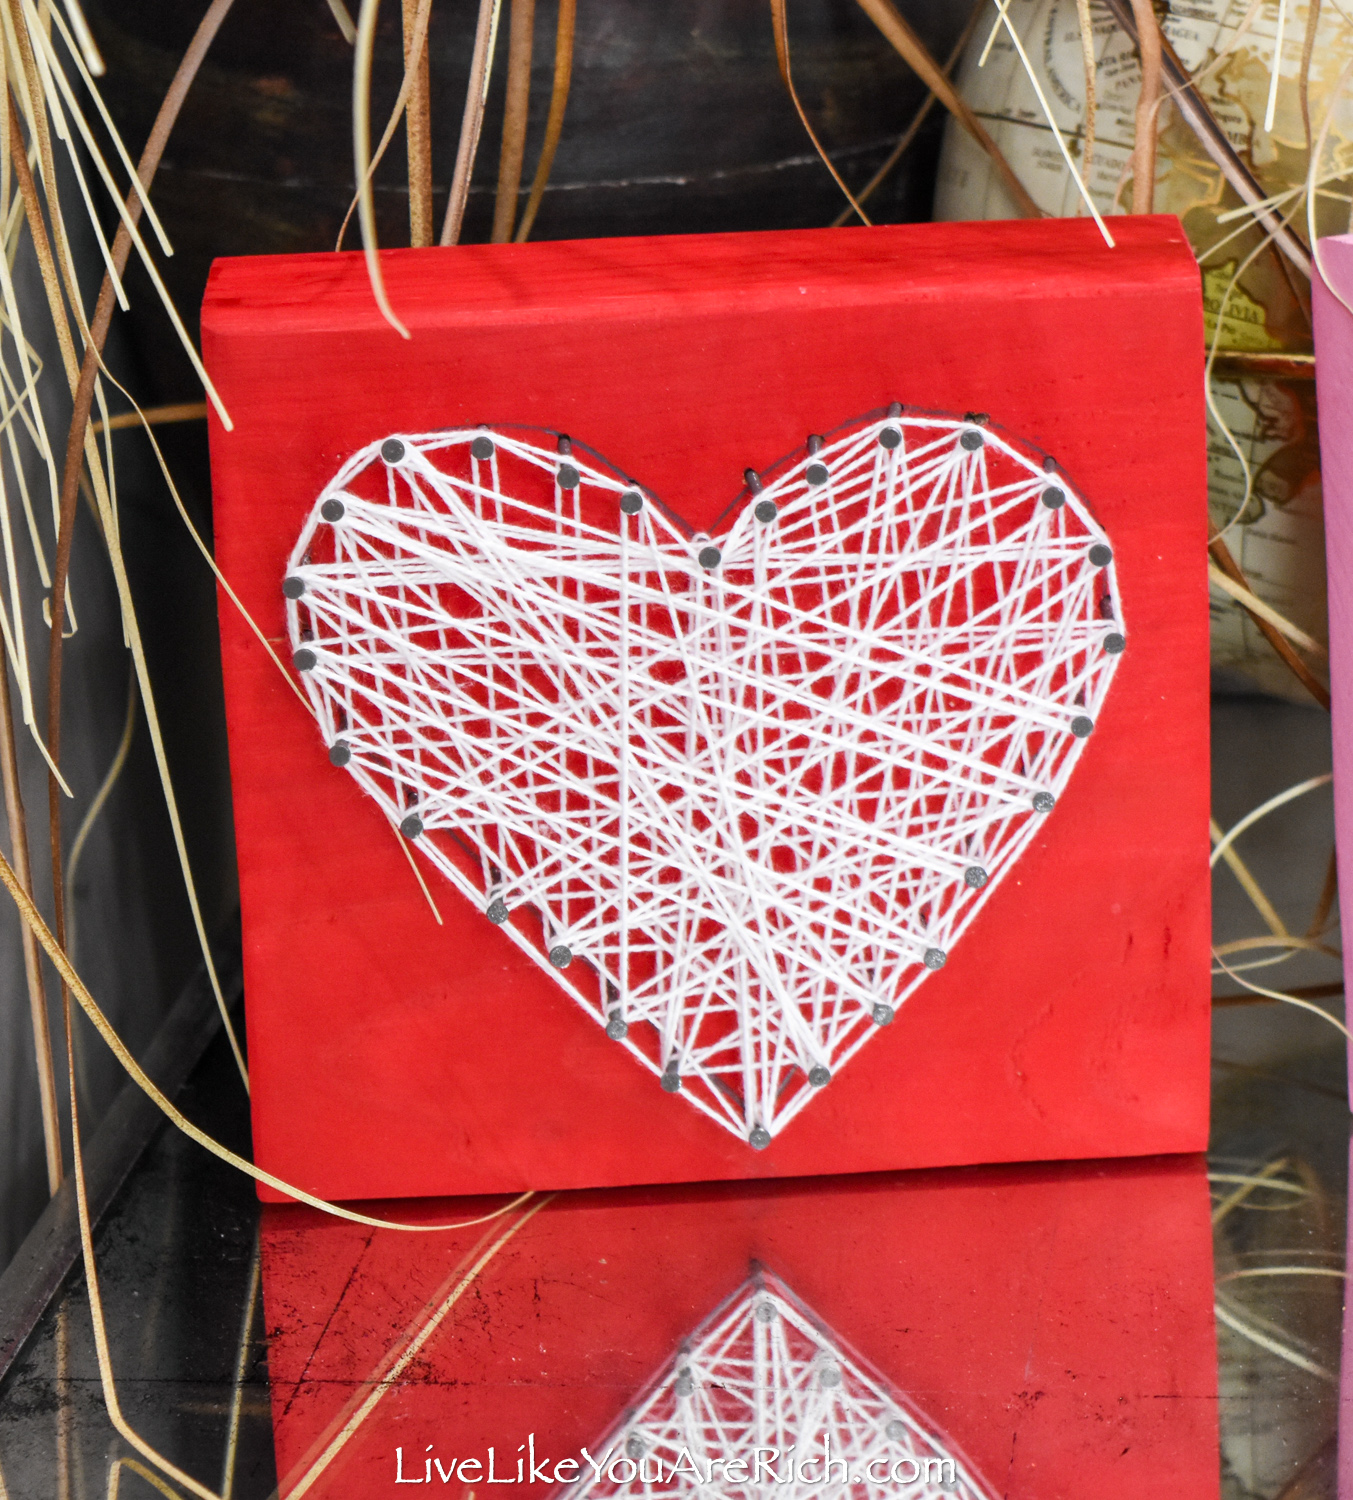
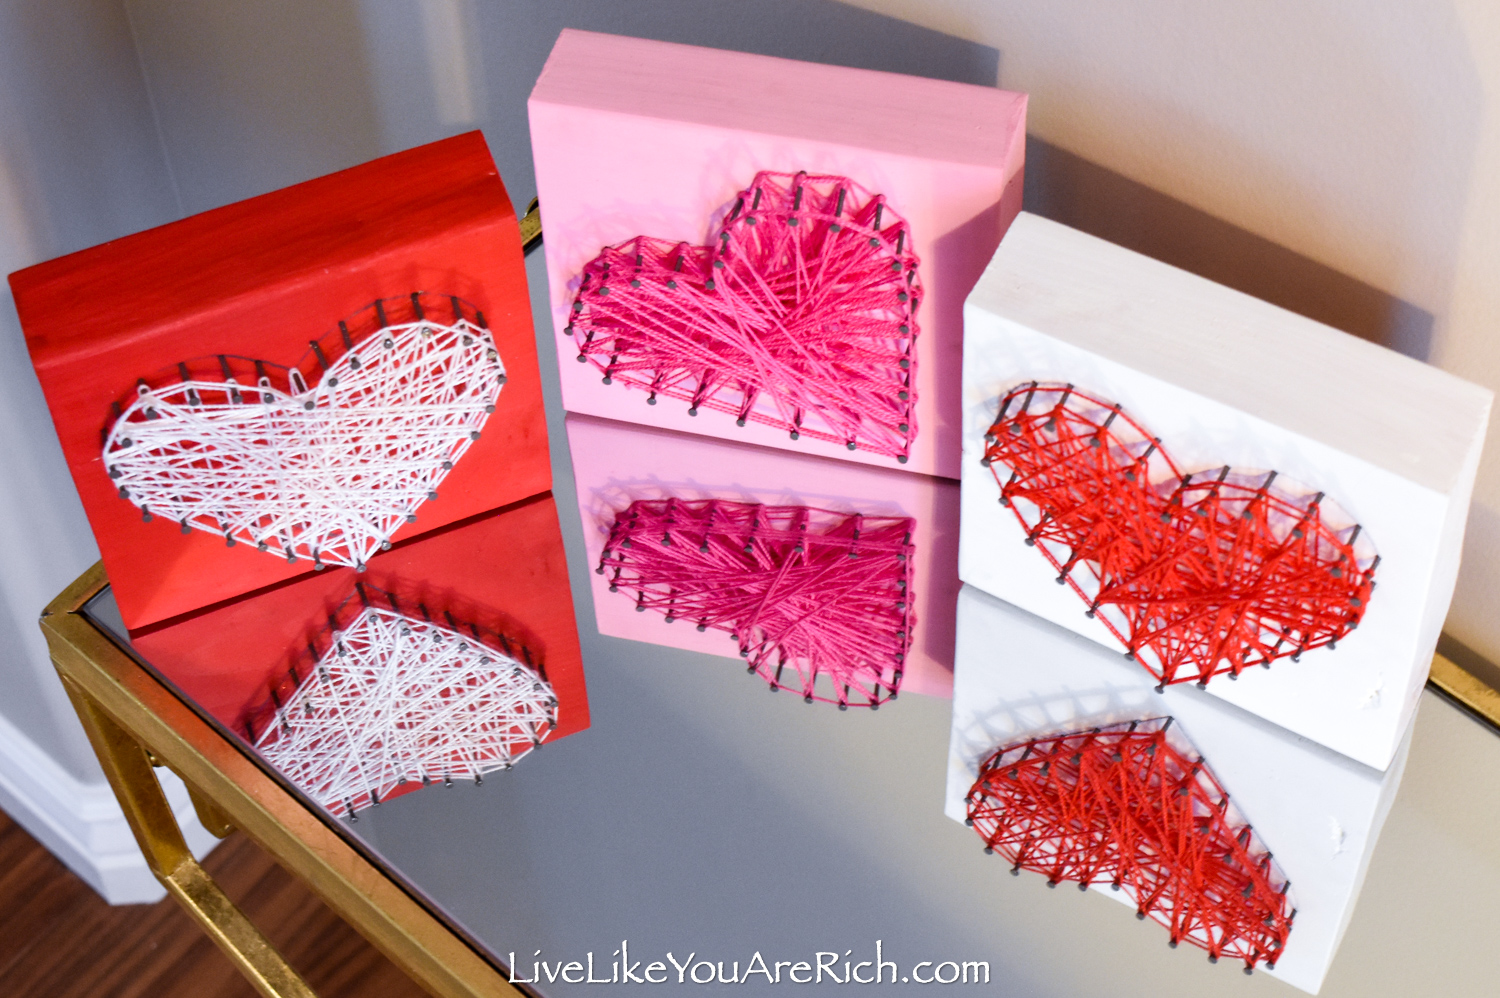
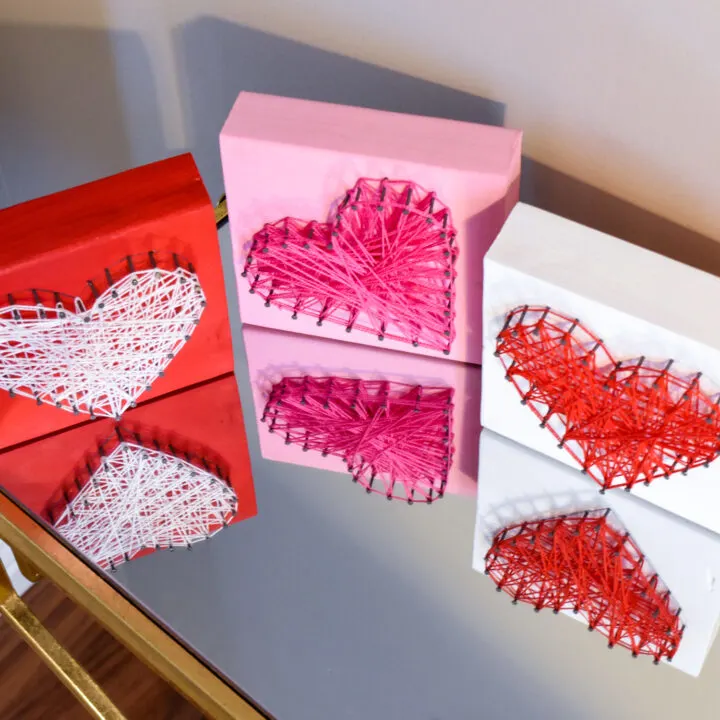
I needed something for my entry table, so I decided to use the left over wood from the wood hearts and make these Valentine’s String Heart crafts! I have had compliments on them from friends and family, so that’s always nice as well.
They turned out to be a great family craft to make together. There are many reasons my kids and I enjoyed making them.
First, they were fairly quick to make (it took less than an hour from start to finish).
Second, my kids loved that they were involved in most of the creation process.

Third, I wasn’t expecting this, but we all got to use a lot of eye-hand coordination skills when winding the string around the nails. It was not very easy at first—especially for my kids (see the video). But they kept at it and about half way through they had figured out how to pull the string taut and not let it slip and come undone as they wound it around the next nail.
Fourth, I loved that these were inexpensive to make. They ended up costing about $2.00 each (we did have the tools on-hand). If you don’t have a saw, you could ask an employee at Home Depot or Lowes to cut the 2×8 for you.
The more you make of these string heart crafts the cheaper they become. If we had made many more, we could have gotten the price down to about $1.00 each.

Finally, another thing I wasn’t expecting when I set out to make these with my kids was that they would be so creative.
We all varied on the patterns we used to string the hearts.
My daughter got really creative. She wanted to place her heart at an angle. I wasn’t planning on drawing the heart at an angle like she wanted to but I let her express her creativity and did so.
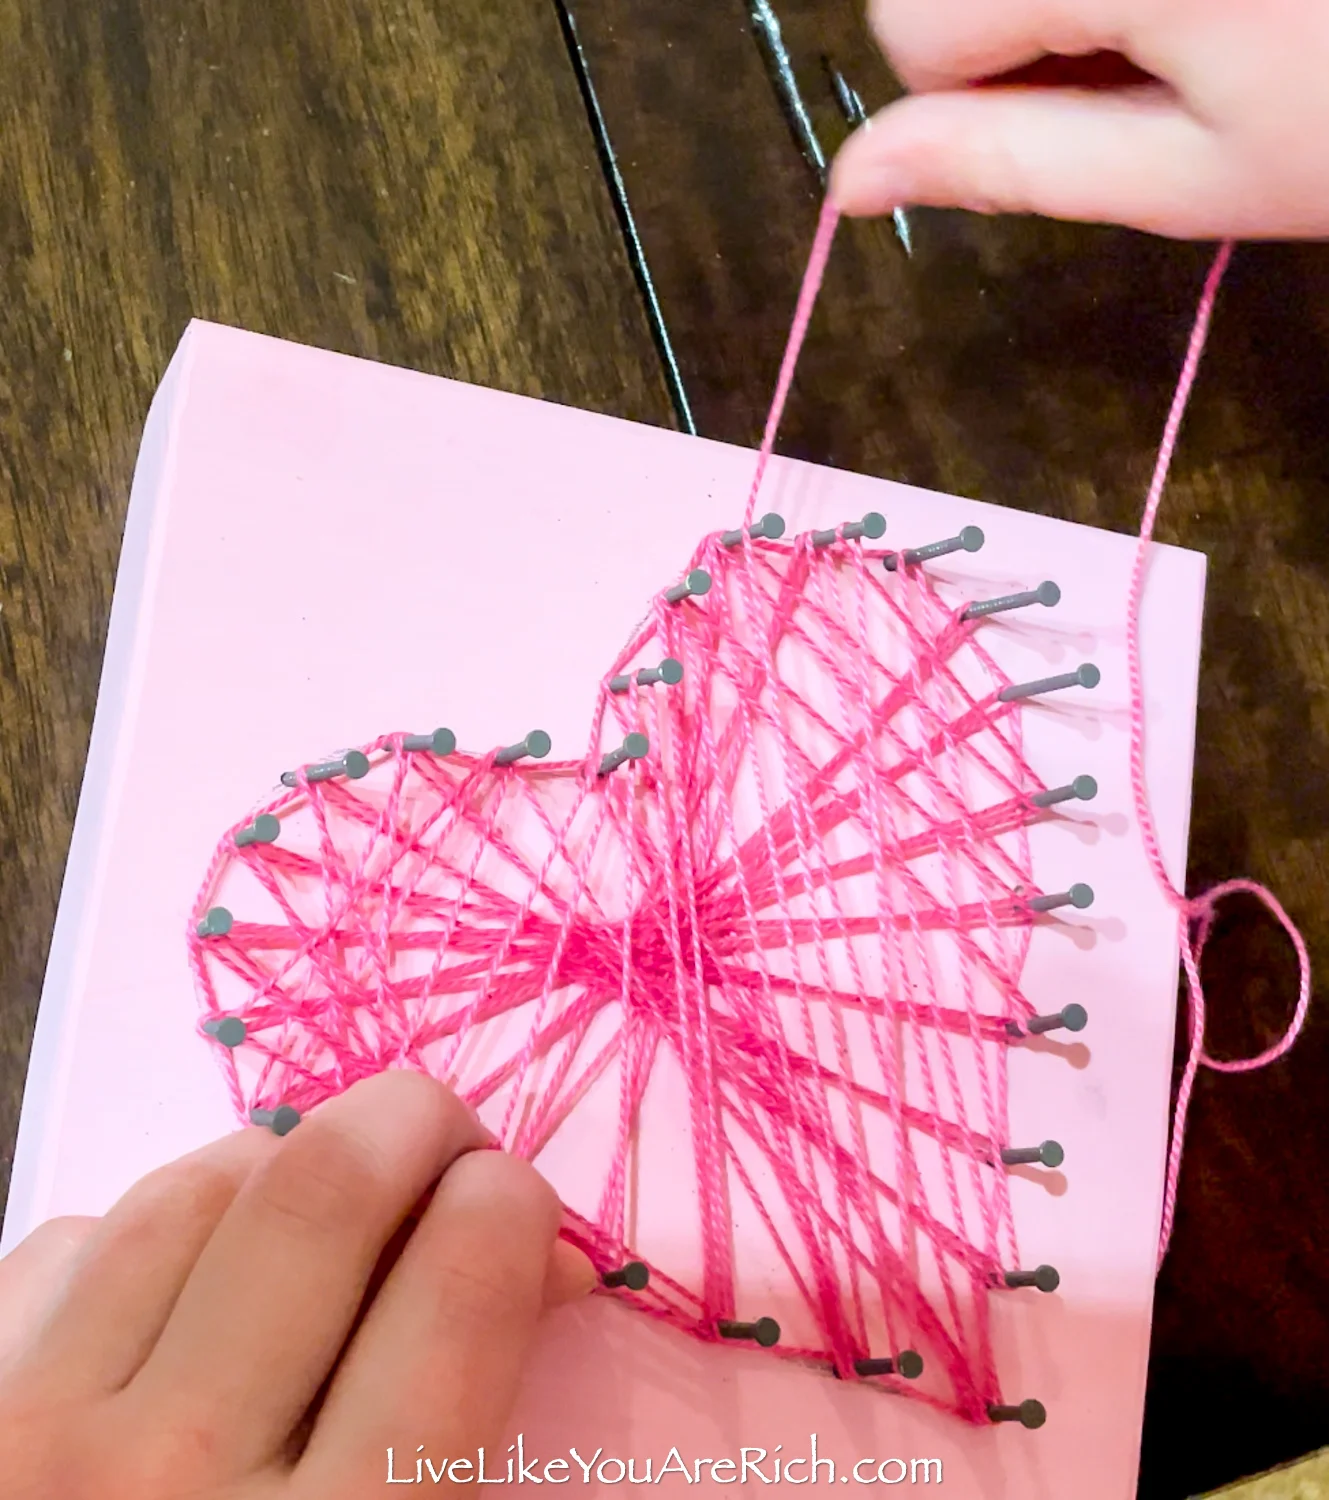
Then she wanted to do pink floss on pink paint. I also wasn’t planning for that but I let her go for it!
Then she said she wanted to double up on the embroidery floss. My son and I only used one little bundle of embroidery floss, she wanted to use two. In order to do this, she had to press down the floss intermittently as she wound it around (to make room on the nail for it all).
Her heart turned out darling (better than ours) and I love that she came up with these changes to my original idea and made it her own.

All in all, this was a super fun craft to make with my kids who are 6 and 8 years old.

Supply List for Valentine’s String Heart Craft
Clamps to secure the wood—or have someone hold it while the other cuts
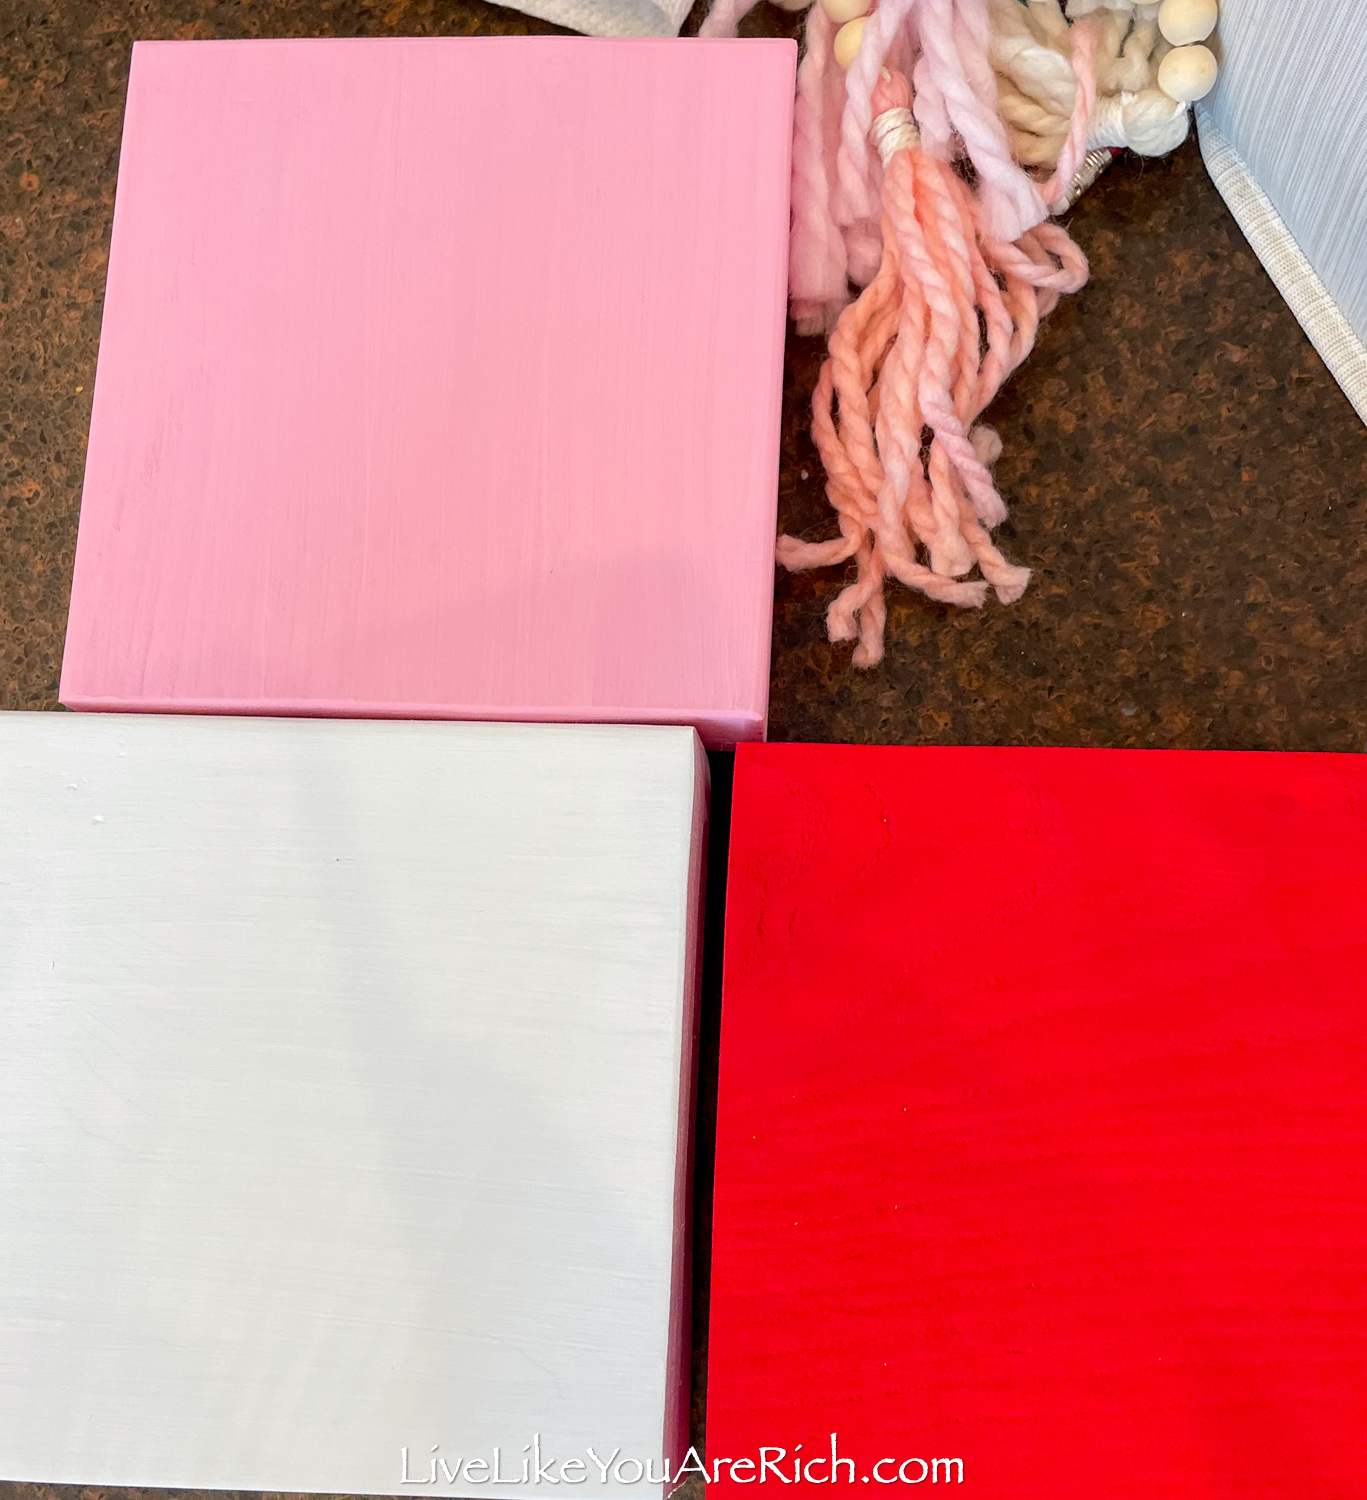
Acrylic craft paint (I used Titanium white, Stop Sign Red, and Think Pink)
Sand paper or an orbital sander
Free digital download/printable for the heart
Pencil to mark the wood
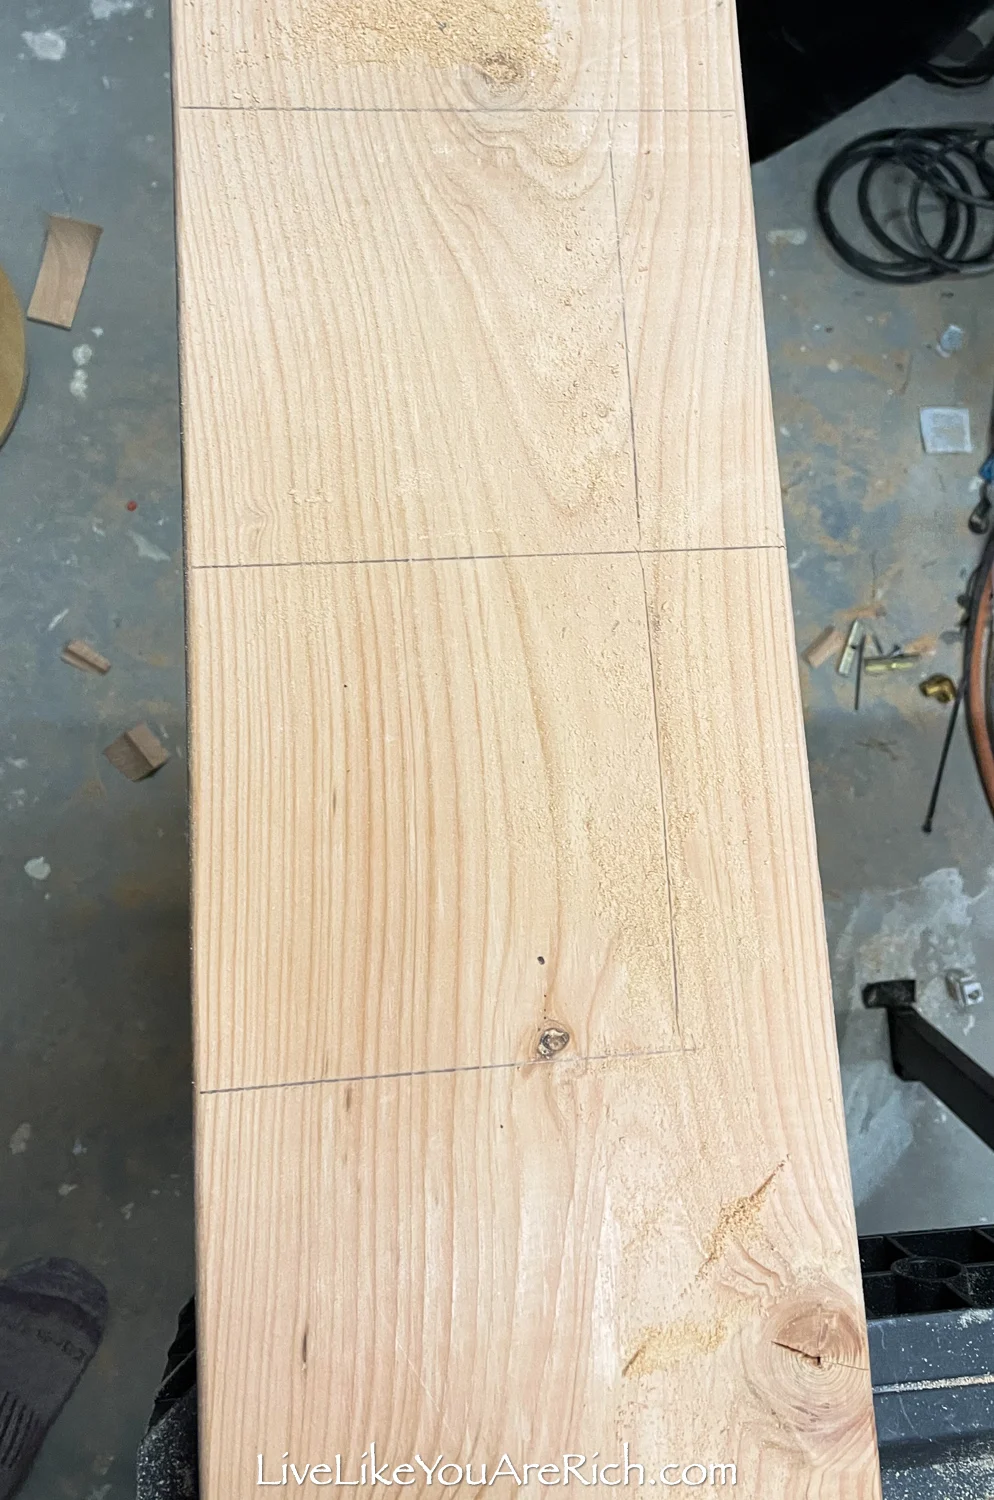
2x8x4 piece of wood about 2′ long (for 3 hearts)
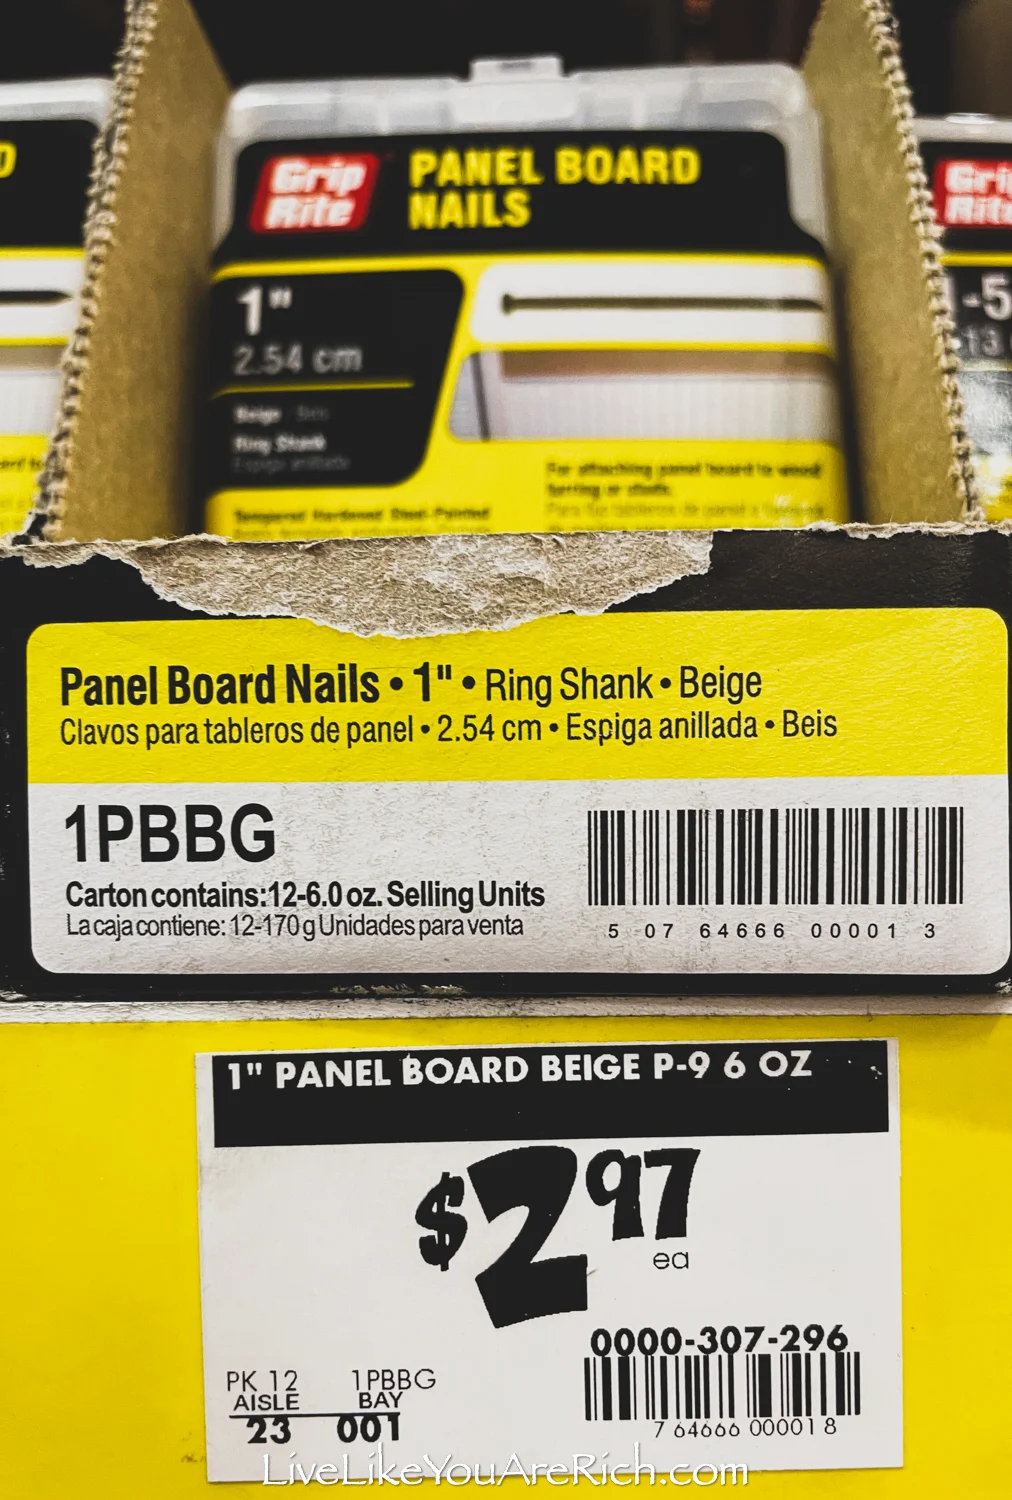
1″ Panel Board Nails (26 per craft)
Measuring speed square or measuring tape
How to make this Valentine’s String Heart Craft
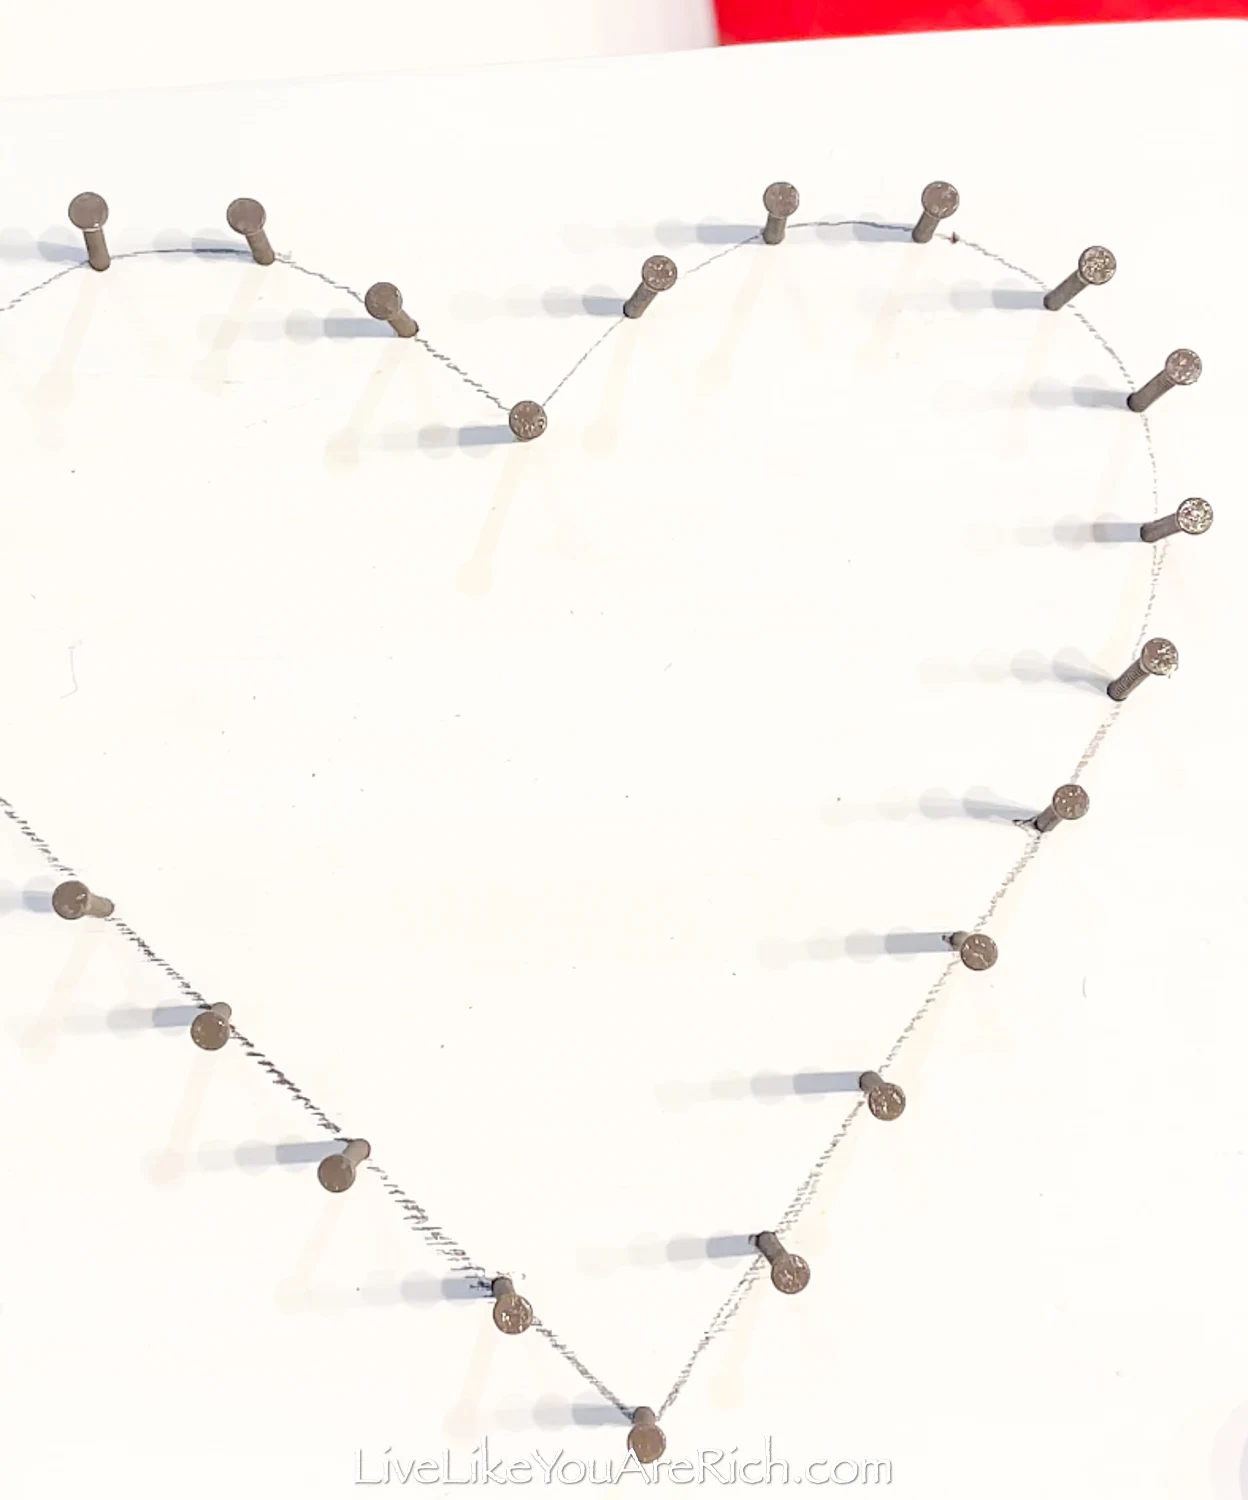
- Trace a square 6″ Tall x7″ Wide on a piece of wood of 2×8 wood.


- Cut it out with a saw

- Sand the edges

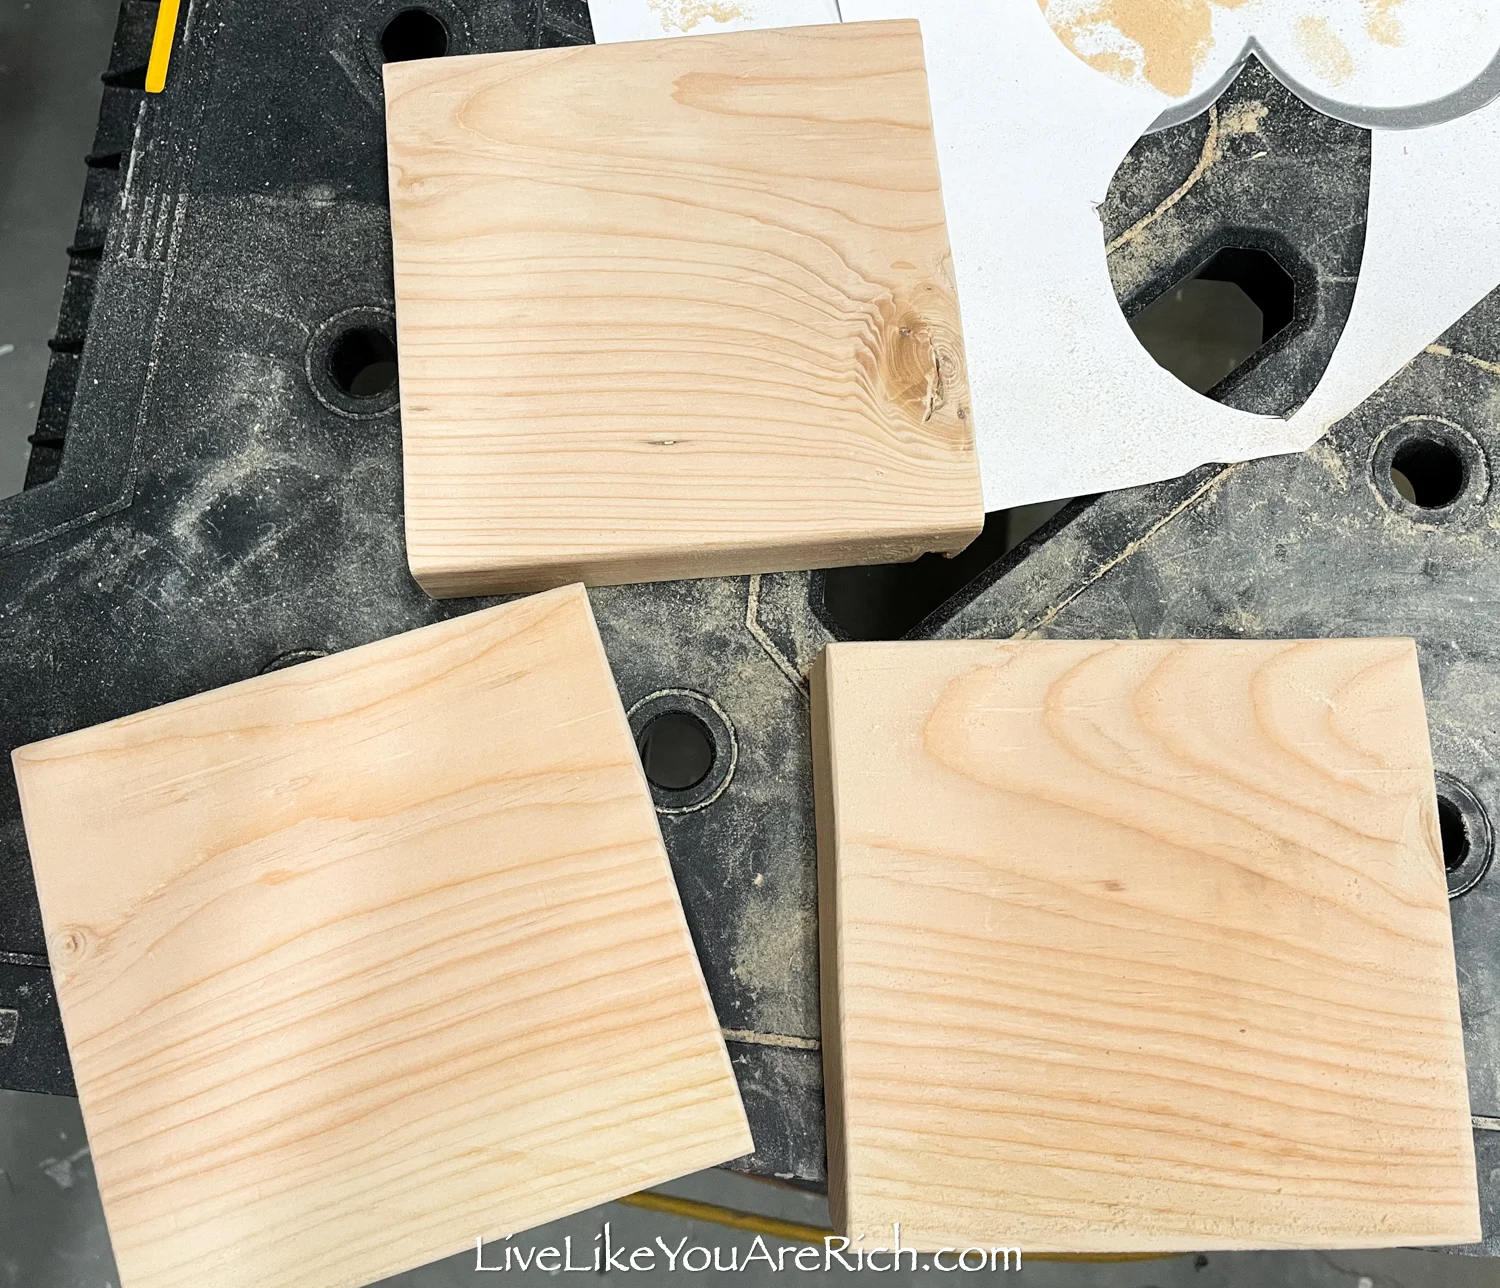
- Wipe off the sawdust
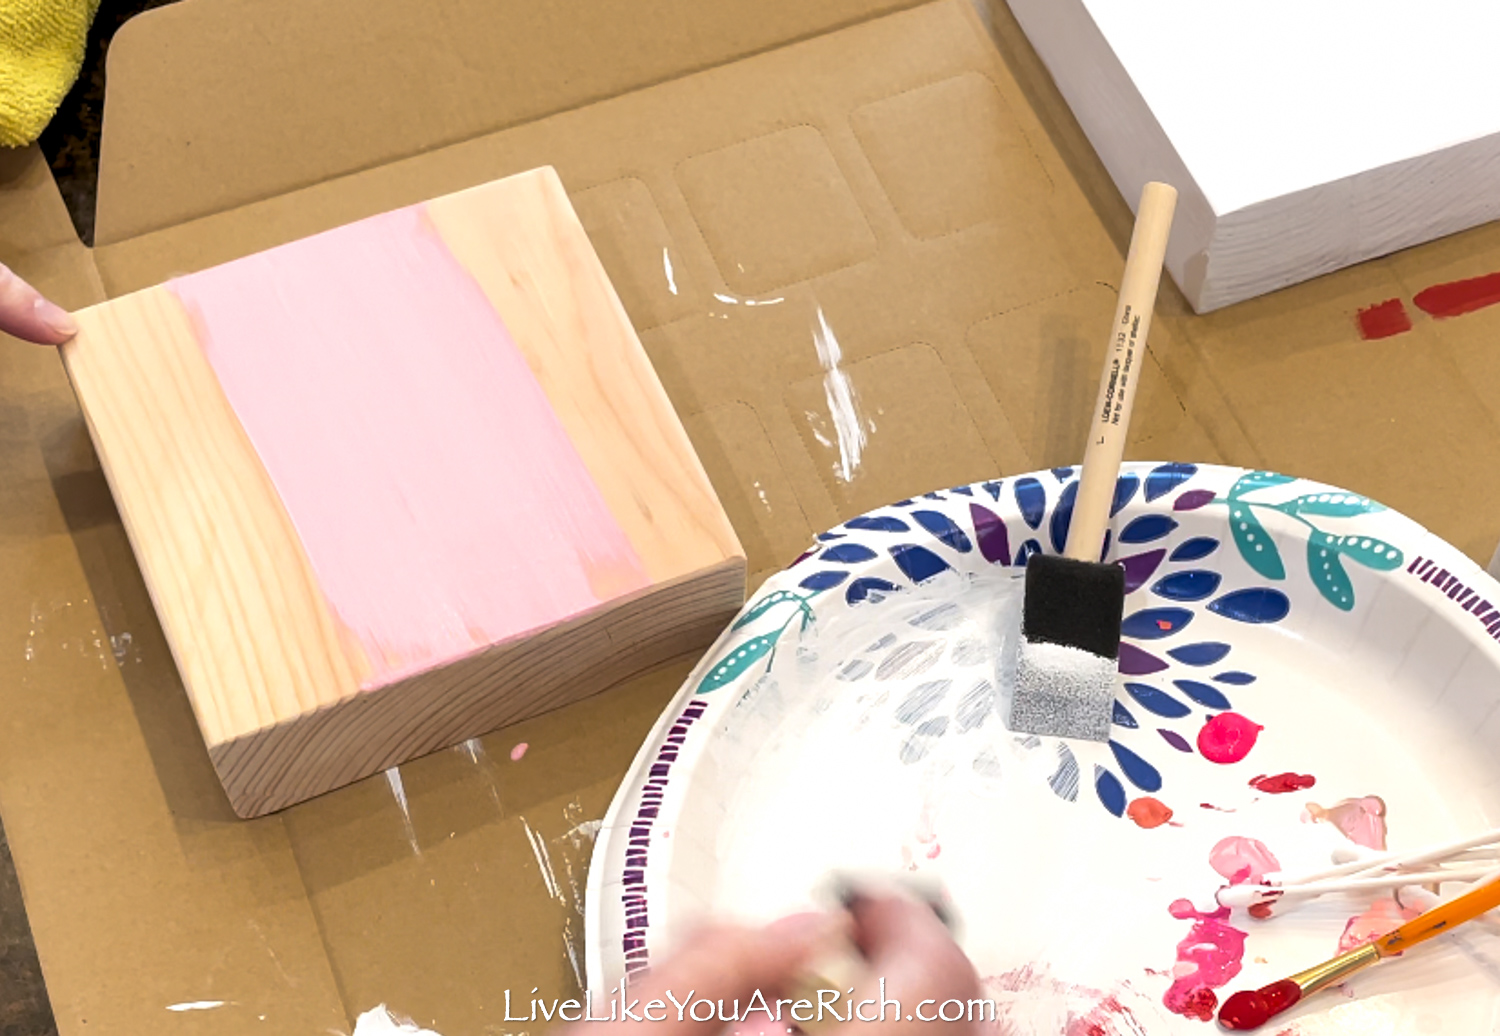

- Paint the blocks of wood. You may need 2 coats.

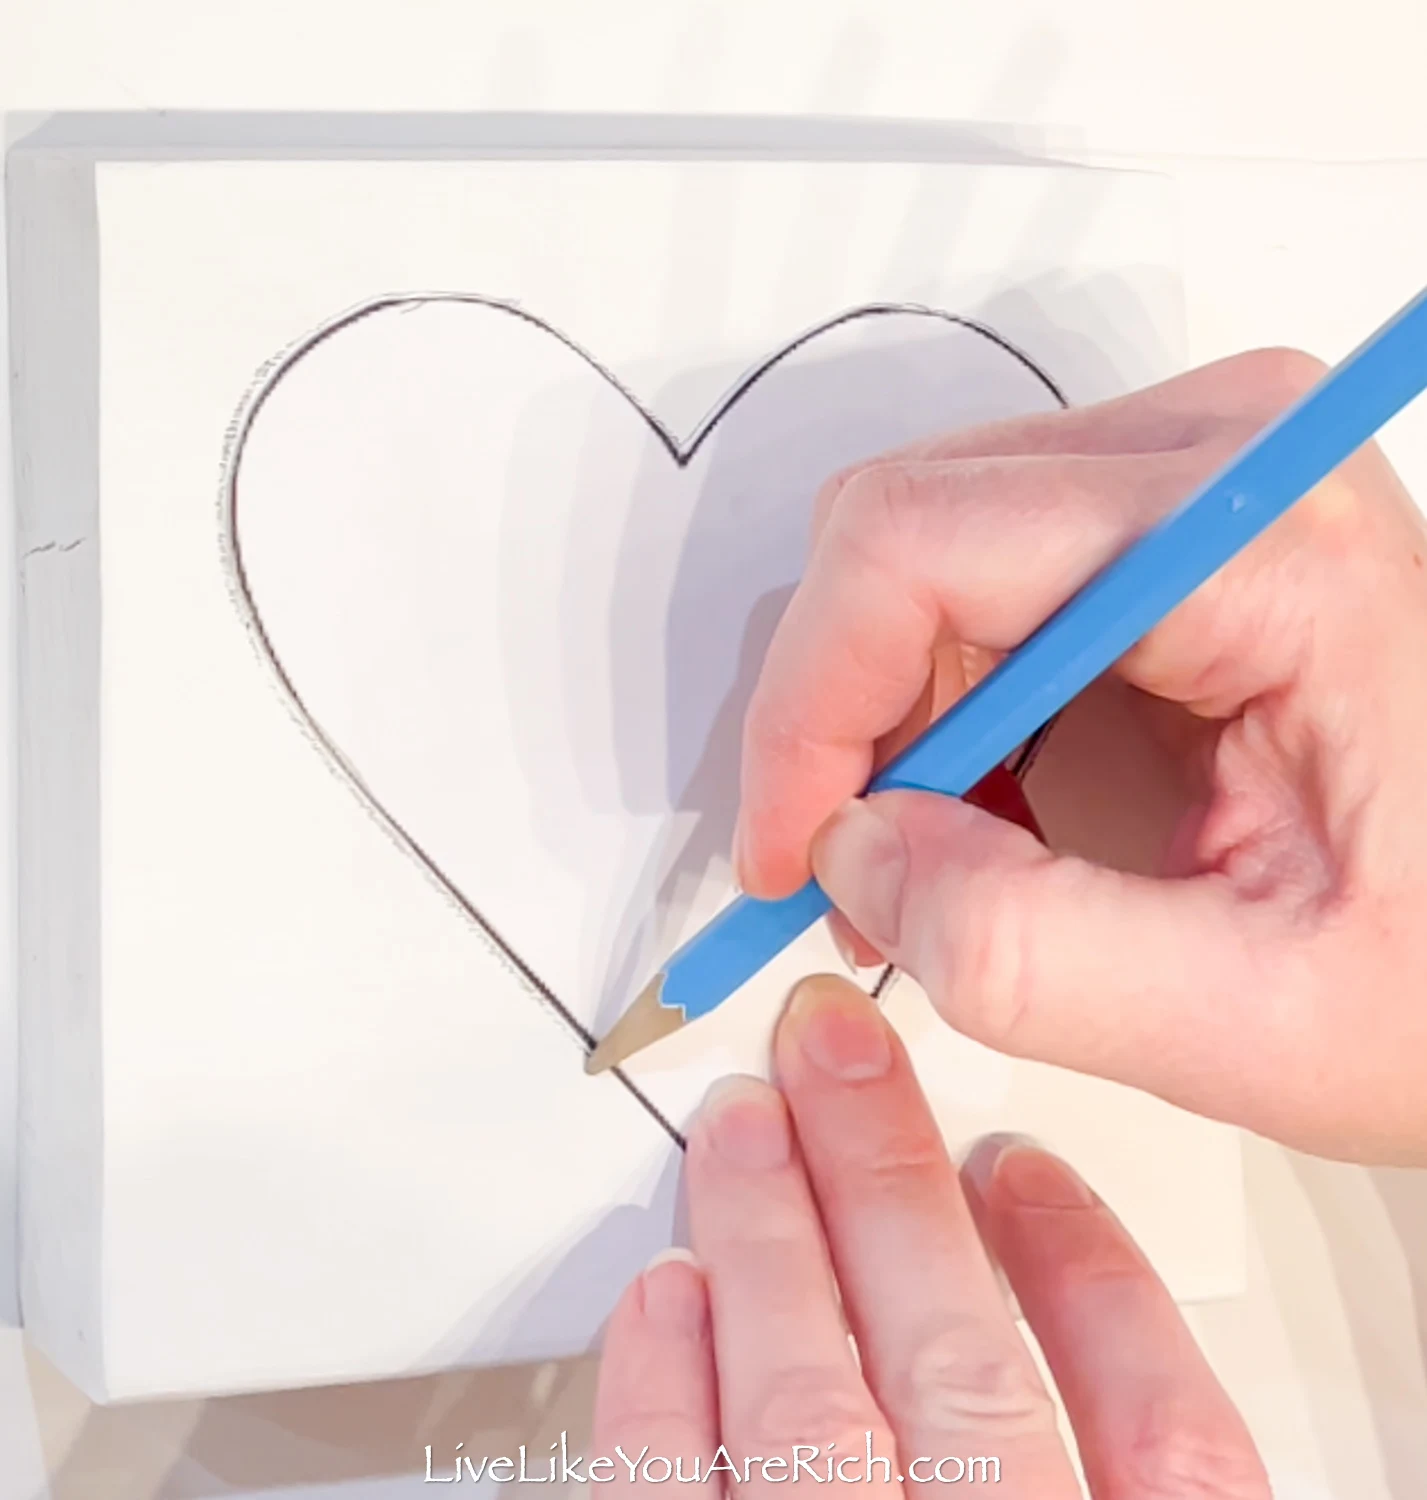
- Print off this free printable and trace the heart on the painted wood. I printed this at 90% its original size to get it to fit as I wanted. You can do that in advanced printer settings on most printers. You may have to do a little experimenting on your printer to get it to the size you prefer.

- Nail the nails around the heart—spacing them as evenly as possible. I started a nail at the two points of the heart and then spaced 12 nails evenly between the 2 nails at the points. It wasn’t perfect, but if you get it close once the string is on, the imperfection is not really noticeable.
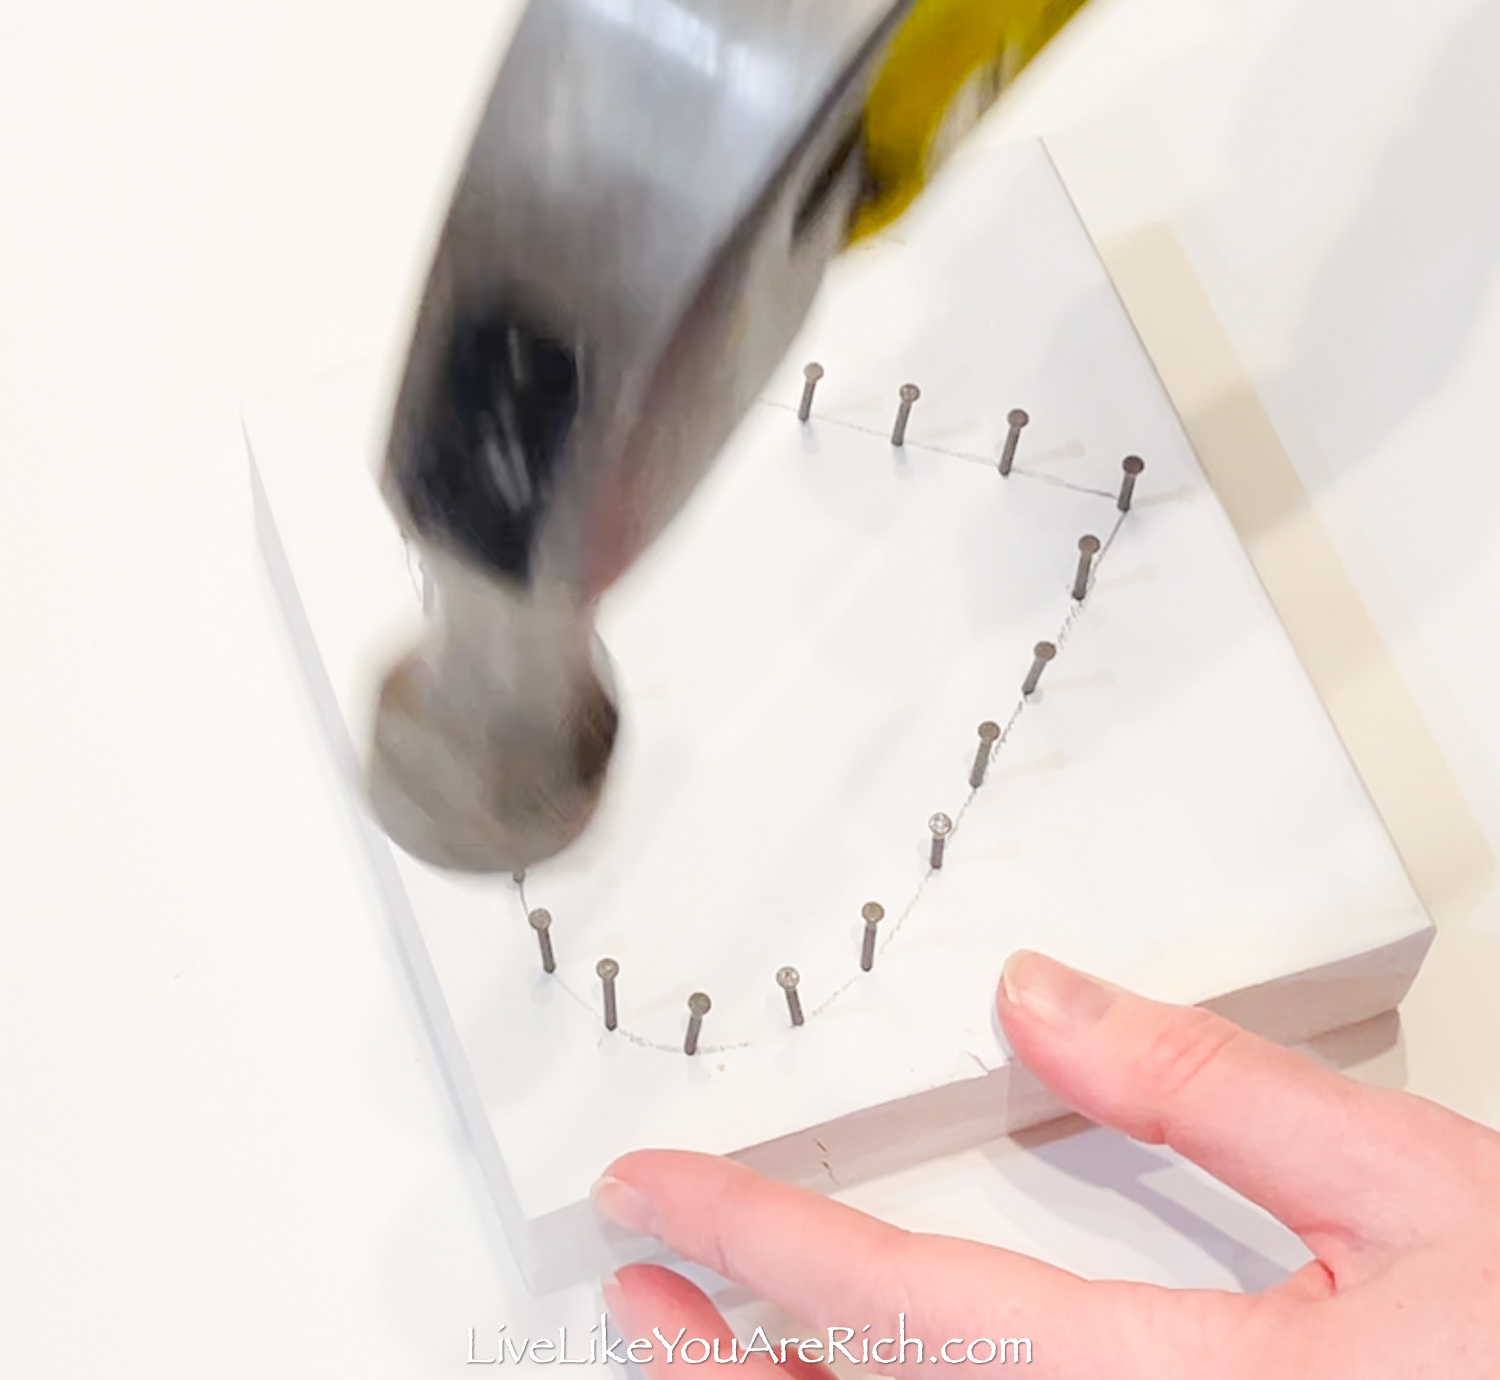
 Each heart took 26 nails. I used 1″ Ring Shank Panel Board Nails.

- At this point, I’d recommend erasing the pencil before proceeding to string on the embroidery floss. We didn’t do this step although, in retrospect, I wish we had.

- Tie the embroidery floss on one of the nails and make a pattern however you desire around the heart nails. I recommend going around the entire perimeter of the heart at least once to add definition to the heart shape.

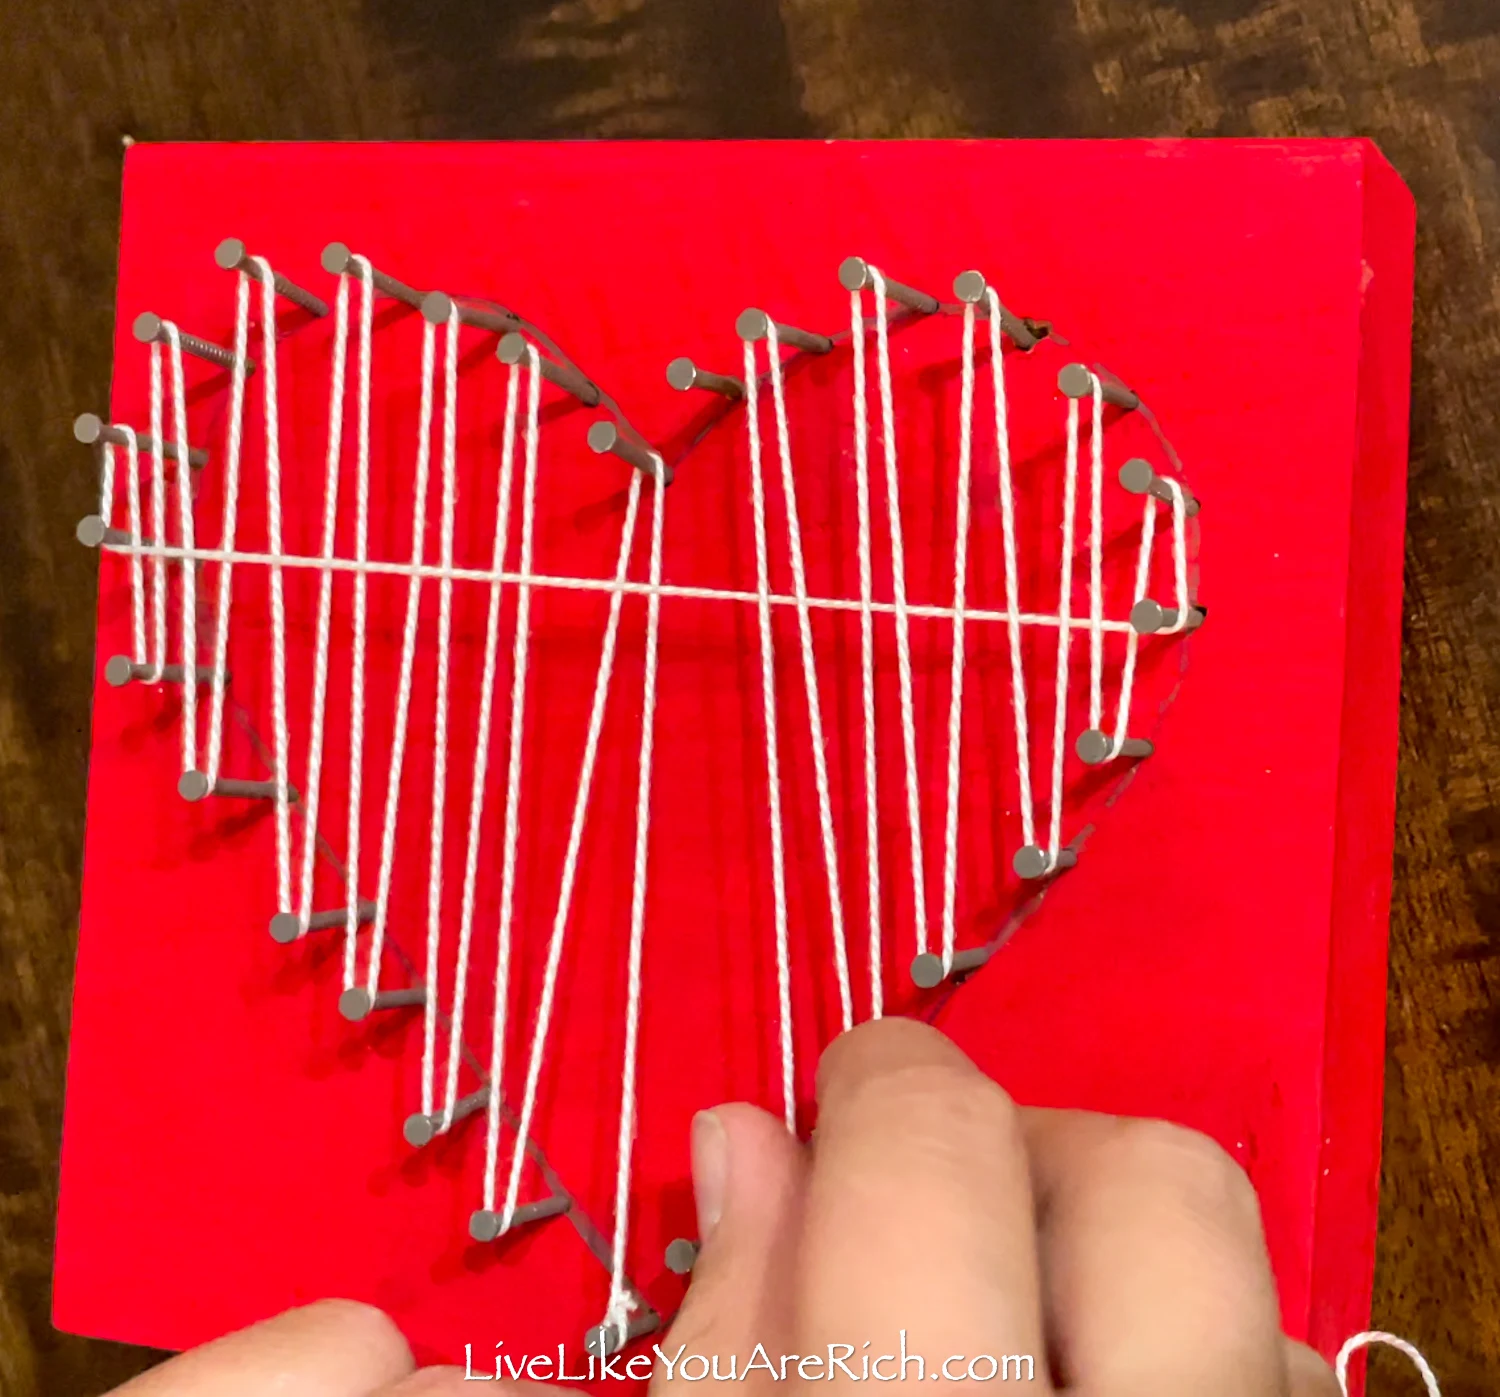
Note- My son and I did the red and white hearts and we did not press the string down to the wood but let it lay as we wound it. Further, we only used one little bundle of embroidery floss. My daughter who did the pink heart wanted to use 2 bundles of embroidery floss and so she had to press her floss down intermittently so it would all fit. In the finished photos, you can see the difference between the two styles and choose which you prefer.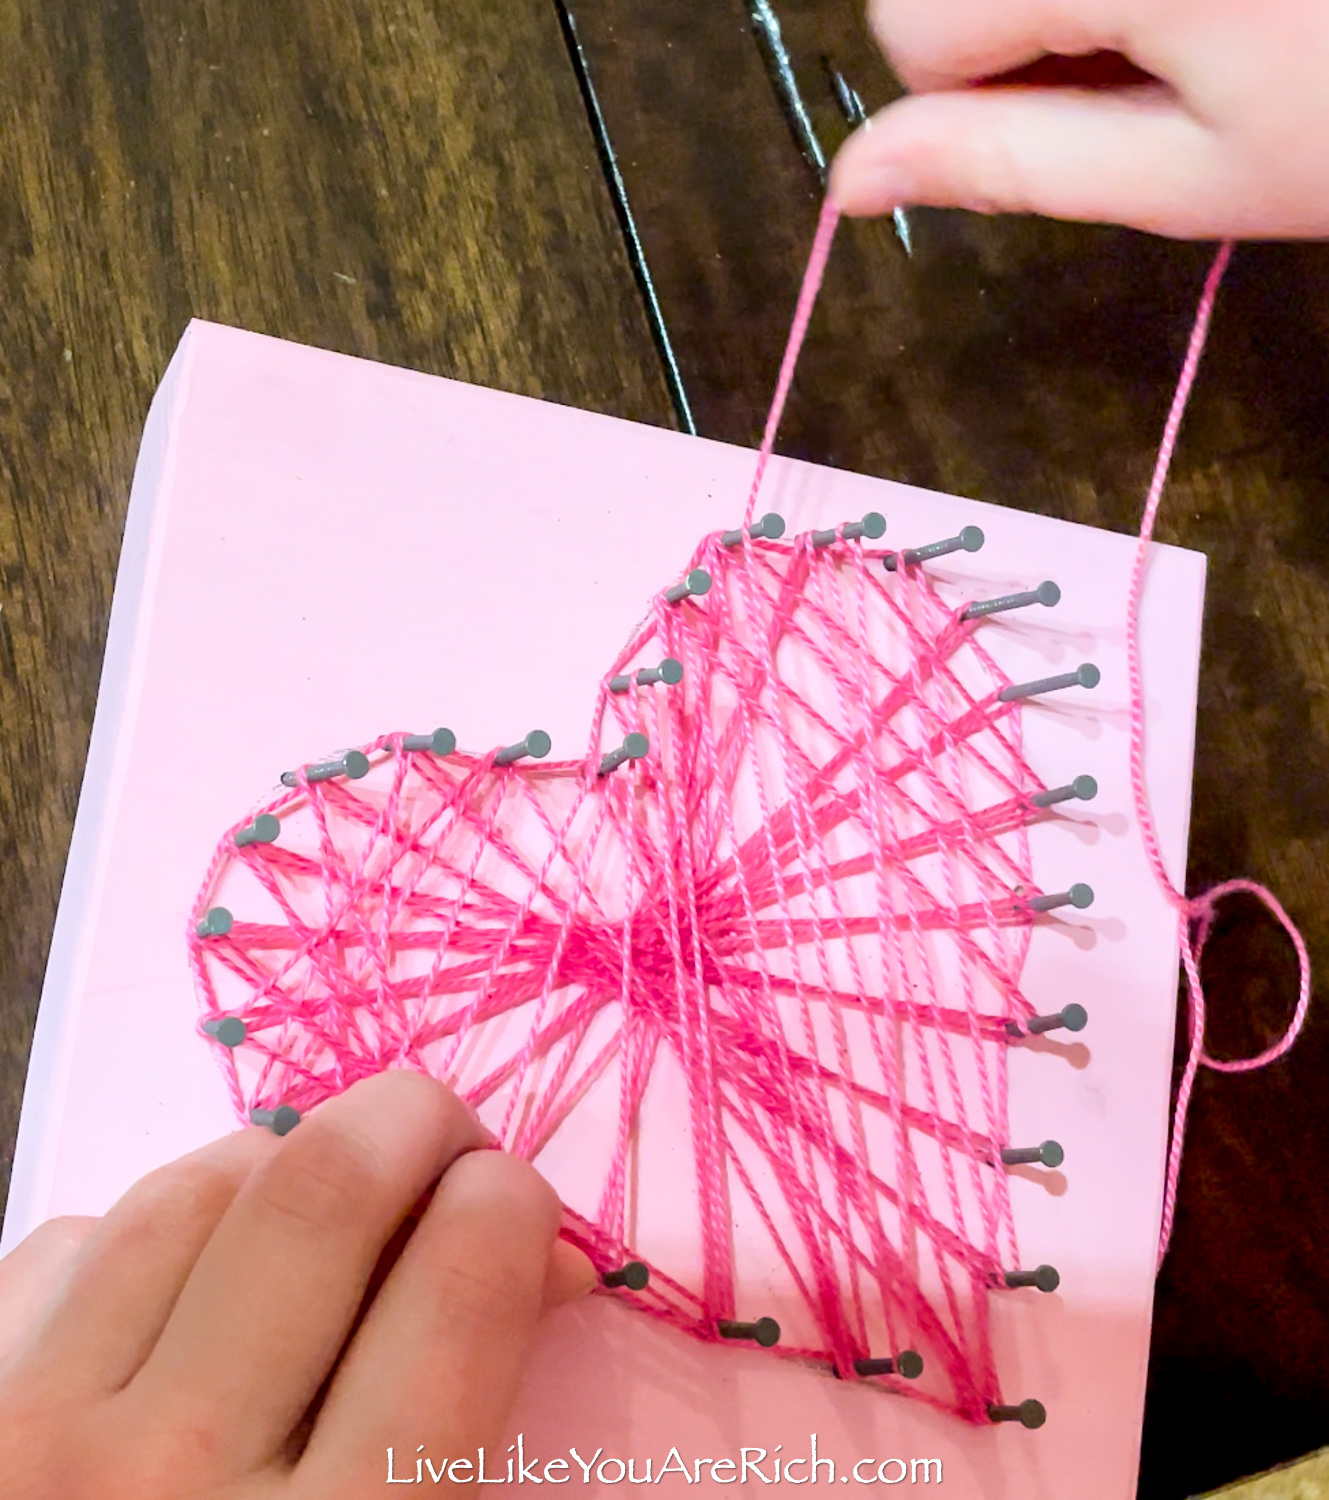
- Leave enough on the end of the string/floss to tie it to a nail. Cut the tail of the string off or tuck it in to the heart design out of sight.

And that is all there is to it!
The only thing I would change to ours (and I did add it to the list of instructions), is to erase the pencil marks before winding the string. After it was wound it was too difficult to remove. From afar you don’t see it, but up close you do. It just would have been a little nicer had I erased the pencil.
Here is a video that I made to show how we made this craft.
Video for Valentine’s String Heart Craft
Easy, inexpensive, and fun Valentine's My son and I did the red and white hearts and we did not press the string down to the wood but let it lay as we wound it. Further, we only used one little bundle of embroidery floss. My daughter who did the pink heart wanted to use 2 bundles of embroidery floss and so she had to press her floss down intermittently so there was room for more on the nail. In the finished photos you can see the difference between the two styles and choose which you prefer.
Valentine's String Heart Craft
Materials
Tools
Instructions
Notes


For other ‘rich living tips’ please subscribe, like me on Facebook, and follow me on Pinterest and Instagram.

25 Easy Valentine’s Day Crafts for Kids - Live Like You Are Rich
Friday 9th of February 2024
[…] Valentine’s String Heart Craft– My children had a great time helping me make these Valentine’s String Heart Craft. […]