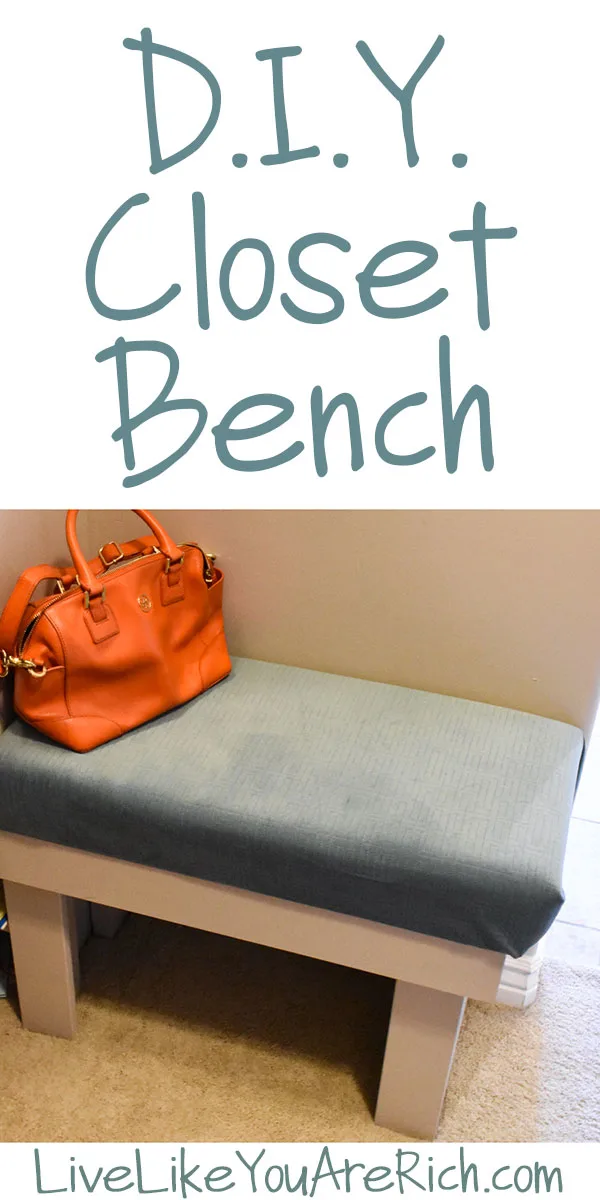
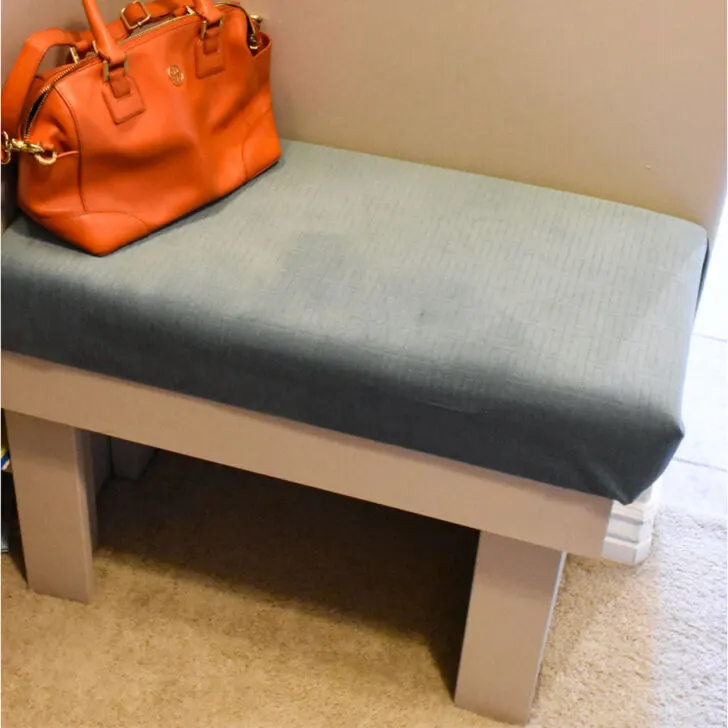
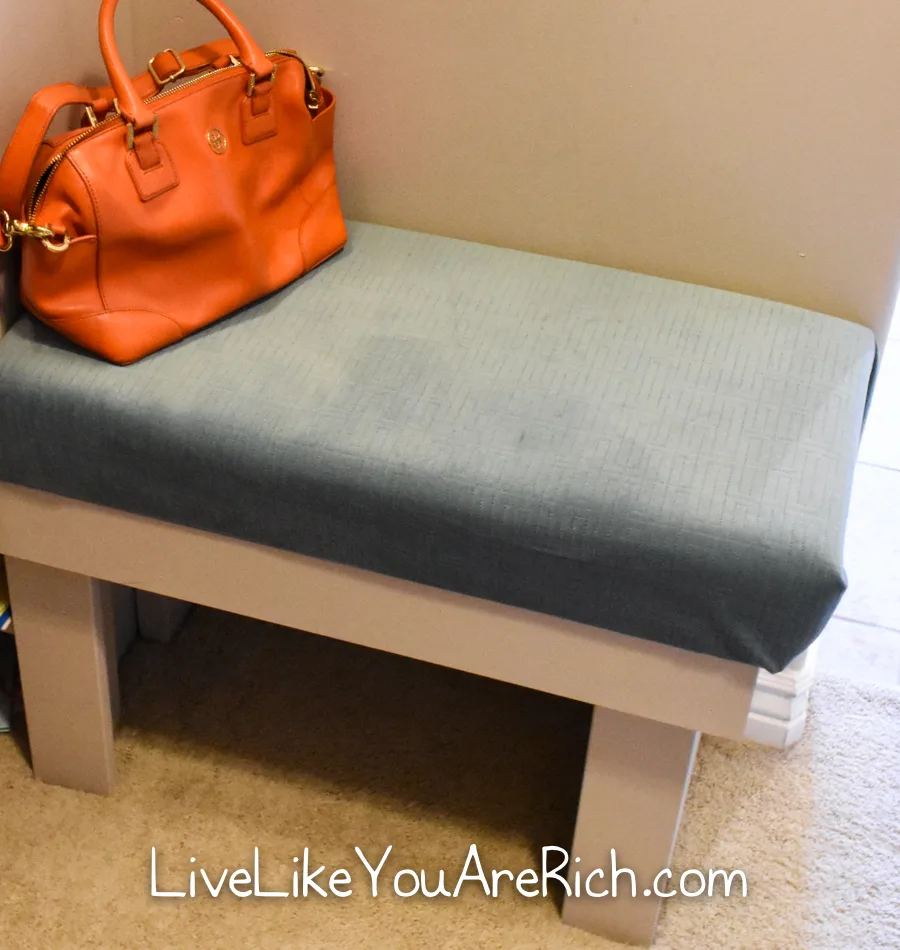
When we were remodeling our master closet, we thought that having a bench seat would be a nice addition. This tutorial outlines how to make a closet bench similar to ours.

First and most importantly, you are going to want to customize this bench to fit your closet. I will put the dimensions and directions in this post that we used, however, every space is different. So be sure to measure your space and calculate cuts accordingly.
Supplies
40+ wood screws 3″-3 1/2″ long
Drill/electric screw driver
2- 2″x4″x8′ studs (pick nice straight ones)
1- 6′ length of 3.5″ x 3/4″ primed mdf base moulding flat
1 (possibly 2)- 14″ length of 11 3/4″ x 3/4″ melamine white shelf board (if both sides of the bench are exposed you’ll need two).
1- Tube of paintable caulk for finish work
1- caulk gun
1- quart paint and paint supplies
1- sanding block or paper
1- level
A chop saw or miter saw
Optional- A finish nailer with finish nails
1- piece of plywood for seat 1/2″ thick cut to 26″ x 13 1/2″
Additional supplies and instructions for the bench’s seat/cushion (foam, plywood, glue, upholstery can be found here).
Instructions
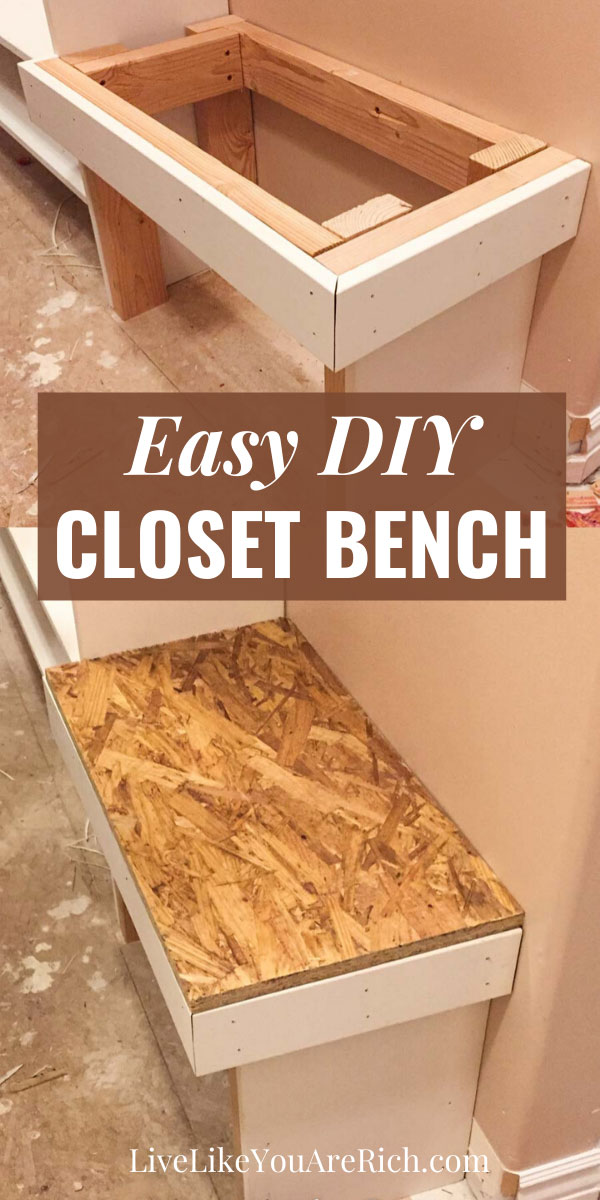
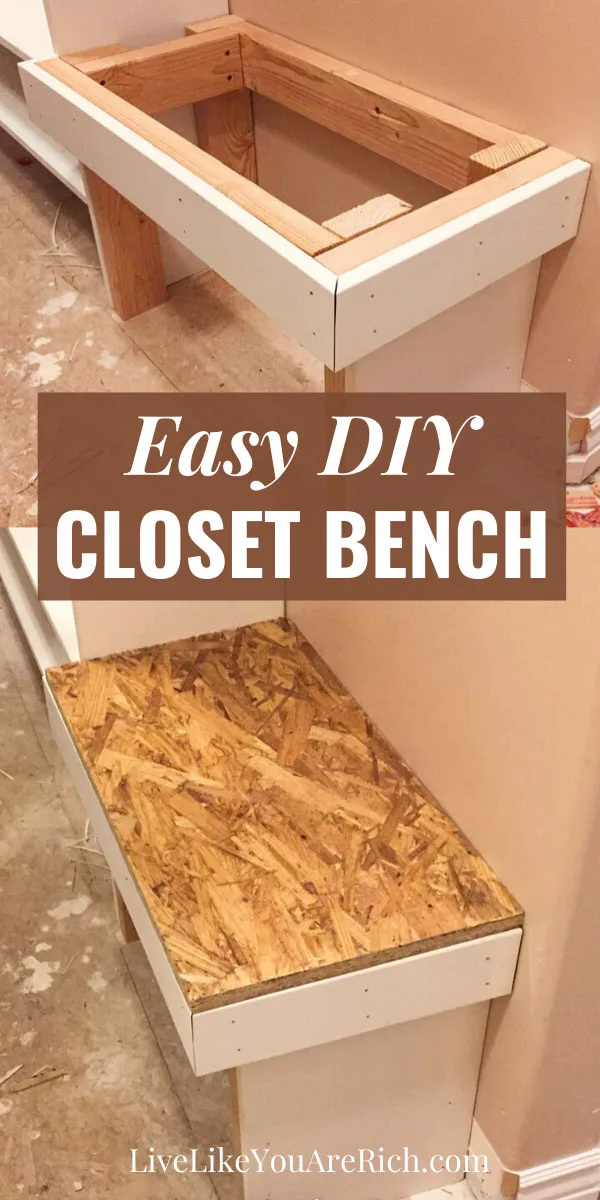
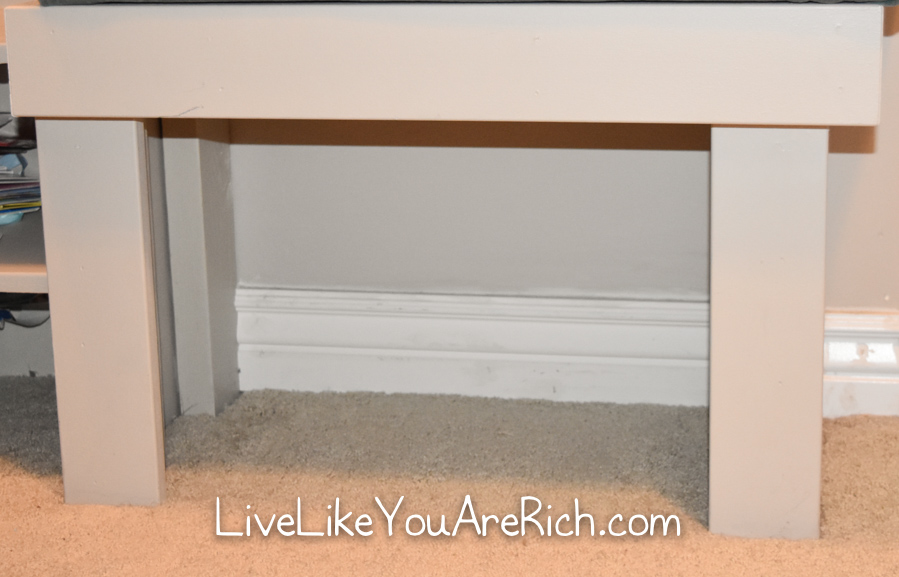
1-Peel back carpet and carpet padding or cut exact holes out where the legs go and prepare the area. Remove baseboard where you will be installing the 2×4’s/legs of the closet bench.
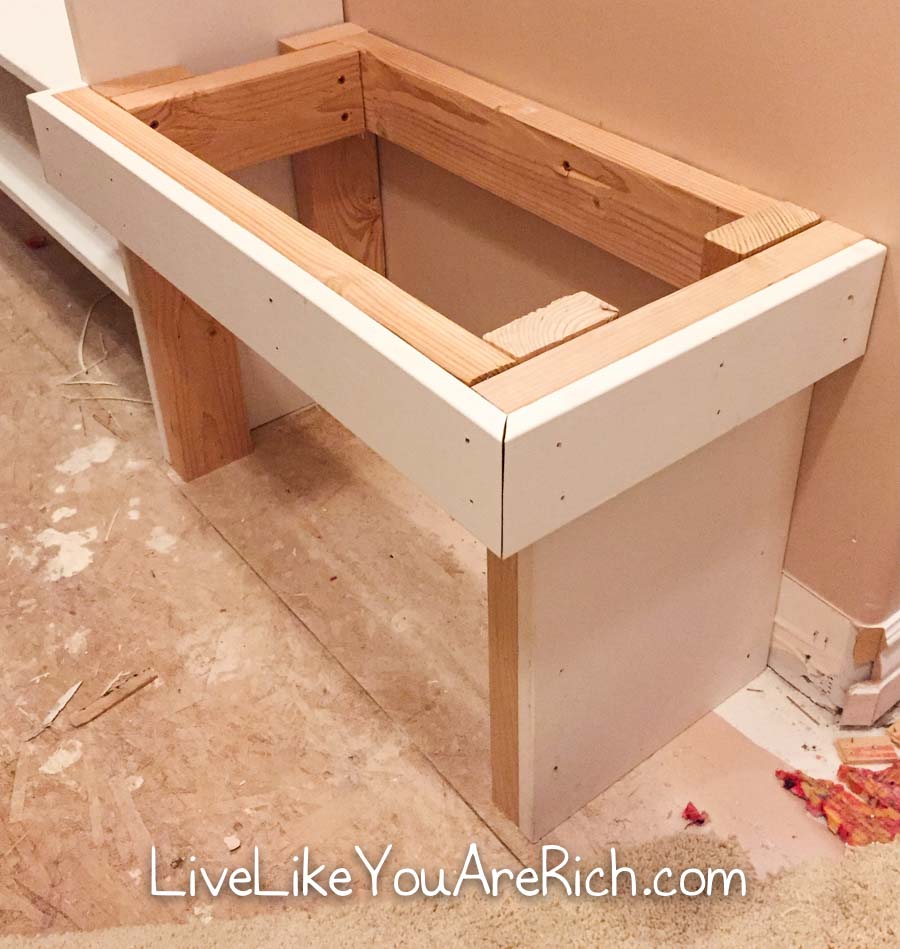
Cut four lengths of 2×4’s as the legs for the bench. Cut them to the exact same lengths (18″ is what we cut).
Cut the 2×4’s for each side. If you have a wall on one side, the cuts will be different lengths (see photo). We cut a 9 5/8″ (inner) and 12 3/4″ (outer) for the sides (see photo).
Cut one length for the back of the bench where it secures to the wall (our length was 21″) and a length for the front (24″).
Note- If your bench isn’t sitting flush to a side wall then you will want to make each side identical (both 2×4’s cut to 12 3/4″ long and put them both on the outside of the frame).

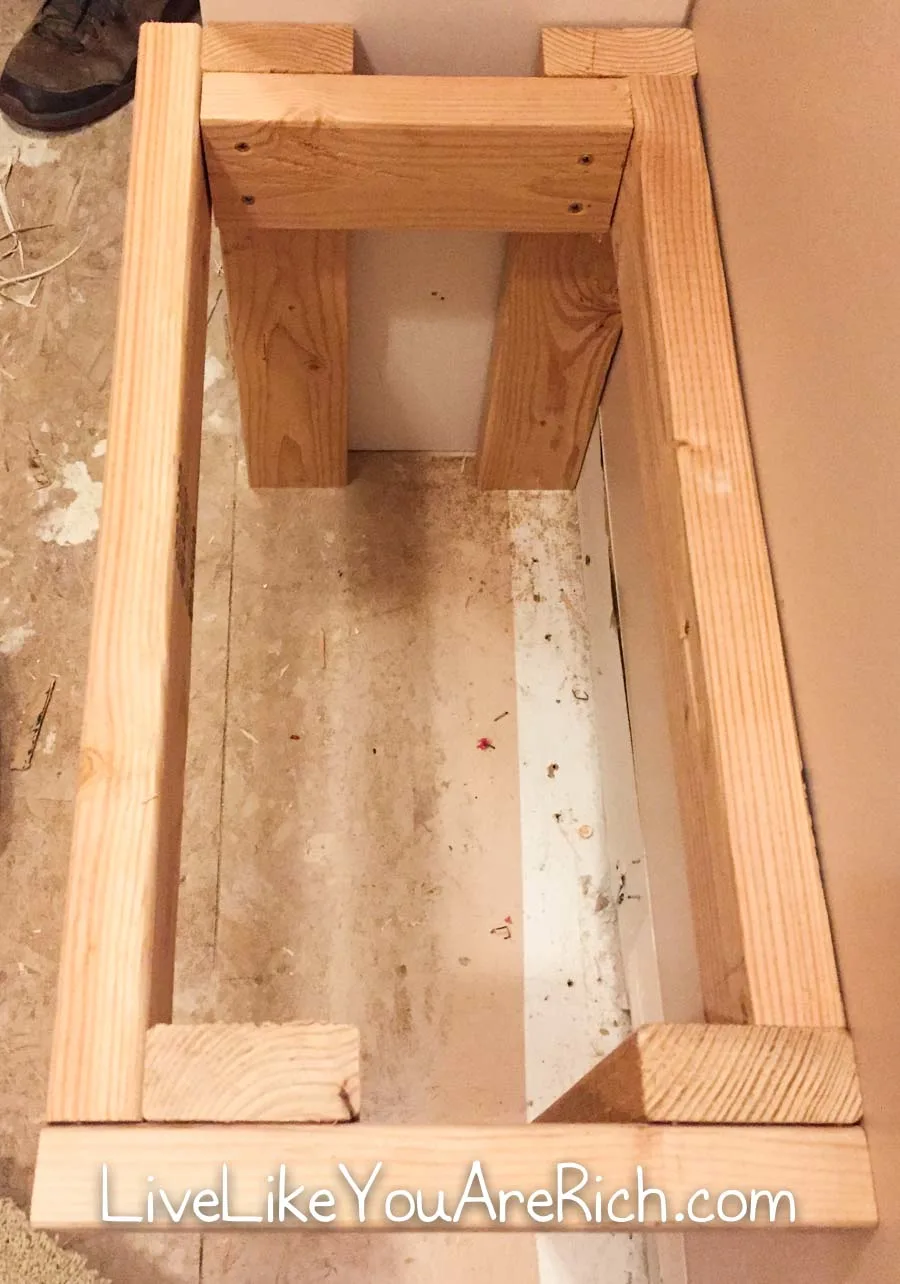
Screw all 8 pieces together making certain that the 4- 18″ studs are completely level because you want to make sure the bench is level.
Try to make everything flush and level as possible.

Again, it is important to note that if you have a set up like ours, the side piece next to the wall goes on the inside the frame, the outer side piece that doesn’t flush up to a wall goes on the outside of the legs. This is so everything is flush and easy to trim. If your bench is not next to a wall or closet, then both of the side 2×4’s (12 3/4″ long), will go on the outsides of the legs.
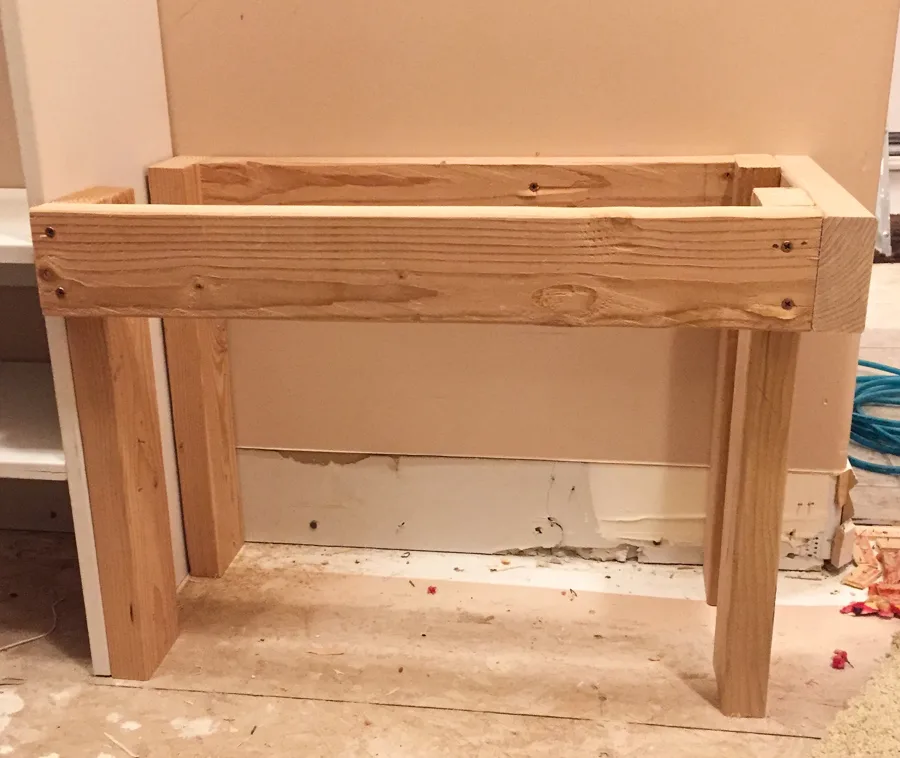
You now have the basic frame created!
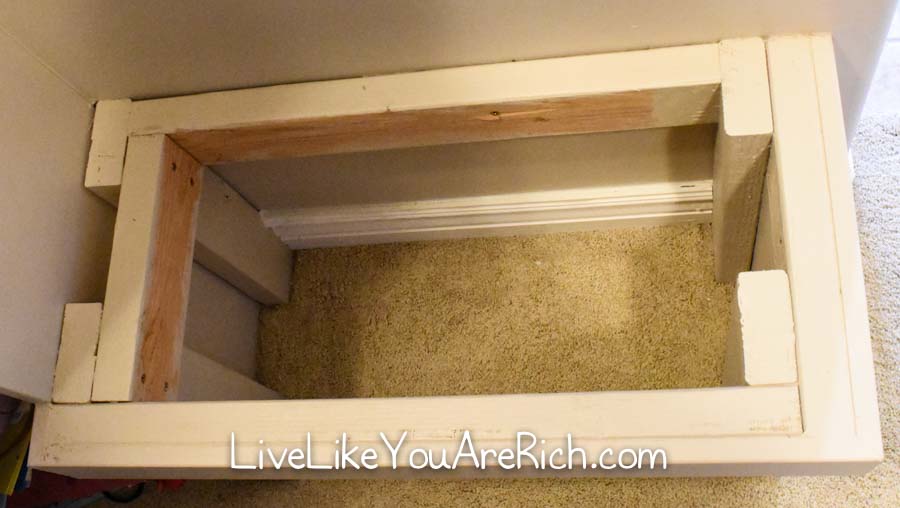
Next, you’ll want to secure the frame of the bench to the wall. Find at least one or two wall studs and screw it into the wall studs making sure everything is level.
Now, you are going to make it look nice by trimming, caulking, and painting the bench frame.

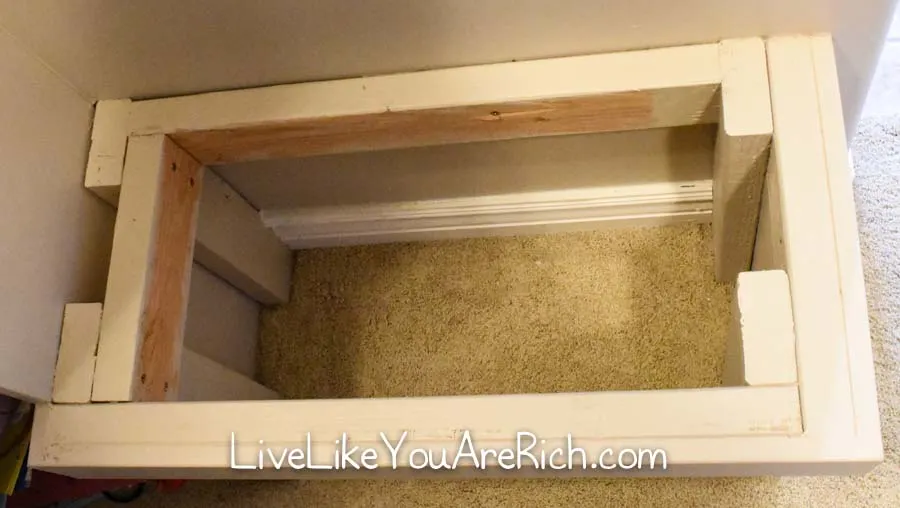
Cut the melamine closet board 14″ tall. This board should be 11 1/4″ wide x 3/4″ thick. Nail it on to the legs that are exposed. If both sides of the bench are exposed you’ll need two.
If you don’t have a finish nail gun then just use wood screws. Using screws for the finish boards will make the caulking and finishing job more difficult but it can work. I’d highly recommending borrowing a finish nail gun if you don’t have one.
Using a saw that will cut a 45 degree angle you’ll want to cut the trim. Our bench bordered the other closet shelving but not fully so, our measurements went like this: 2″ trim along short side x 26 3/4″ trim across the front x 13 1/4″ trim on the longer side.
Before cutting the trim, be sure you are cutting the 45 degree angle in the correct direction so they all fit together!
Nail the trim on..
Next, nail trim on to the front legs. I didn’t get a photo of the front trim during the installation so here is a photo of the front trim after it was completed.

Using paintable caulk, run the caulk along the exposed edges and corners and over the finish nail holes or screws. Allow to dry.
Sand caulk well so that you cannot see the nail/screw holes or edge gaps.
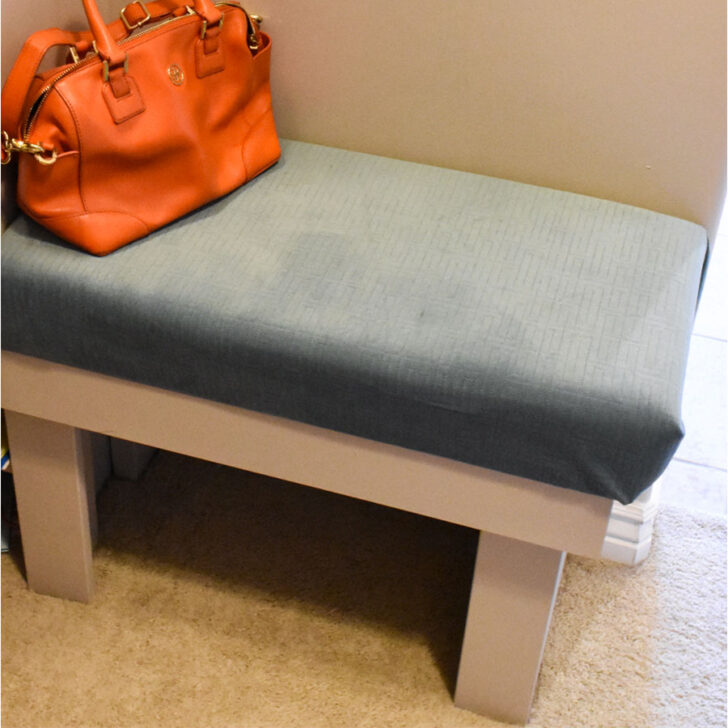
Paint giving it at least two good coats. I found no need to paint inside the bench. I mainly painted the outside.
Great job! You have built a closet bench frame.
Replace the carpet padding, carpet, and baseboard.
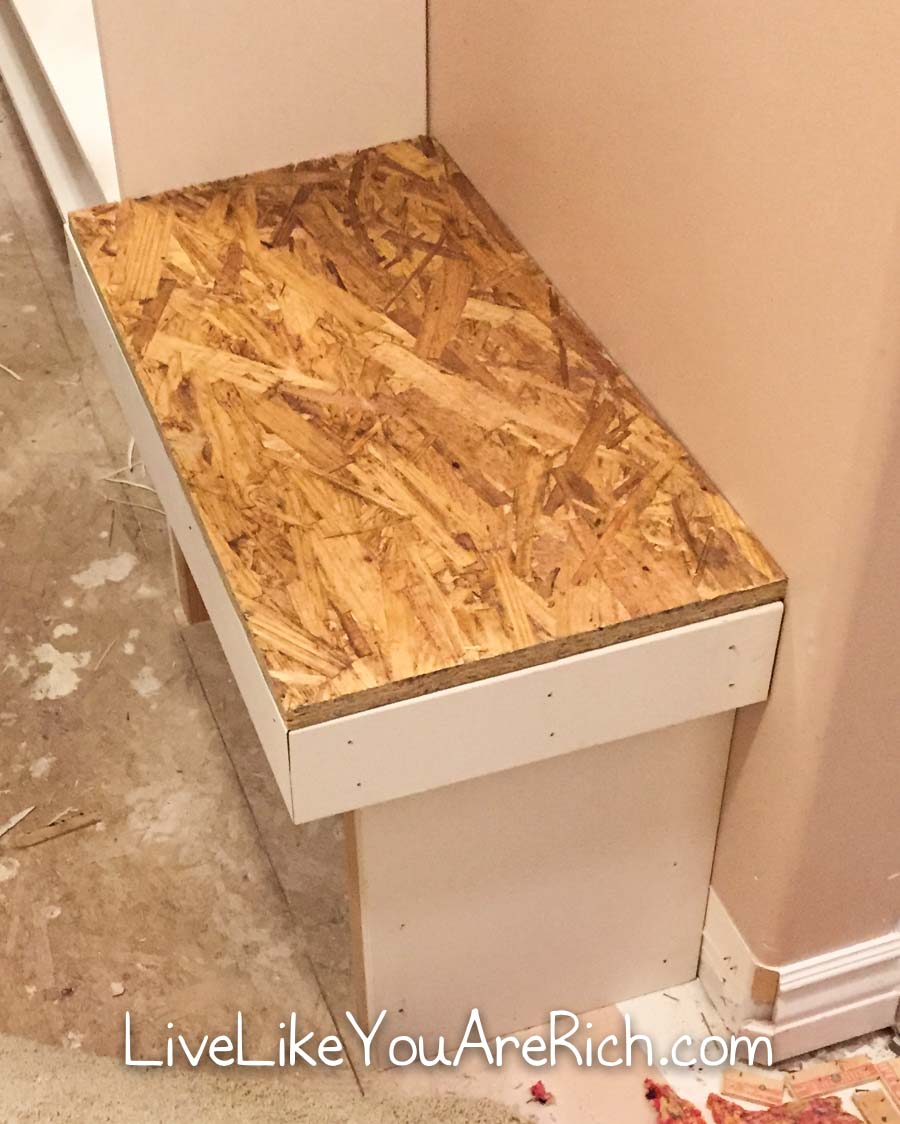
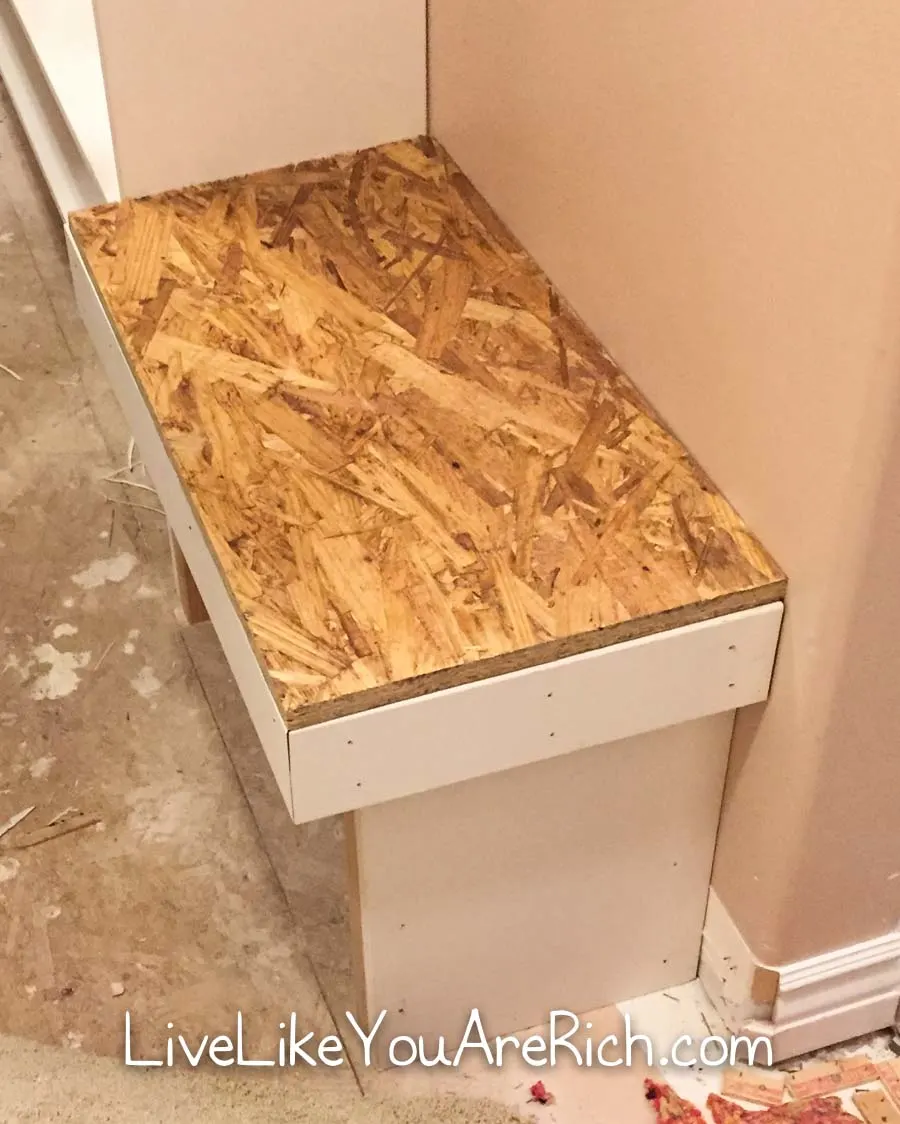
Cut a piece of plywood 1/2″ thick cut to 26″ x 13 1/2″

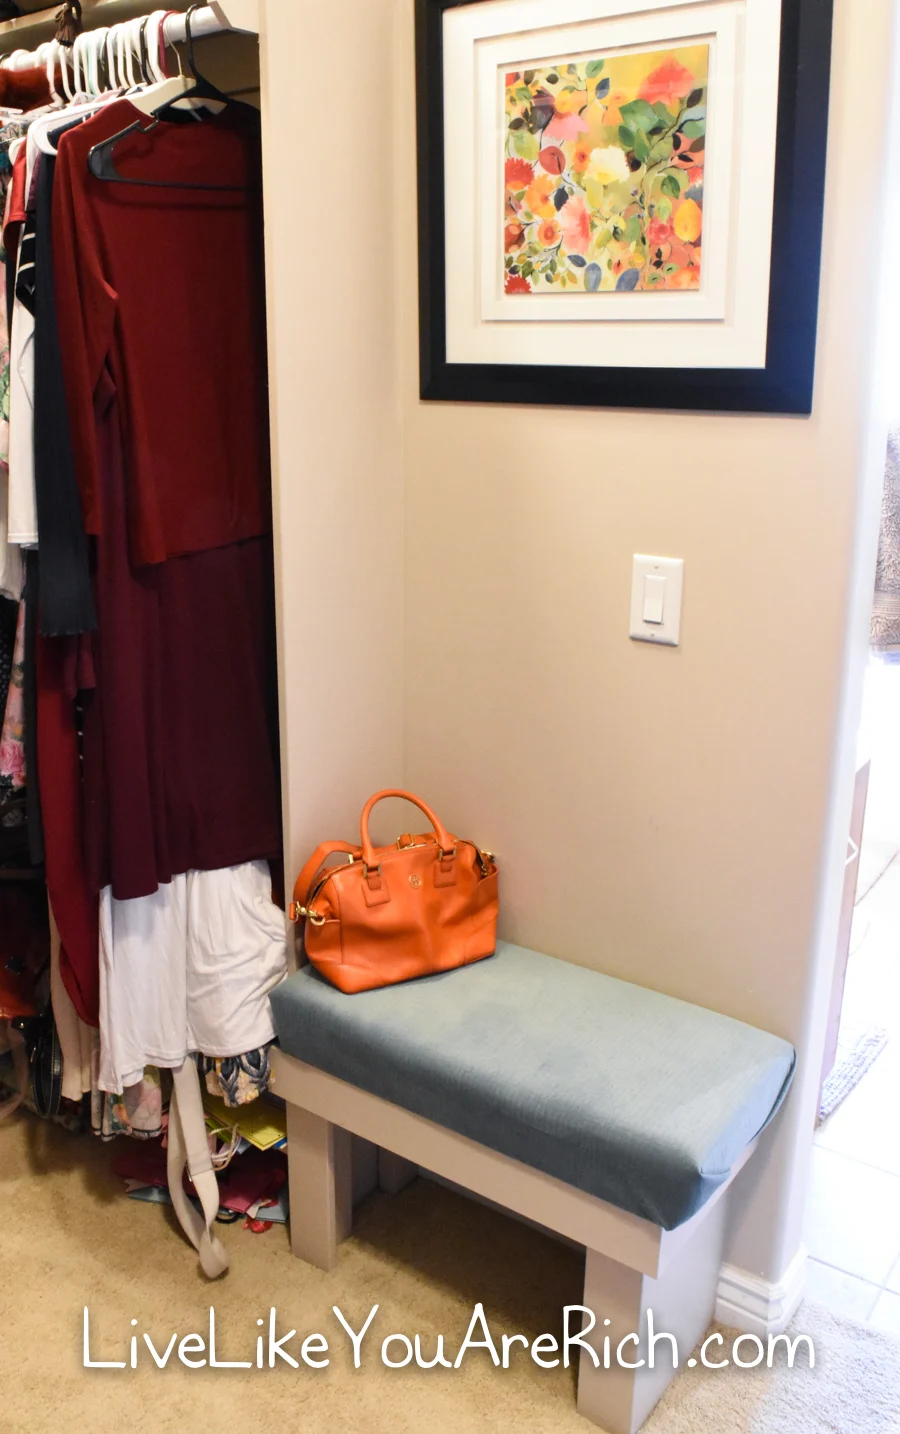
Next, move on to this tutorial for the D.I.Y. closet bench cushion.


Some may wonder how much the bench seat cost. This is very difficult for me to determine as we were in the middle of a remodel. We had the studs, screws, tools, caulk, paint, plywood, sand paper, etc. The only real items we had to pick up were the melamine and moulding as well as the seat cushion items (I’ll total that up on this post). If you have most of the tools and supplies as we had, the total would be about $20.00 to make this closet bench. If you don’t have the things like studs, caulk, sand paper, screws, finish nails, etc. I’d budget about $100 for it.


For other ‘rich living tips’ please Subscribe Here or connect with me on these other platforms: