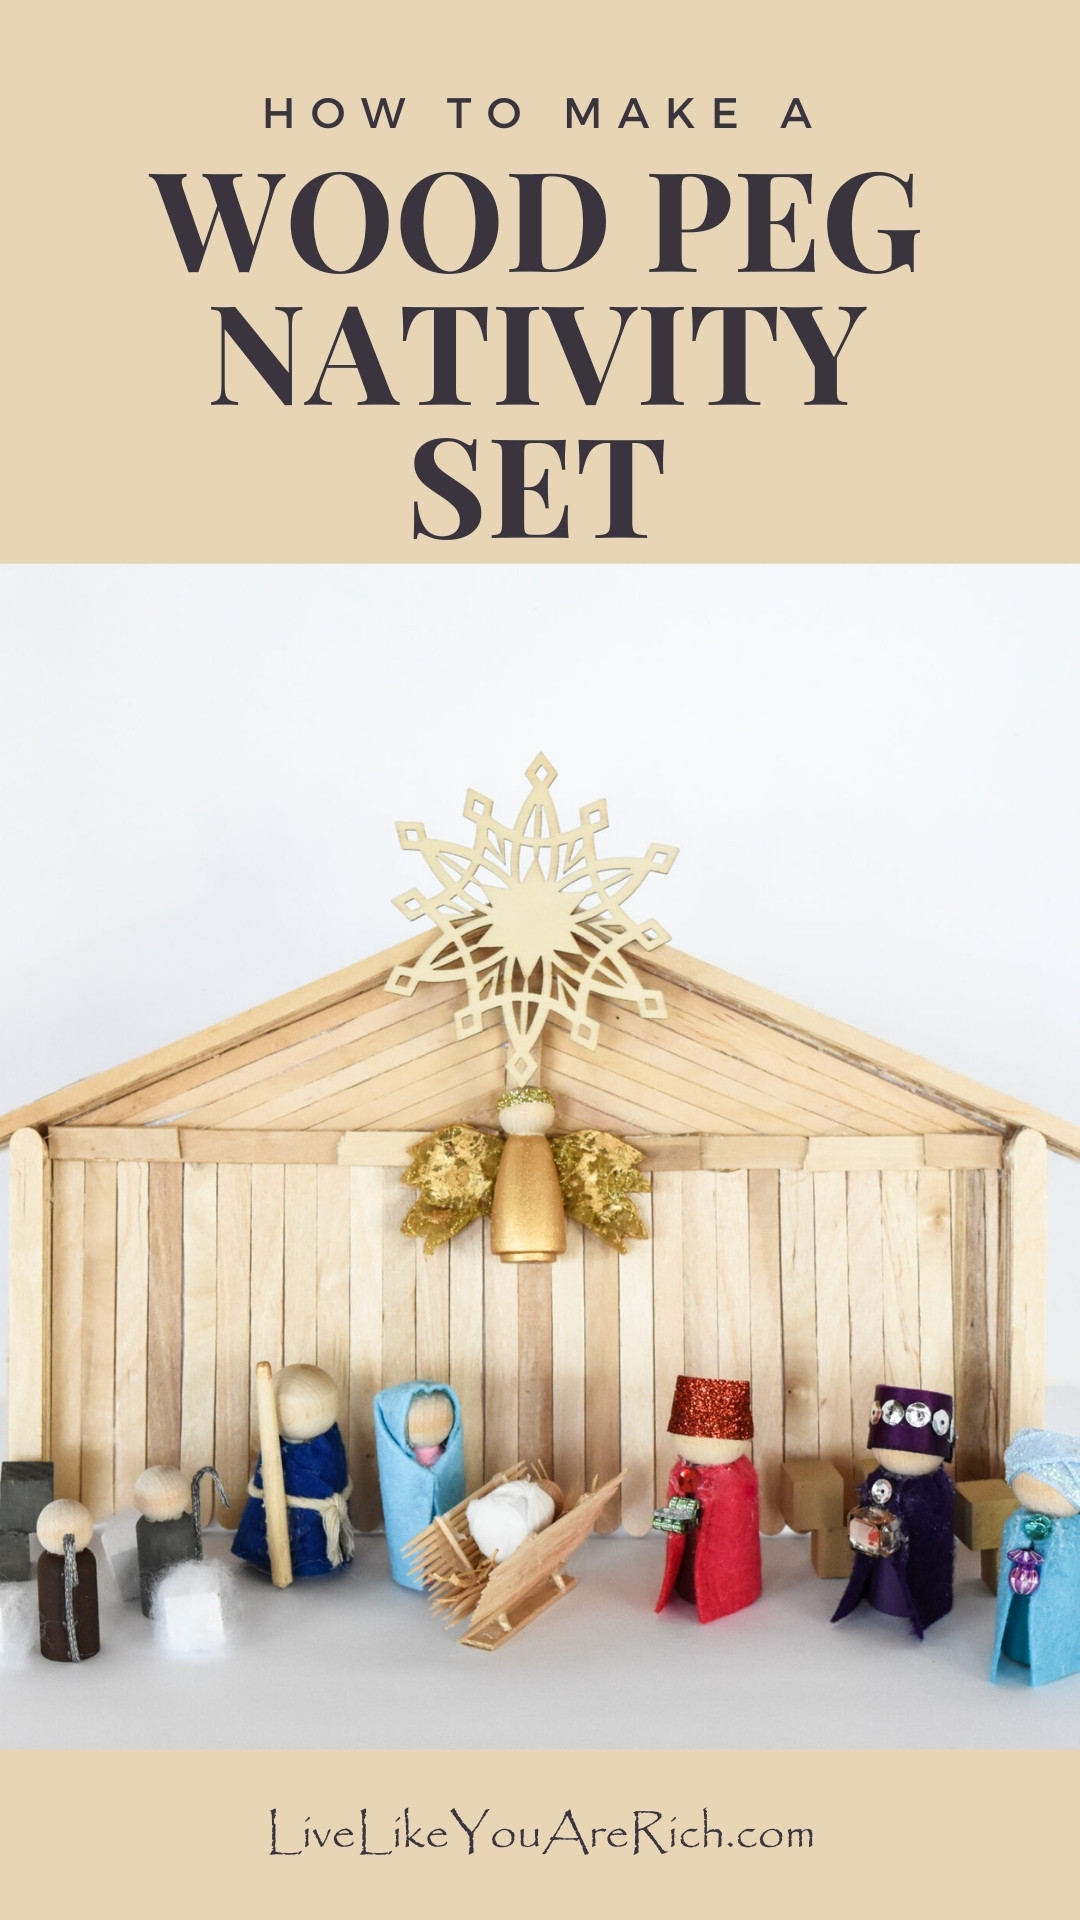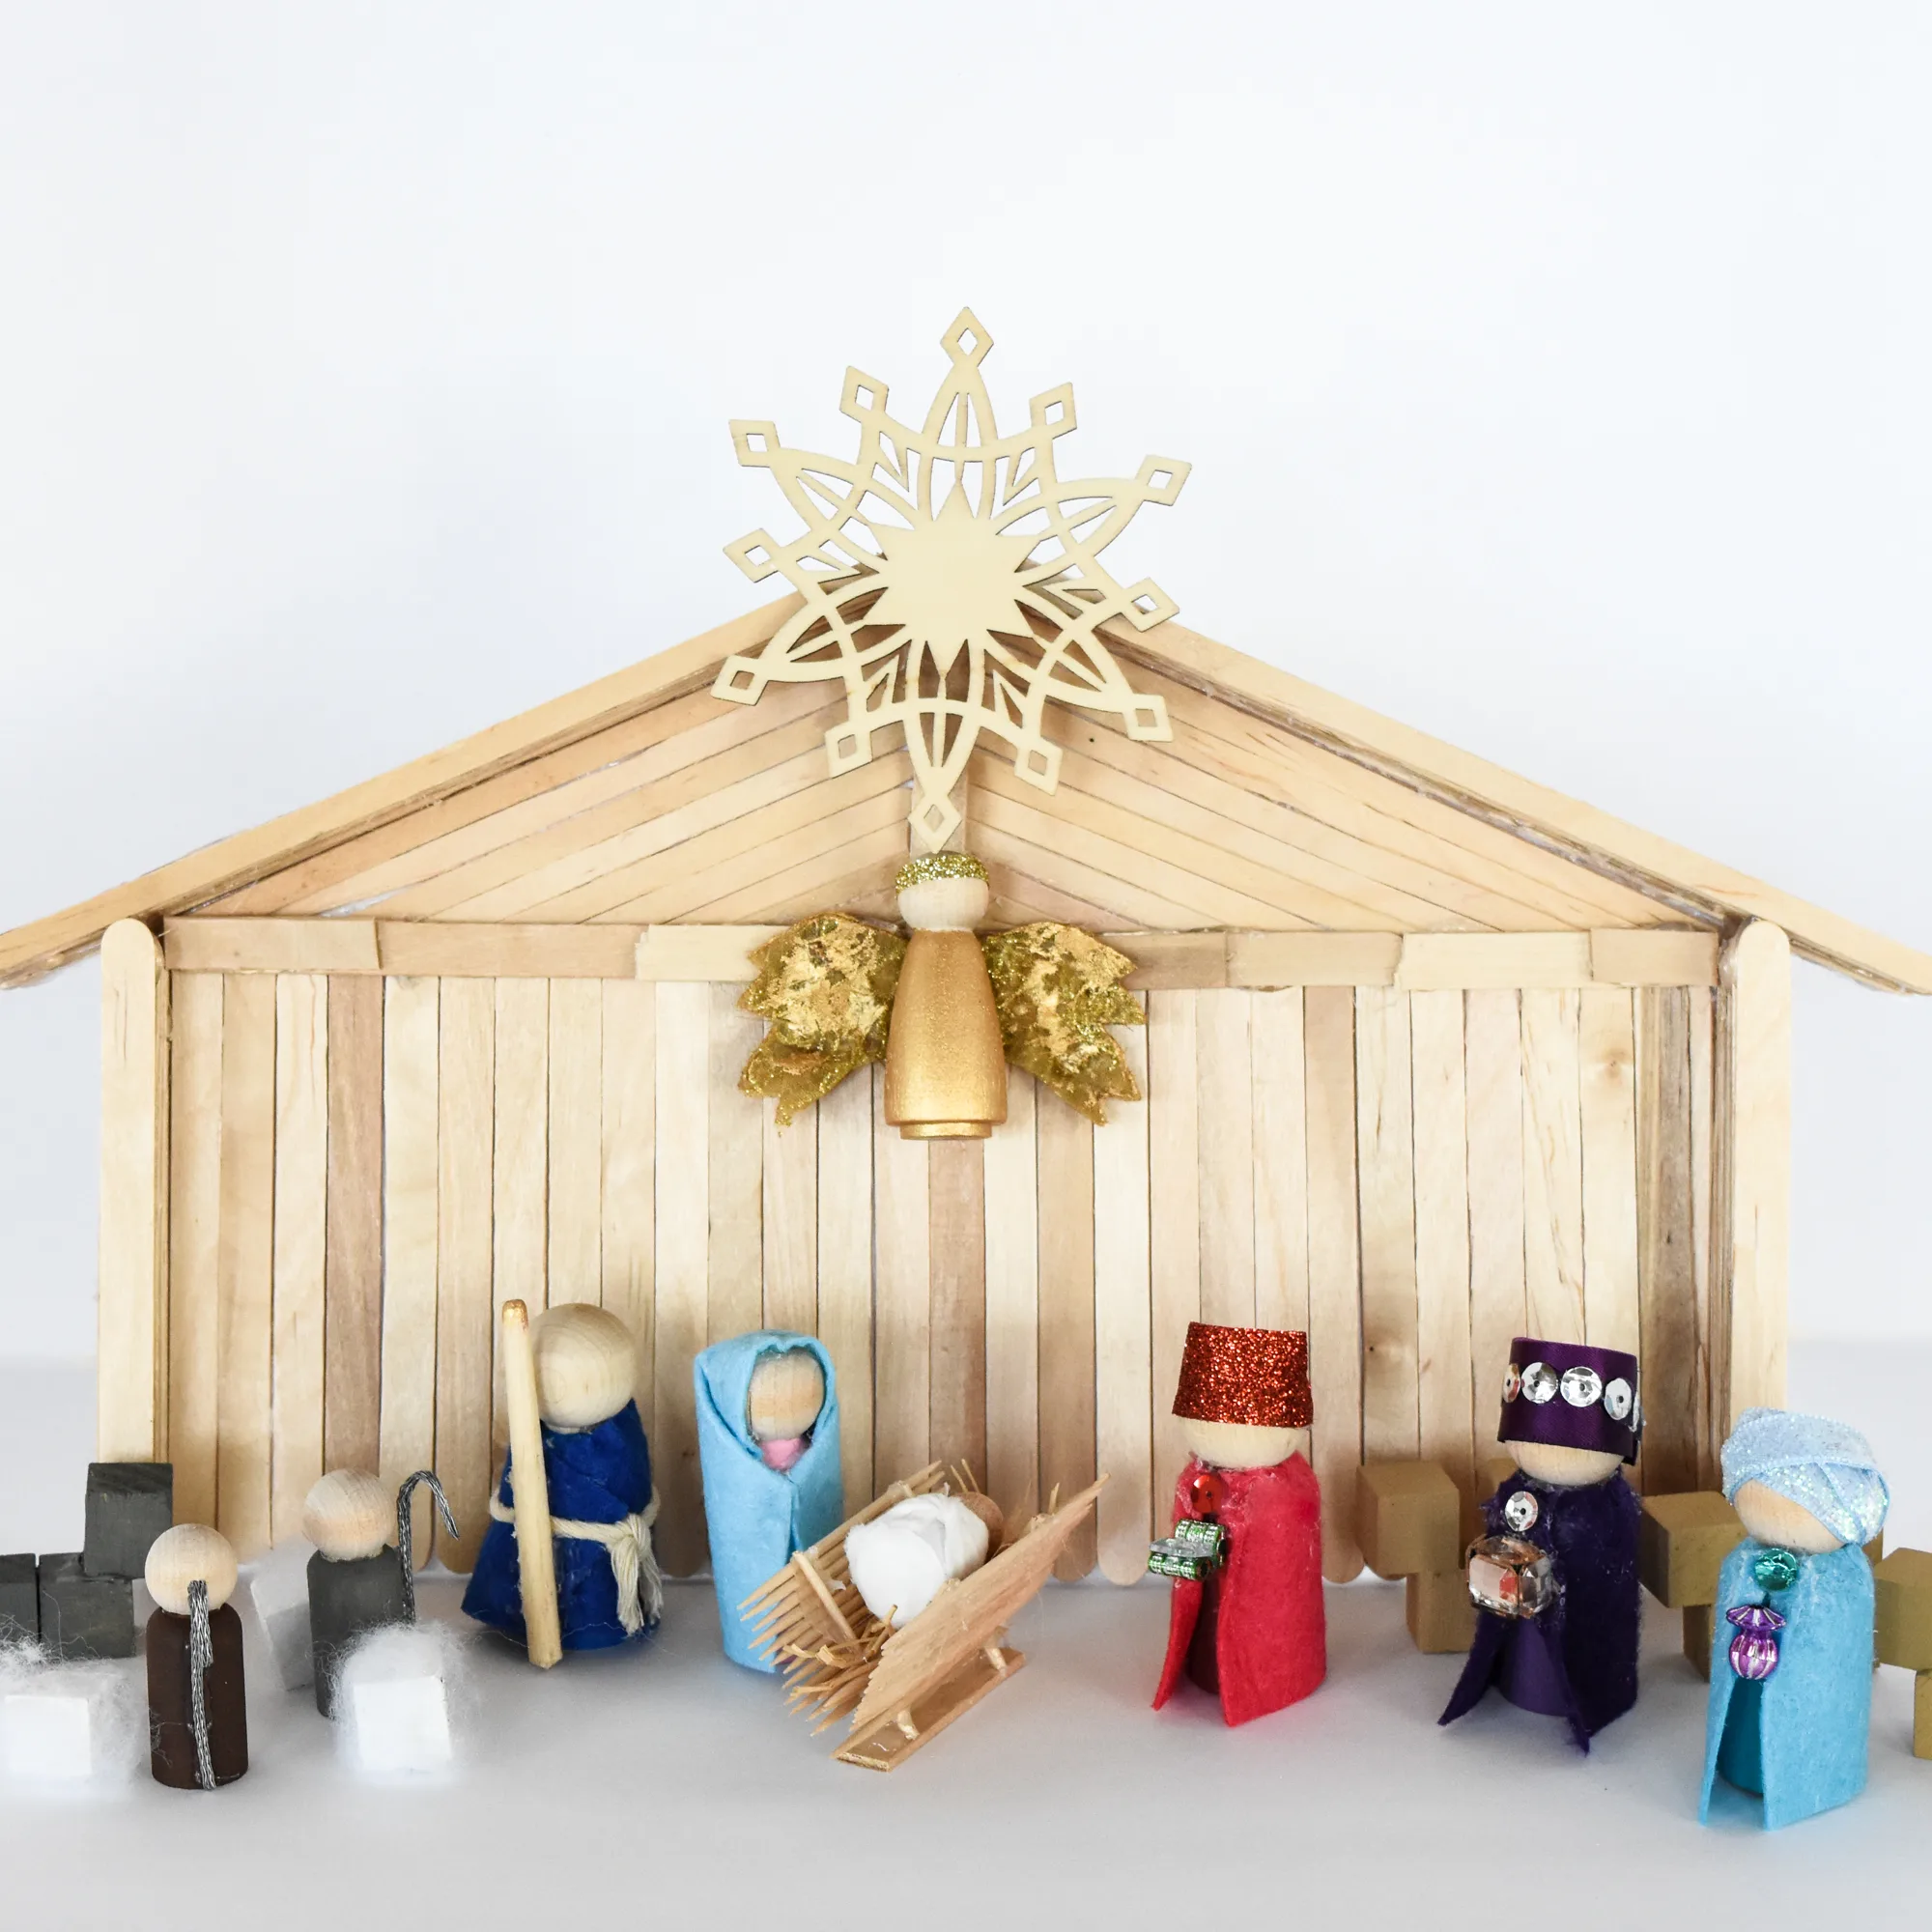
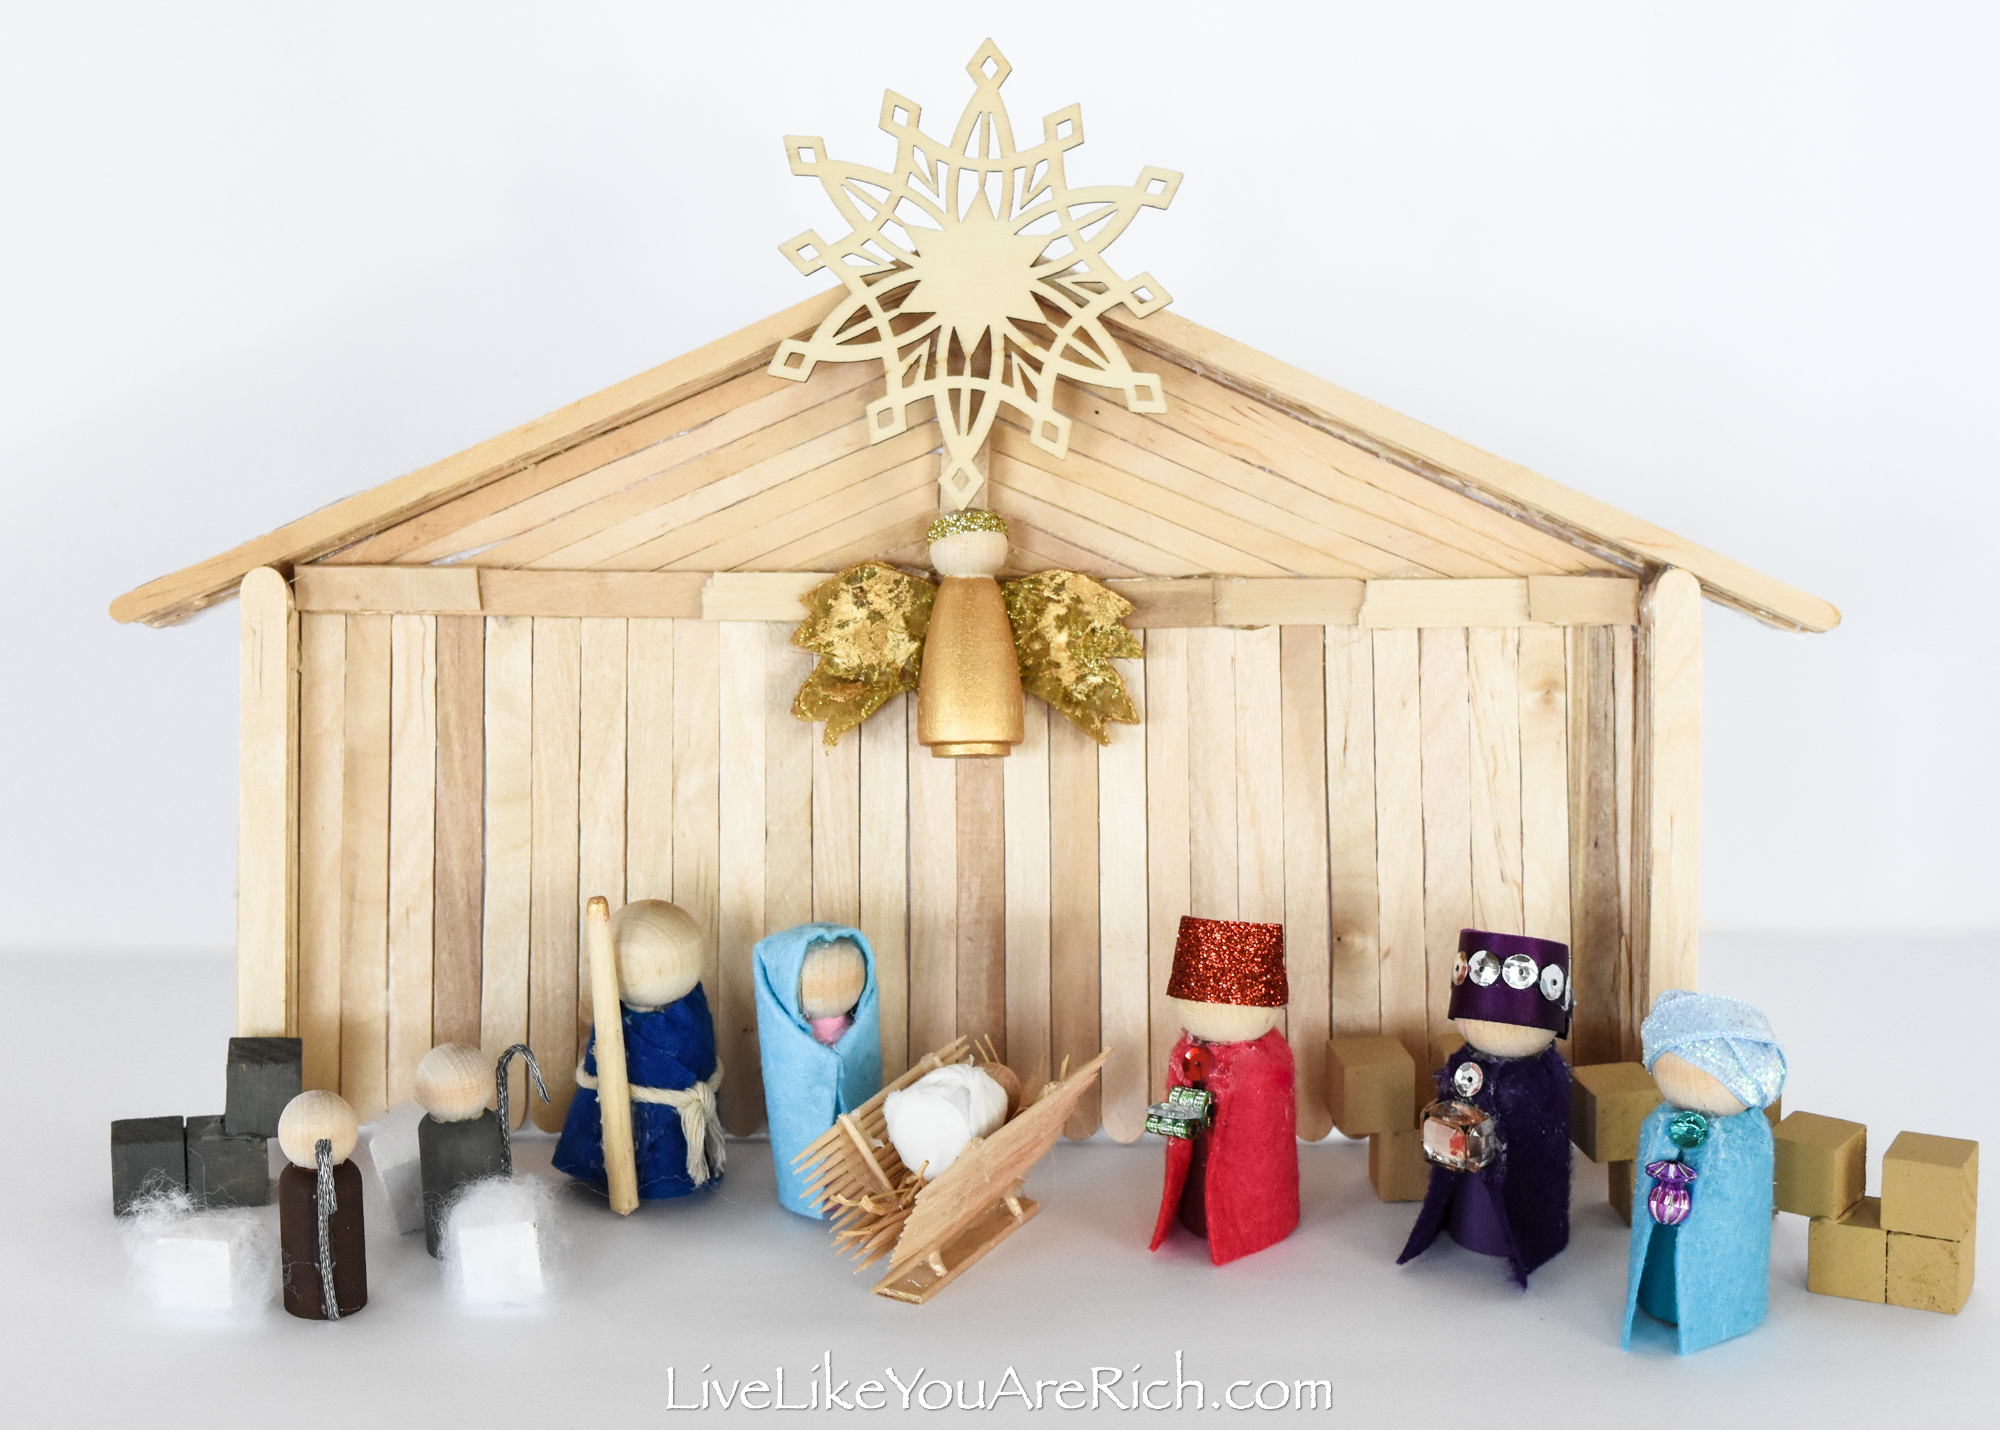
This Wood Peg Nativity DIY project was a fun for to make this Christmas season.
I love to decorate with nativities! Our upstairs mantel is Nativity-themed this Christmas. I wanted to add a nativity that I handmade to our collection.
I had all the supplies on hand so Sunday I decided I’d make it. Soon after I started this project, my daughter asked if she could join in.
She helped paint, trace and cut out the angel wings, build the manger and more.
She is becoming very skilled at crafting as I include her more often. We love our mommy-daughter-craft-time.

We had so much fun putting together this nativity.
I highly recommend making this with a child or grandchild. It is extra special because my daughter and I made it together. She said a few times, “Mom, I just love crafting together”.

I loved her contributions and advice and after it was complete she often stares at it and says, “I cannot believe we made this from scratch! I just cannot believe it!”. It is so cute.
It took us a couple of hours to make and although time consuming (keeping in mind we did have a LOT of interruptions), it was simple and inexpensive to make.
I think we could have probably made it in an hour and a half if I hadn’t had multiple interruptions.
Supply List for this Wood Peg Nativity DIY
variety of 4×4 colored felt
variety of acrylic paint (I used gold, white, light pink, brown, navy, carmel, purple, red, light blue, black)
little bit of straw/hay or raffia
popsicle sticks (regular)
7-7.5 ” thin paint or popsicle sticks
wood toothpicks (regular)
threaded wire strand (shepherds staff)
rope or thick string (Joseph’s belt)
end of wooden paint brush (Joseph’s staff)
beads, sequins, small jewel stickers (wise men clothes buttons, crown and their gifts)
ribbon (wise men head dresses and crowns, angel wings)
How to Assemble this Wood Peg Nativity DIY
continue reading and/or watch this video tutorial…
- Label each member of the nativity by writing on the bottom of the wooden peg the name of that character. This really helps when your craft area becomes cluttered with a lot of different supplies.

- Paint the wood peg bodies the colors you’d like them, let them dry and give them a second coat.Tip- You may want to match the felt, sequins and ribbon in order to choose paint colors that work with the items you have.
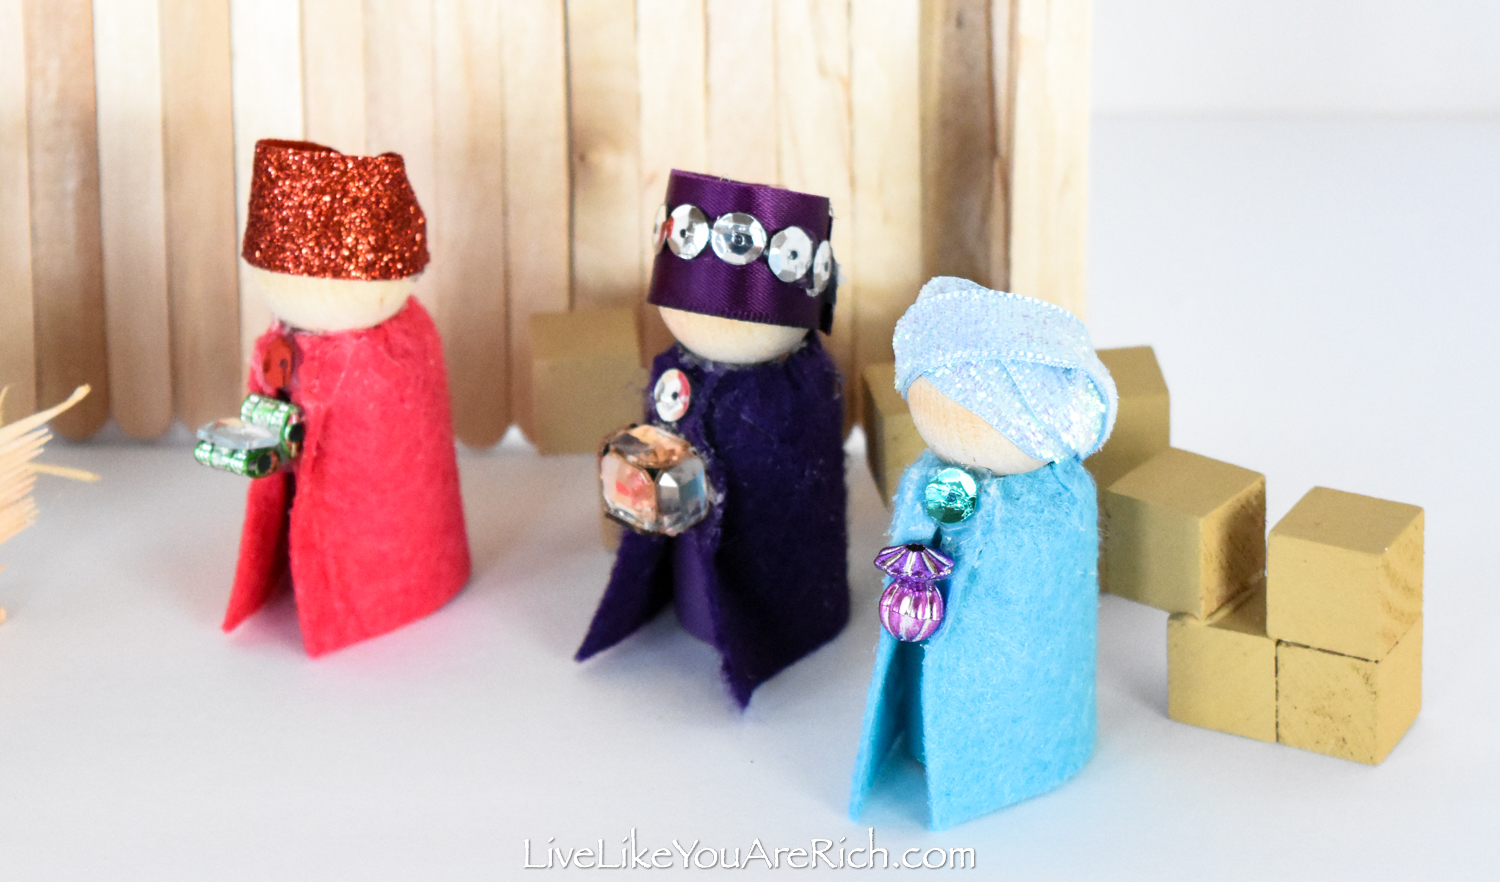
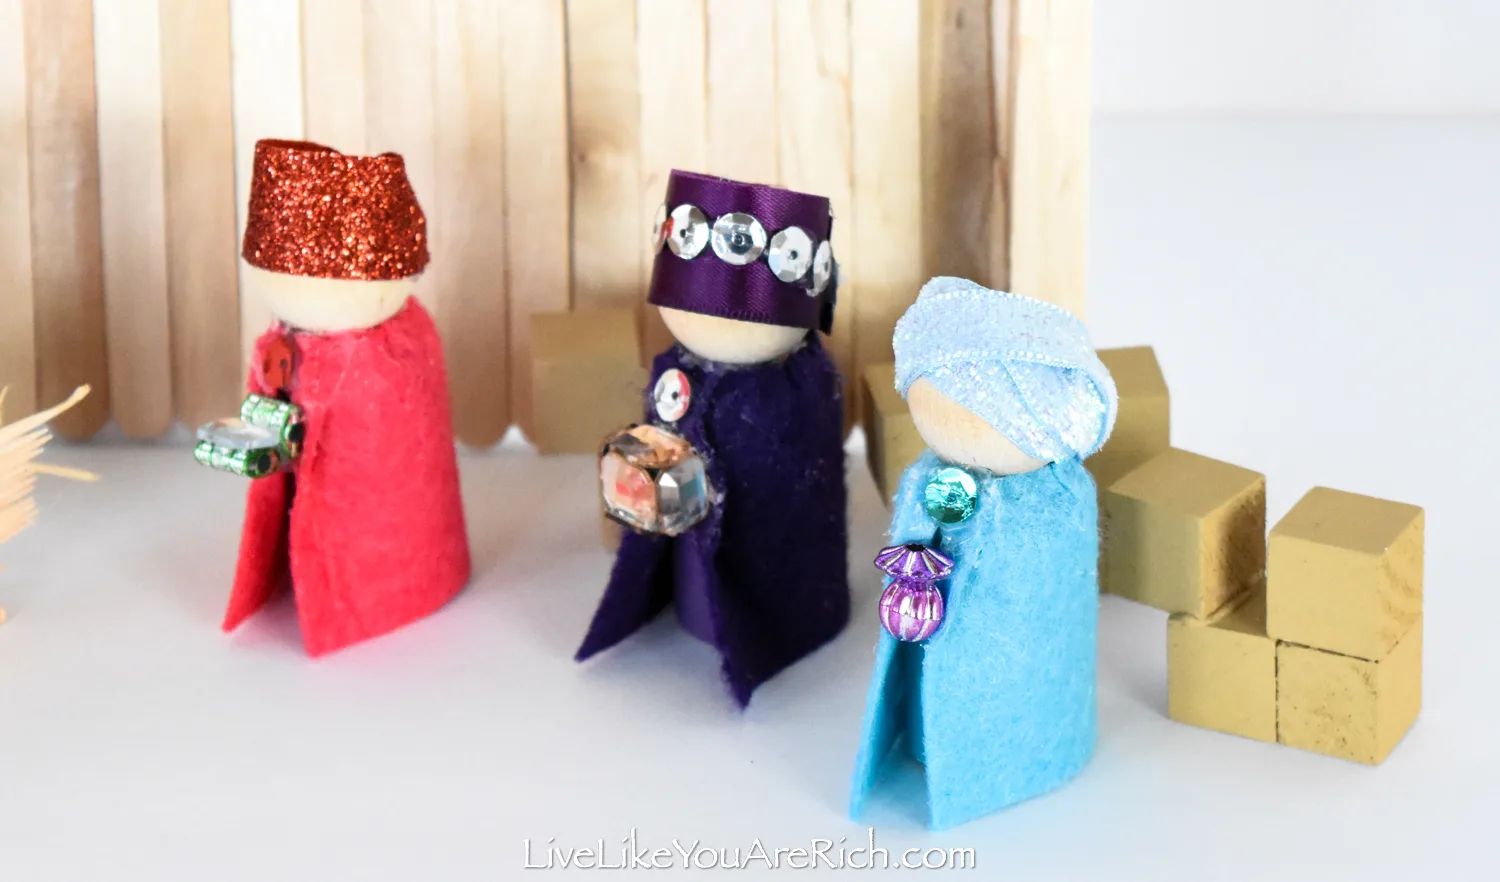
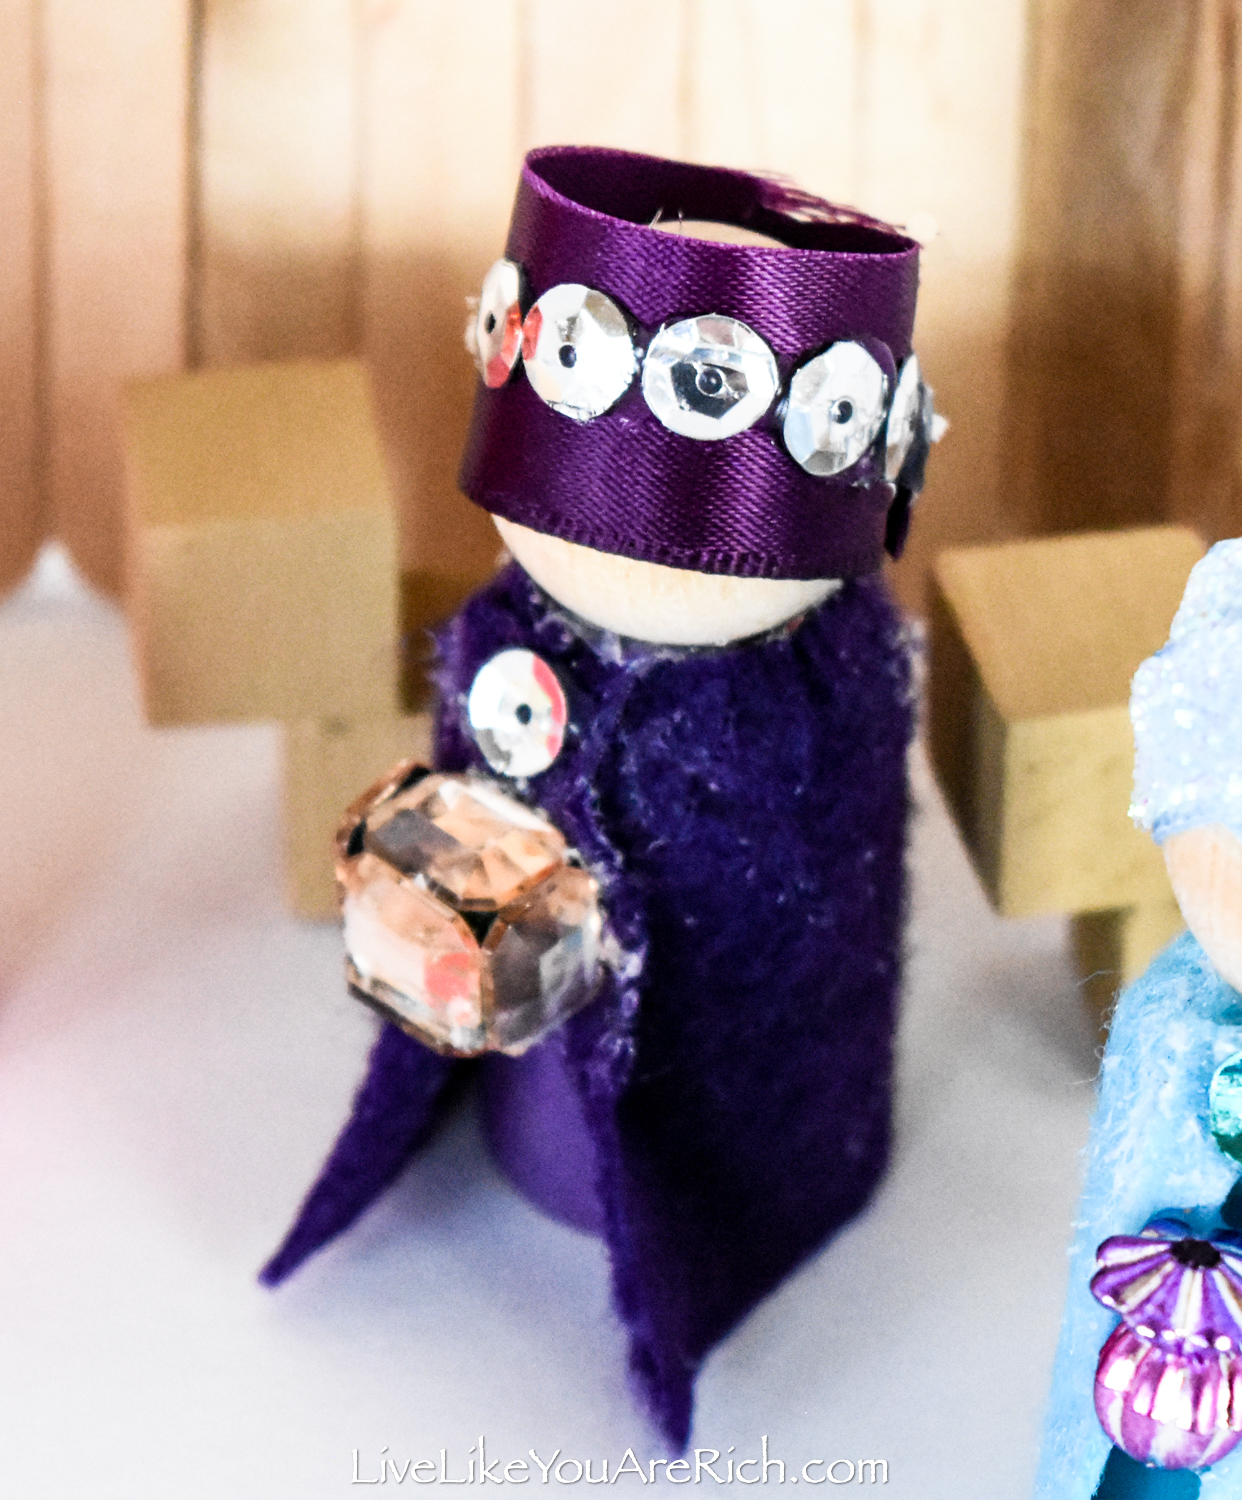
- As seen in the video instructional, you’ll add items to the dolls slightly differently depending on their character. It may be easier to watch the video to see how to make these wood peg characters but if not, continue reading the description below…The Wise Men- Clothe them in felt by tucking a straight side of felt around the neck. I was using a 4×4″ square which come cut straight.
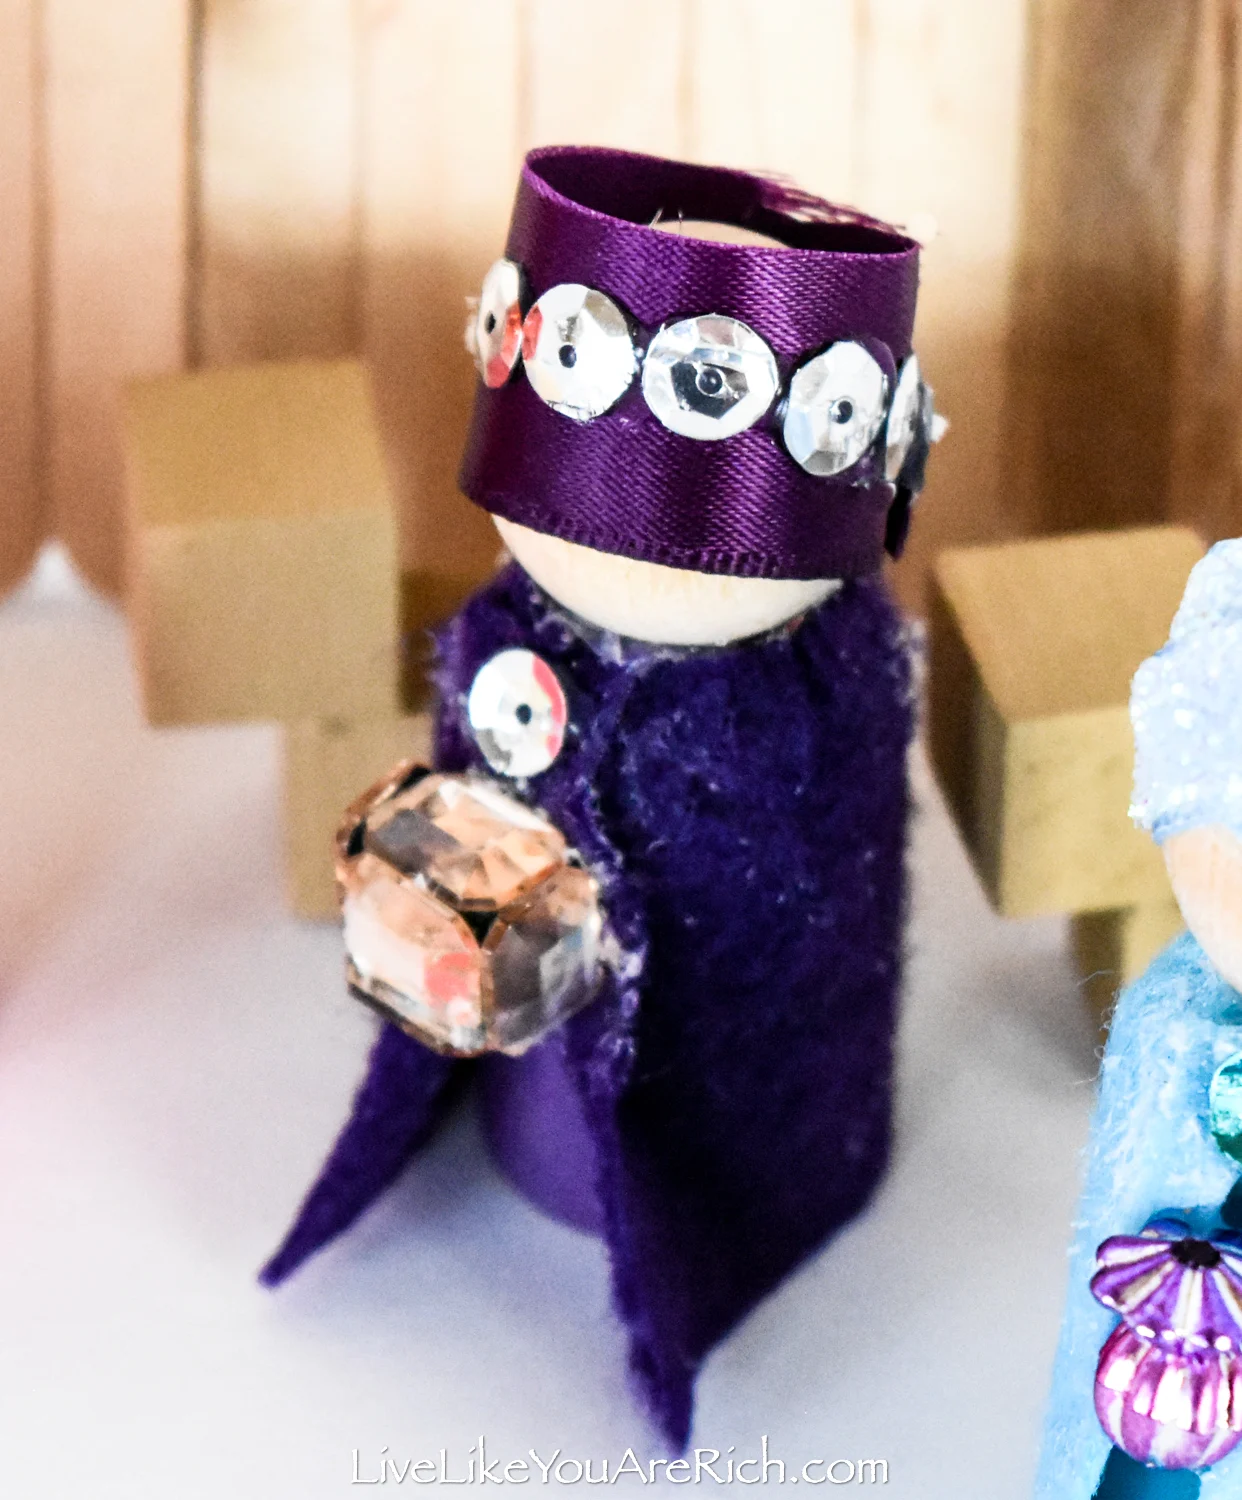 Tuck and glue all the way around. Leave a little extra felt on each end and fold it back and glue it down to make a collar.

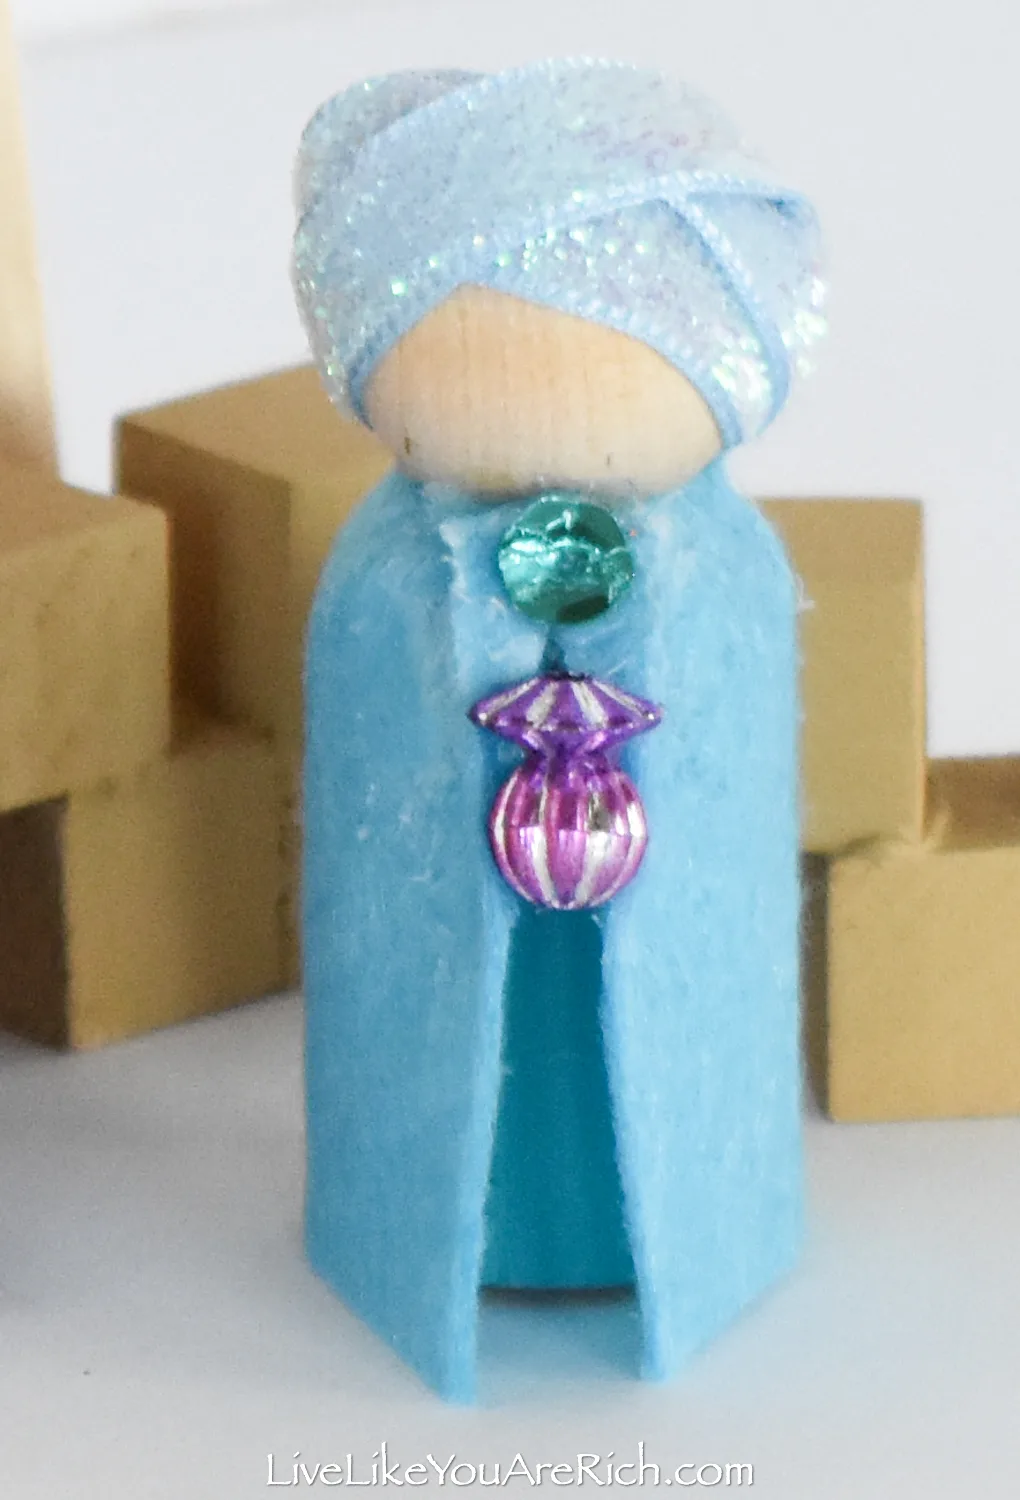 Then you’ll glue a sequin in between both sides of felt.
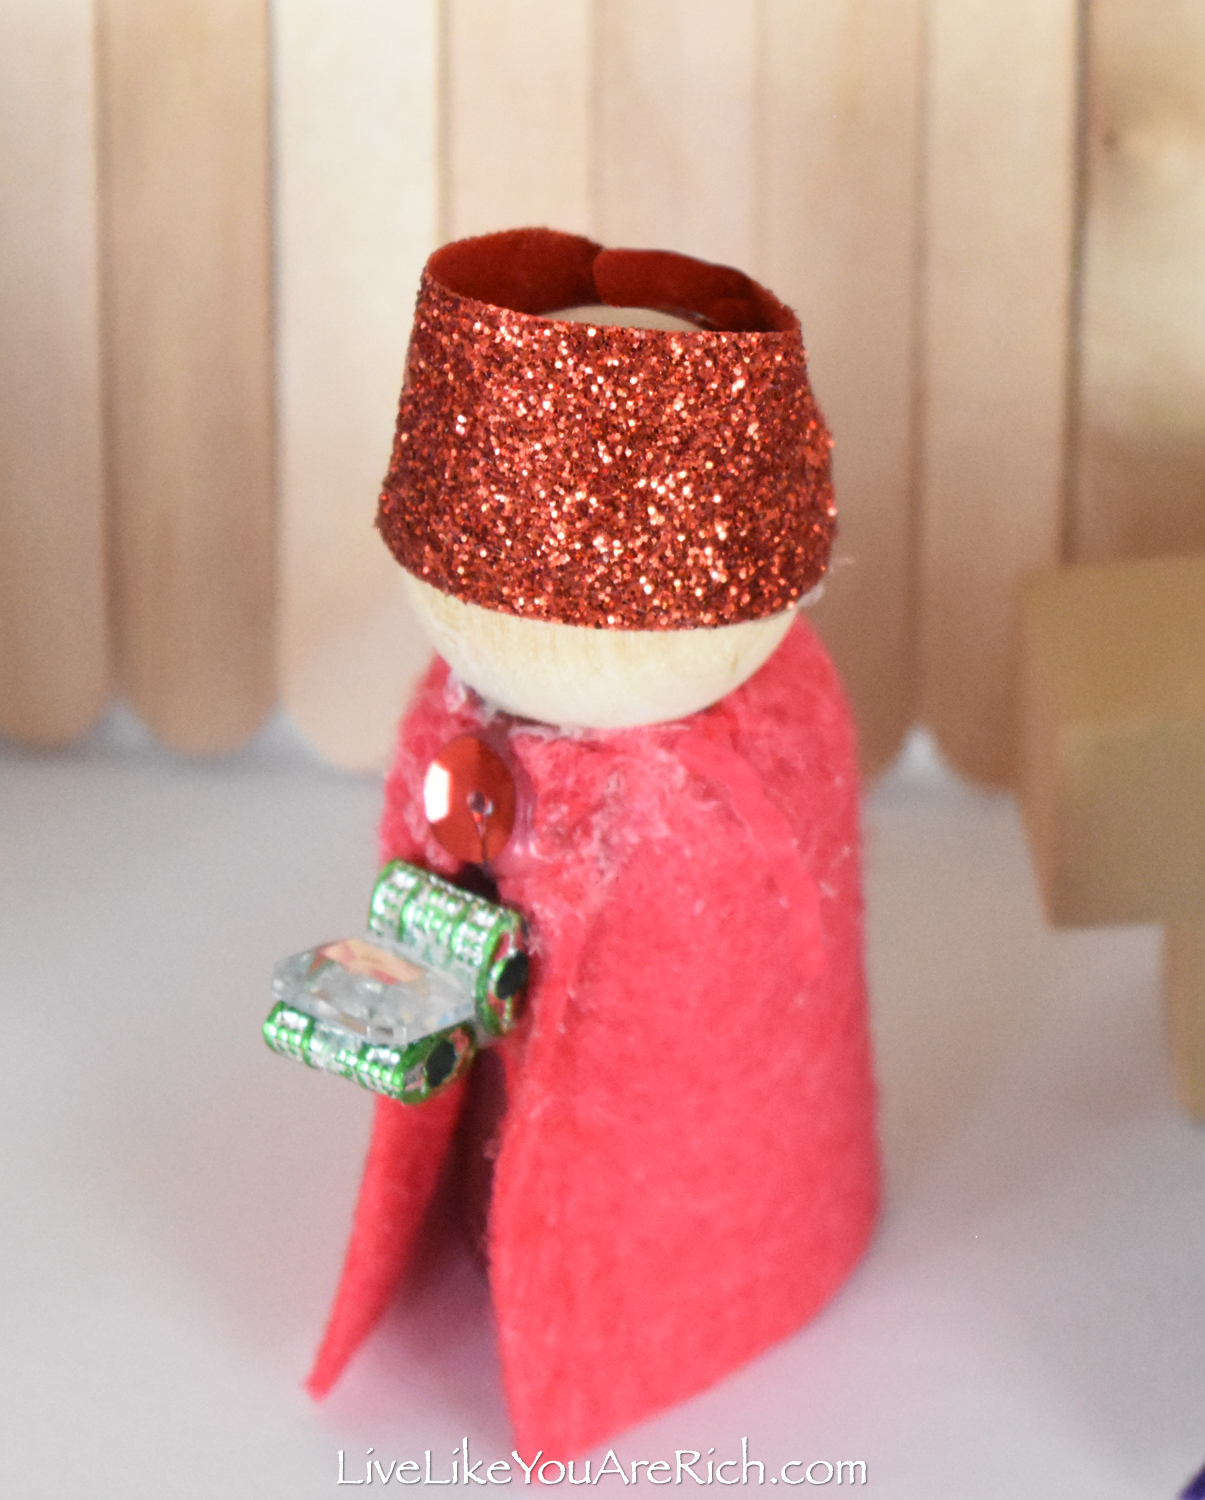
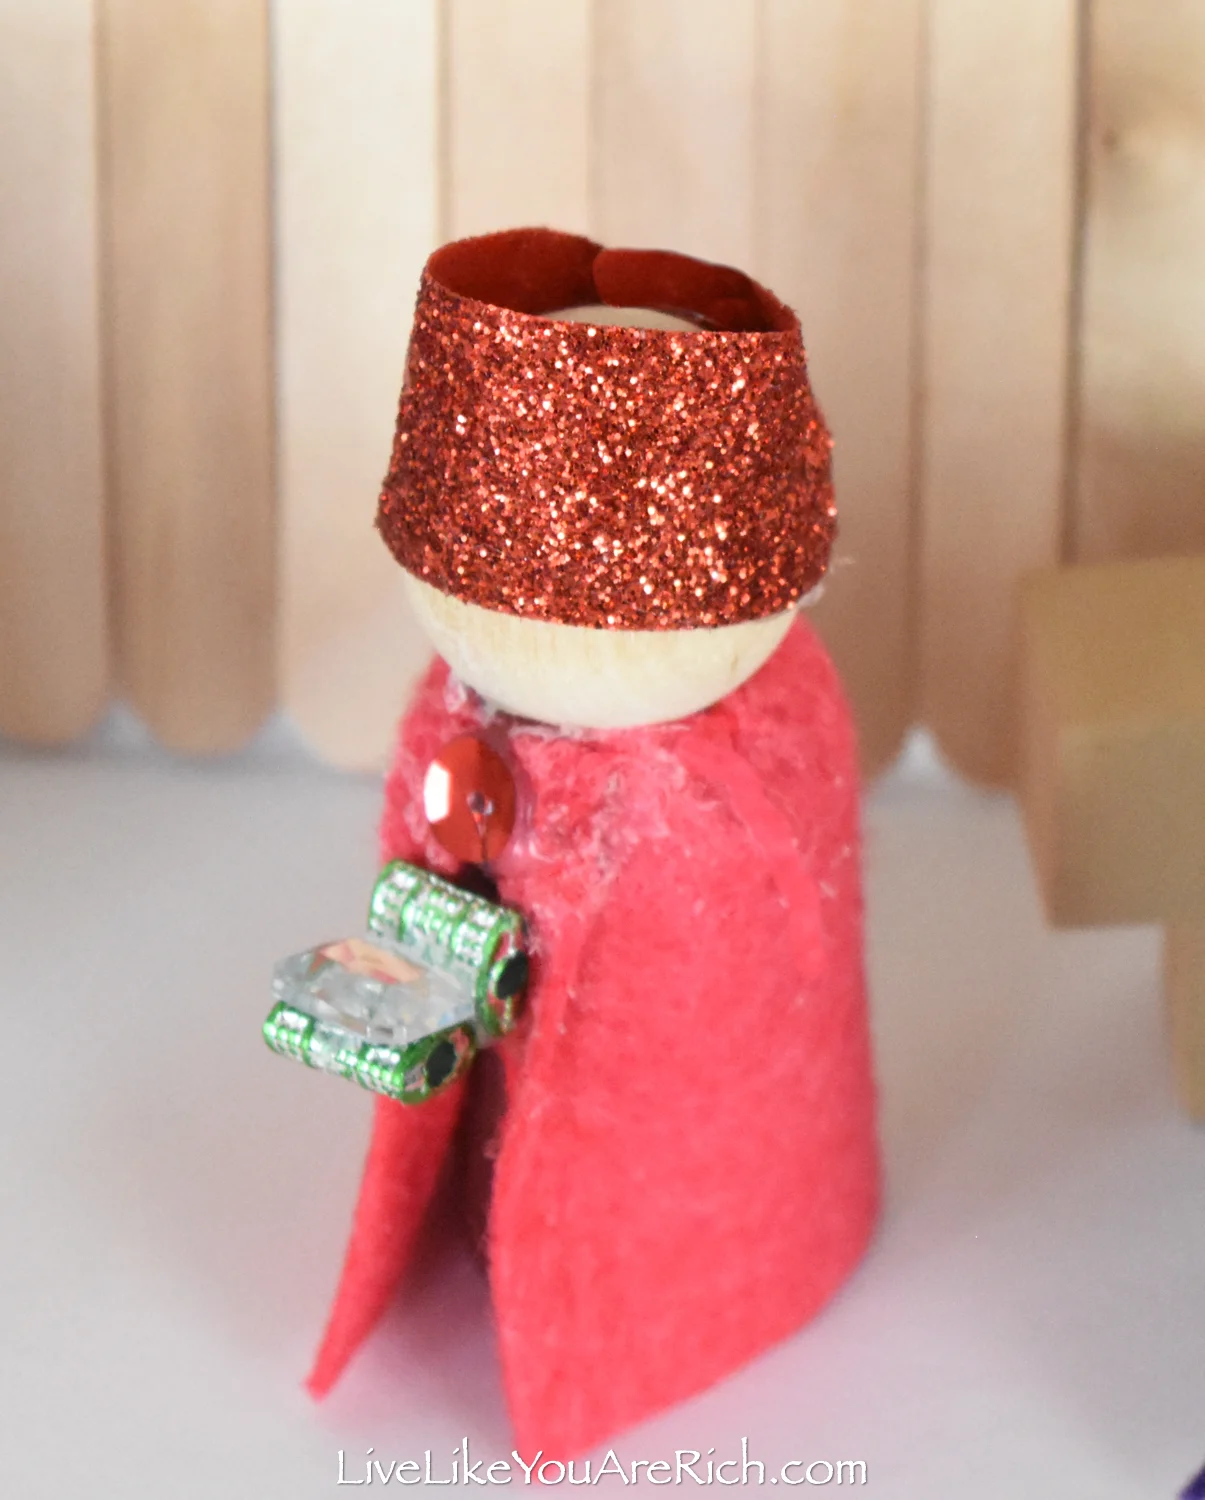 Trim the bottom of the felt so it is flush with the table.

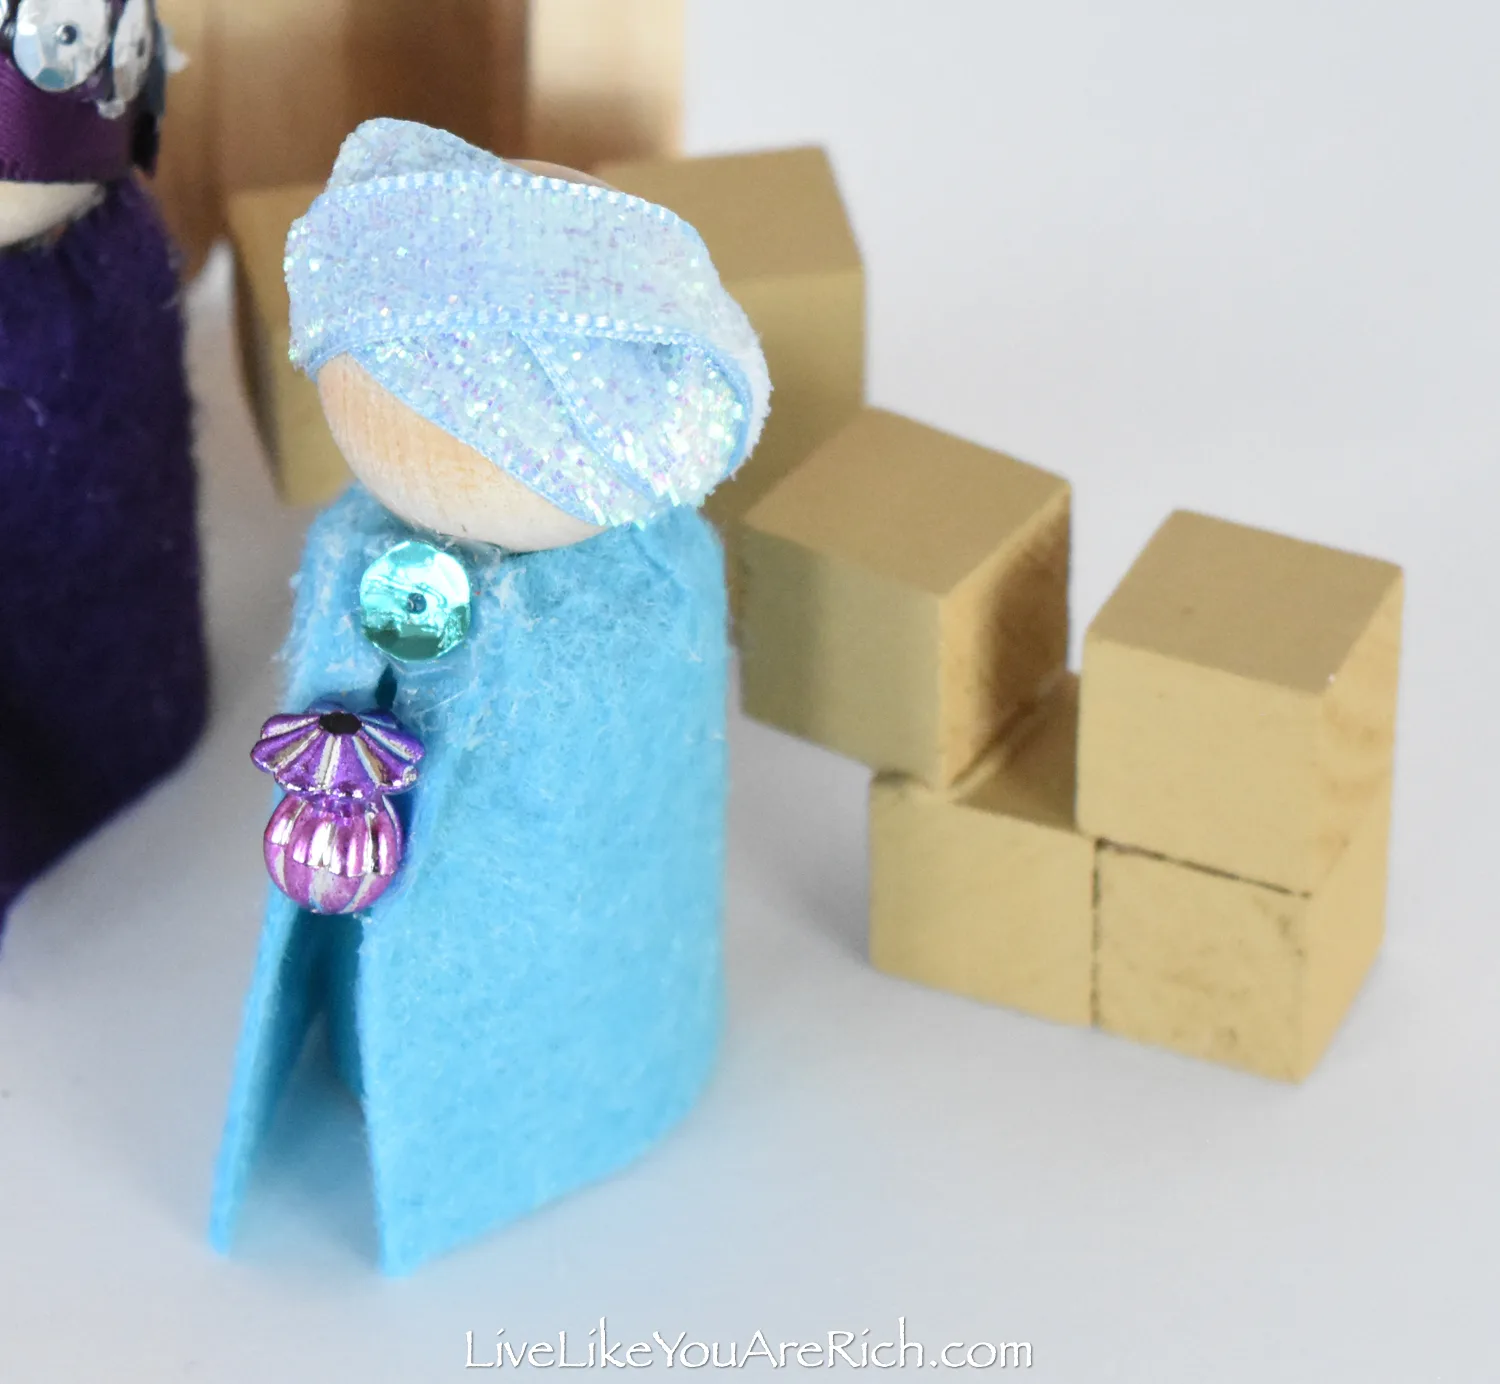
- You’ll then add a head wraps on the wisemen. I did 3 different styles.
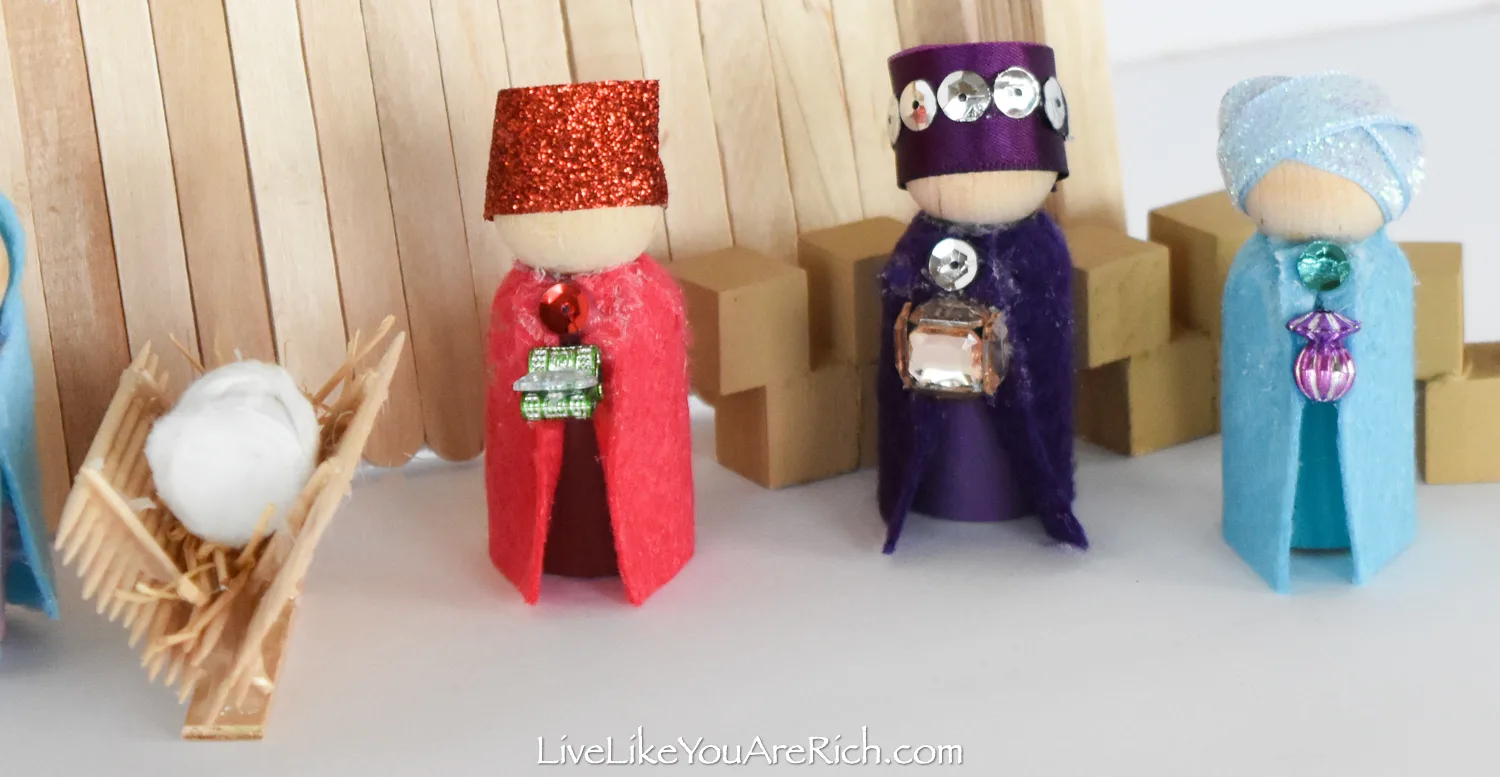
- Gifts- We used random items we had on hand to make the gifts the wisemen brought. Gold=square gold looking gems glued around a bead. Frankincense= two purple beads to look like a perfume bottle. Myrrh= two beads and a gem to look like an open treasure chest.
- Put the animals together.
For the sheep, we left them one block cube and painted them white. Then we added a little bead of hot glue and some poly fill to make them look fluffy.

 Camels- Glue two blocks together on the bottom. Glue one stacked directly on top of the second block and add one block glued 1/3 on the first block, turned slightly to indicate movement of a neck. We painted ours a mustard color.

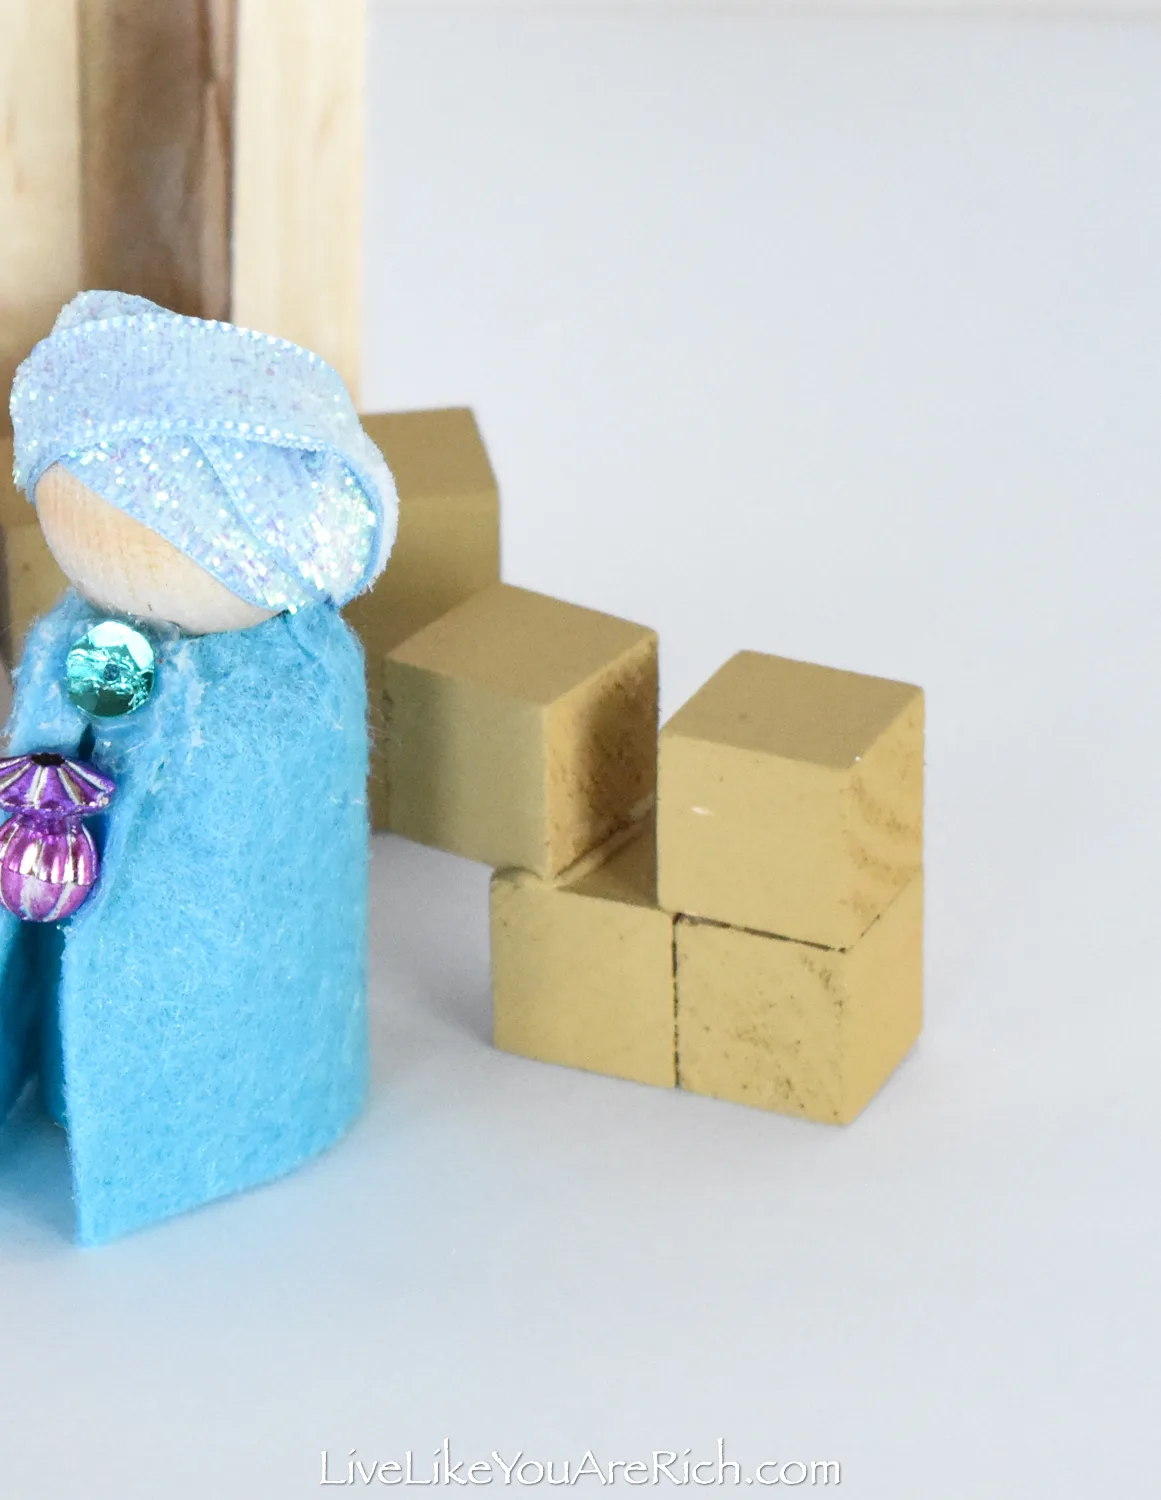
Donkey- Glue two blocks next to each other and one 1/3 the way on the first block turned slightly to indicate neck movement. We painted ours grey.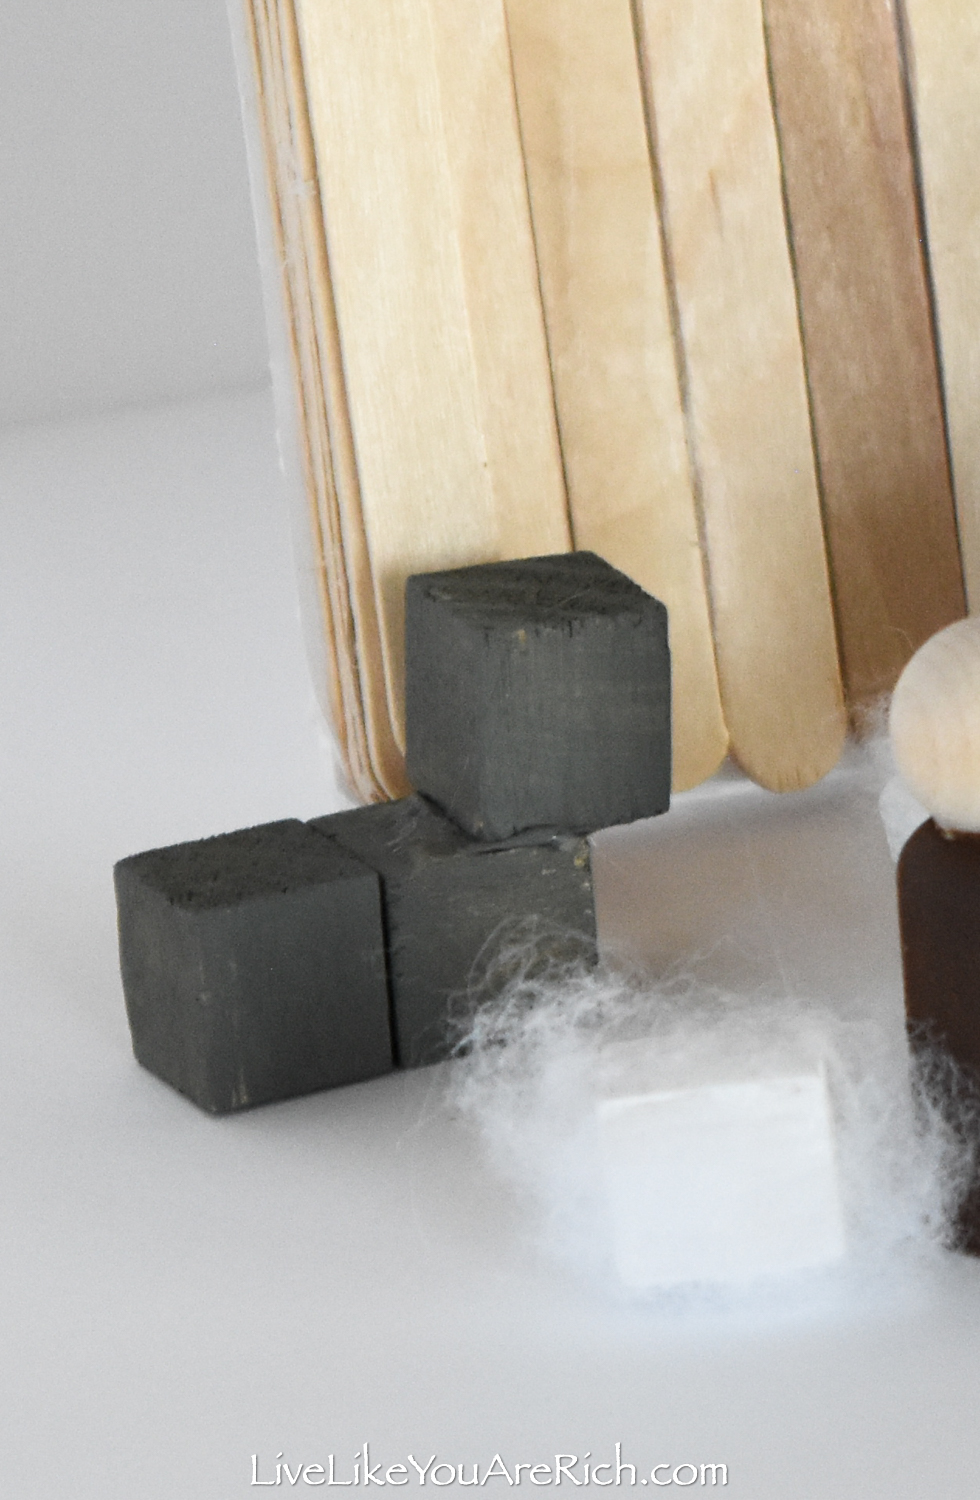

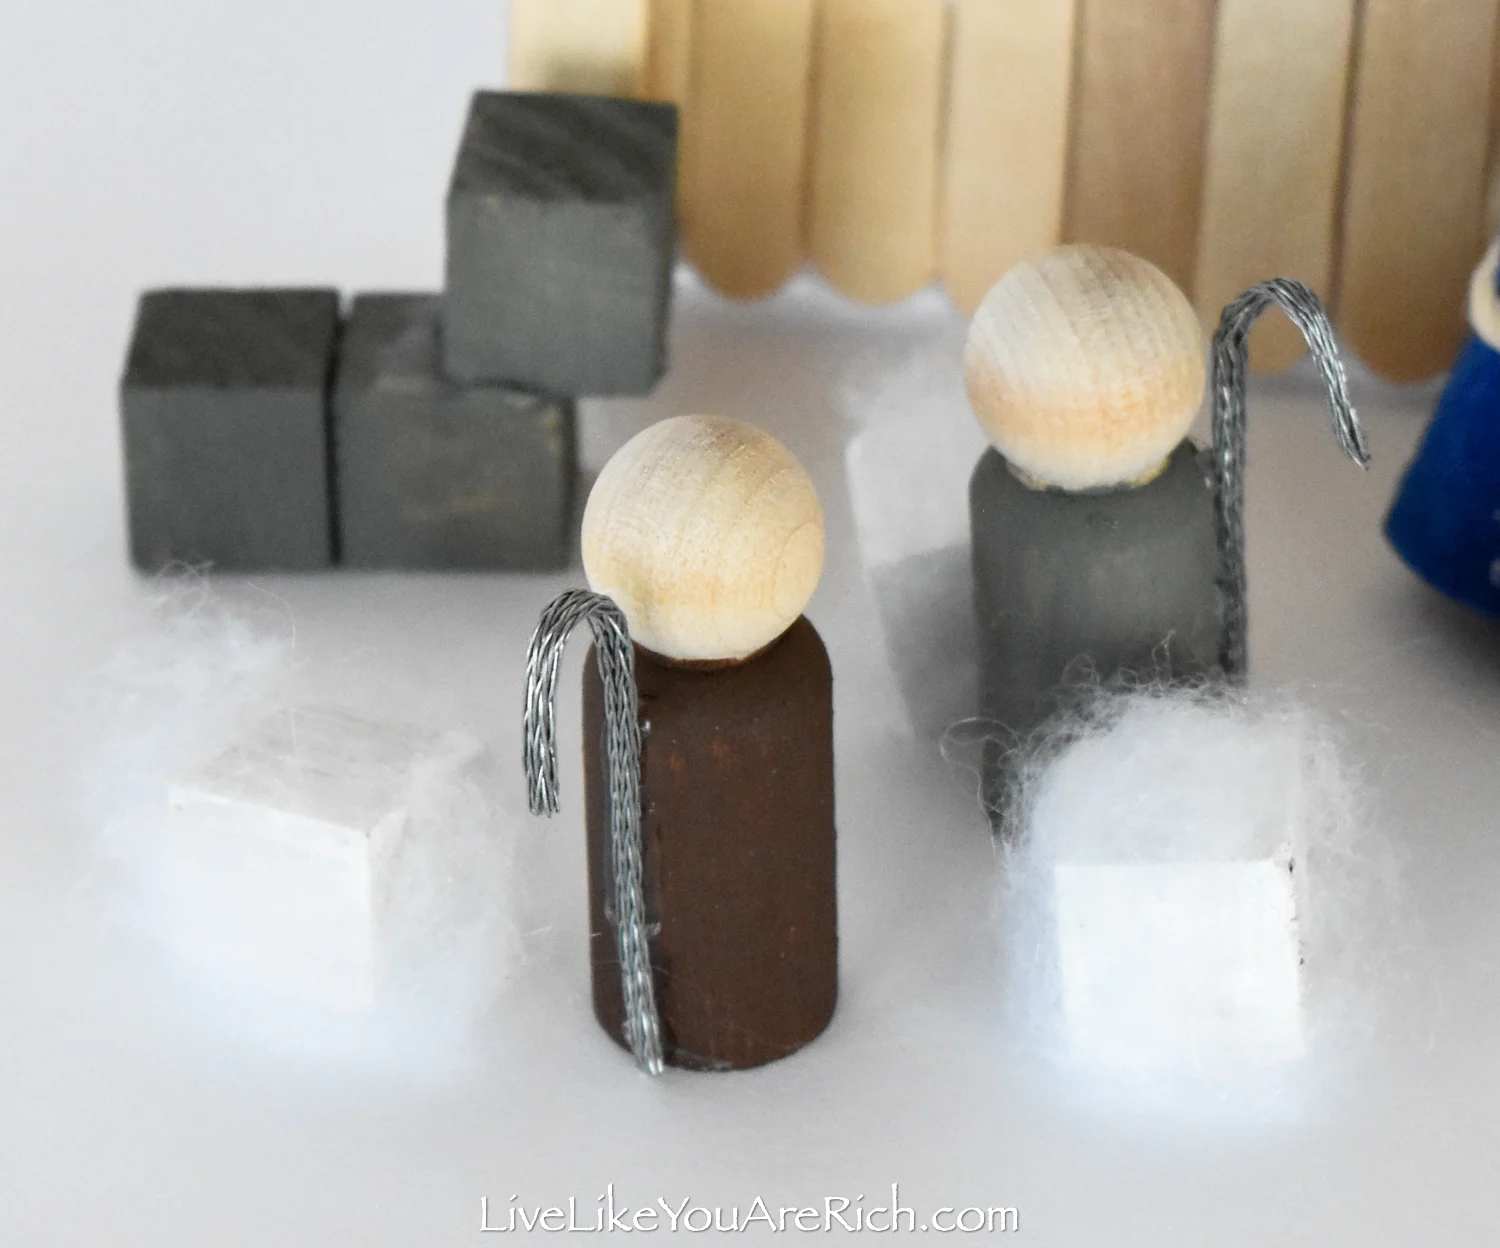
- Shepherds
We have been using our batch of wood peg people for different projects and ran out of regular sized men. So I used the smaller figures for the shepherds. I do like how unadorned they are—as they represent humility.
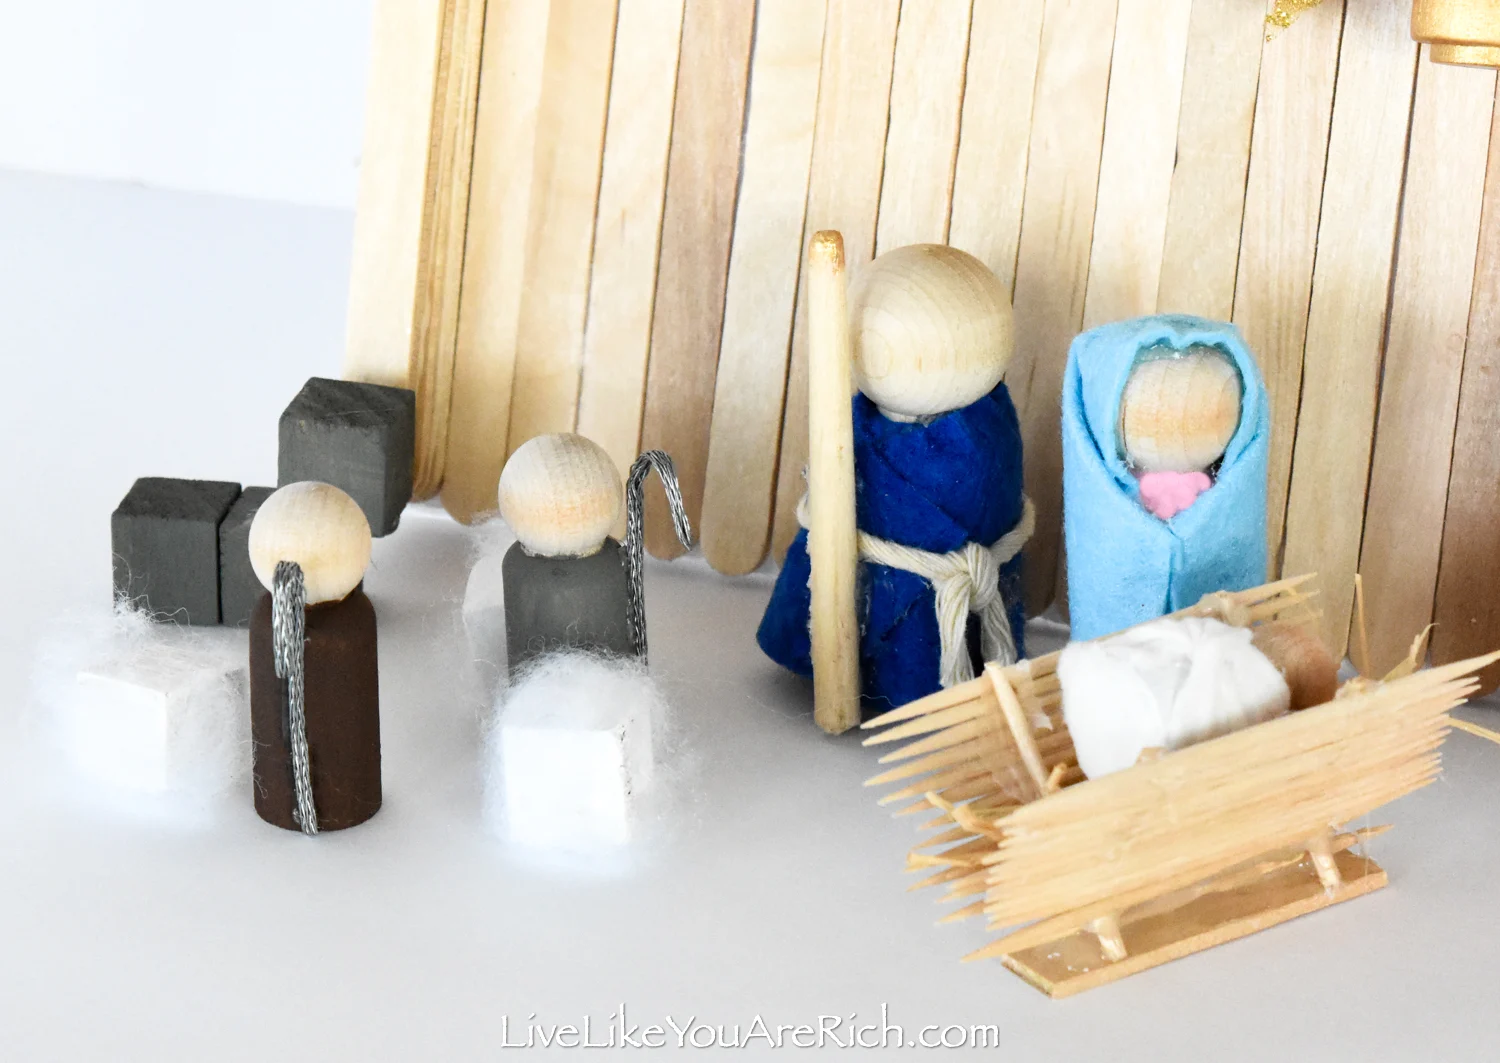
I painted one brown and one a dark grey. Then I took braided wire and shaped it into a shepherd’s hook and glued it to the pegs.
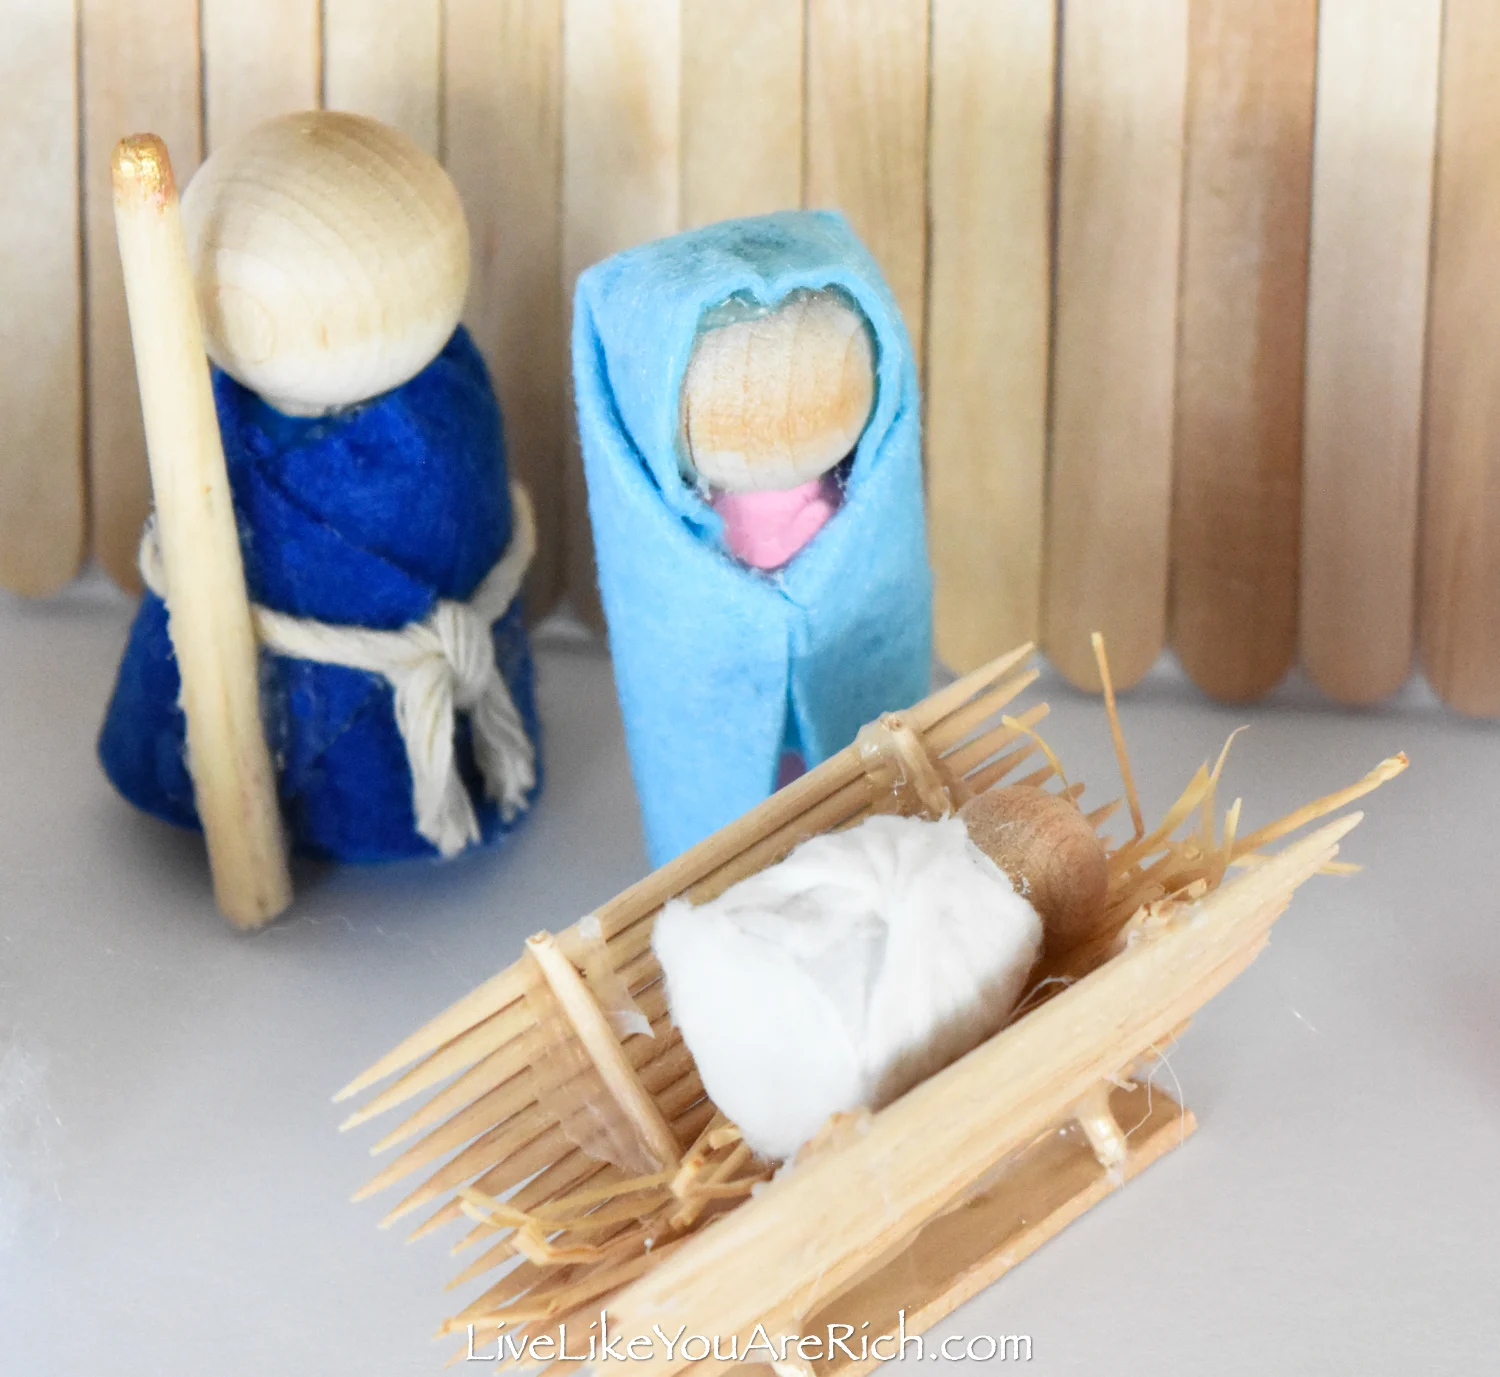
- Joseph- We painted him navy then wrapped a piece of felt around him and put a little bit of cloth rope around as a belt.

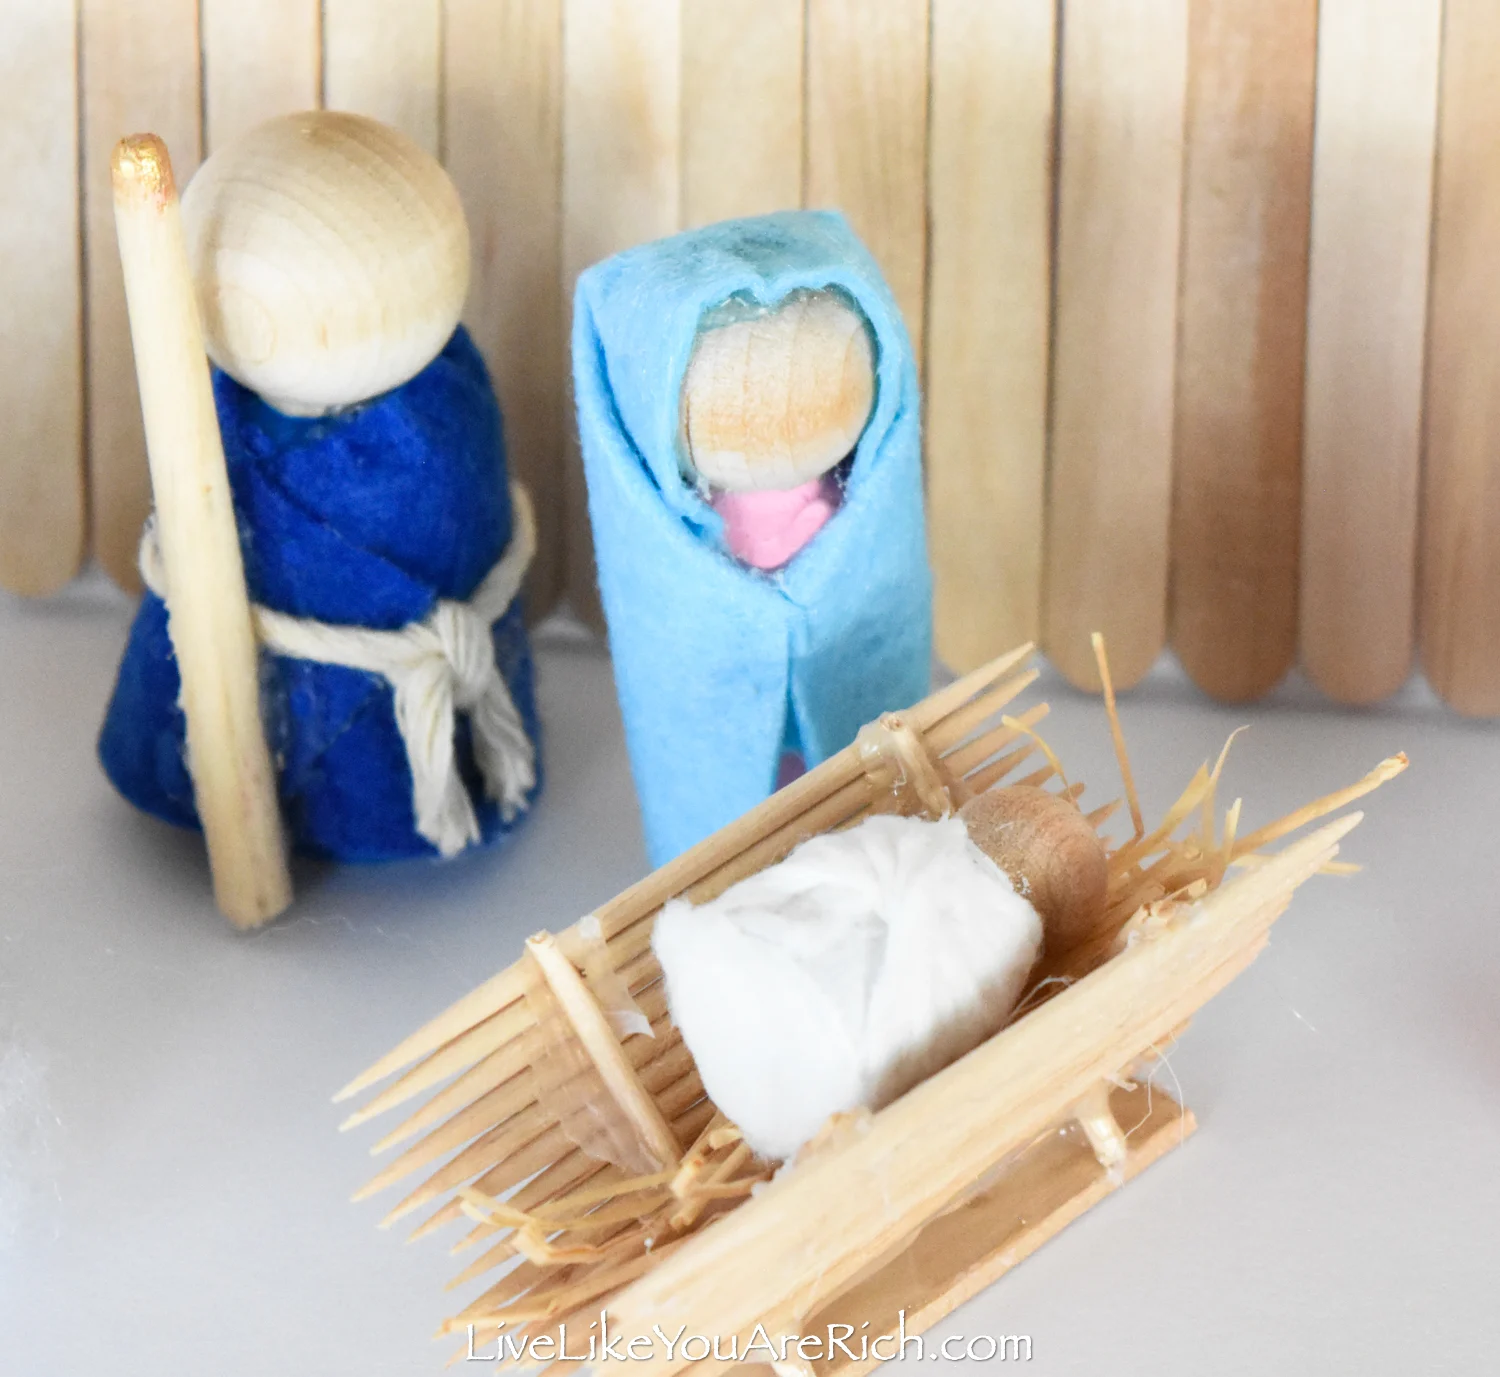
I took a wood handle of an old paint brush and cut the brush top off, painted the top gold (for a little interest) and glued it to Joseph for his staff. - Mary- We painted her pink and then wrapped her head with light blue felt. We tucked it around her shoulders like a hooded shawl.

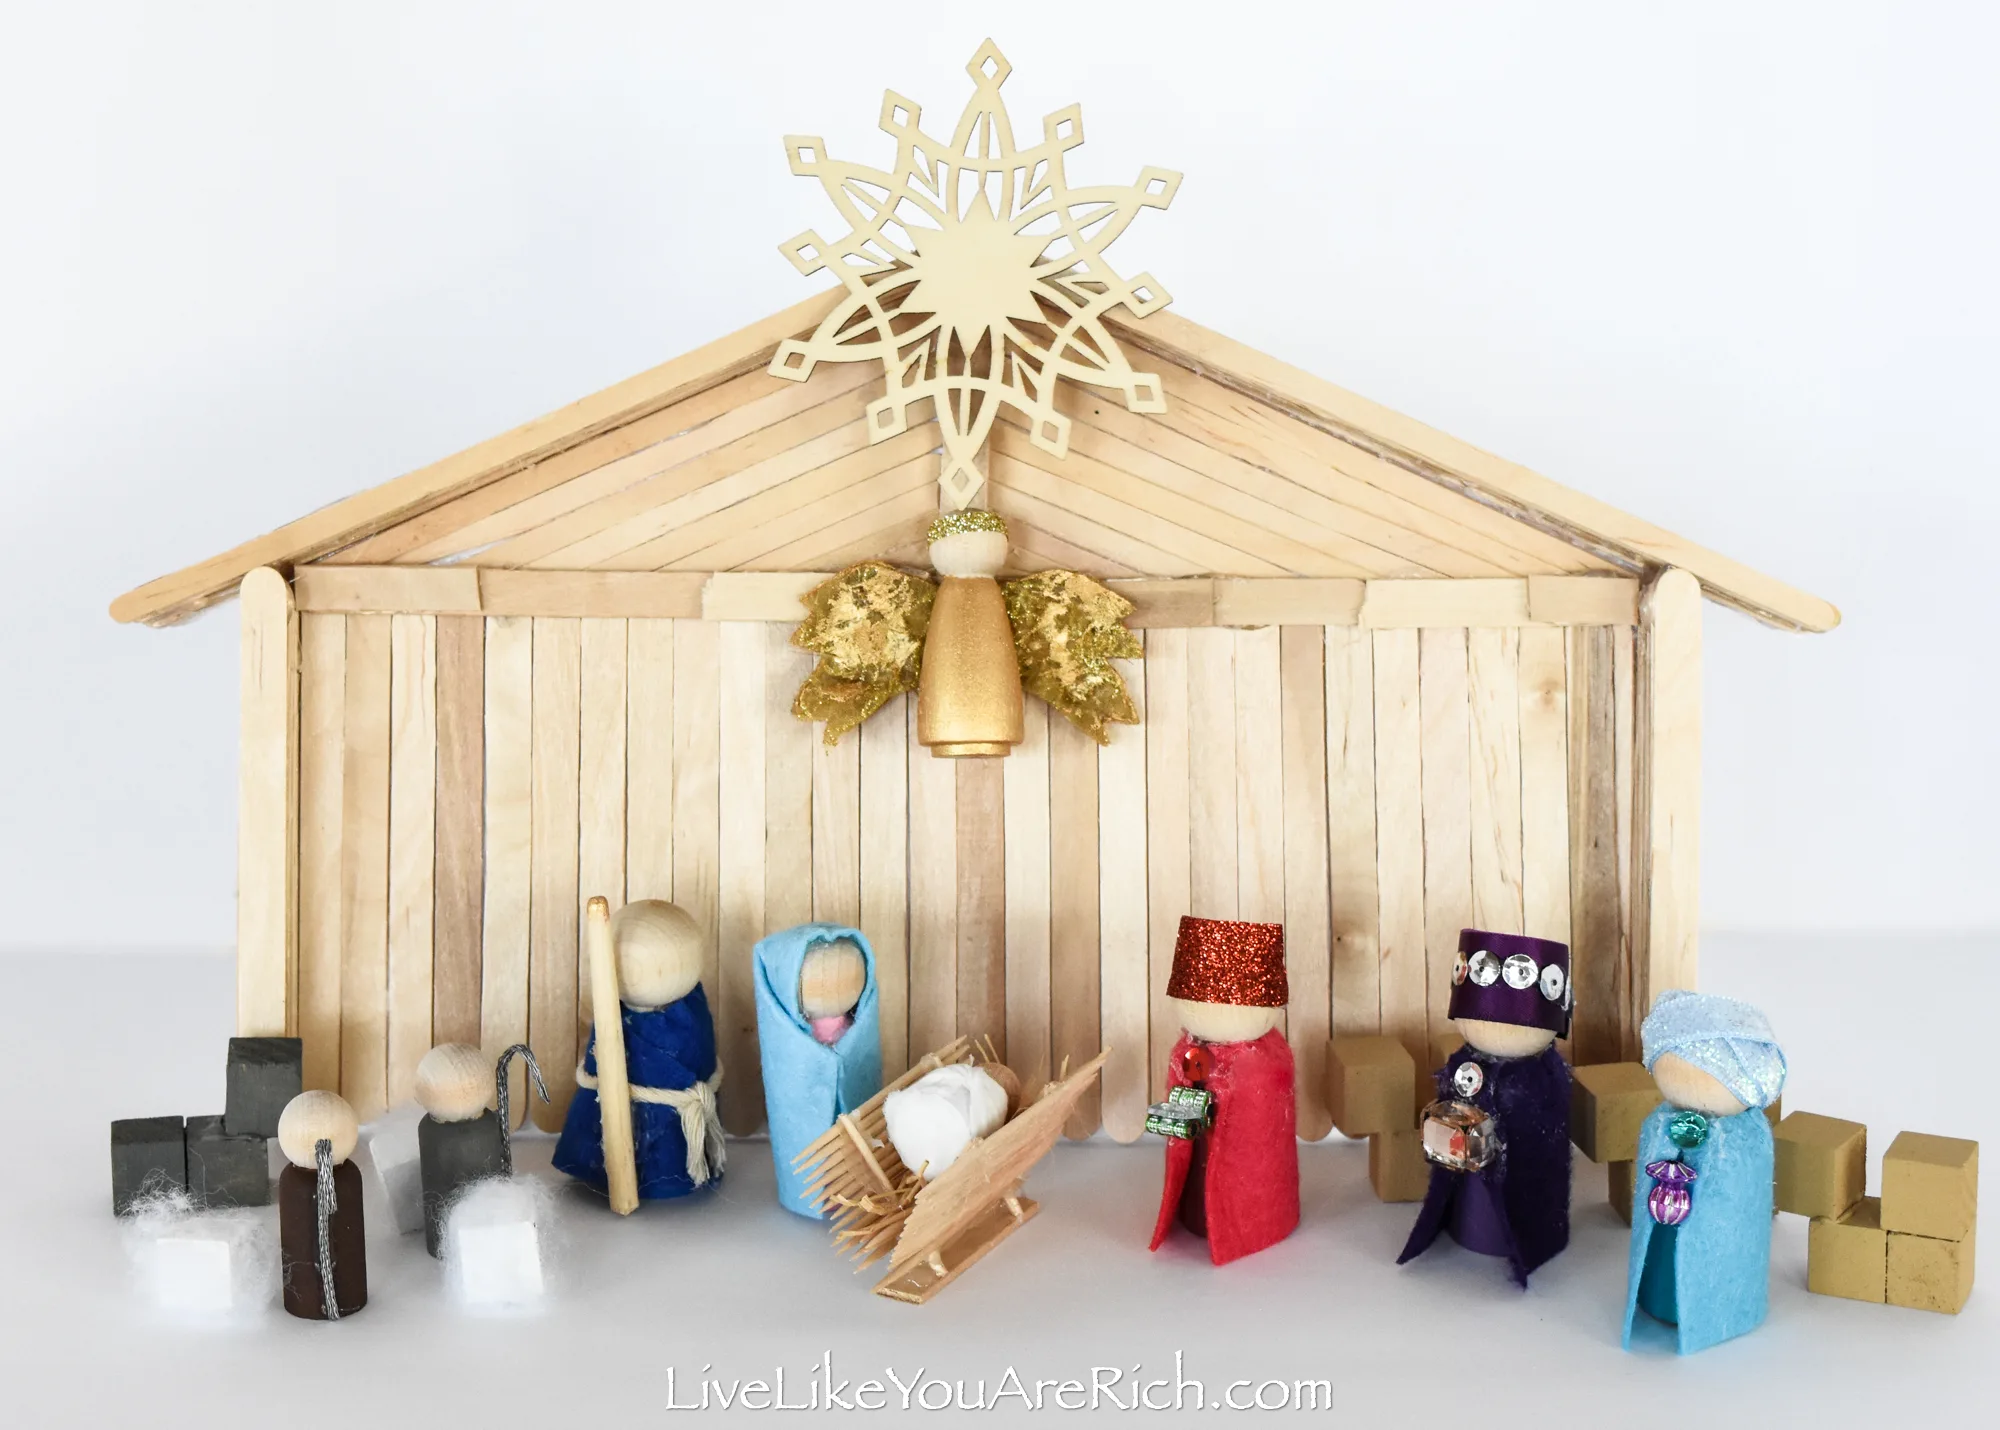
- Angel- We painted the angel gold. Then we added a little bit of gold glitter ribbon around her head for a crown.
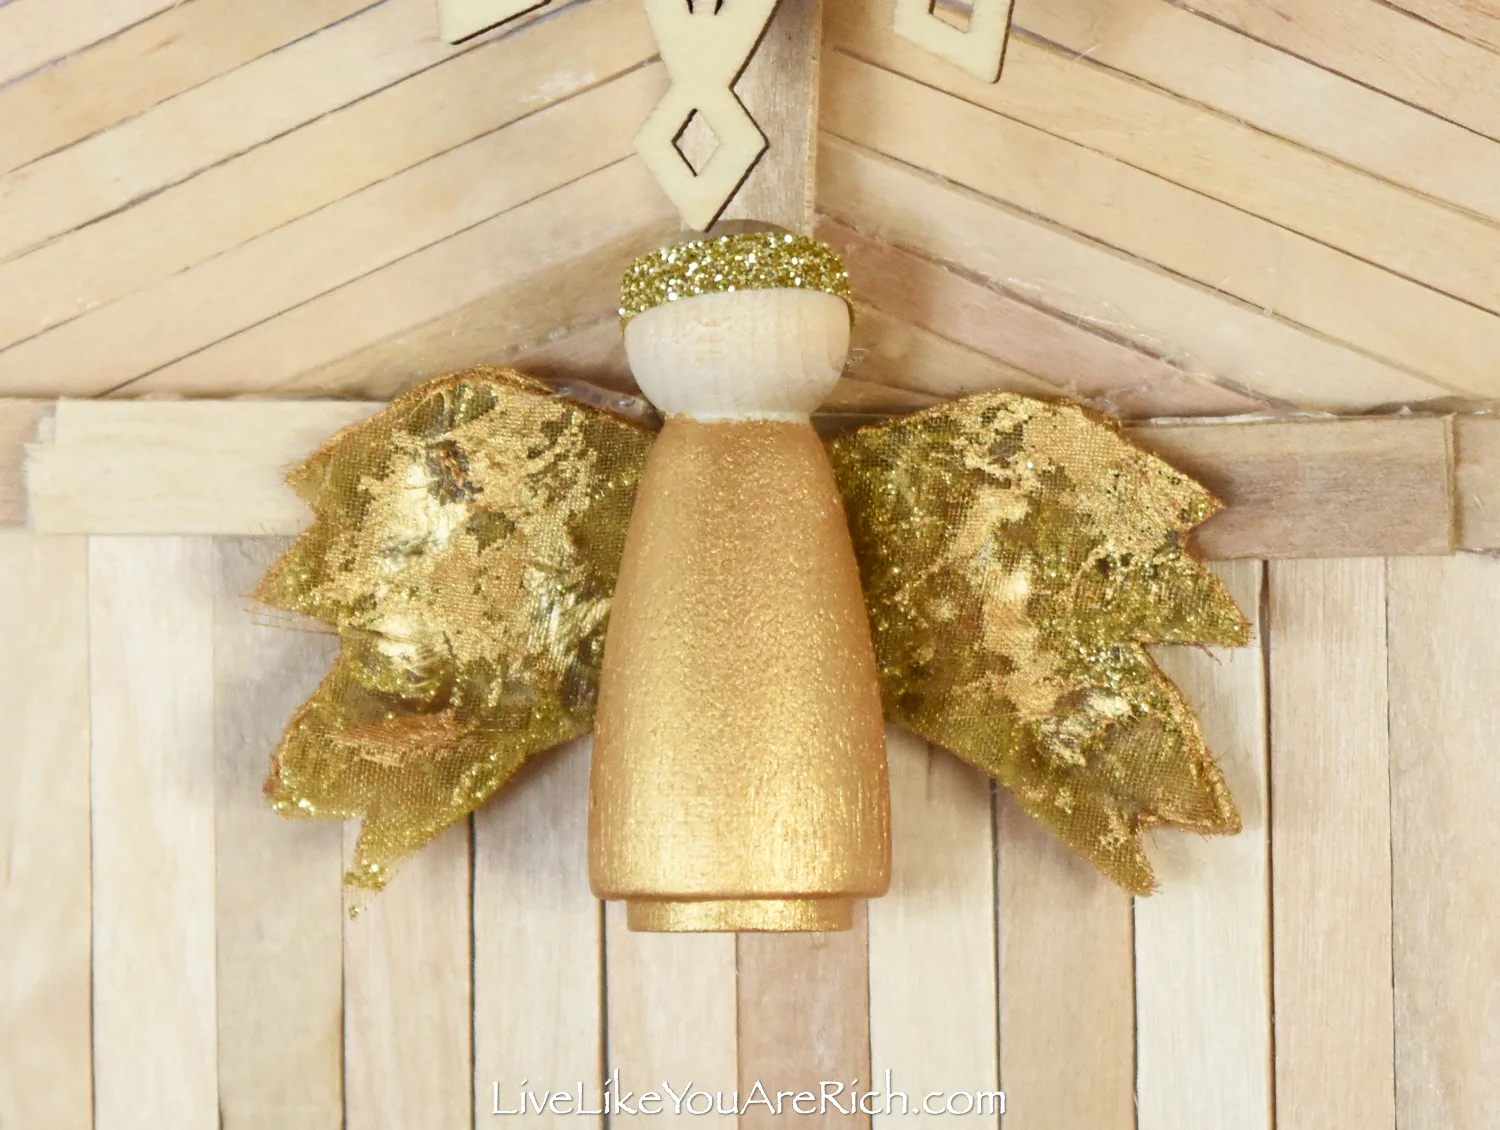
Next, my daughter traced angel wings in yellow felt and cut them out. I then layered gold ribbon 4 times and glued the stack of ribbon onto the yellow felt (all in a pile). Next, I painted a little gold paint here and there to add a gold leaf look.

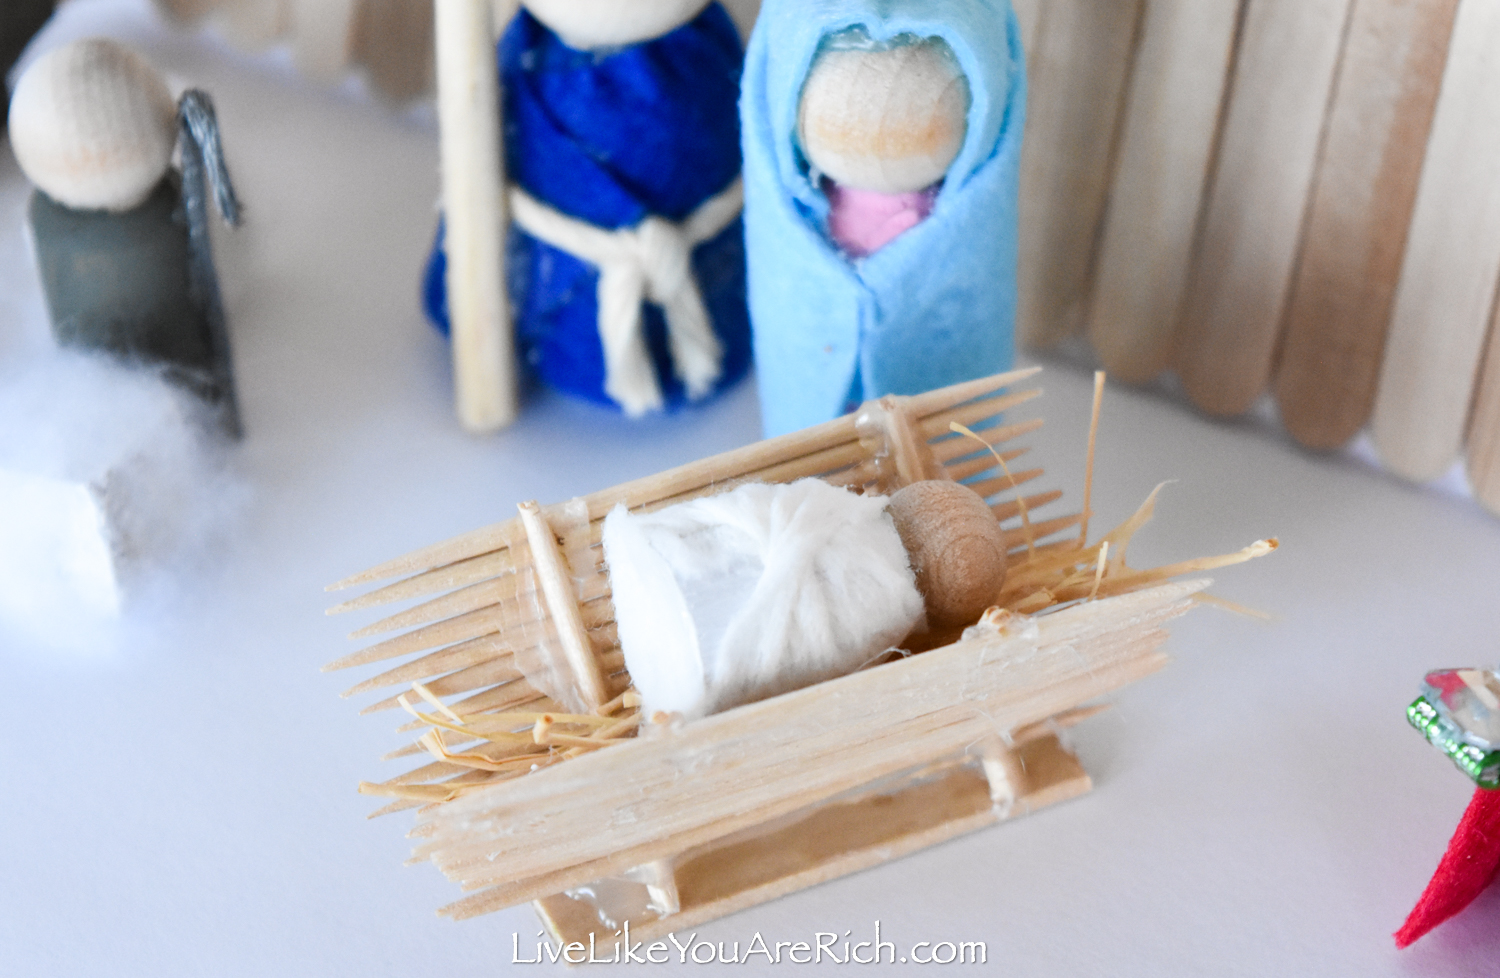
My daughter really wanted the angel flying so we glued her to the stable backboard. I love the look as well. - Manger- Lay about 10 toothpicks together and glue 1 toothpick about an inch in from both of the ends horizontally (to hold them together). Repeat this for the other side making sure the legs are staggered (not exactly in the same spot so you can attach them together). See video for further clarification.

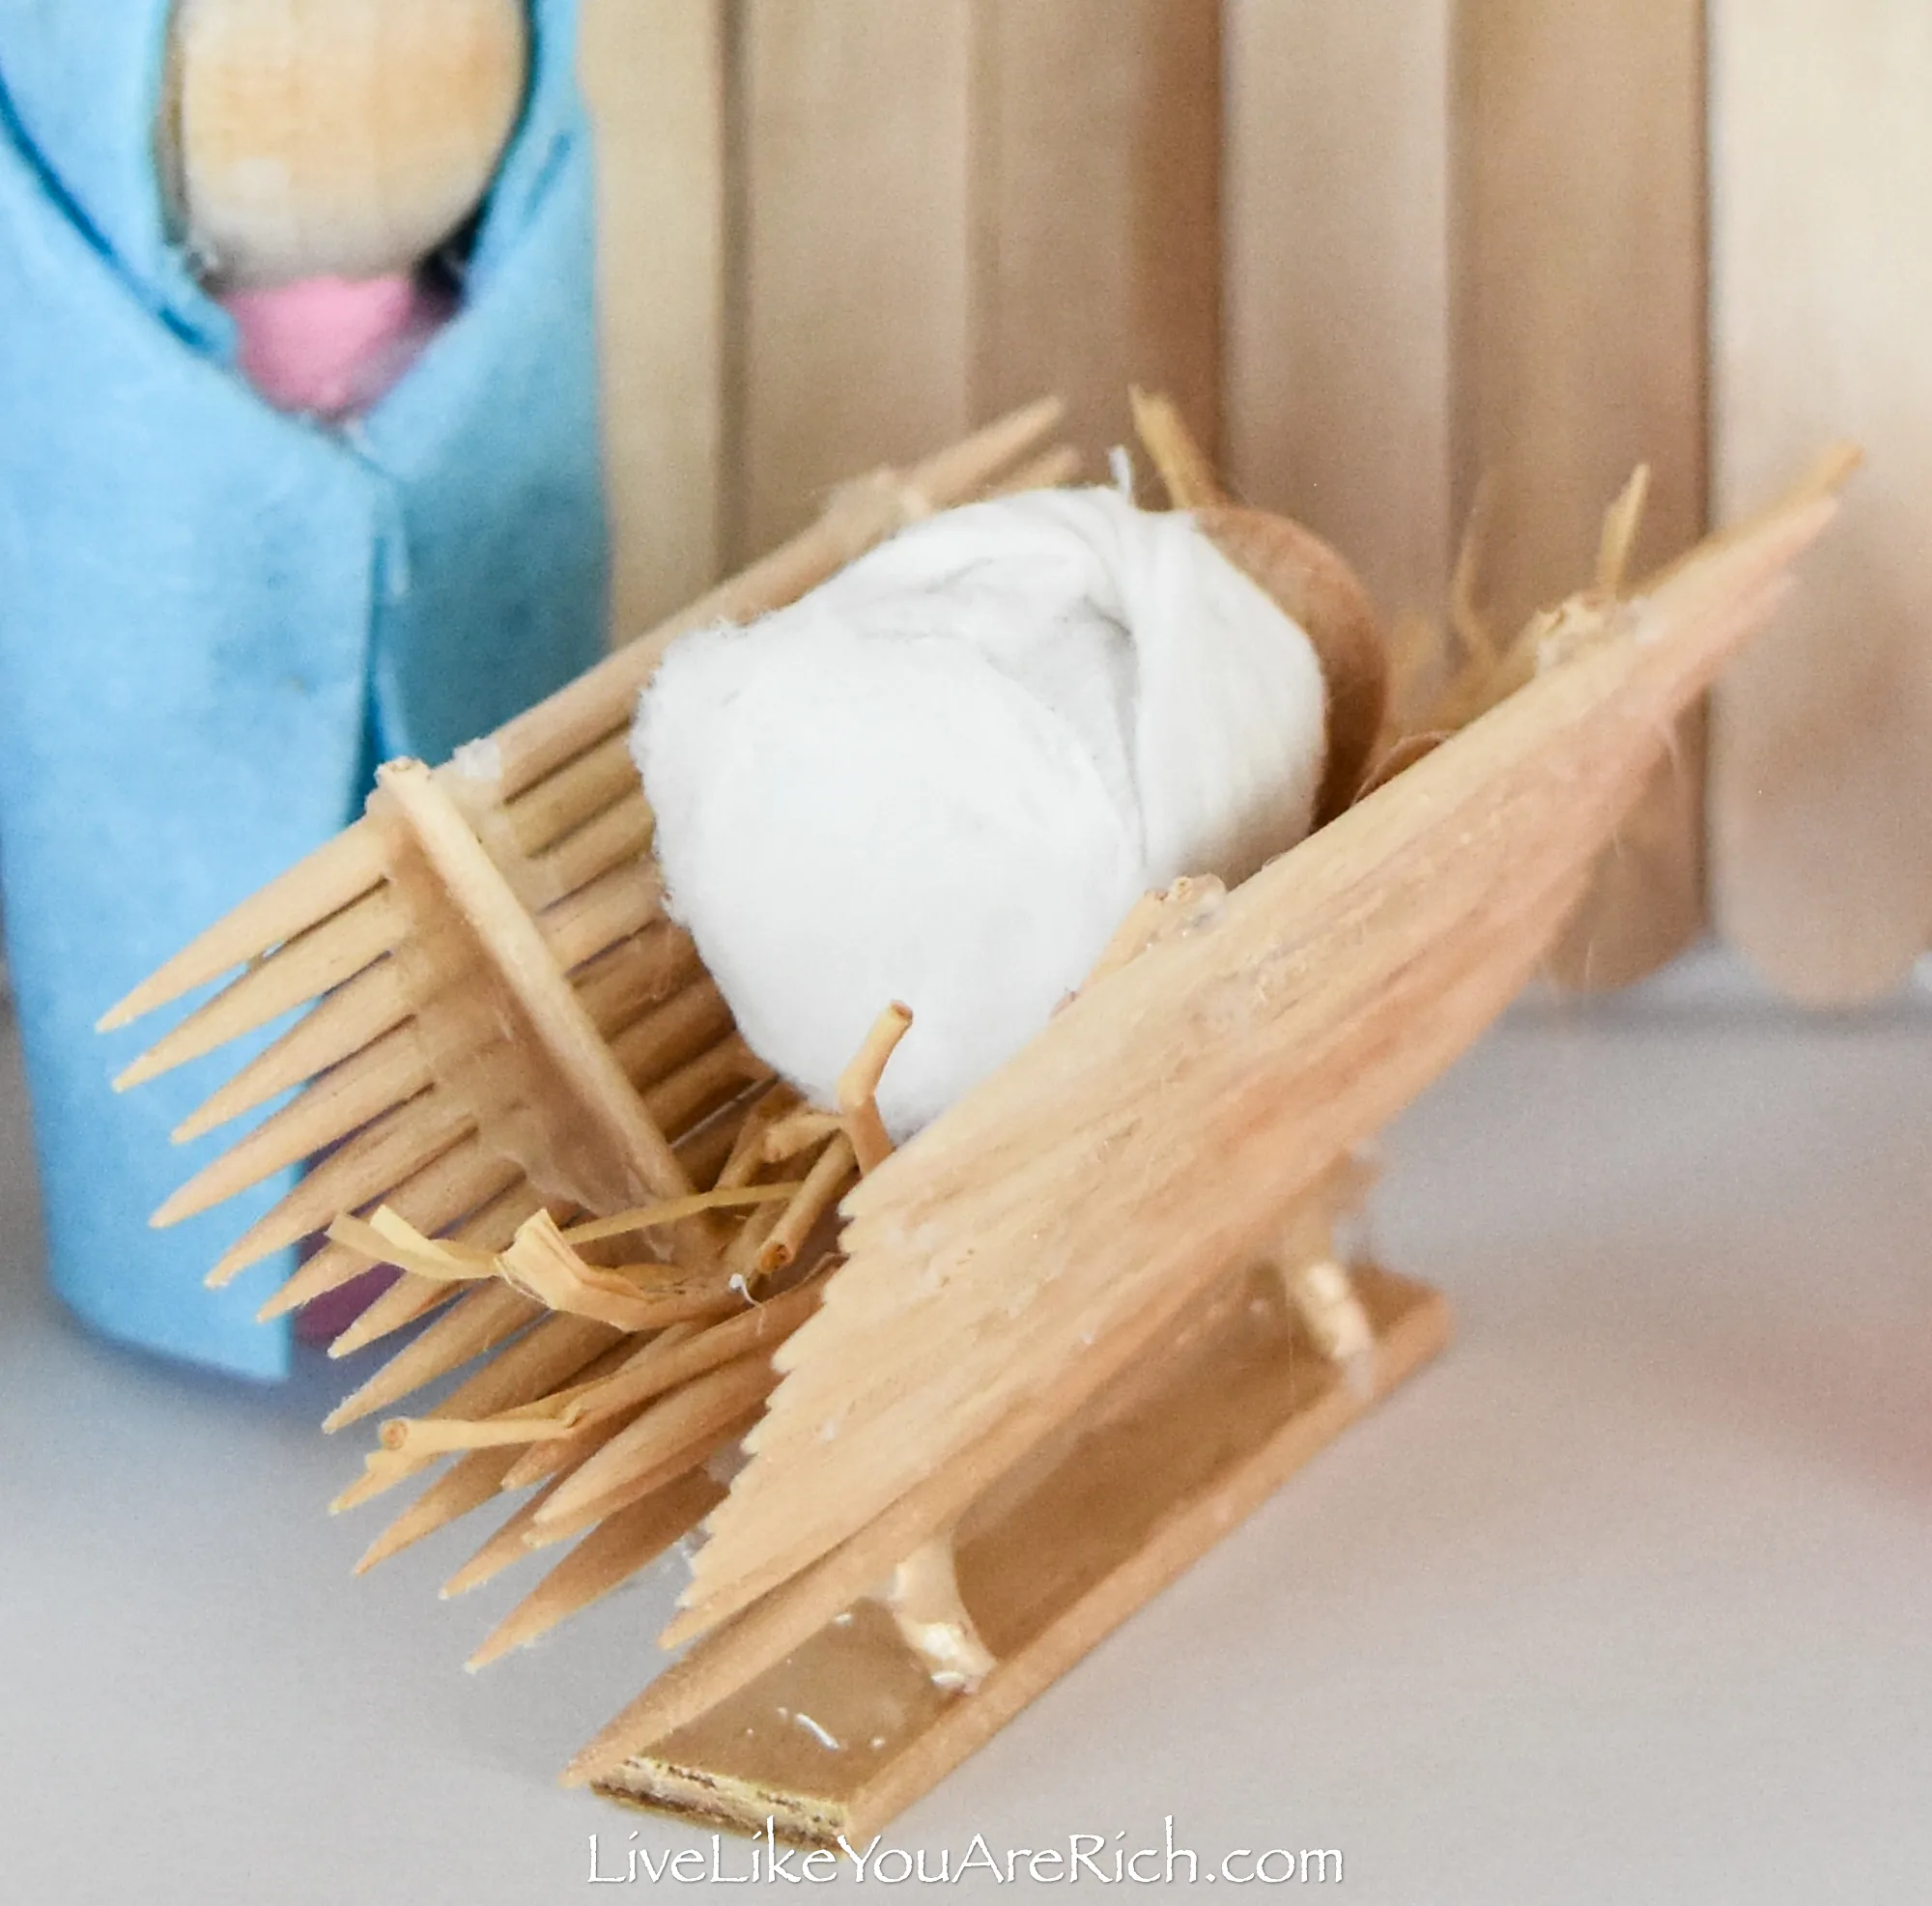 Glue both sides together in a V form. Cut the toothpick legs short and glue them onto a trimmed-to-size popsicle stick. If you want to make a slightly different version of this manger, check out my post. How to make a small wood manger.

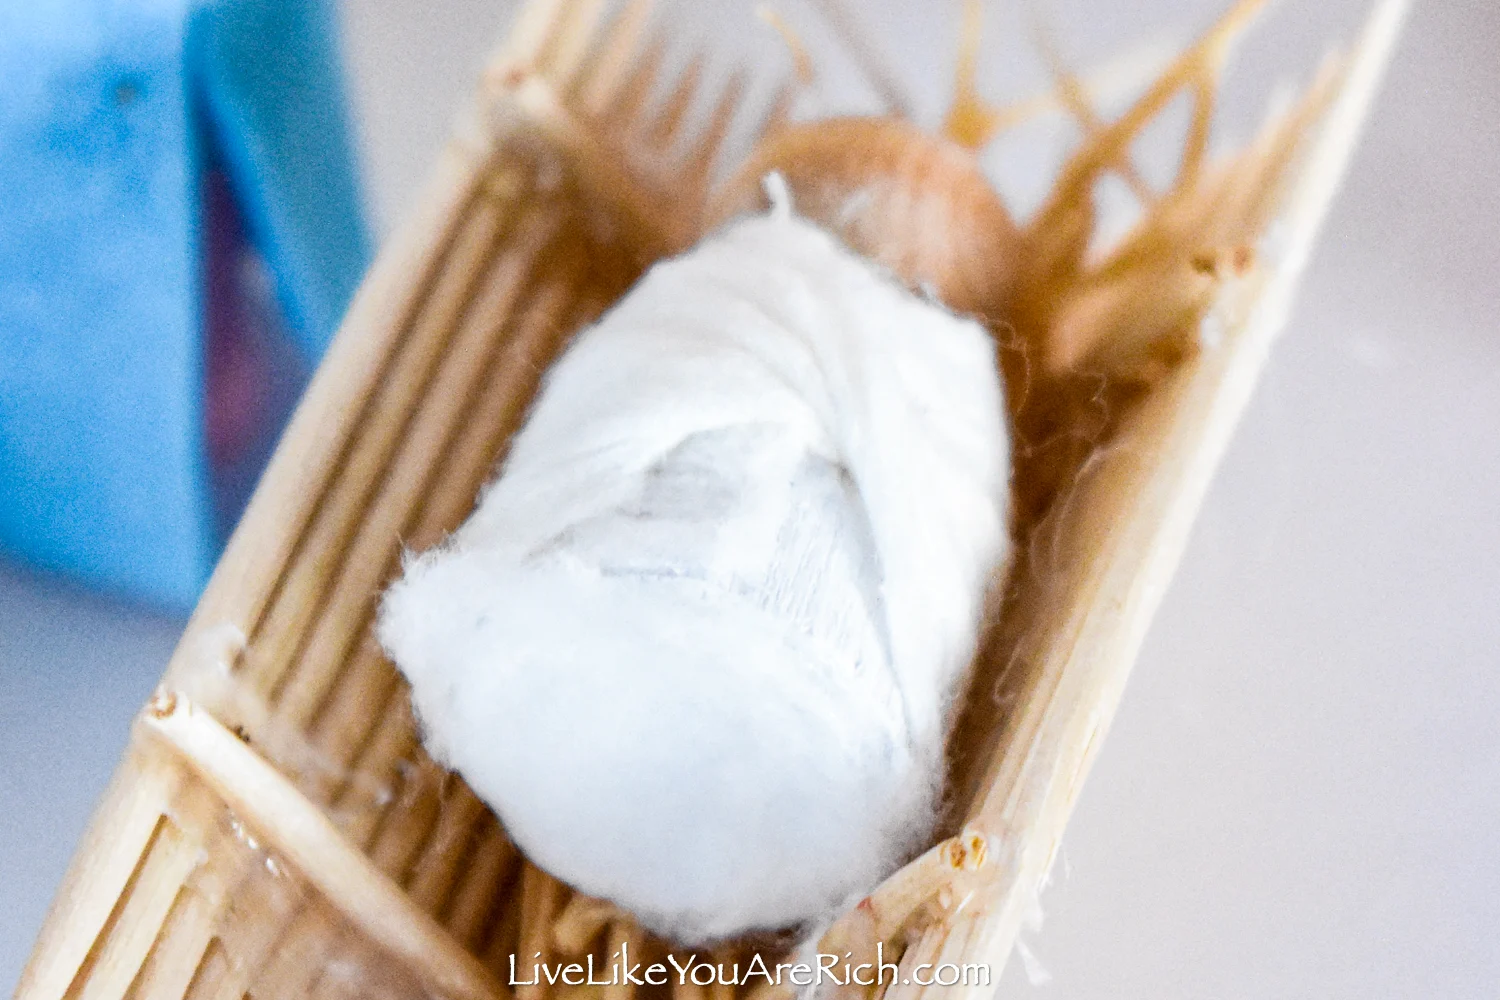
- Baby Jesus- We painted a baby wood peg white (paint the bottom of this wood peg because it will be lying down).
Then we wrapped the body and bottom in gauze from our first aid kit. I twisted the front of the gauze to give it a swaddle look.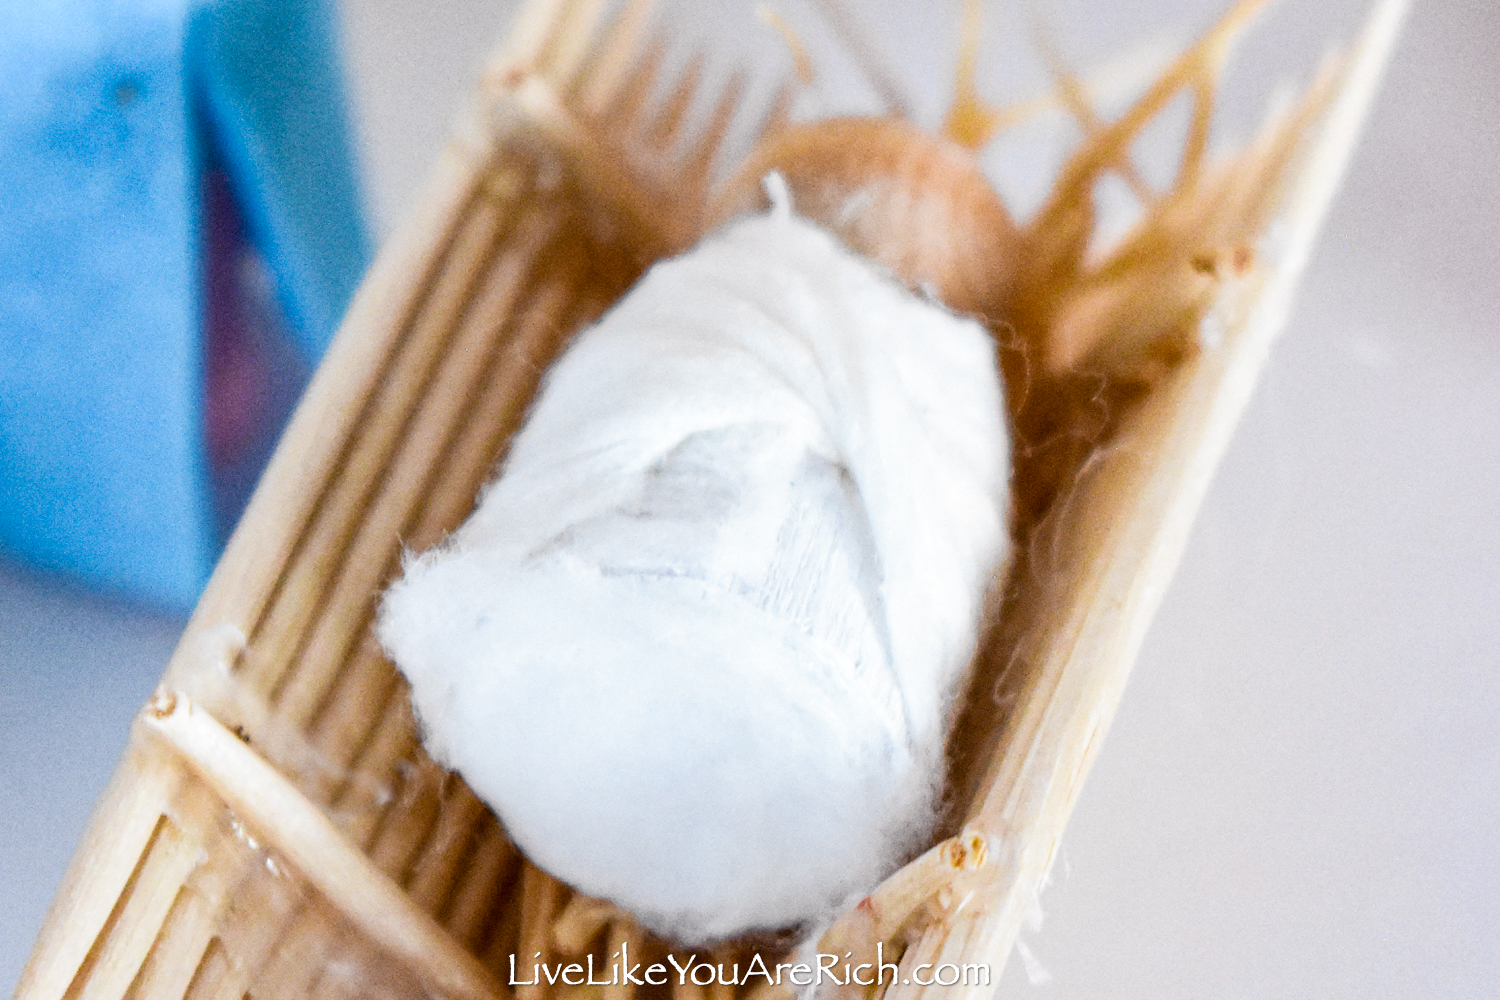
- Stable- Get white foam board and glue popsicle sticks and craft sticks to it in the shape of a stable. Stack the edges about an inch high to give it more dimension.
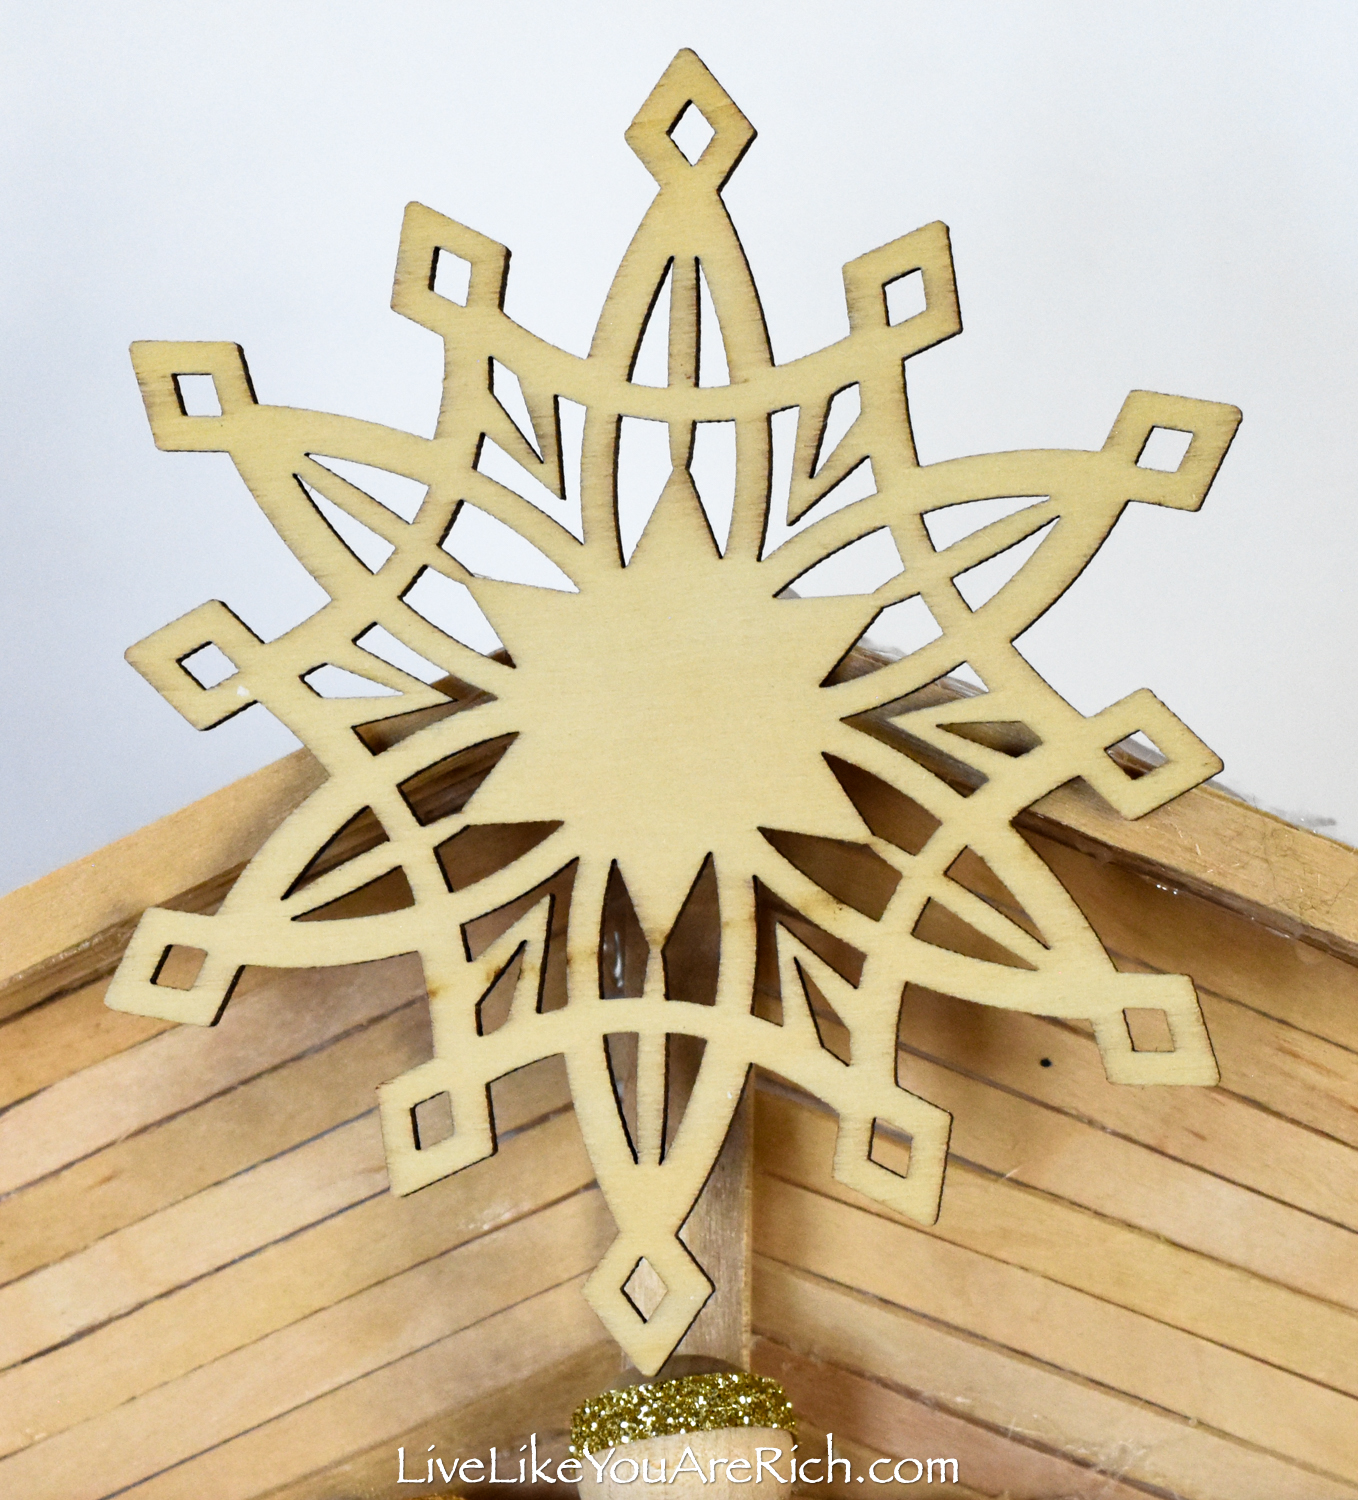

- Star- Glue a wood star to the top of the stable.
- Set Up– Admire your own wood peg nativity DIY project.
I hope you enjoy this project as much as my daughter and I did.

For other ‘rich living’ and D.I.Y. decor tips please subscribe, like me on Facebook, and follow me on Pinterest and Instagram.