

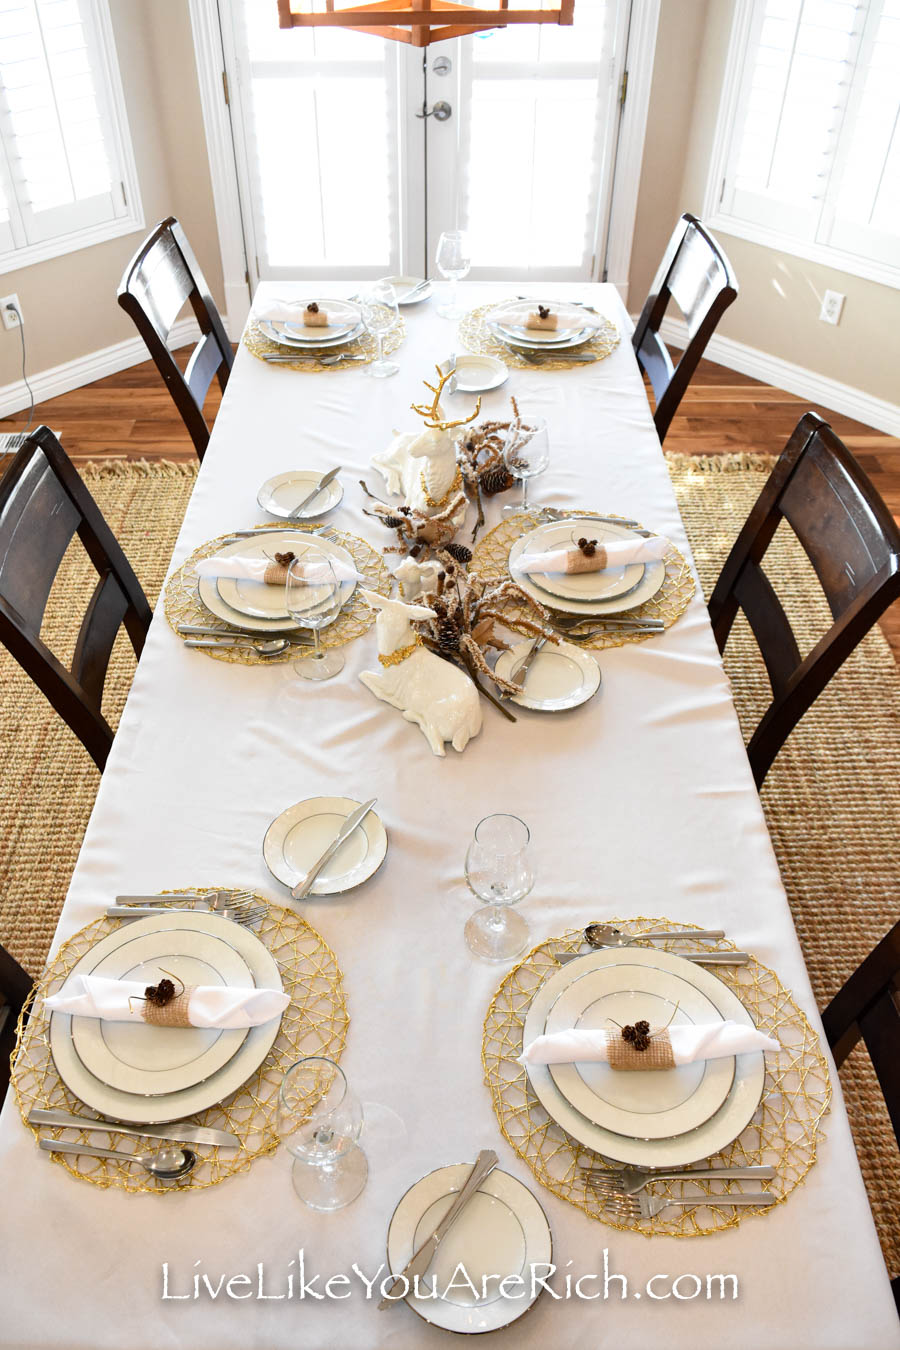
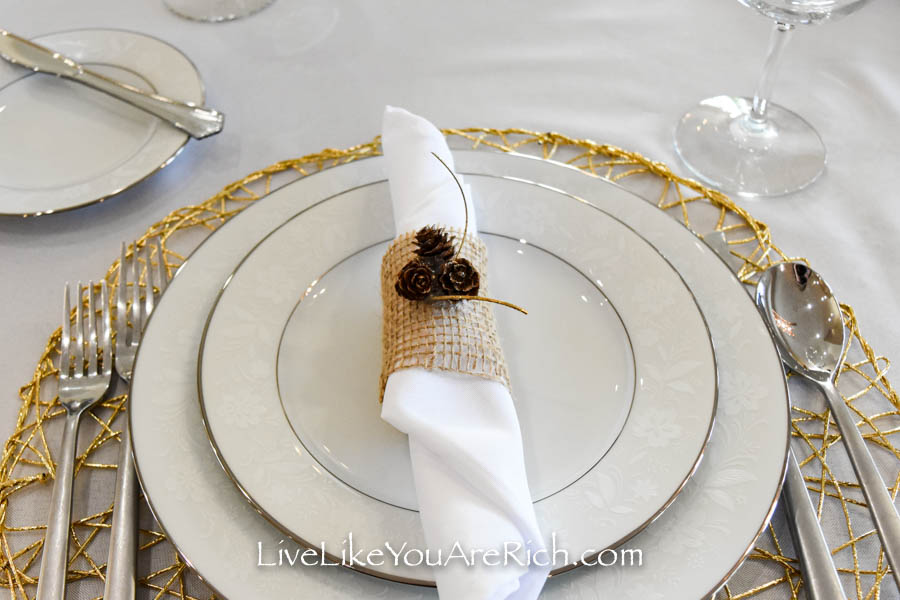
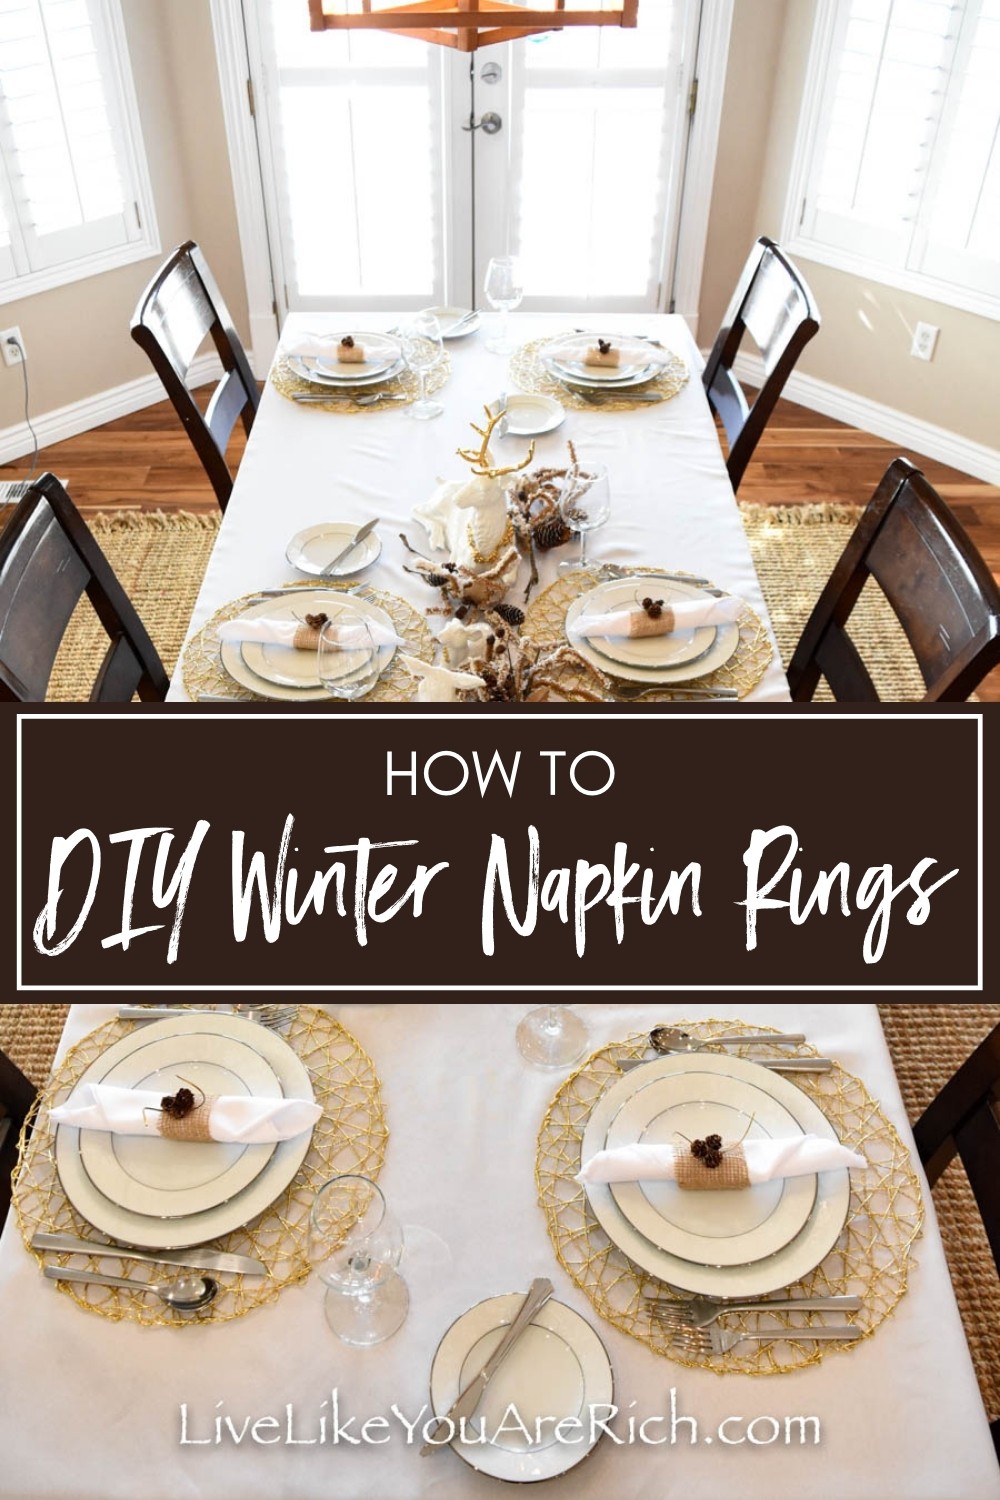
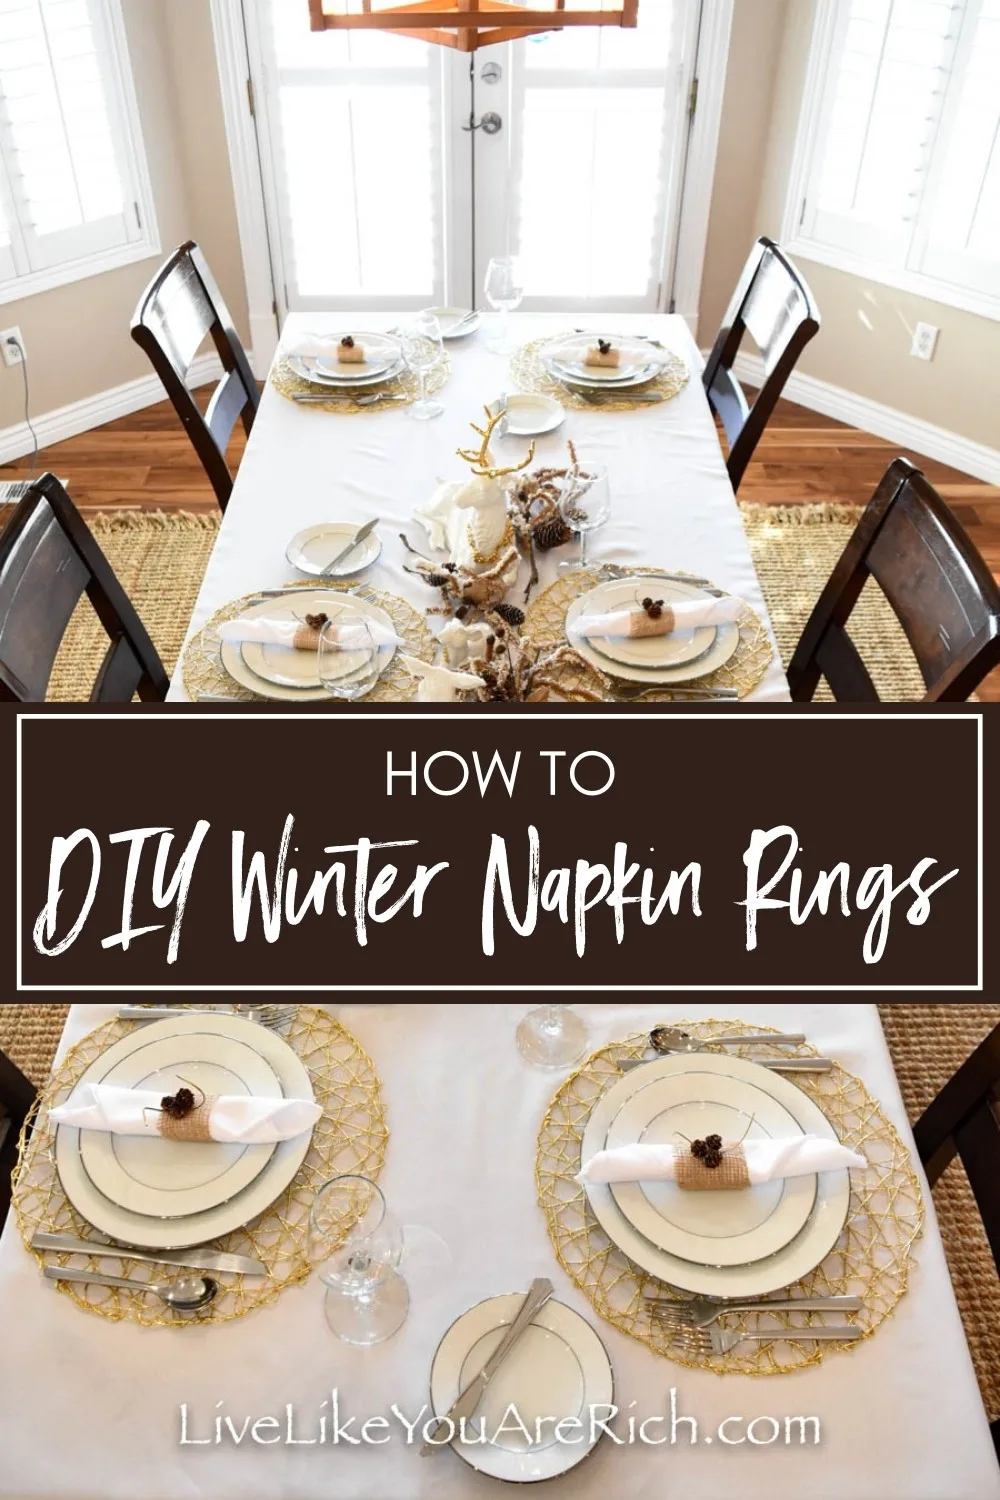
Recently, I decided to make these DIY Winter Napkin Rings to match my White Winter Tablescape.
 These napkin rings came together pretty last minute. I had about 2 hours before some family arrived for a Christmas dinner and I still hadn’t set the table or finished the food!
I knew the food would take about 30 minutes to finish up and setting the table would take about 30 minutes as well. So I decided with my extra hour, I would “wing it” and try to make some napkin rings that would enhance my White Winter Tablescape.
 First, I had an idea of what I wanted to do by taking inspiration from the table I was going to set.
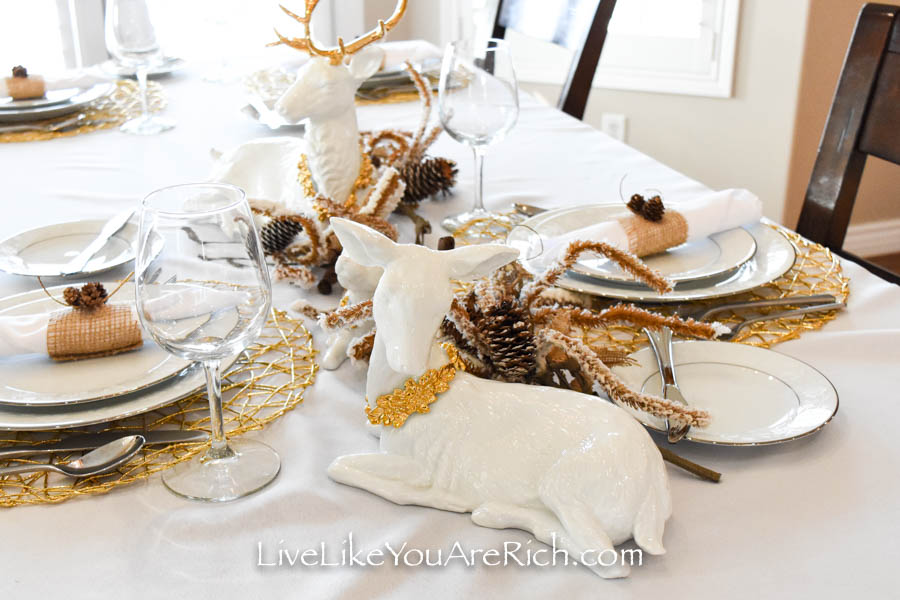
I knew that the centerpiece of the table would have white and gold deer surrounded by flocked branches and bits of burlap and pinecones mixed in. I had gold chargers that I wanted to match as well.
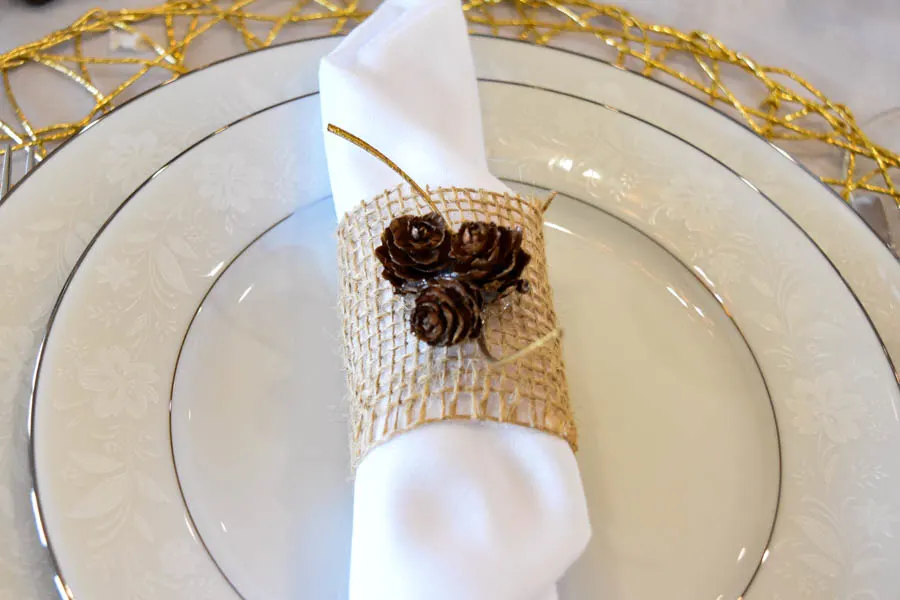
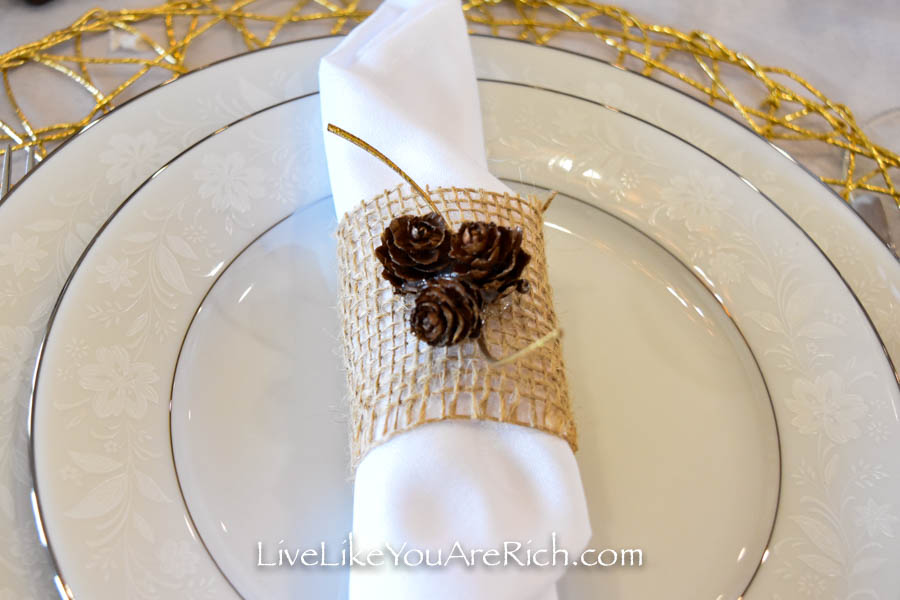
 I wanted to make a napkin ring that would tie in the nature aspect, burlap, and gold accents if I could.
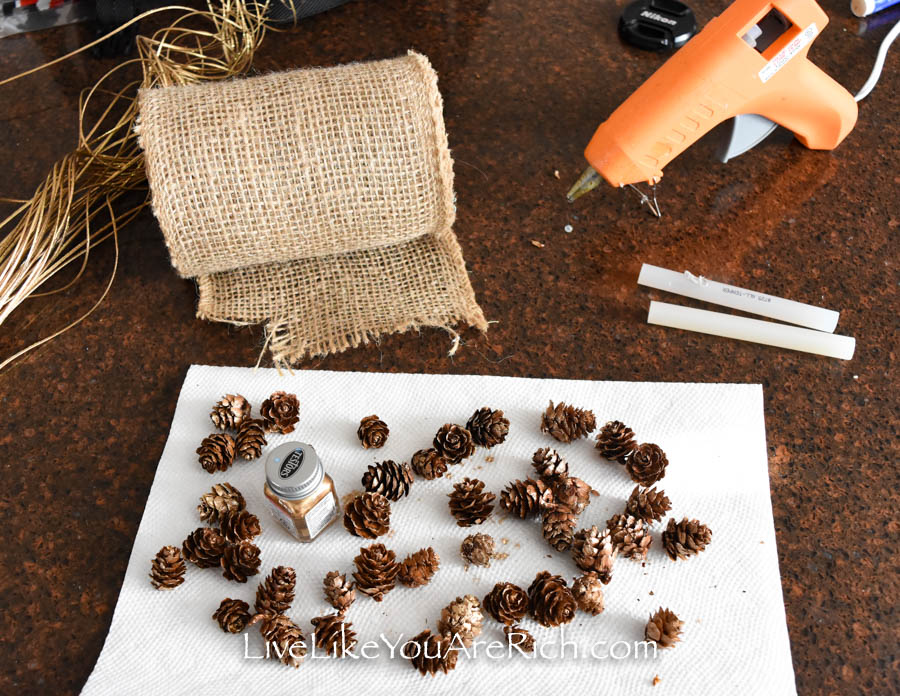
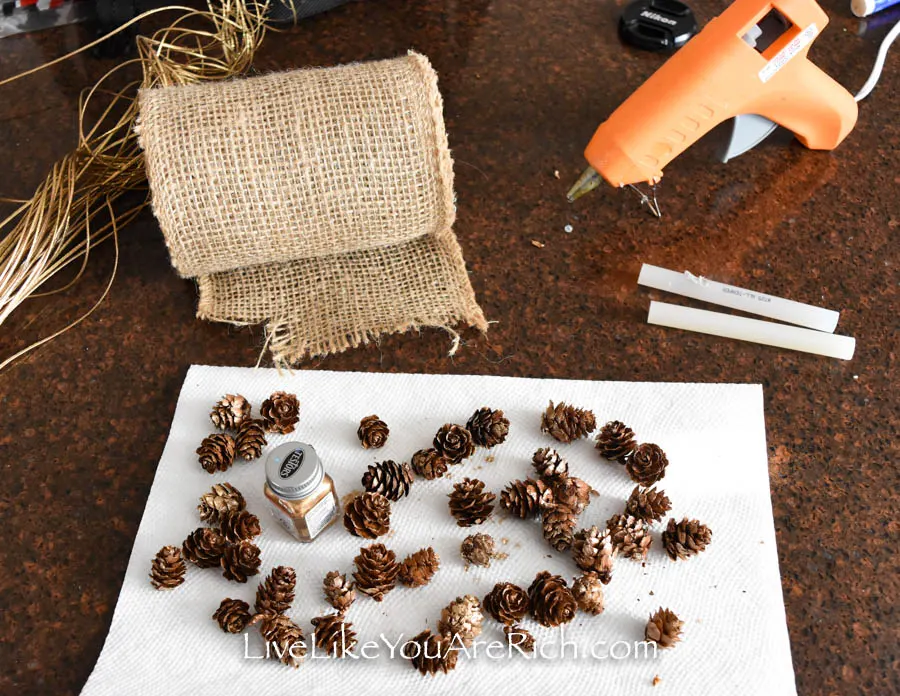
I went to my craft room and found that I had mini pinecones, gold twirly stems, burlap, and gold paint.
Supply List for DIY Winter Napkin Rings
gold paint enamel Testors Null 1144TT
optional but useful (aluminum tube)
optional: Mod Podge
optional: nail polish remover to remove enamel paint from fingers or disposable gloves for working with enamel paint
scissors
 How to Make DIY Winter Napkin Rings
First, I painted the pinecones in a gold leaf style paint. I simply brushed up and down the sides of each pine cone in a very quick and light manner. I dabbed the brush a little inside a few areas of each pine cone as well.
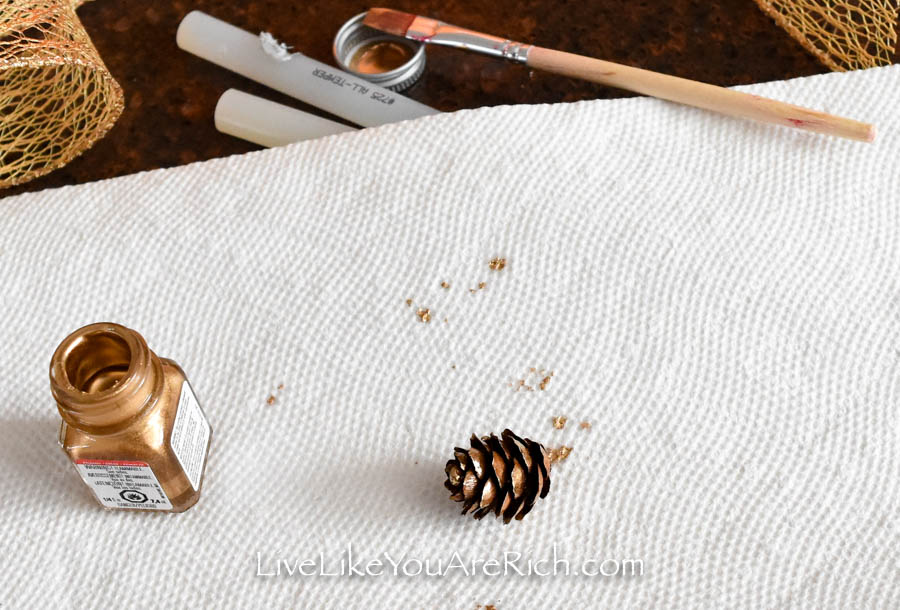
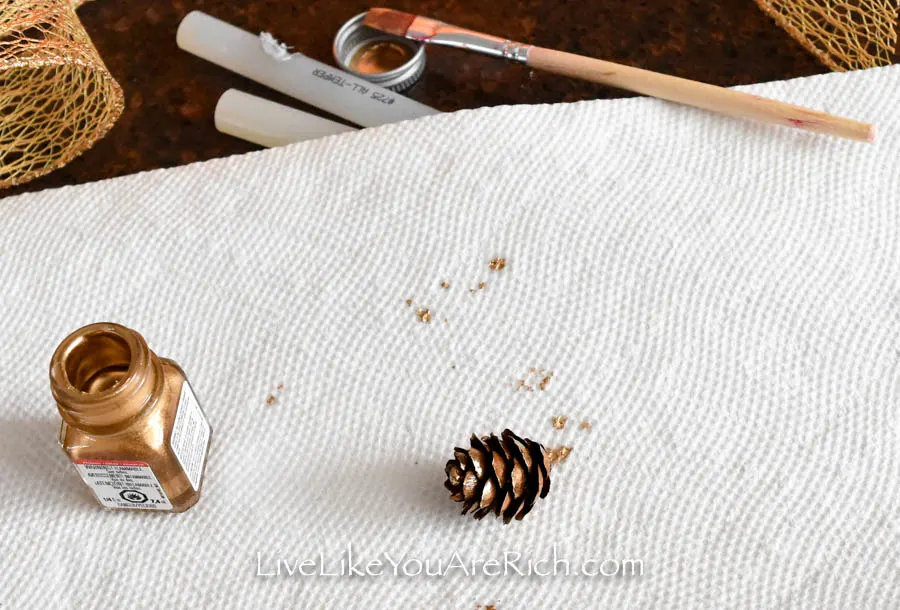 This went very quick. It only took me a few minutes to paint them all.
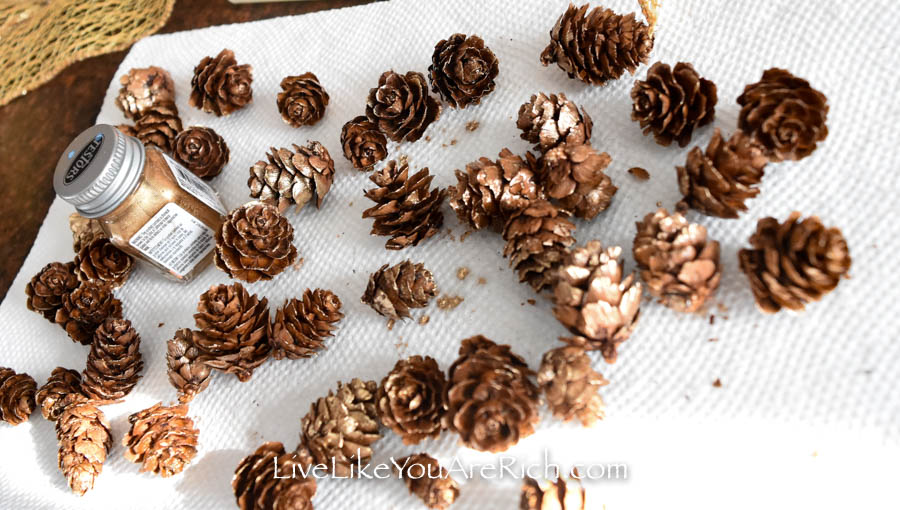
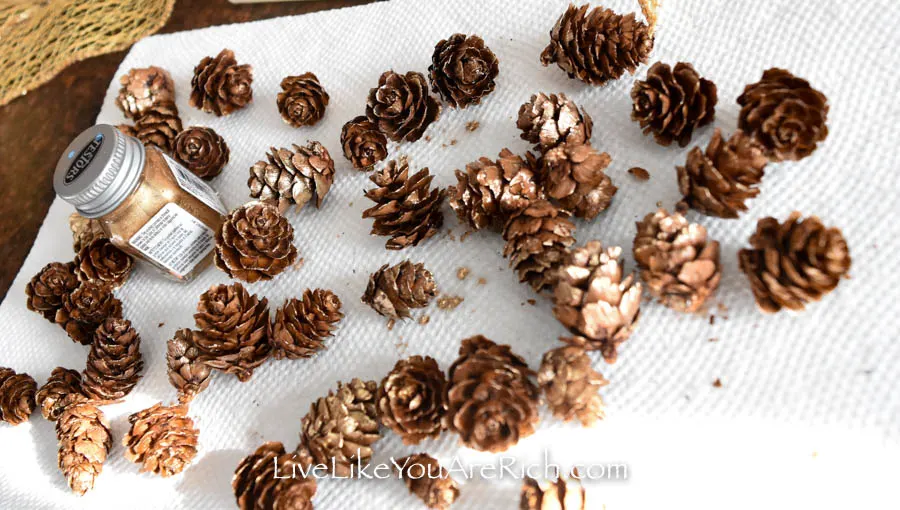 The paint dried very quickly as well! In a few minutes, these mini gold leaf pinecones were ready to be glued.
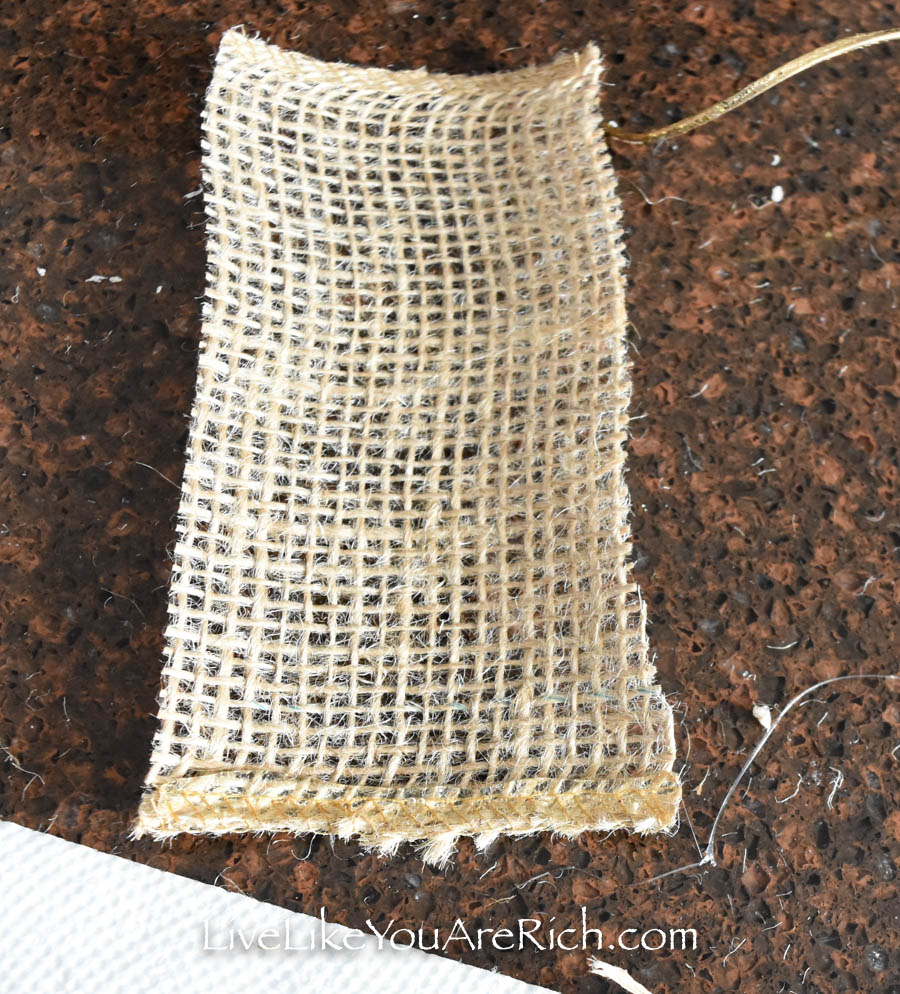
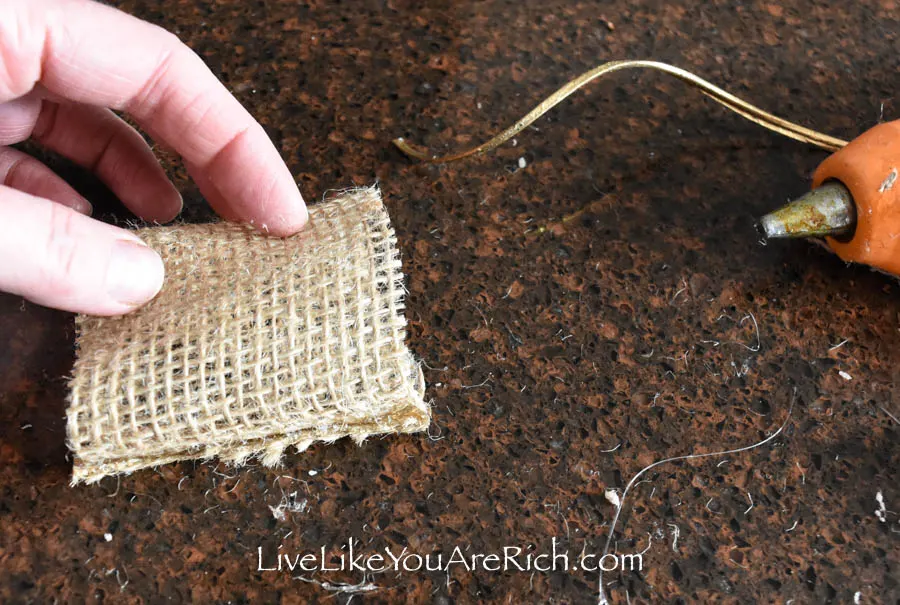
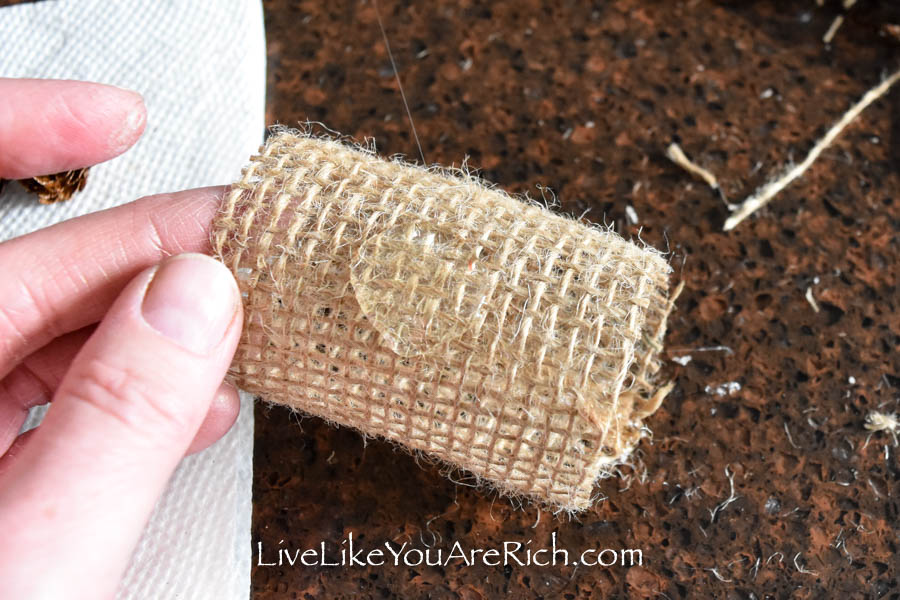
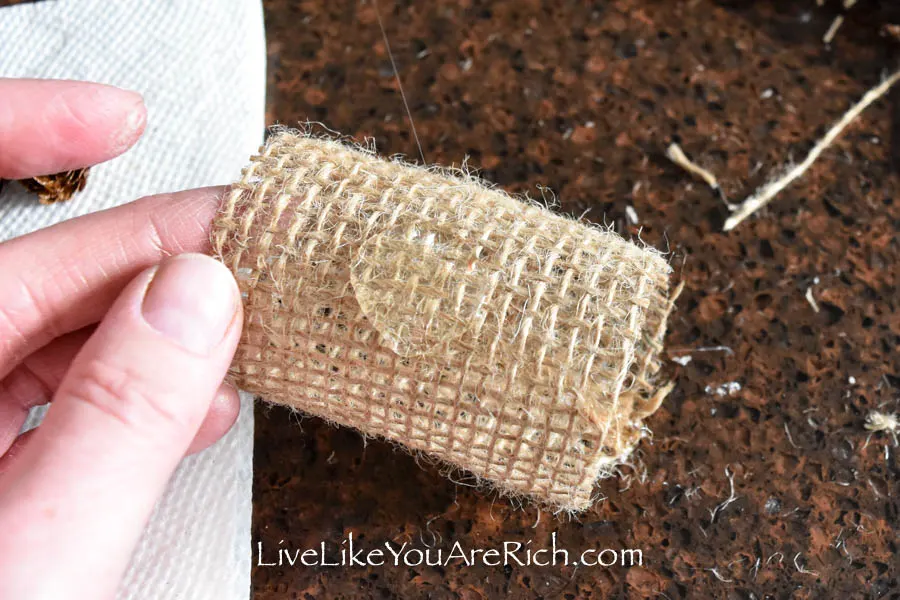
Next, I cut about a 2 1/2-inch strip of burlap (5.5″ wide) and ran a bead of hot glue along the bottom edge of it.
 Then I carefully (without burning my fingers) pressed the ends together to make a ring.

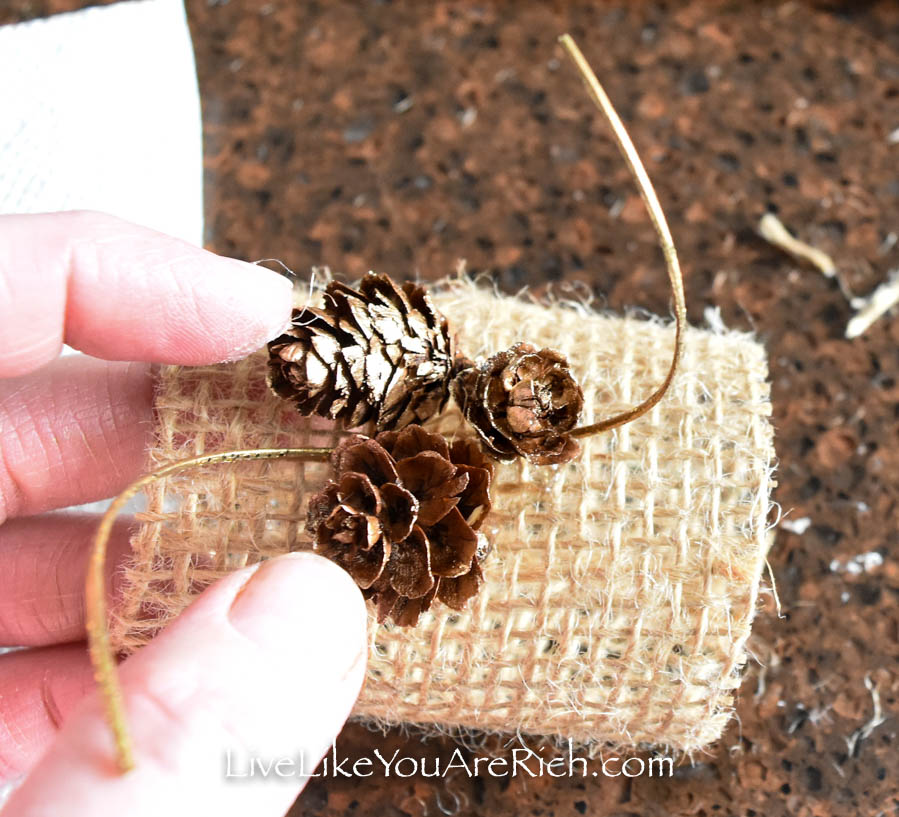
 Next, I put a large nickel-sized dollop of hot glue on the top of the napkin ring (exactly opposite of the glued-together seam.
 I cut a little piece of gold twirl and placed it and 3 pine cones in the glue.
 I added some more glue in between the pinecones but was having problems getting this to set together in the time frame I was trying to make these in.

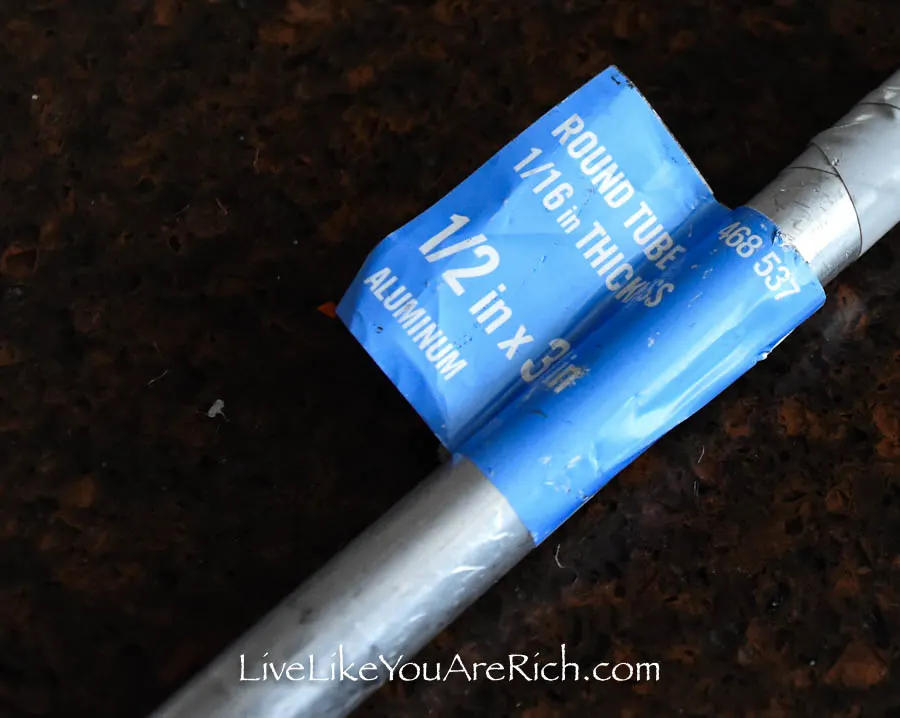 So my husband (aka inventor and creative genius) got an aluminum rod and put it in the freezer for a few minutes in between each napkin ring we made.
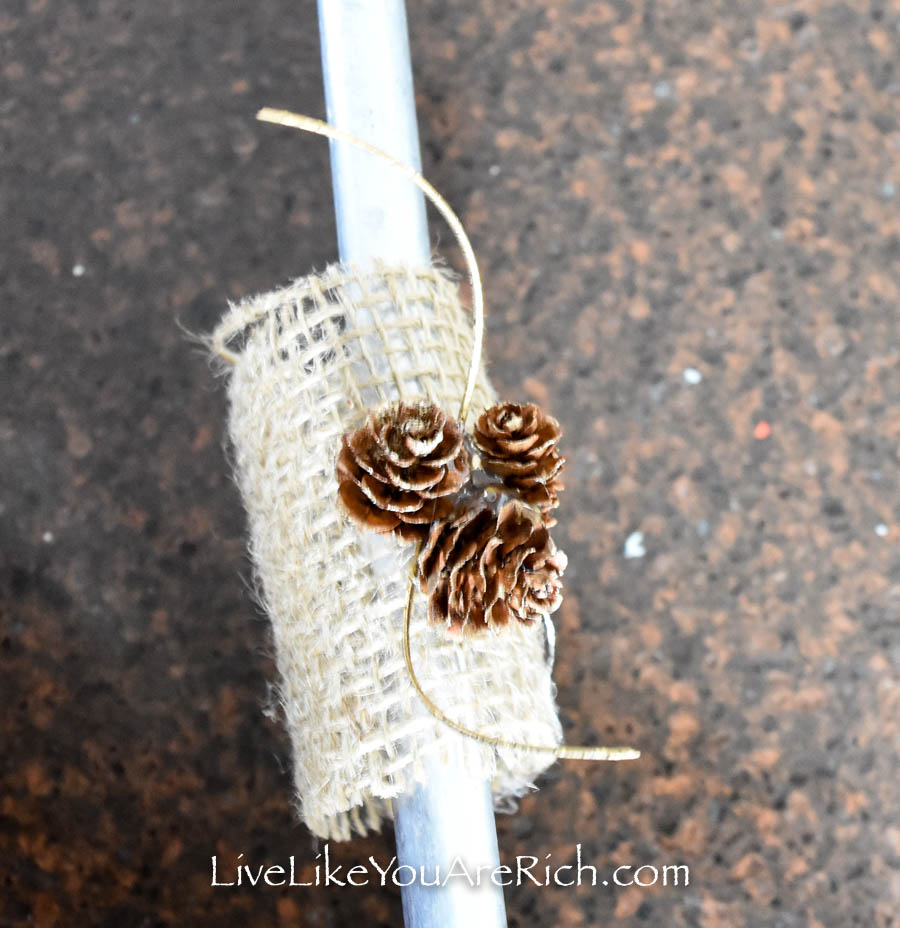
 Then we used the cold rod to help set the glue quickly and hold everything together in a rounded and quick manner. He thought to use rounded metal so it would get cold fast, dry the napkin ring in the correct shape and so that the glue would not stick to it.
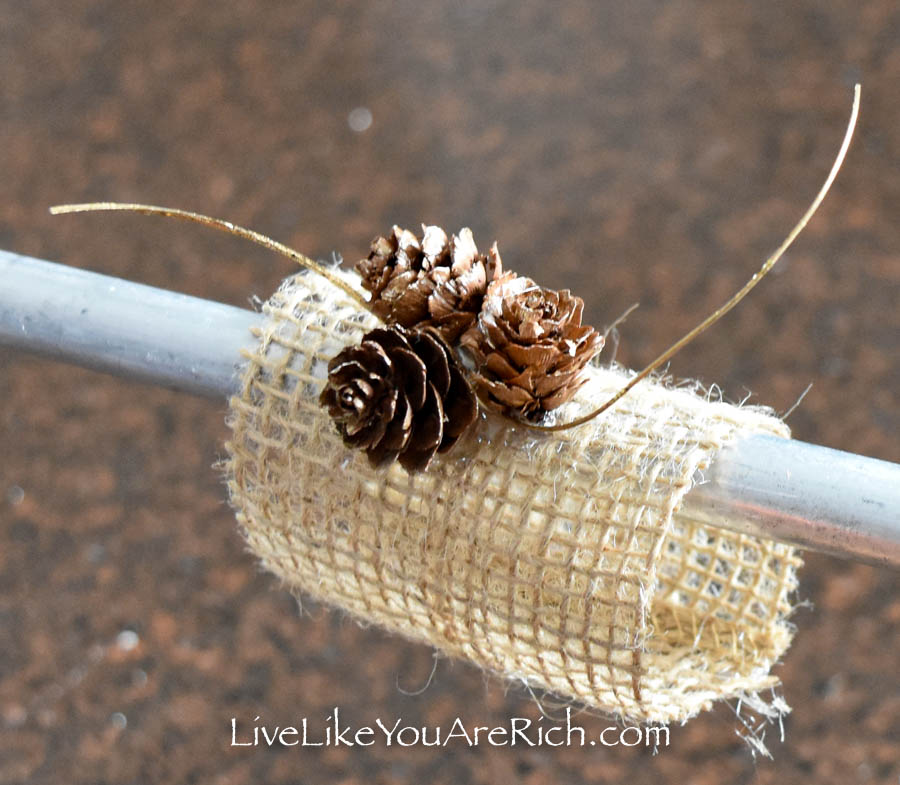
 After the glue was set to the point where the pinecones and gold twirl were not moving anymore, we placed the DIY winter napkin ring in the freezer to set.
My husband put the rod into the freezer between each napkin ring I was making to keep it cold. I would make the napkin ring and he would hold it on the rod while it set. It went super fast!
 They each only took 2 minutes in the freezer and they were completely set.
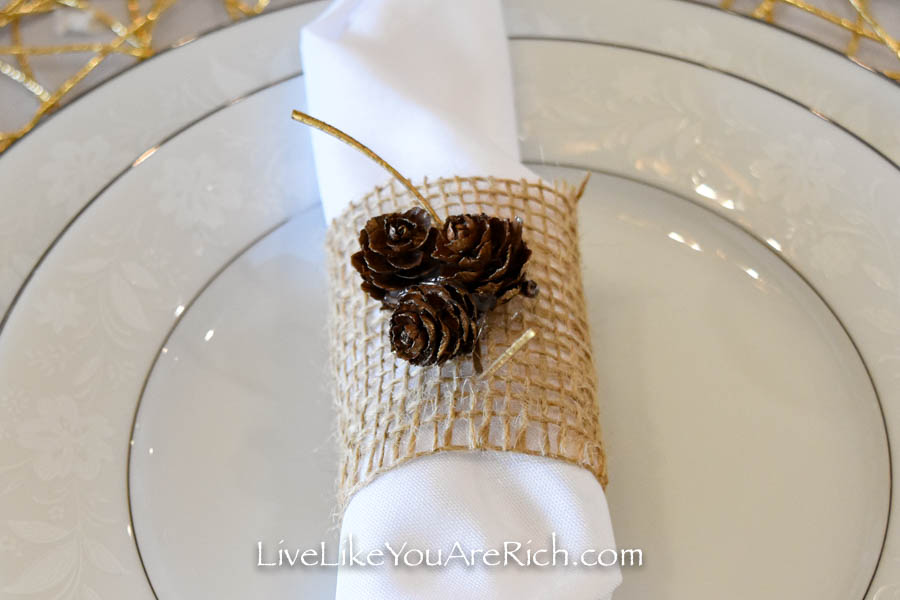
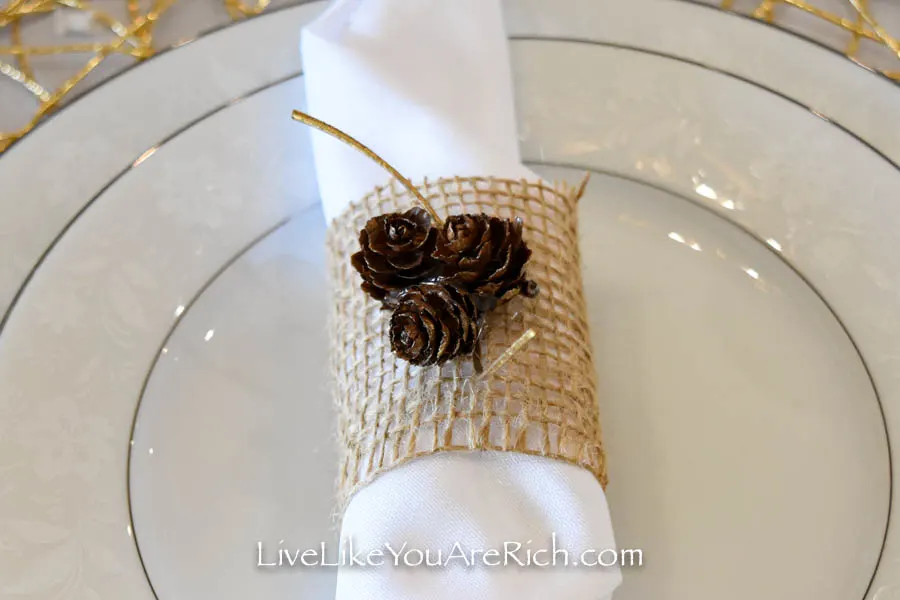
I was very pleasantly surprised with how well these napkin rings sat flat on the china yet also held the napkins together just right.
 Those who came to the dinner were surprised that we had made them ourselves and said how cute they are.
The only additional thing I am going to do now that the dinner is over and I have more time on my hands is to add mod podge on the edges to prevent them from fraying.
What I am planning to do is dip one side of the napkin ring in a bowl of mod podge—getting the first couple of rows of burlap jute wet. Then I will let that side dry and then I’ll alternate and glue the other side. I’m fairly confident this will prevent any unraveling or fraying which is bound to happen with exposed burlap ribbon.
To my surprise and especially because of my husband’s freezer hack, 10 of these napkin rings came together from start to finish in under 45 minutes.
Another bonus is that I used things I had on hand, so they were free.
I was very happy with how these DIY Winter Napkin Rings came out and how well they matched and enhanced my White Winter Tablescape.
Have you had luck throwing a few craft items together to make something functional as well? I’d love to hear about your spontaneous projects in the comments below.

For other ‘rich living’ and D.I.Y. decor tips please subscribe, like me on Facebook, and follow me on Pinterest and Instagram.
Supply List for DIY Winter Napkin Rings
gold paint enamel Testors Null 1144TT
optional but useful (aluminum tube)
optional: Mod Podge
optional: nail polish remover to remove enamel paint from fingers or disposable gloves for working with enamel paint
Scissors
Richard Tunner
Wednesday 23rd of December 2020
Such a fabulous sharing! Thank you very much.
Anita
Thursday 31st of December 2020
You’re welcome! Thanks for stopping by.