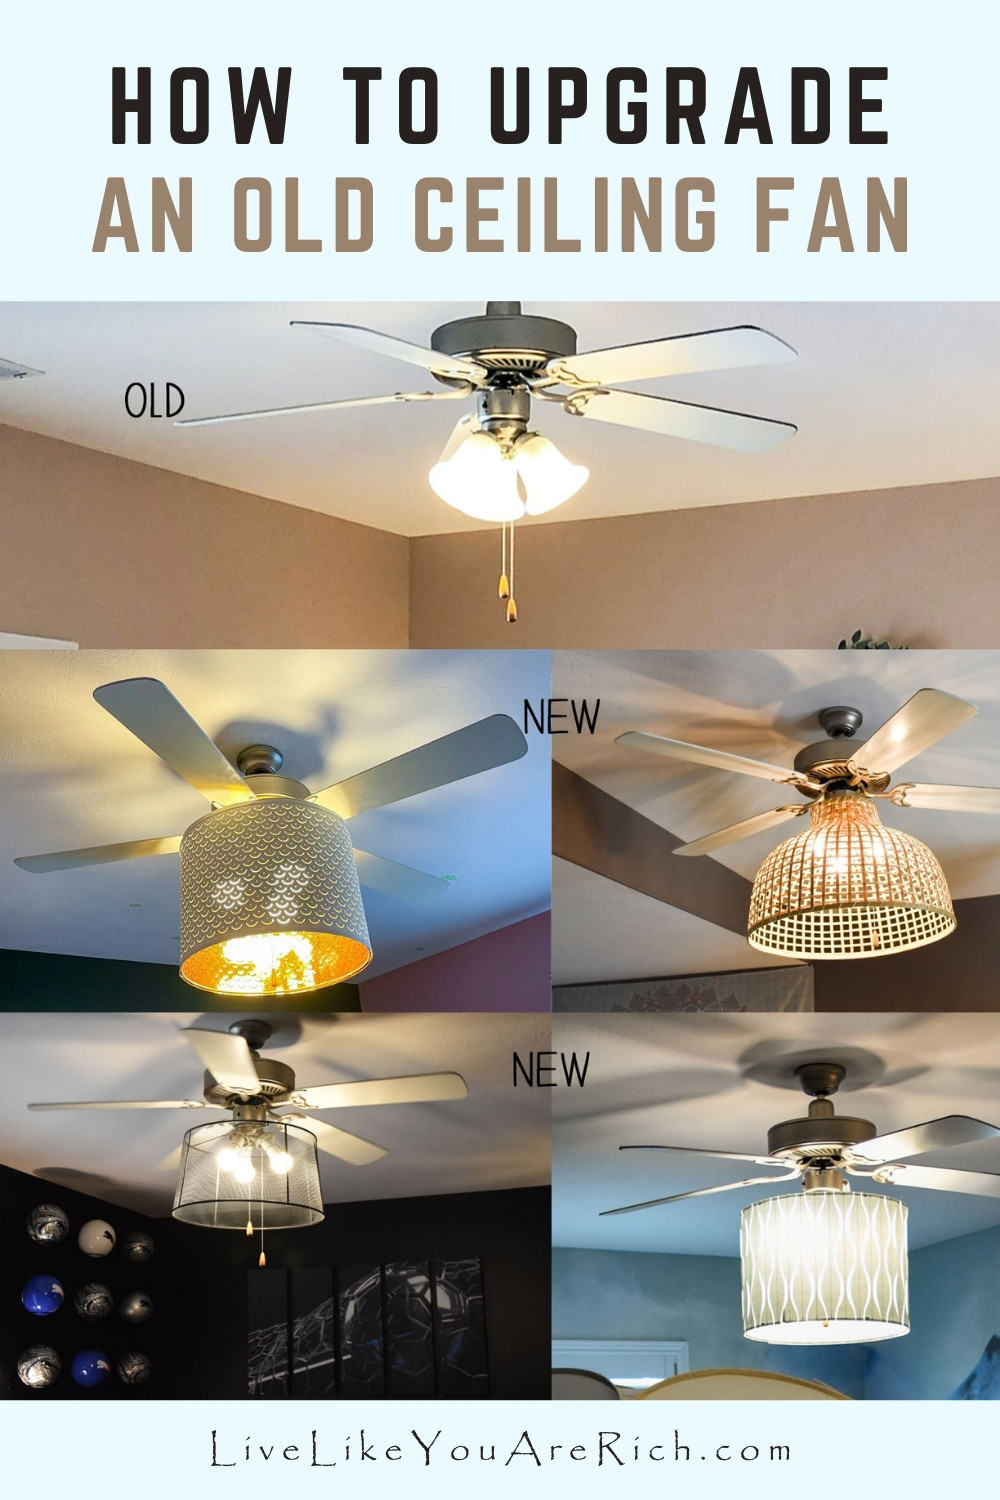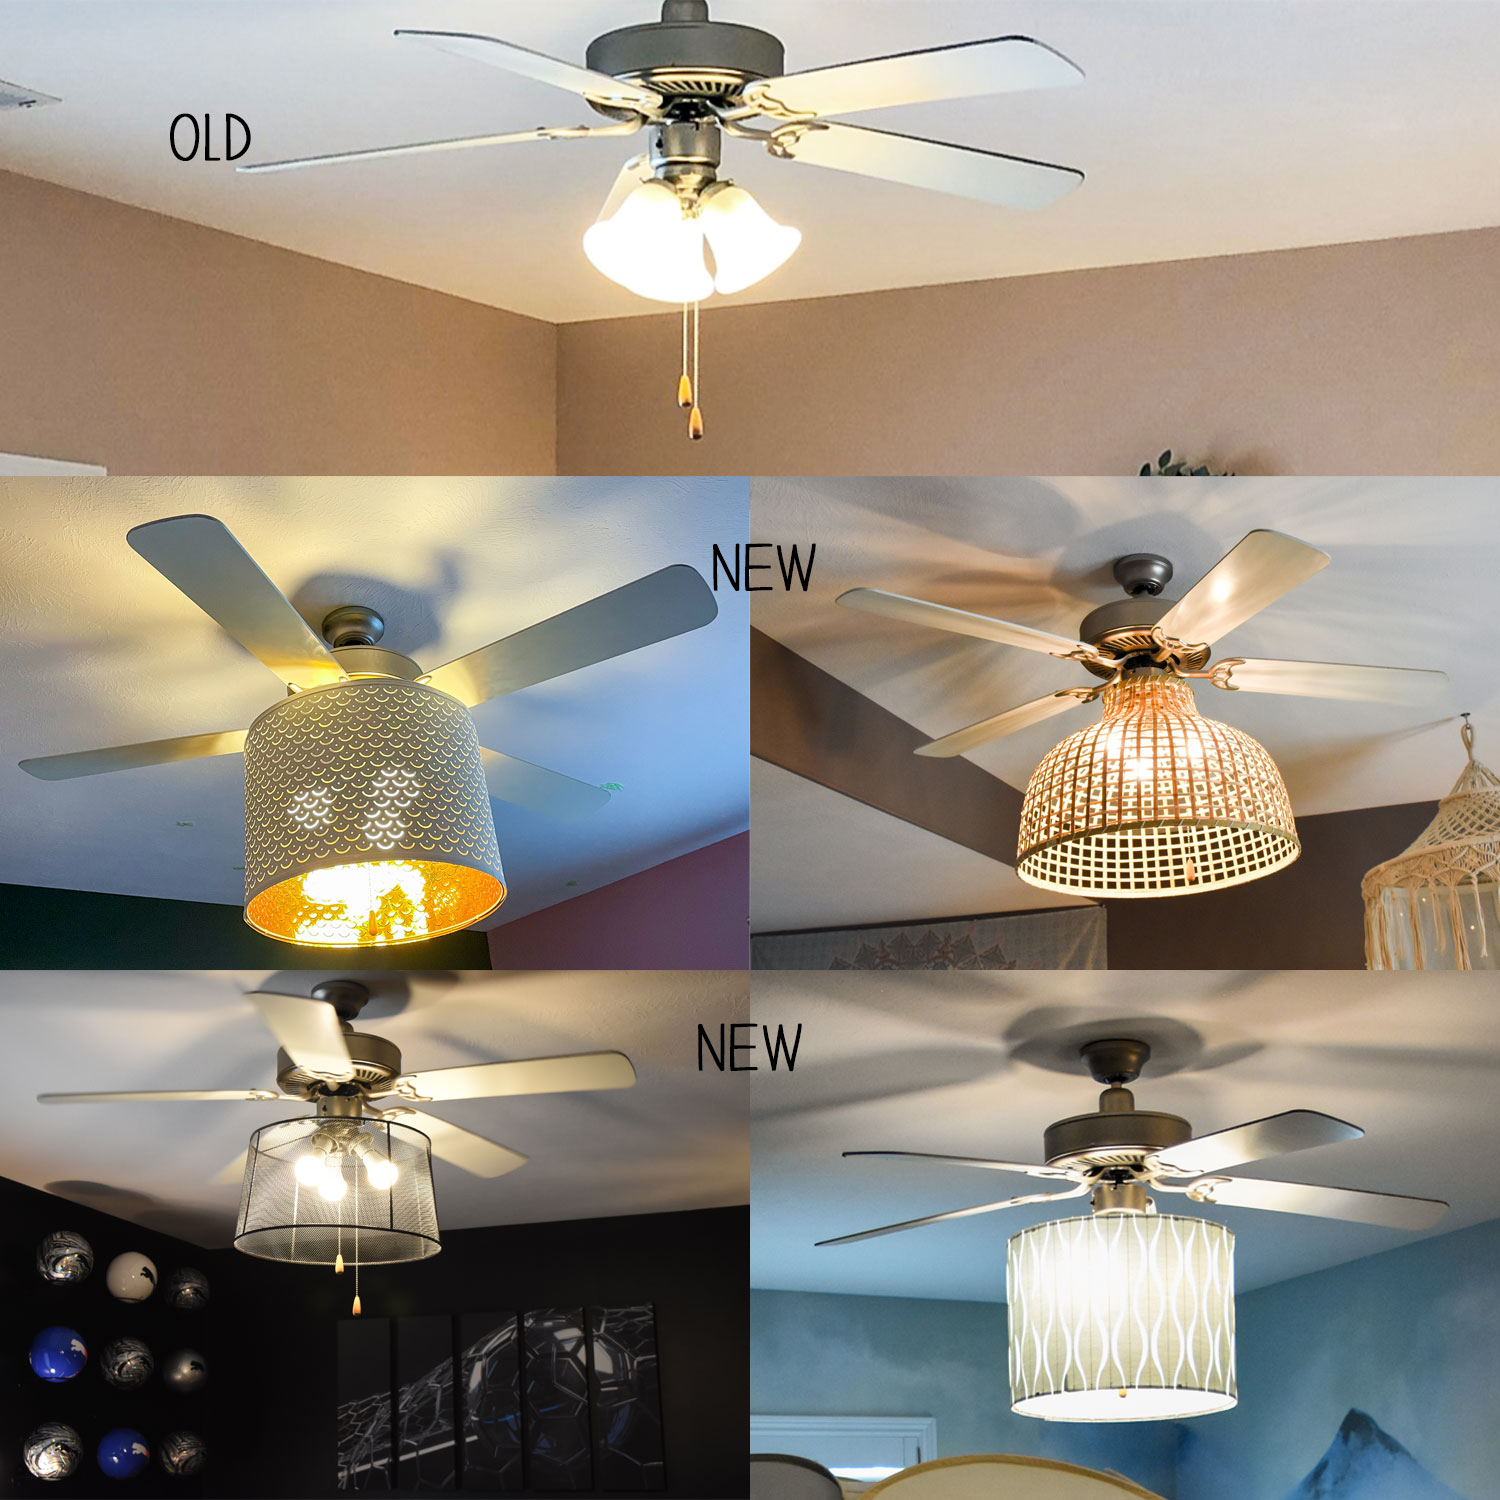

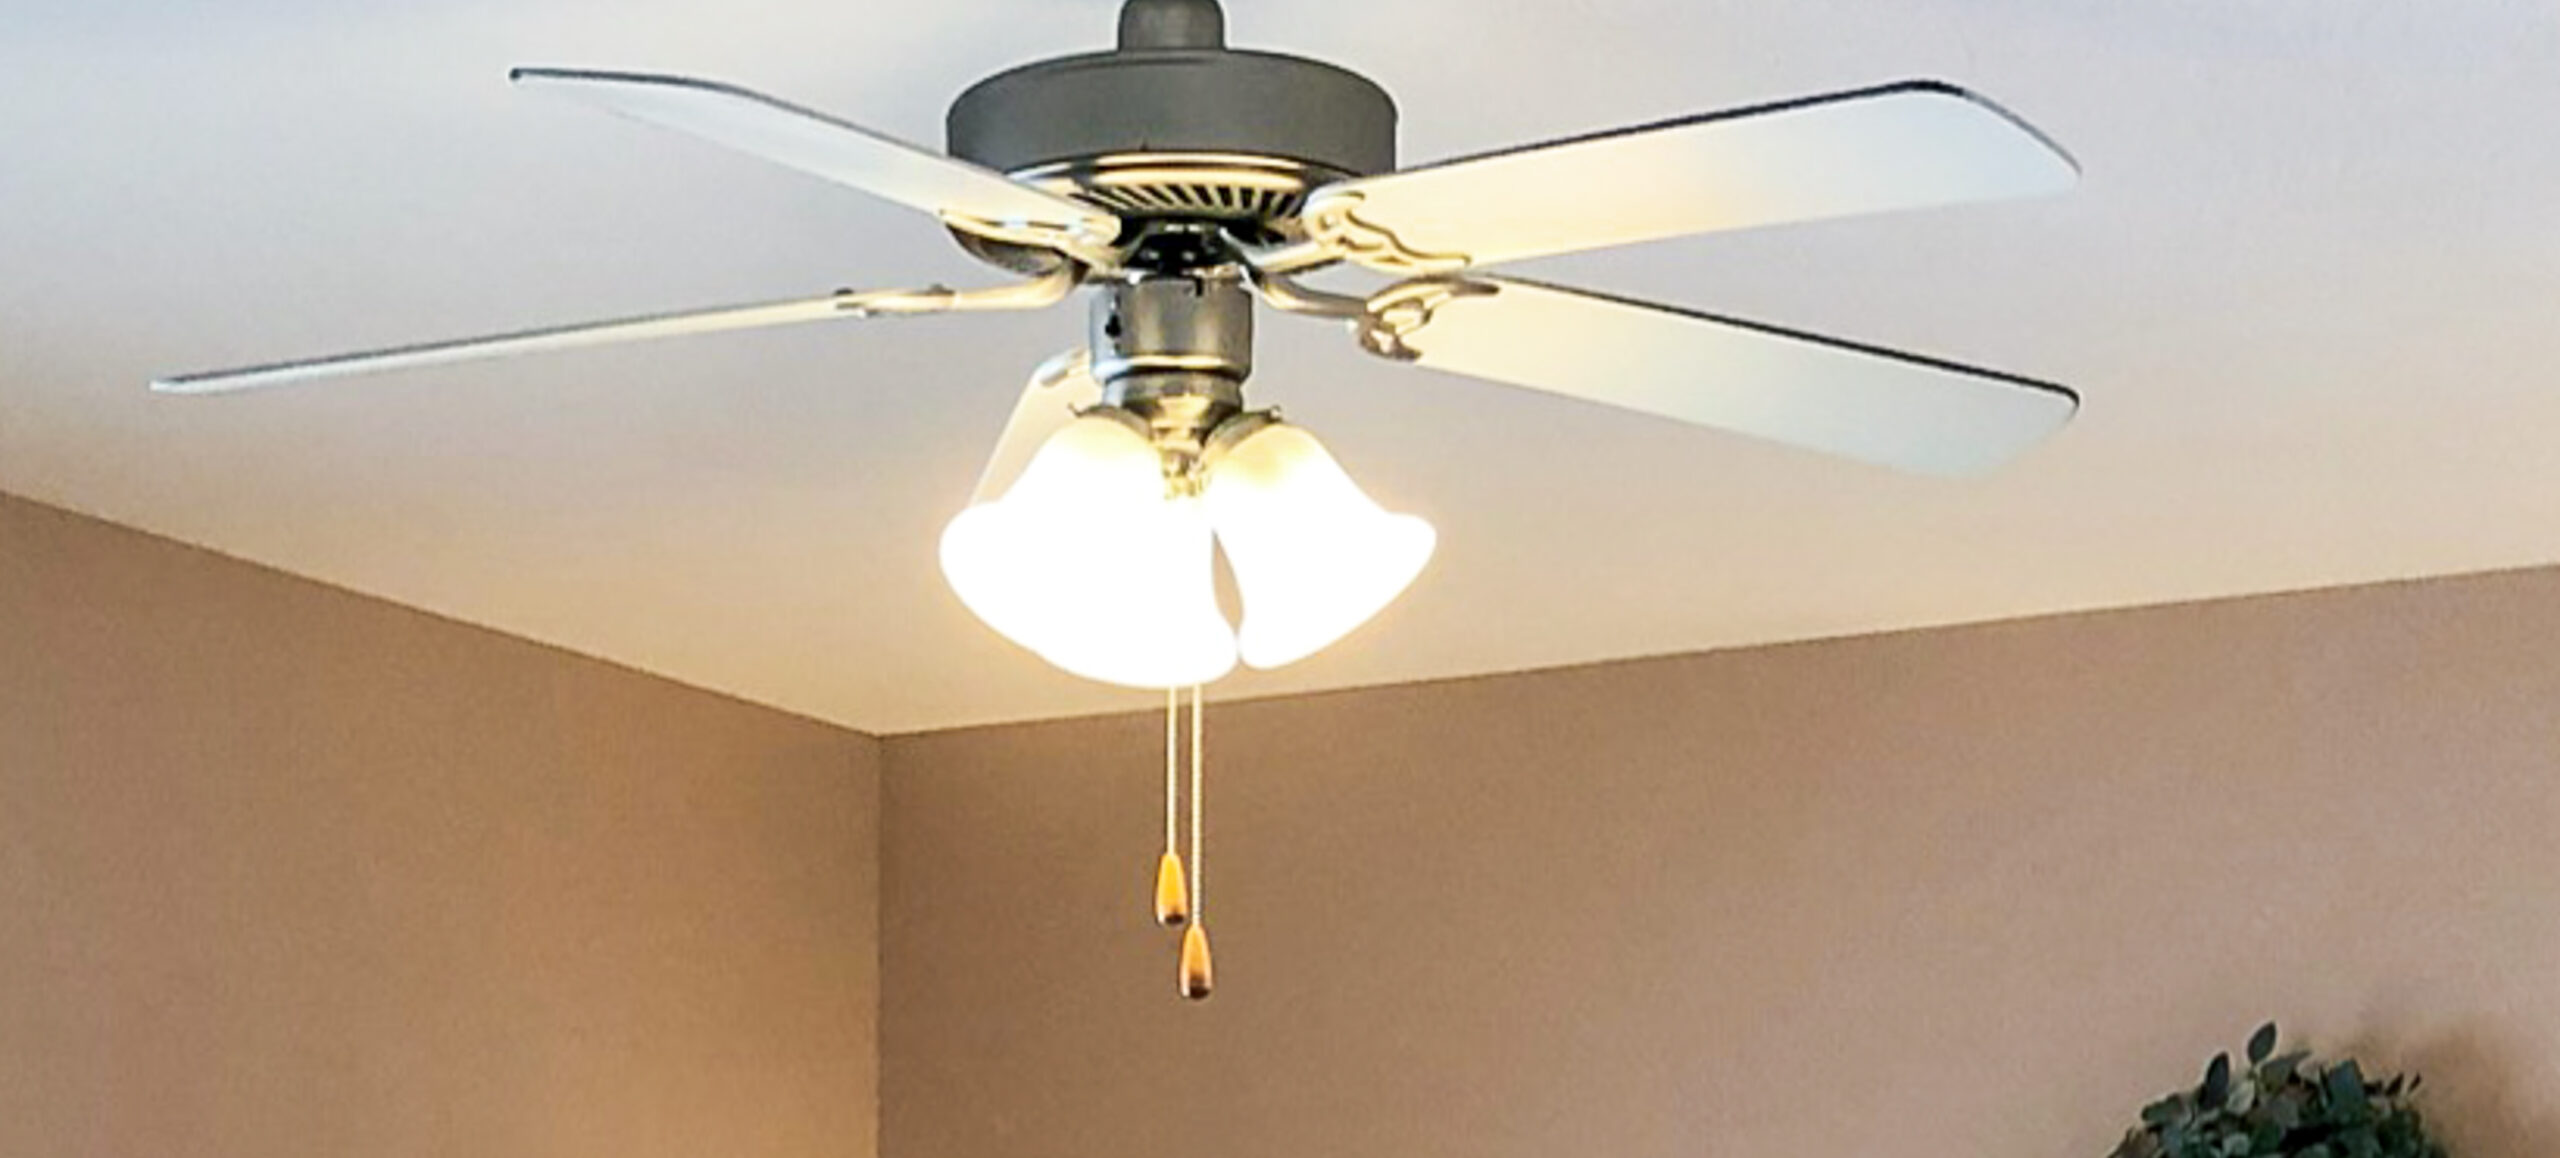
How to Upgrade an Old Ceiling Fan
We have multiple ceiling fans in our home. They are still working well and are very effective at circulating air.
However, they have become a bit dated and when we remodeled our kids’ rooms, I wanted to upgrade them.
I was wanting to update and customize each light fixture to match the decor in my kids’ rooms.
I asked my husband if he could find a way to add lampshades to the fans. He tried soldiering them on but then came across a better way.
My husband figured out how to add a light shade to the fans to customize and modernize them without needing to use a soldering iron. The tools he used were common household tools.
See the video on how he did it…I had a cold when recording so my voice sounds weird… also there is a bit of shaking at the start of the video but it stabilizes about a minute in.
I think the video really helps to see how to do this but there are written instructions below as well as some tips I forgot to add to the video.
Supply List for How to Upgrade an Old Ceiling Fan
Drill bit
How to Upgrade an Old Ceiling Fan
Continue reading and/or watch the video on this page to see how…
This tutorial is complex, so I’d recommend watching the video; but for those who would rather read, I’ll try explaining how we did this.
- Disconnect power to the ceiling fan.
- Take off the light shades and bulbs.
- Take off the housing below the fan blades (the one that holds the electrical wires for the bulbs and their sockets).
- Take those two units apart so that you can drill the holes where the lampshade needs to go.
- Measure where the 3 holes from the lampshade will go (or 4 holes or however many crossbars your lampshade has).
- Drill the holes a little higher up on the housing (but not too high to interrupt the flow of the fan blades if possible for added stability).
- Using a tin snip, snip a strip of metal up to the hole.
- Using needle-nose pliers, peel back the metal to allow for the lampshade frame to slide into the holes.
- Using needle-nose pliers, push the metal back.
- Put the pieces of the fan including all of the wires back together again.
- Alter as needed for your fan and light shade/fixture so that they will work together seamlessly.
- Put the shade back onto the fan and test that everything works as desired.
Tips for choosing a lampshade/light fixture to add to an old ceiling fan.
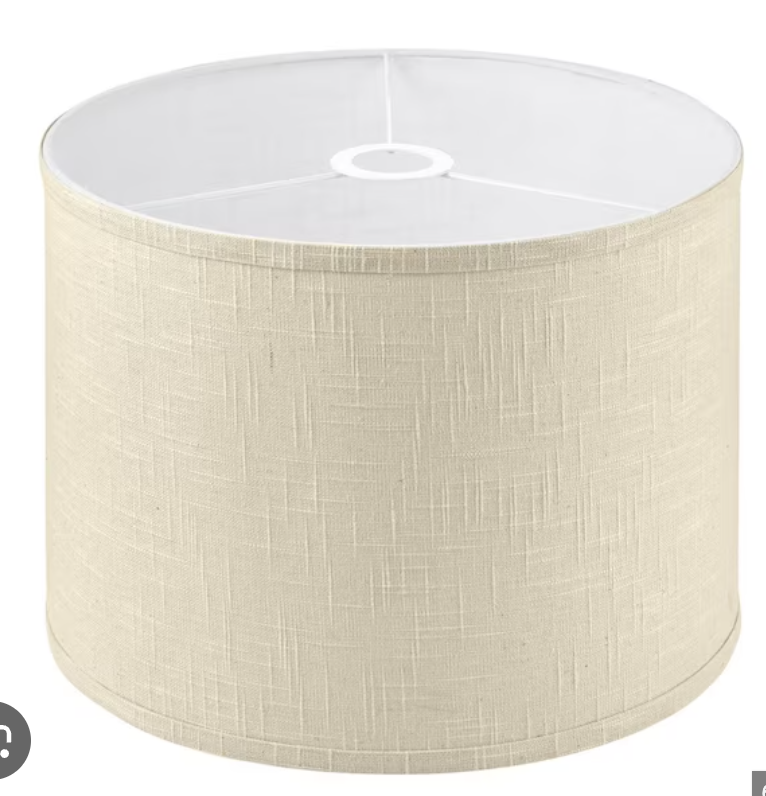
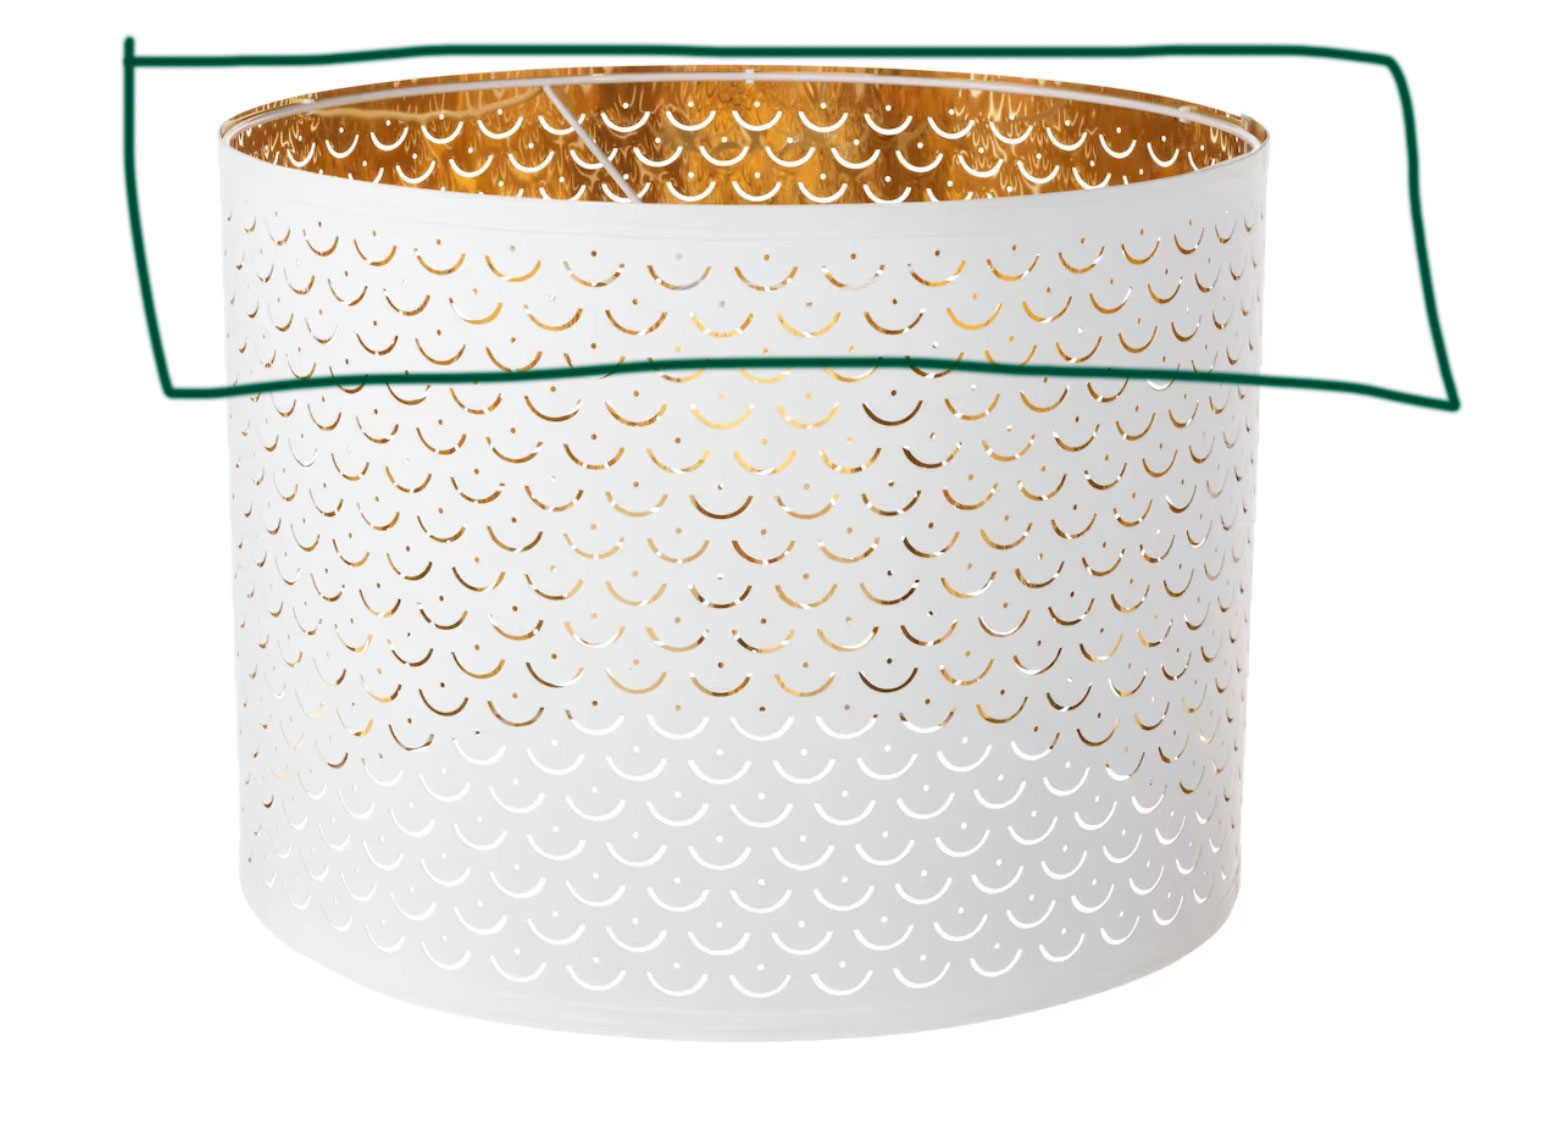
1. MOST IMPORTANT. The frame of the lampshade needs to meet up at the top of the shade so that it can attach to the fan housing appropriately.
I thought I had bought a lampshade that would work, but in the end, the three bars and round circles where they meet up were in the middle of the shade (height-wise they were 1/2 down into the shade), so I had to return it.
Be prepared to be flexible with the lampshade you use. Most that I looked at actually had bars that met in the middle of the shades, they will not work.
This one will work:
These would also work:
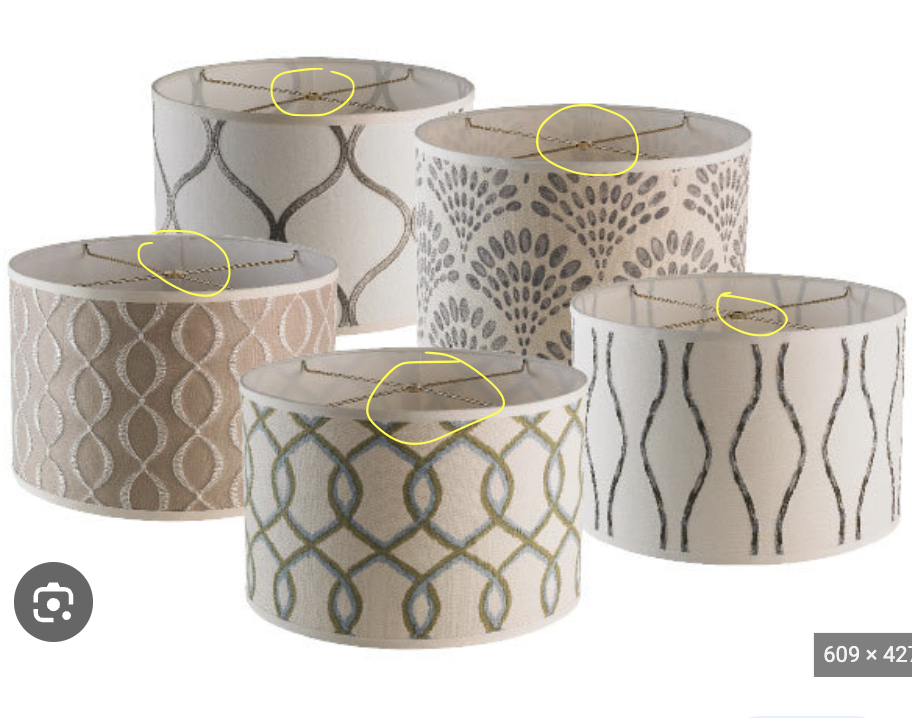
This one would not work as the cross bars meet in the middle/bottom of the shade.
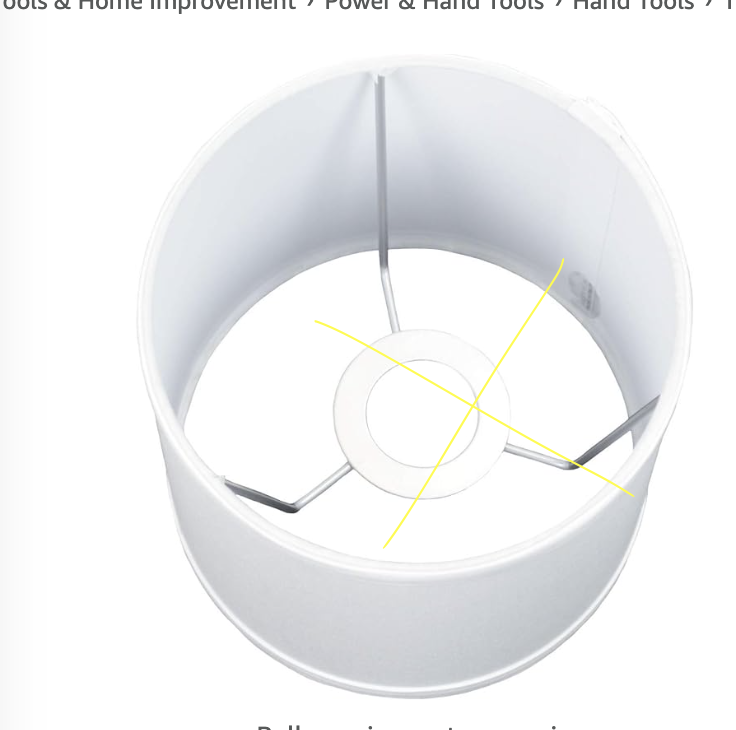
If the bars are malleable then they can be somewhat bent towards the top. If the crossbars meet within the outlined box in the photo below they’ll probably work. So, if the crossbars meet up at the top 1/4 of the shade then you can just bend them up a little to make it work. If they meet further down or outside of the box, (or the lower 3/4th of the shade), it likely won’t work.
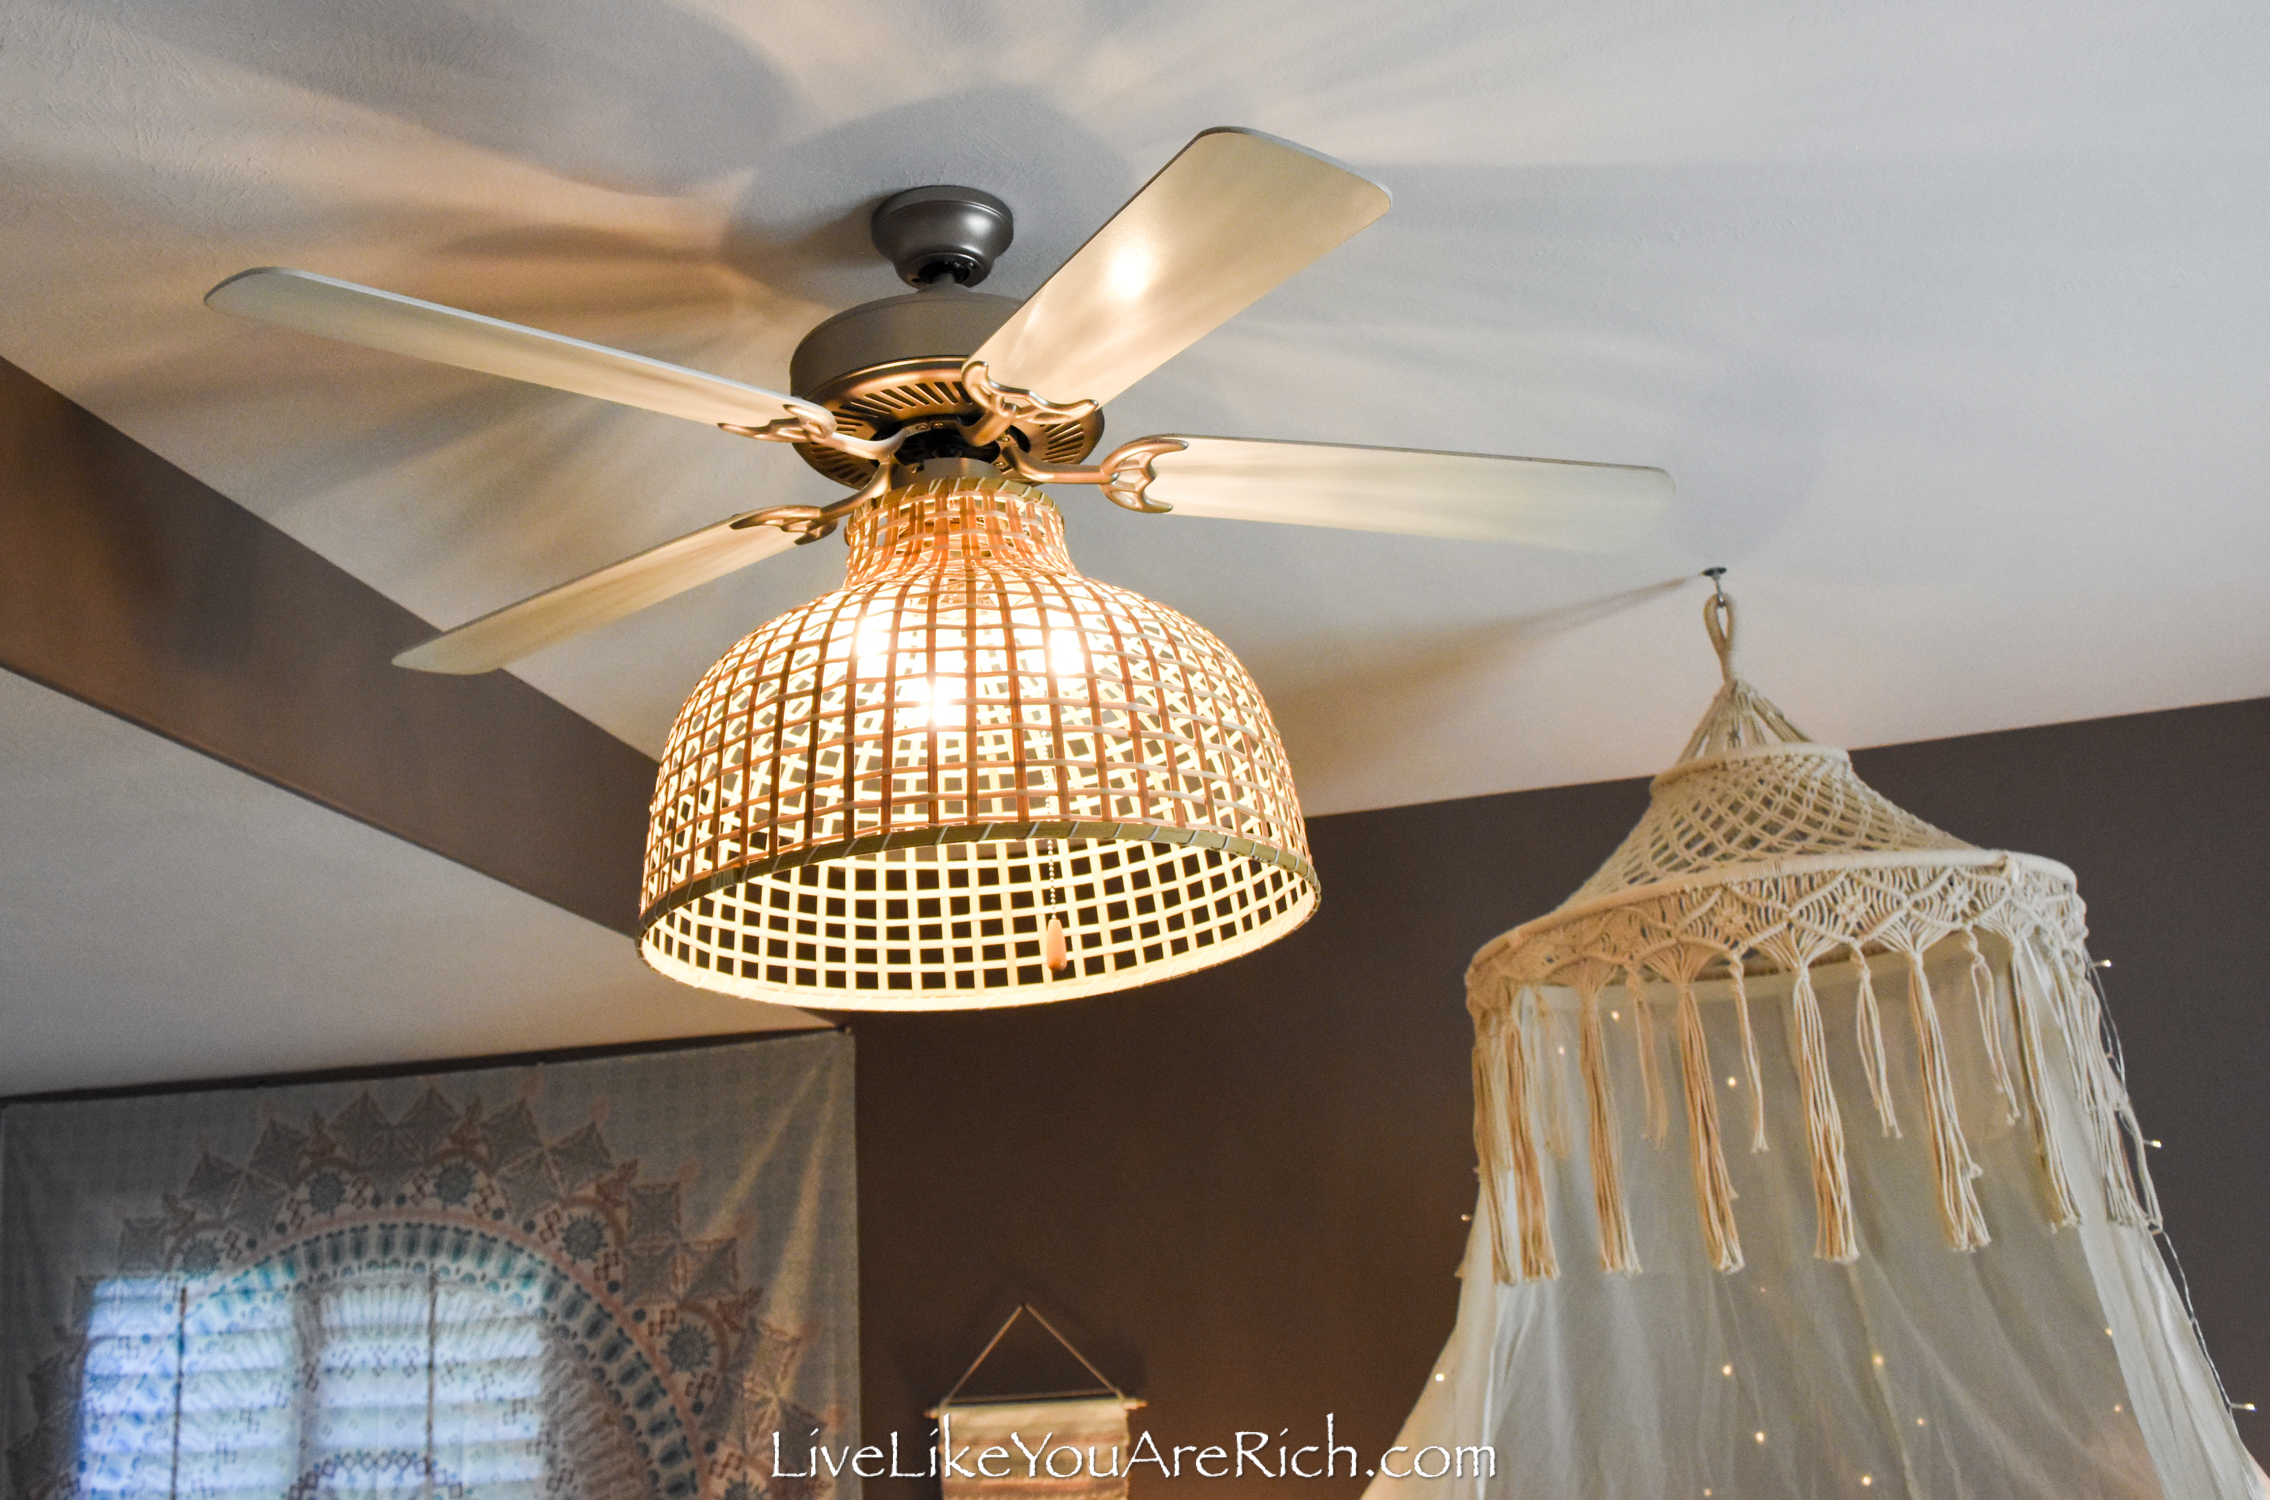
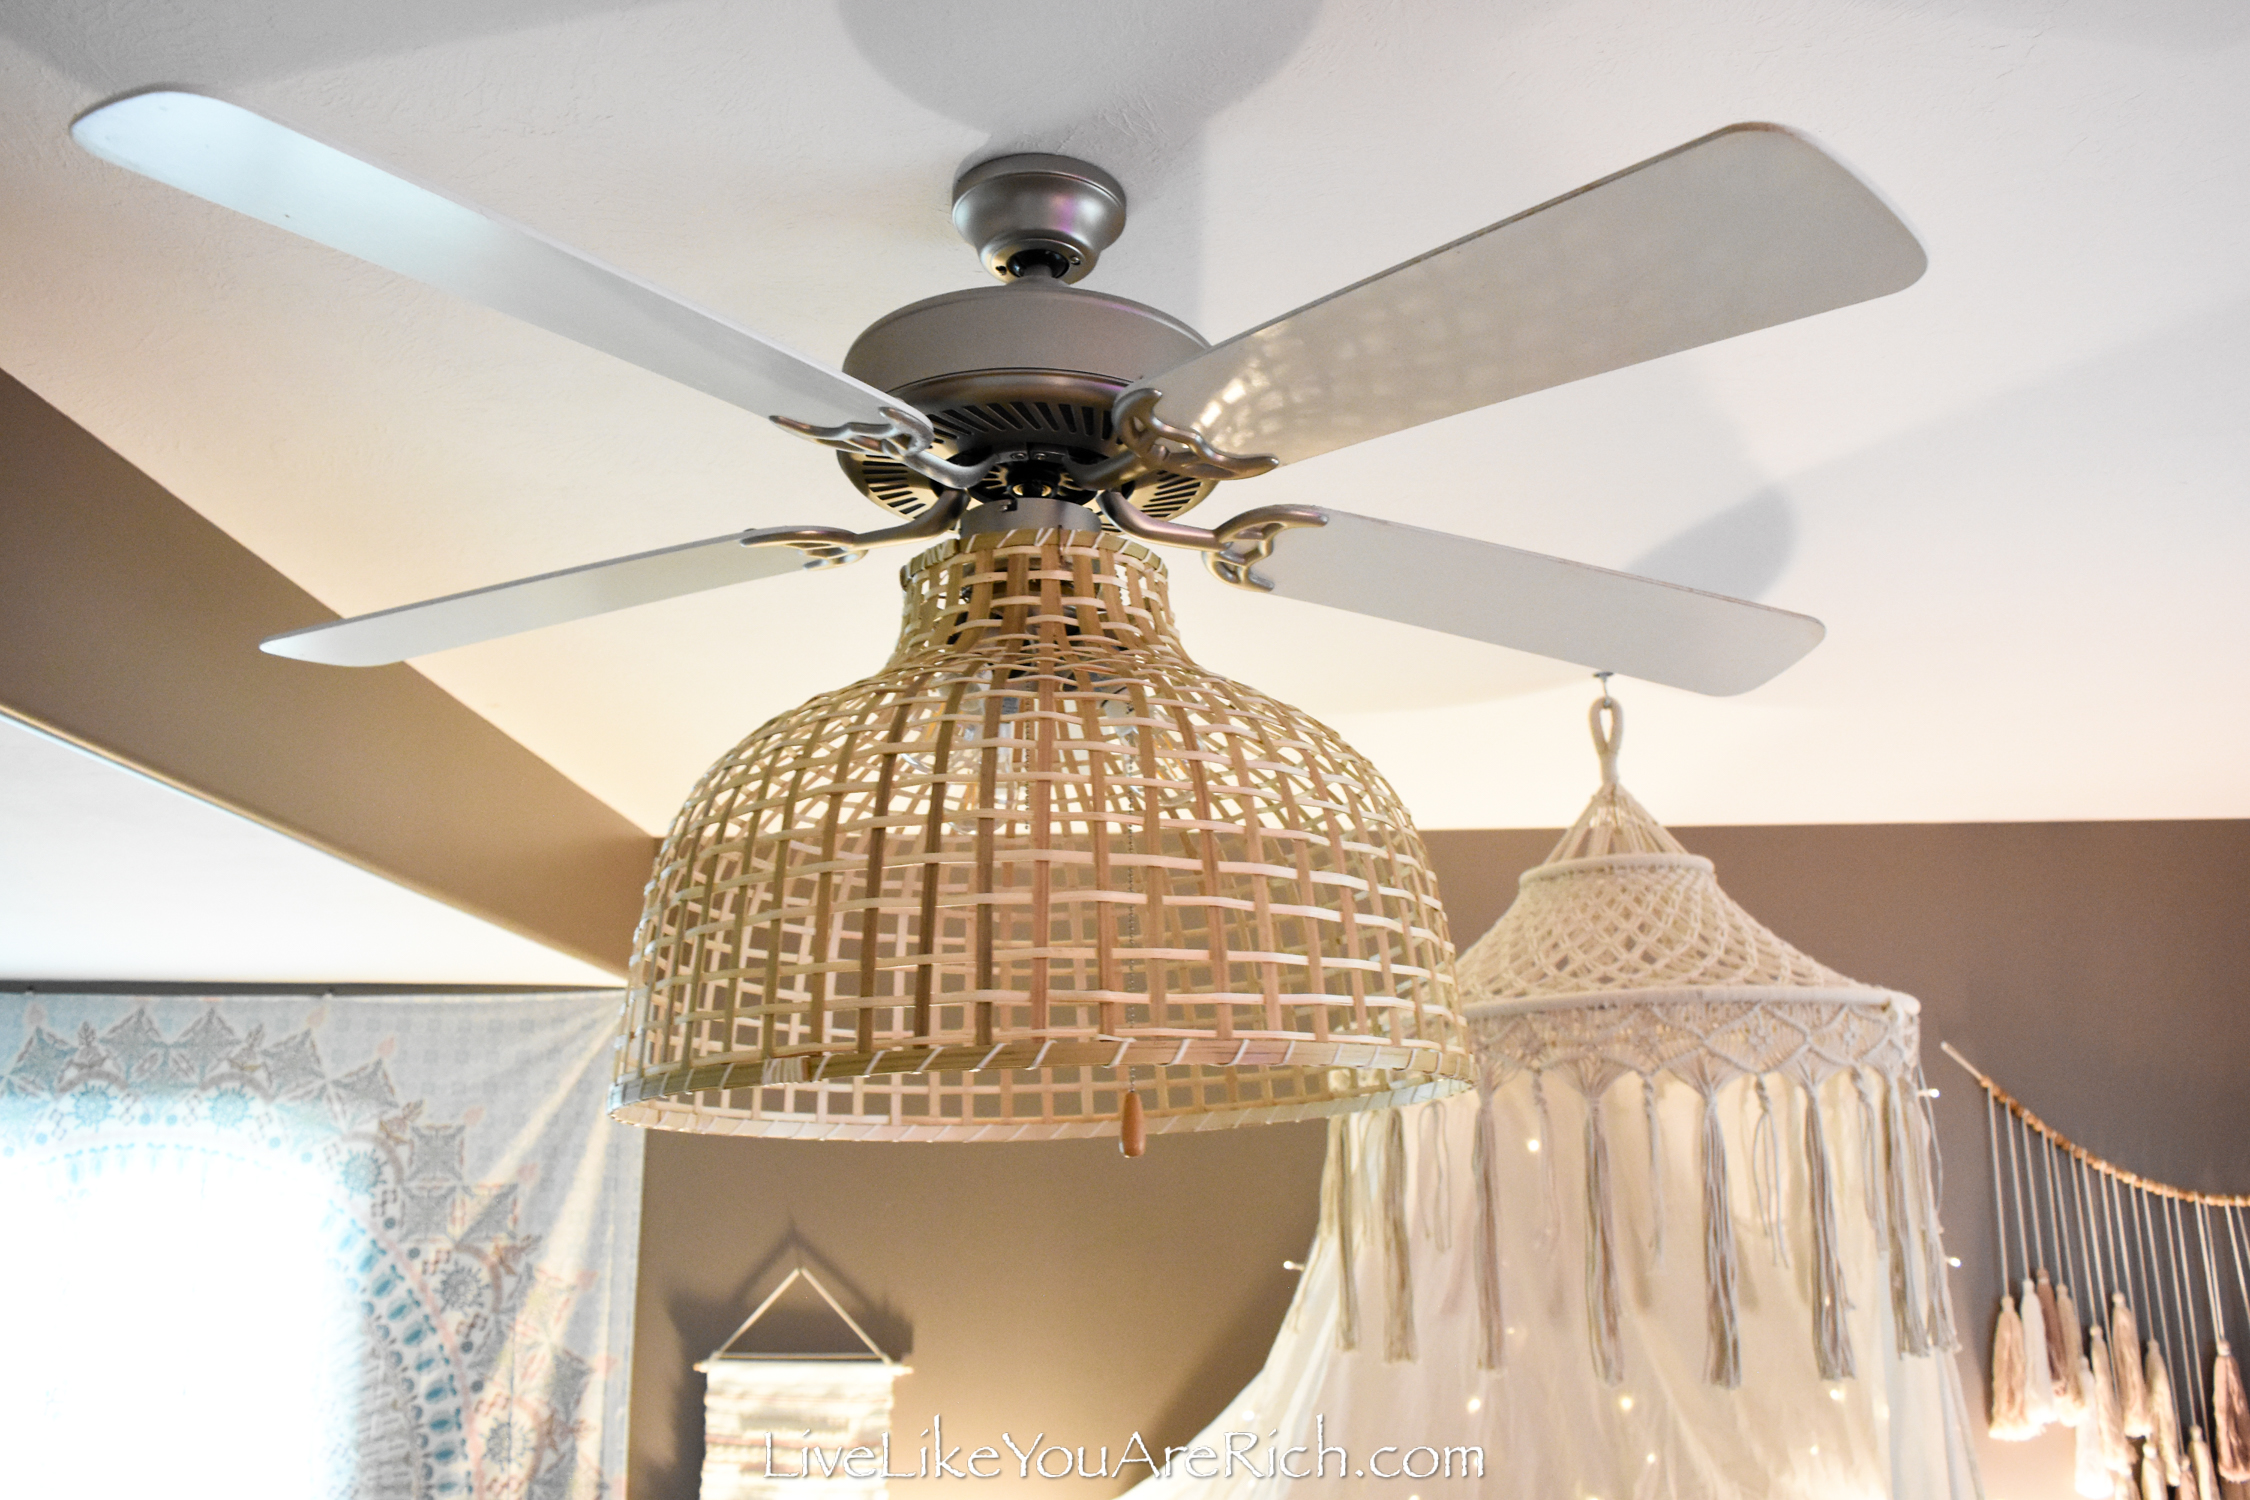
2. Use a large enough fan to be able to fit the lightbulbs that need to go back onto the ceiling fan. I wasn’t sure about my daughter’s boho lampshade but my husband measured and found it would work.
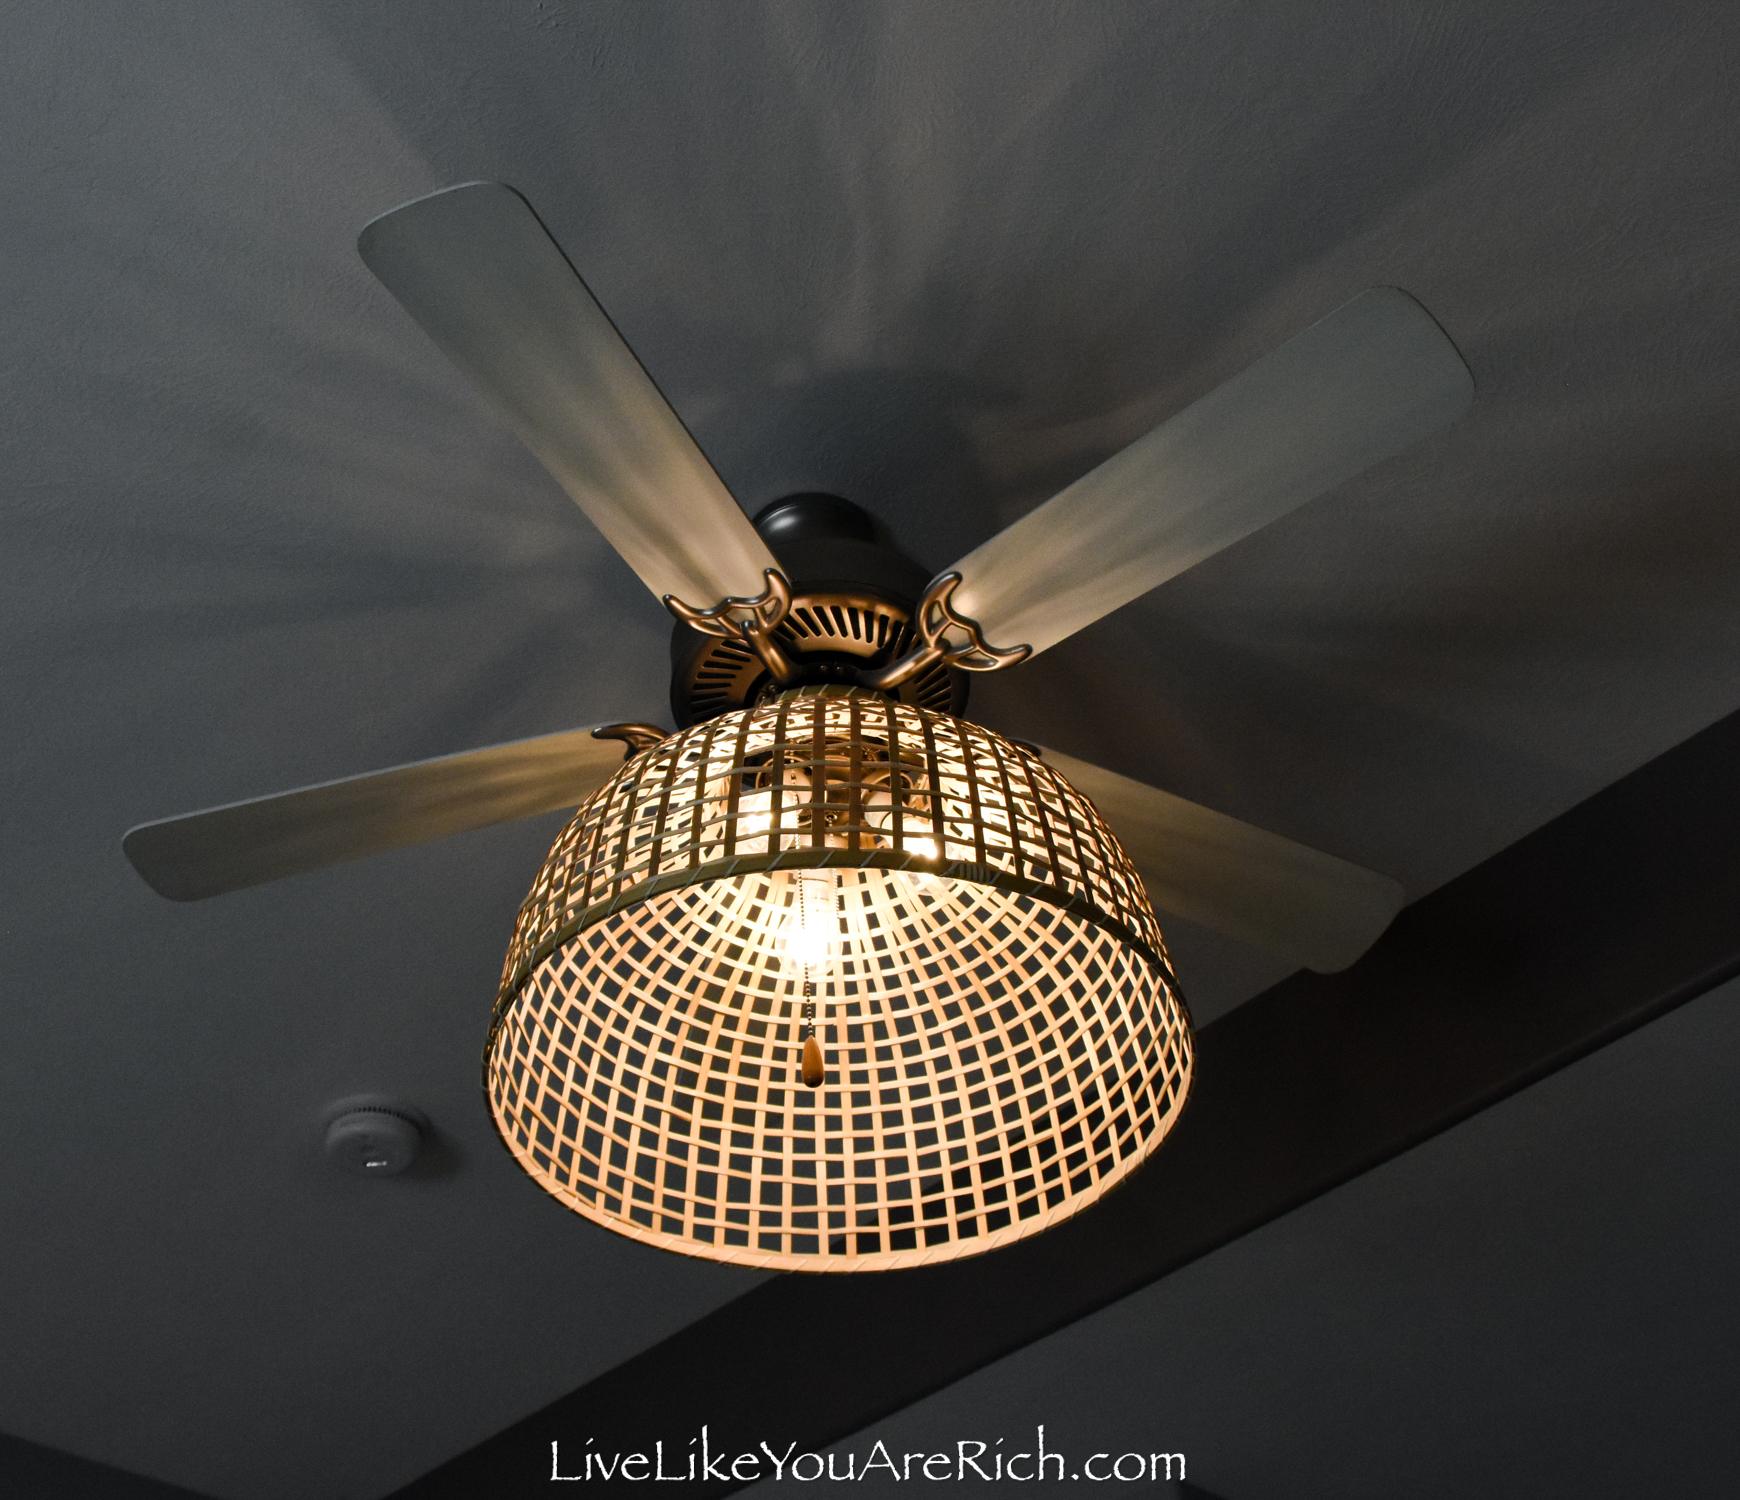
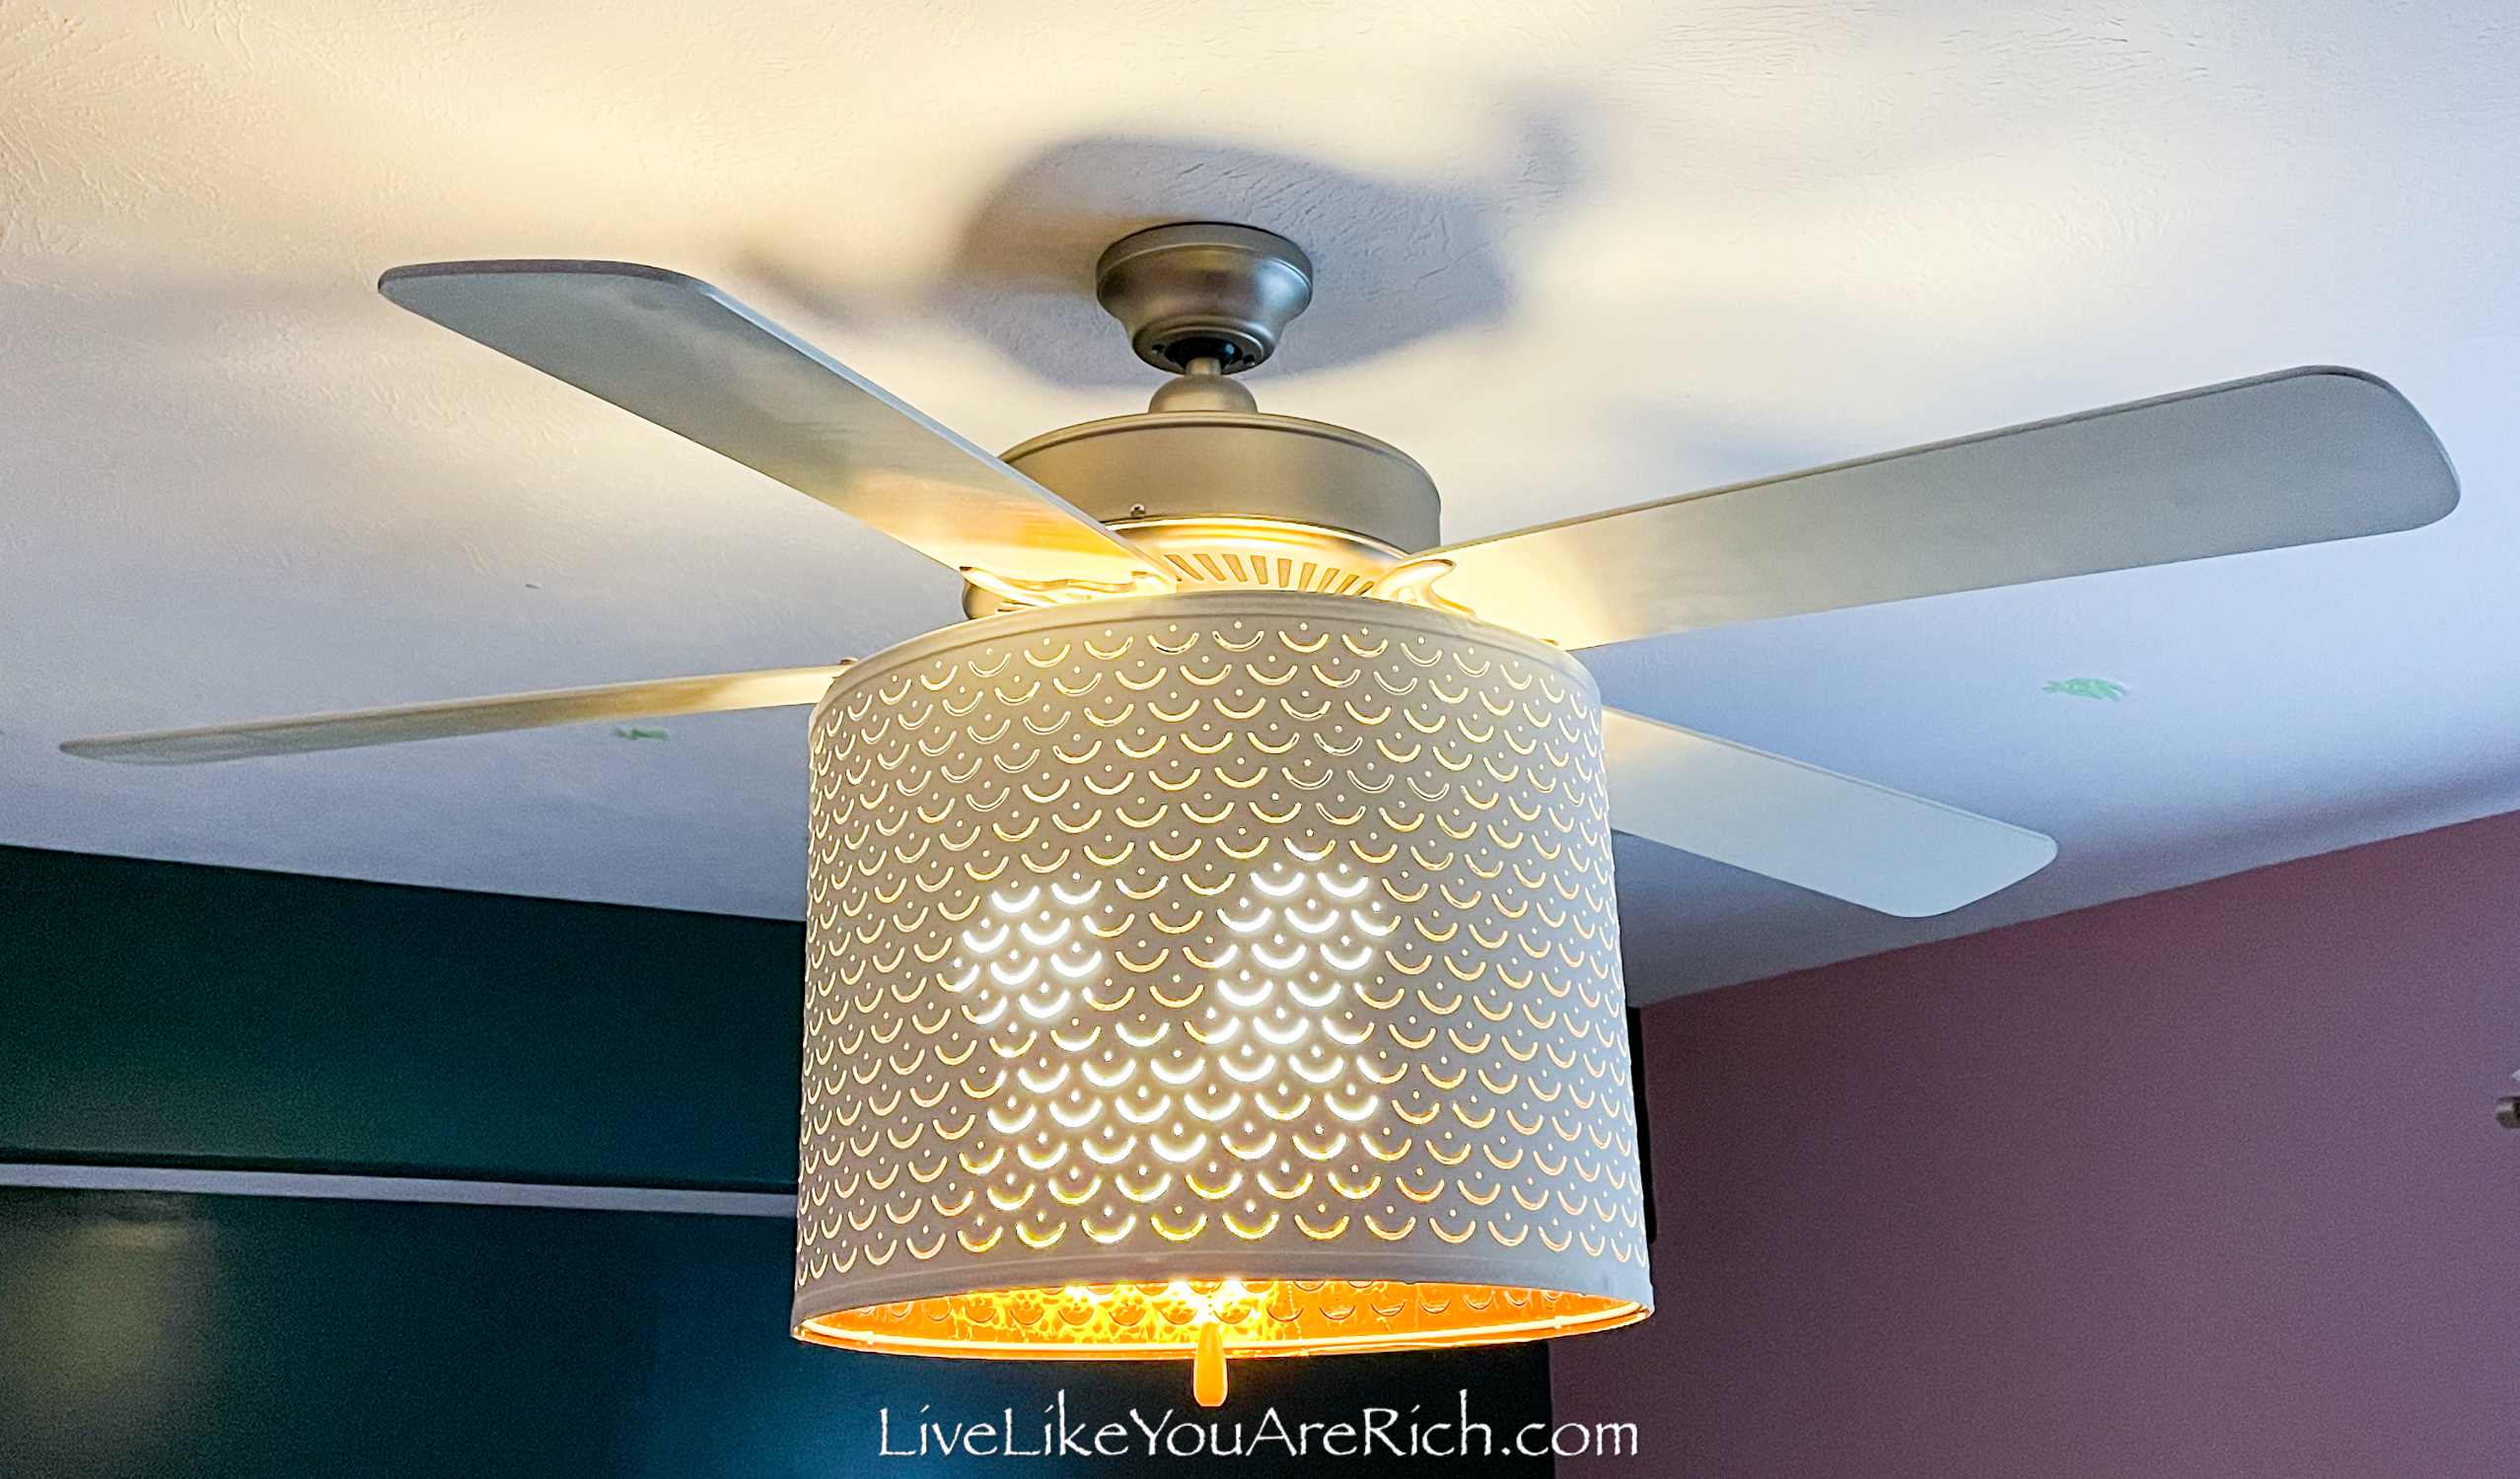
All of these lampshades were purchased from IKEA; I was not trying to do that it just worked out that way.
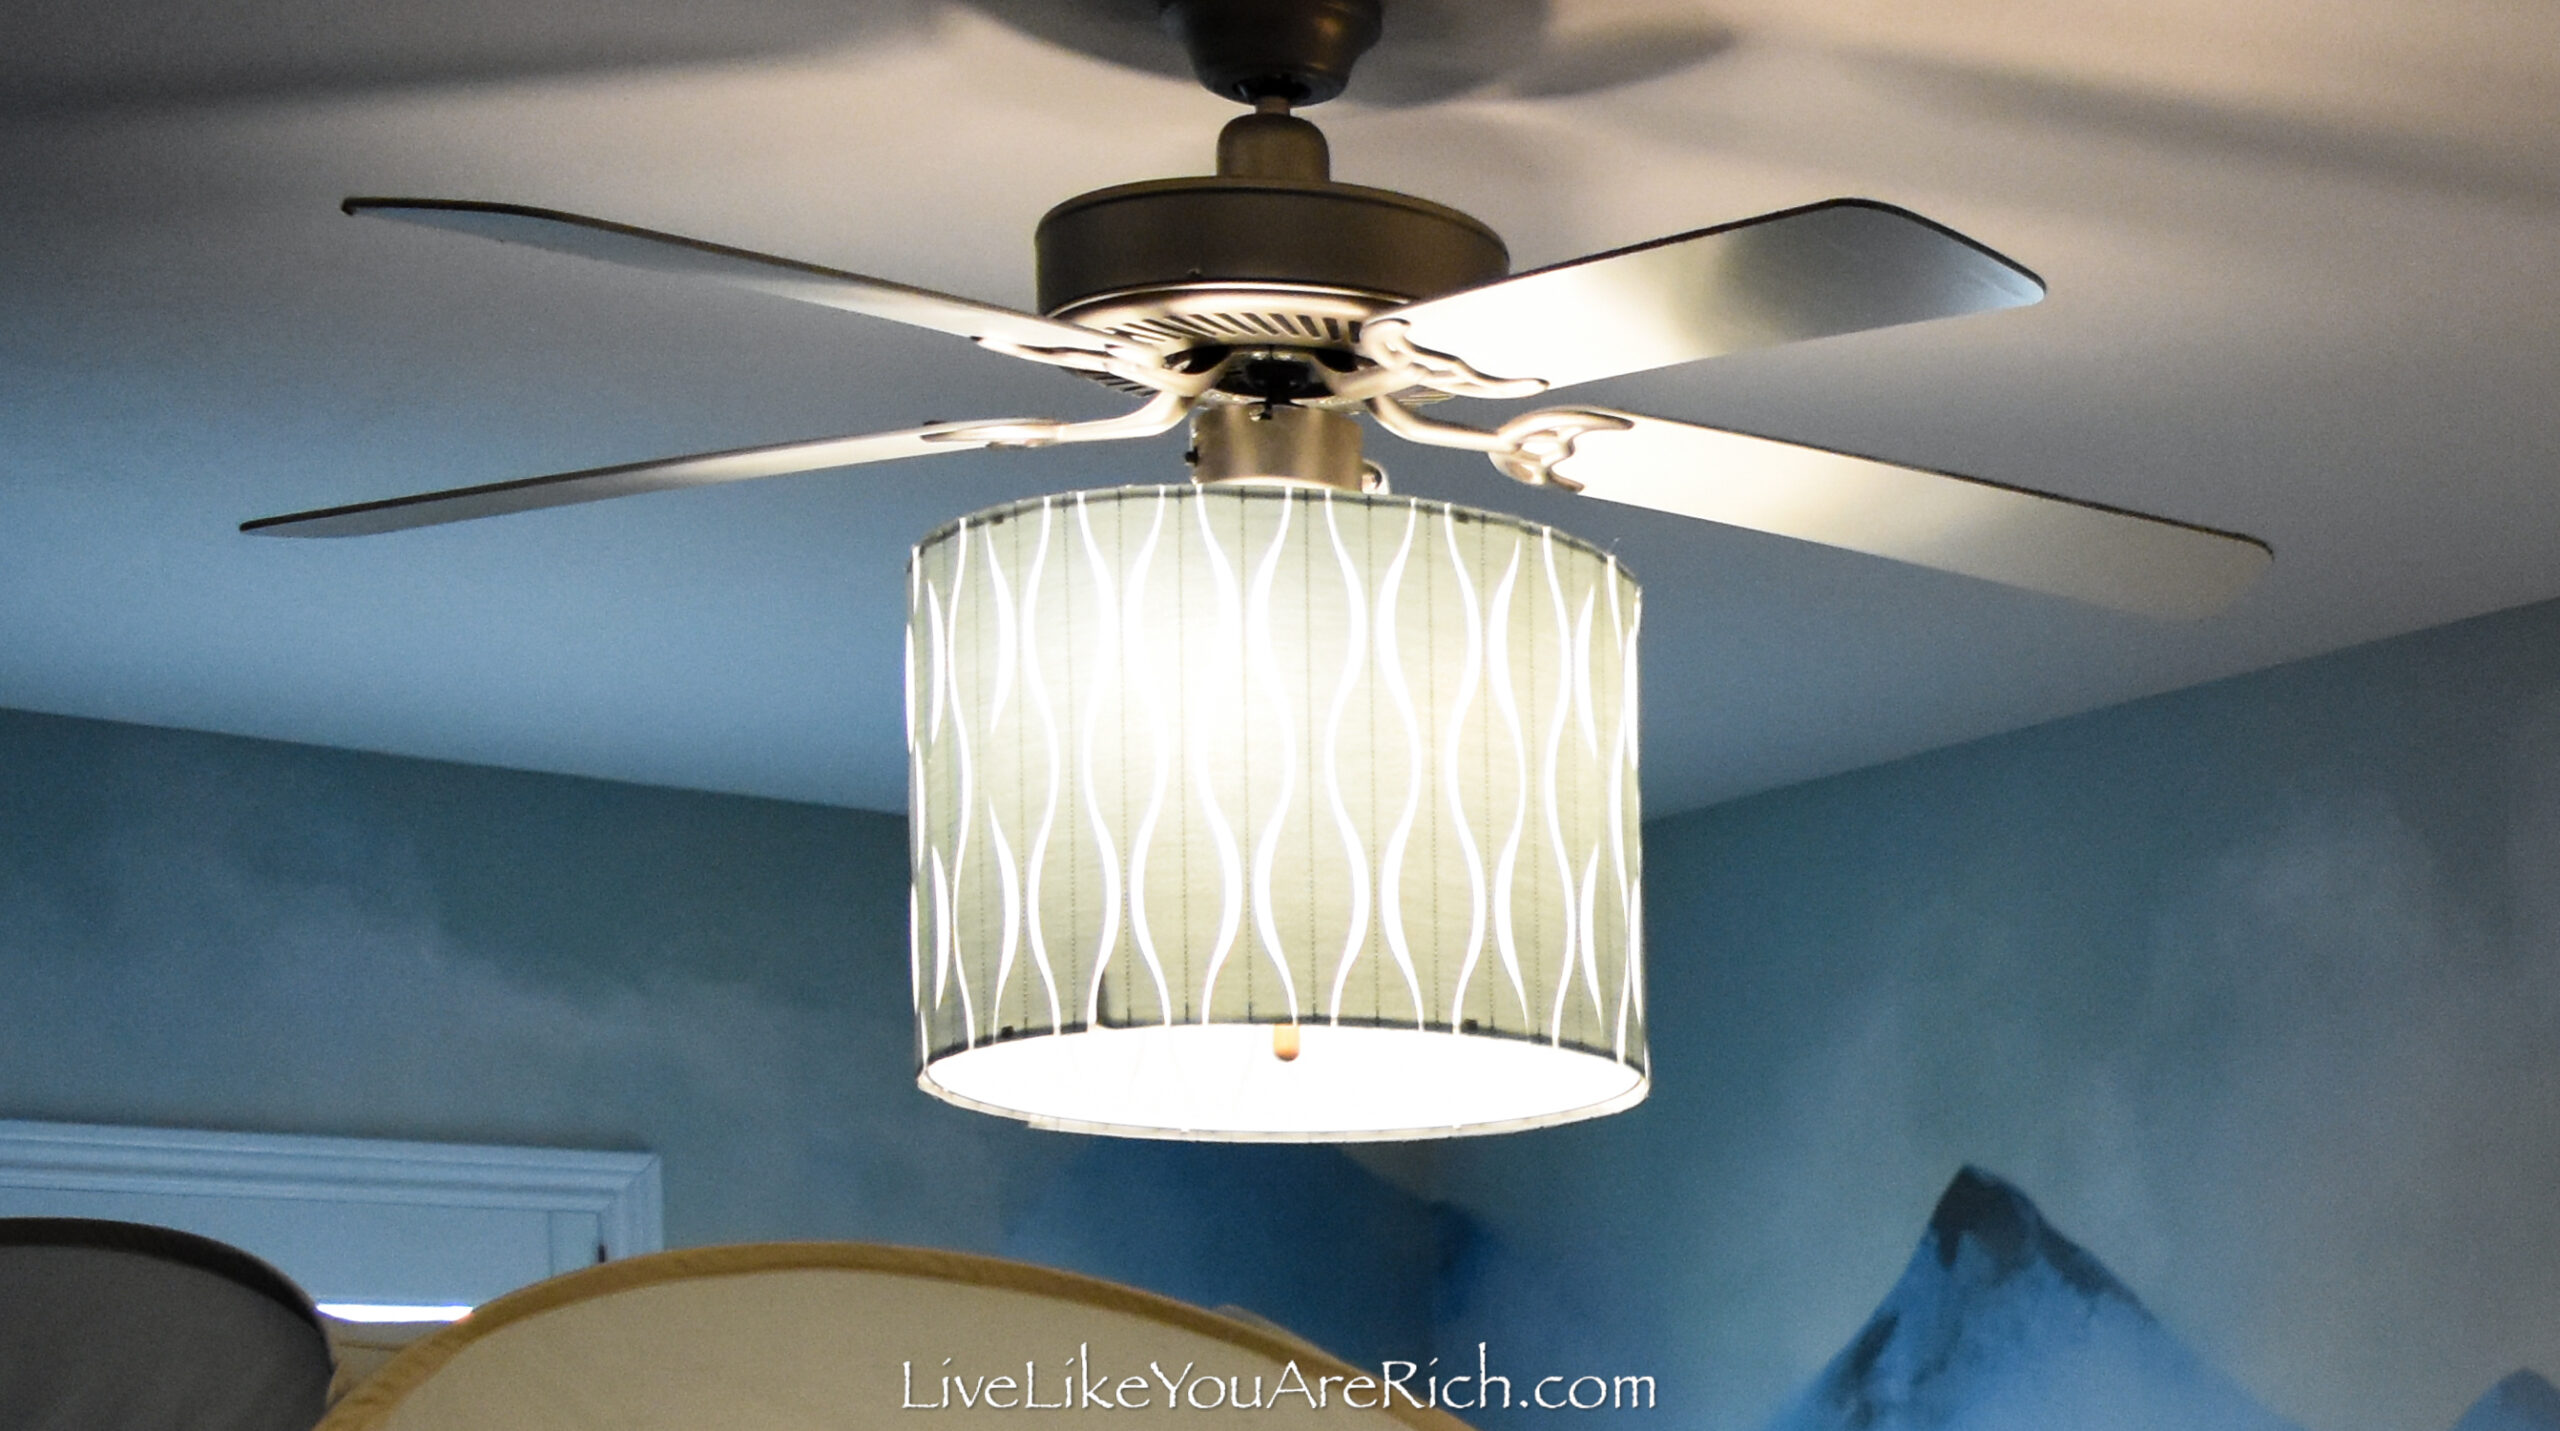
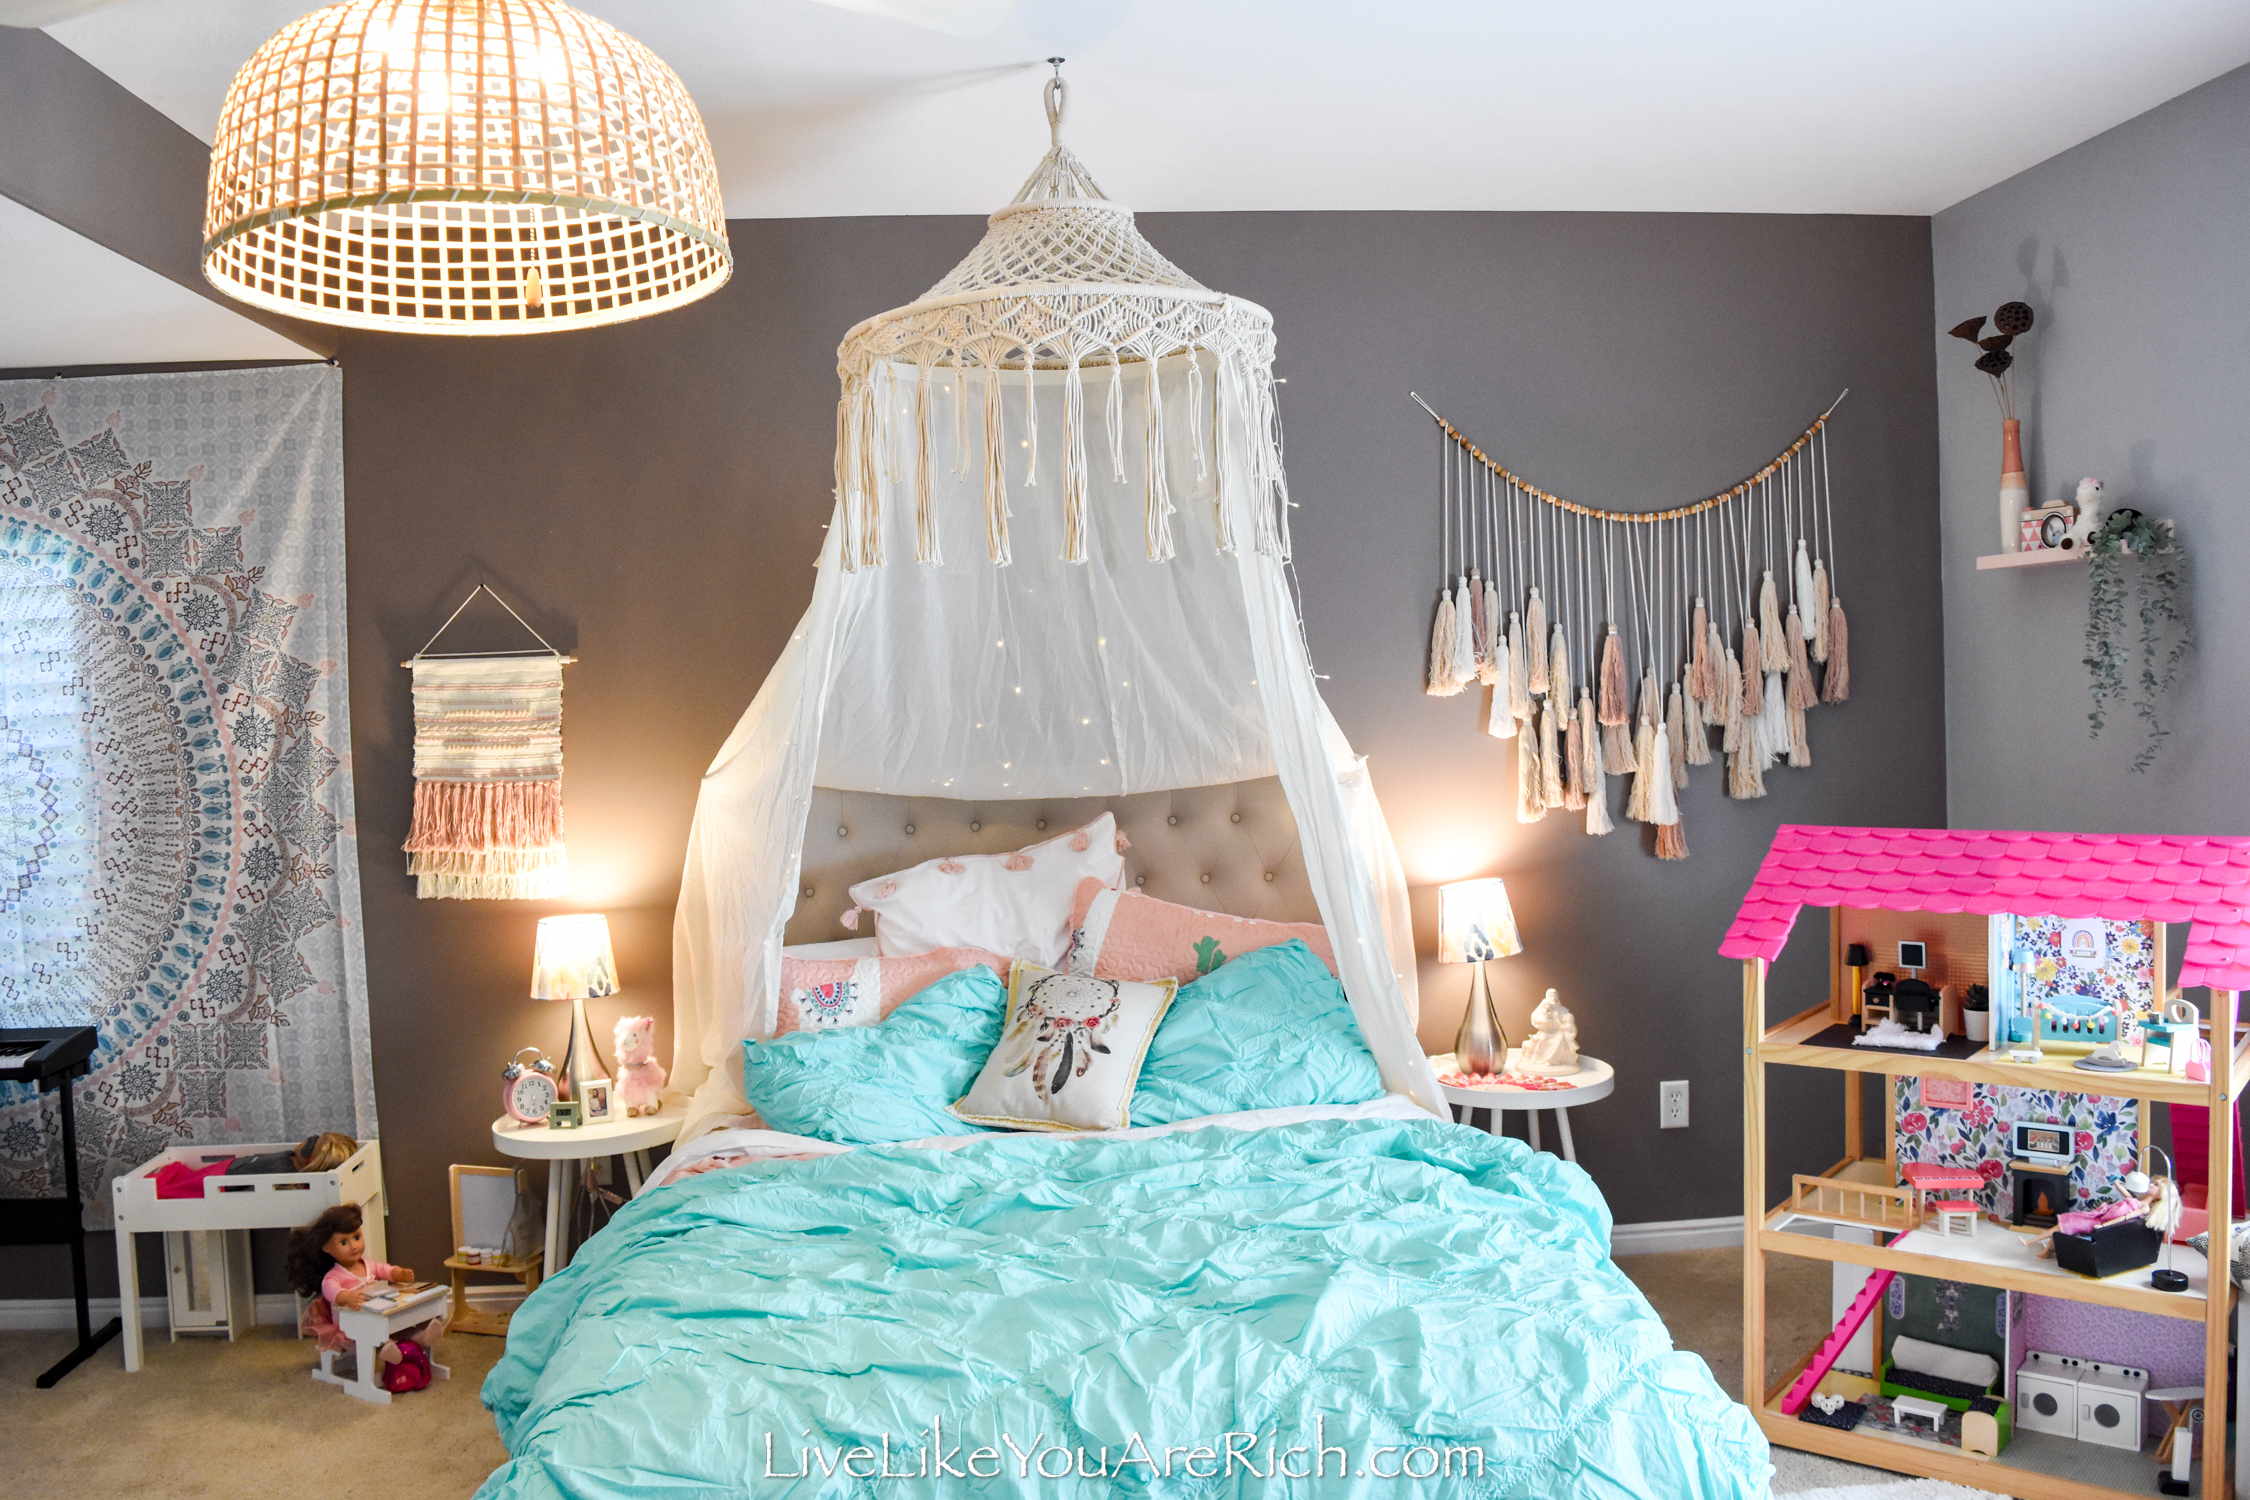
I purchased the GOTTORP Pendant lamp shade, bamboo, 22×15″ for my daughter’s Boho chic room.
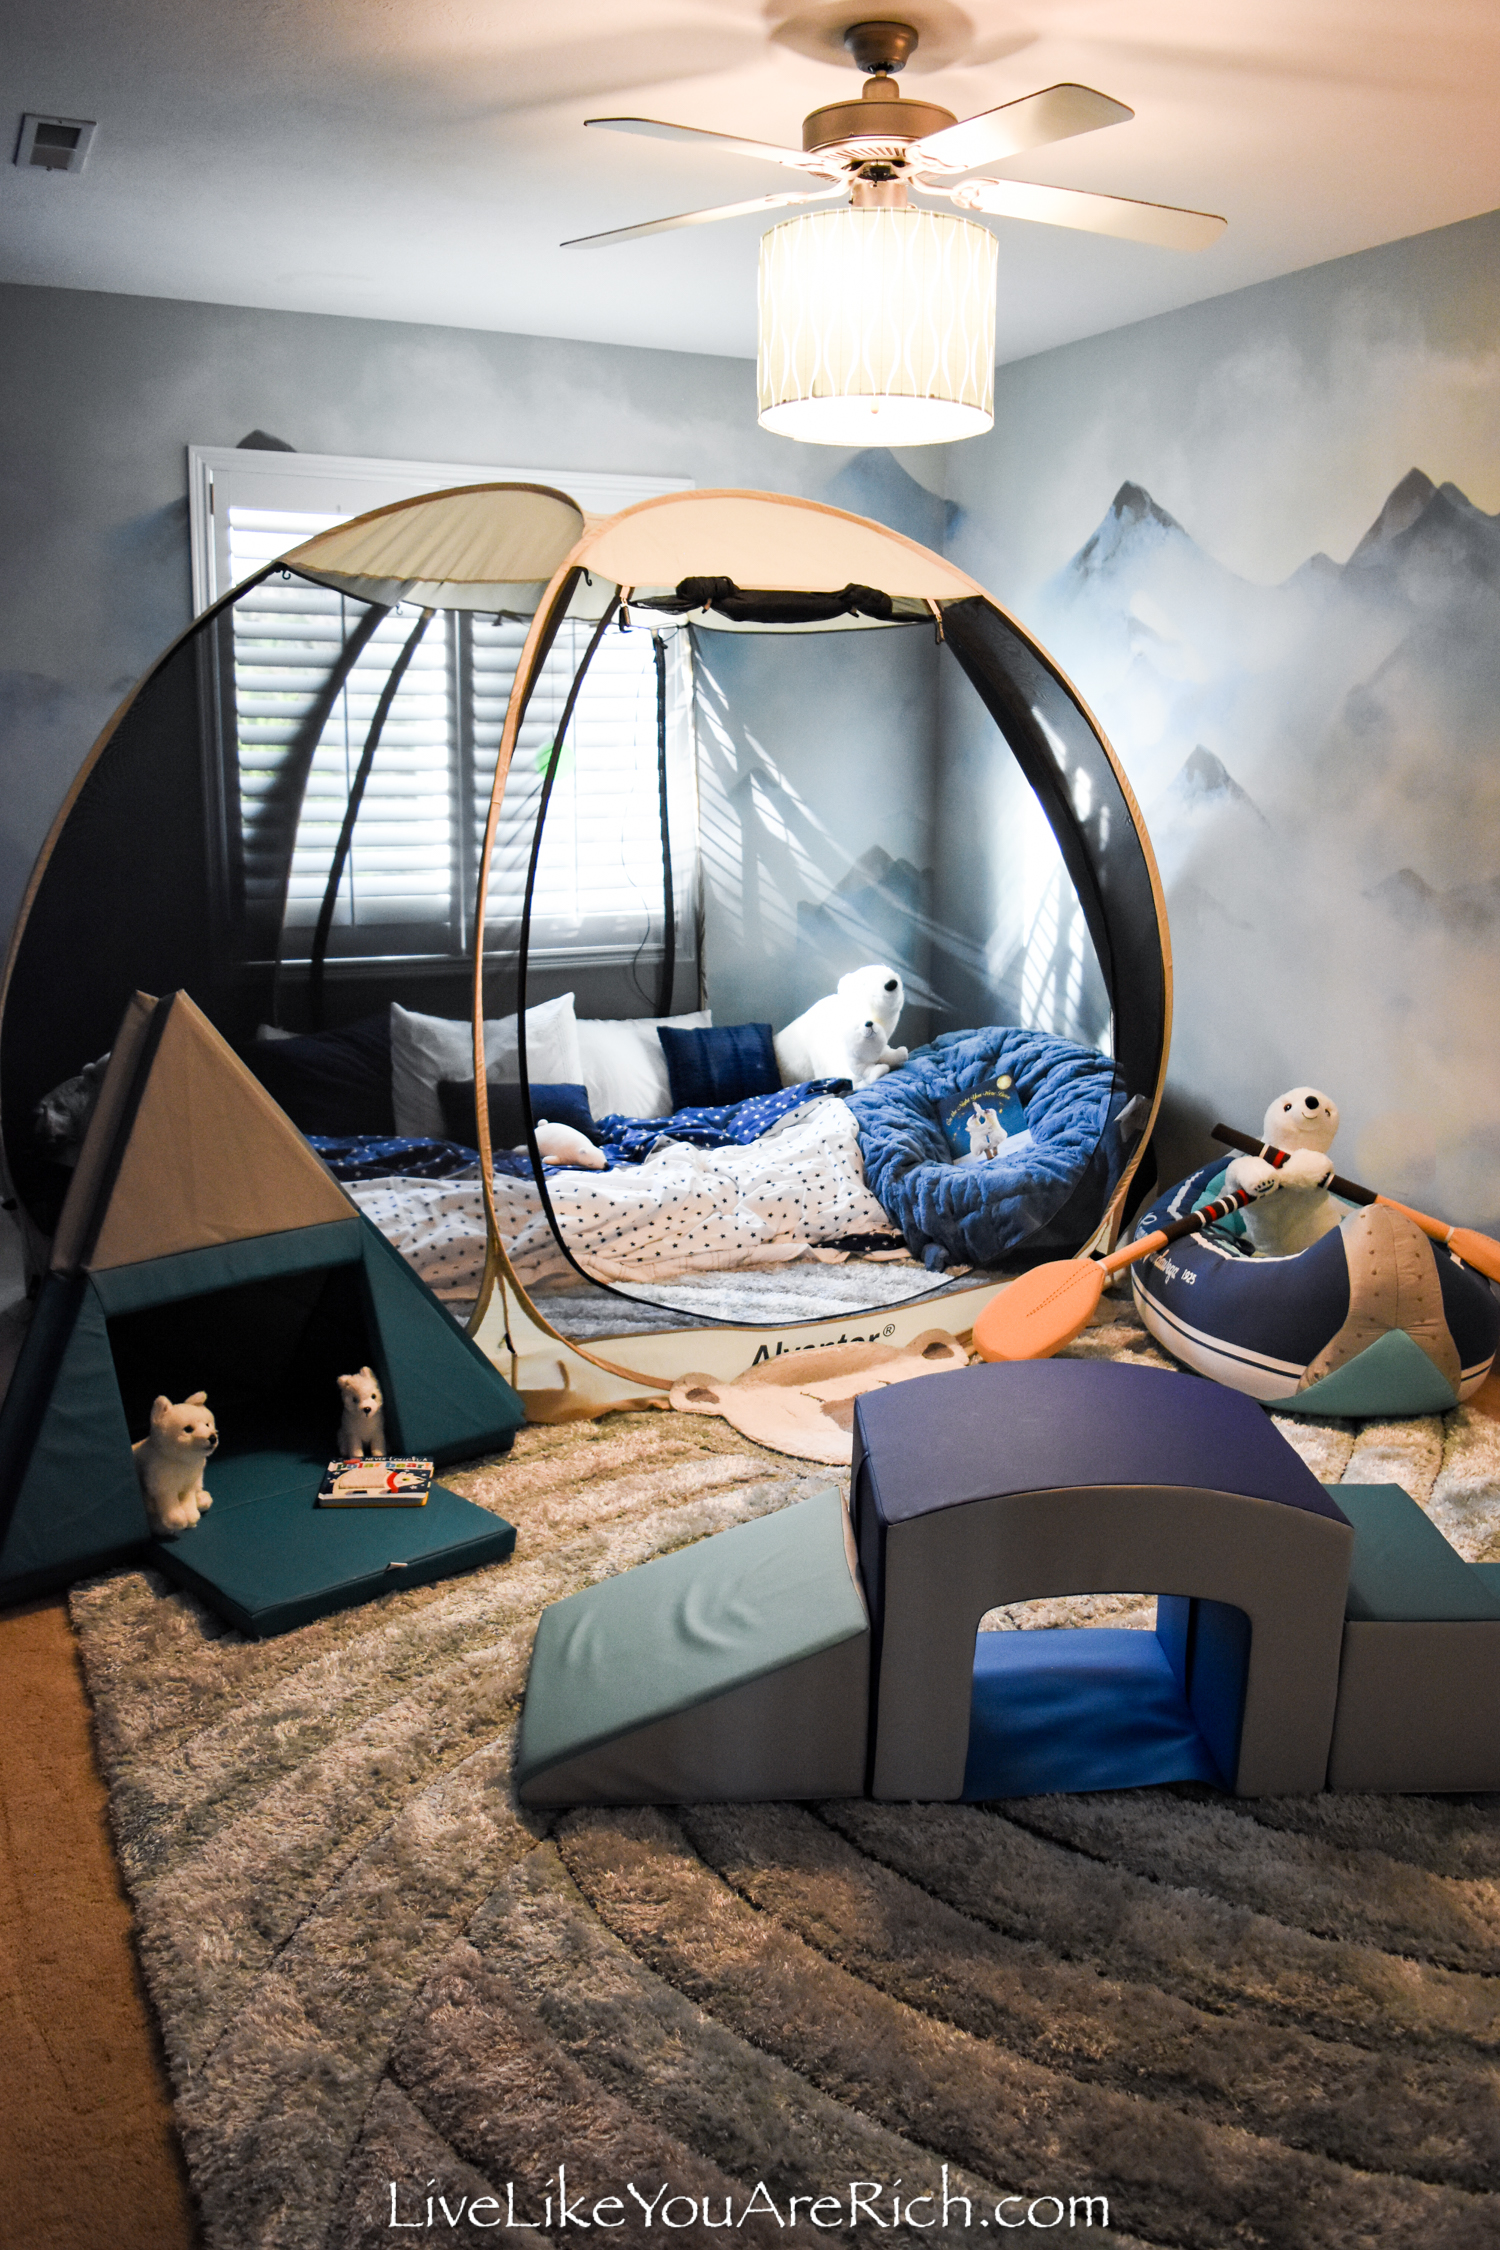
The LÖKNÄSLamp shade, blue/silver color, 17″ was purchased for my son’s Polar Bear Arctic room.
The NYMÖLamp shade, white/brass color, 17″ for my daughter’s Kitty Cat Room (coming soon).
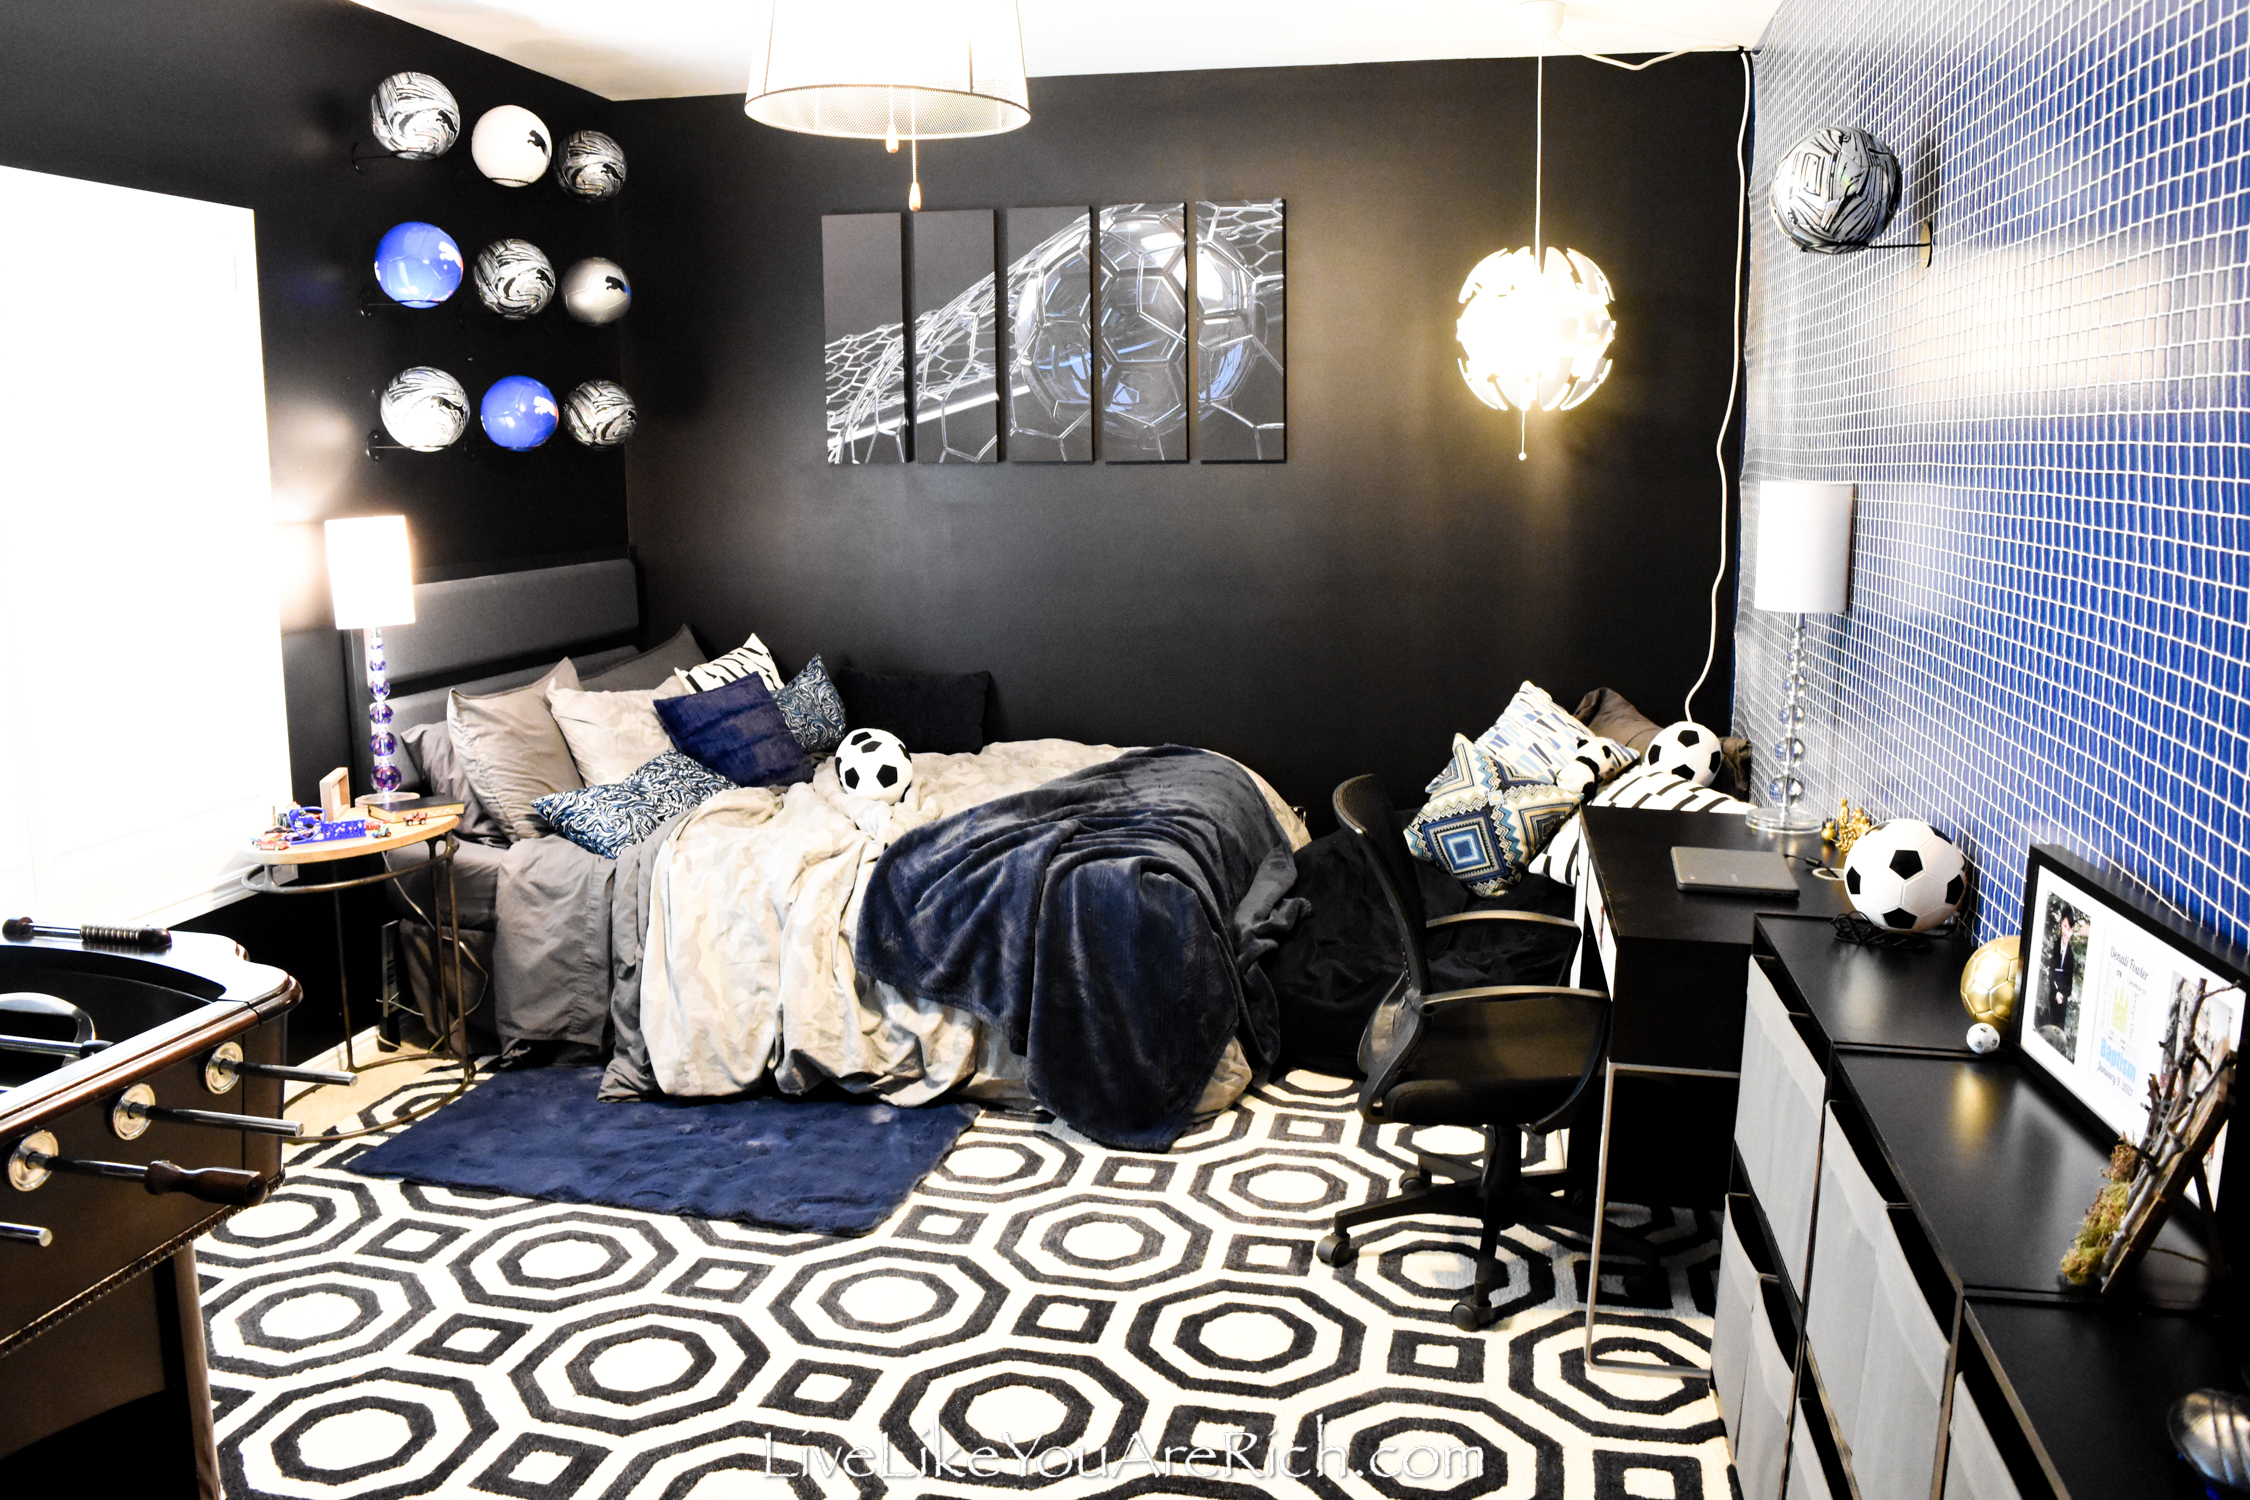
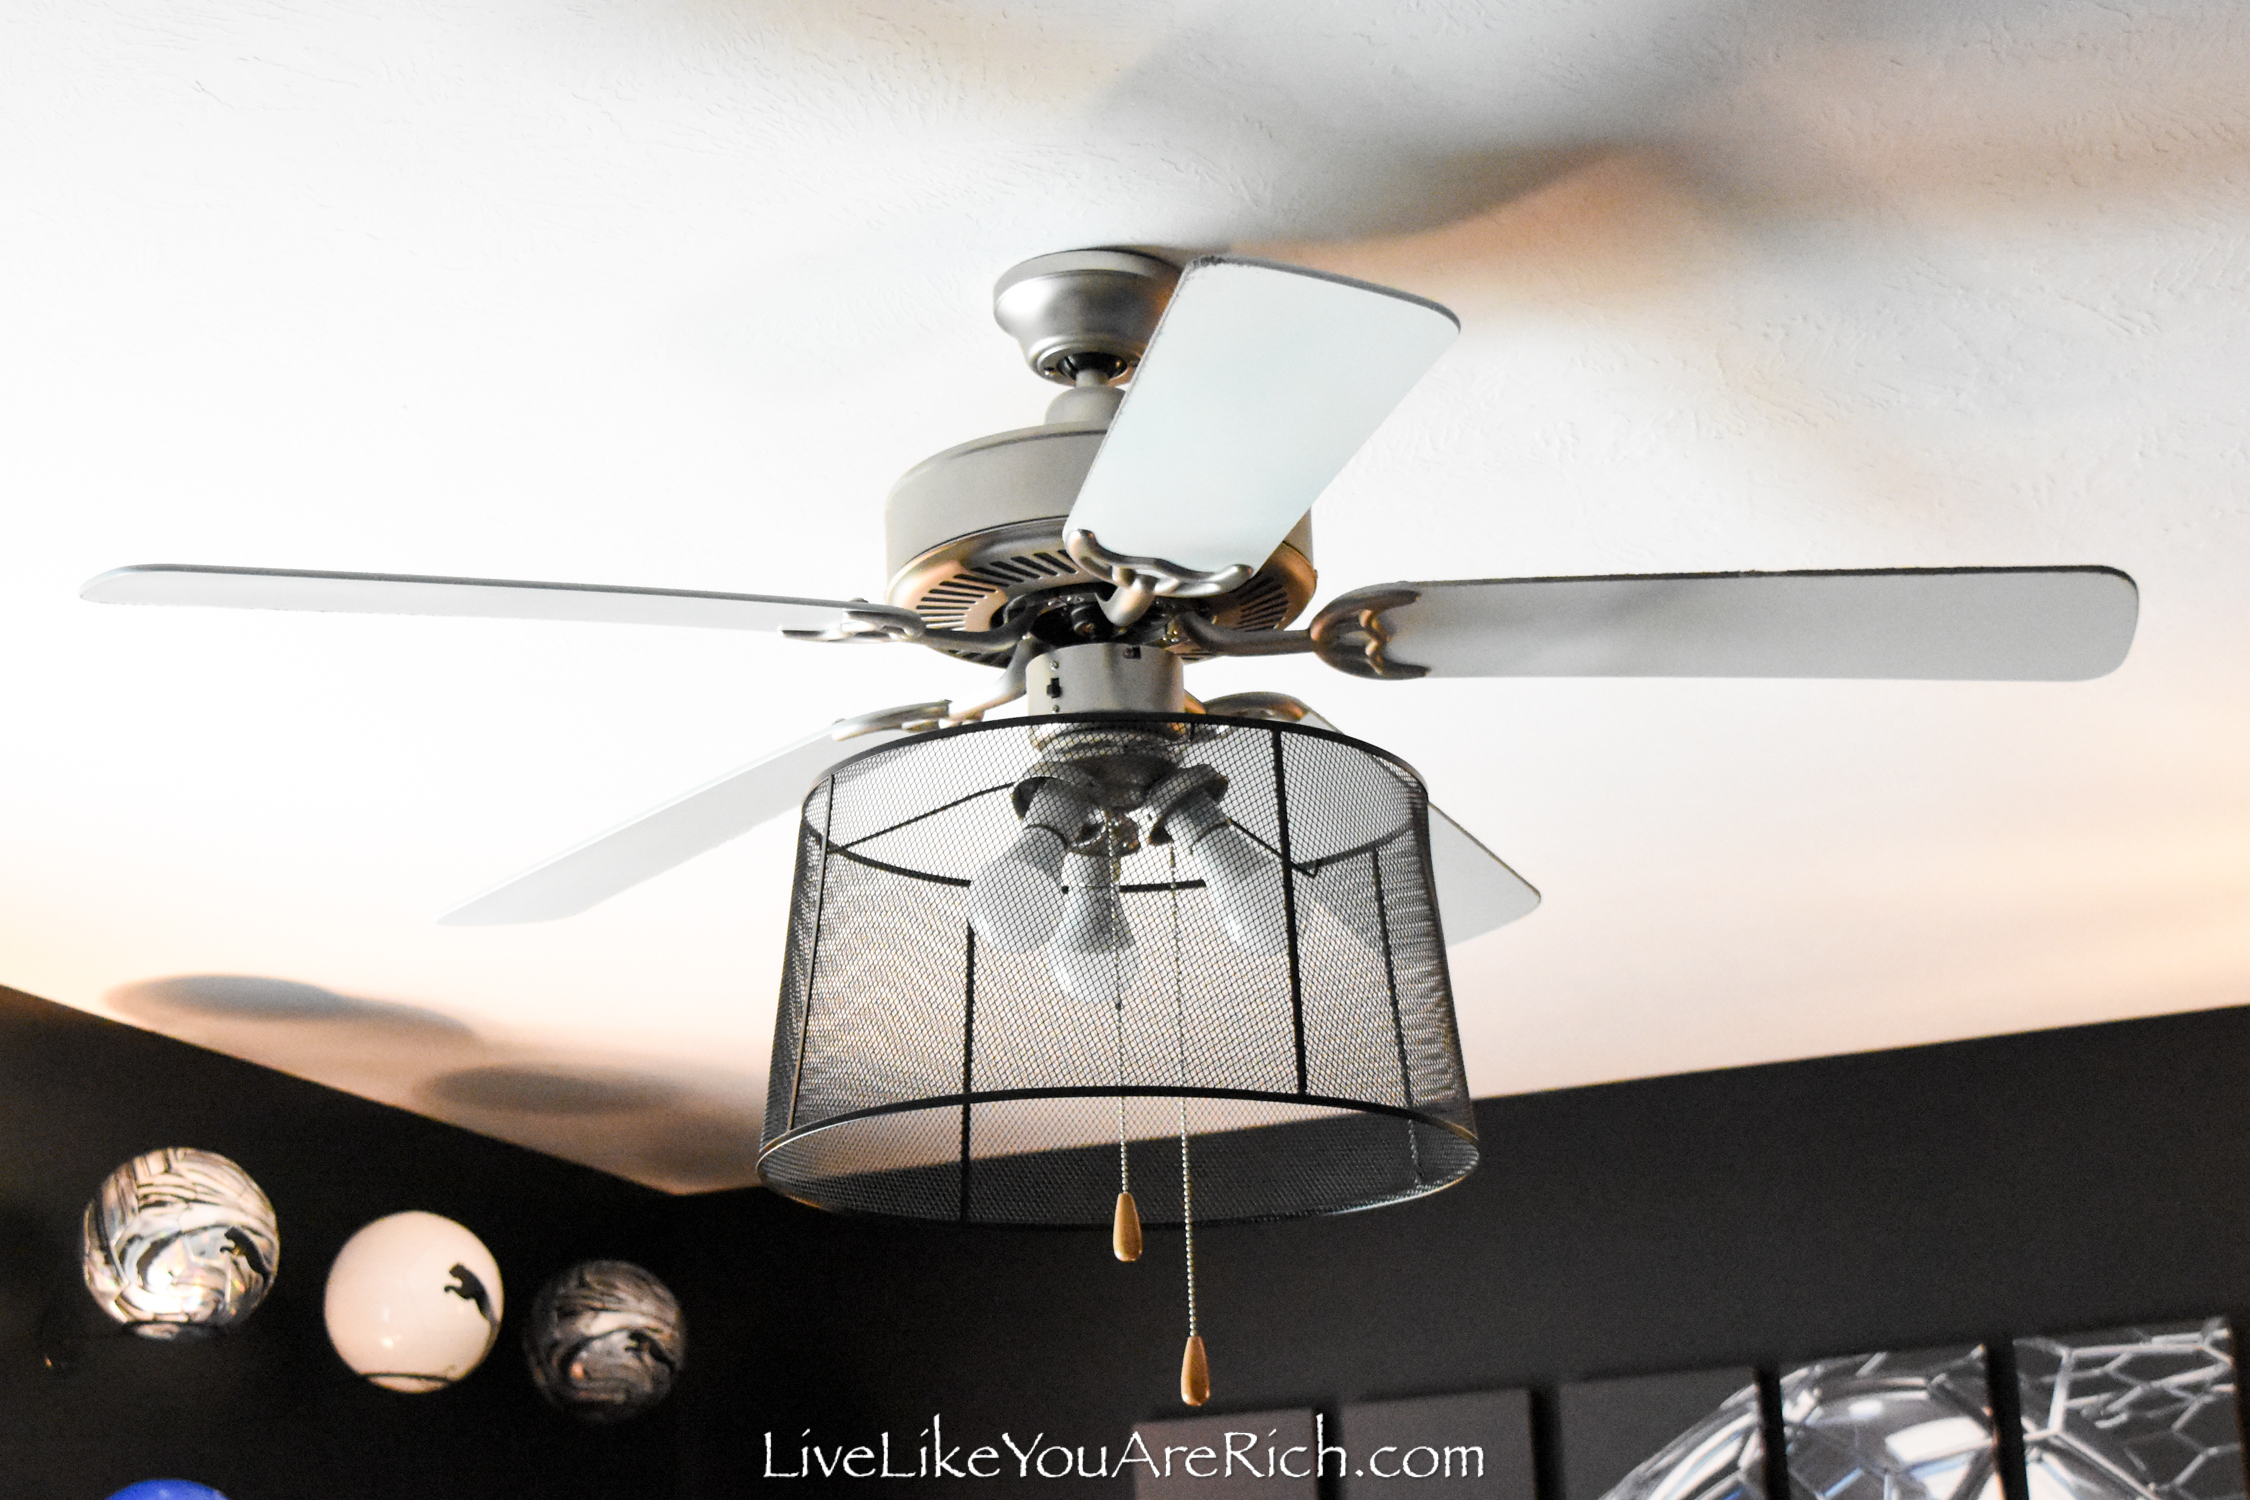
and the FAXSTAD Pendant Lamp Shade ~16″ was used for my son’s Soccer Rocket League Themed Room.
3. Use a lampshade or light fixture that is not too heavy.
You don’t want to add too much weight to the existing fan as it was not originally built to hold it. Aim to use a lampshade that is only a few pounds.
Update: We have been using these lights/fans for two years without any issues at all.
The stability and build quality look as if this upgrade/alteration should last throughout the life of the fan.
Despite being modified this change should not affect the function or life of the ceiling fan.
I hope this tutorial and video help to show you How to Upgrade an Old Ceiling Fan easily and inexpensively as well.
If you have any questions or comments, please leave them below.

For other ‘rich living tips’ please Subscribe Here or connect with me on these other platforms: