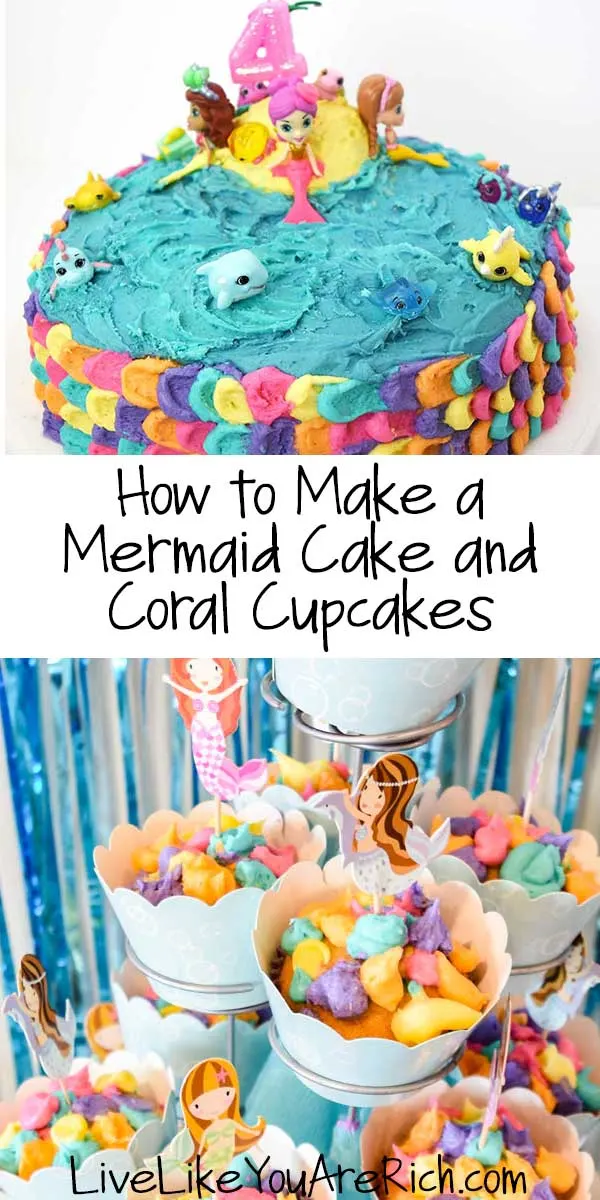
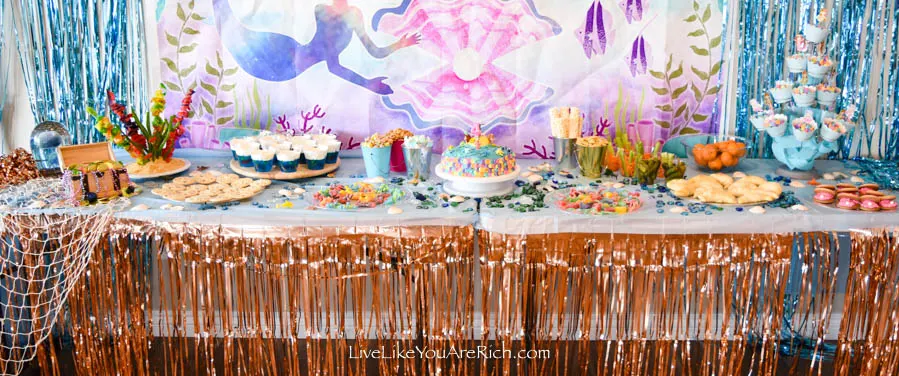
How to Make a Mermaid Cake and Mermaid Coral Cupcakes
For my daughter’s fourth birthday party we did a mermaid theme. I made a mermaid cake and coral cupcakes and have been asked how. It’s very easy. I am not an expert at making and icing cakes (I still use box mixes!) and was able to do this with ease. Here is How to Make a Mermaid Cake and Mermaid Coral Cupcakes.
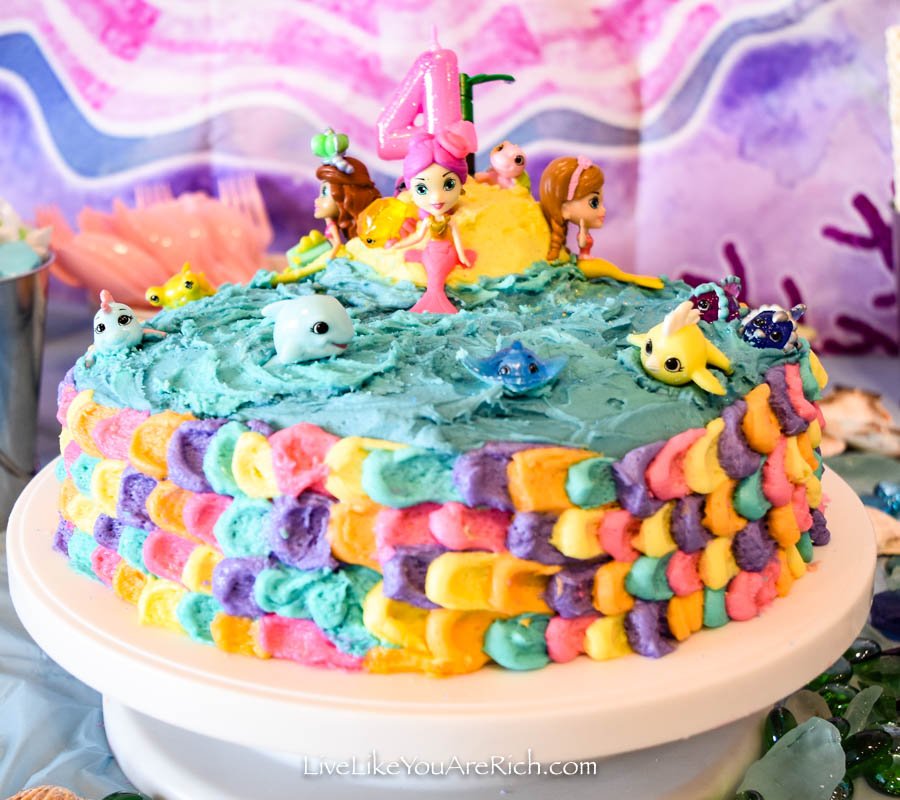

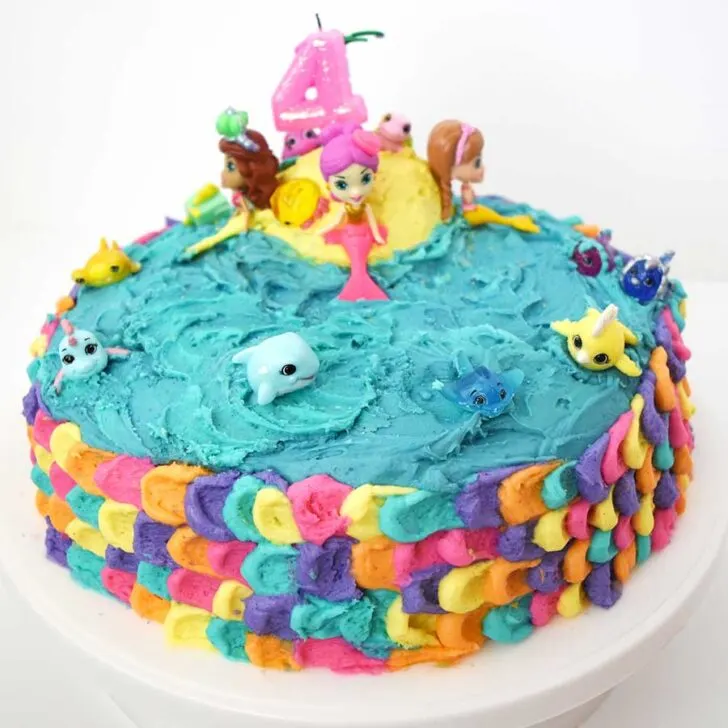
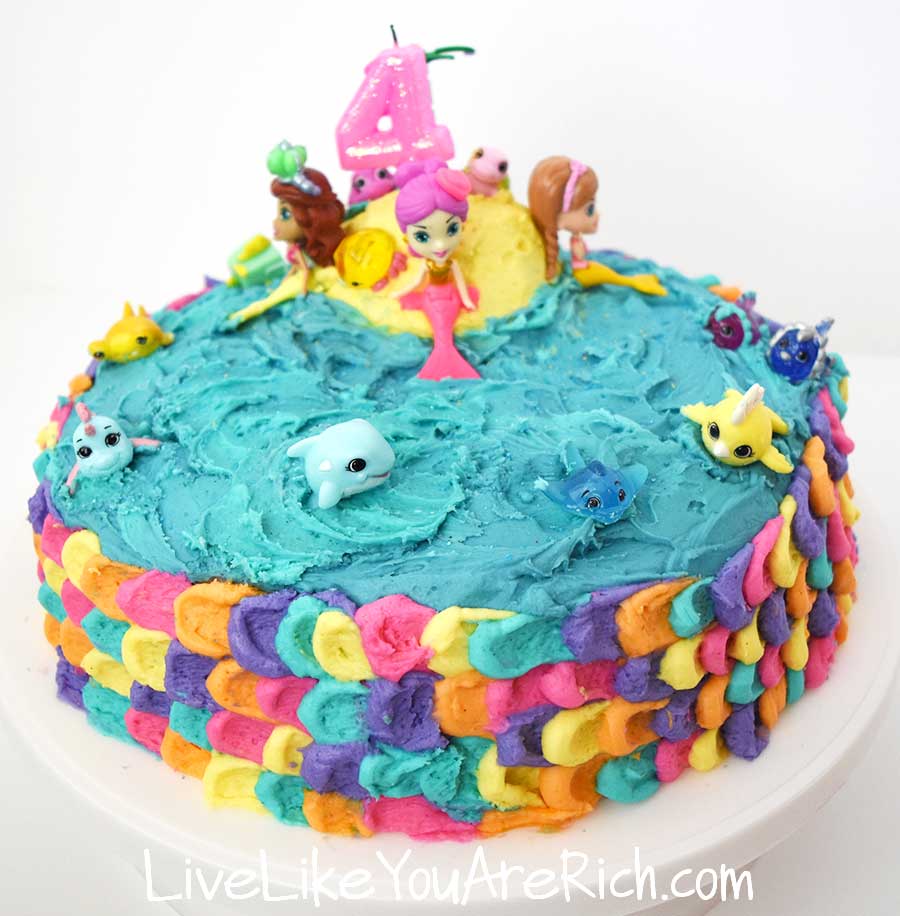
This mermaid cake was made of one Funfetti box mix cake in two 8 inch round pans or one 8-10 inch round springform pan and baked slightly longer. I used a springform pan for the whole cake mix.
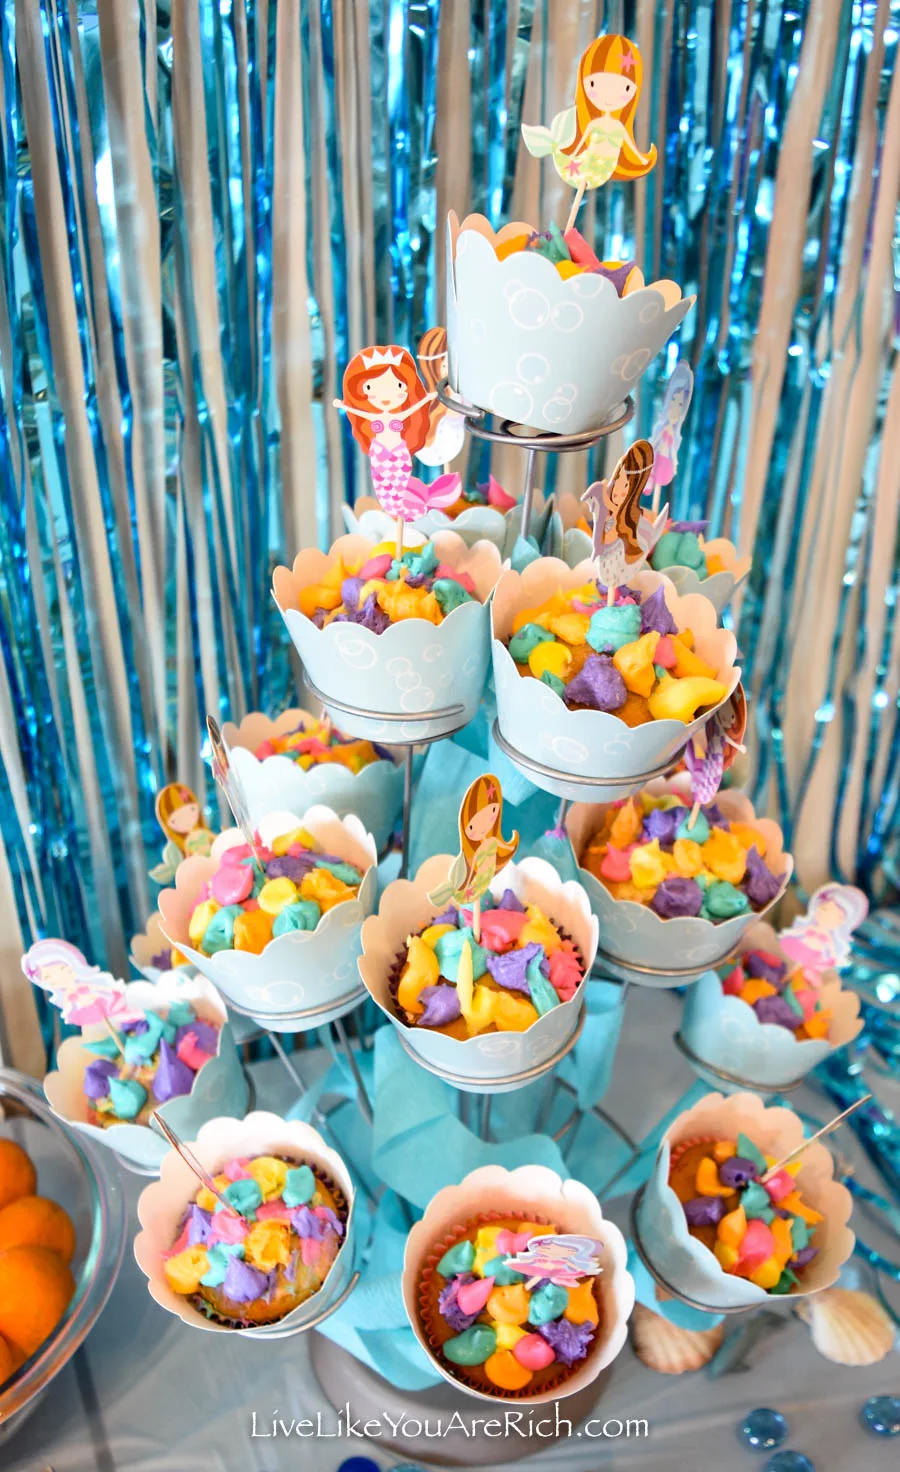
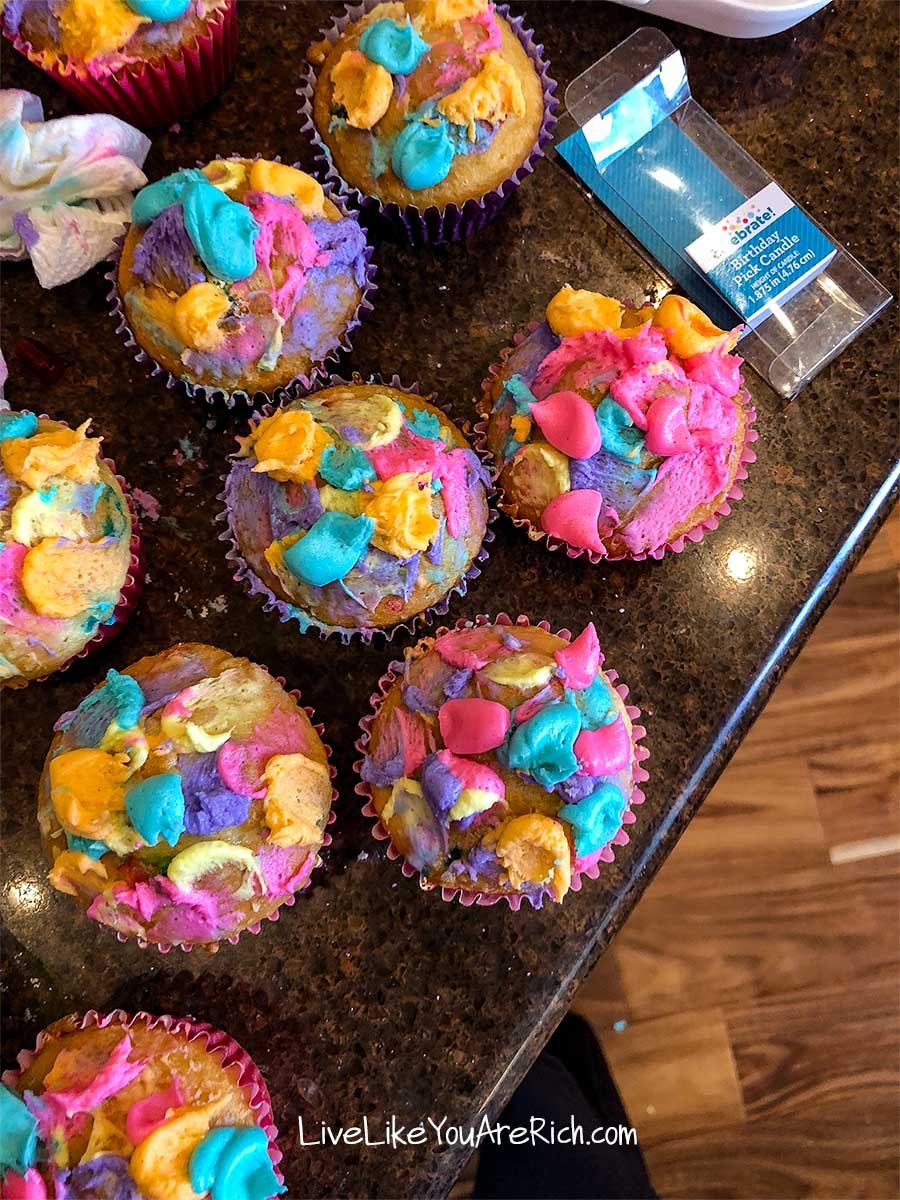
The coral cupcakes are also made with one box of Funfetti box mix cake in 2- 12 cupcake/muffin tins

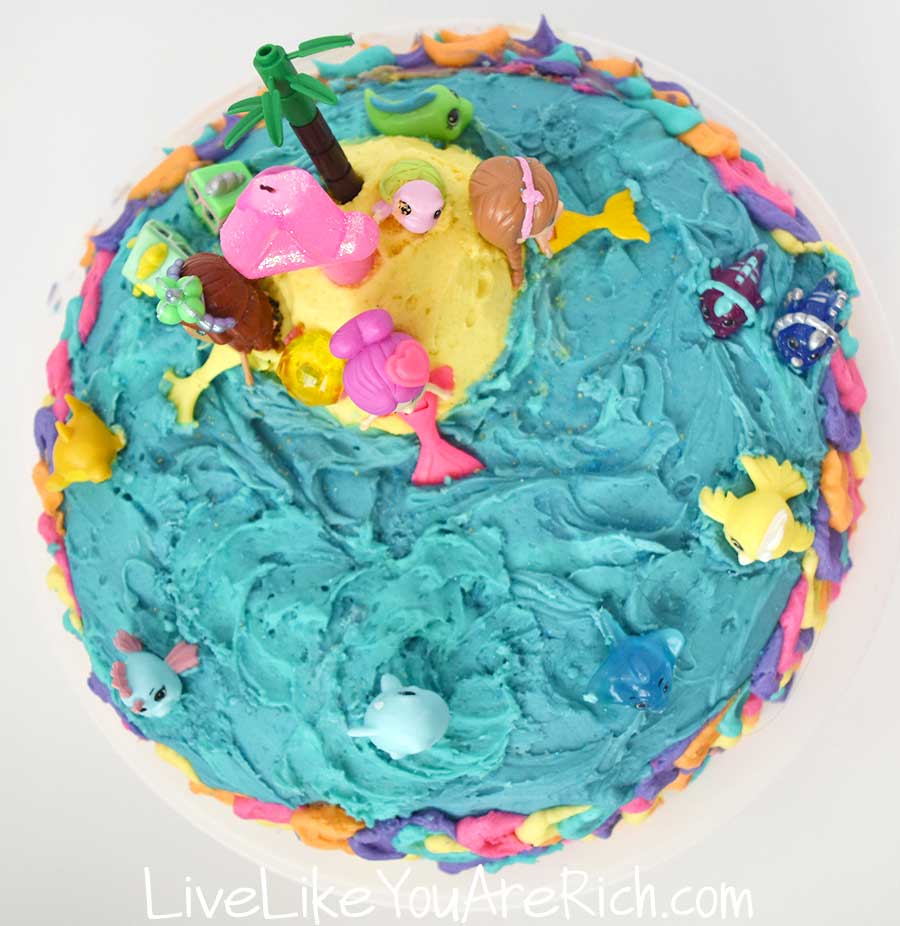
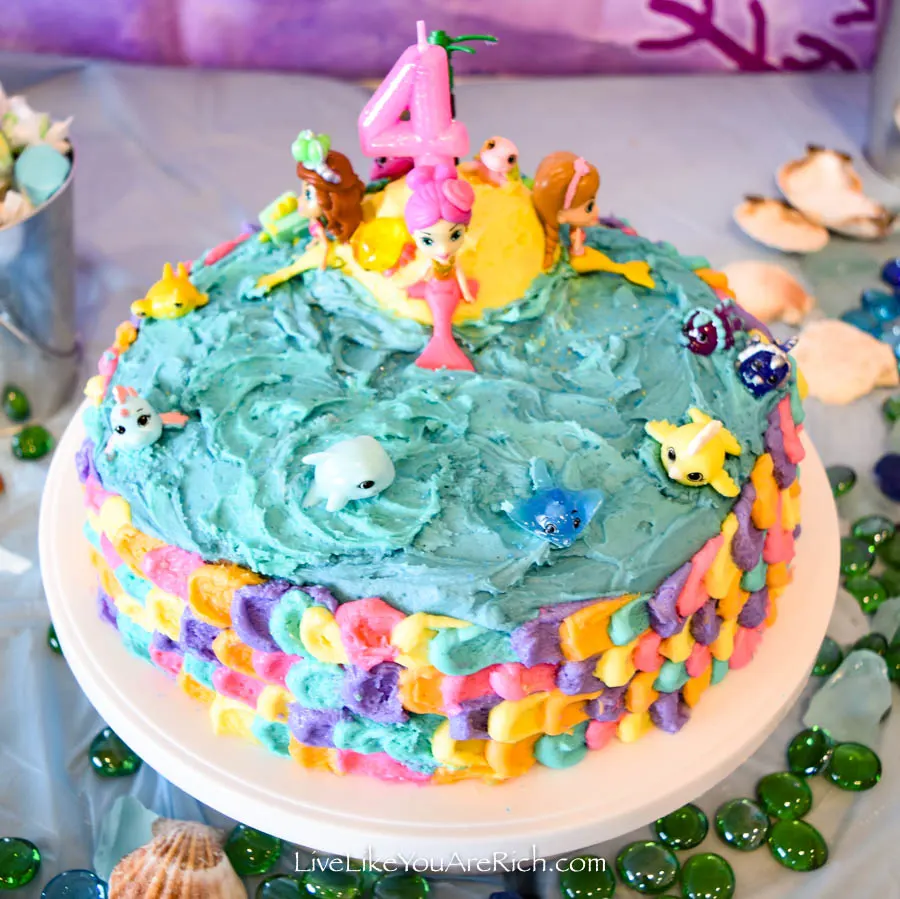
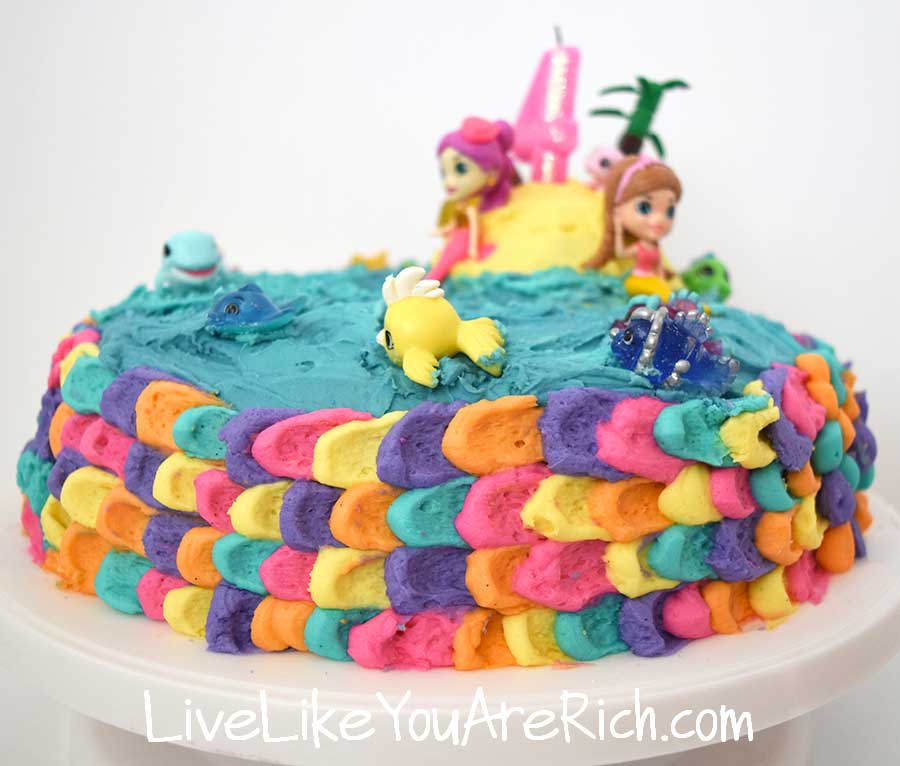
Topped on the cake are these Splashings Mermaid figurines that my daughter got for her birthday the day before, a birthday candle, and a lego palm tree from my son’s lego set.
Supply List
2- Funfetti box mix cake + ingredients to make them
2- 8 inch round pans or 1- 8-10 inch springform pan
Birthday candle(s)
Wilton Neon Gel food coloring pack + blue and yellow food coloring
Kitchen aid or other mixer
Small bowls and spoons for icing
Ziploc bags or piping bags
Small rounded icing spatula or tool
Coral Cupcake Topper Picks and wrappers
Ingredients for this frosting recipe found here

Instructions for Mermaid Cake AND Coral Cupcakes, they are frosted simultaneously.
-
Make the cake mix as instructed for the cake.
-
Before pouring in the pan, spray the cake pans with cooking spray. I spray a lot of cooking spray at the bottom of the pan and then use a paper towel spread it around and to make sure it is fully coated—even in the edge and on the sides. Then lightly flour the bottom, edge, and sides so the cake can come out without crumbling.
-
Make the Cake mix as instructed for cupcakes. Pour into 24 cupcake liners and bake.
-
Let both cakes and cupcakes cool completely. Place cake on rotating cake stand if desired.
-
Make this full recipe (don’t half it): best vanilla bean frosting here. Both the Mermaid cake and coral cupcakes were frosted from this one recipe. Keep the frosting at room temperature.
-
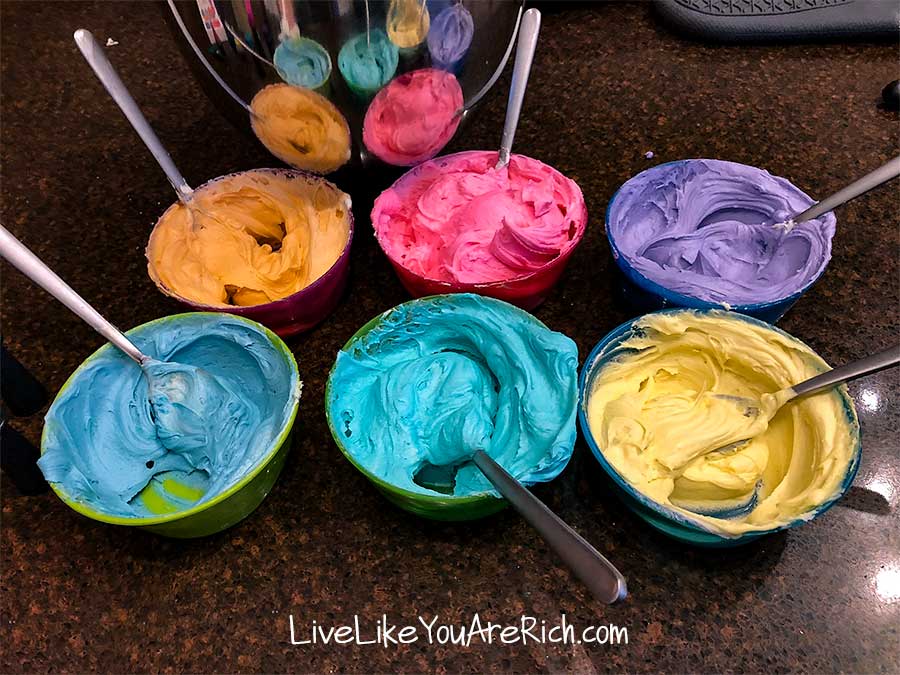
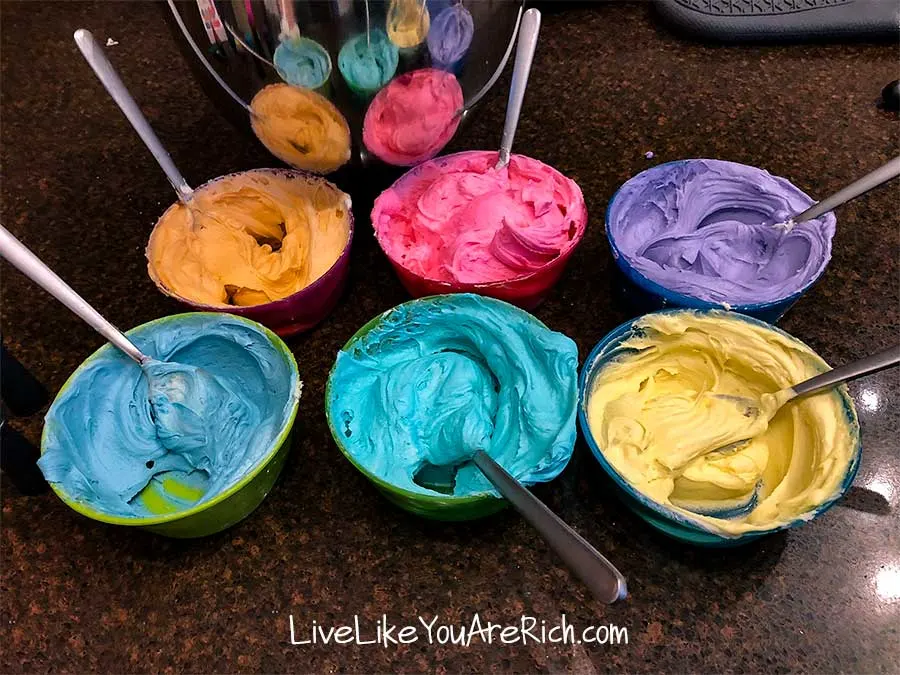
Divide the frosting into 6 bowls and mix in the food coloring. Use the Wilton Neon Gel food coloring pack to achieve these same colors PLUS yellow and blue food coloring. The following are the colors I achieved:
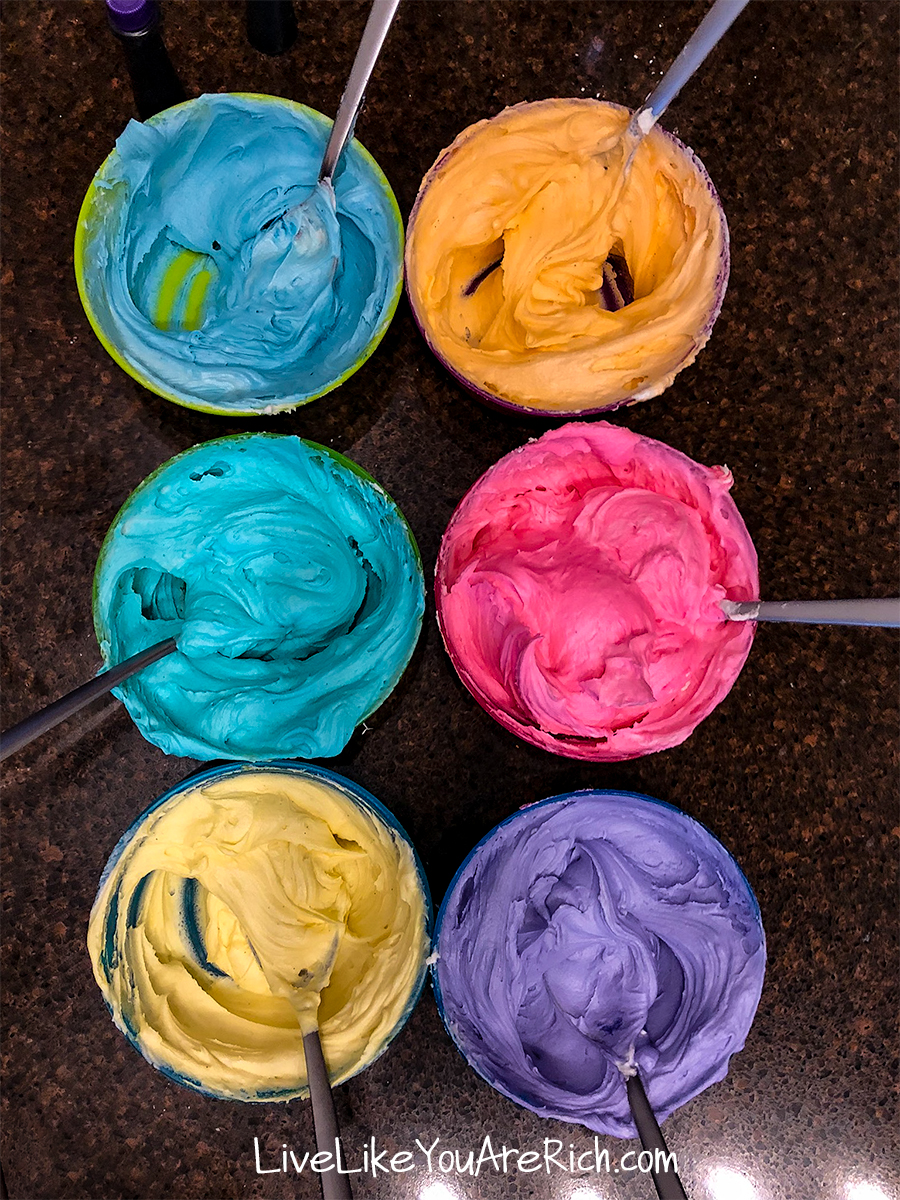

Just in case multiple photos help to get the colors right, here is another one.
7. Combine both layers of cake by putting a little frosting in the middle (if you baked 2 rounds). Don’t use too much frosting combining the layers as you may run out.
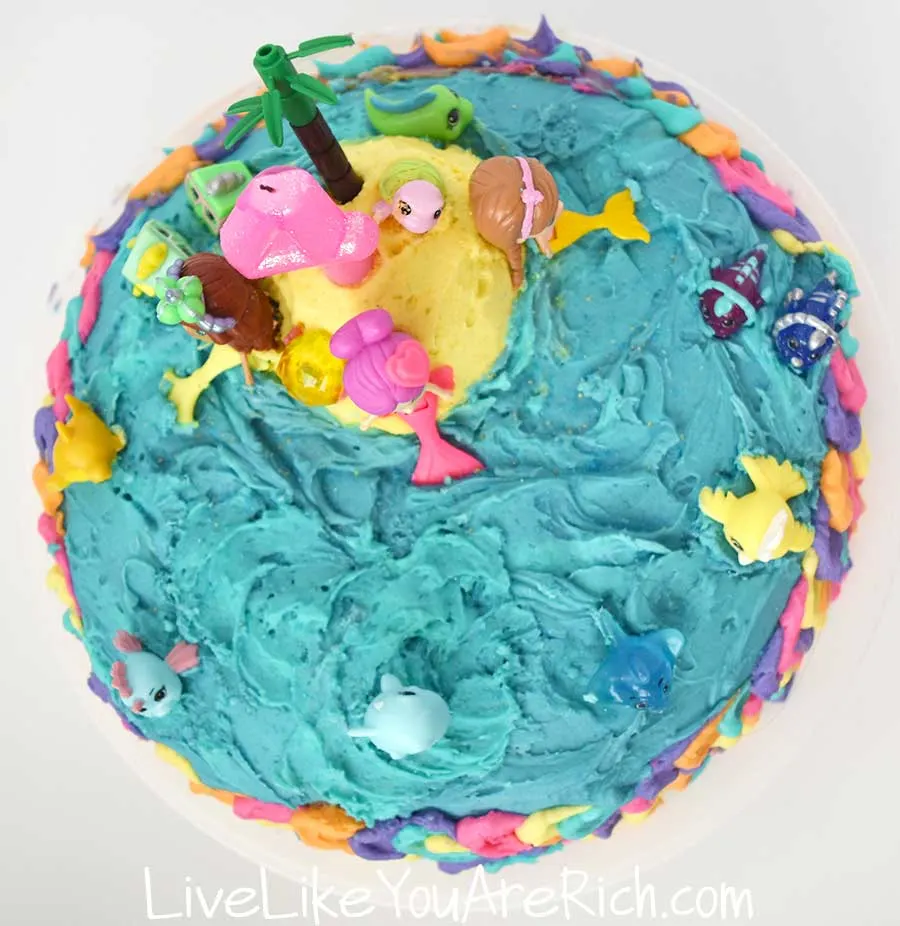
8. Frost the top of the cake with the blue and teal frosting alternating and mixing it just a little as you go. Lift the spatula as you ice so it forms wave-like designs.
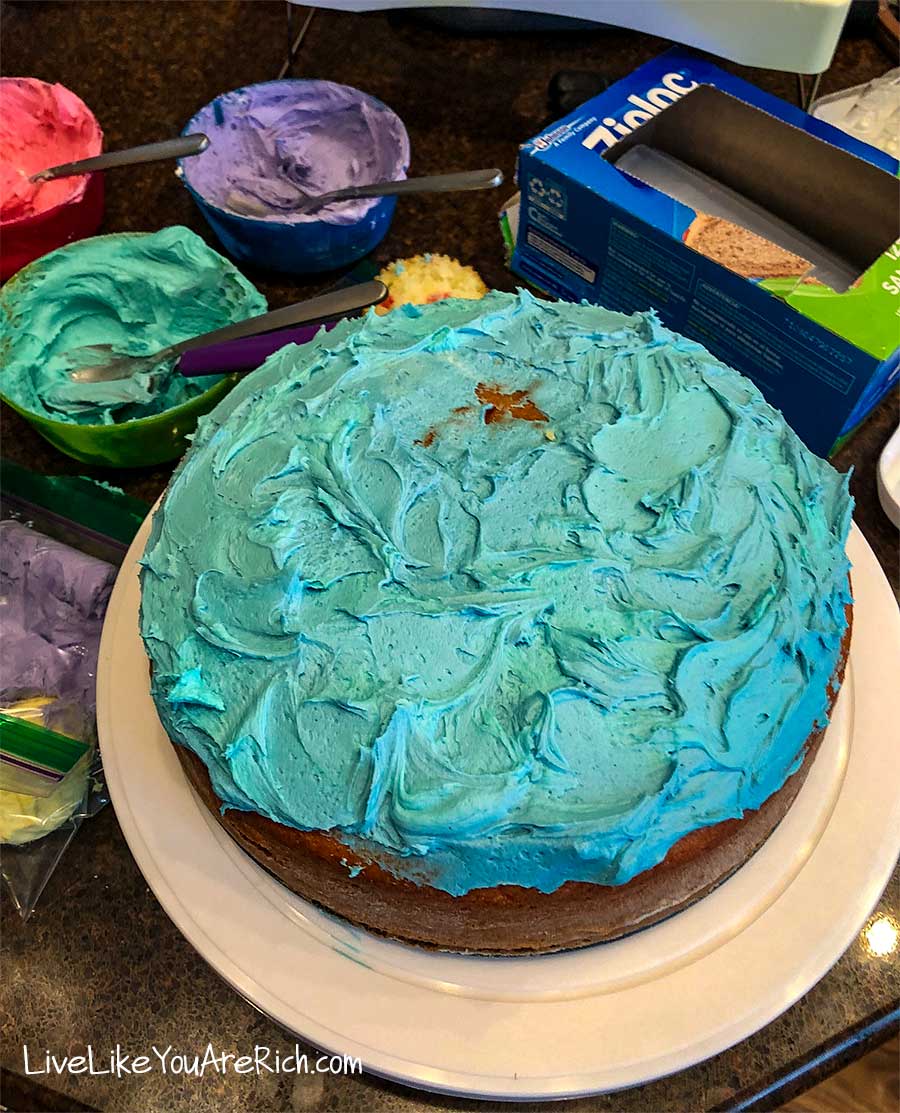

9. Next, add the top 2/3’s of one cupcake for an island.
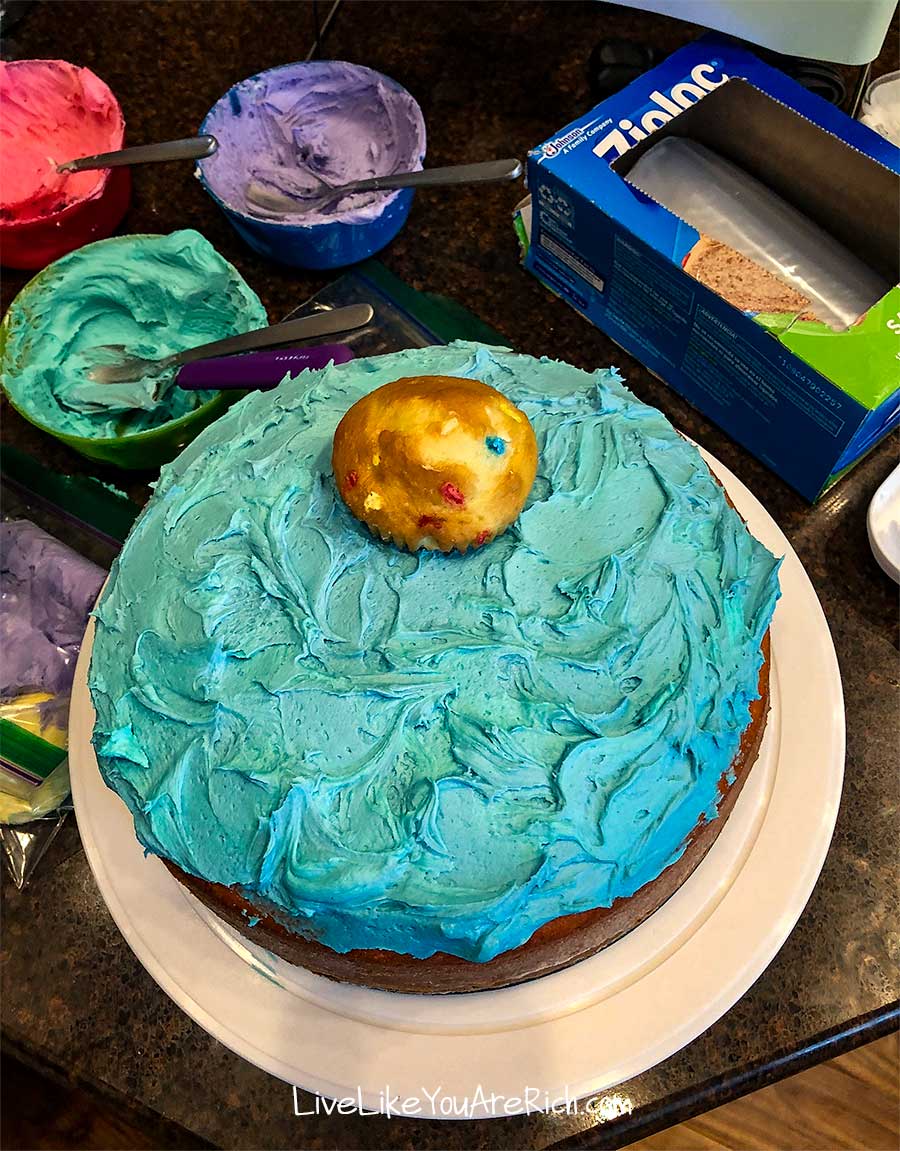
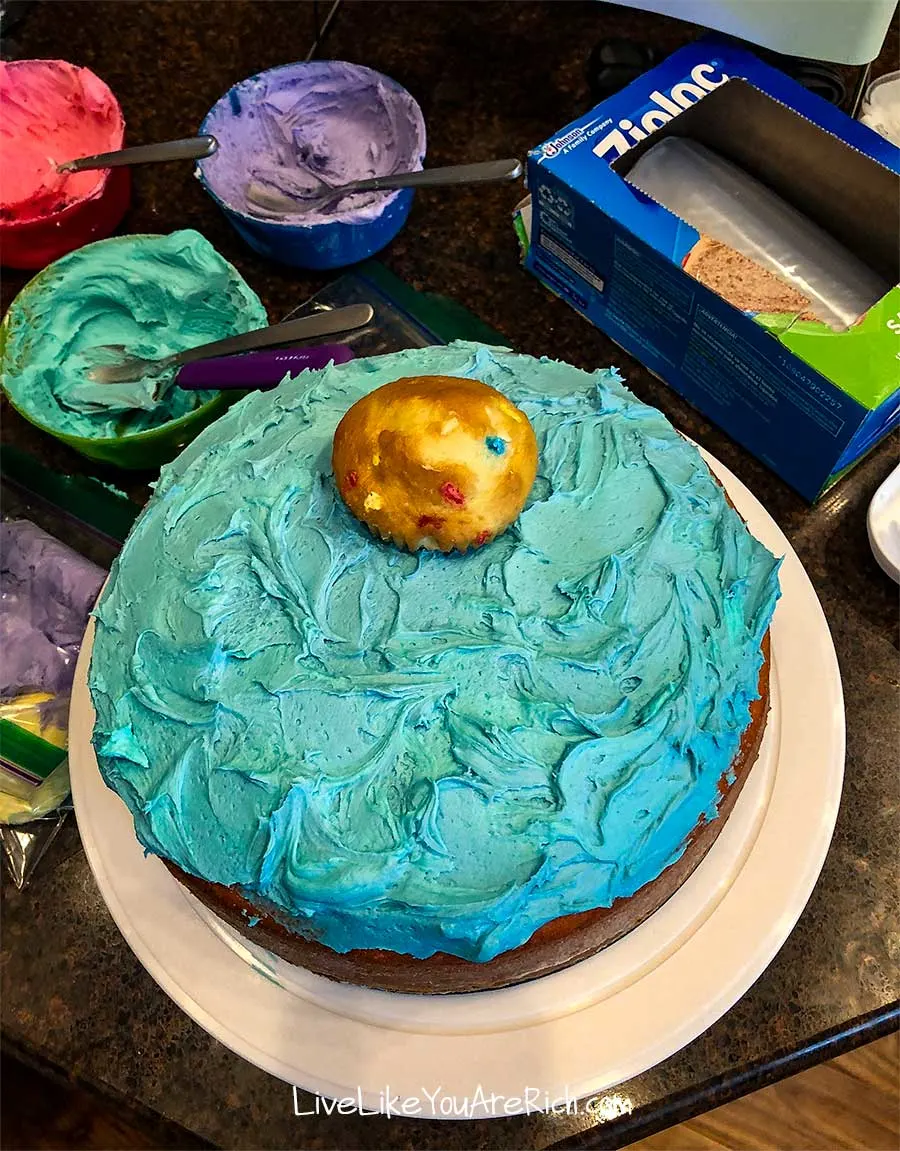
10. Ice the island in yellow icing.

11. Put all the icing into 6 separate ziploc bags or piping bags. If using ziploc bags, cut the tips off so there is a small-medium sized hole for piping.
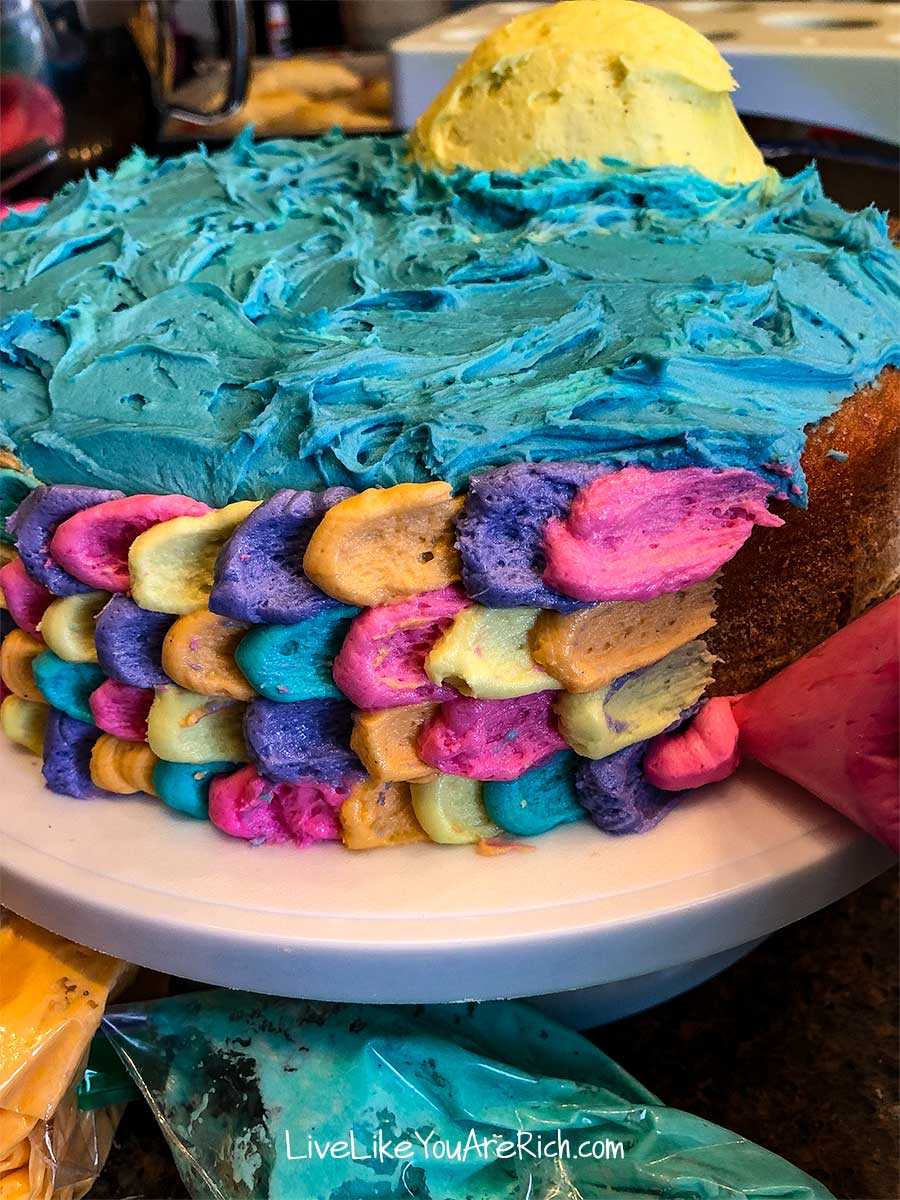
12. Ice starting on the side of the cake working your way across the front and ending in the back. Going in this direction is in case you run out of one color of frosting toward the end, it will not be as noticeable on the back.
Put an oval-shaped blob of icing in a spot and BEFORE doing another blob, use a small rounded tool/icing spatula (something with a rounded edge) and spread the icing forward. This makes the design of a scale shown in the photo above. I sanitized our tweezers in boiling water and used the handle because it was the correct shape (see them three photos below). Start from the bottom of the cake and work your way up towards the blue ocean/icing. Layer the next row slightly overlapping the last to make a cohesive scale look.
13. When done with one color/one mermaid scale, wipe the excess frosting from the piping bag and the excess icing from the rounded small spatula or tool on to the un-iced cupcakes. Alternating colors on the cupcakes as well.
Using the excess frosting from the piping bag and icing tool ensures a cleaner look on the cake’s mermaid scales and also helps you get really neat colors on the cupcakes, plus you avoid wasting the frosting.

14. Once the cake has been completely frosted, decorate it with figurines.

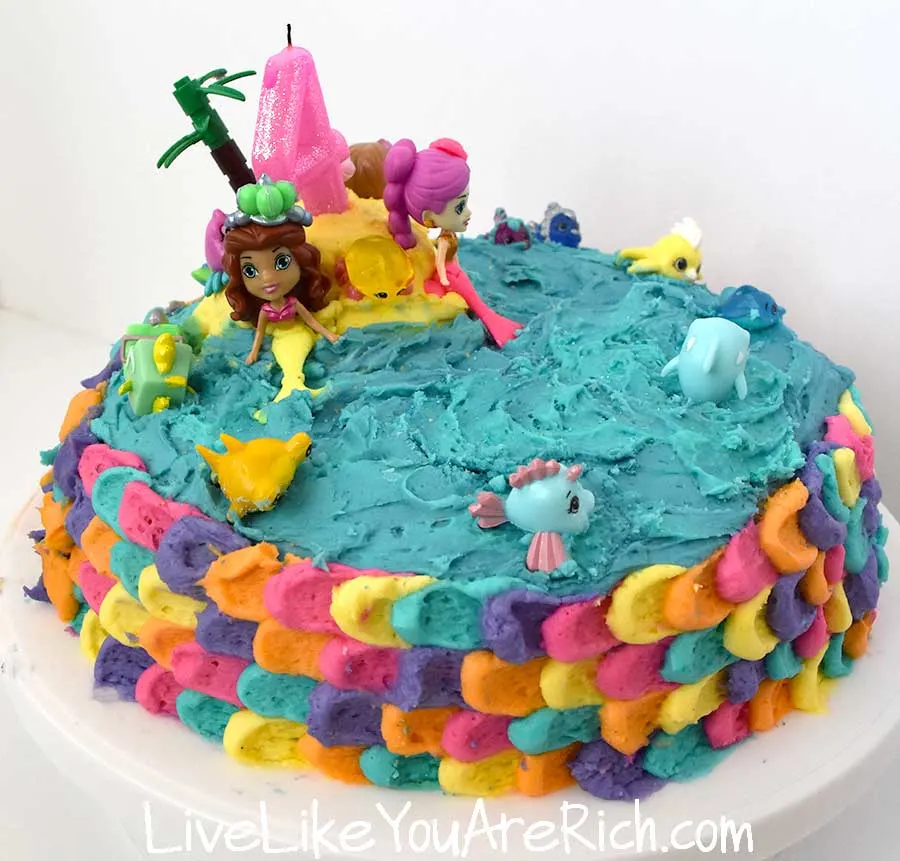
I bought three different Mermaid Splashings for my daughter’s birthday present so we’d have cake toppers.

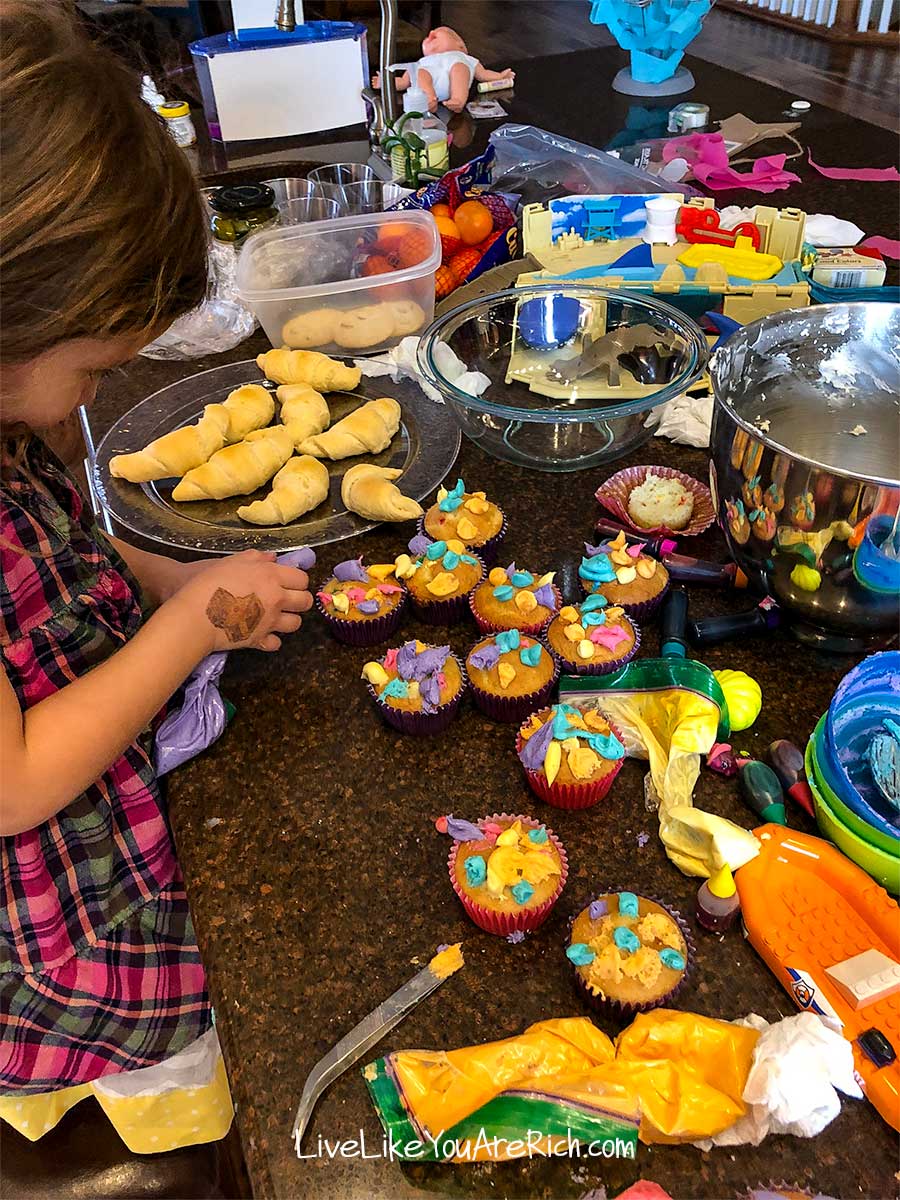
15. Use the left over frosting to make small little icing blobs/mounds all over the cupcakes alternating colors.


I let my kids help with this since it did not need to be as precise as the cake frosting needed to be.

16. I put the cupcakes in and topped them with these Coral Cupcake Topper Picks and wrappers found here.
17. Put them in this cupcake stand or similar for display. I wrapped blue streamers in it to resemble water.

It was very inexpensive and turned out quite cute!

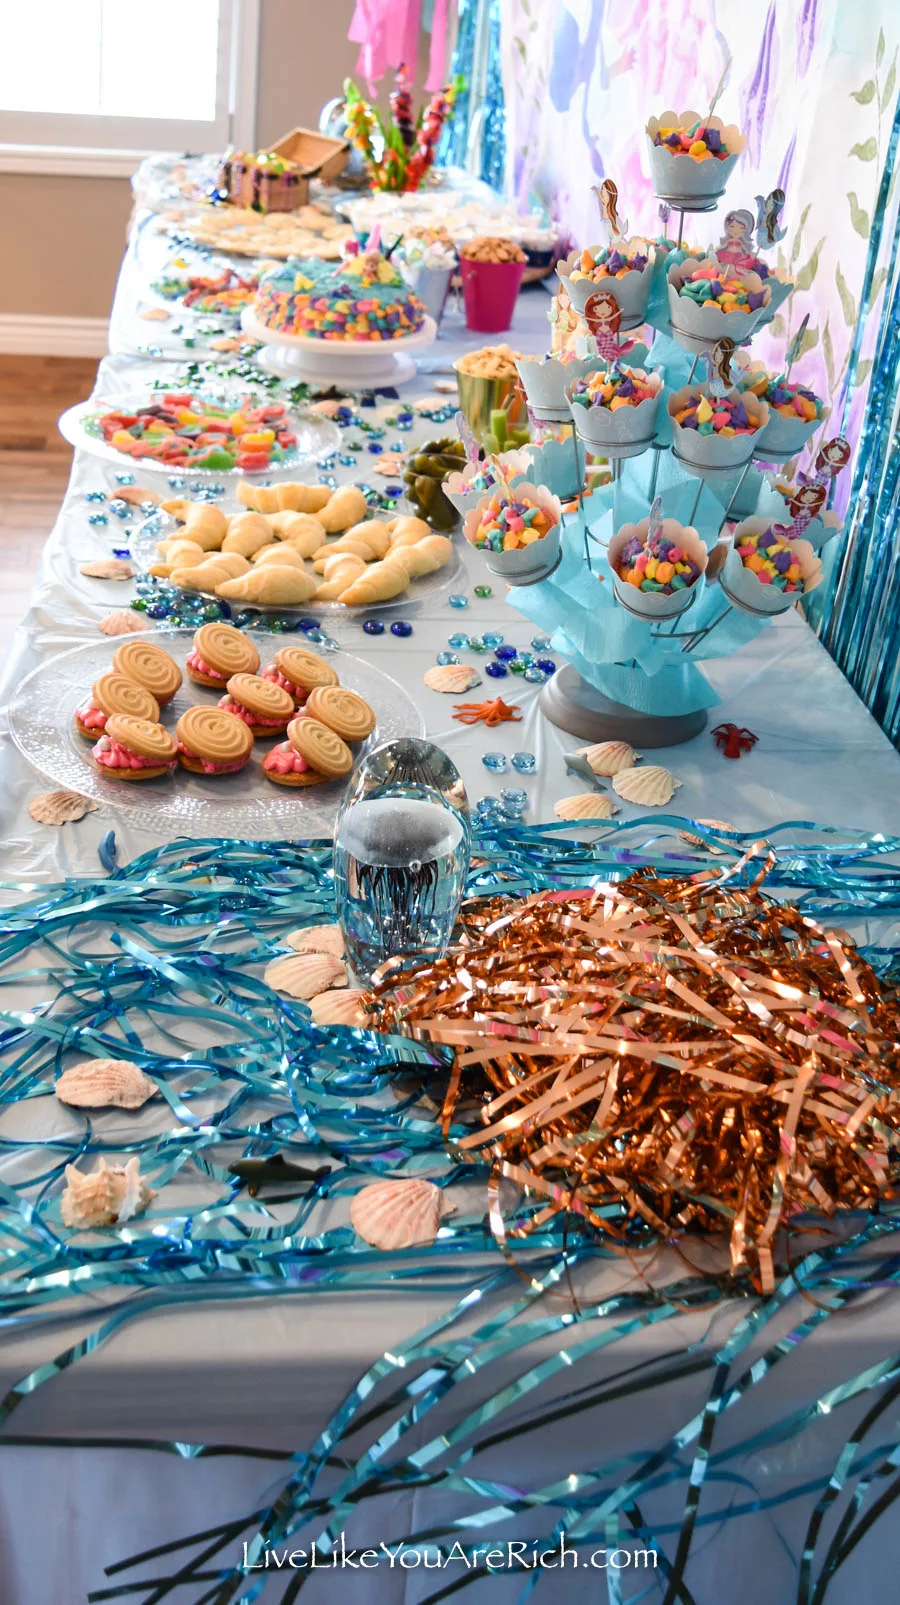
Check out the food we had at the party here or the many Mermaid activities we did here.
Hopefully, this tutorial on How to Make a Mermaid Cake and Mermaid Coral Cupcakes was of help!
- 2 Funfetti box mix ca
- For frosting:
- 3 sticks salted butter, softened
- 1 tsp vanilla bean paste (or seeds scraped from 1 vanilla bean)
- 3¼ teaspoons clear vanilla extract (or normal, if you don’t have clear)
- 7 ½ cups confectioners’ sugar
- 8 tablespoons heavy cream or milk
- Make the cake mix as instructed for the cake.
- Before pouring in the pan, spray the cake pans with cooking spray. I spray a lot of cooking spray at the bottom of the pan and then use a paper towel spread it around and to make sure it is fully coated—even in the edge and on the sides. Then lightly flour the bottom, edge, and sides so the cake can come out without crumbling.
- Make the Cake mix as instructed for cupcakes. Pour into 24 cupcake liners and bake.
- Let both cakes and cupcakes cool completely. Place cake on rotating cake stand if desired.
- Make this full recipe (don’t half it): best vanilla bean frosting here. Both the Mermaid cake and coral cupcakes were frosted from this one recipe. Keep the frosting at room temperature.
- Divide the frosting into 6 bowls and mix in the food coloring. Use the Wilton Neon Gel food coloring pack to achieve these same colors PLUS yellow and blue food coloring. The following are the colors I achieved:
- Combine both layers of cake by putting a little frosting in the middle (if you baked 2 rounds). Don’t use too much frosting combining the layers as you may run out.
- Frost the top of the cake with the blue and teal frosting alternating and mixing it just a little as you go. Lift the spatula as you ice so it forms wave-like designs.
- Next, add the top 2/3’s of one cupcake for an island.
- Ice the island in yellow icing.
- Put all the icing into 6 separate ziploc bags or piping bags. If using ziploc bags, cut the tips off so there is a small-medium sized hole for piping.
- Ice starting on the side of the cake working your way across the front and ending in the back. Going in this direction is in case you run out of one color of frosting toward the end, it will not be as noticeable on the back.
- When done with one color/one mermaid scale, wipe the excess frosting from the piping bag and the excess icing from the rounded small spatula or tool on to the un-iced cupcakes. Alternating colors on the cupcakes as well.
- Once the cake has been completely frosted, decorate it with figurines.
- Use the left over frosting to make small little icing blobs/mounds all over the cupcakes alternating colors.
- I put the cupcakes in and topped them with these Coral Cupcake Topper Picks and wrappers found here.
- Put them in this cupcake stand or similar for display. I wrapped blue streamers in it to resemble water.


For other ‘rich living tips’ please subscribe, like me on Facebook, and follow me on Pinterest and Instagram.