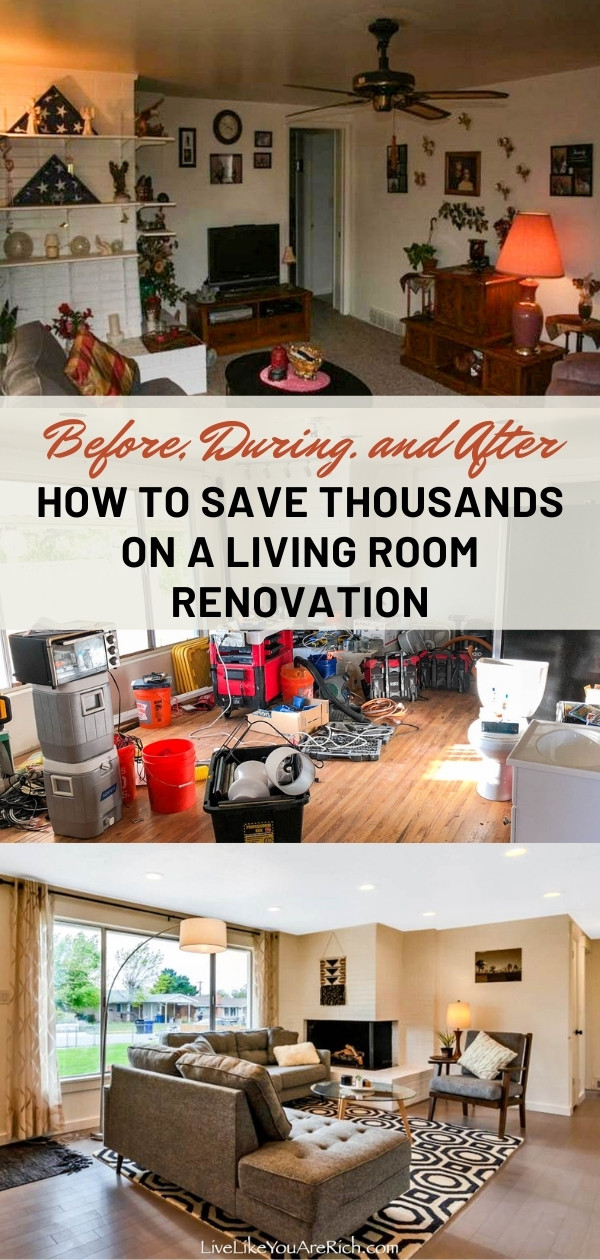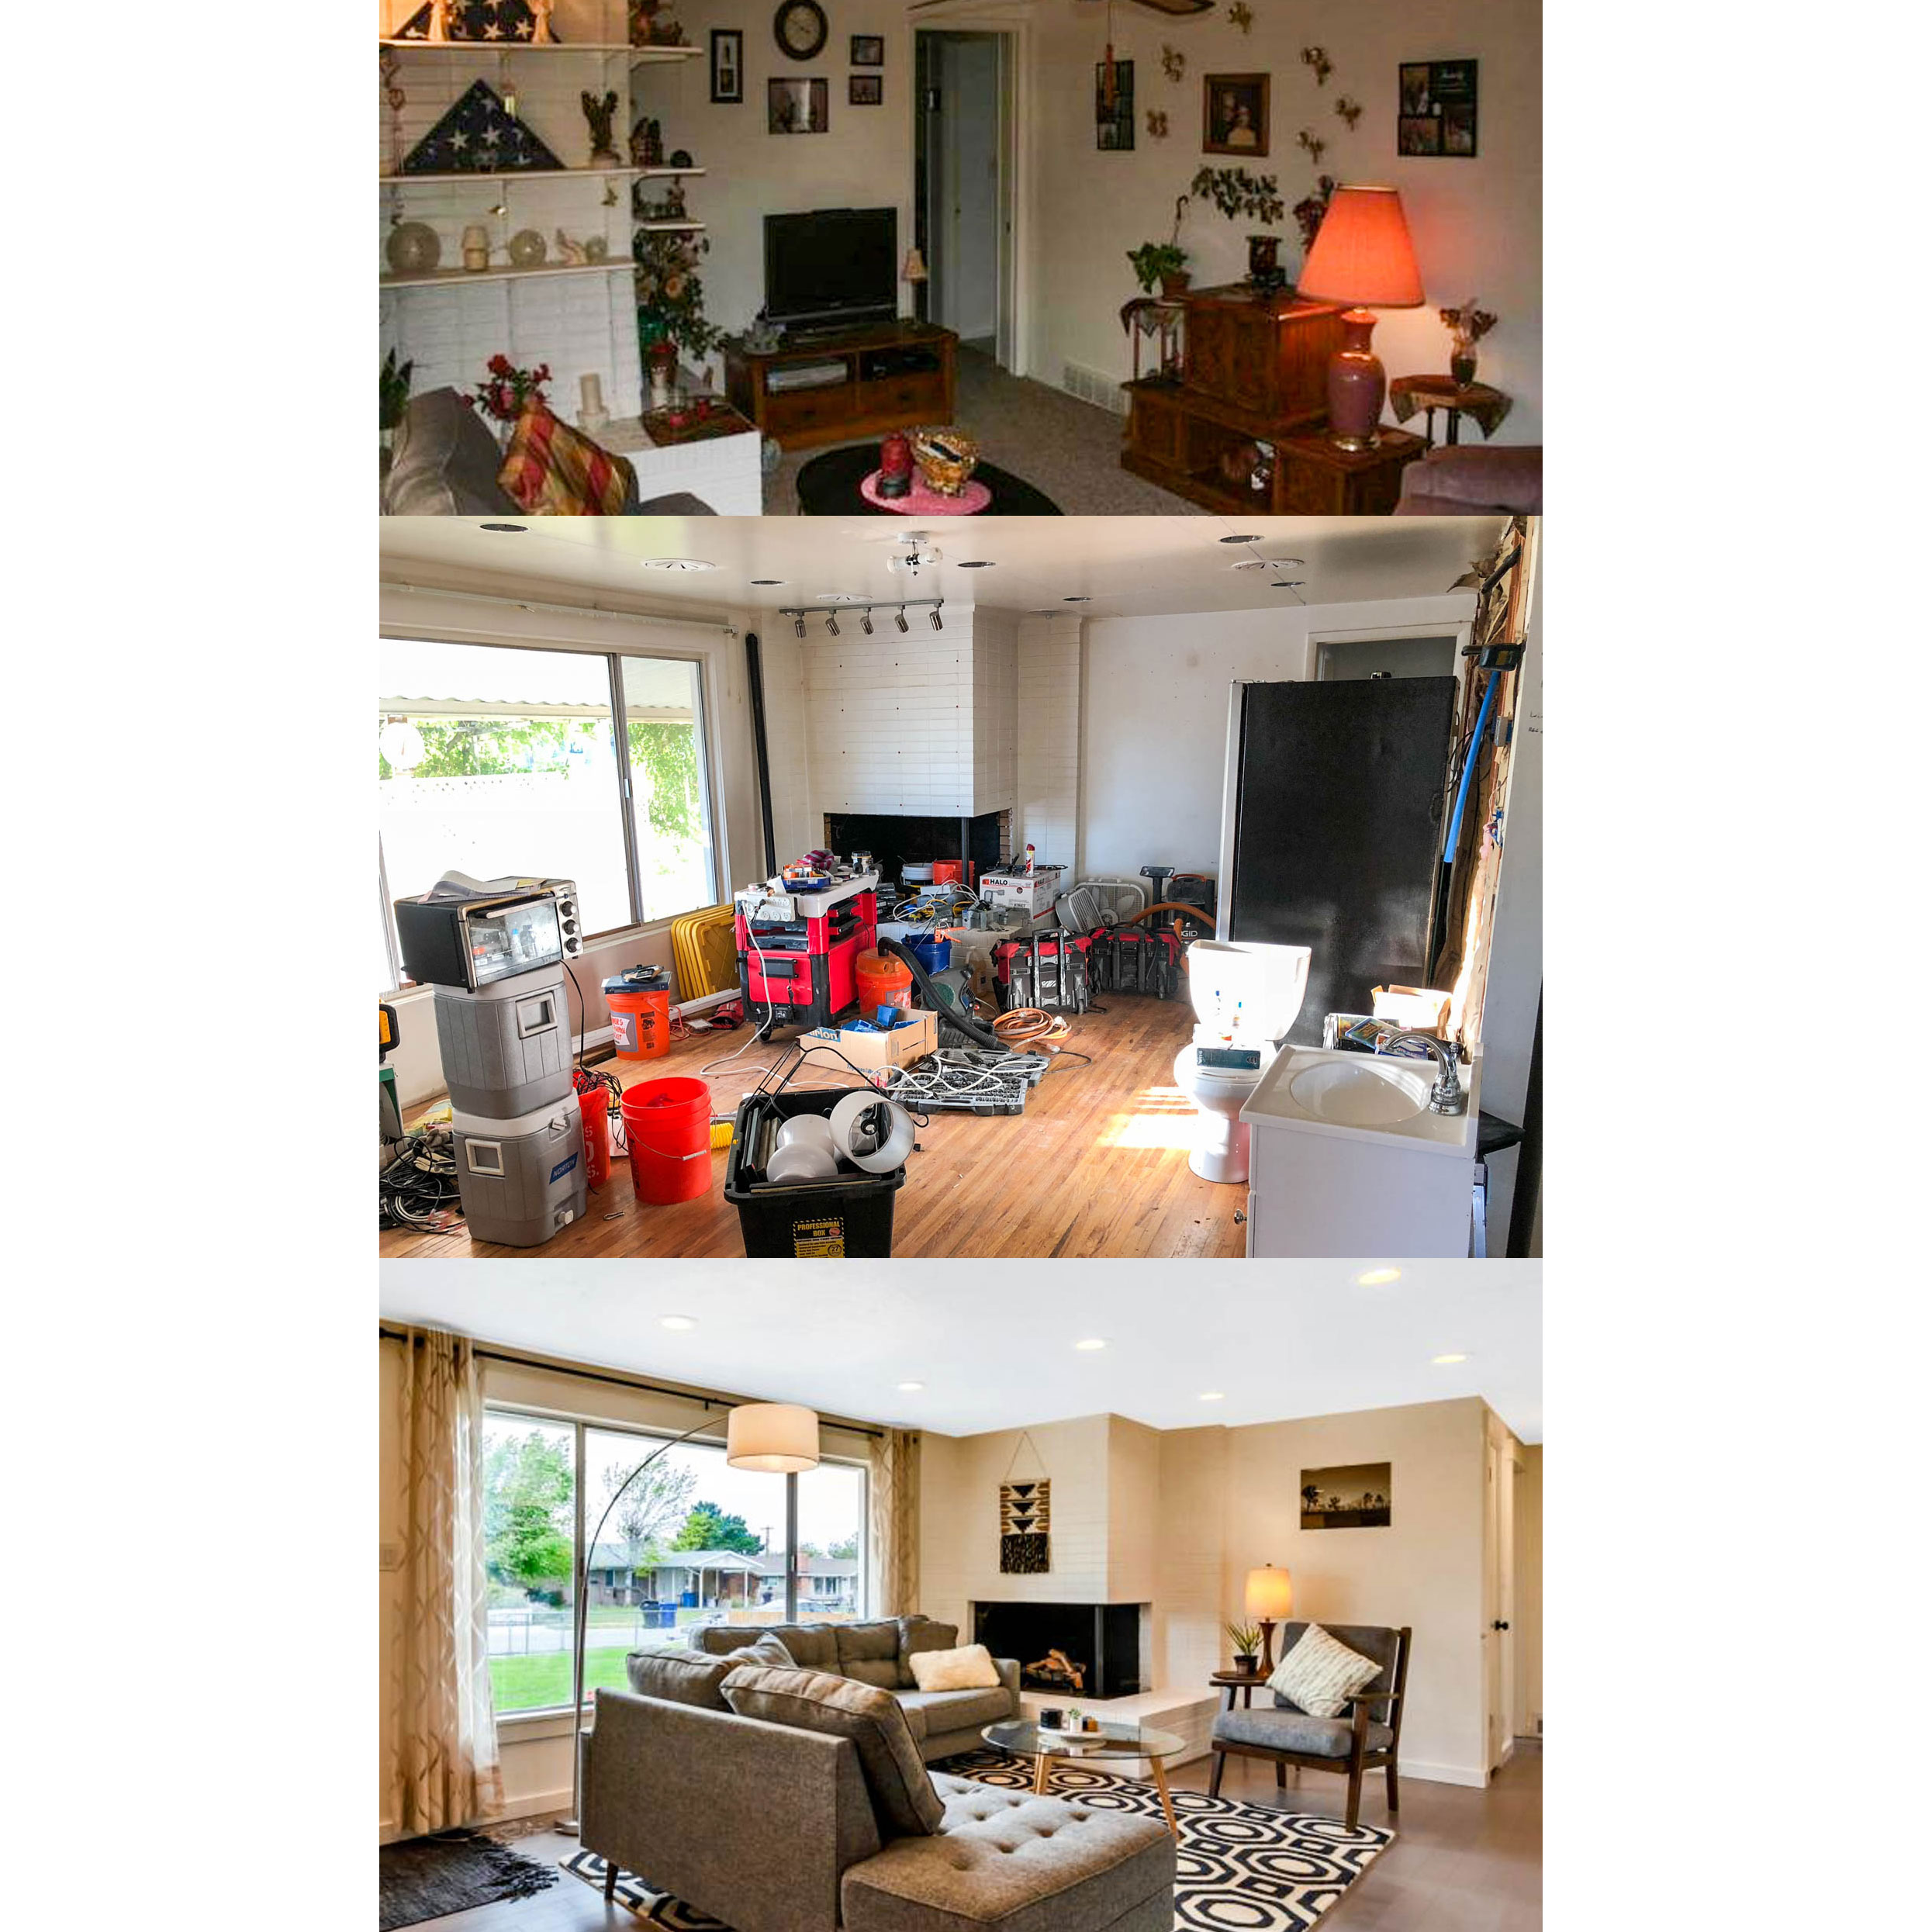
Inexpensive Living Room Renovation Before and After Home 2
I’m jumping back in time to write about how we renovated my husband’s fixer-upper home. He had it went we met. I had completed my Home 1 renovation and sold for a profit, so we decided that instead of selling it in its demo state when we married, we’d fix it up and sell it for profit as well.
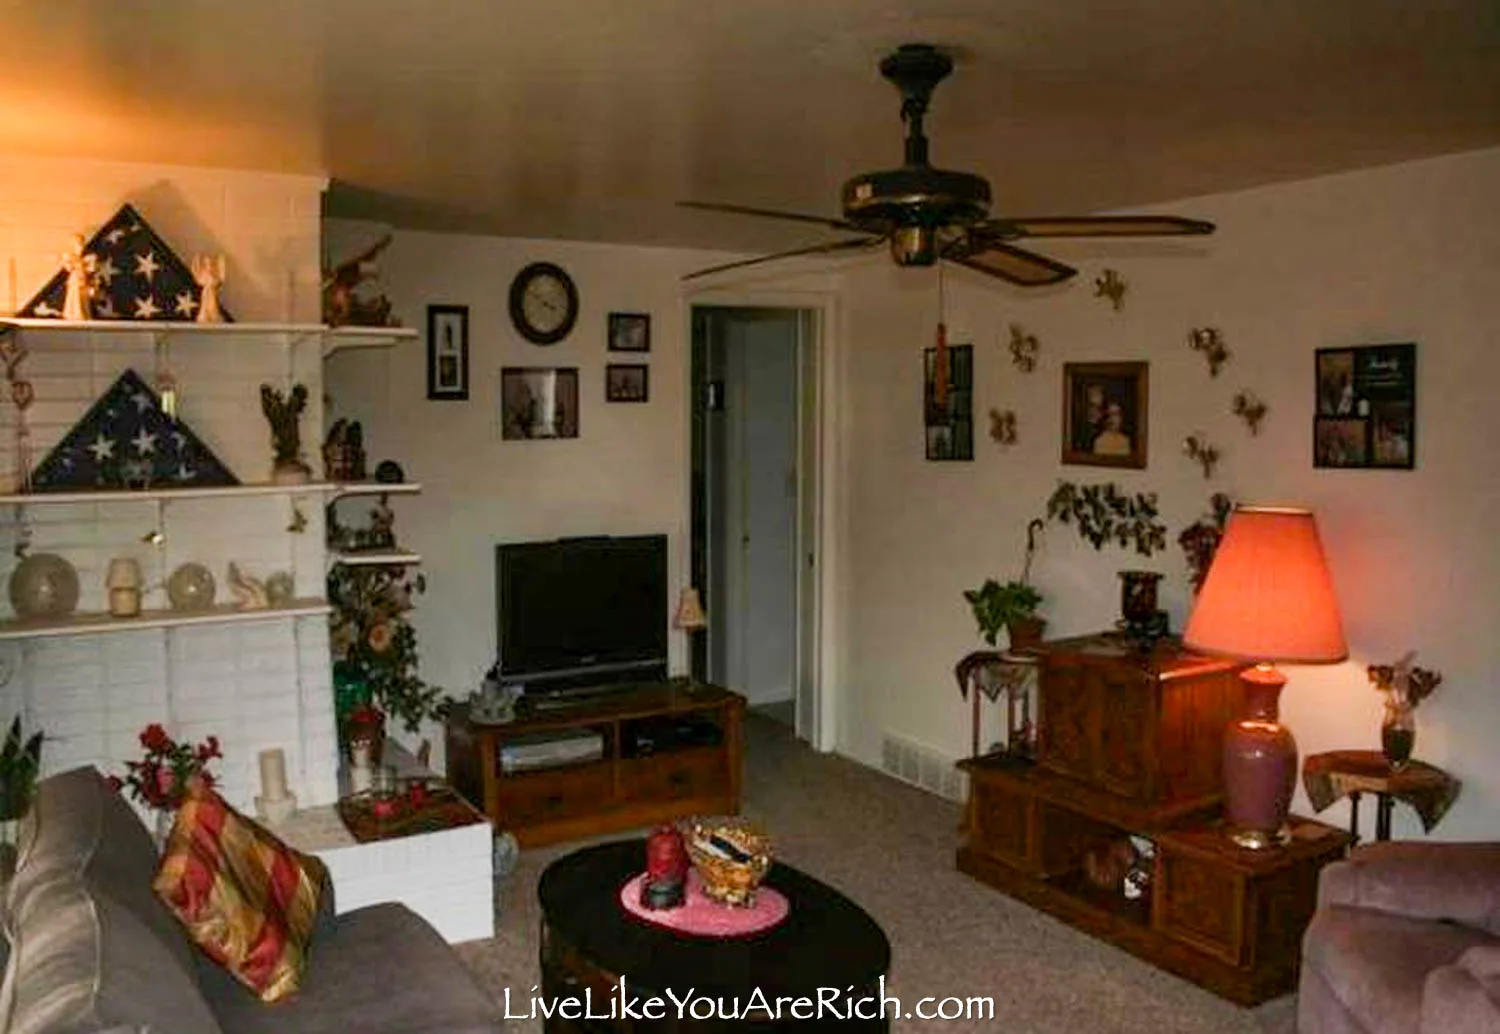
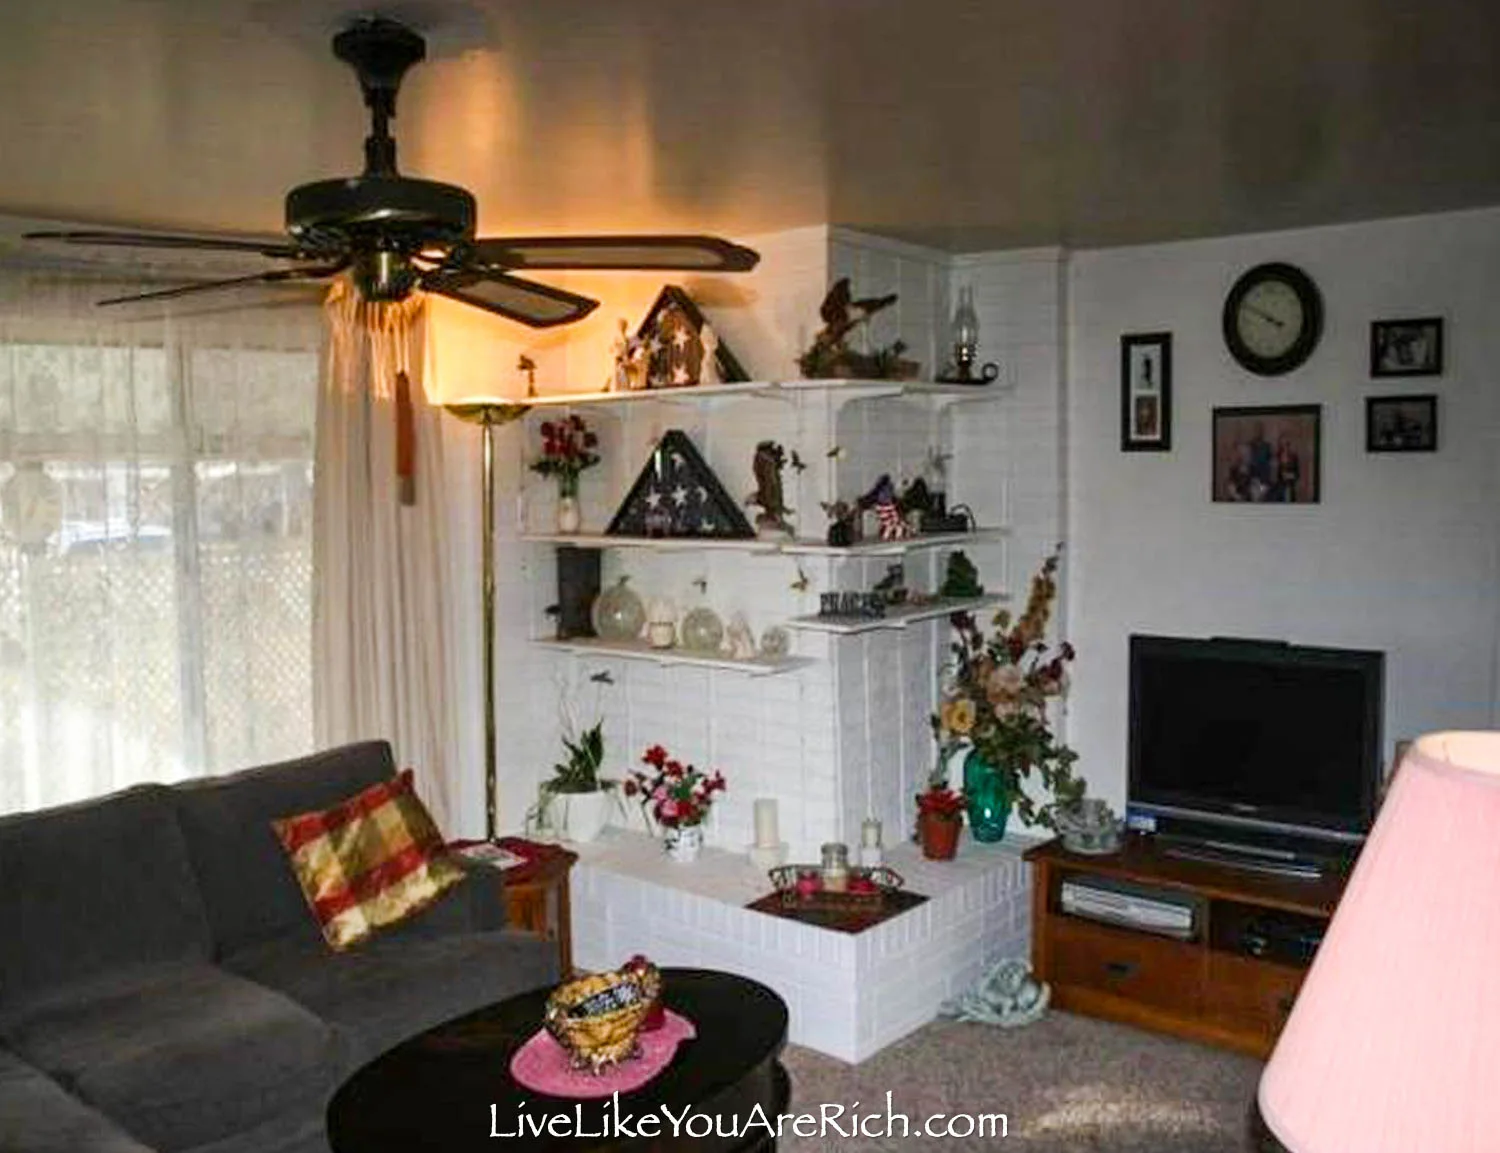
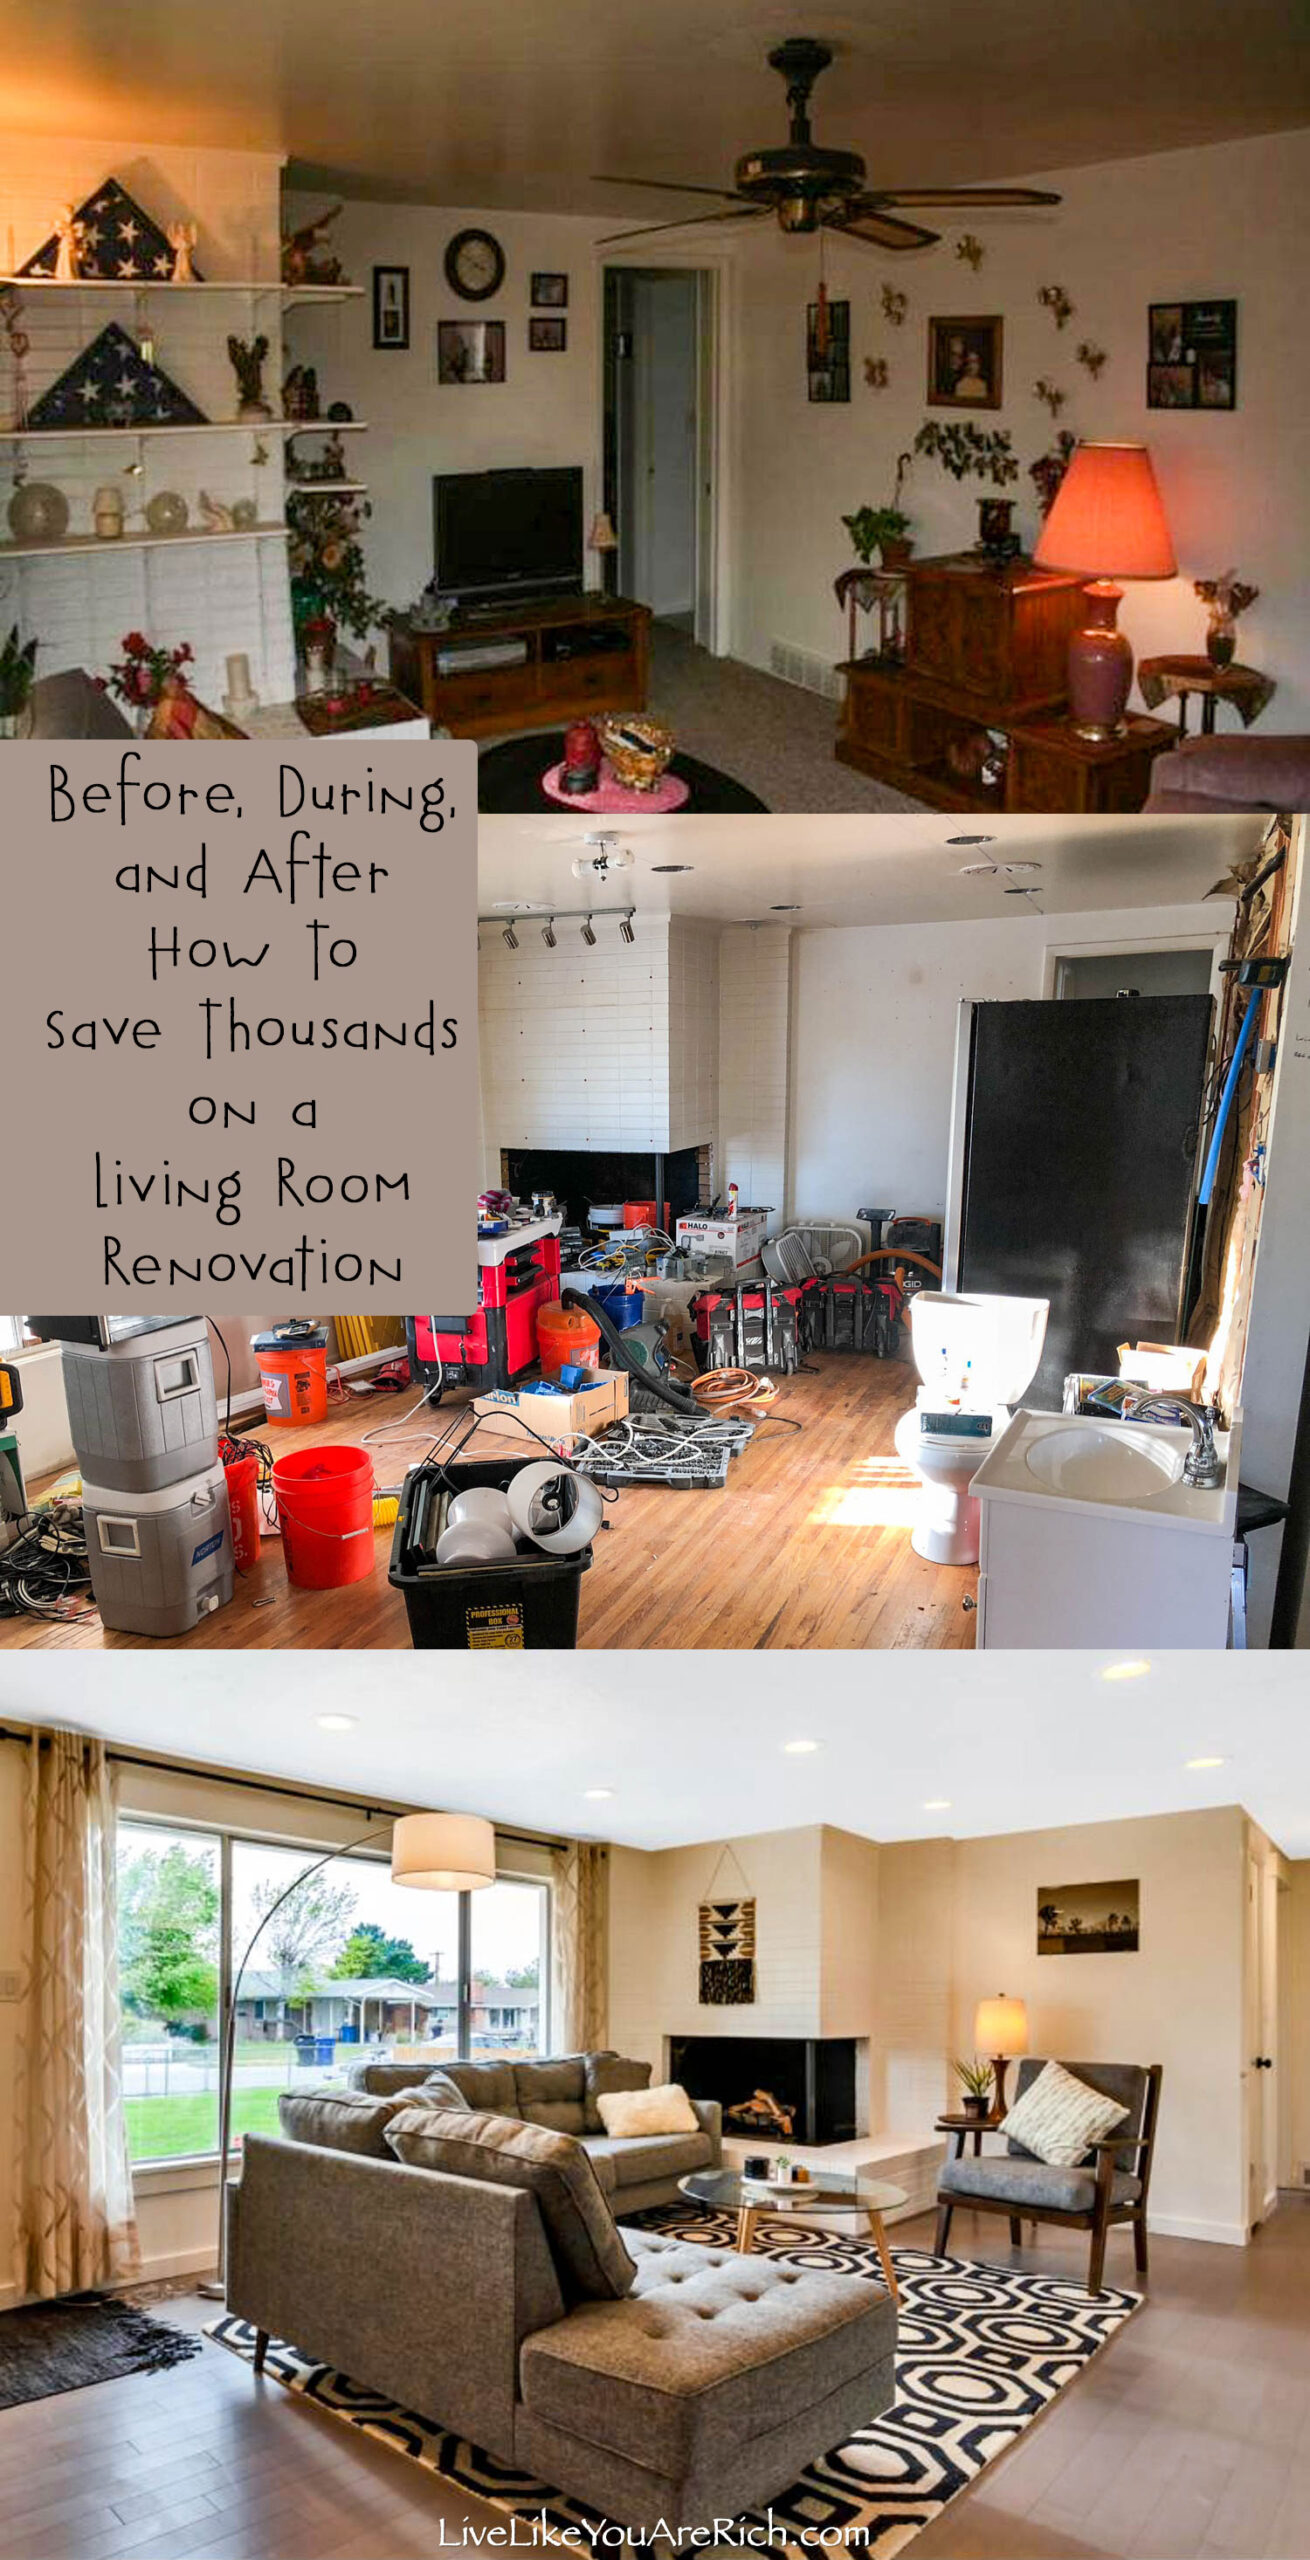
The “Before’s” are the real estate listing photos for when he bought it—terrible I know. I guess the agent didn’t worry about good lighting for its listing photos.
He bought it in 2016, we married in 2018 and we sold it summer of 2019. We spent about 8 months renovating everything—from the inside out.

This home actually had a really great floor plan.
But, as you can see this mid-century build was not showcasing its inherent beauty.
The fireplace was even bricked off and used as a shelving display.

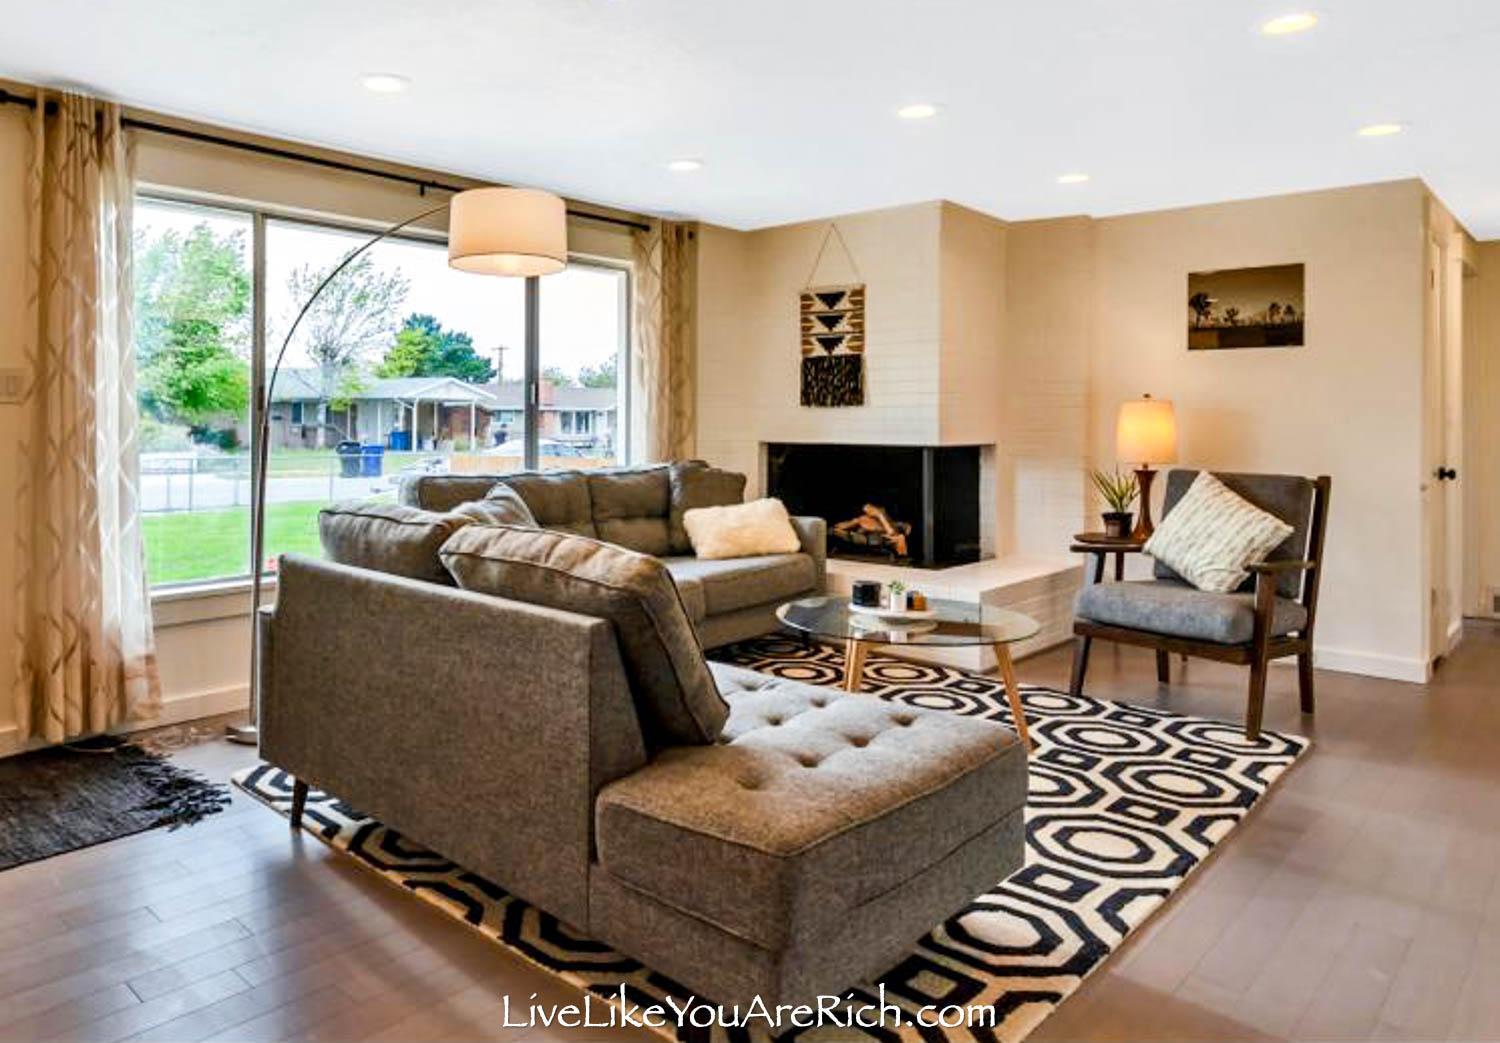
This is the living room renovation of home 2 during our remodel.
We pulled up the carpet, opened up the fireplace, redid the lighting (my husband was installing an industrial sound system when we got married and I convinced him that for a flip this was not the best plan), so we took the industrial-sized speakers out and just did can lights).

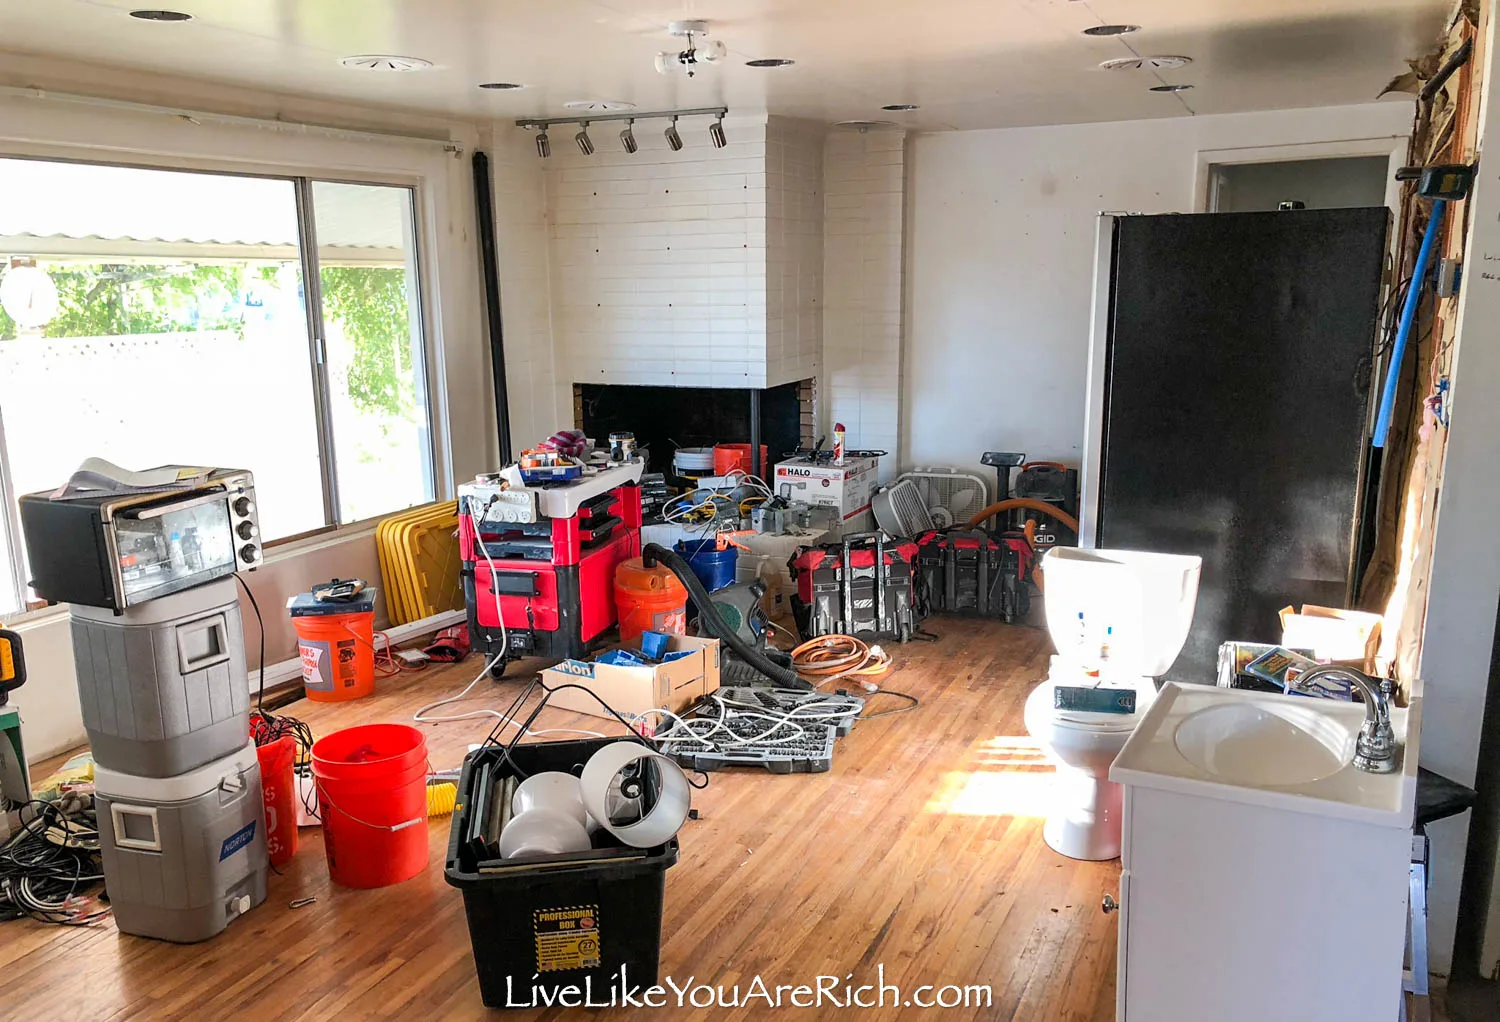
We added new insulation, lighting/ electrical, flooring, paint, and TV mount/hook up, and a new thermostat.
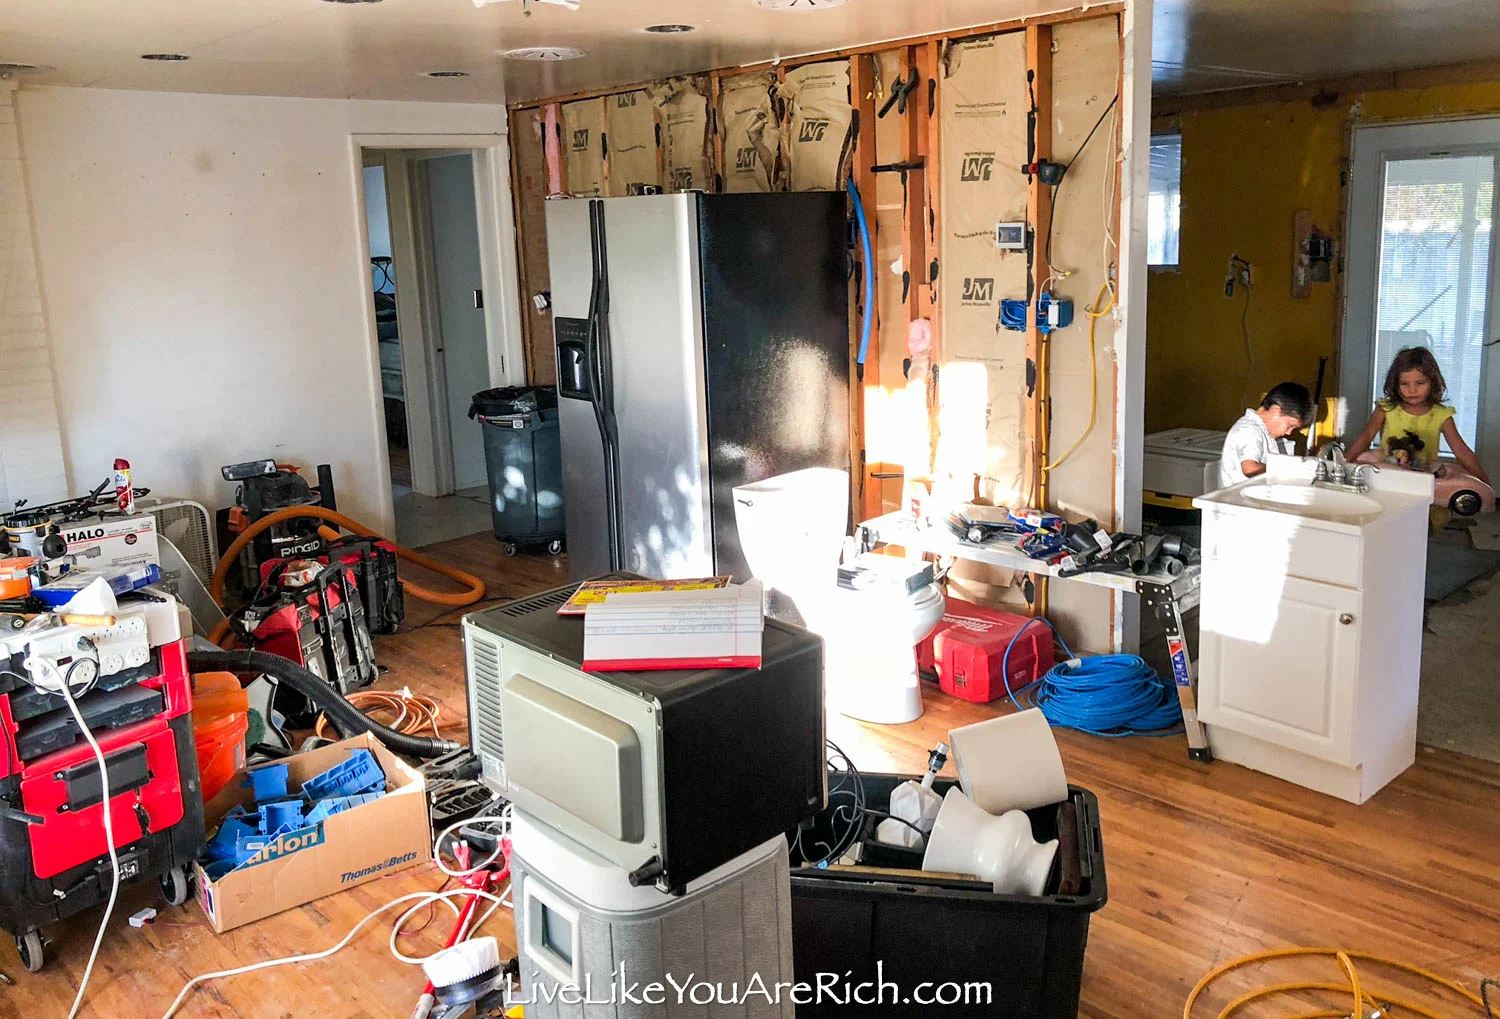
This is a peek into the adjoining room. The area where my kids are is the spot that we turned into a bathroom and a dining room.
Check out the before and afters of the dining area here.

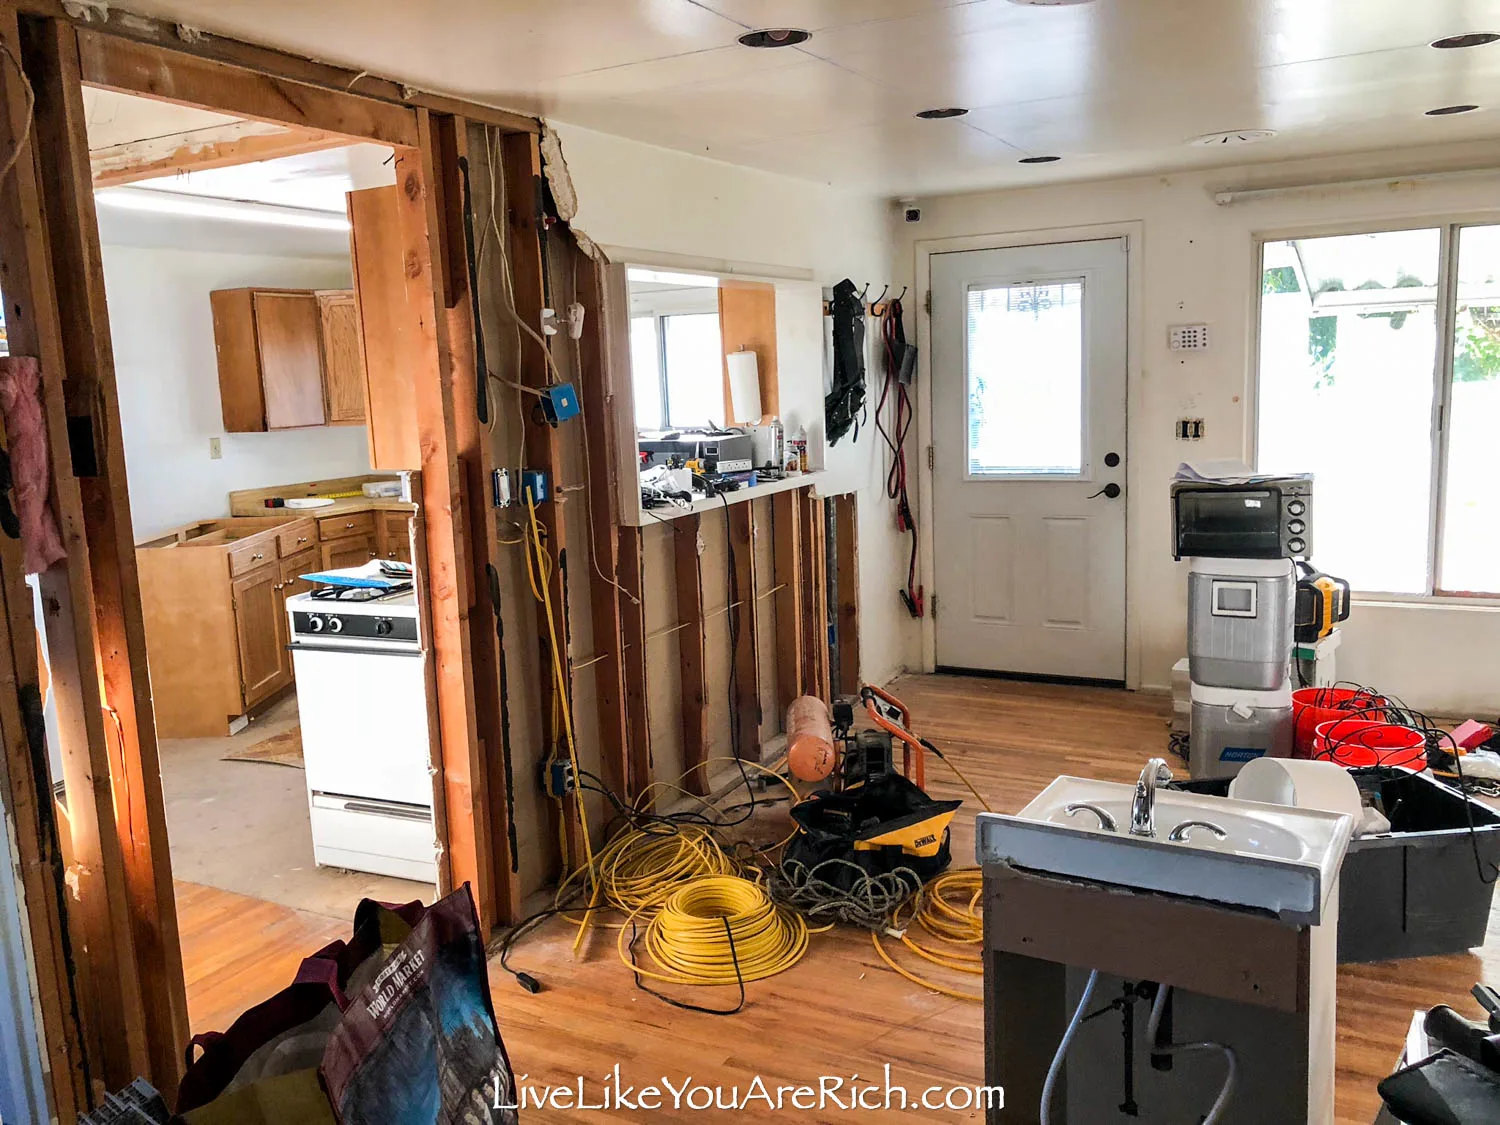
As I show in the kitchen remodel before and afters, we cut down this wall to make it an open concept floor plan.

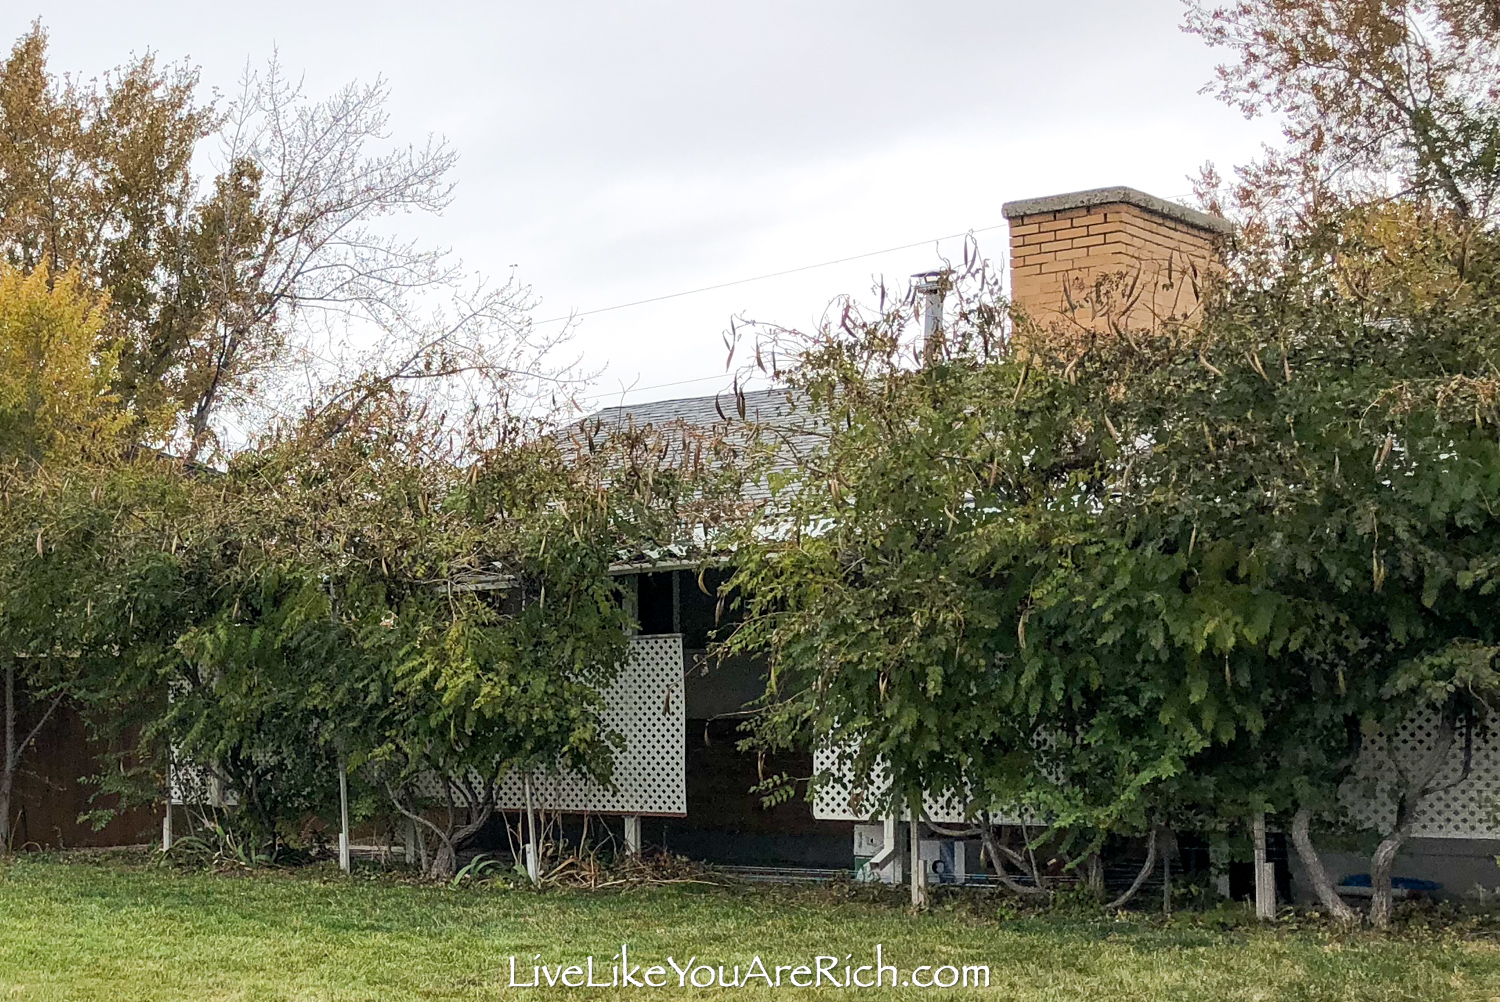
We also tore down the over-grown greenery and lattice that was blocking the front window (as shown in the exterior front before and after’s here).
This let significantly more light into the home and made it much more attractive from inside and out.
As with any remodel, the during photos are not pretty! There was so much dirt and grime and work!
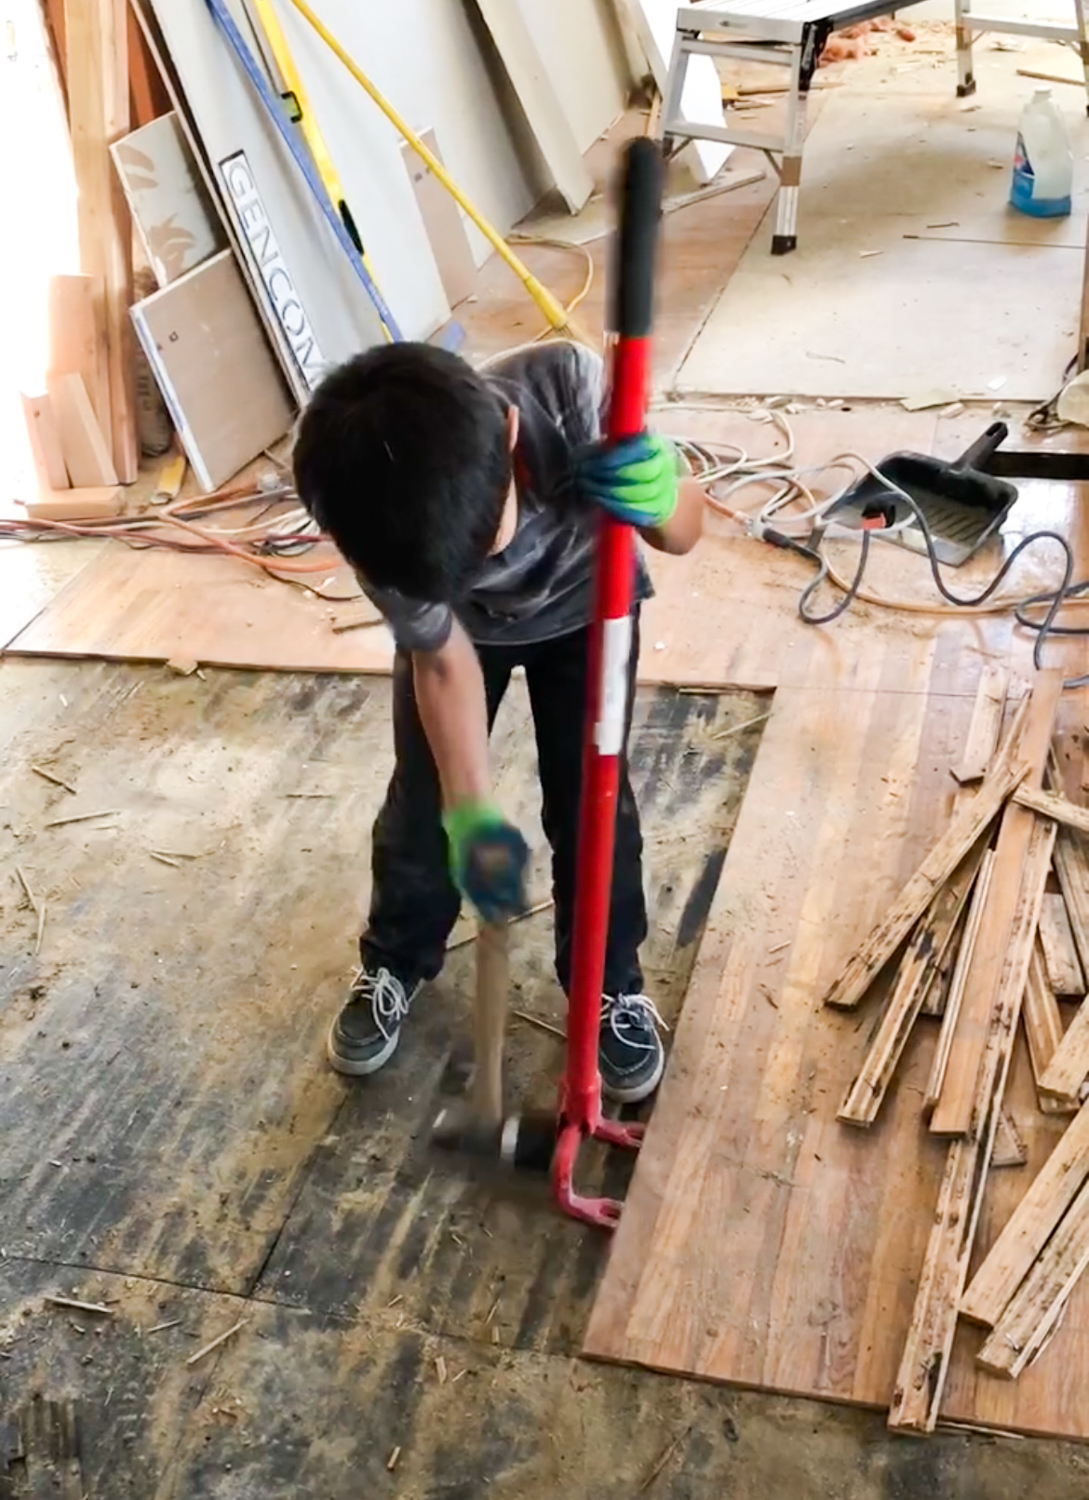
My kids often played while we renovated but sometimes they wanted to earn money or incentives so they helped me with jobs. One of the jobs they actually liked doing was ripping up the old hardwood floor.
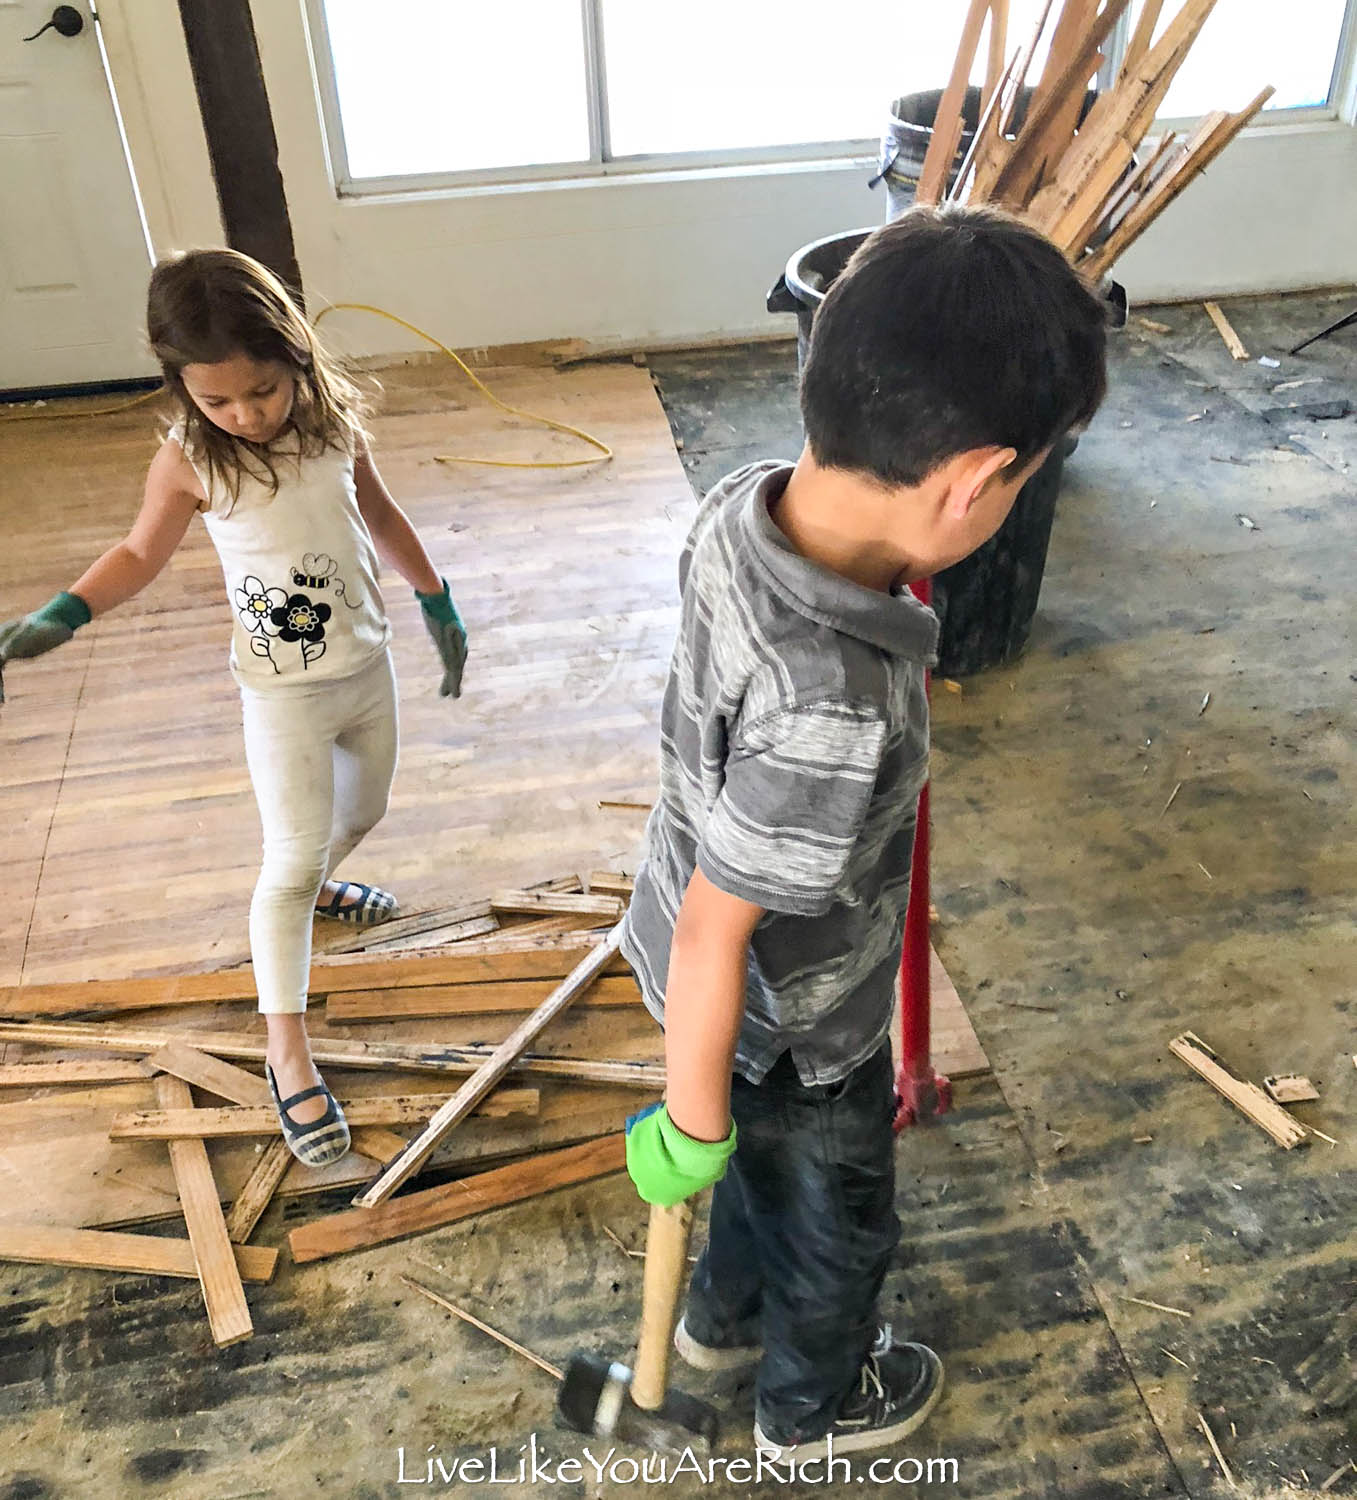

They became experts at pulling up this oak floor that was totally shot.
We ripped it up because there were so many squeaks and issues with it and its subfloor that needed to be fixed. Plus, there had been a kitchen addition that the previous owners did so the hardwood did not run throughout the main level (only in a few rooms).
My son became an expert at using this rubber mallet and hardwood floor pry bar.
If you have a lot of wood to pull up, I highly recommend using a hardwood demolition pry bar and rubber mallet.
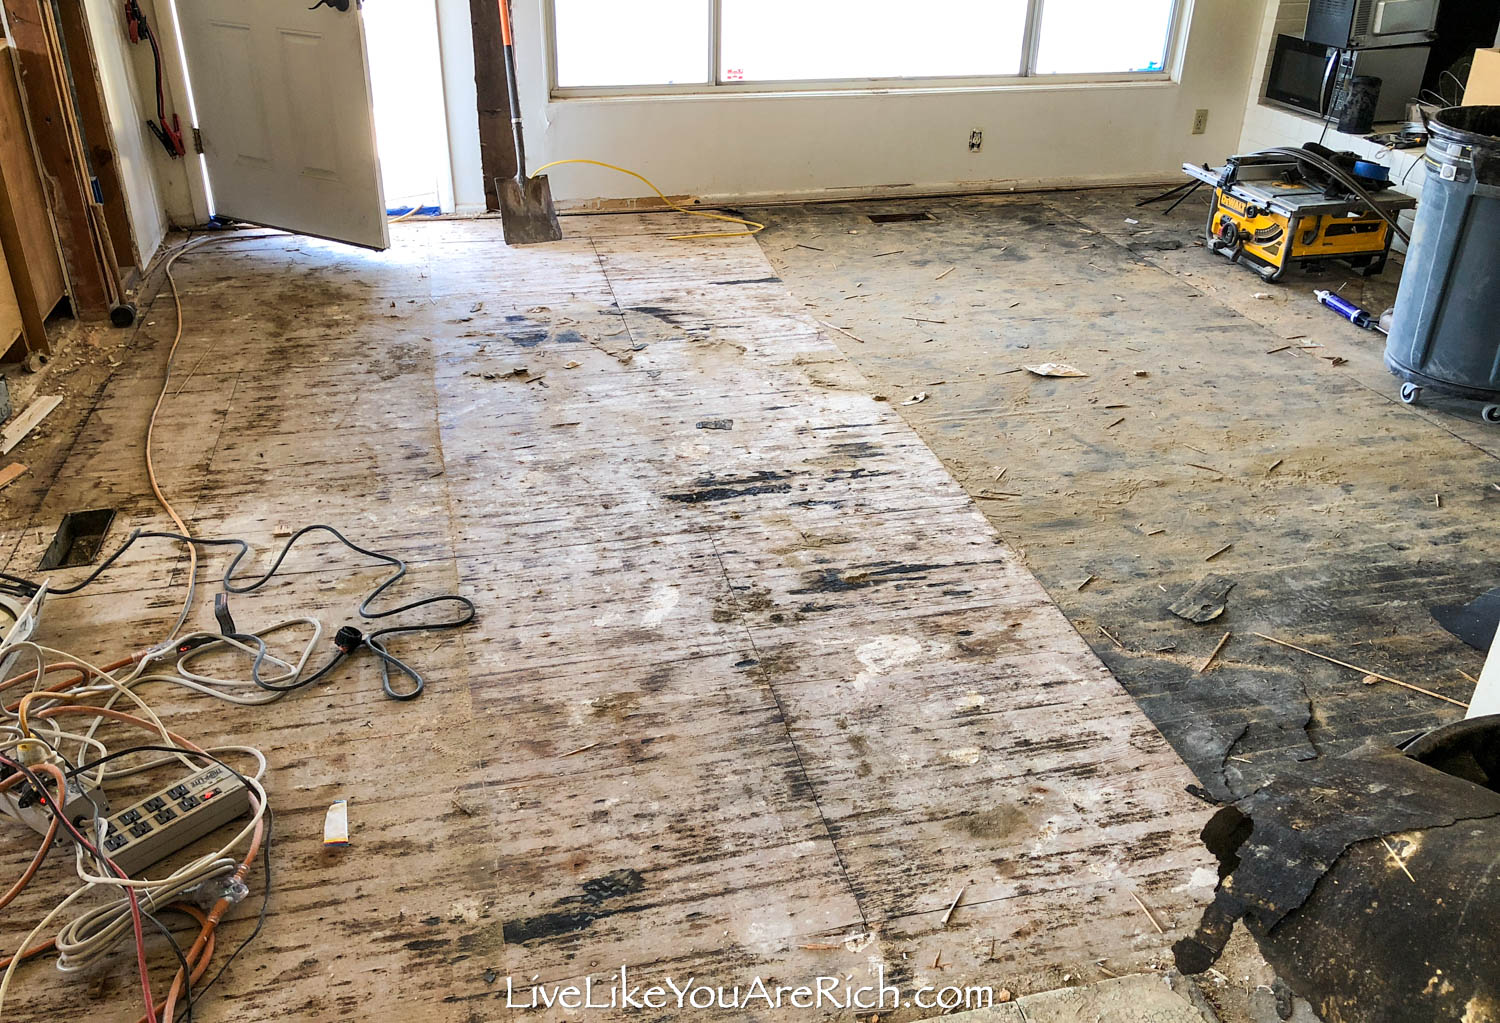
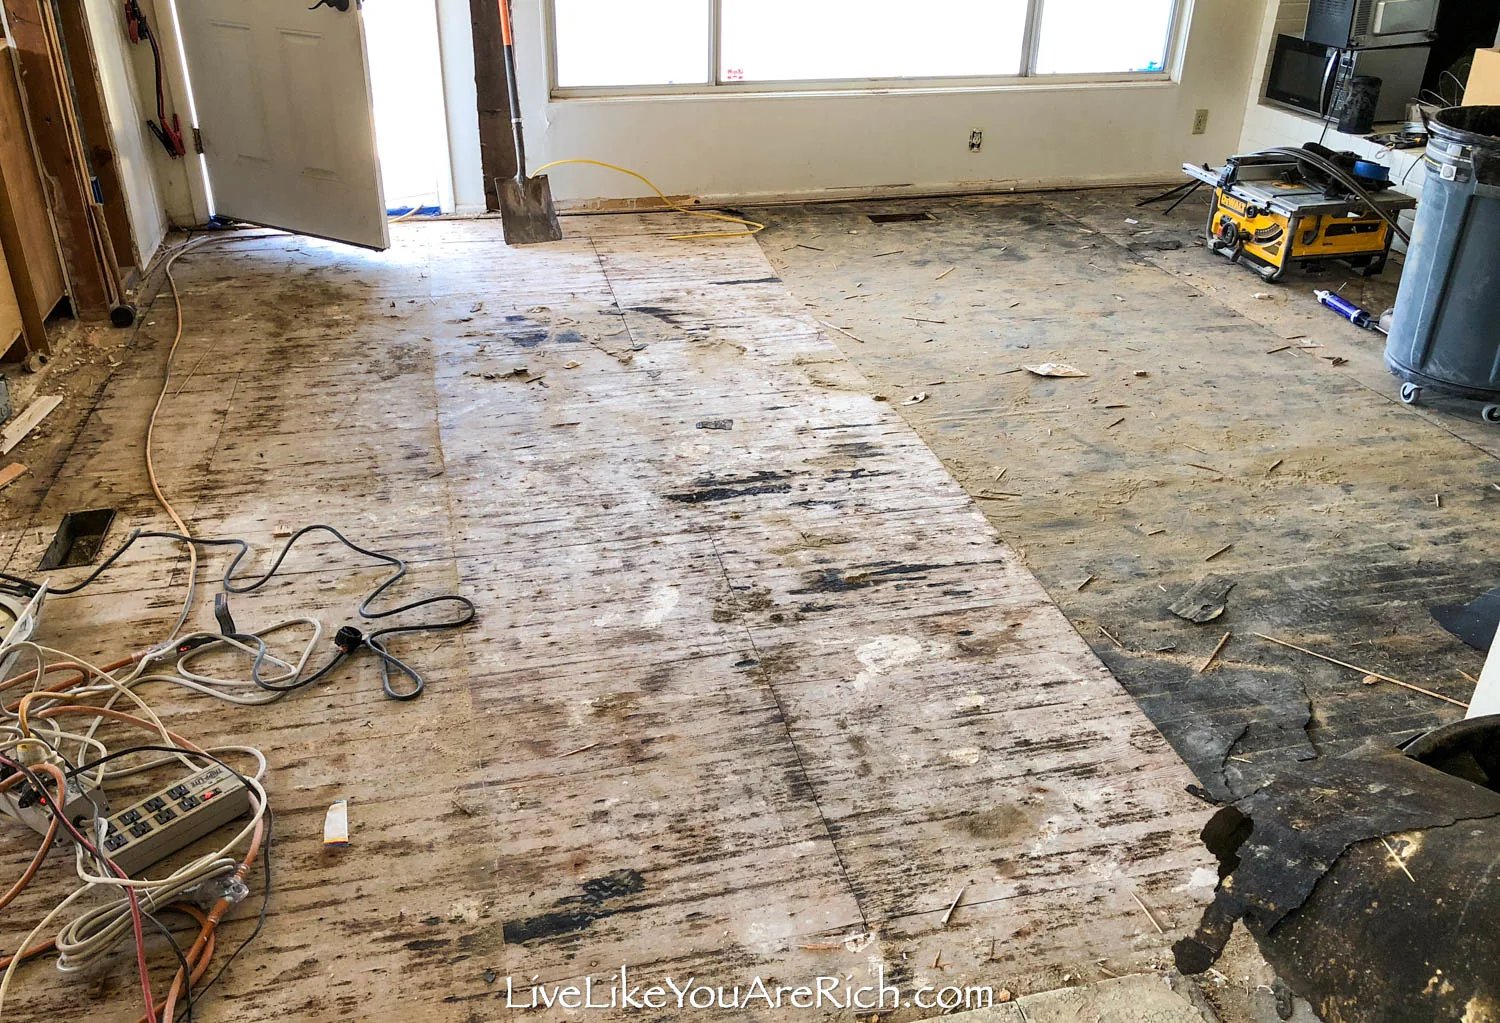
After the wood floor was up, we cleaned it and fixed any subfloor issues we had.
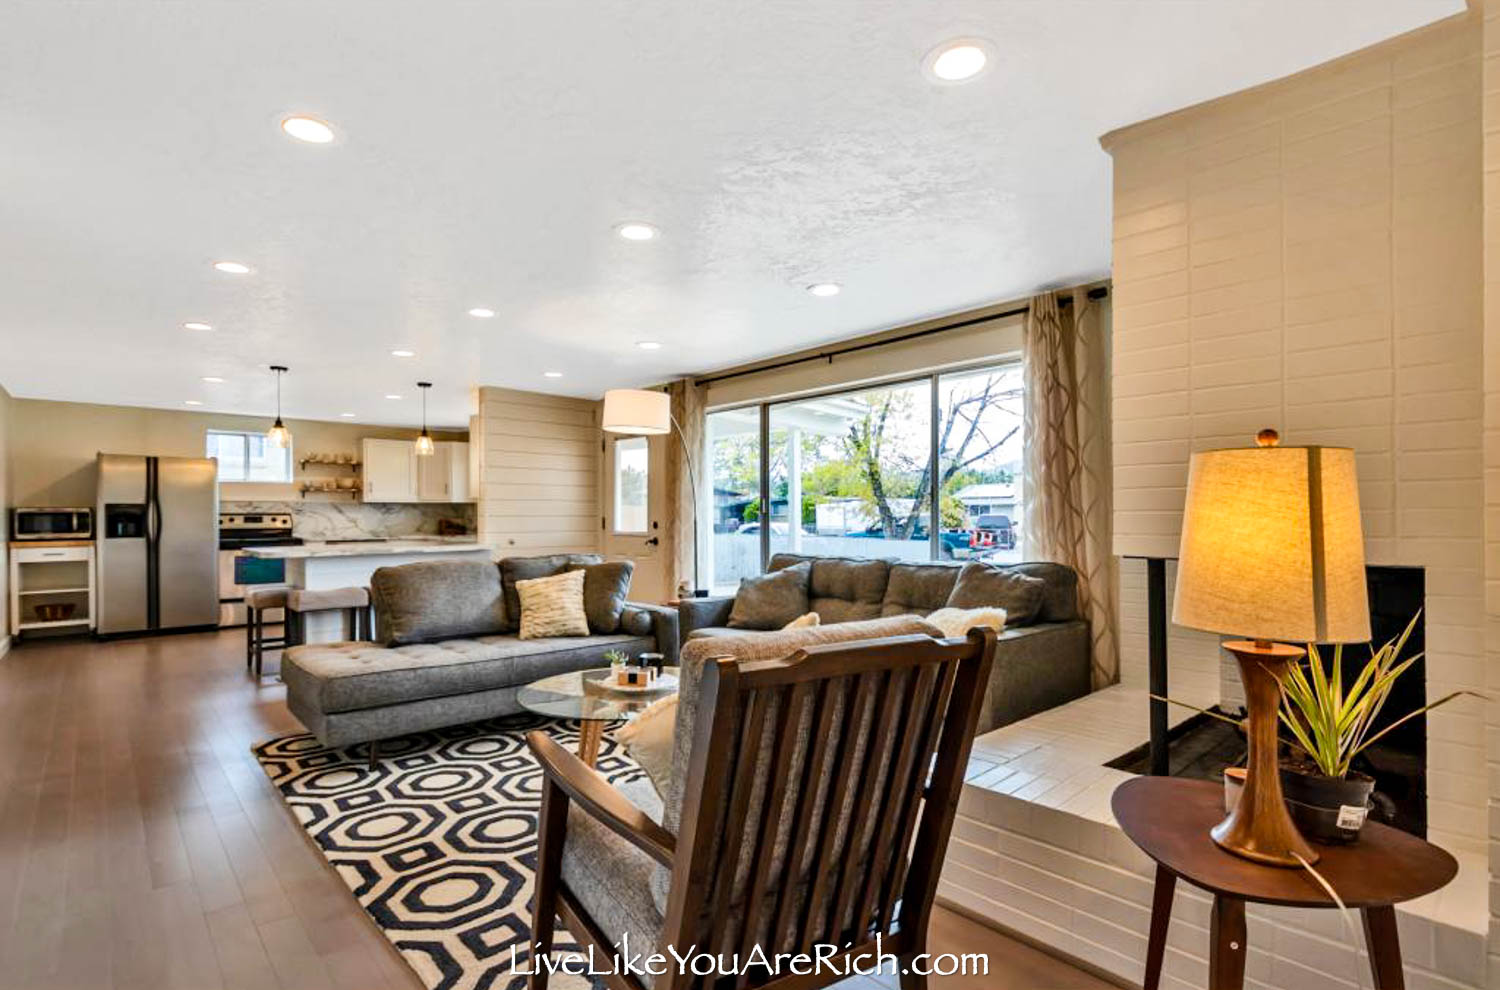
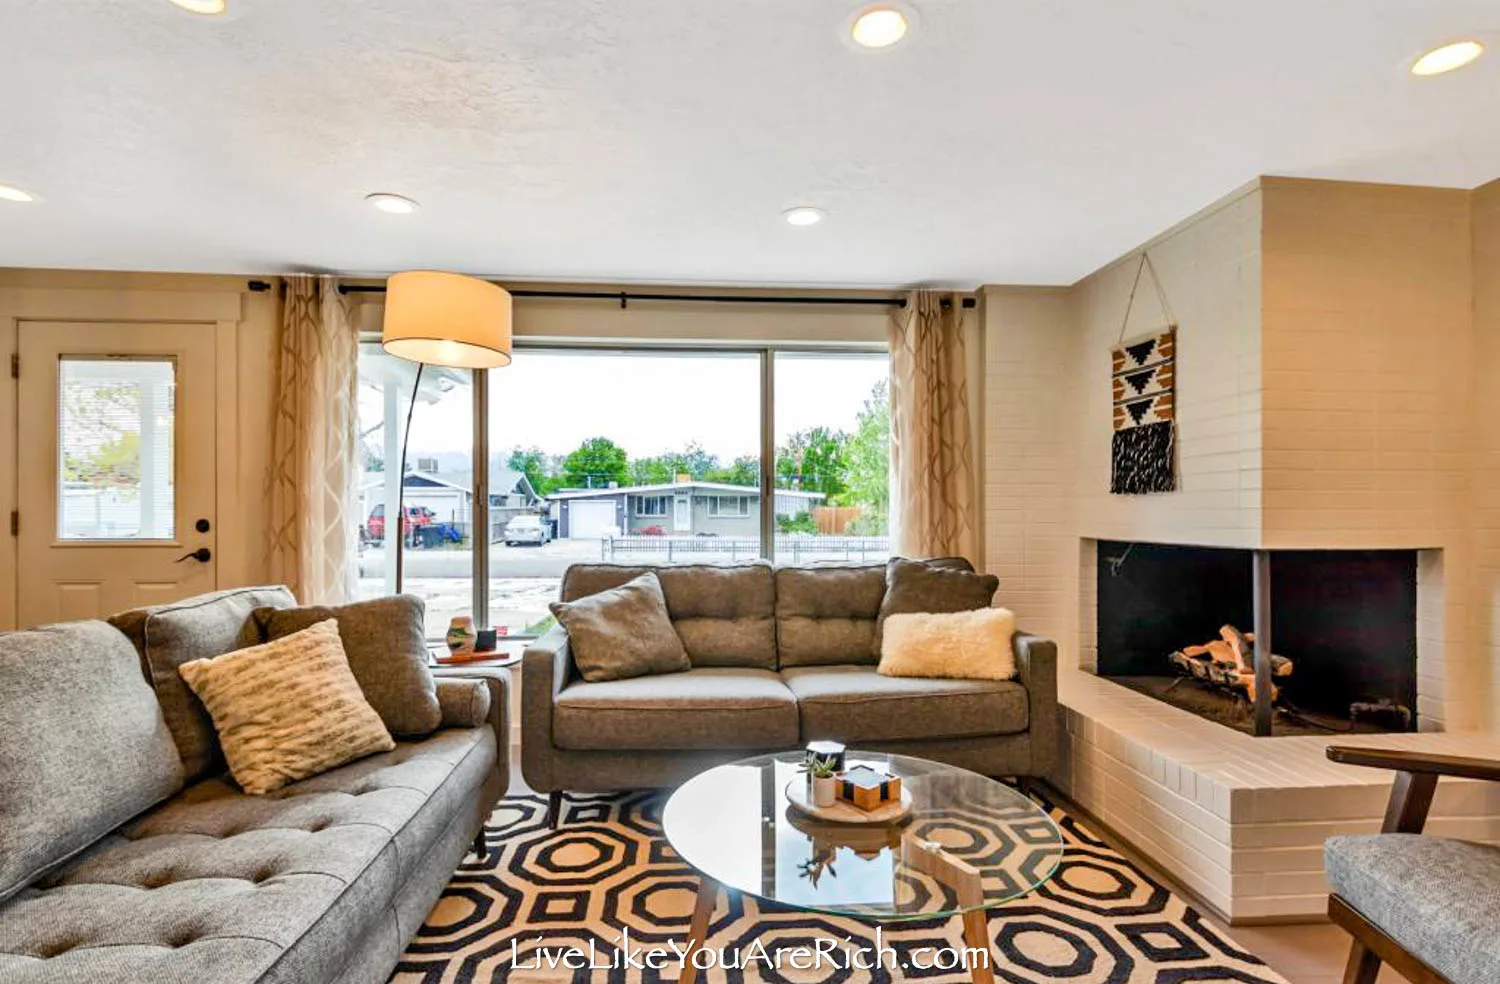
We patched the fireplace brick holes that were made for the shelving, painted the inside black and all of the brick white.
I found a gas fireplace log insert that we installed as well.

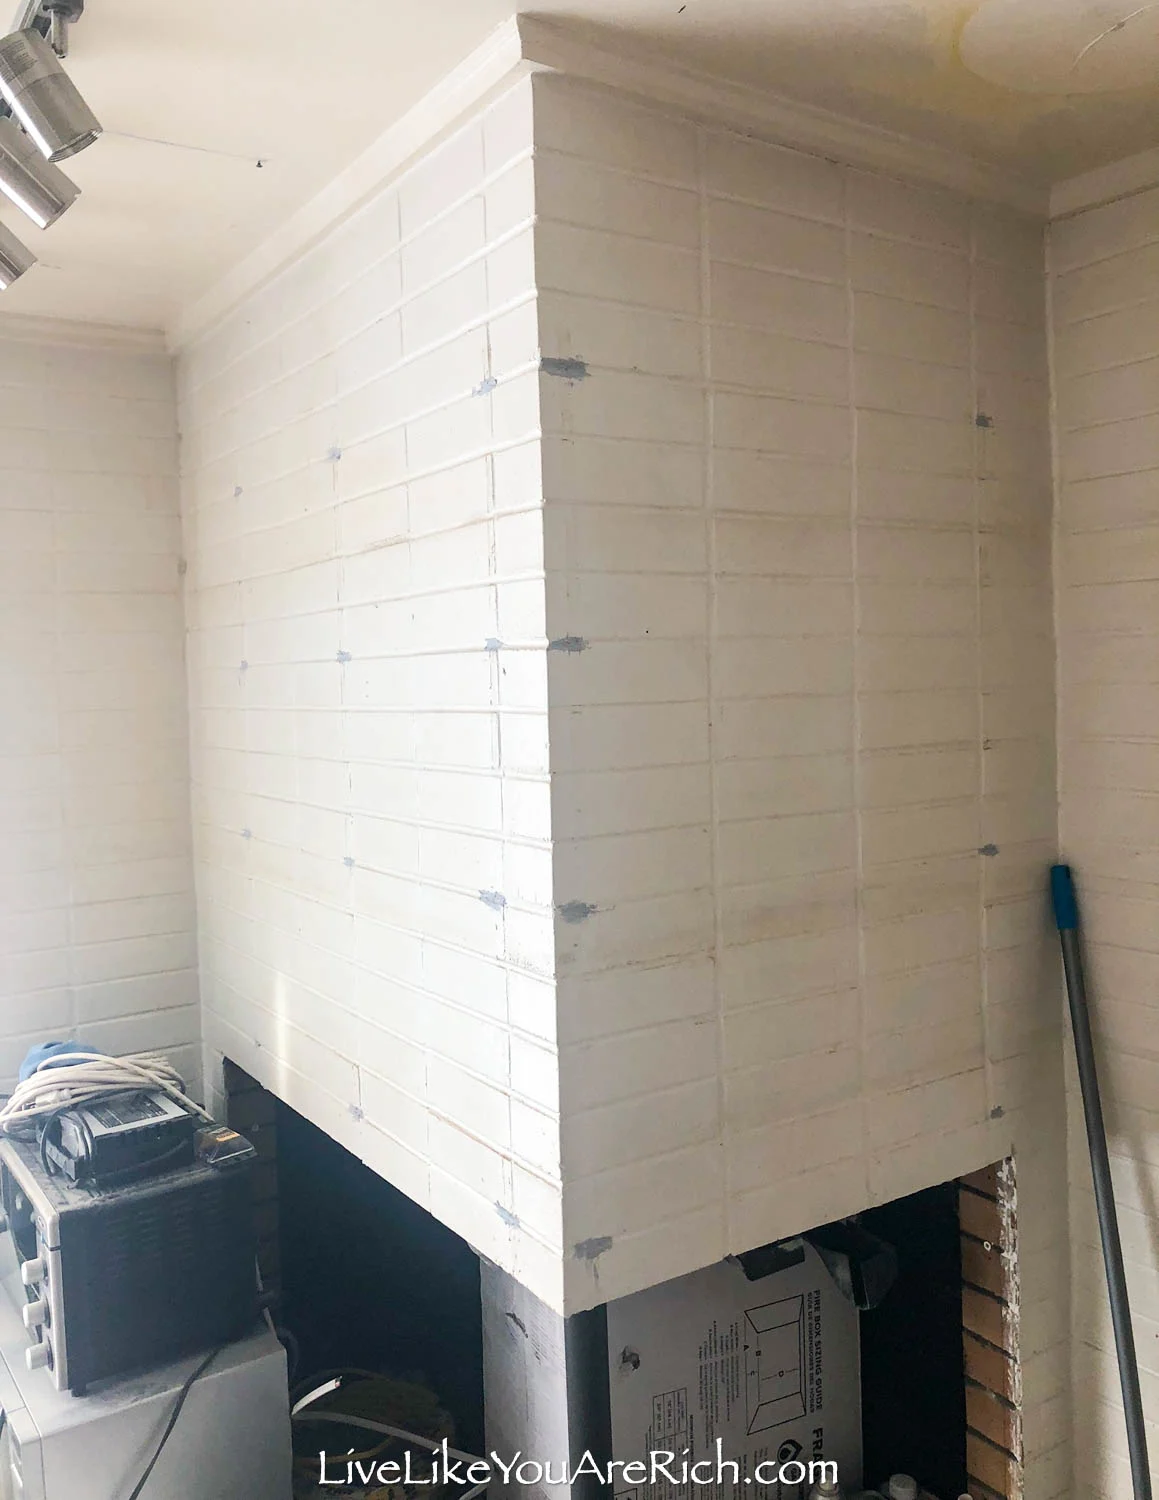
We sheet rocked a wall that needed to be demoed to re-run the home’s electrical wires.
We patched, sanded, and painted the ceilings and walls and my brother-in-law installed real bamboo wood flooring.
Living Room Renovation After Home 2
I did the purchasing of the home decor and staging.
Since this home was built in the 70’s, the mid century modern decor style fit nicely. So, that is the style that I did a lot of the decorating in.
I’ll now list what was purchased and the price (or a close estimate) of what we paid to renovate this living room.

As a note, we could have spent less by re-selling what we used to stage this home, but we ended up using all of the furniture in our Home 3 remodel which obviously saved us money on Home 3.
I don’t really know how to calculate that in to this, for now I’ve just added all of it to the total cost of this room and then I will not add it to the Home 3’s calculated cost when I post about that remodel.
| Living Room | Brand | Name | Original | What We paid | ||
| couch | Ashley Furniture | Zardoni | $550 | Bought used for $300 | ||
| Right-arm Zardoni chaise | Ashley Furniture | Zardoni | $450 | Bought used for $200 | ||
| Zardoni Accent Chair | Ashley Furniture | Zardoni | $450 | Bought used for $200 | ||
| Area Rug | At Home | $225 | Sale $100 | |||
| lamp standing | Lamps Plus | Cora | $115 | Sale $90 | ||
| Coffee Table | Overstock | Safavieh | $135 | Bought Used $60 | ||
| 2 side tables | Overstock | Hoyt Guitar Pick | $110 | $55.00 each | ||
| Curtains | At Home | $85.00 | $22 each | |||
| Curtain Rod | Amazon | AmazonBasics 1″ Curtain Rod with Cap Finials, 72″ to 144″, | $30.00 | $30.00 | ||
| candles | Smiths | varies | $15.00 | Sale $5.00 each | ||
| plants | Lowes | $15.00 |
$10 larger $5.00 smaller
|
|||
| other small table decor | misc | $25.00 |
pot, book, coasters used or brought from home $25.00
|
|||
| marble console | target | Thirstystone | $32.00 | sale $25.00 | ||
| lamp table | Lamps Plus | Brandon Walnut | $35.00 | $30.00 | ||
| Hanging weaved art | Smiths | $25.00 | $25.00 | |||
| Glass cactus art | At Home | $20.00 | $15.00 | |||
| Fireplace Log insert | Barton | Amazon | $70.00 | Bought new classifieds $40.00 | ||
| Entry black fringe leather rug | At Home | 100% leather | $30.00 | $30.00 | ||
| Sheepskin Pillow | Houzz | 100% NZ sheepskin | $45.00 | Bought used $15.00 | ||
| Pillows | At Home | $30.00 | Sale $7.00 each | |||
| TV wall mount (no TV just the mount) | TV mount swinging | Chief TS318TU Medium ThinStall Dual Swing Arm Wall Display Mount 18′ extension | $390.00 | Sale $200 |
|
Furniture, Rugs, and Decor Cost for the Living Room: $1,484.00

We also only spent about $500 on the flooring. It was real bamboo pre-finished hardwood on closeout special for .90 cents a square foot my brother-in-law did us a favor and installed the entire first floor for $2.00 a square foot. This room cost ~$500.
I helped to install the base board and we caulked, sanded, and painted the trim.
I also bought and put together the furniture and hung the curtains and artwork.


My husband and I did the majority of the labor= sweat equity/free.
I got the paint and supplies for this room for ~$125.00.
Sheetrock and supplies ~$100.00
Fireplace stuff patch work and paint ~$100.00
Can lights $6.00 each with a coupon (Lowe’s) ~$75.00 + wire ~$200. My husband did the electrical work and installation of lights.
Odds and ends ~$200.00
bamboo flooring and staples ~$500
Total: $1,300.00
+ Decor $1,500.00
Grand total: ~$2,800.00
WAYS WE SAVED MONEY RENOVATING THIS DINING ROOM:
1. Instead of getting new windows, I took the screens out and cleaned them very well with a good cleaner and a razor blade (don’t attempt unless you know how to do this without scratching the glass).
2. We tried to buy all demo supplies and items on sale and/or with coupons.
3. We did the electrical ourselves.
4. We did the demo ourselves.
5. We primed and painted the ceilings and walls ourselves and our family members came to help too.
6. I found a great deal on the bamboo wood flooring (.99 sq ft) and got a discount on the install from my husband’s awesome brother ($2.00 sq foot). We could have done it ourselves (I’ve installed hardwood and so had my husband) but my husband, Shane, was working full time and I was pregnant and had 2 children to care for. It just saved us a months worth of time (and mortgage payment) to have someone else do it inexpensively (which was a wash cost-wise to do it this way).
7. We installed trim and baseboards, caulked, sanded, and painted them ourselves.
8. I put together the furniture and staged it myself.
9. We reused the furniture bought for staging this home for our current home (home #3). You can re-sell the staging furniture when finished if you do not need it and recoup most of your investment. Renting furniture is an option but I bought all ours for the price that many rental agencies would have charged to come in set up, and stage and take down.
10. I bought most of the furniture second hand but in like new condition(local classifieds) or on deep discount or with coupons this room.
As you can see, it is possible to renovate in a cost-effective manner.
I hope this Living Room Renovation Before and After Home 2 has given you an idea of how to save thousands while renovating a Living Room.


For other ‘rich living tips’ please subscribe, like me on Facebook, and follow me on Pinterest and Instagram.