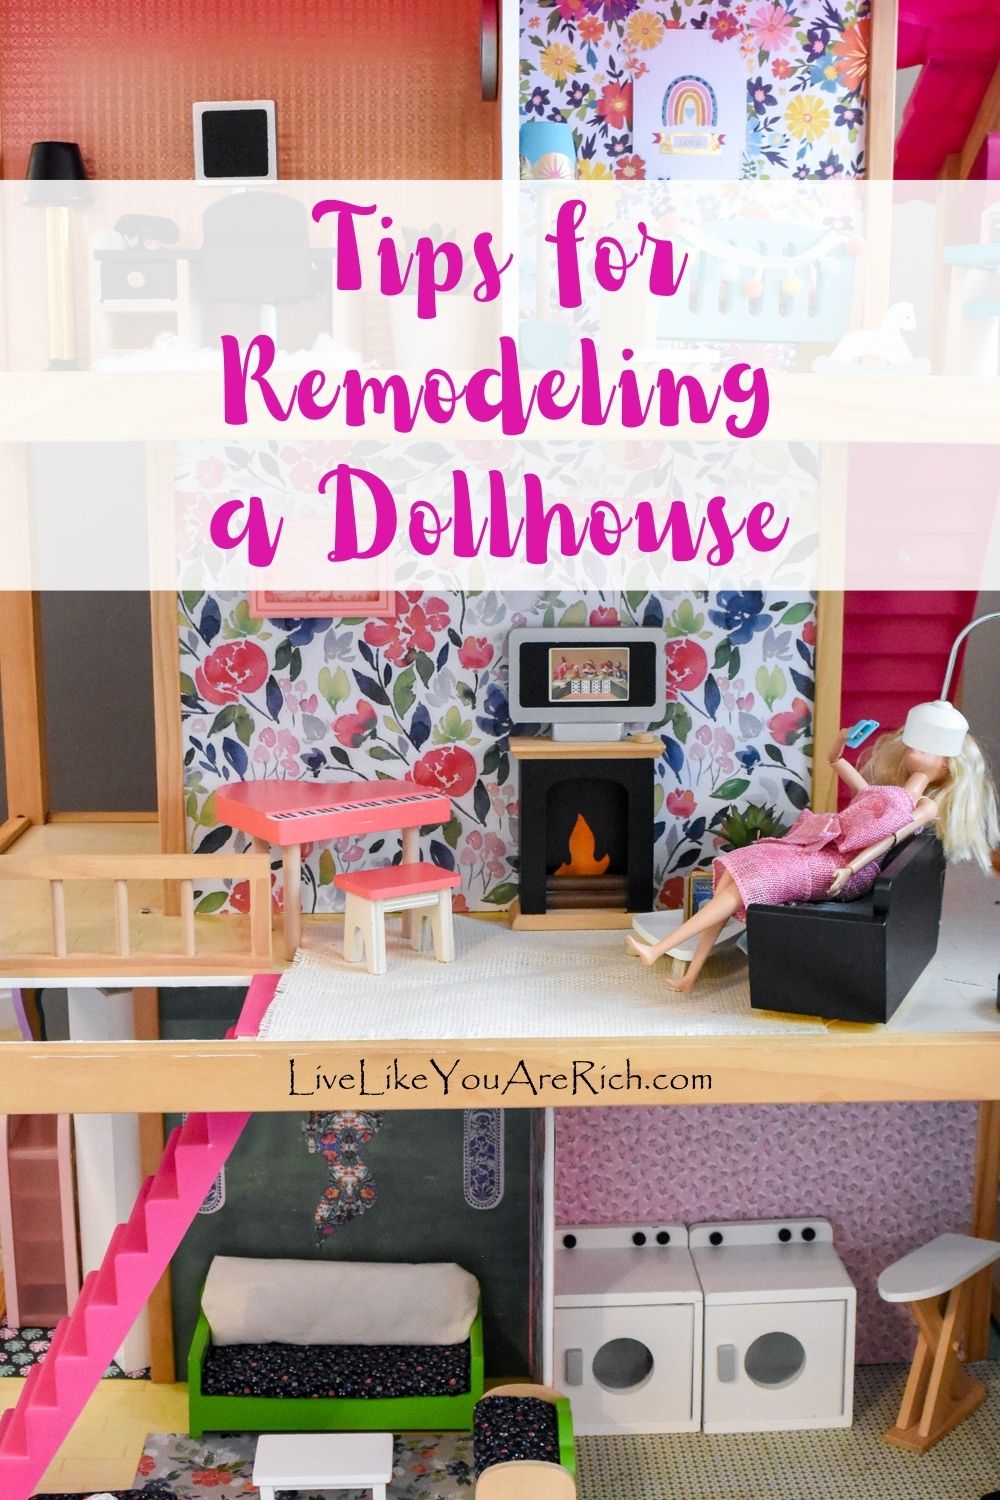

Tips for Remodeling a Dollhouse
My daughter, Aurora, and I worked together to remodel her dollhouse.
It was such a fun activity to do with her. I really enjoyed it and so did she.
She told many people in our extended family as well as her friends about how much fun she had doing this project with me.
It’s the best thing, as a parent when your child has so much fun doing a project with you!
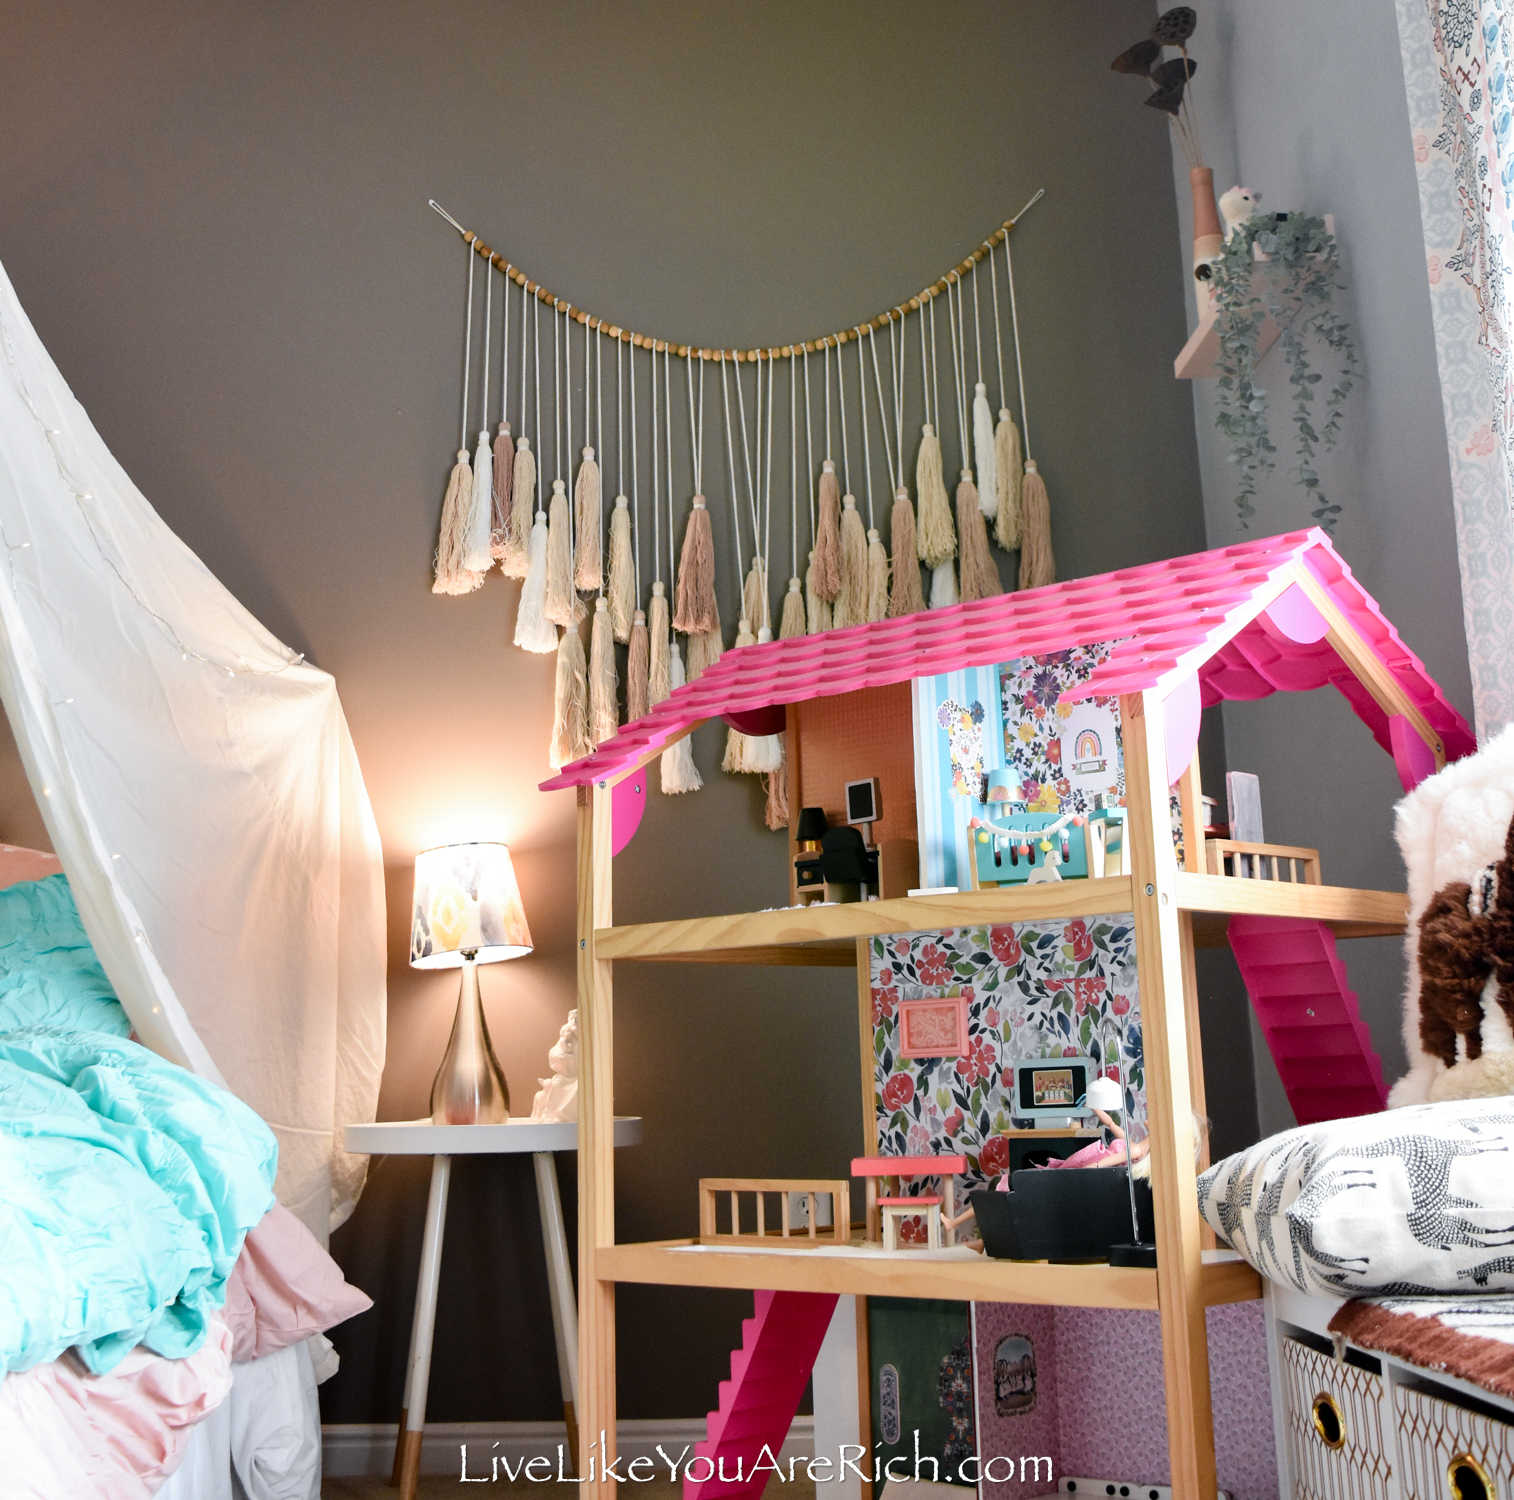
Before:
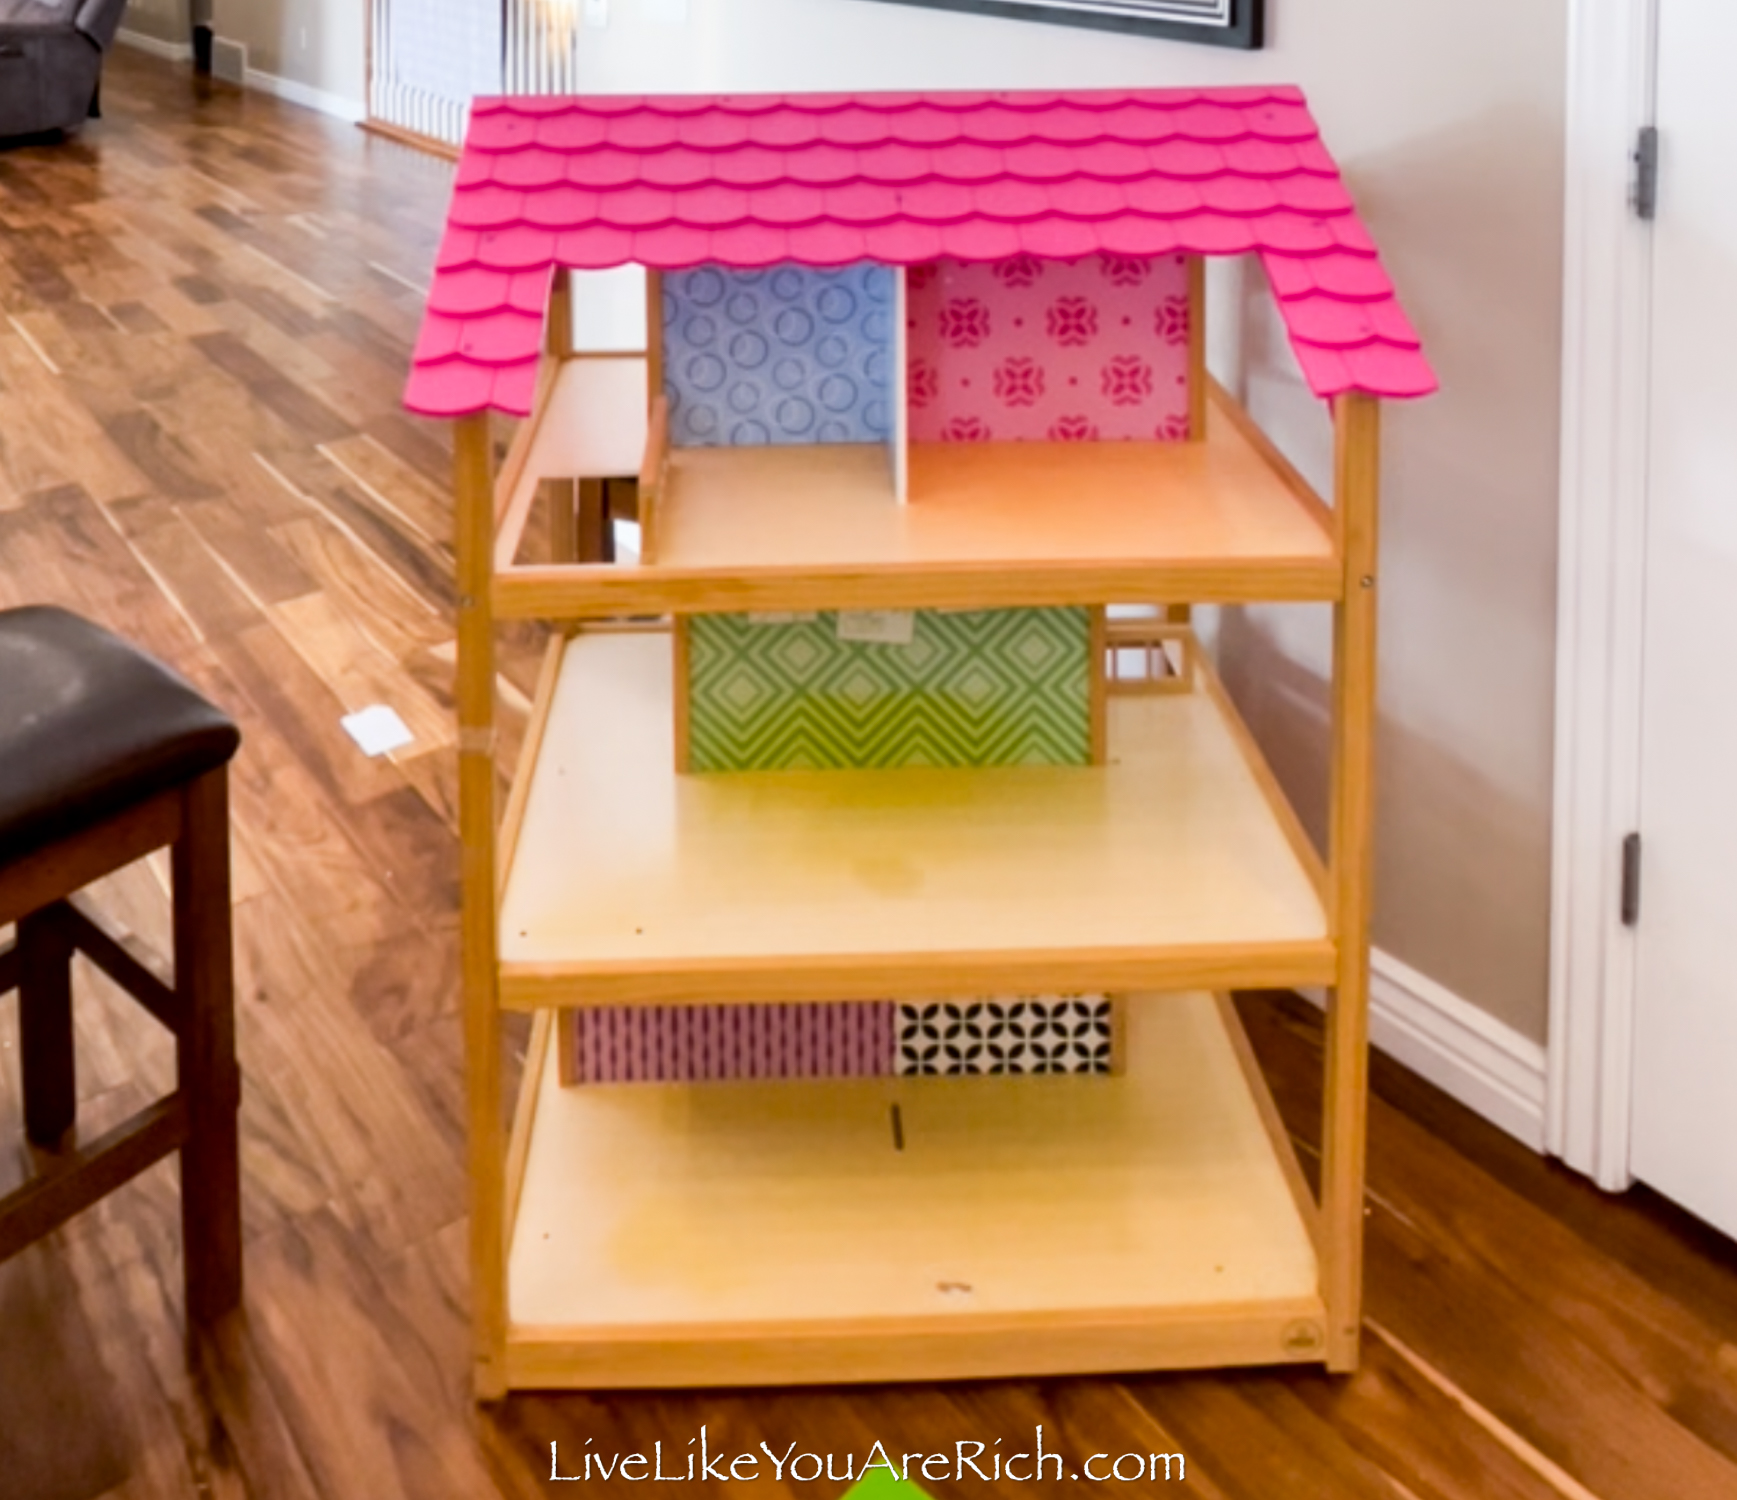
We bought this Kid Kraft So Chic dollhouse from a neighbor selling it for $50.00.
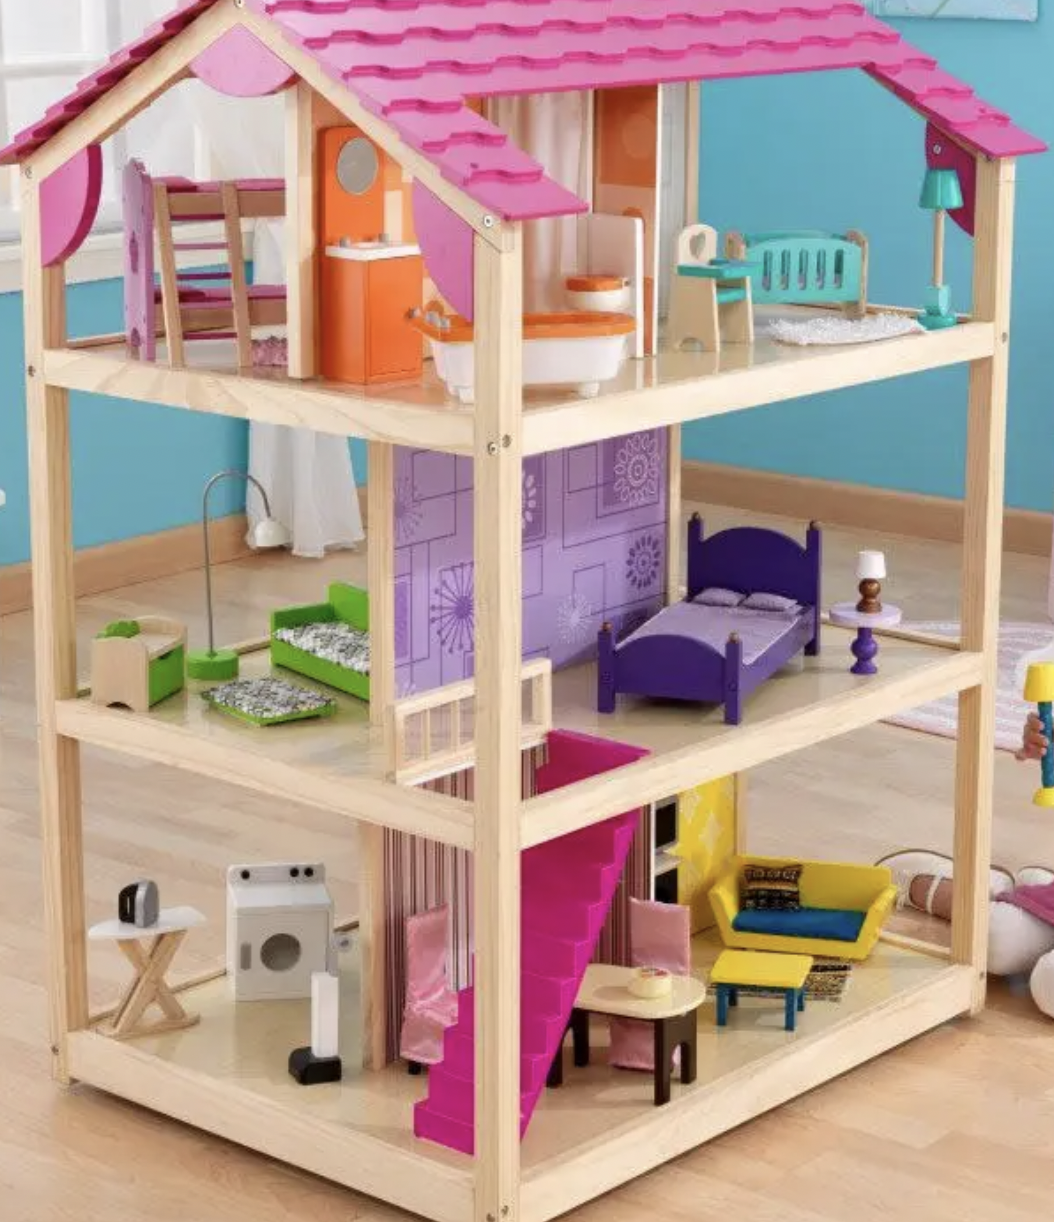
It has excellent structure, layout, and access to all of the rooms.
The furniture is high quality and mainly made of wood. Plus, the dollhouse rolls which is so convenient.
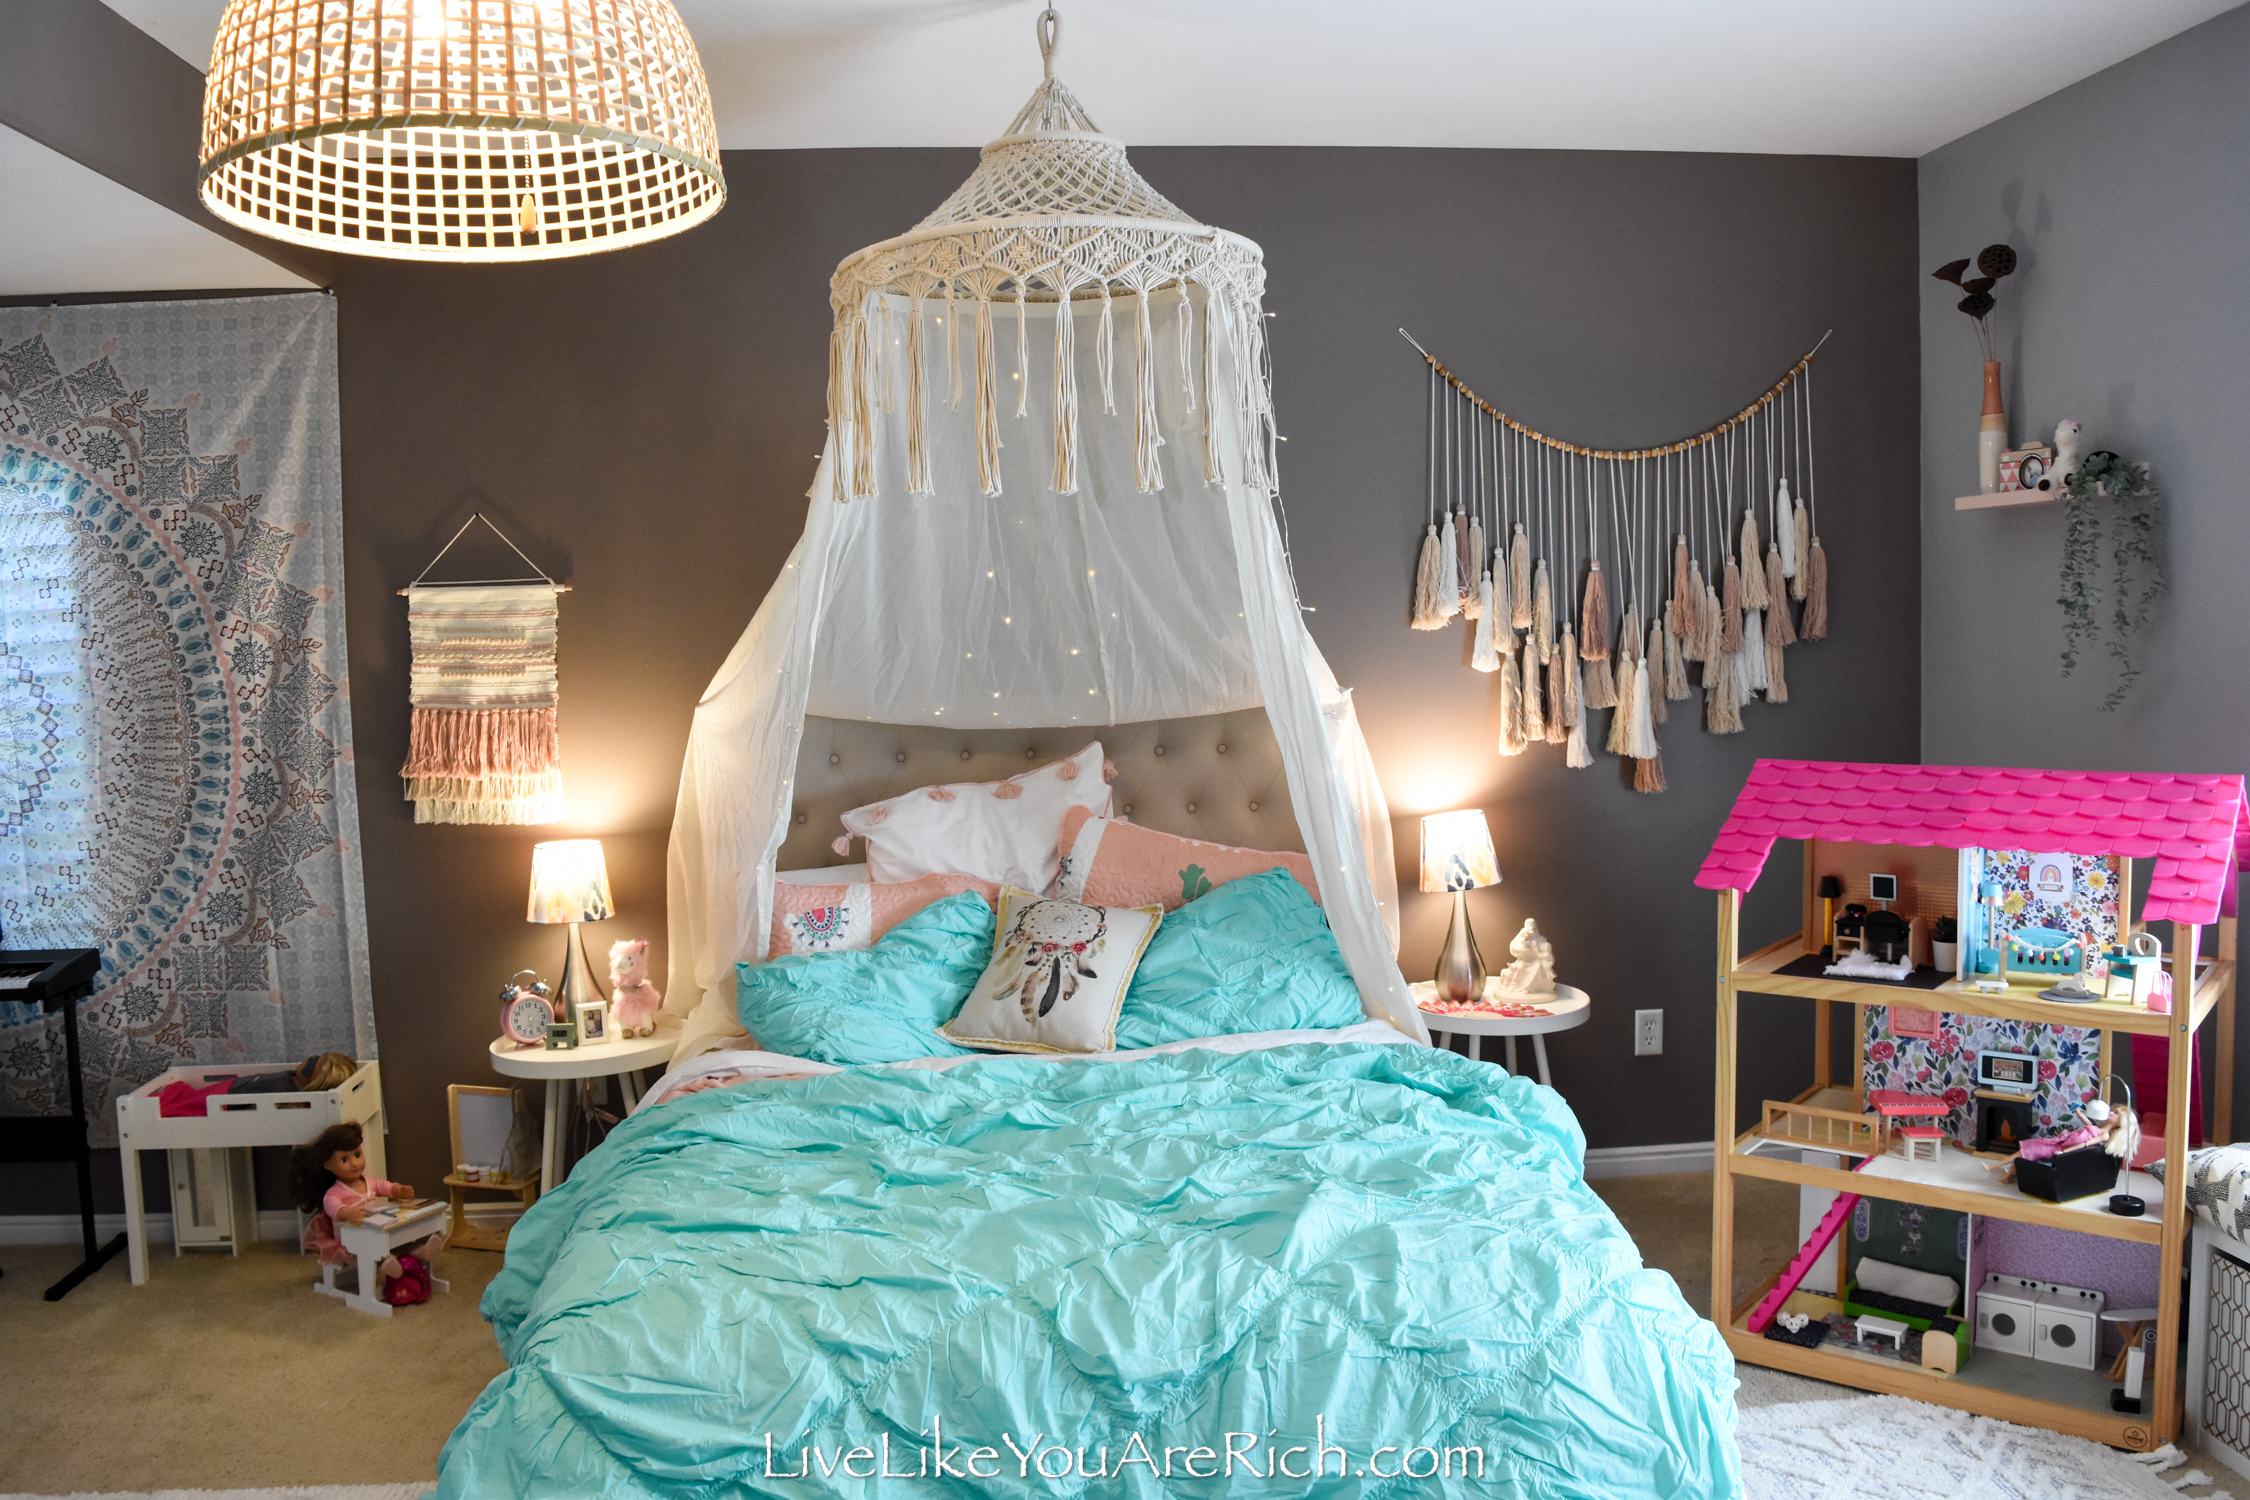
We were remodeling my daughter’s room. We made it a Colorful Boho Chic room and wanted her dollhouse to match the color scheme, so, we remodeled it with that in mind using items we had on hand.
After:

I love to craft and we just used items I had in my office.
This is a list of supplies we used:
Supply List for remodeling a dollhouse
dollhouse (we used the So Chic from Kid Kraft)
fabric (various textures, colors, and patterns that will work with your color scheme)
scrapbooking paper 12×12 (gold foil, linen, watercolor, floral, regular)
stickers
scissors
paint acrylic craft paint for furniture
doll furniture from KidKraft So Chic (additional used from KidKraft Designed by Me™: Magnetic Makeover Wooden Dollhouse with Magnets, Fabric Wallpapers and 10 Pieces of Furniture, Gift for Ages 3+)
foam brushes
mini Goodnight moon book- digital file found on Etsy here
Narnia cover (printed small and glued on a tiny book)
small paint brushes cut down with wire cutters to make tiny paint brushes.

Tips for Remodeling a Dollhouse
1- Get out all of the supplies listed above.
2- Clear the dollhouse of its furniture and all its items.
3- Clean the dollhouse with soap, water, and a dishcloth.
4- Dry the dollhouse.
5- Begin laying out the wallpaper, flooring, and furniture to designate each room with a color scheme and a theme.
6- Move things around so that the items match together.

7- Once you have a layout you like, glue the scrapbooking paper onto the walls and floors that you desire to renovate using mod podge.
A tip is to not use vinyl unless you cut it into small strips like regular wallpaper but on a 1:12 dollhouse scale.
I tried covering the floor and walls with vinyl and it was very difficult!
Vinyl is very hard to work with in large strips and was crumpling up and had a lot of bubbles in it each time I laid it down for wallpaper and flooring.

After a while, I gave up and switched to using scrapbooking paper for both the wallpaper and flooring.


The scrapbooking paper and Mod Podge worked very well and were easy to apply.
It’s held up well these past few weeks and I anticipate it will continue doing so.
I had a lot of different paper so the variation of wallpaper prints and colors was better than had we just used vinyl.
You can see when looking close-up that for the larger walls, we did have to cut the scrapbooking paper and patch more in.

I did try to do a seam that would match up/align together almost seamlessly, but with the scrapbooking paper, some patterns would work as hoped and others wouldn’t.
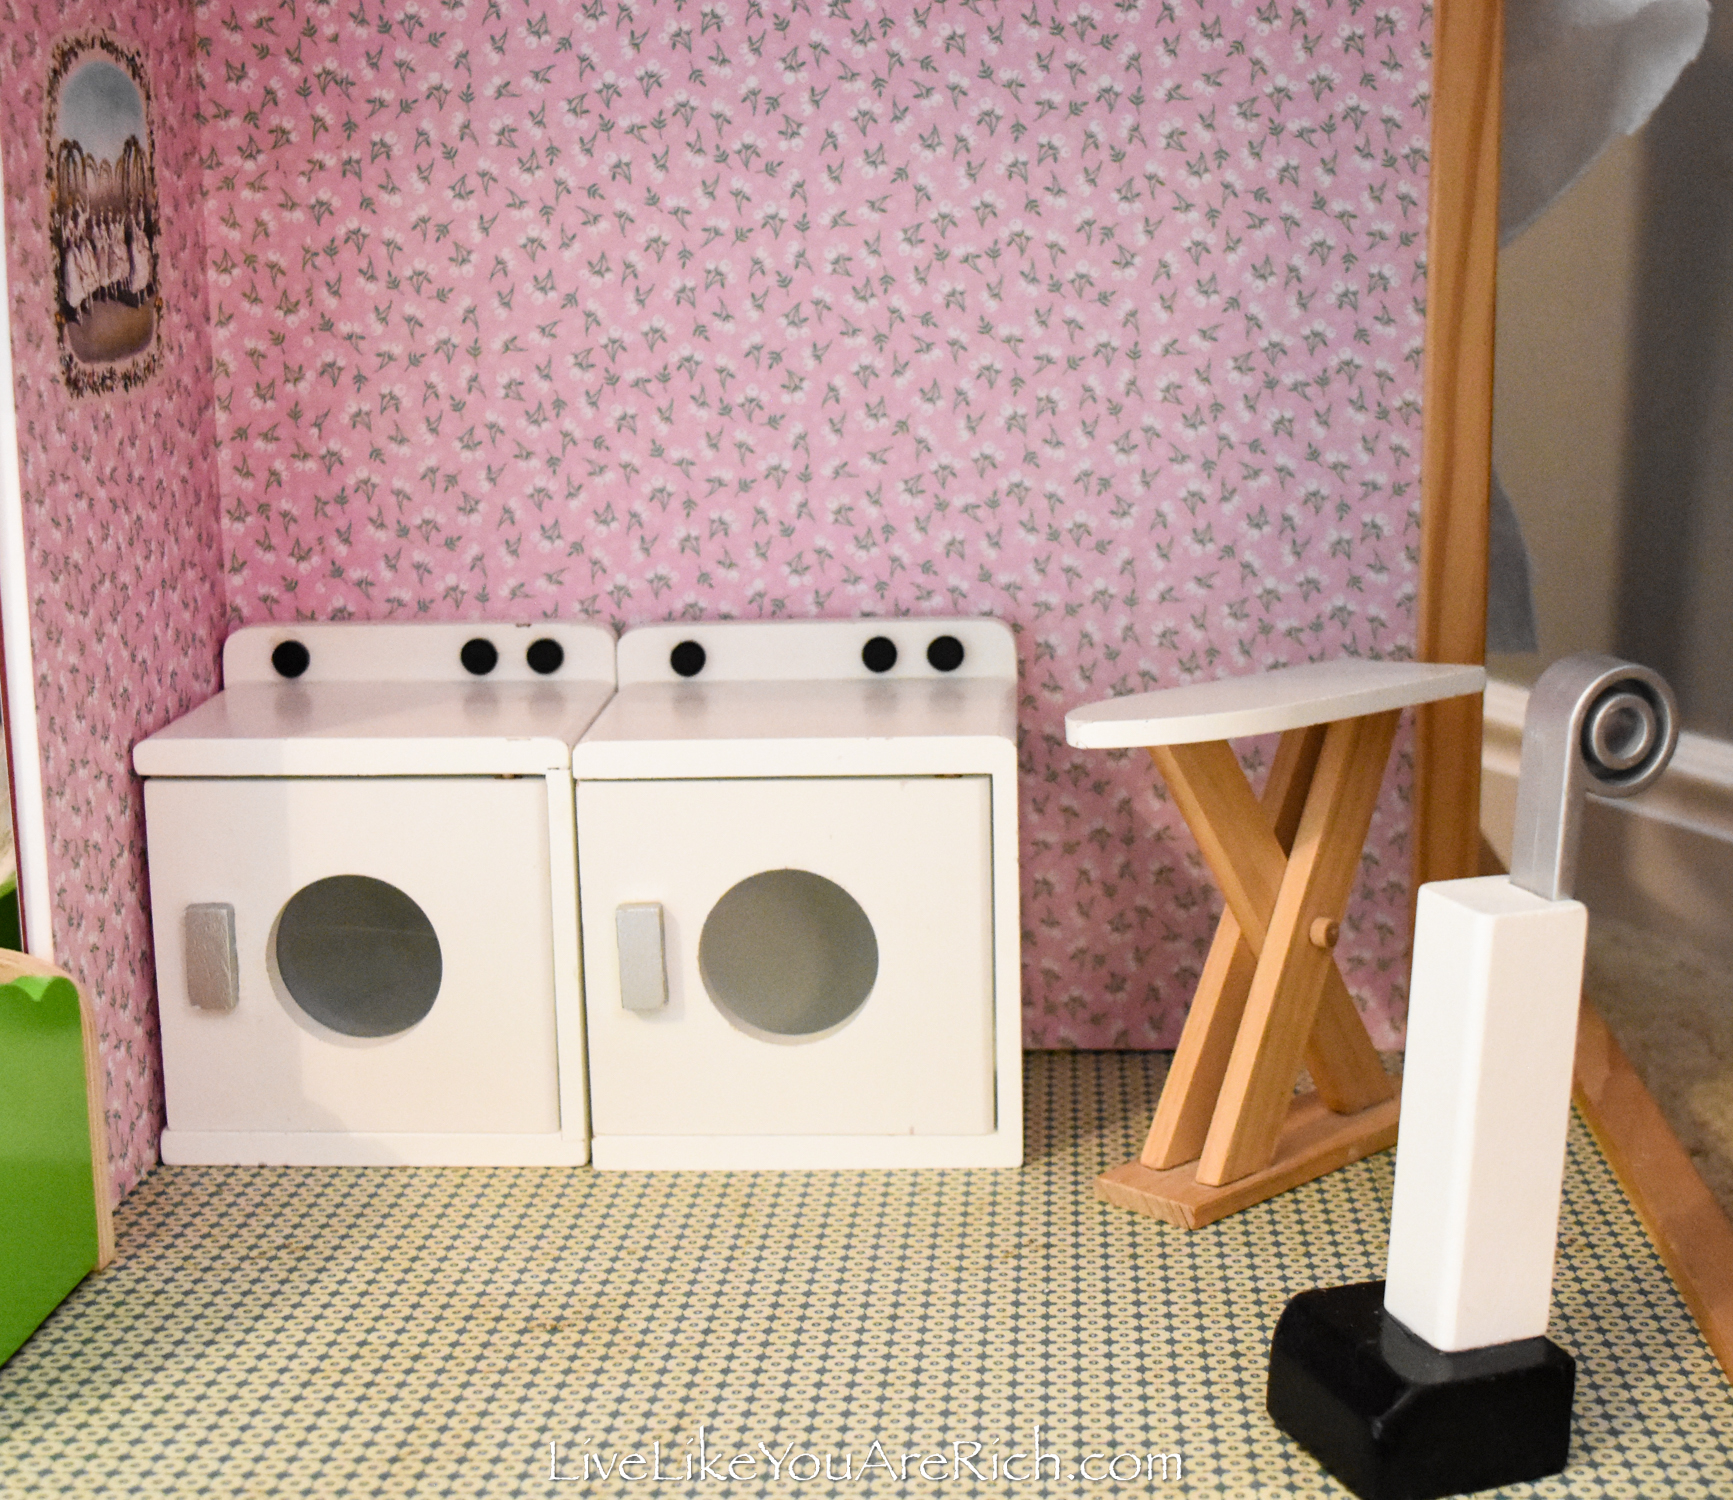
The laundry room wallpaper and tile had small simple and repeating patterns, so it did work when needing to patch in more scrapbooking paper to line them up well.
The living room was a bit more difficult and I couldn’t get the pieces to line up.

However, from a few feet away, it looks just fine.
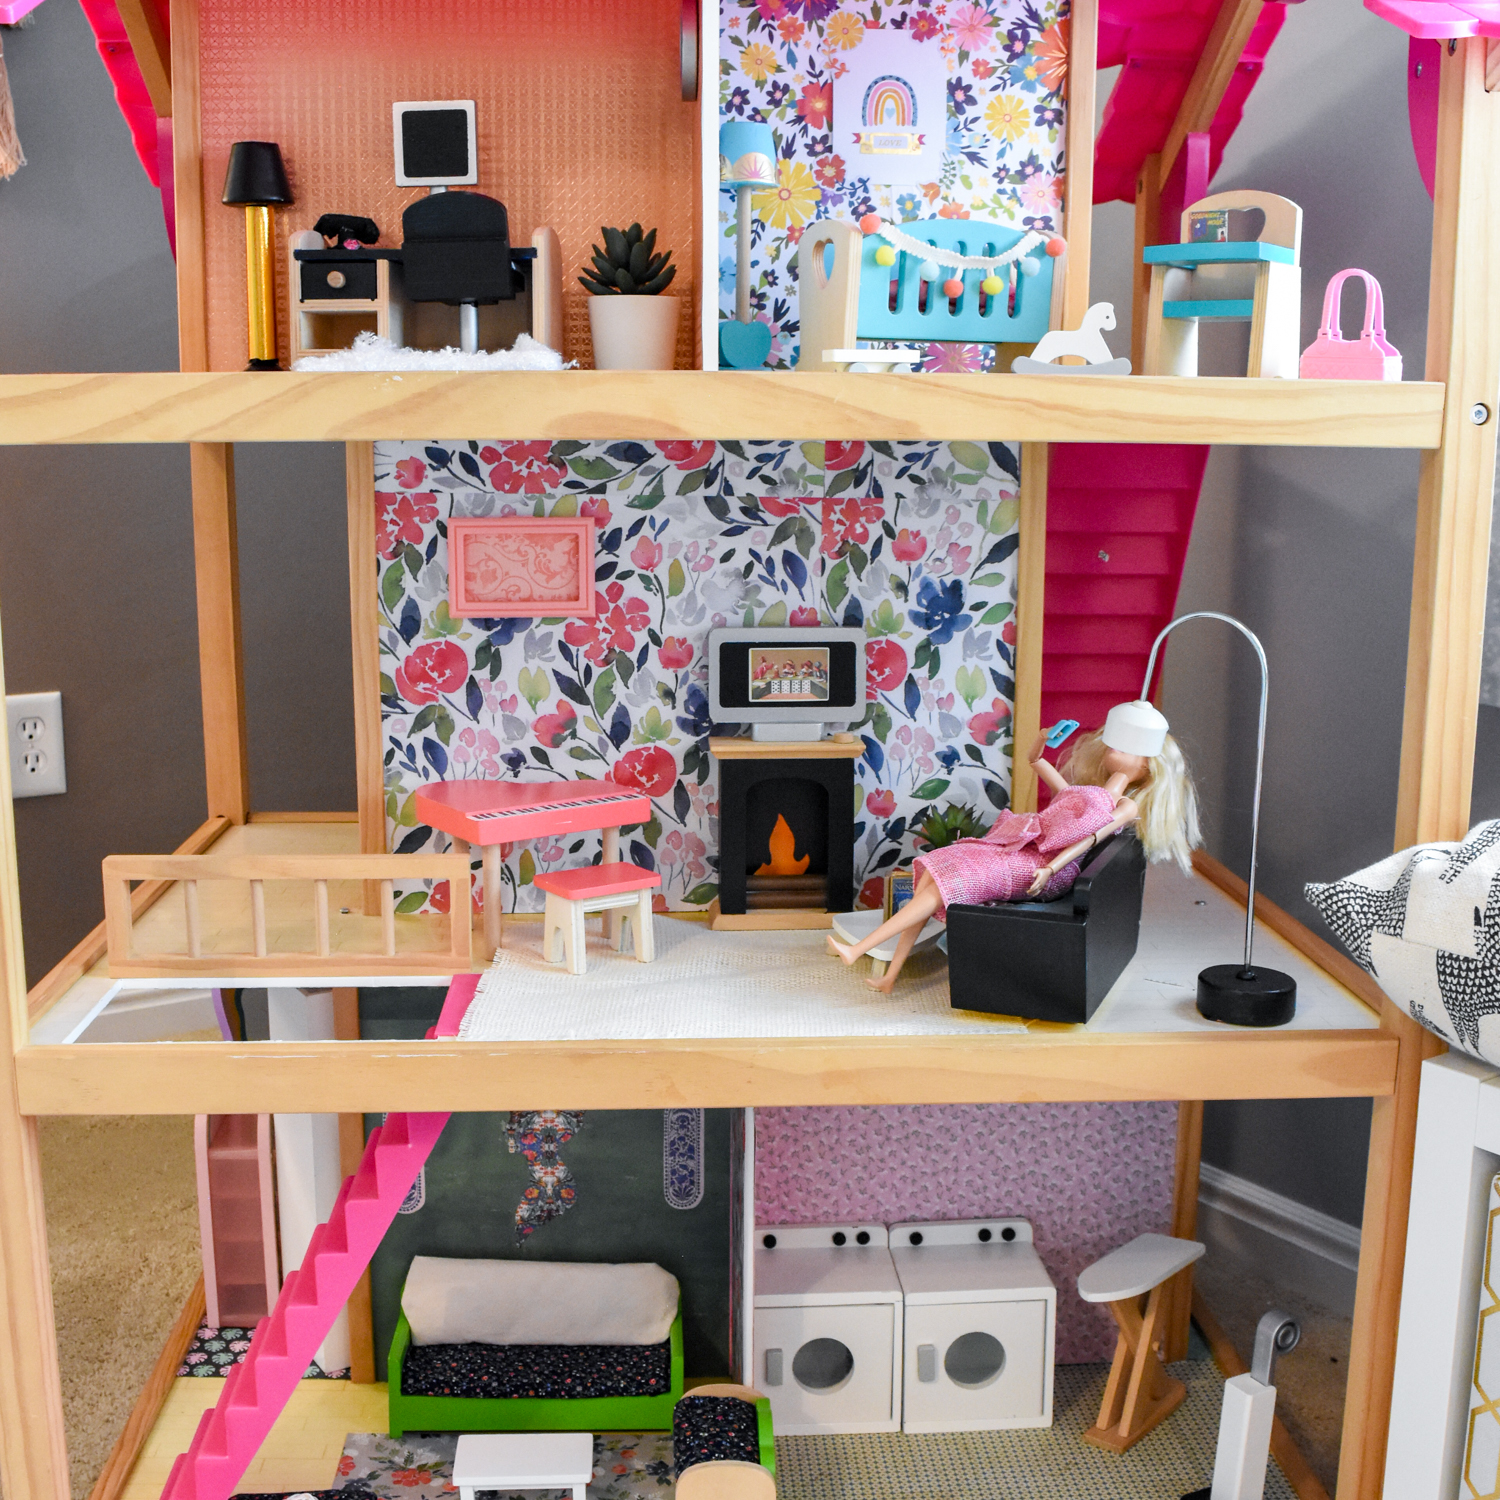
Next, we painted some of the furniture to match each room.
I painted the living room couch, lamp, and fireplace black using acrylic craft paint and a paintbrush. It needed 2 coats with drying in between.
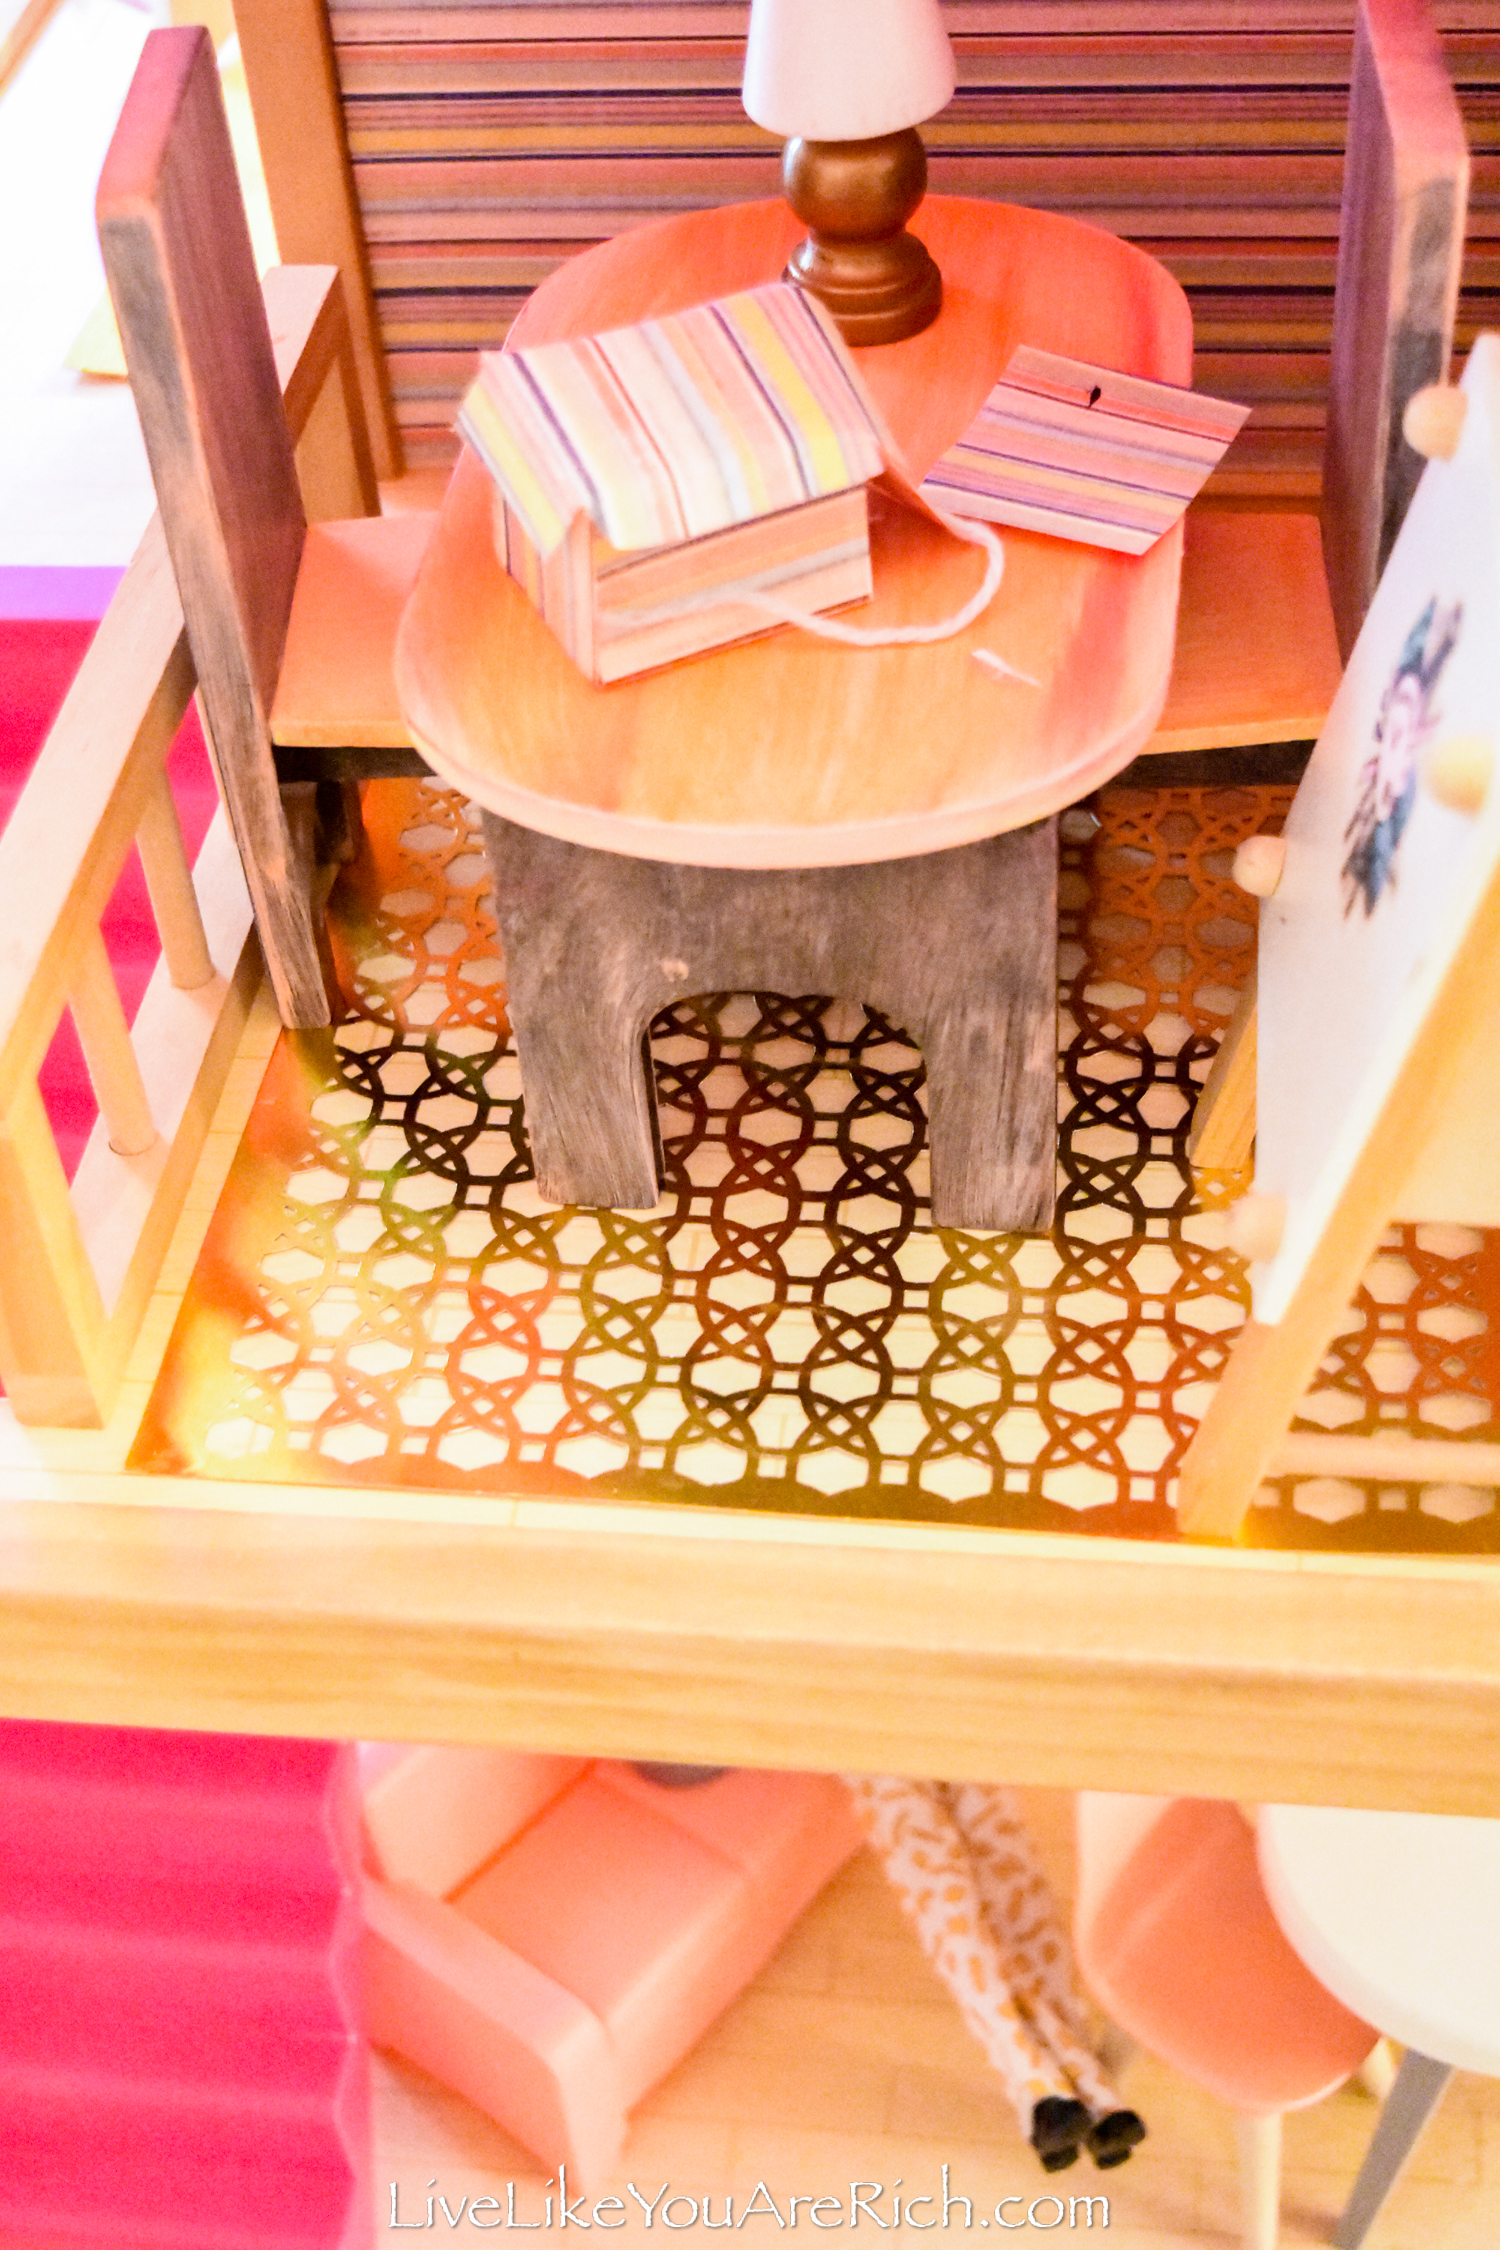
My daughter painted the craft room table and chairs a sunset multi-color scheme to match the wallpaper.

I painted the office furniture black as well.
The rest of the furniture remained its original color.
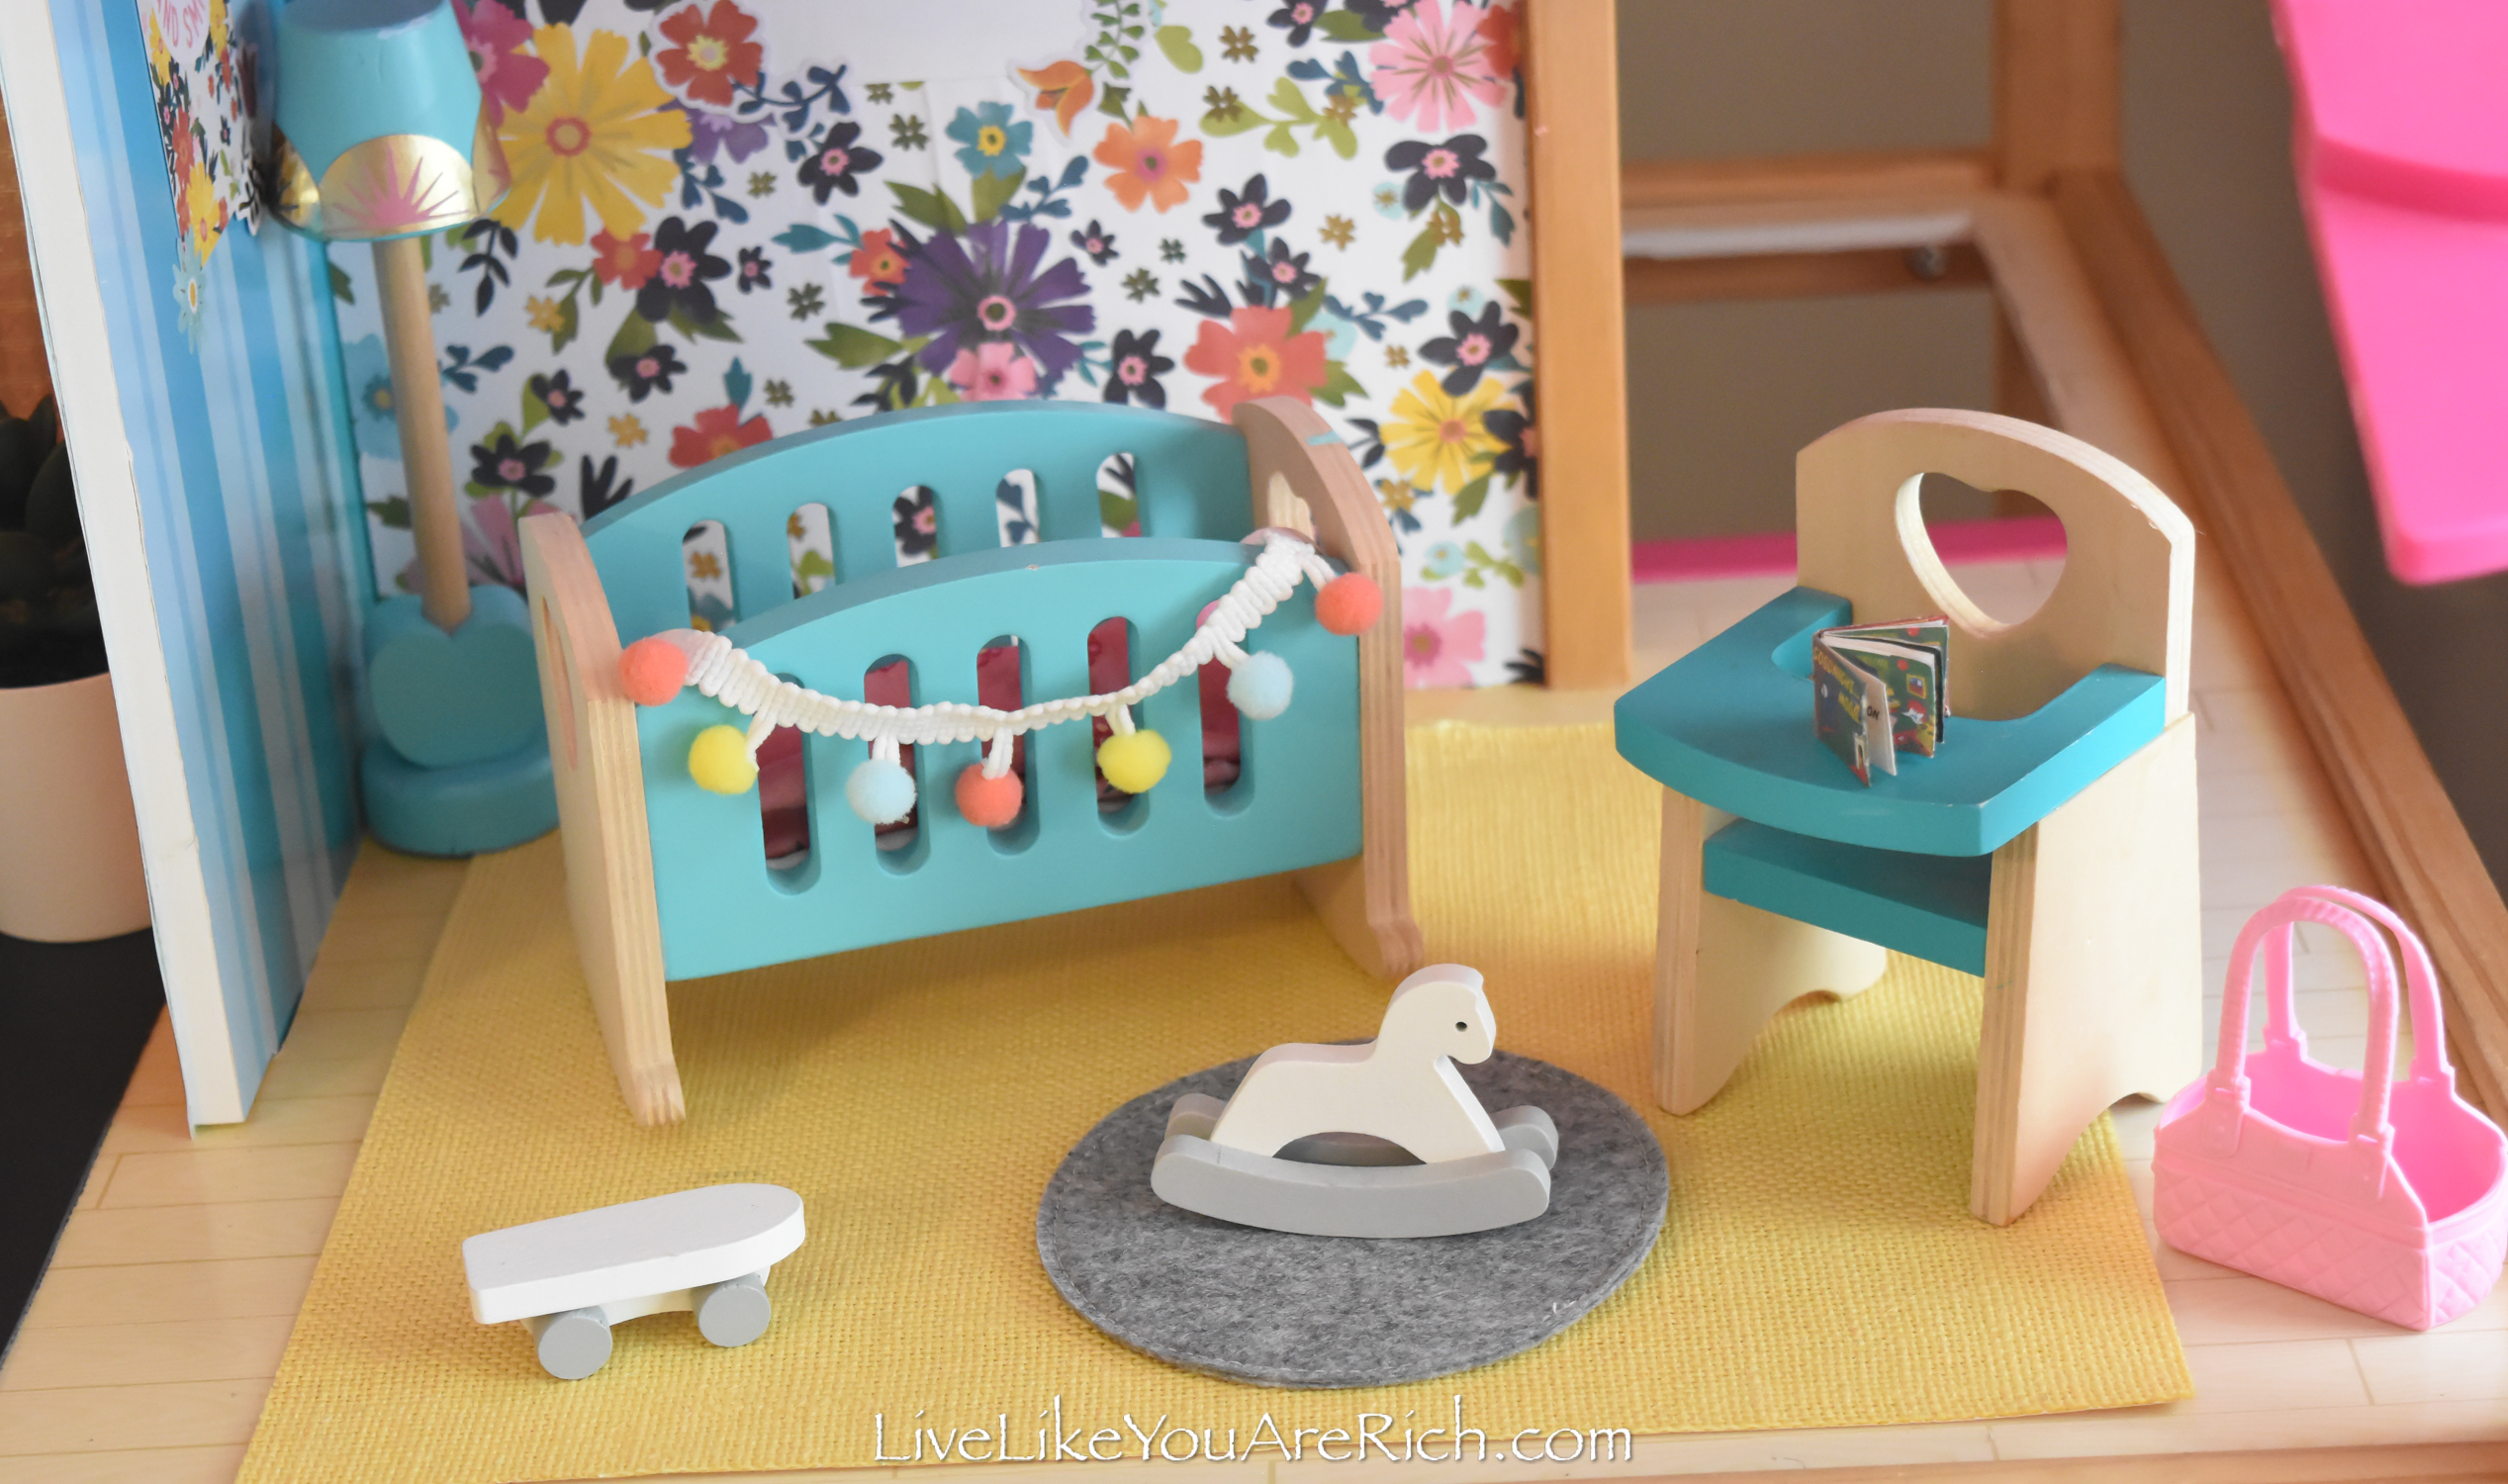
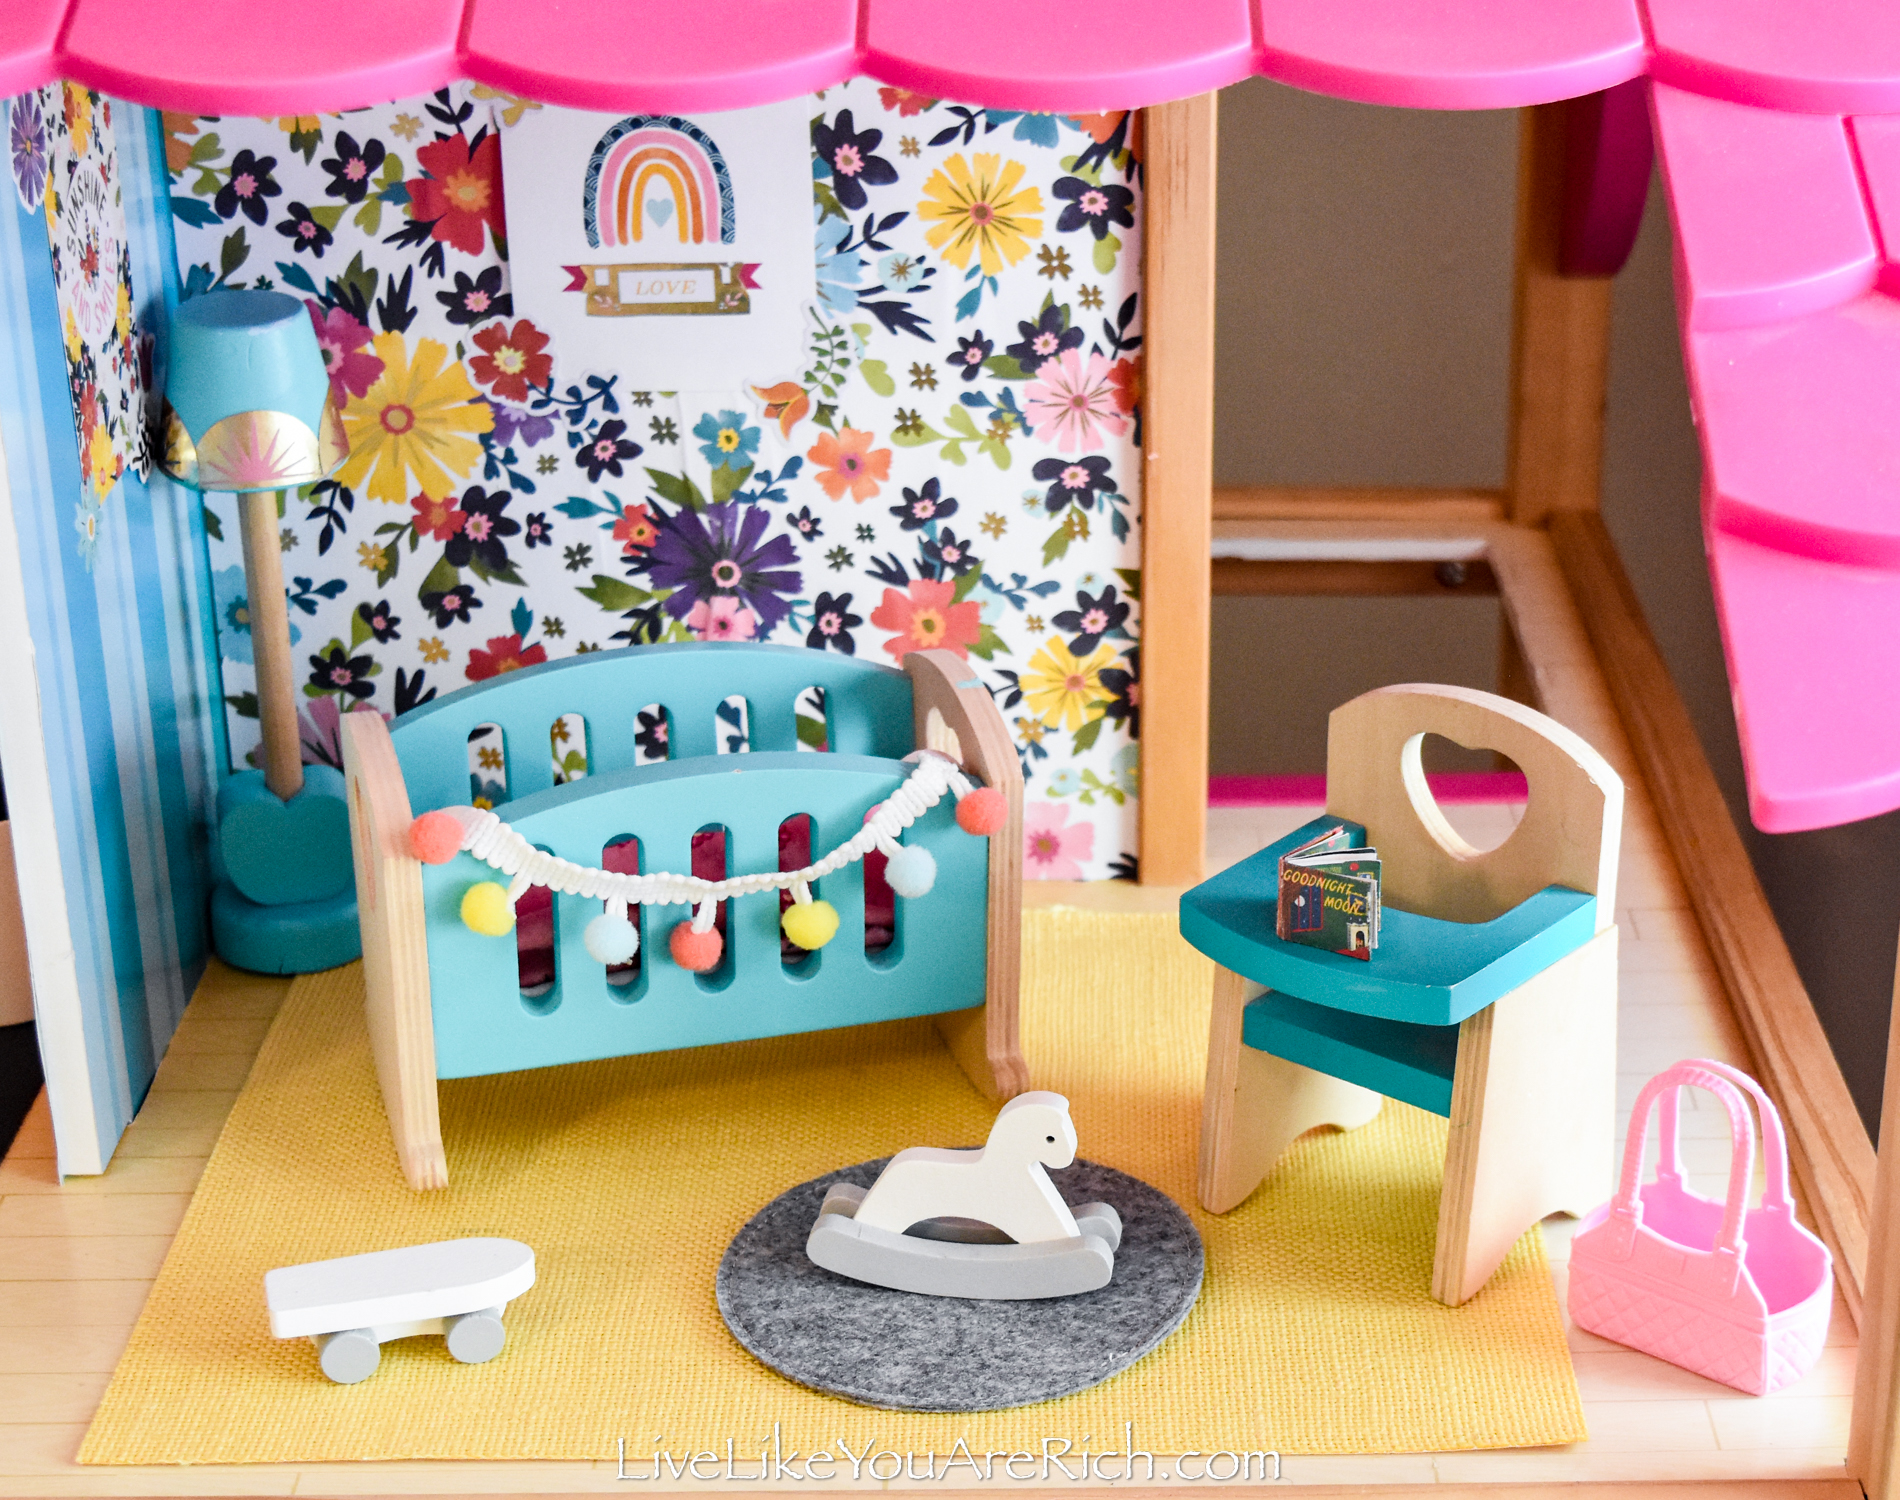
We added a few furniture pieces to this dollhouse from my daughter, Amelia’s, dollhouse and Pottery Barn kids (the rocking horse and nursery items) and we also moved some of the furniture from Aurora’s doll house to Amelia’s.
I got a good deal on the Kid Kraft mermaid bathroom, bedroom, and vanity sets ($5.00 each), so we used some of the furniture from those sets and added them in.

Once we had the furniture set up, we added some other details, such as upholstery.
We upholstered the couches to match the rooms’ color schemes.
I used a vinyl weeding pick to pull up the corners of the existing material and then put fabric glue or hot glue down and shoved in the new material with the pick to secure it.
We made bedding that matched as well.
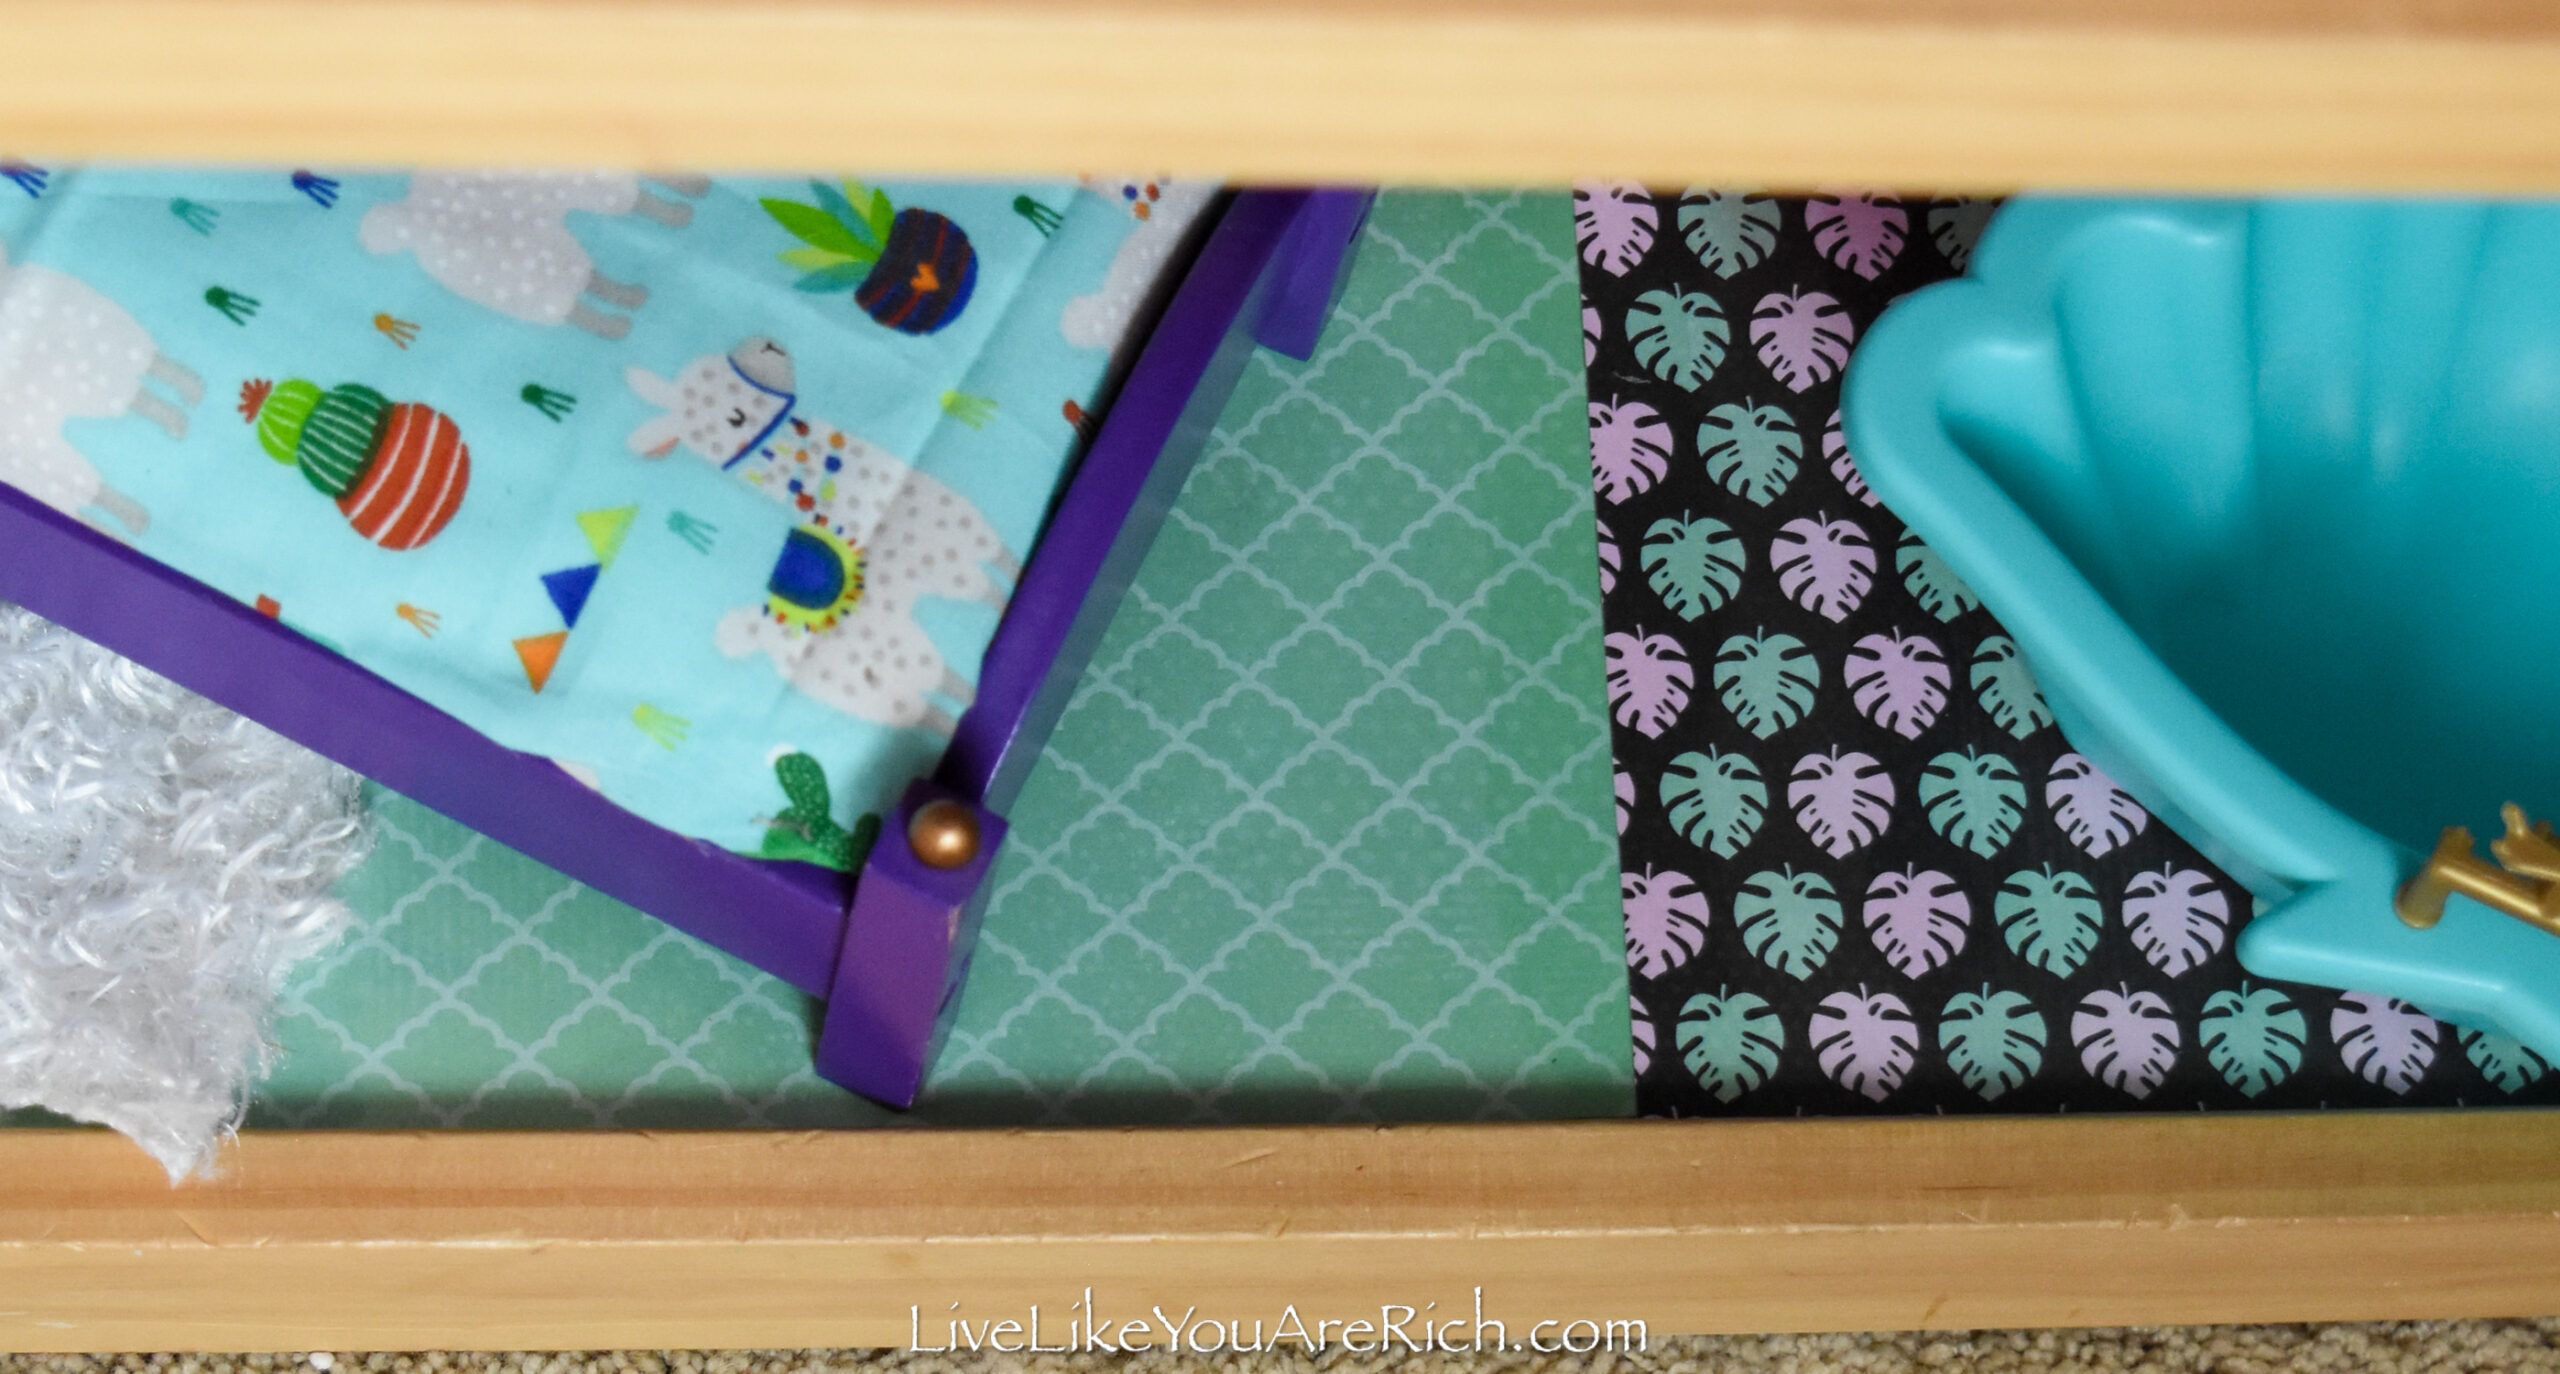
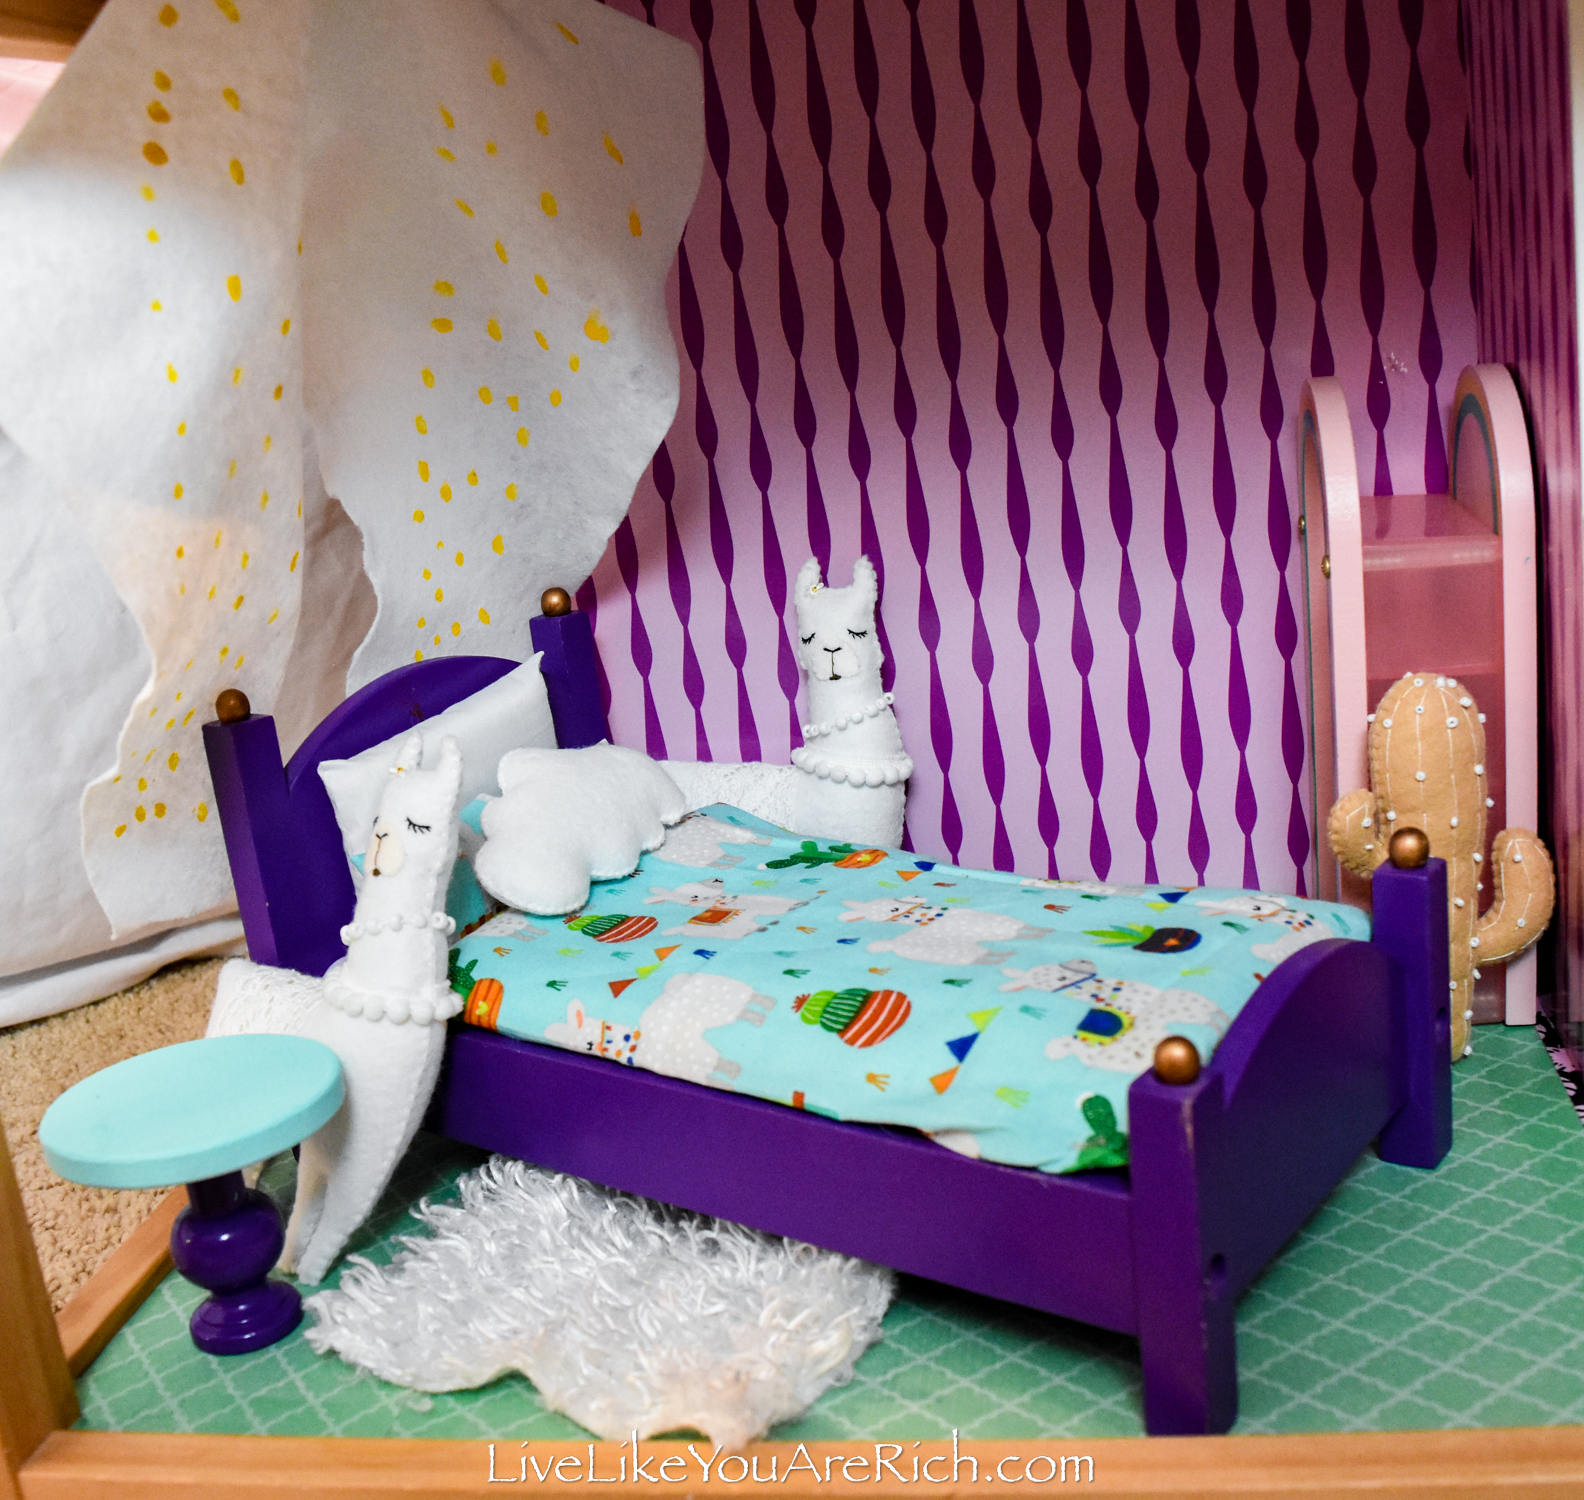
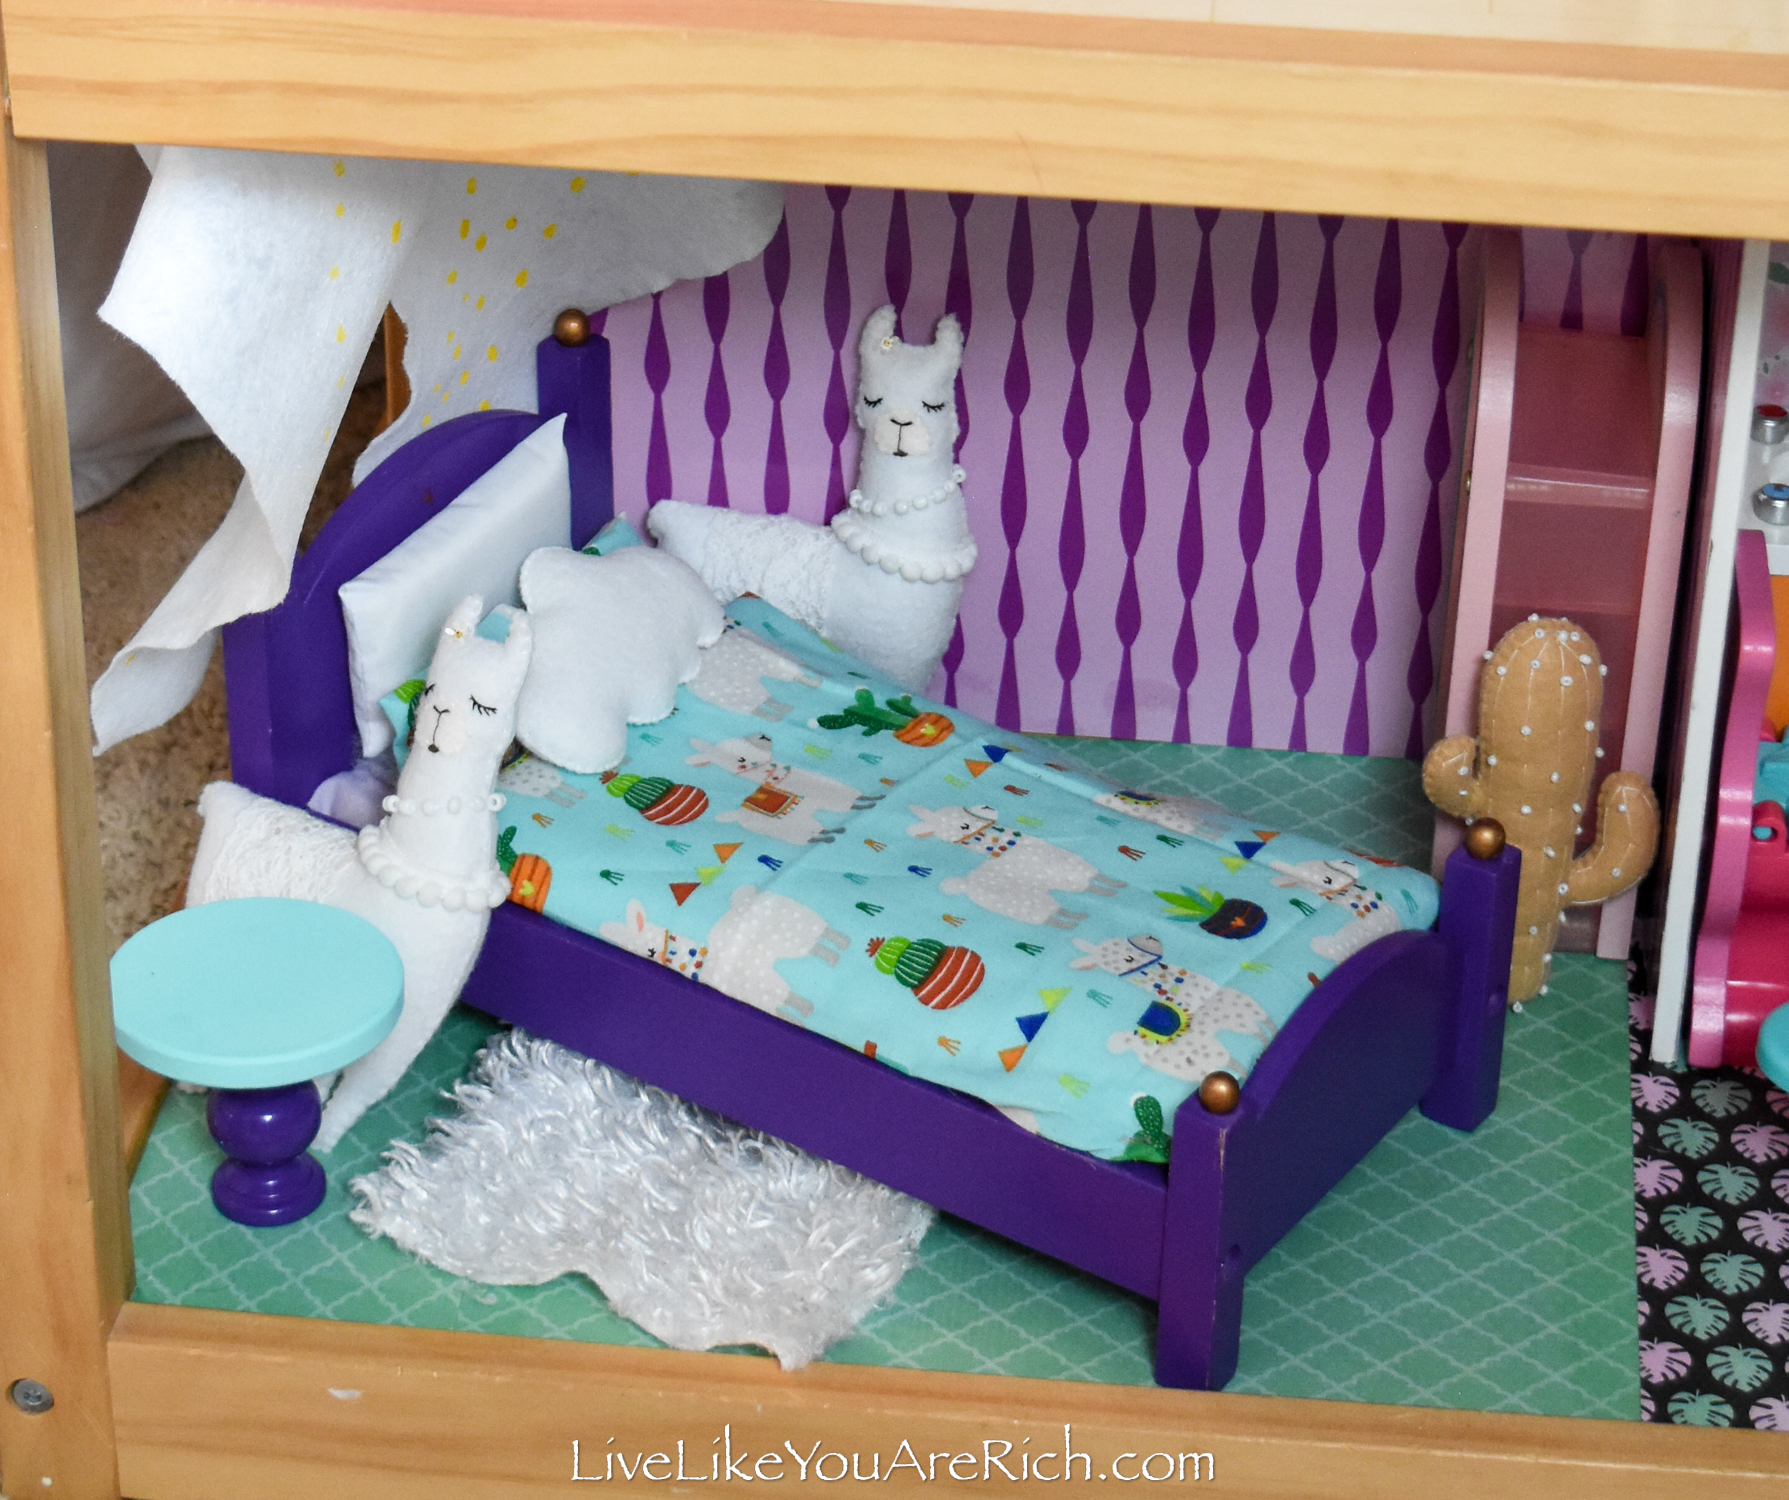
Aurora wanted the main bedroom to have a llama theme to match her own room.
She even made a hanging canopy with lights for the bed to match her own which I thought was so cute!
After we had the walls, flooring, and furniture done.
We moved on to staging the dollhouse with various details.
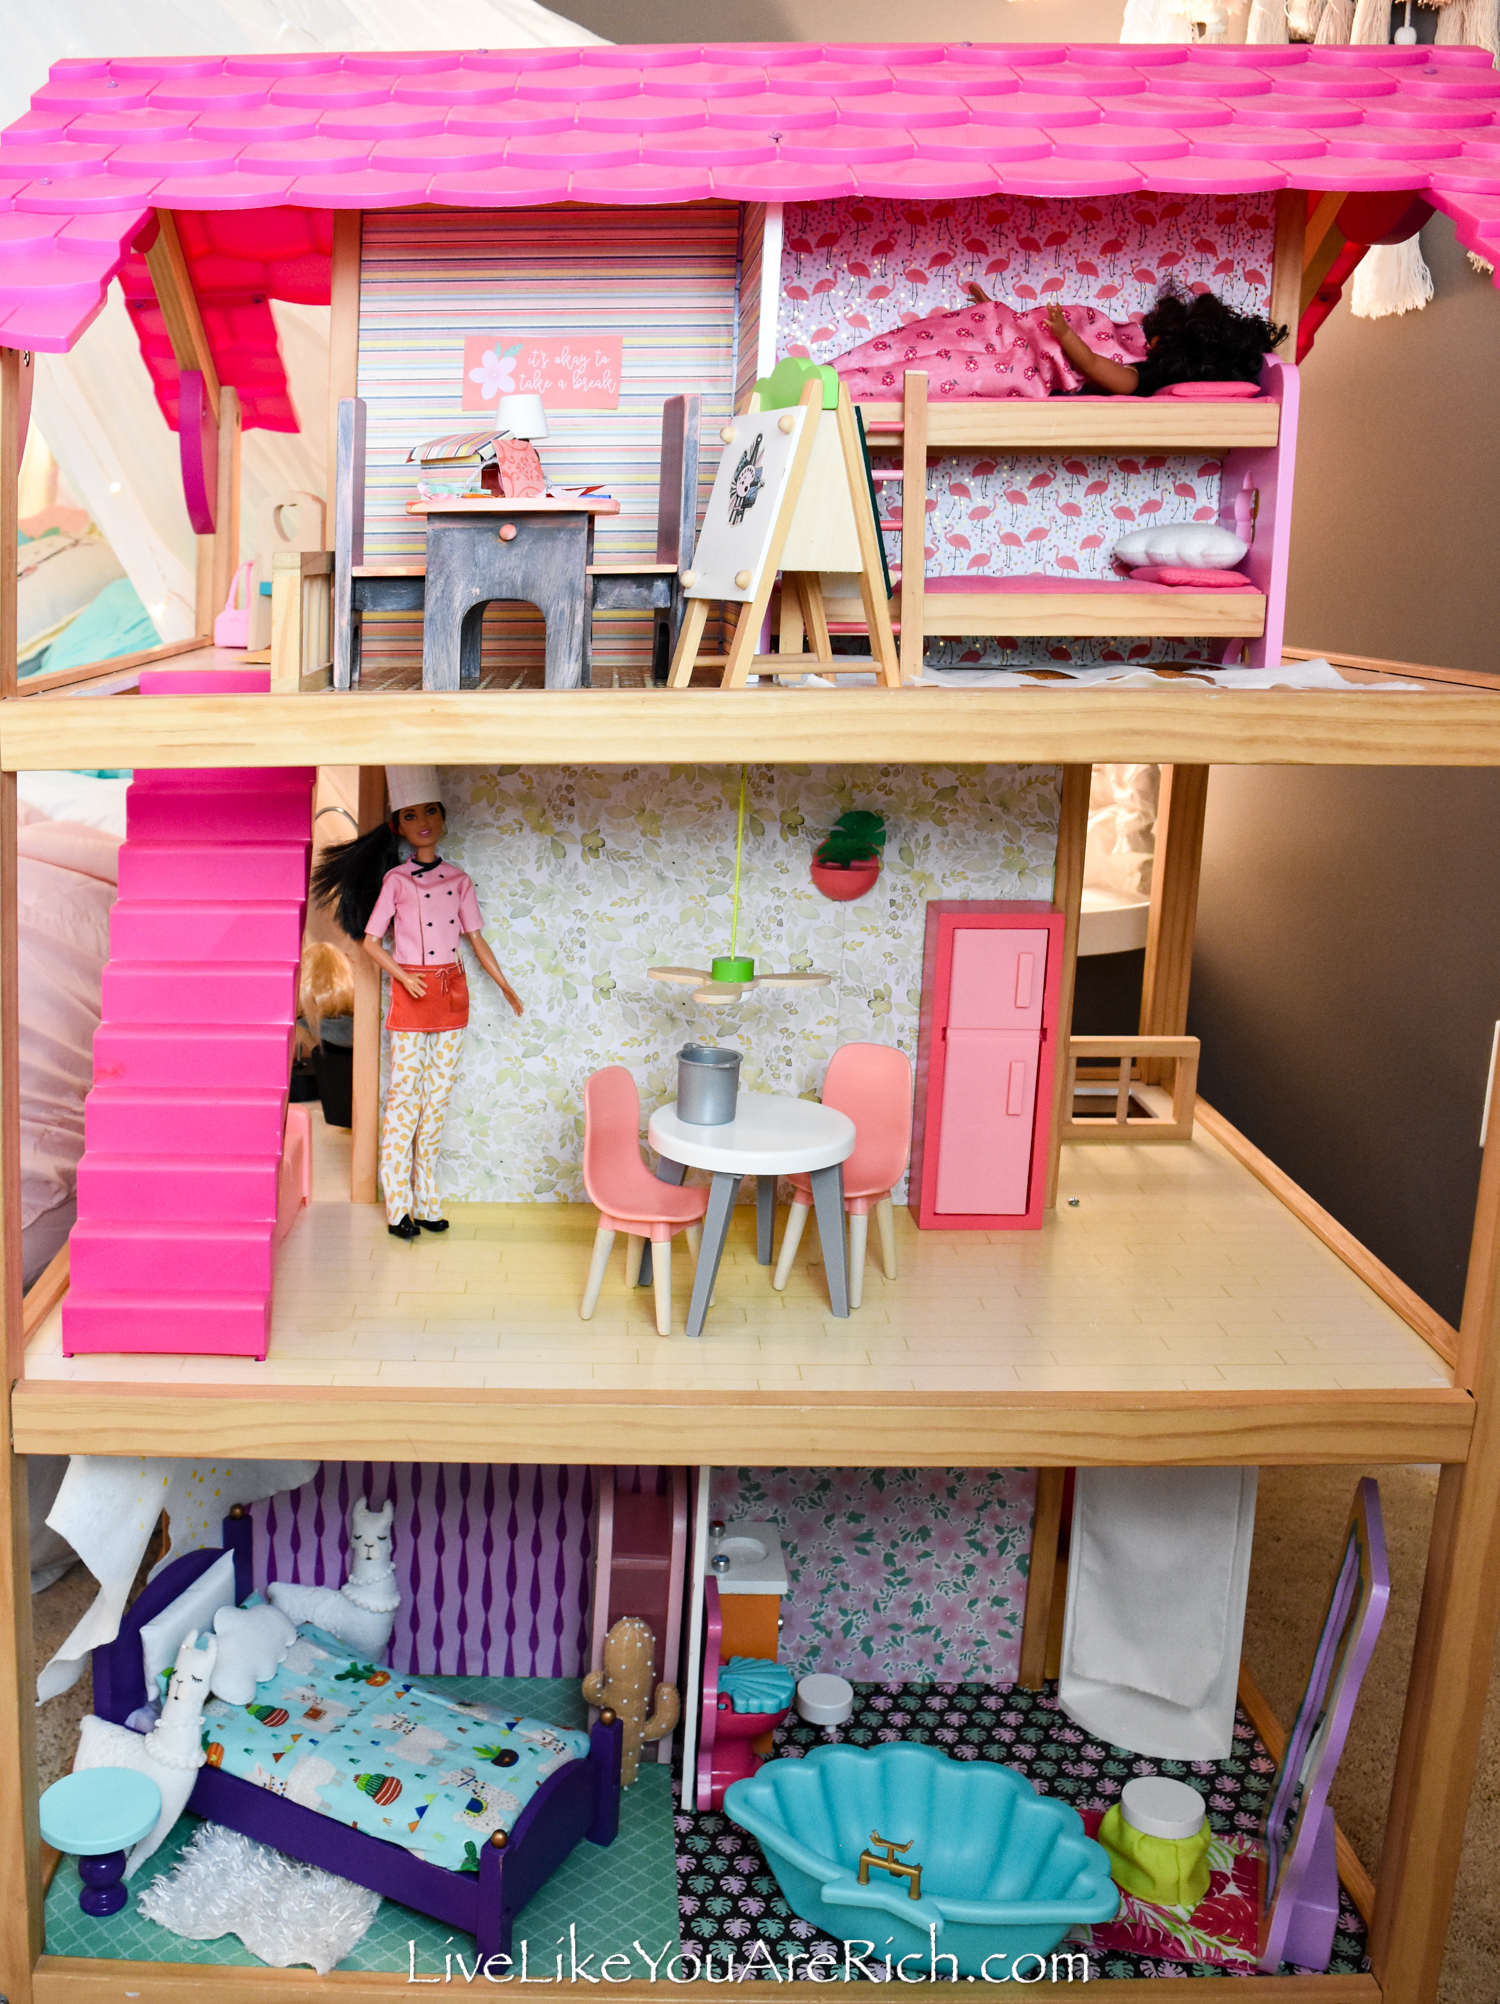
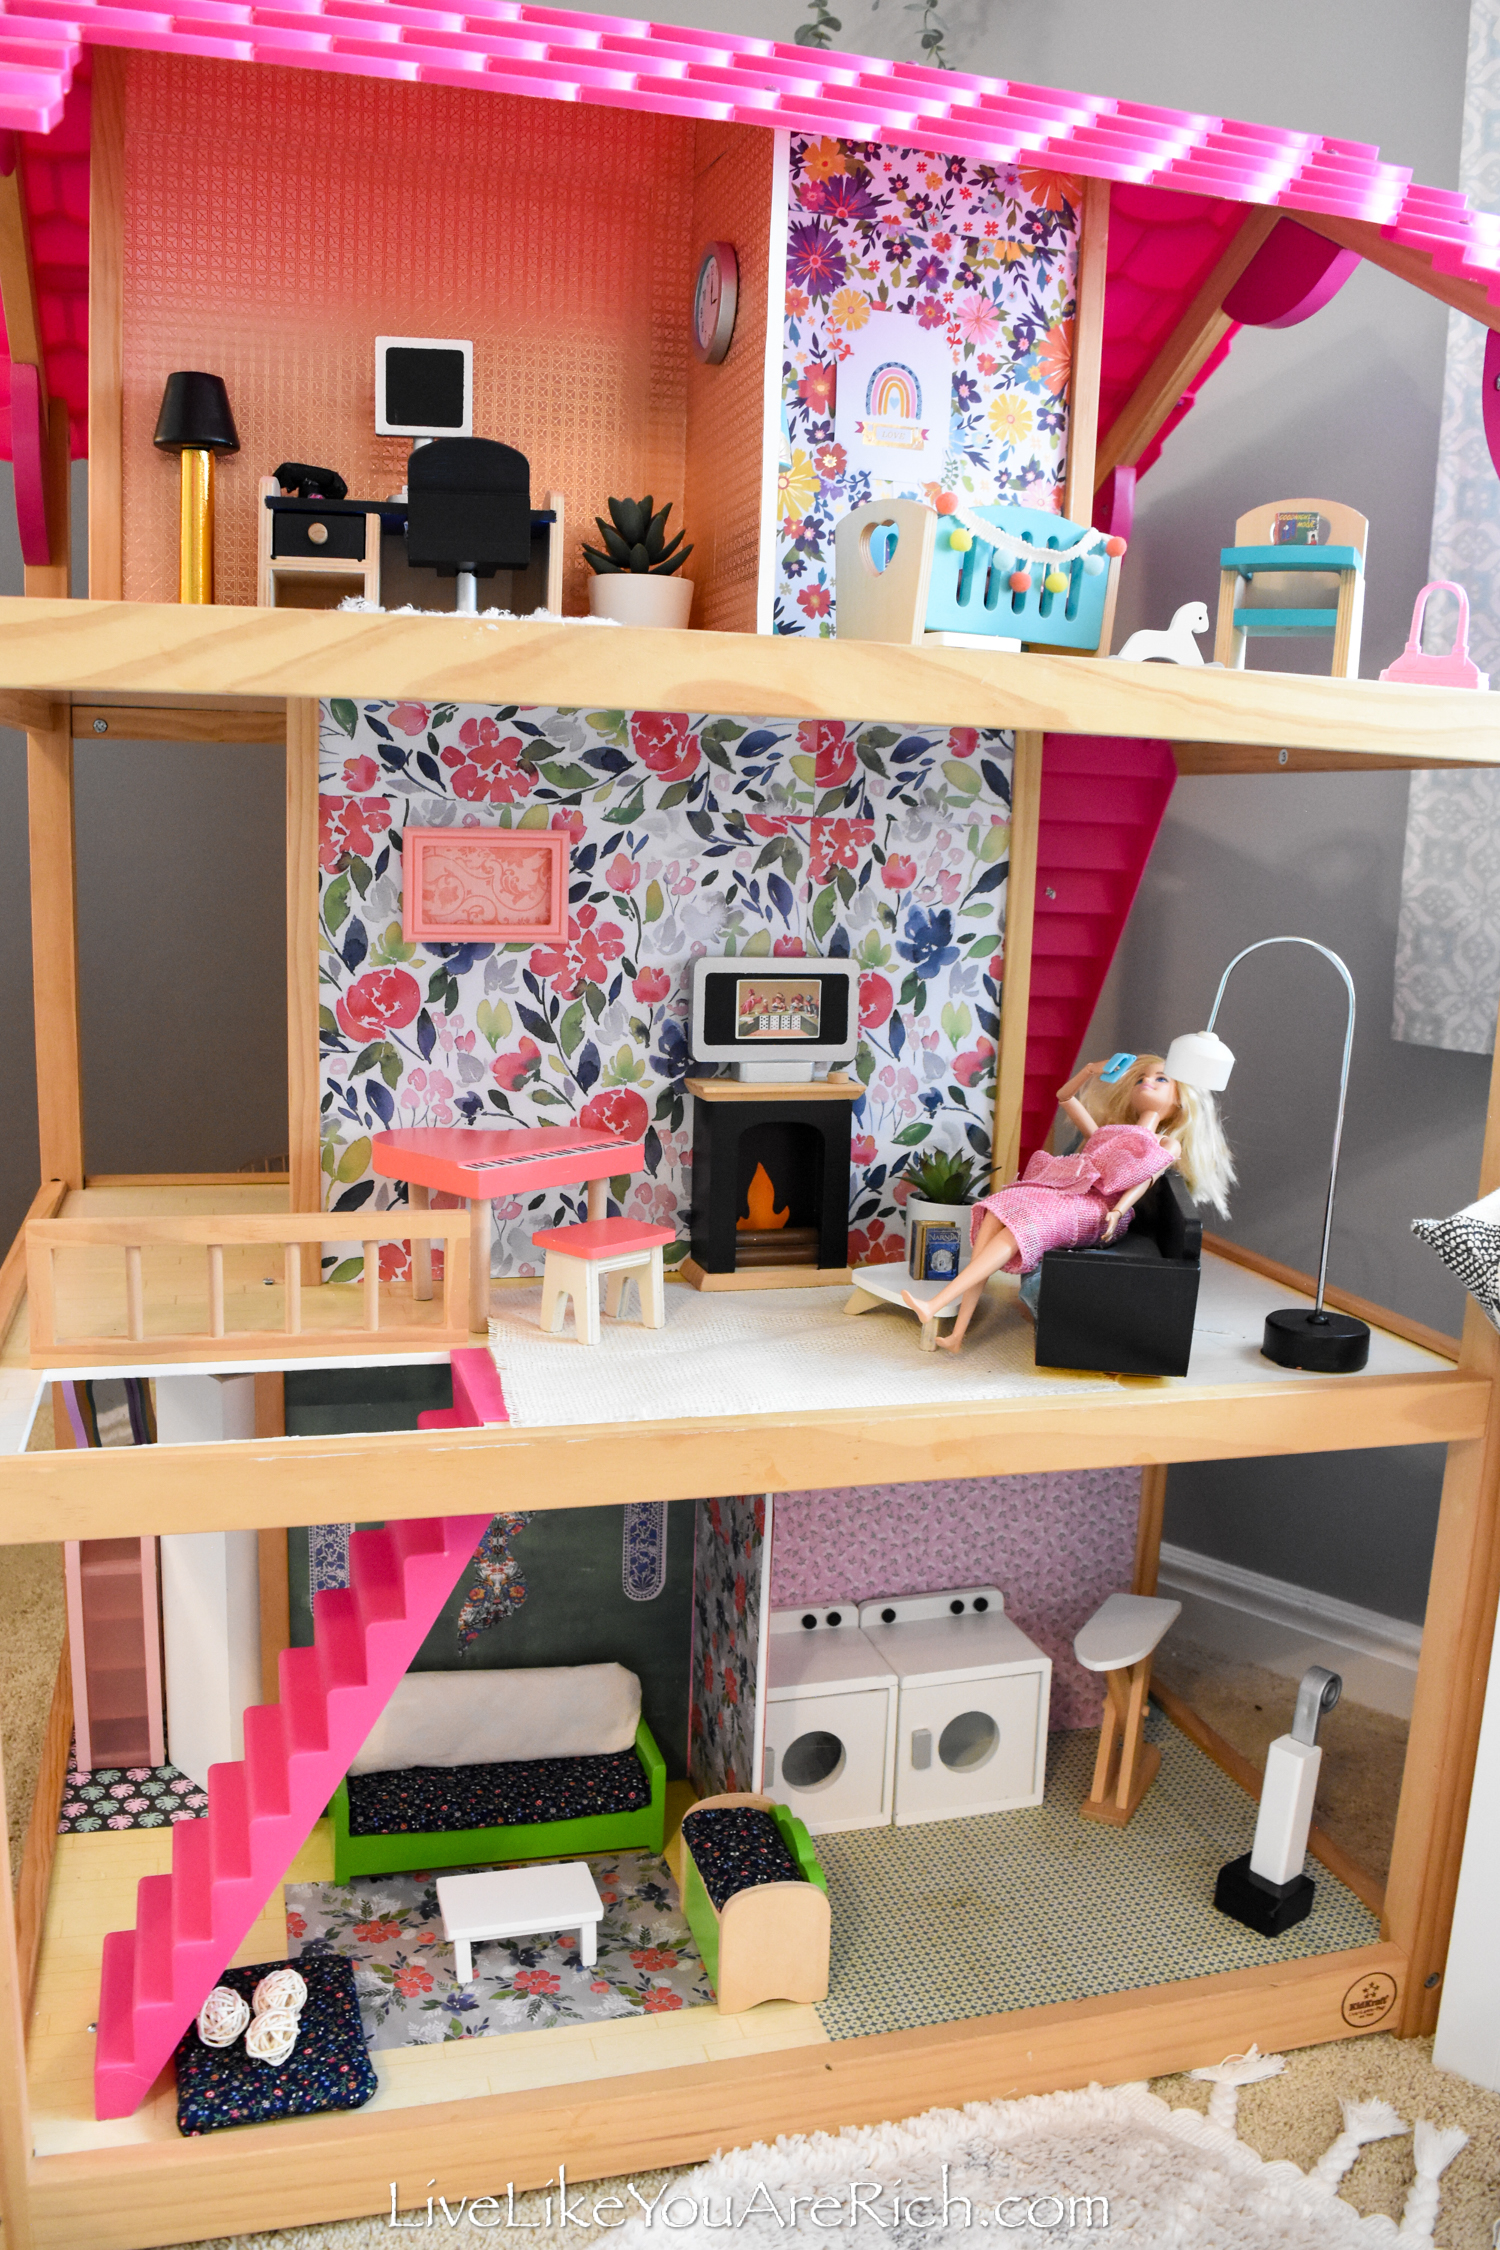
Since it is a two-sided dollhouse, I mainly decorated this side with the office and nursery and Aurora, my daughter, decorated this side with the art/craft room, and kids’ room.
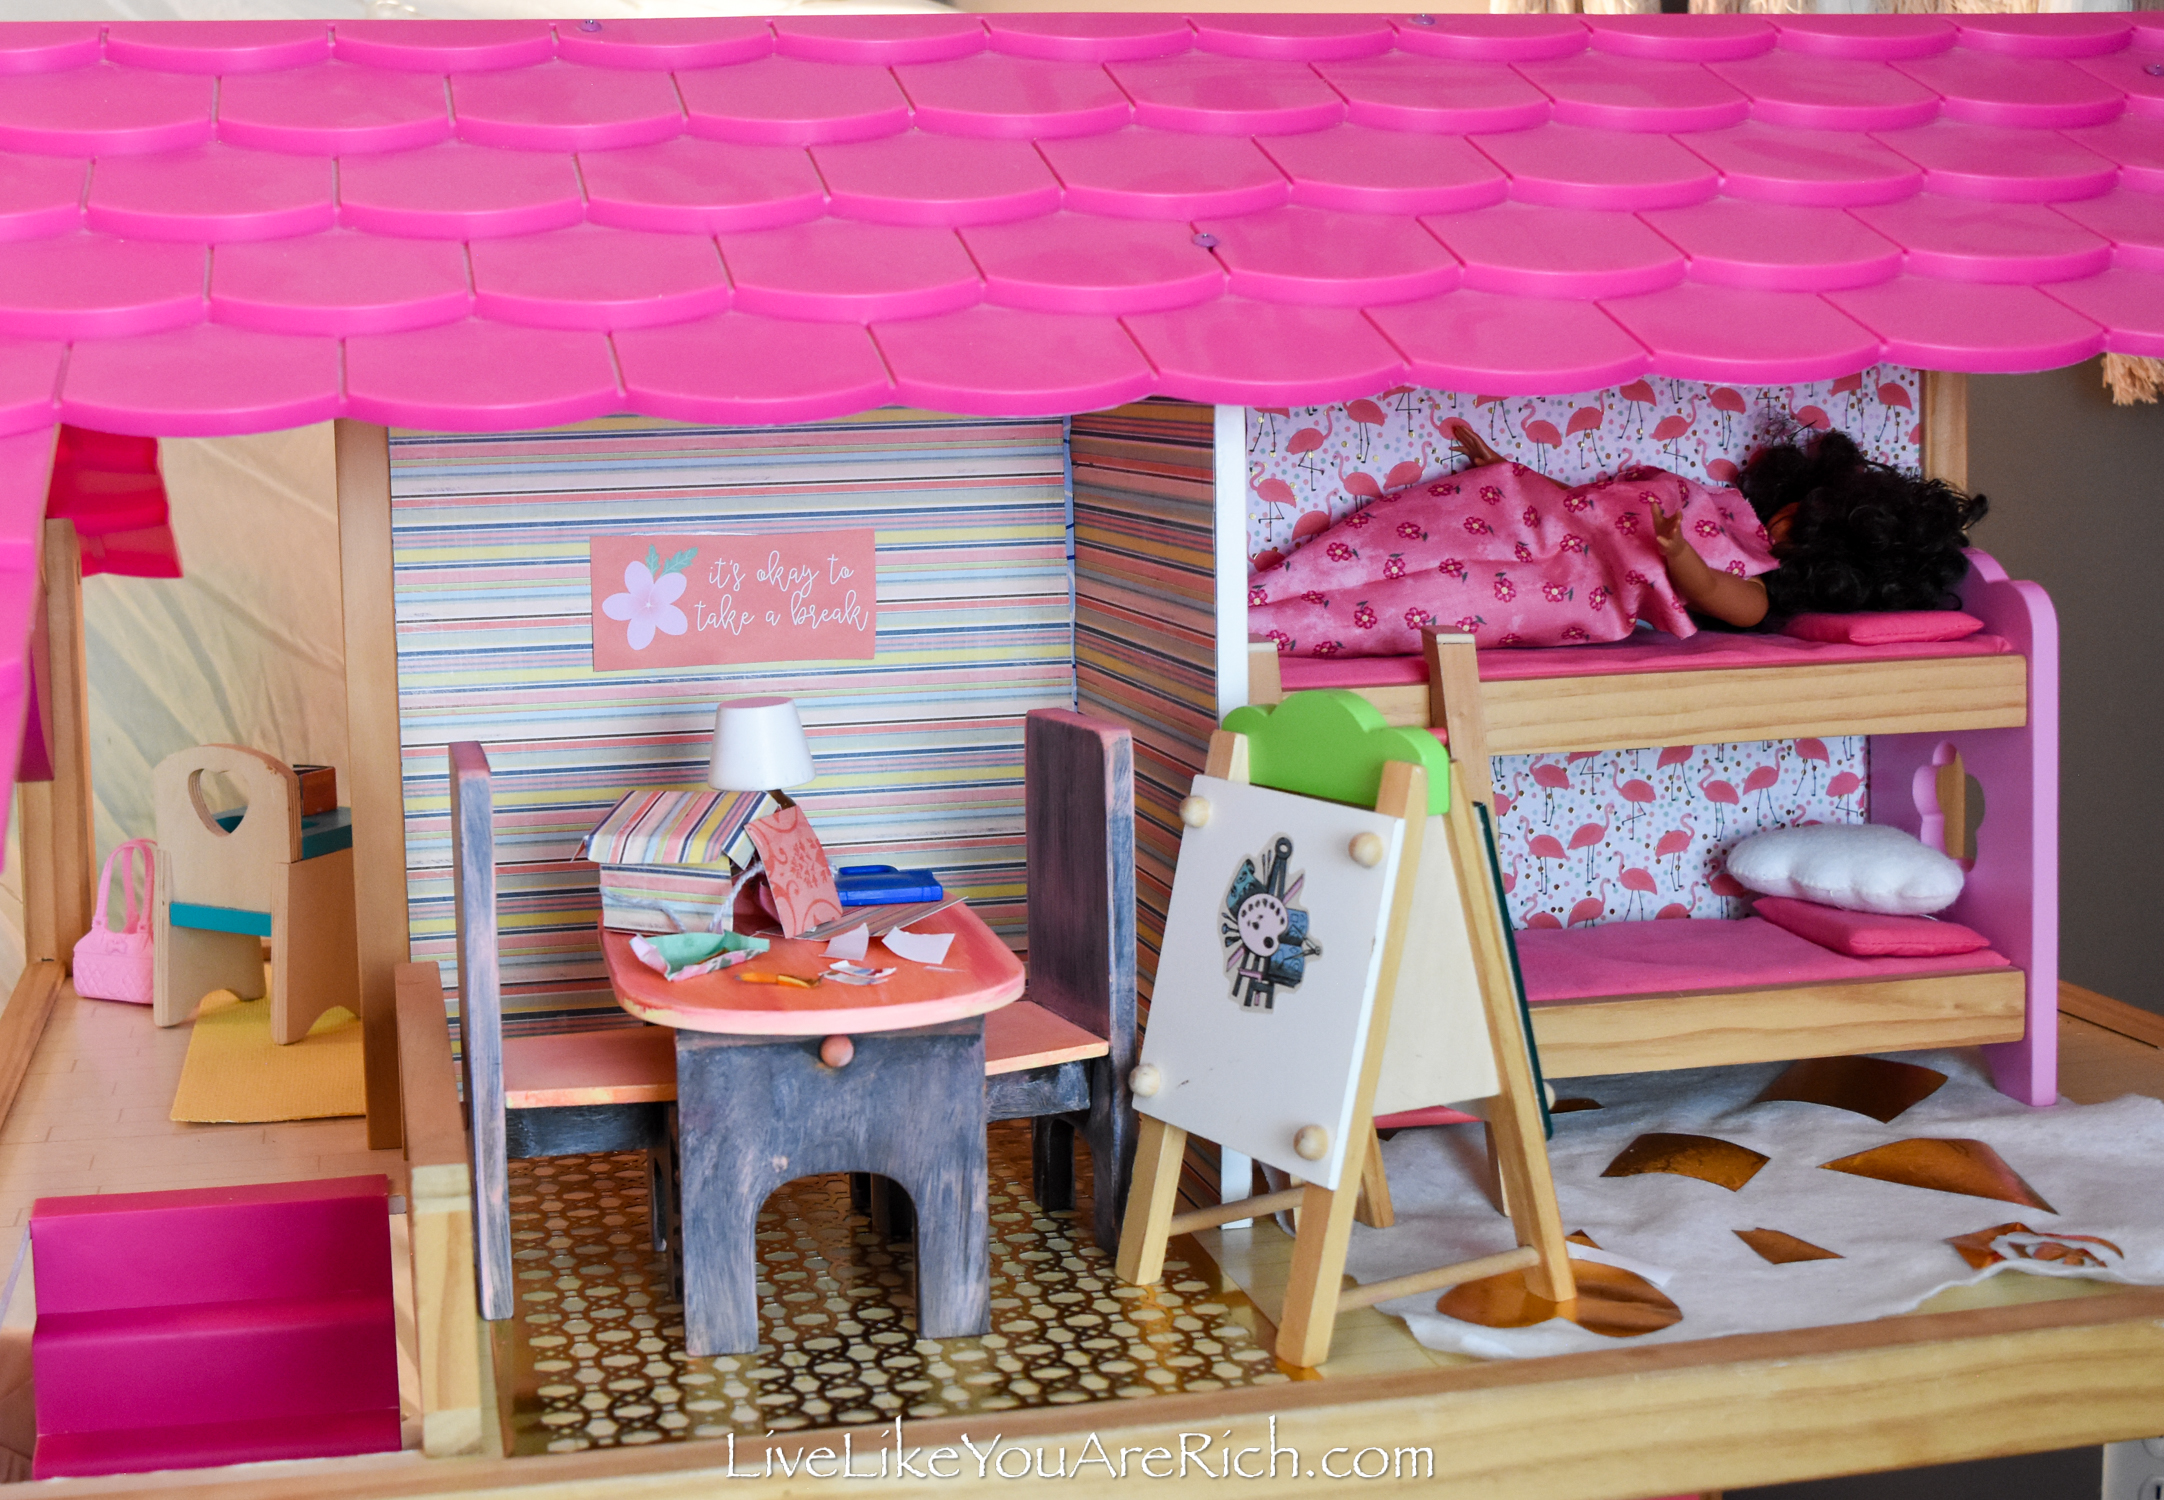
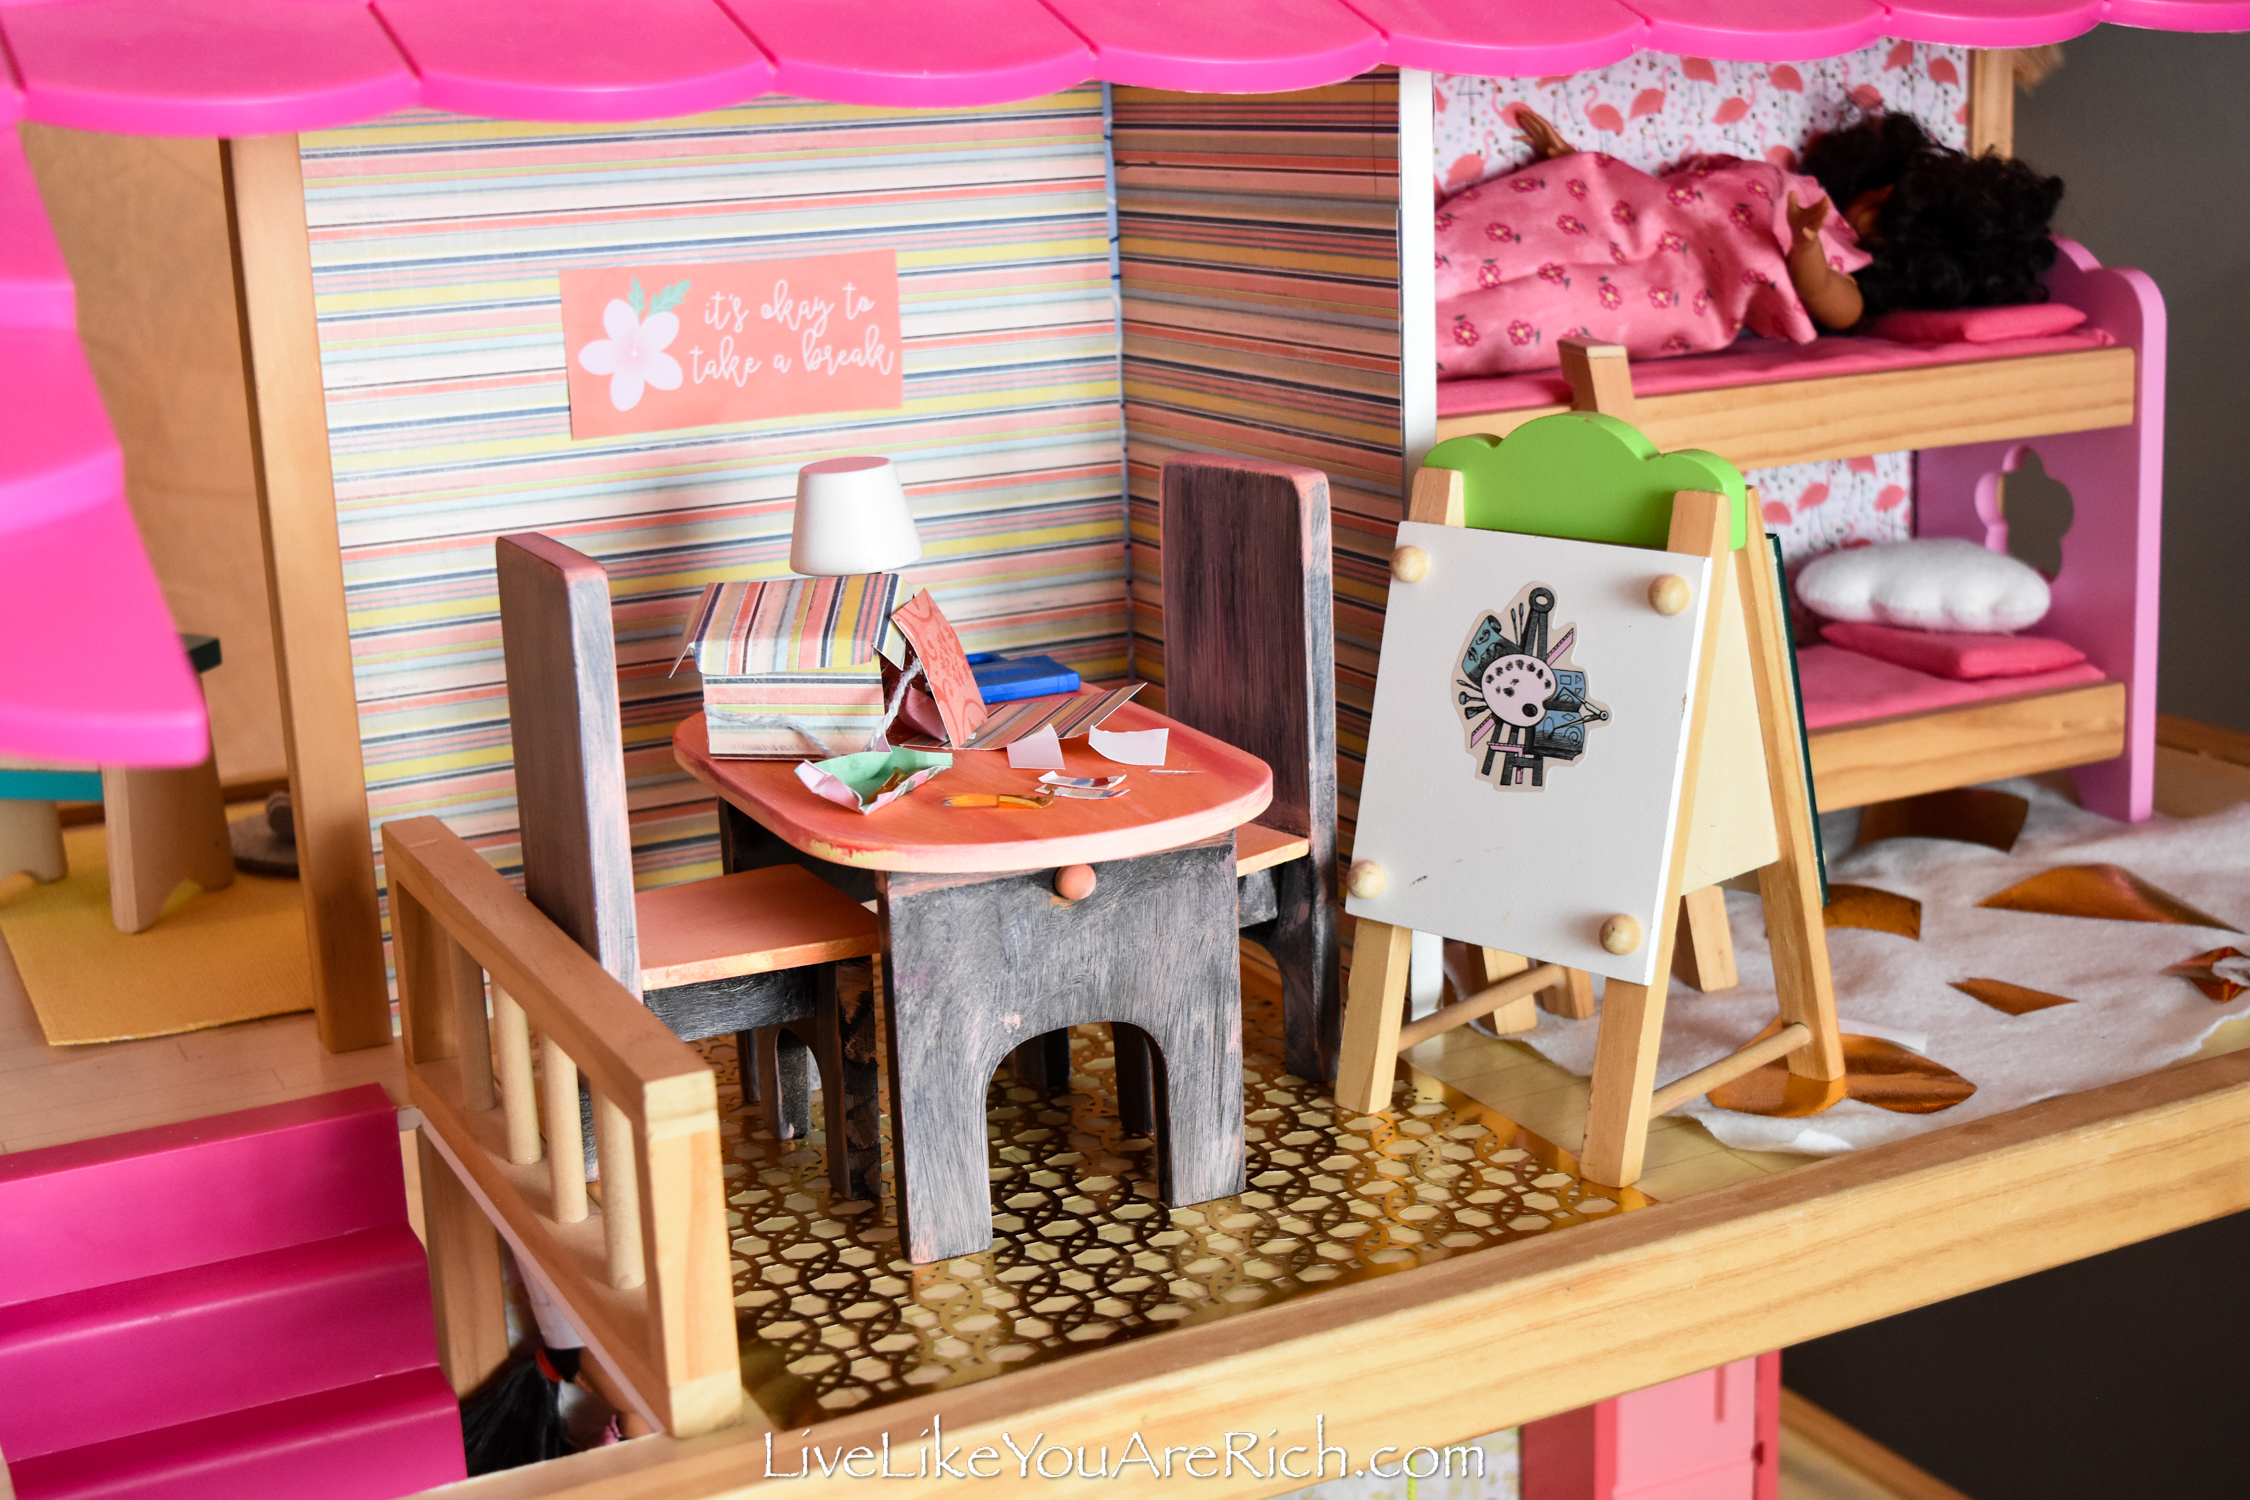
Aurora spent a lot of time and effort making this craft room.
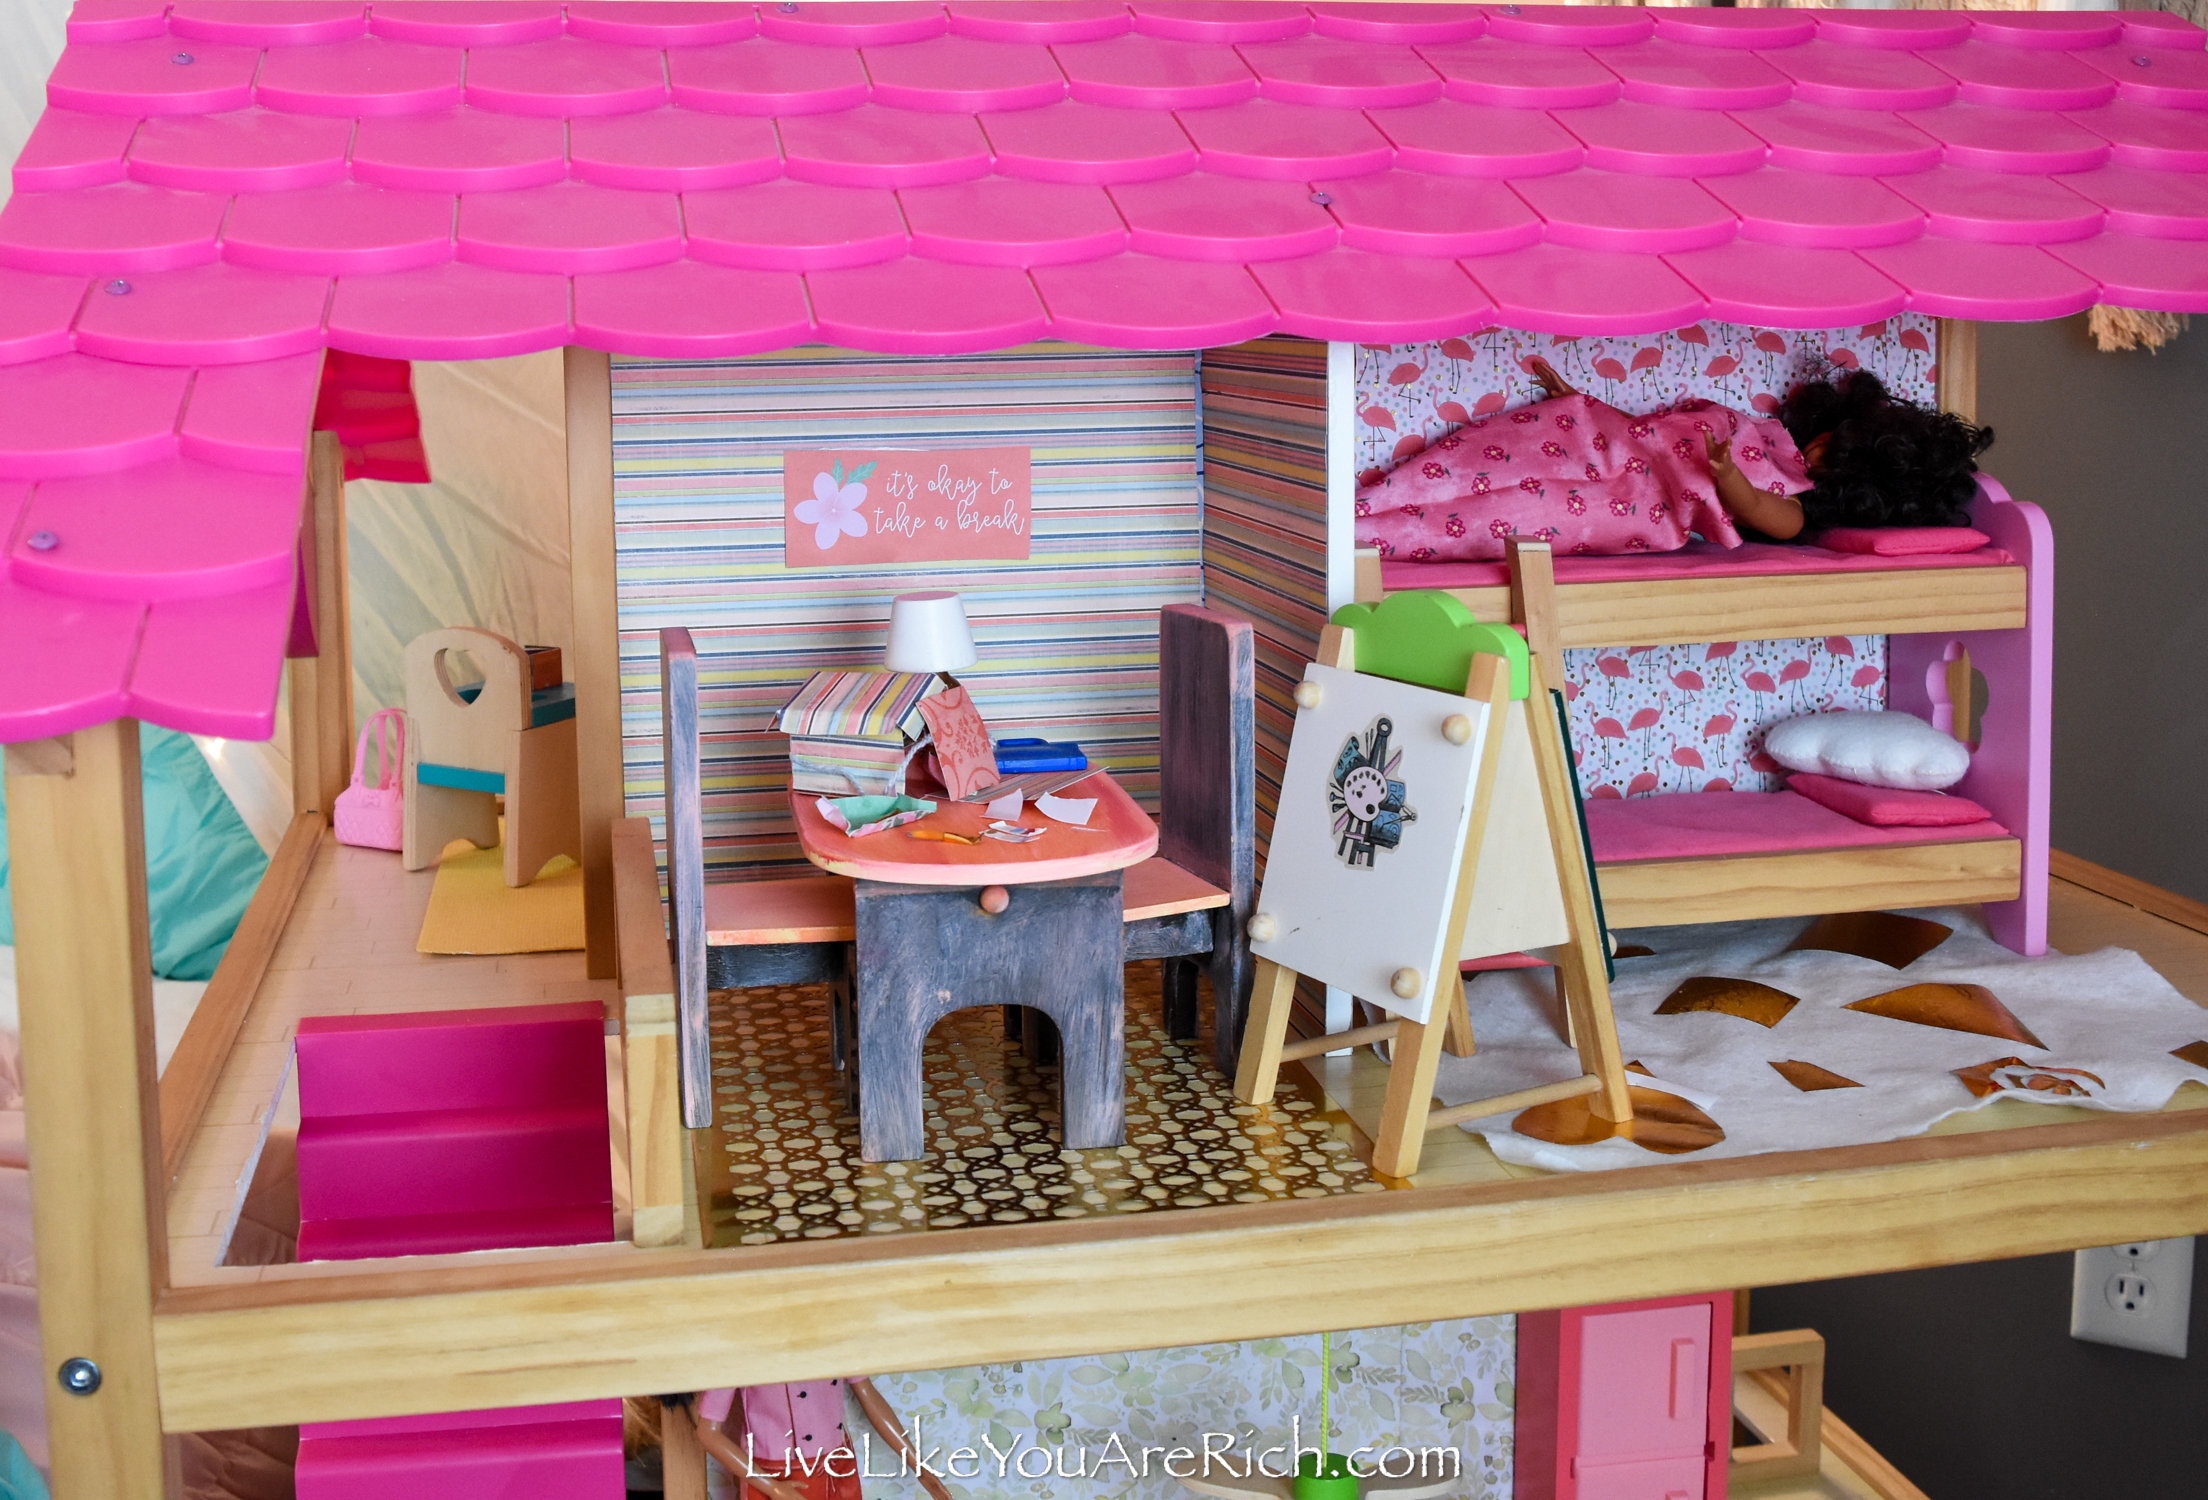
She made a custom art box complete with a paint palette, mini paint brushes, a briefcase, and an easel.
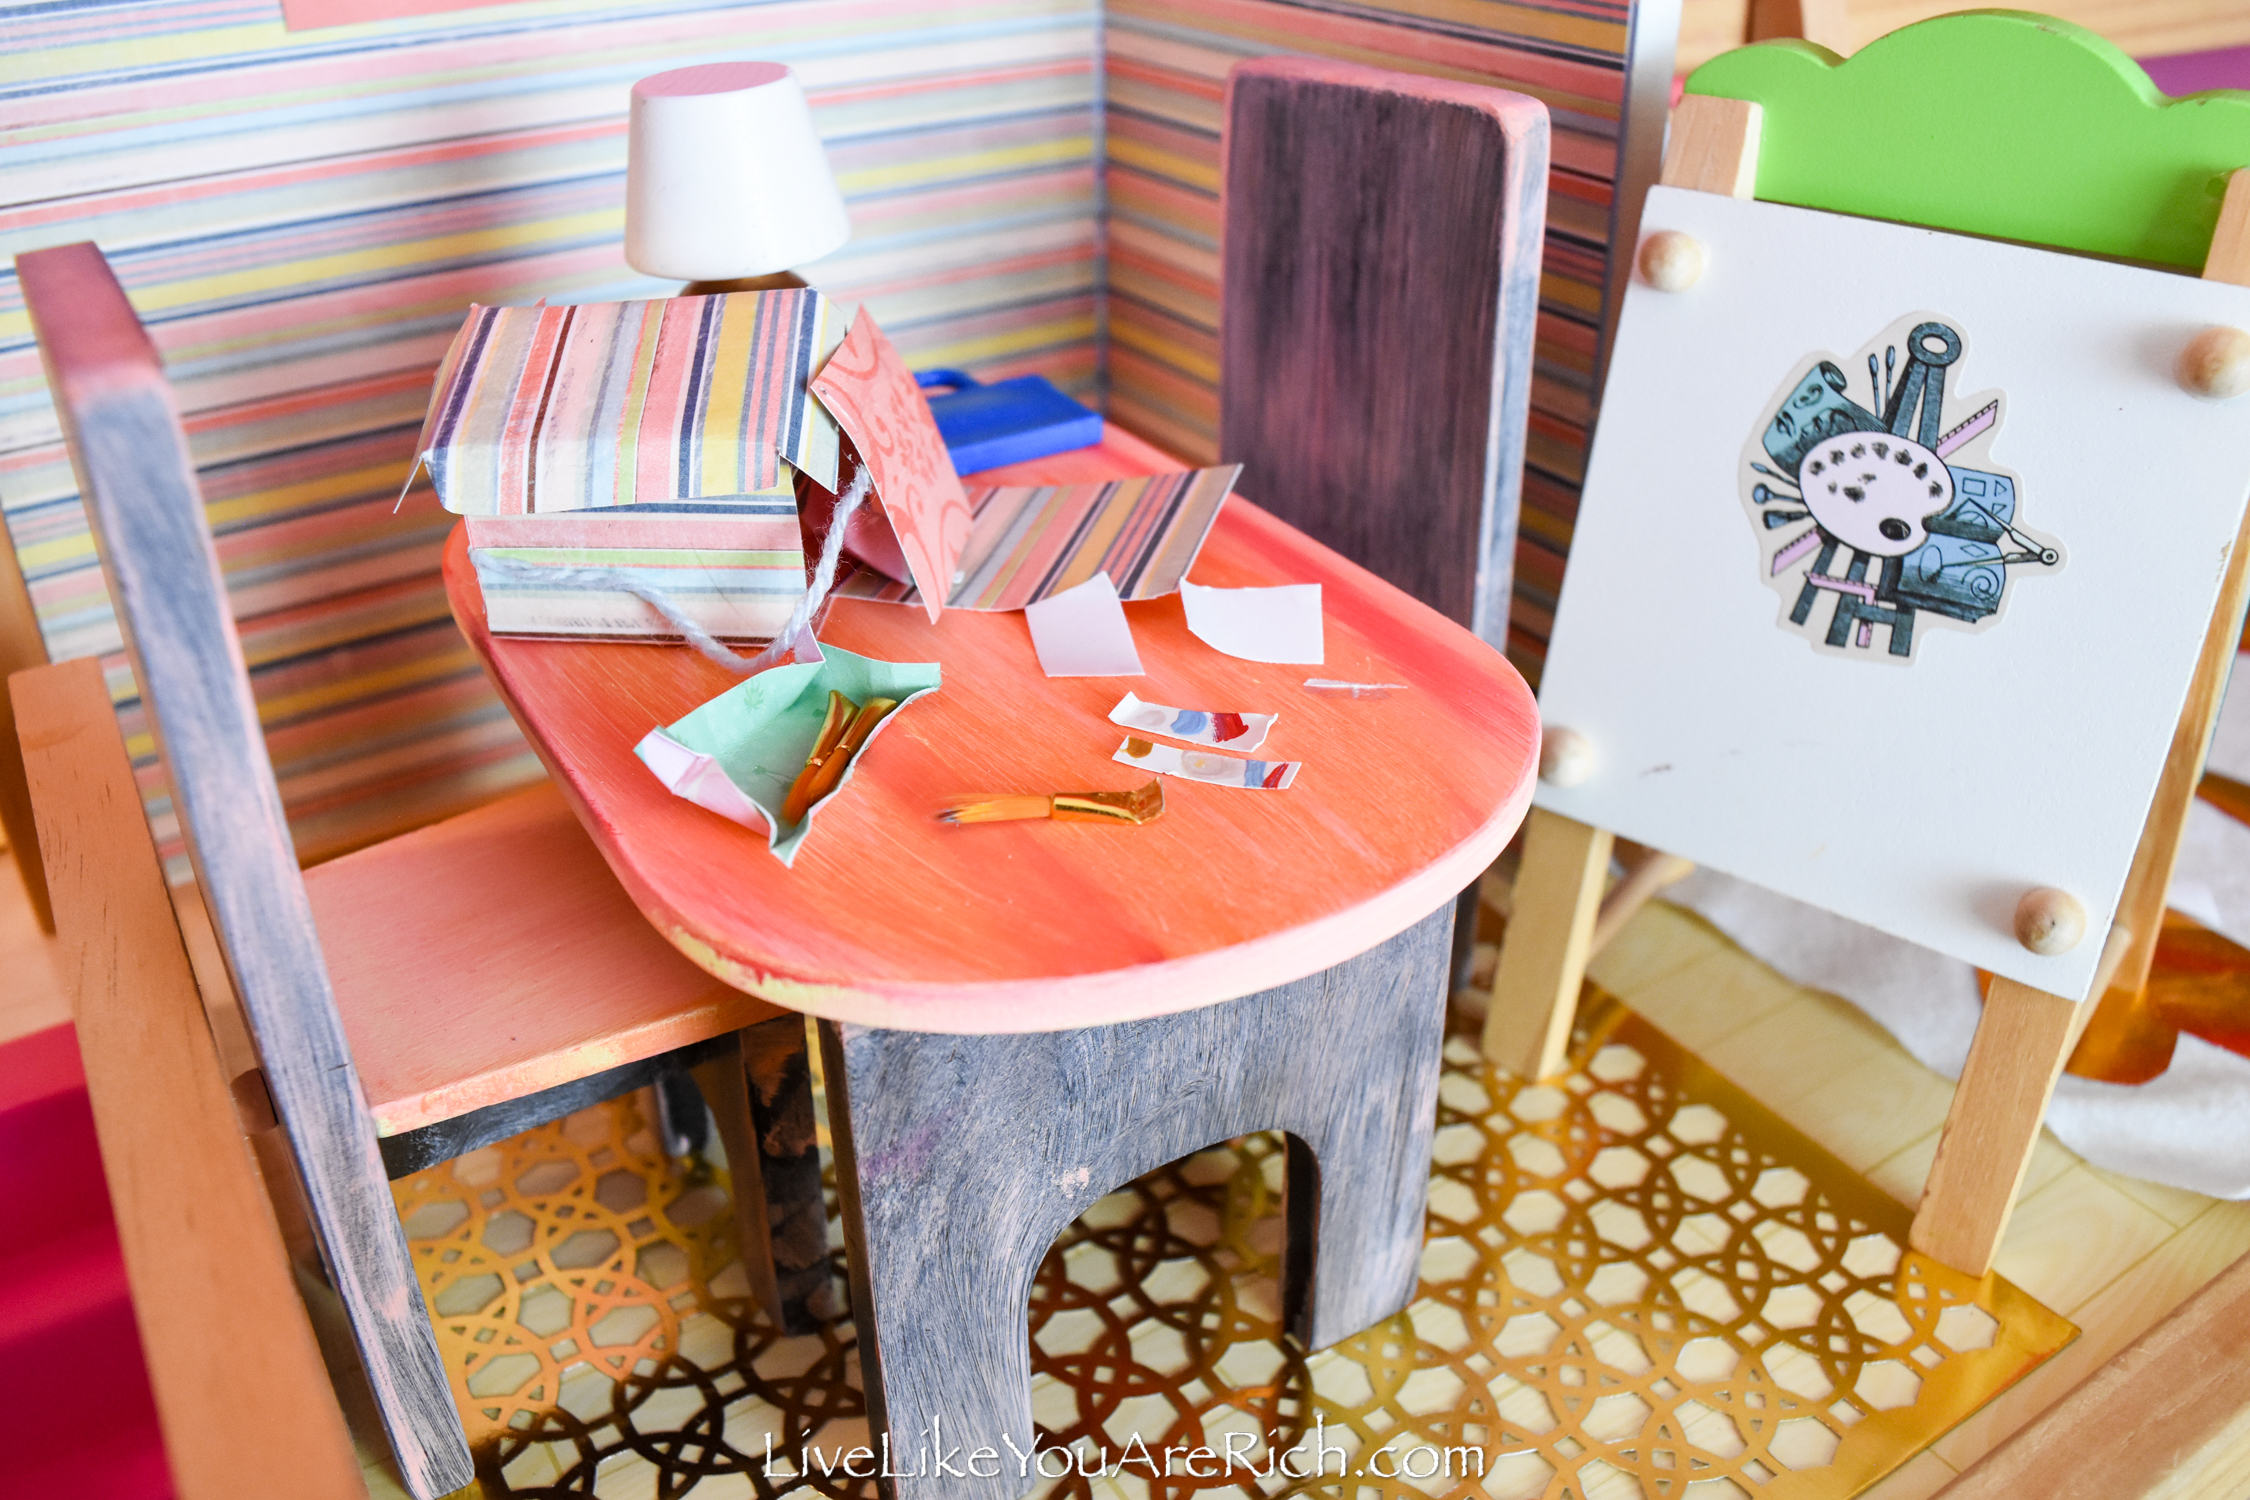
She used a gold foil stencil as the rug.
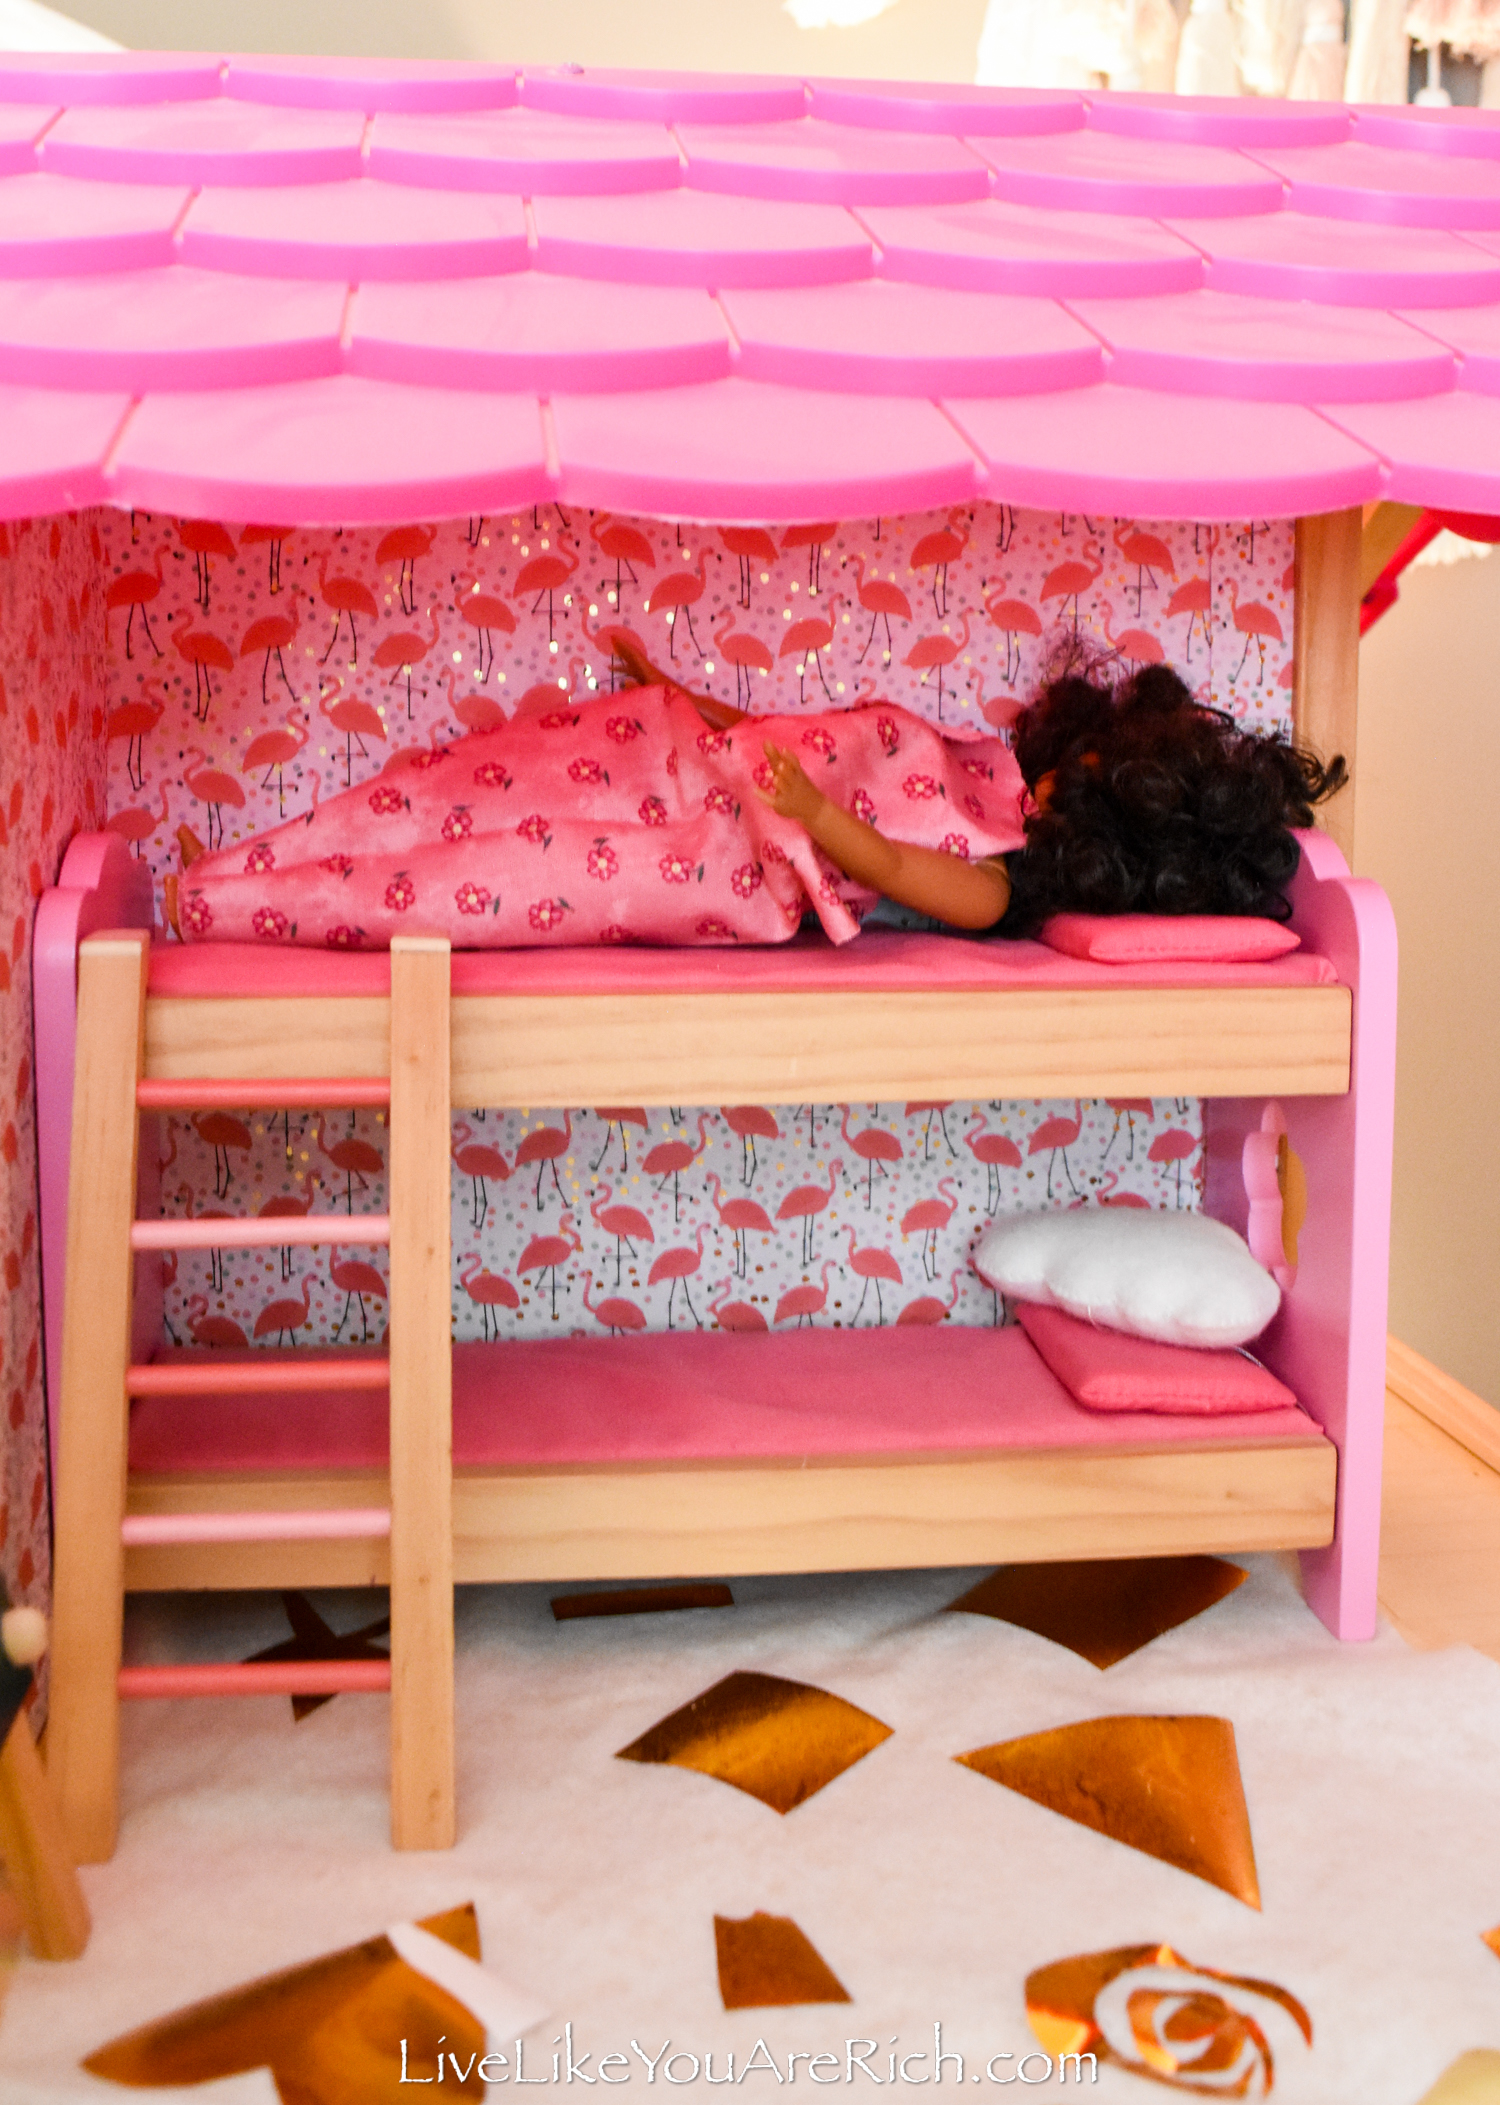
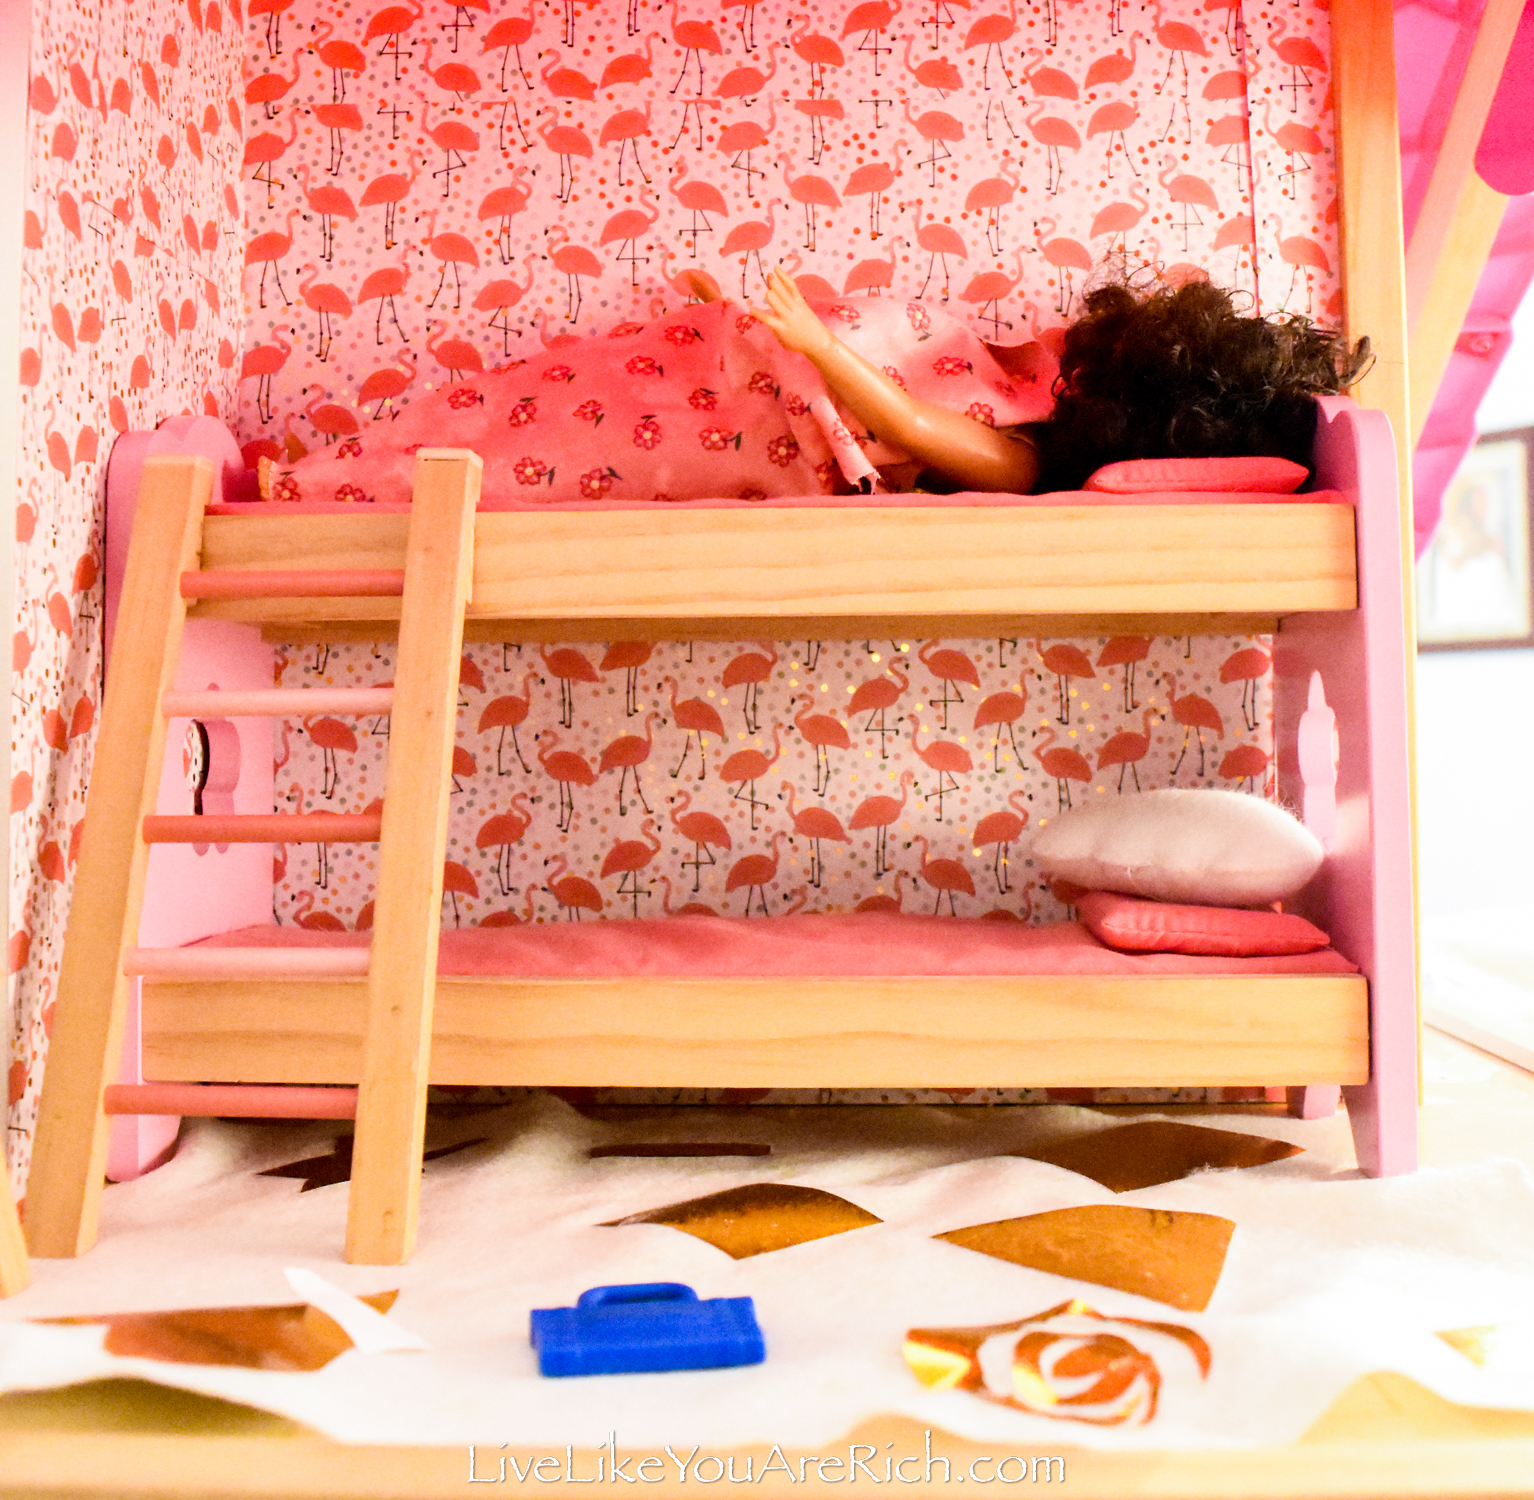
Aurora added gold vinyl detail to the felt that she made for the rug in the girls’ bunk room.
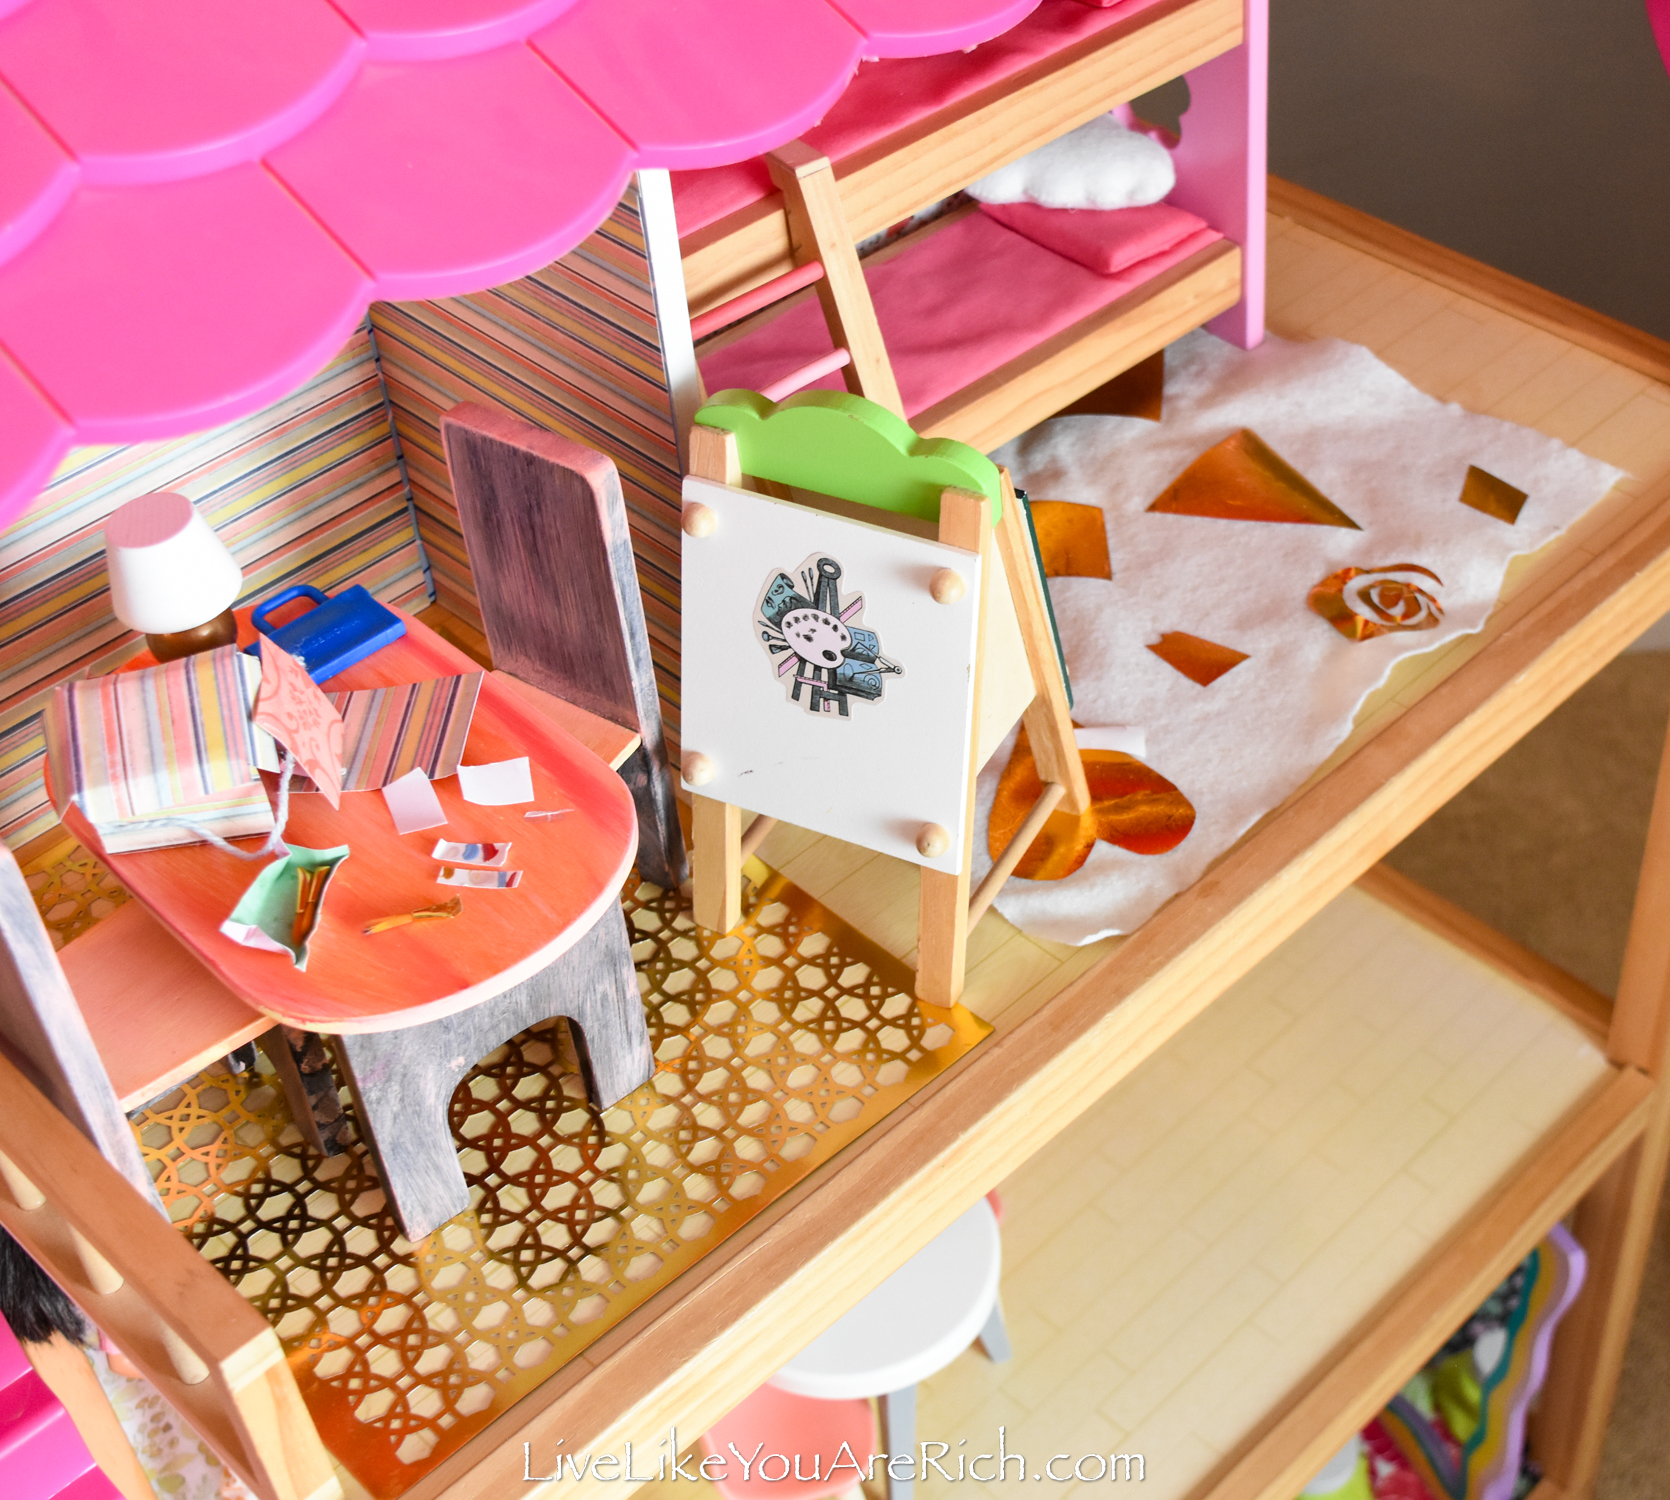
She also made the doll a sleeping bag from material and a cloud pillow she took from the mobile that we used to decorate her little sister’s old nursery.
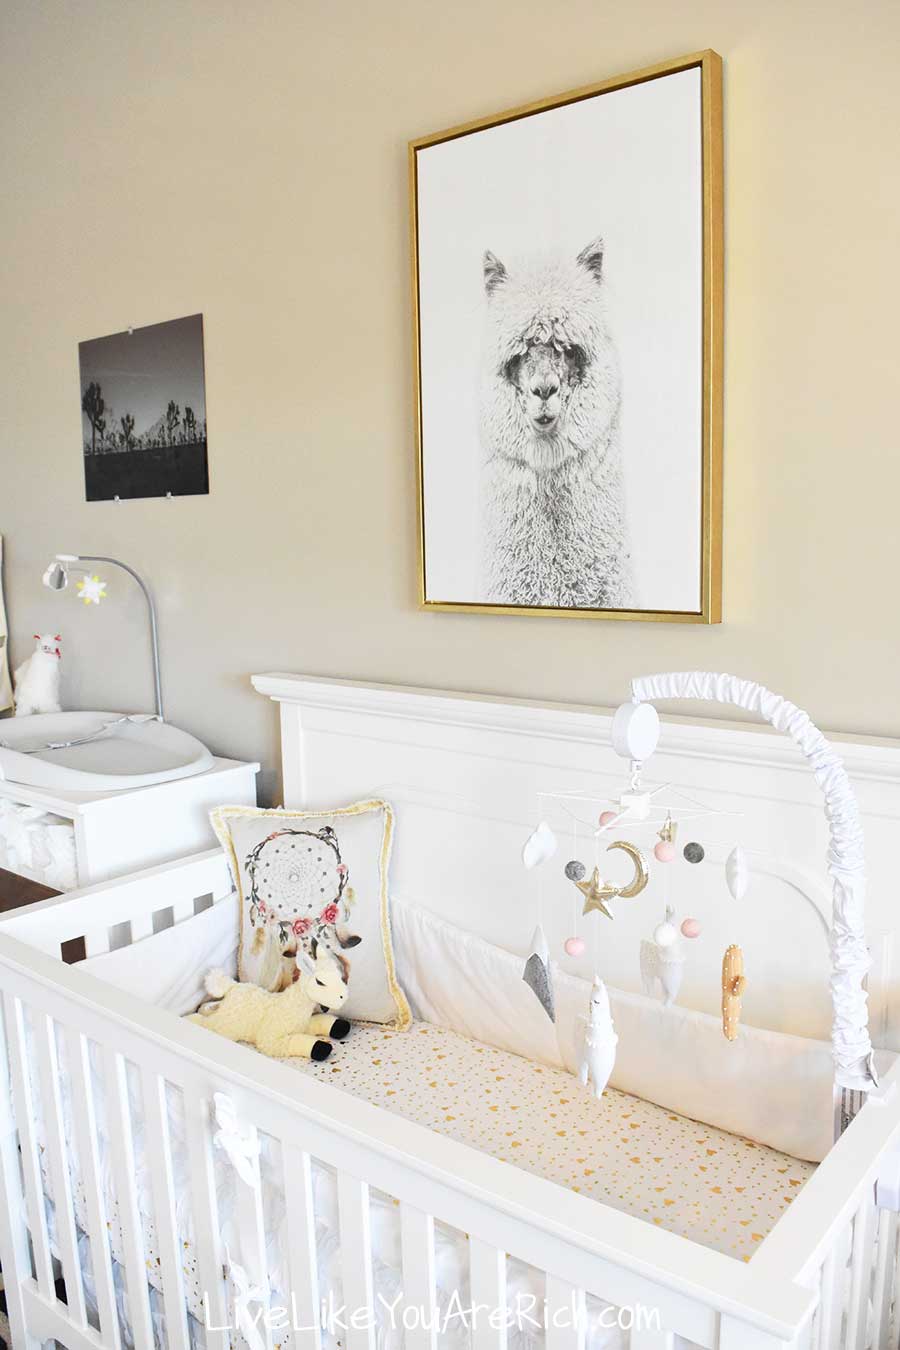
She used the llamas and cactus from this mobile to decorate the bedroom in the dollhouse.
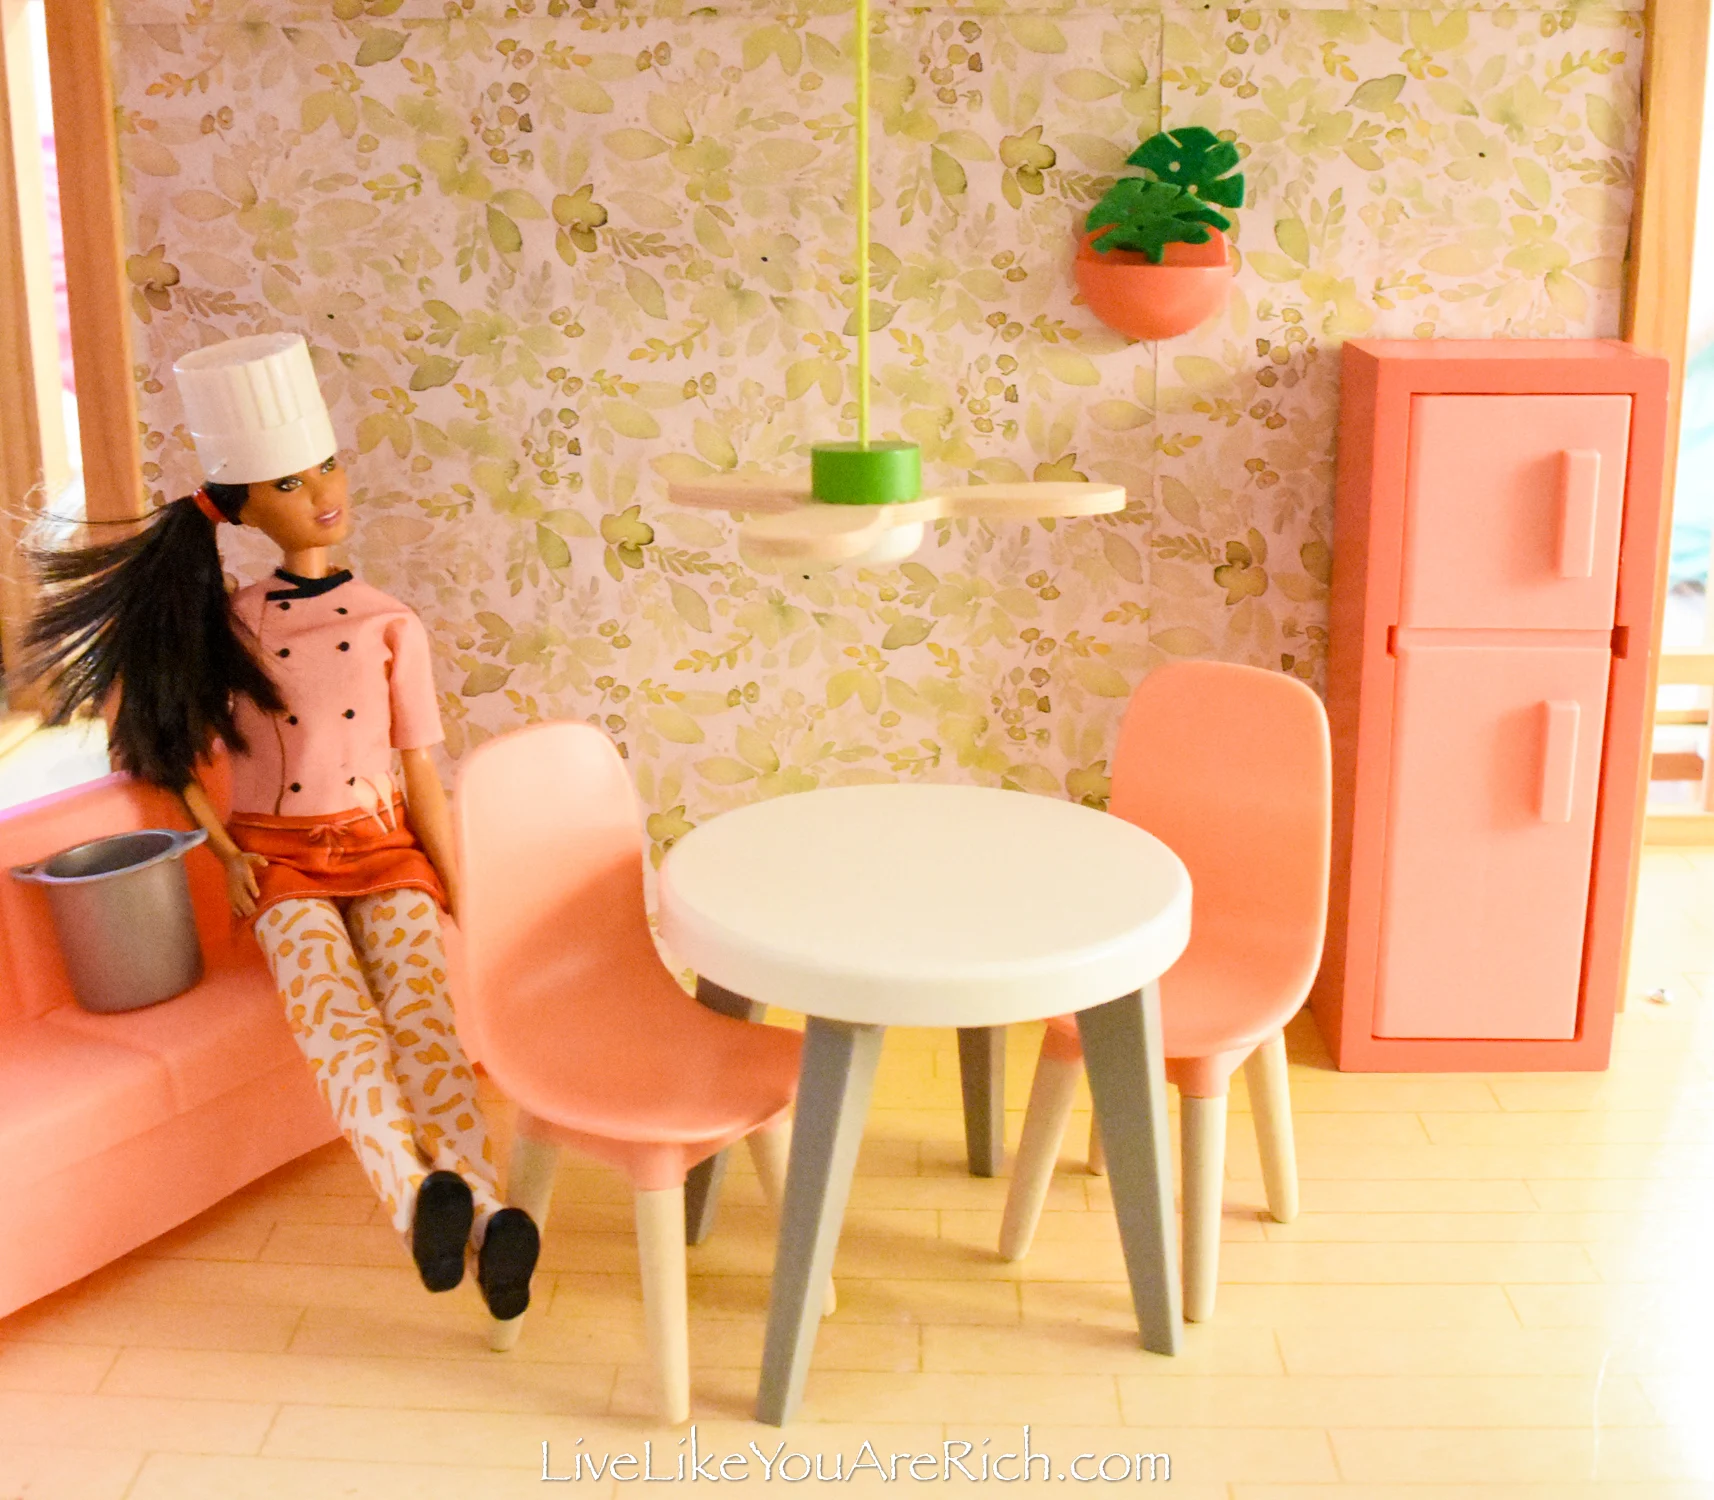
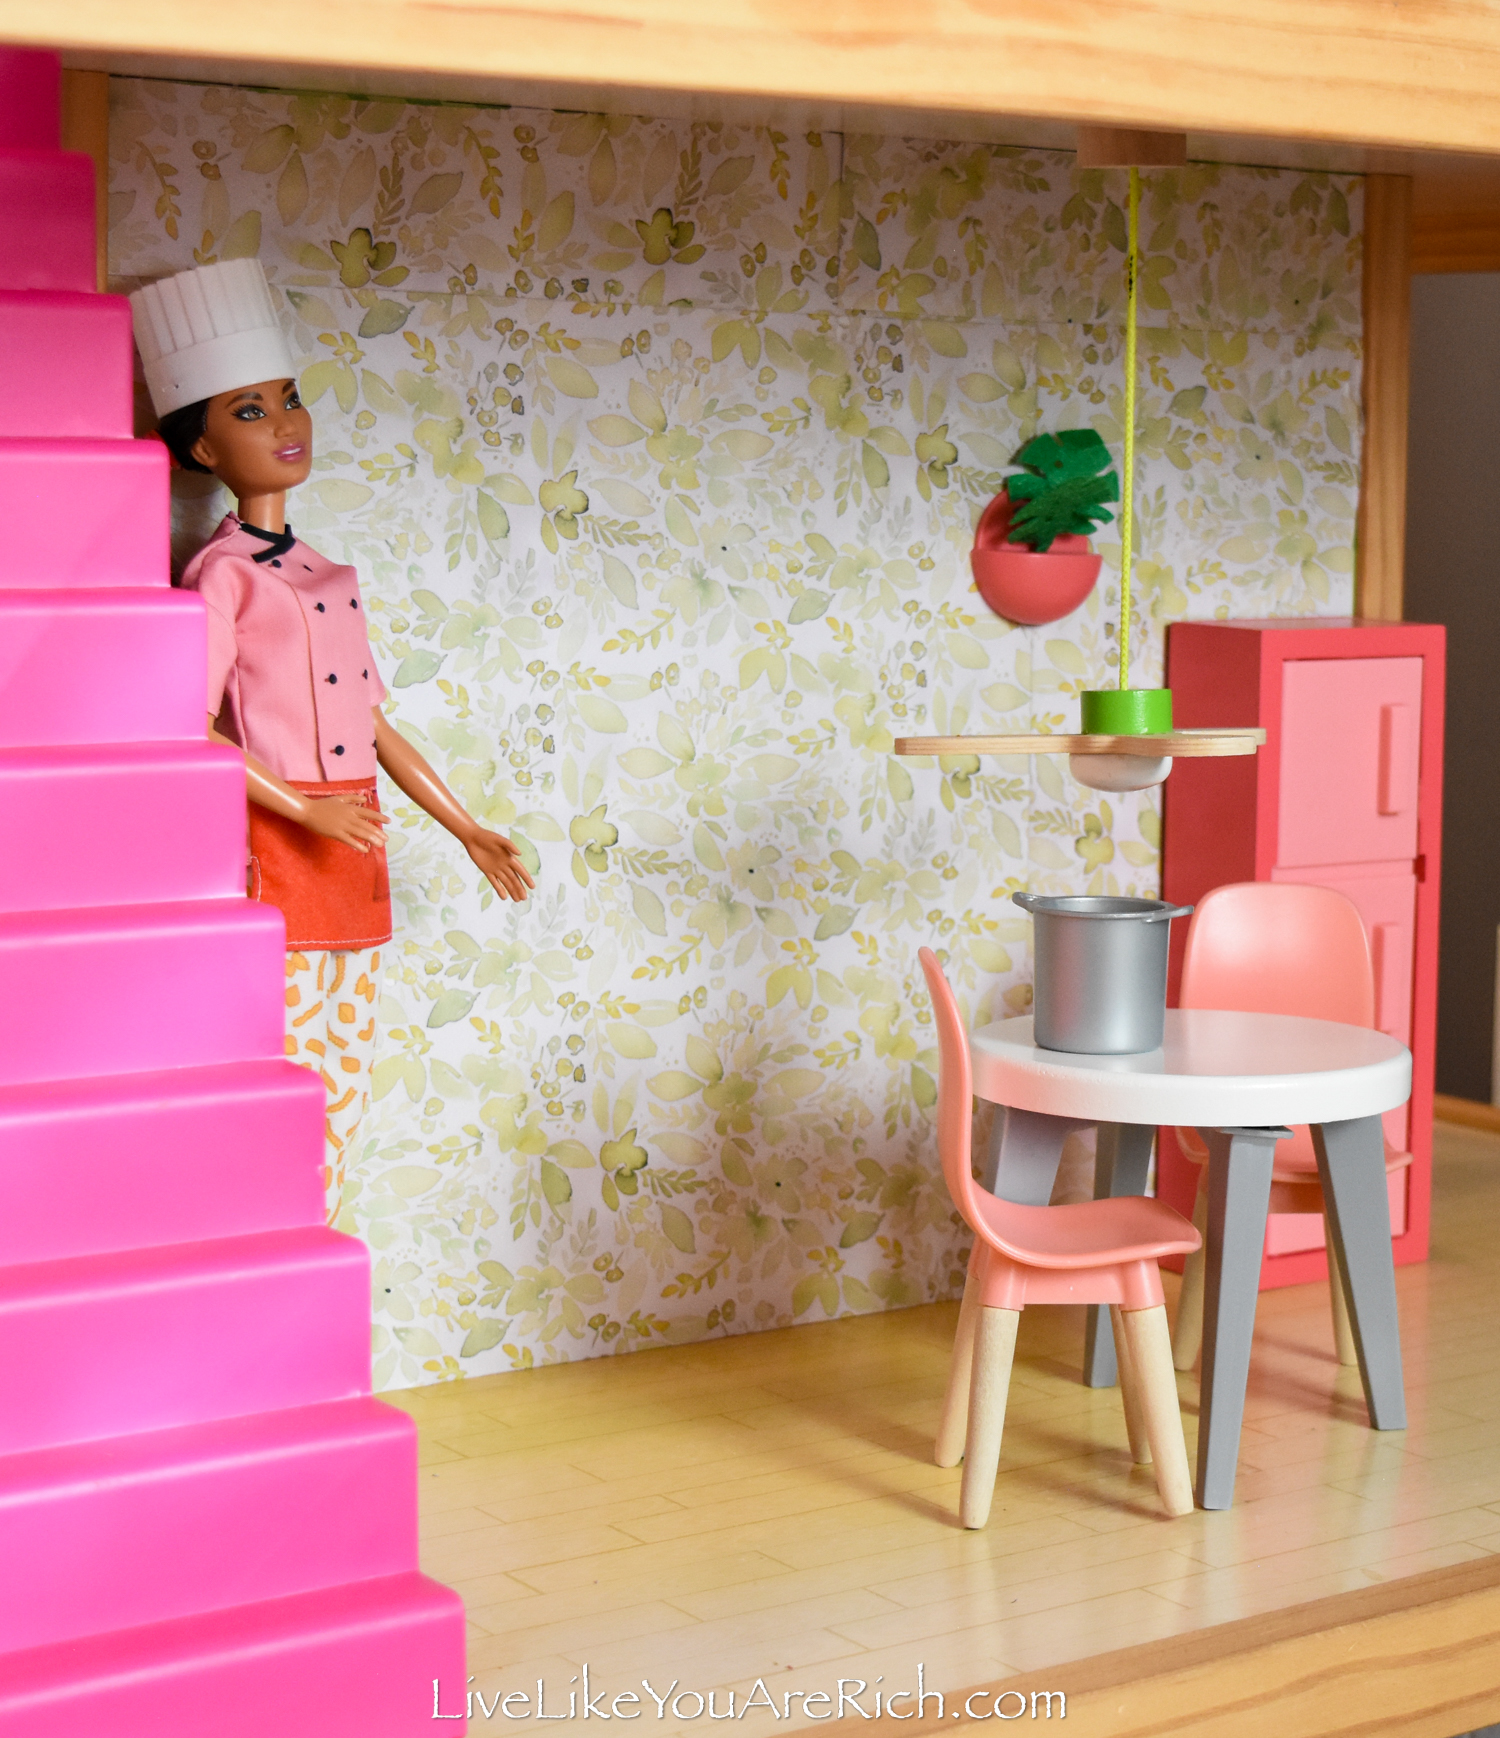
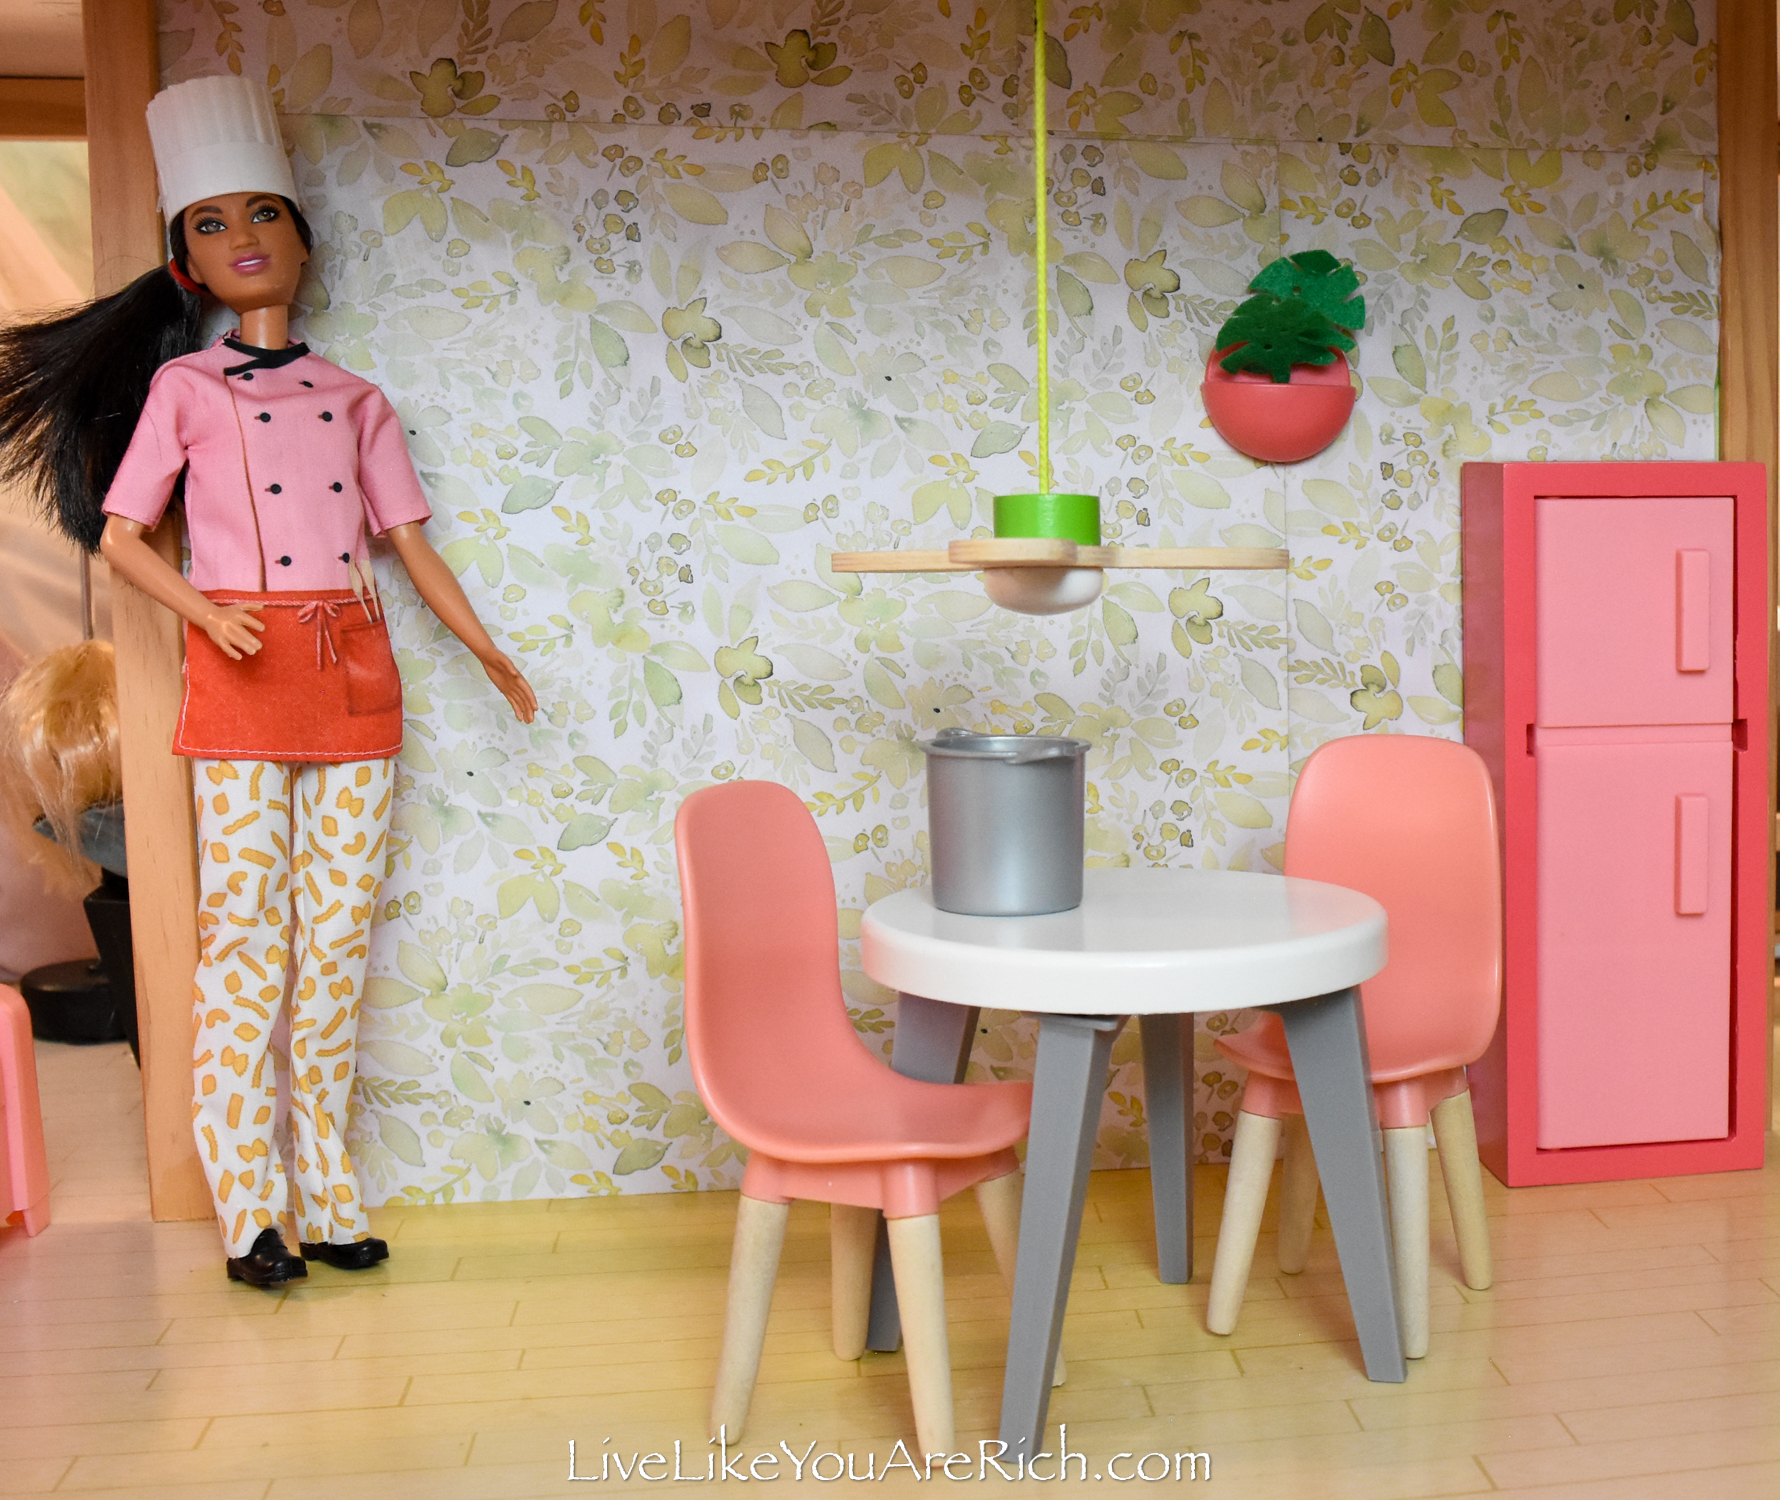
She set up chef Barbie in the kitchen and added a little plant on the wall for interest.
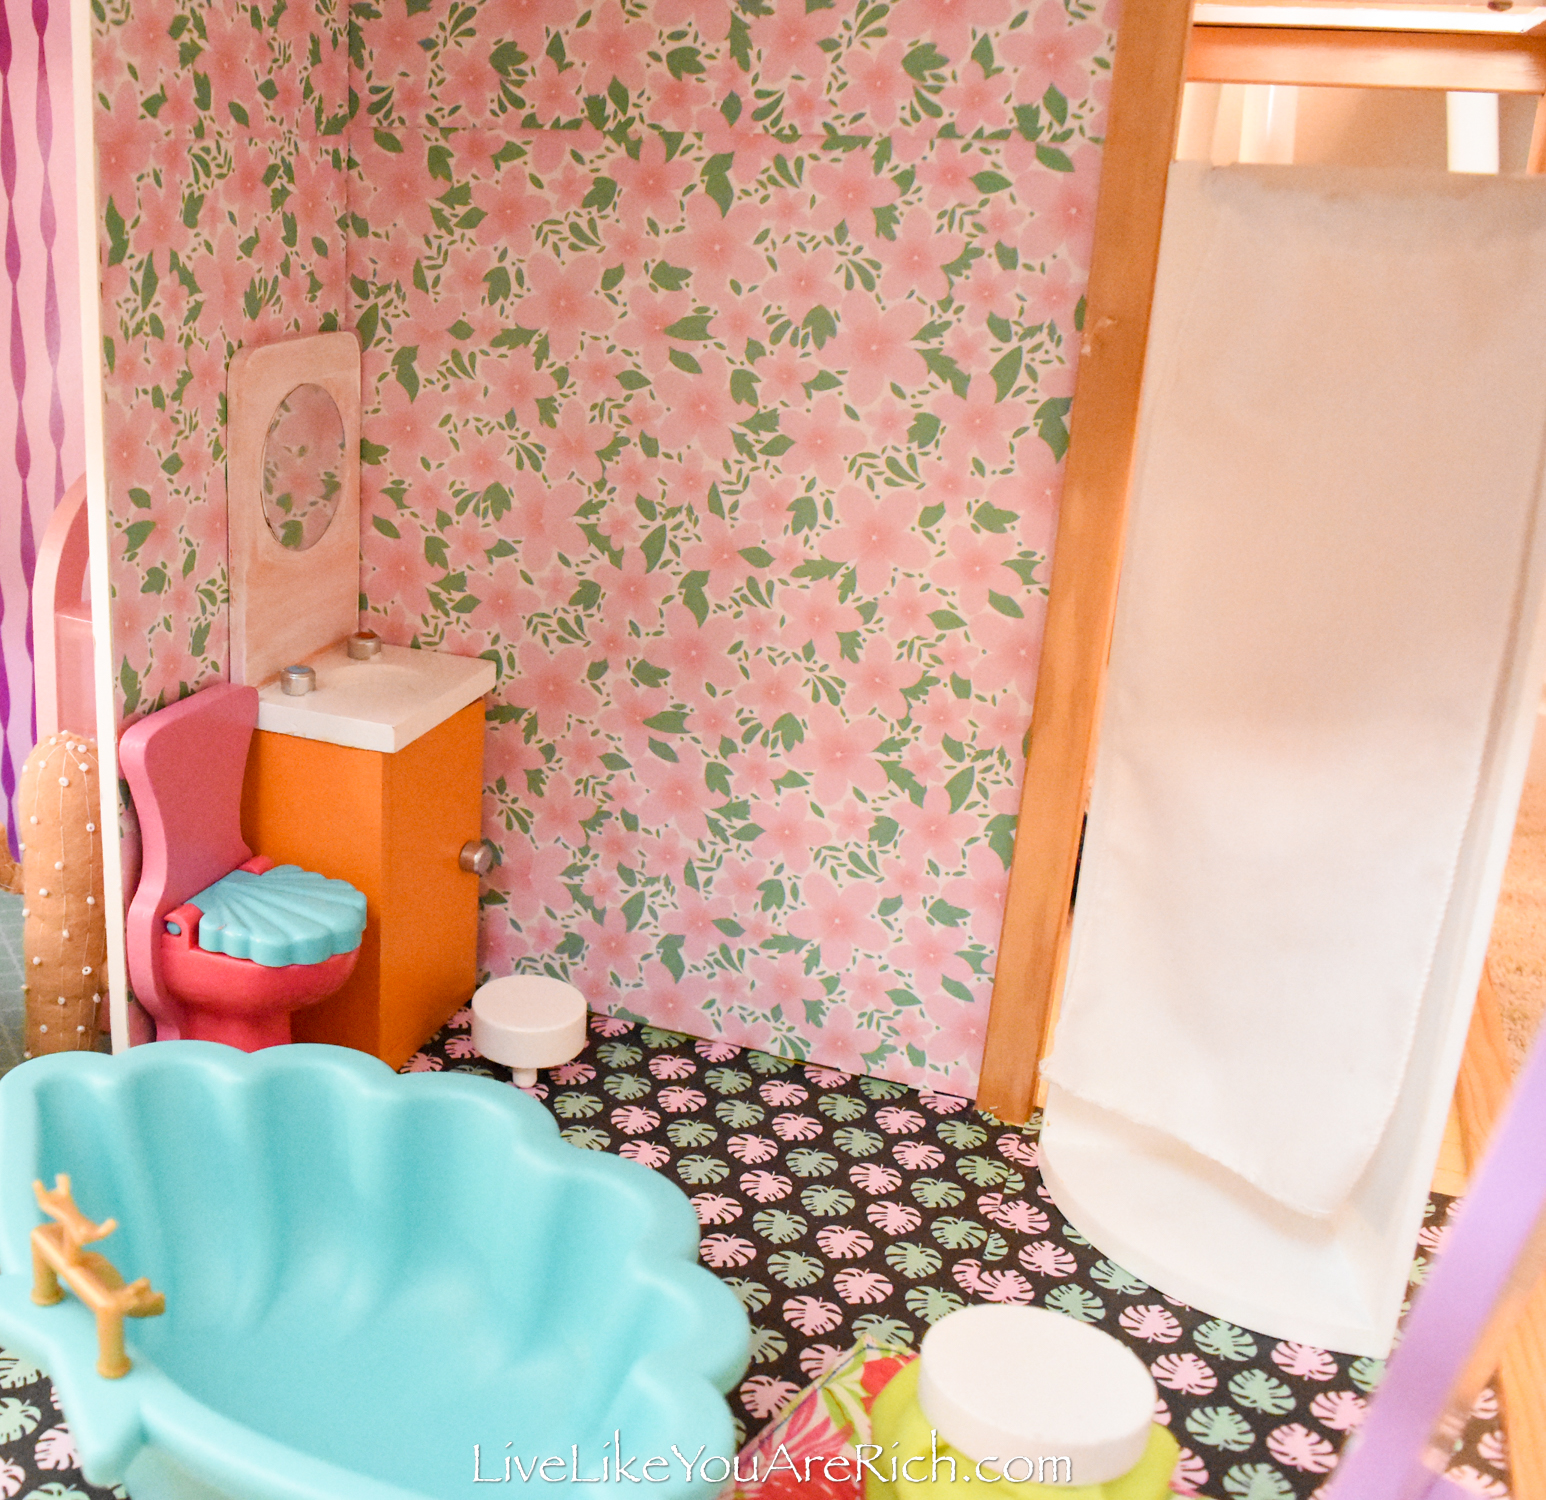
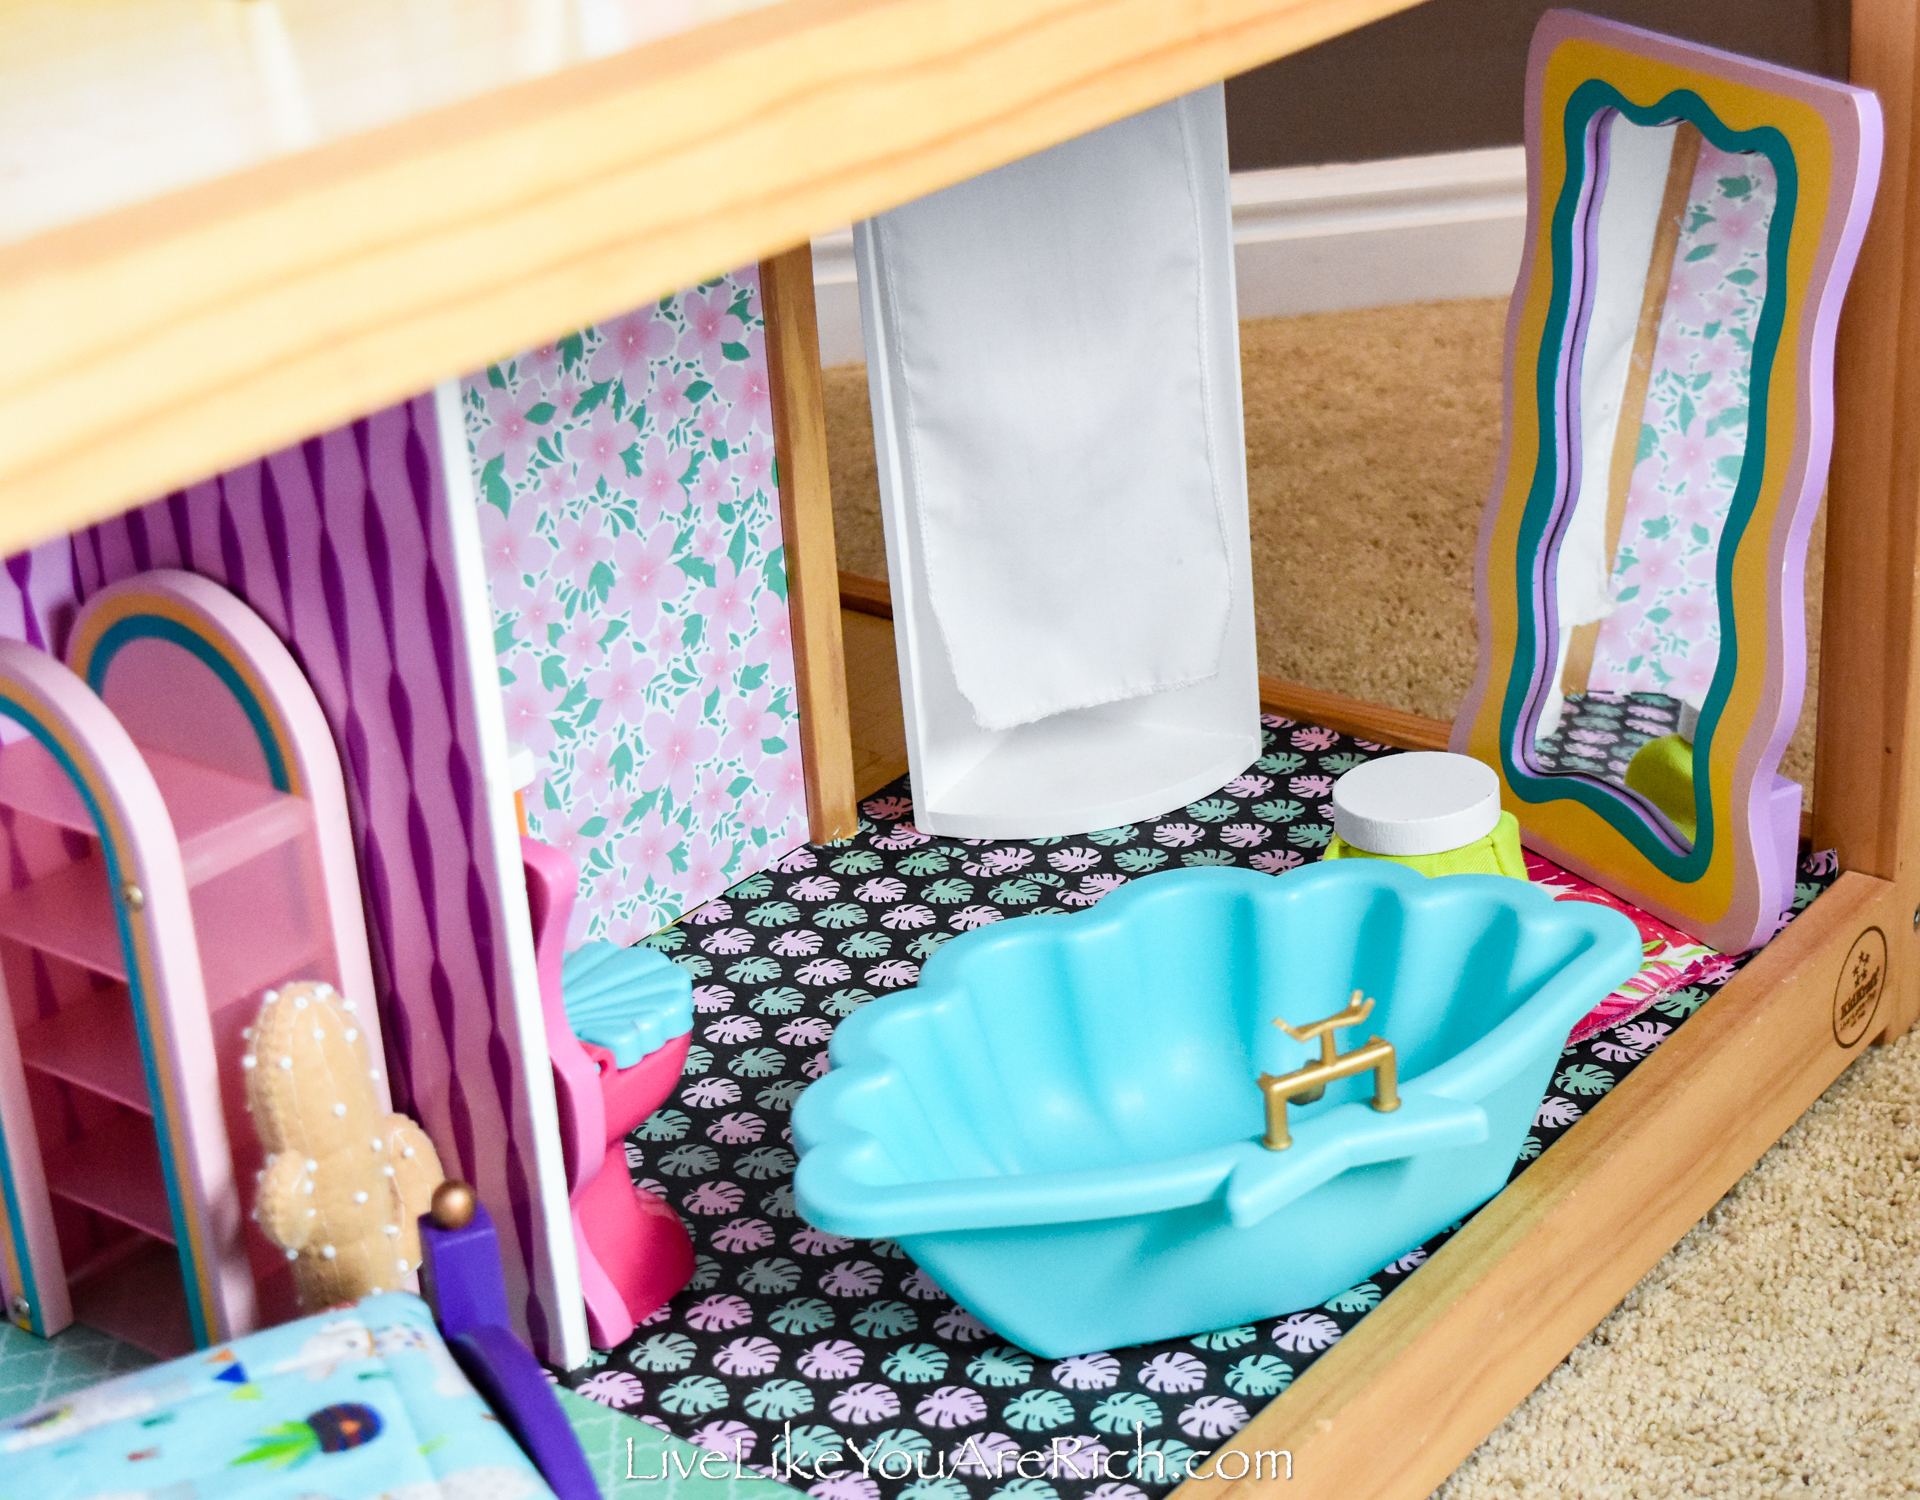
She wanted a Hawaiian themed bathroom, so this is what we came up with together.
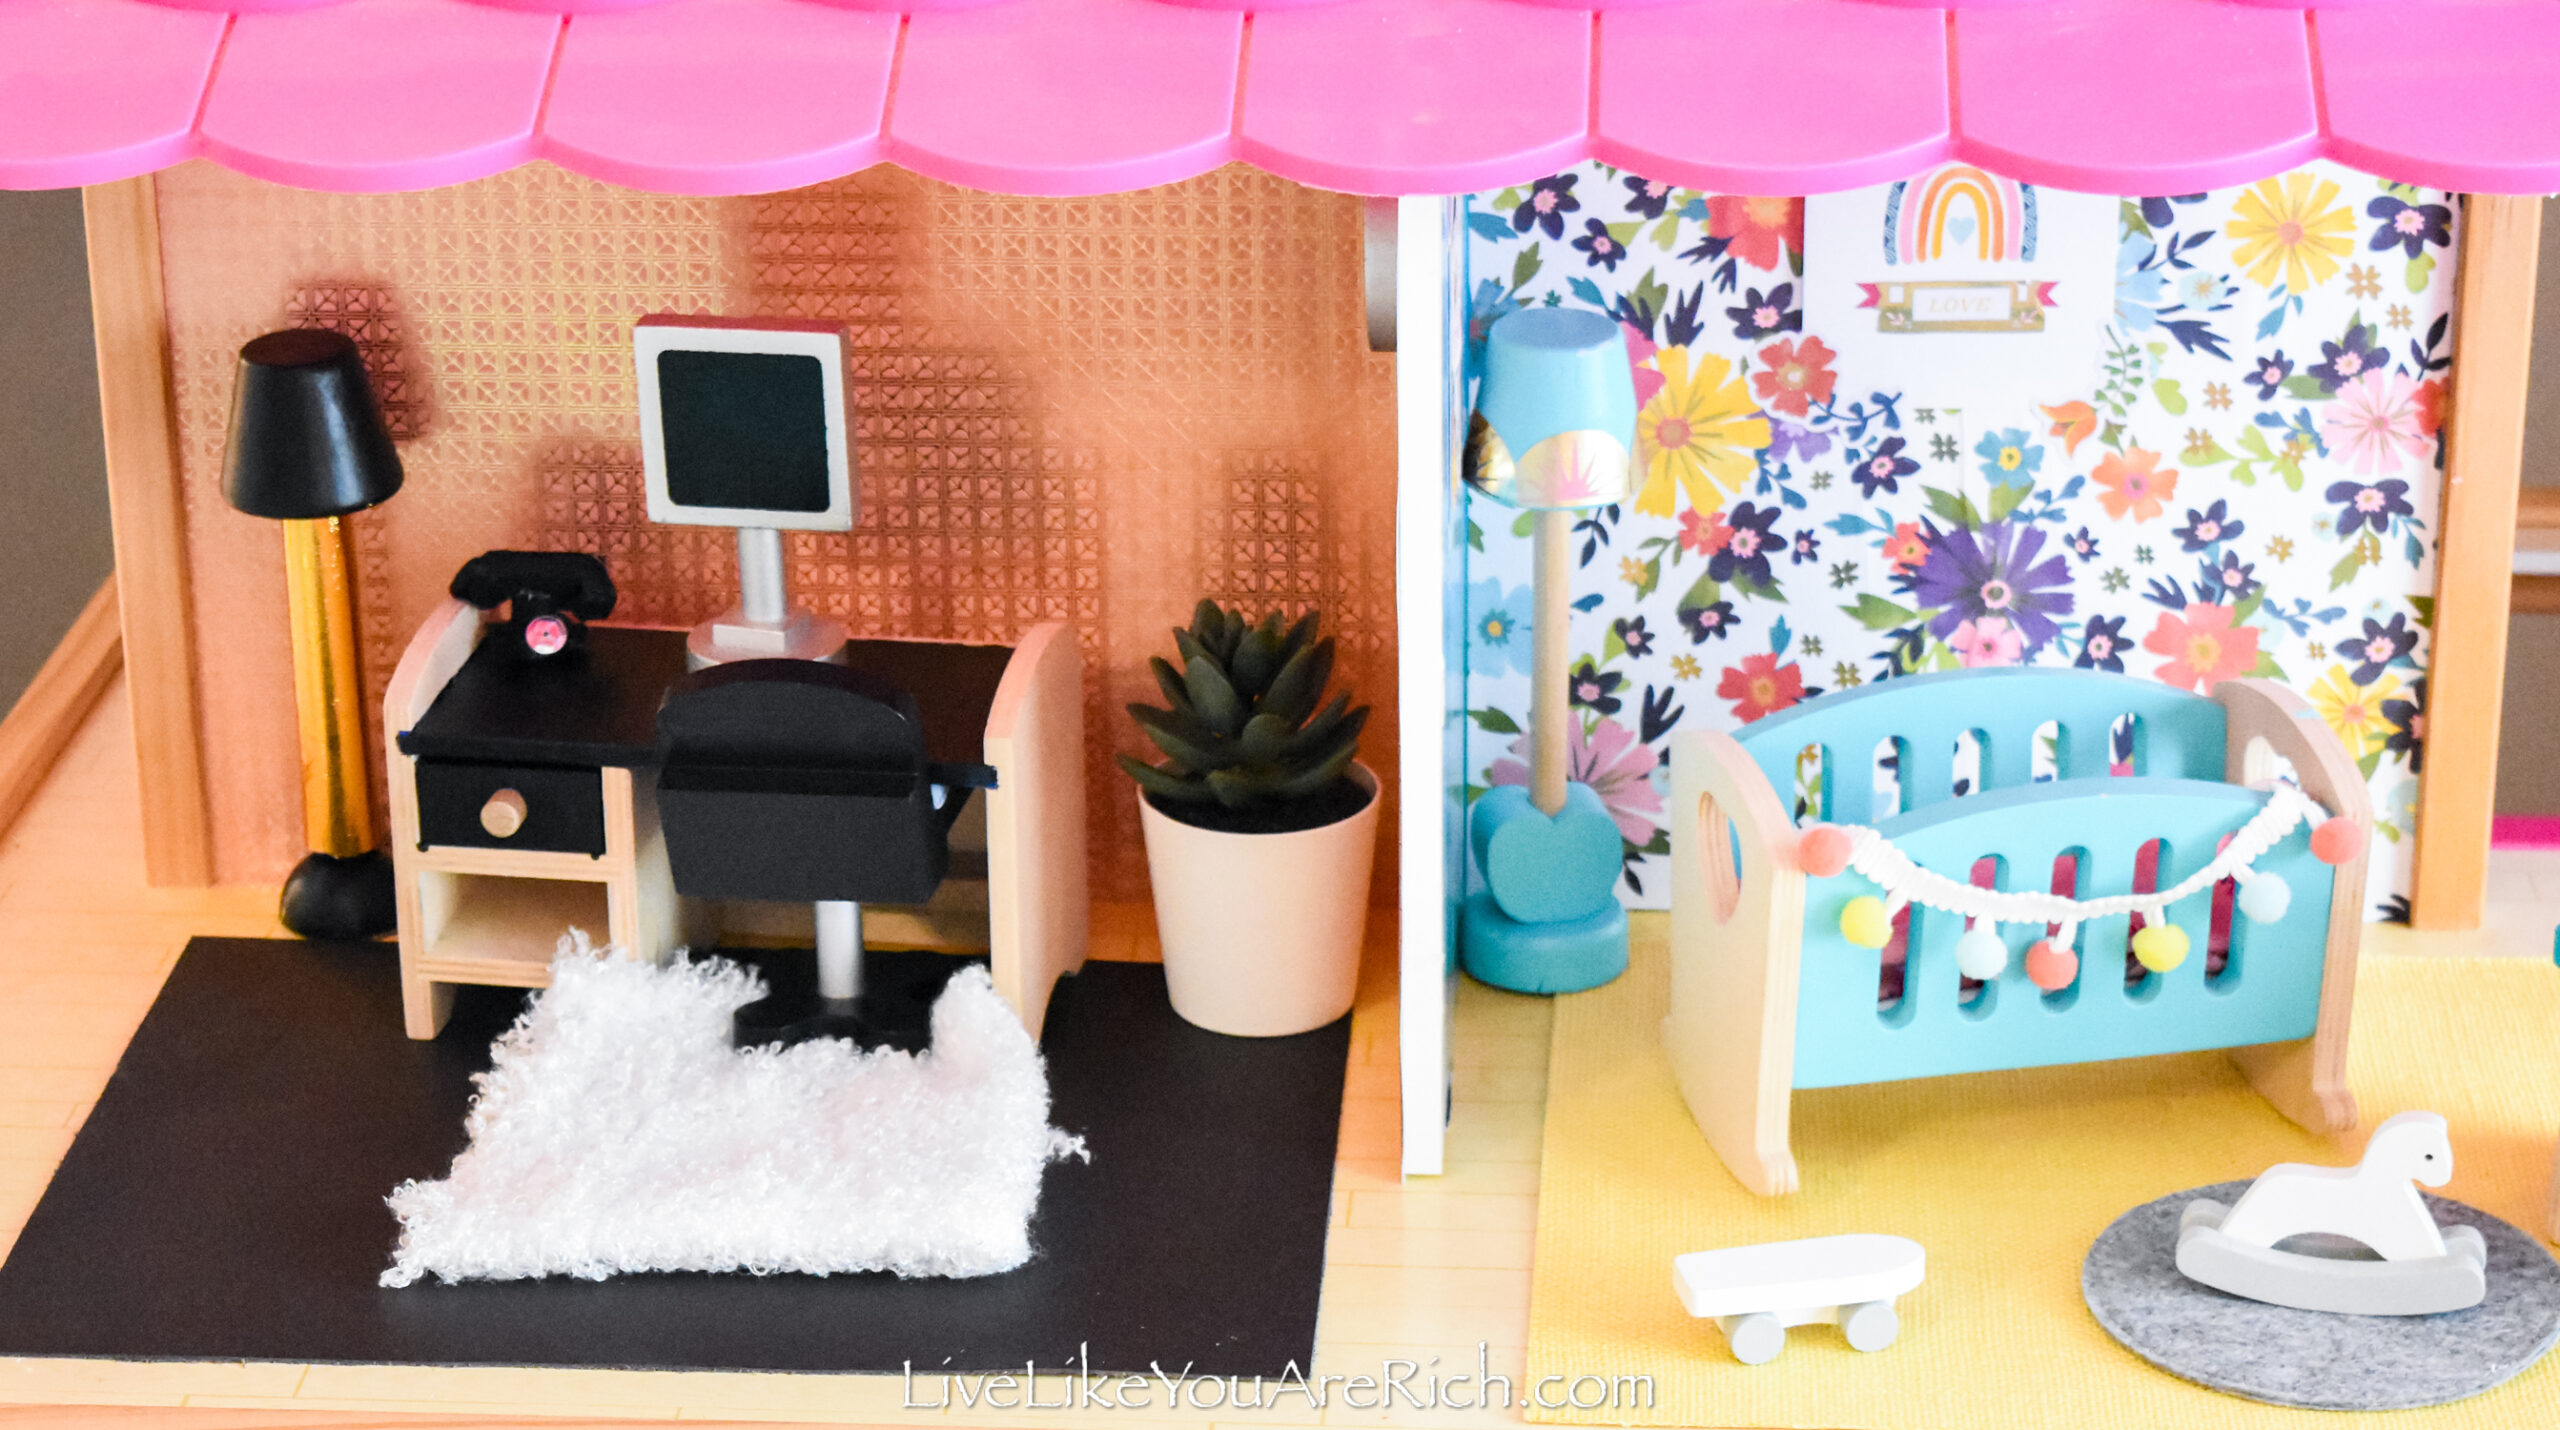
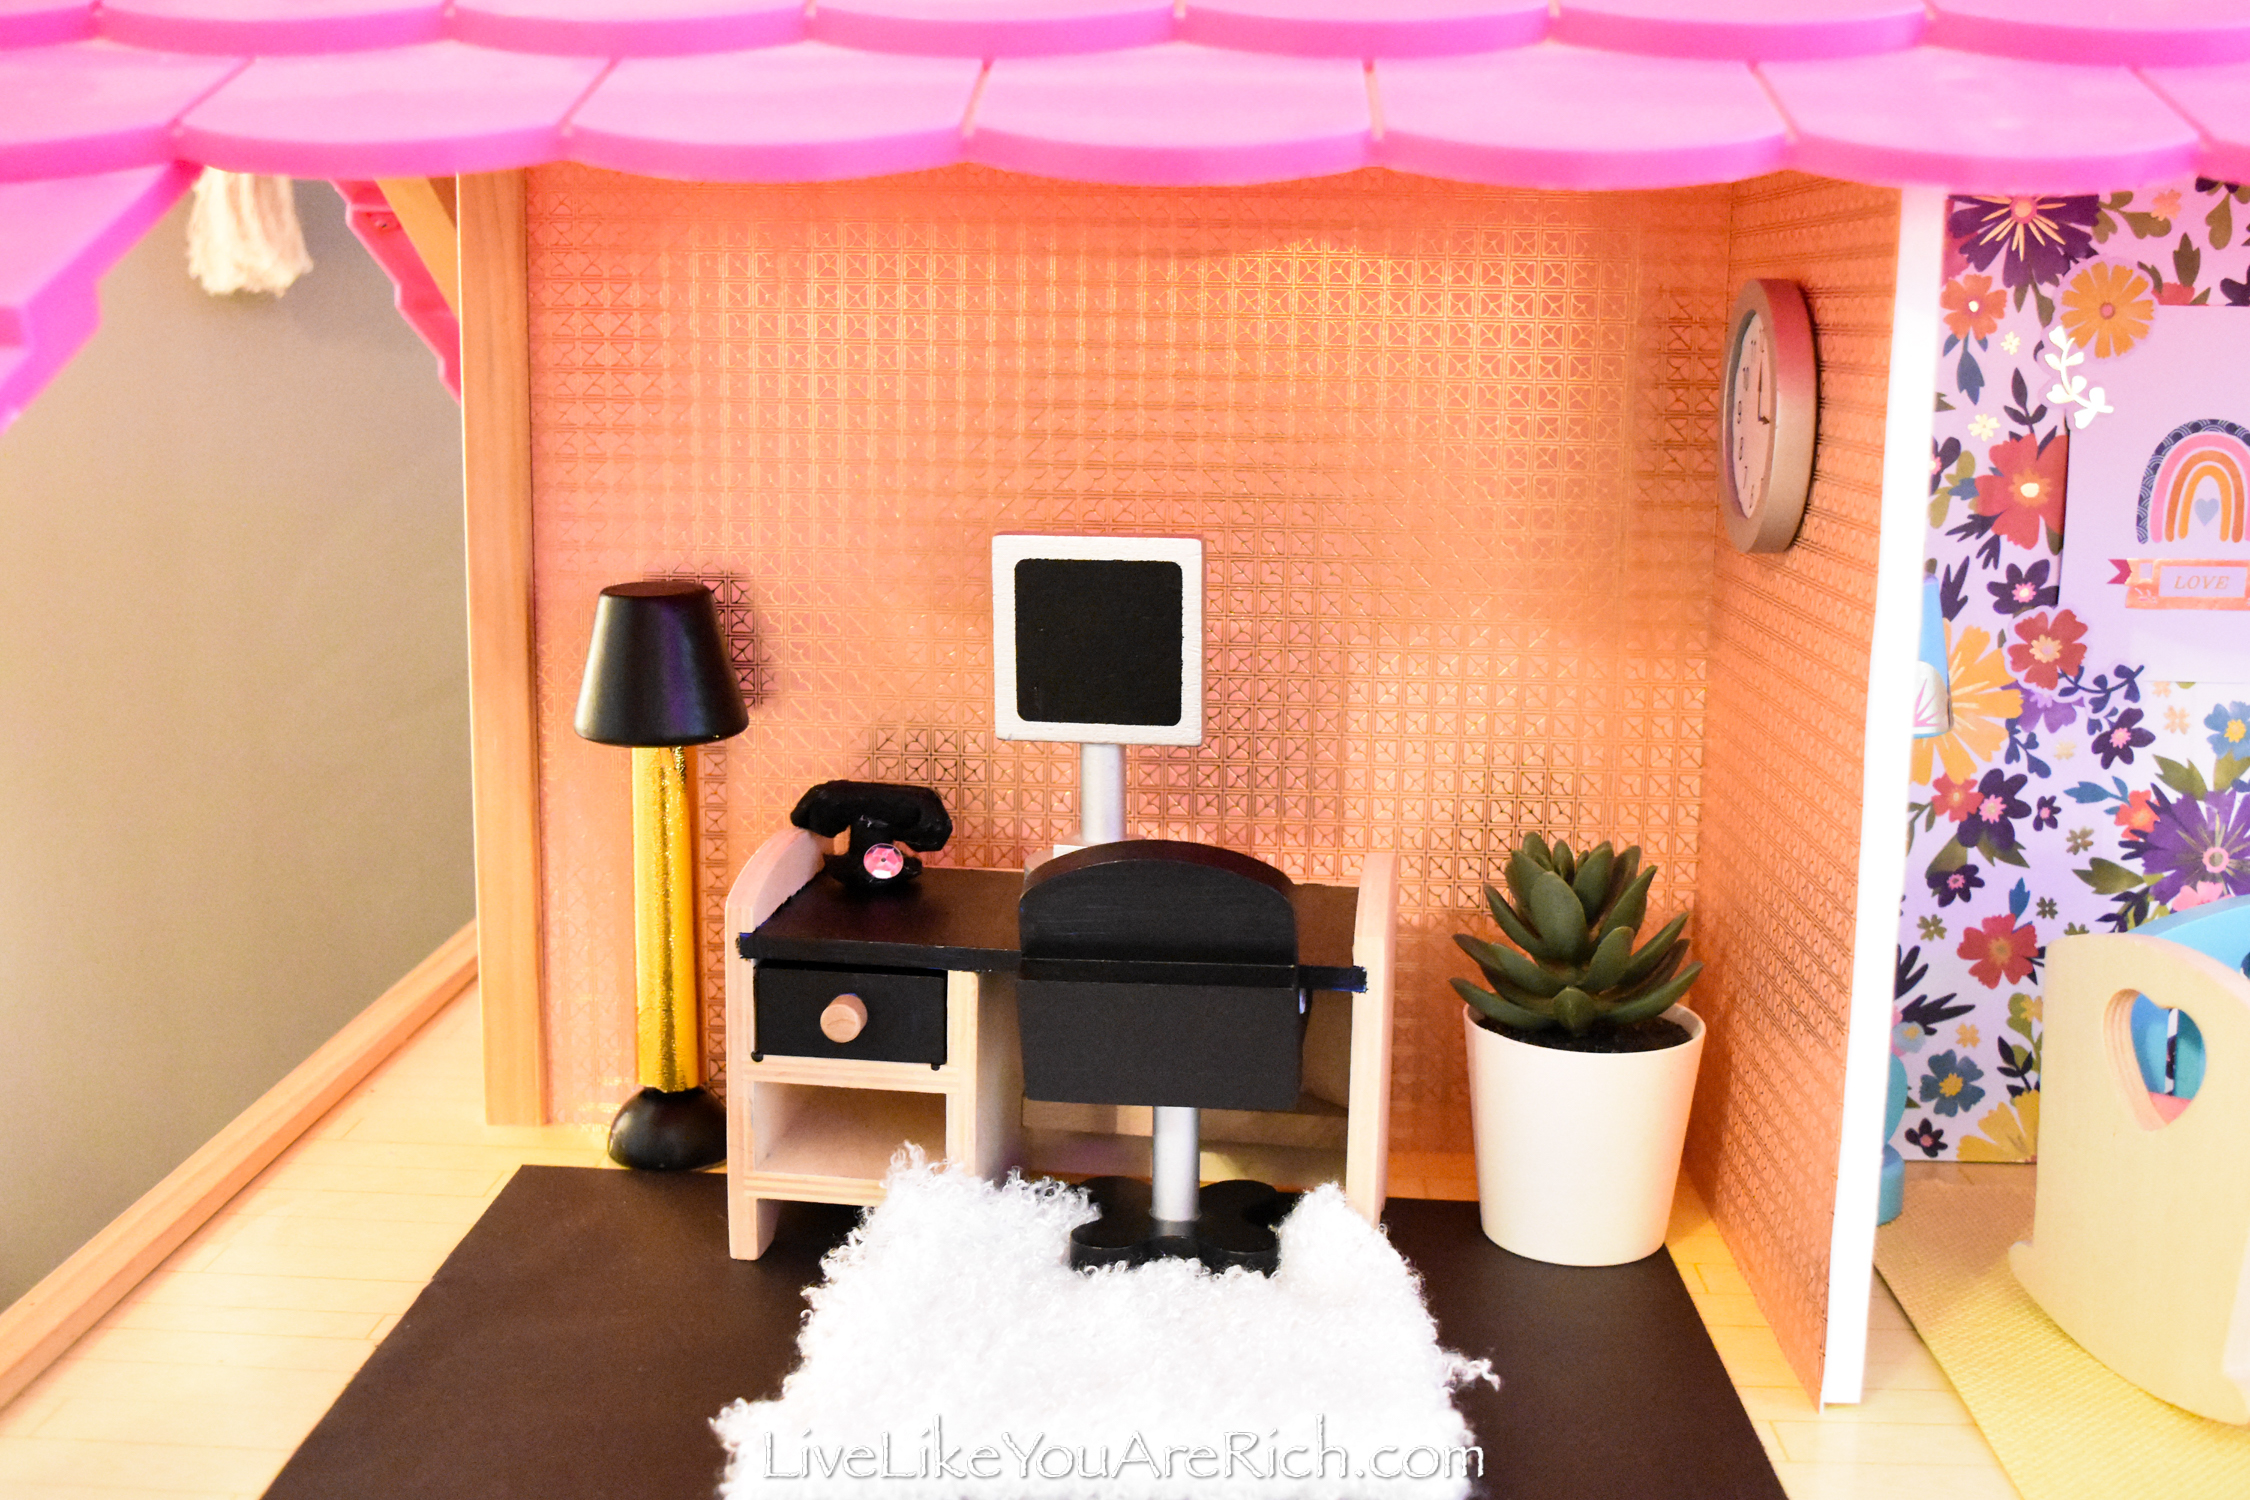
For the other side of the dollhouse, I did gold foil wallpaper in the office and added a Cricut leather piece as a rug and a white loop fabric for another smaller rug.
I hot glued the clock on the wall, wrapped the lamp in some gold vinyl, and put a plant in the corner.
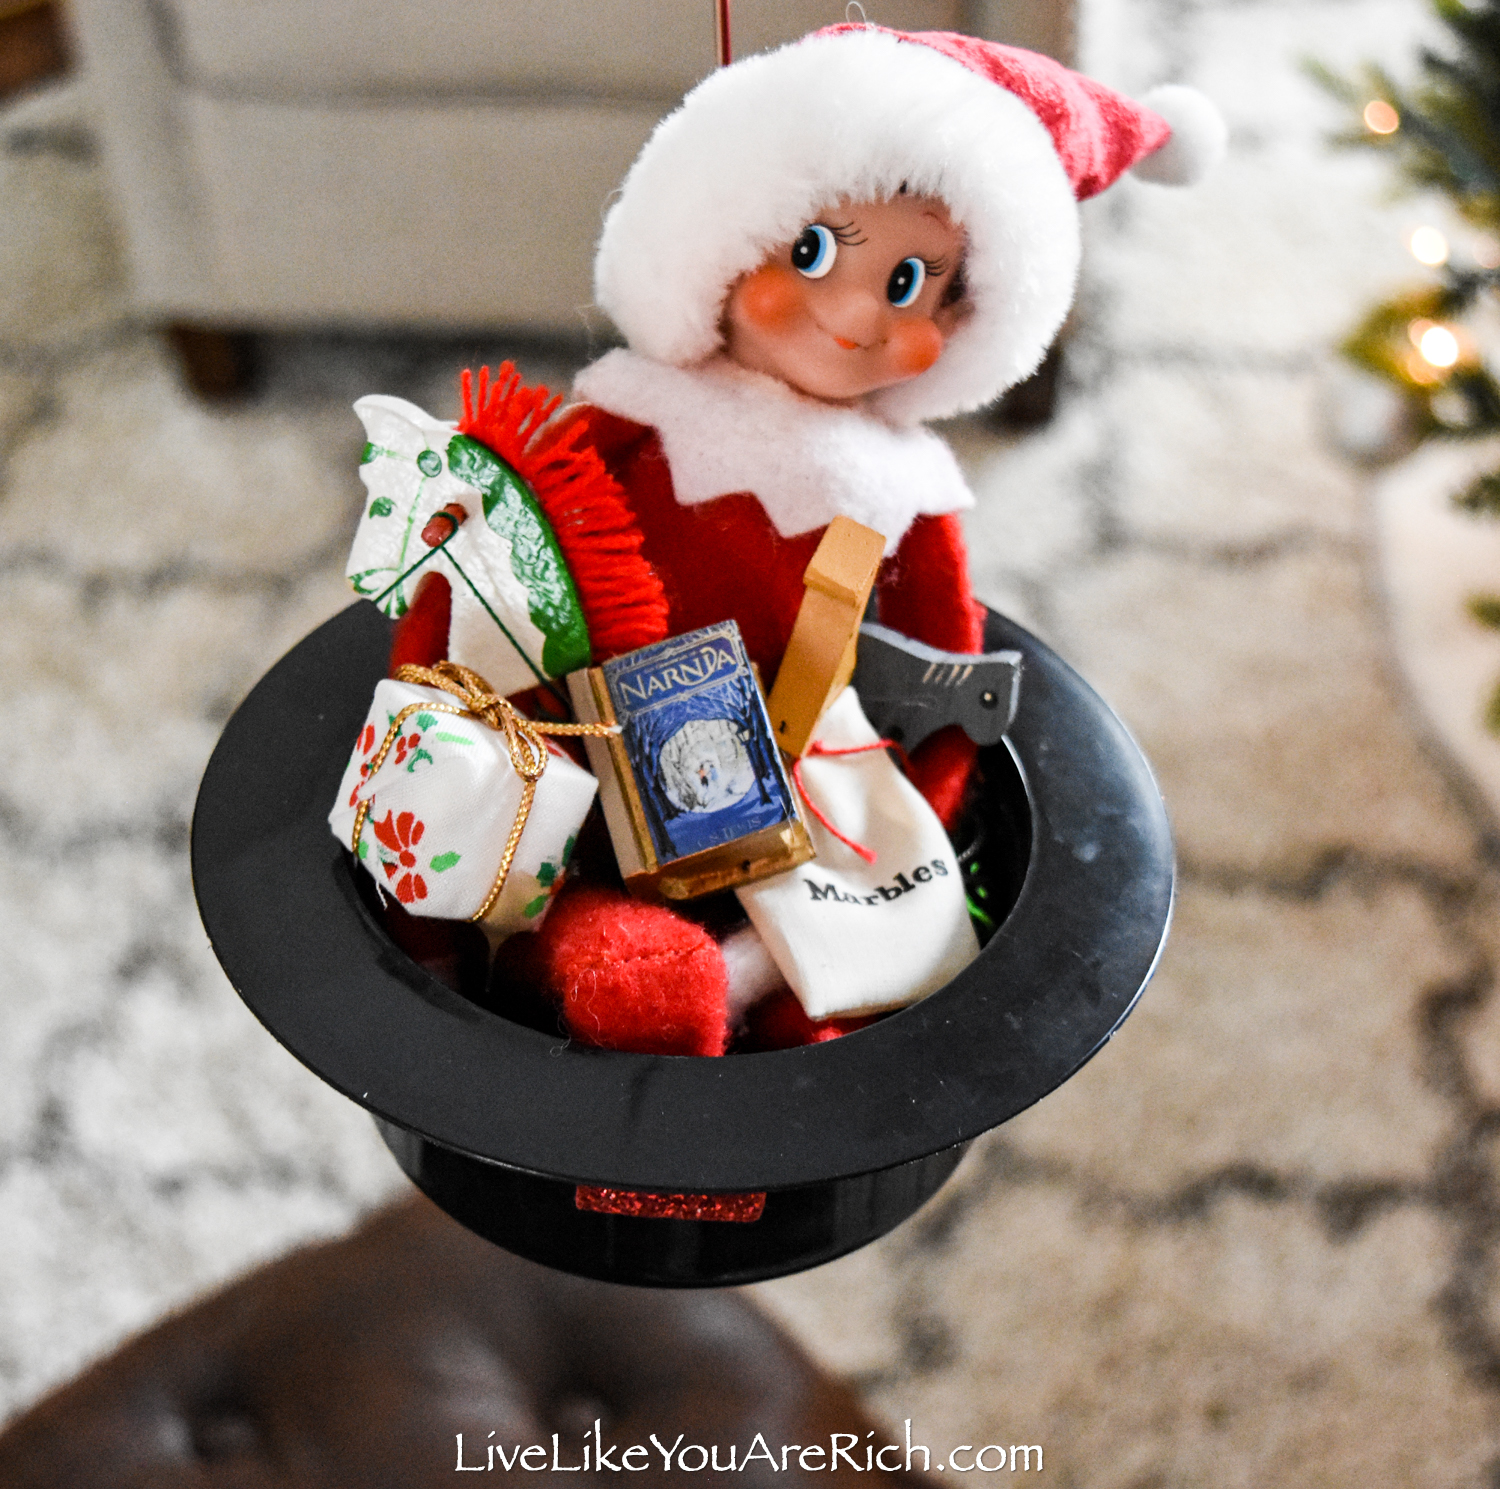
I helped our Elf on the Shelf make the old school telephone for this Elf on the Shelf Goodnight moon set last Christmas.
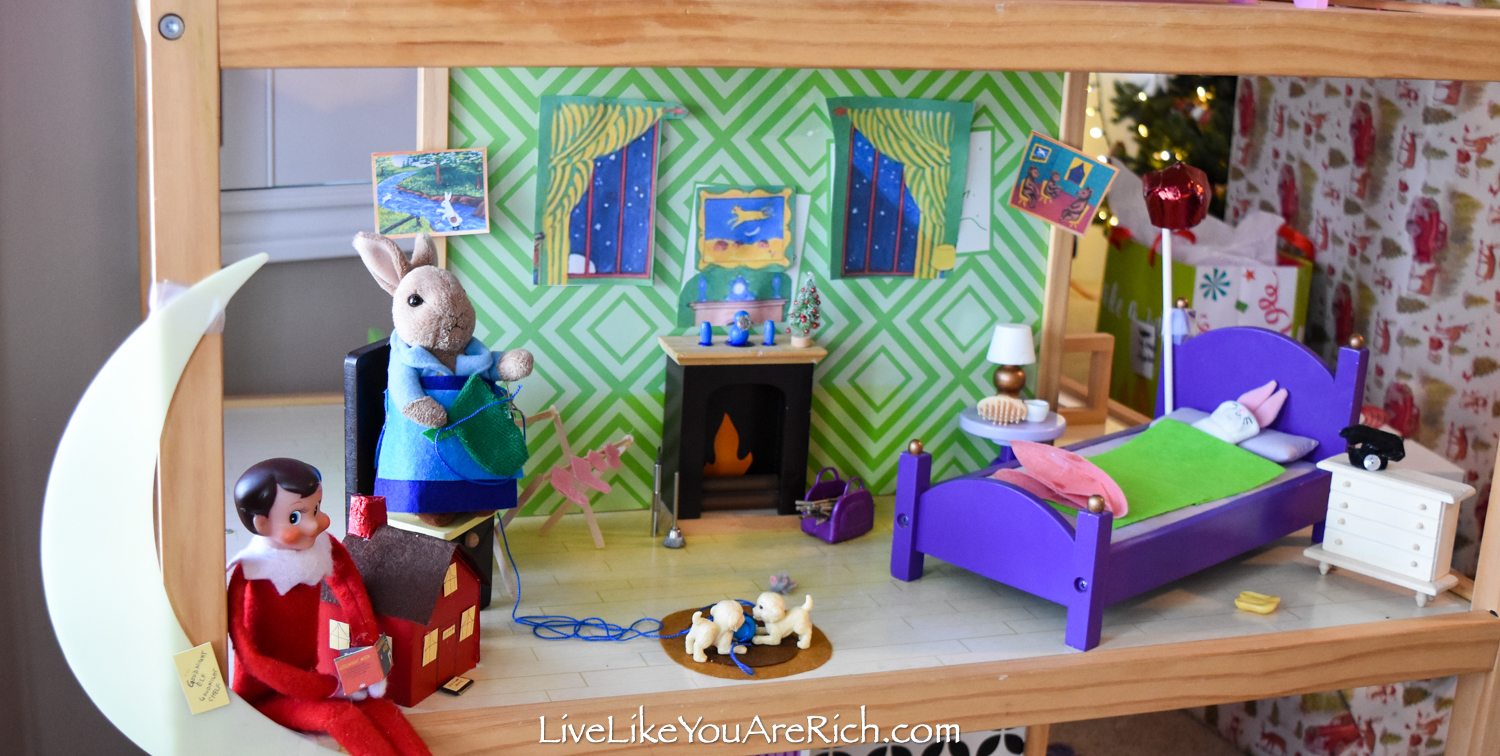

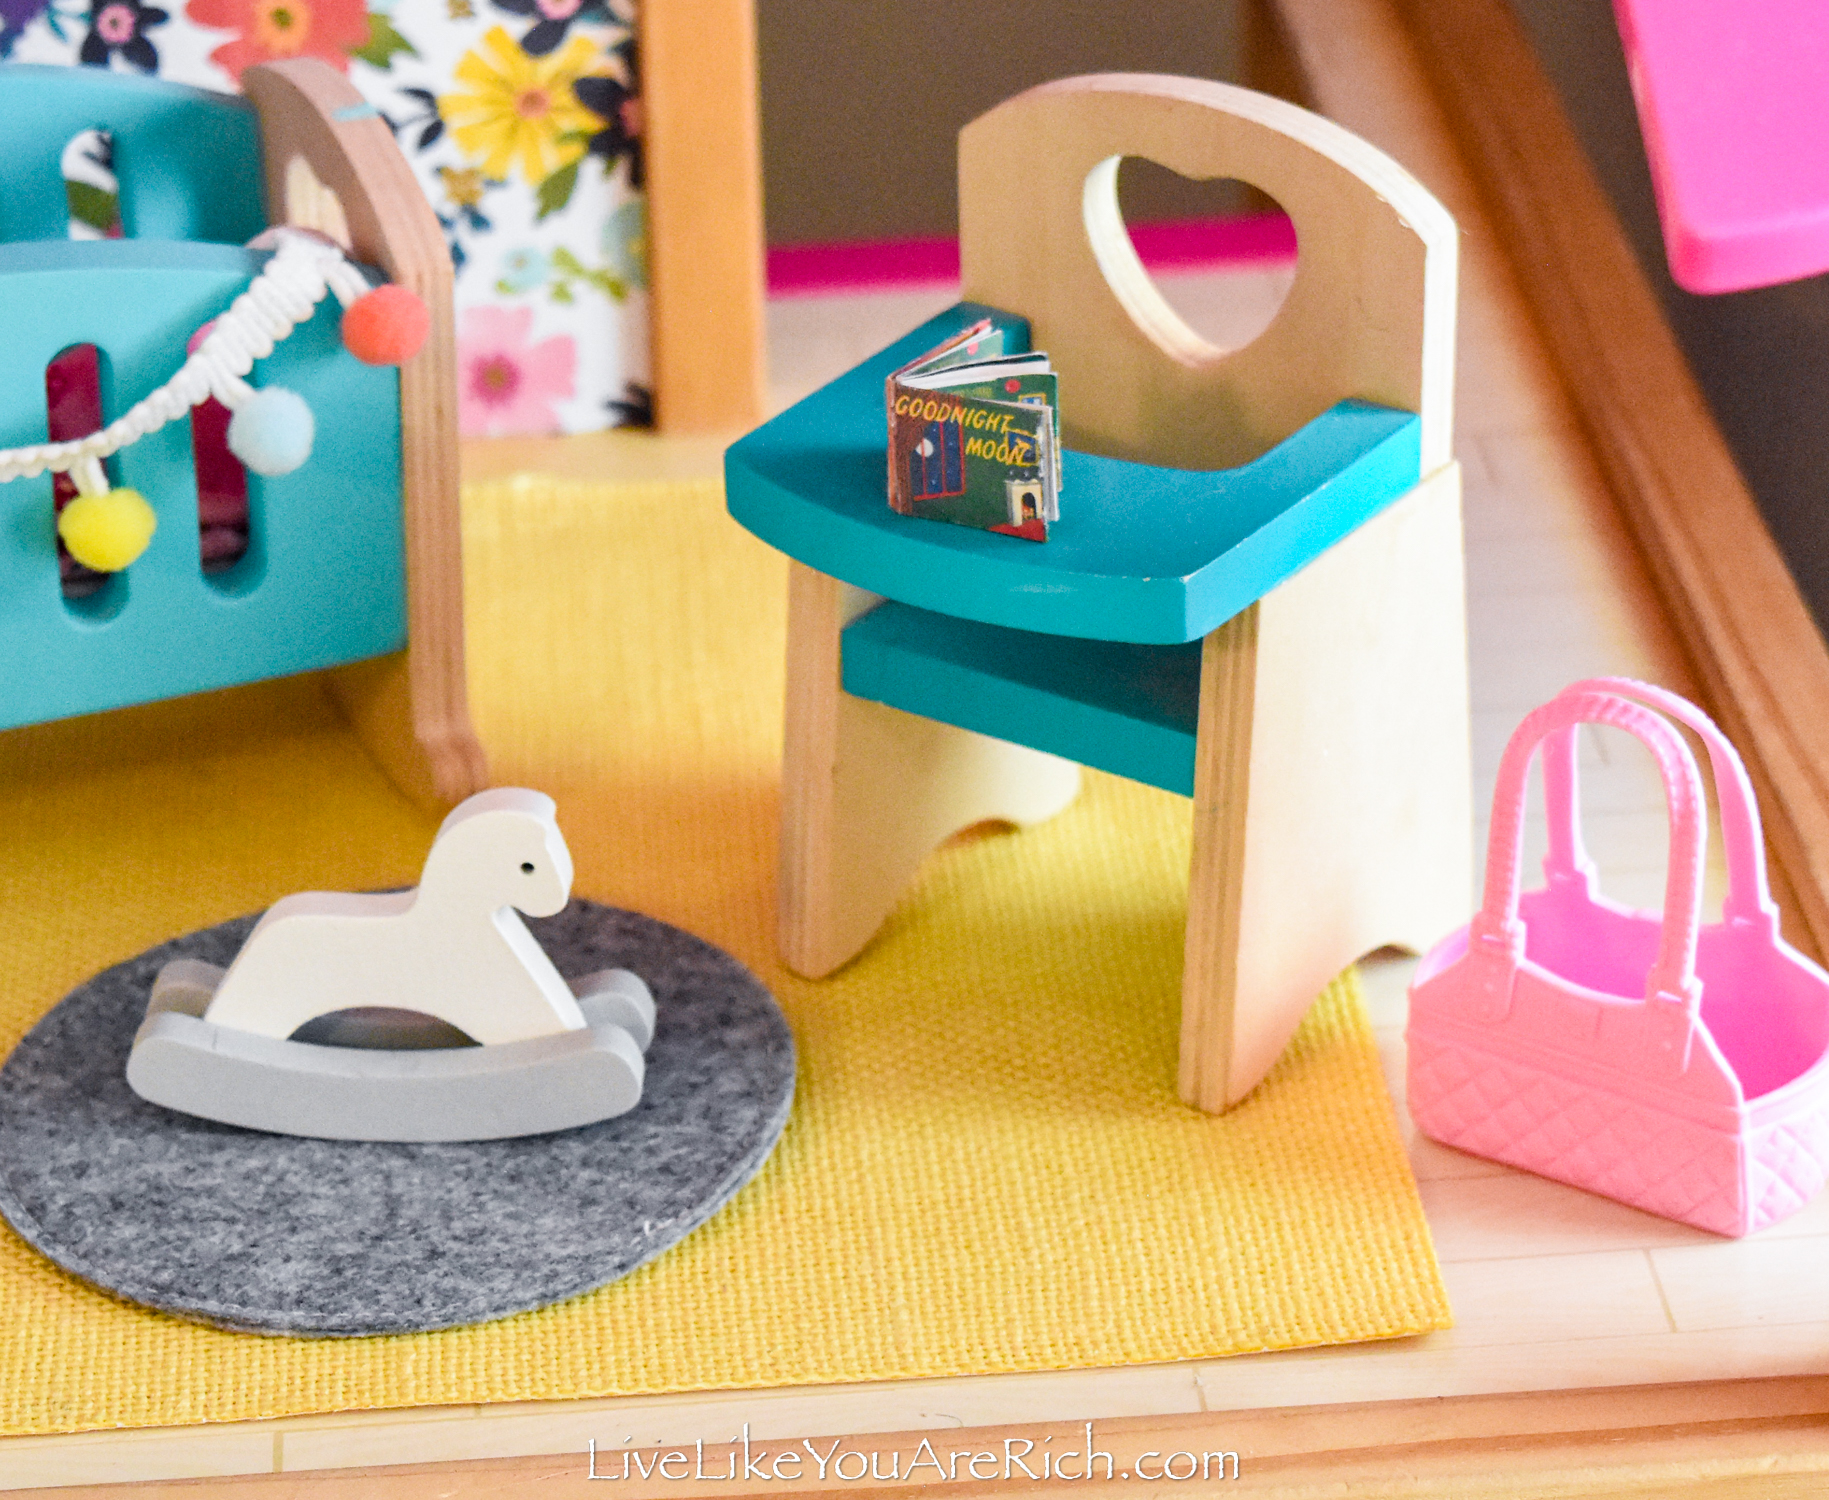
I used the mini book from this same Elf on the Shelf setup and put it on the high chair in the nursery.
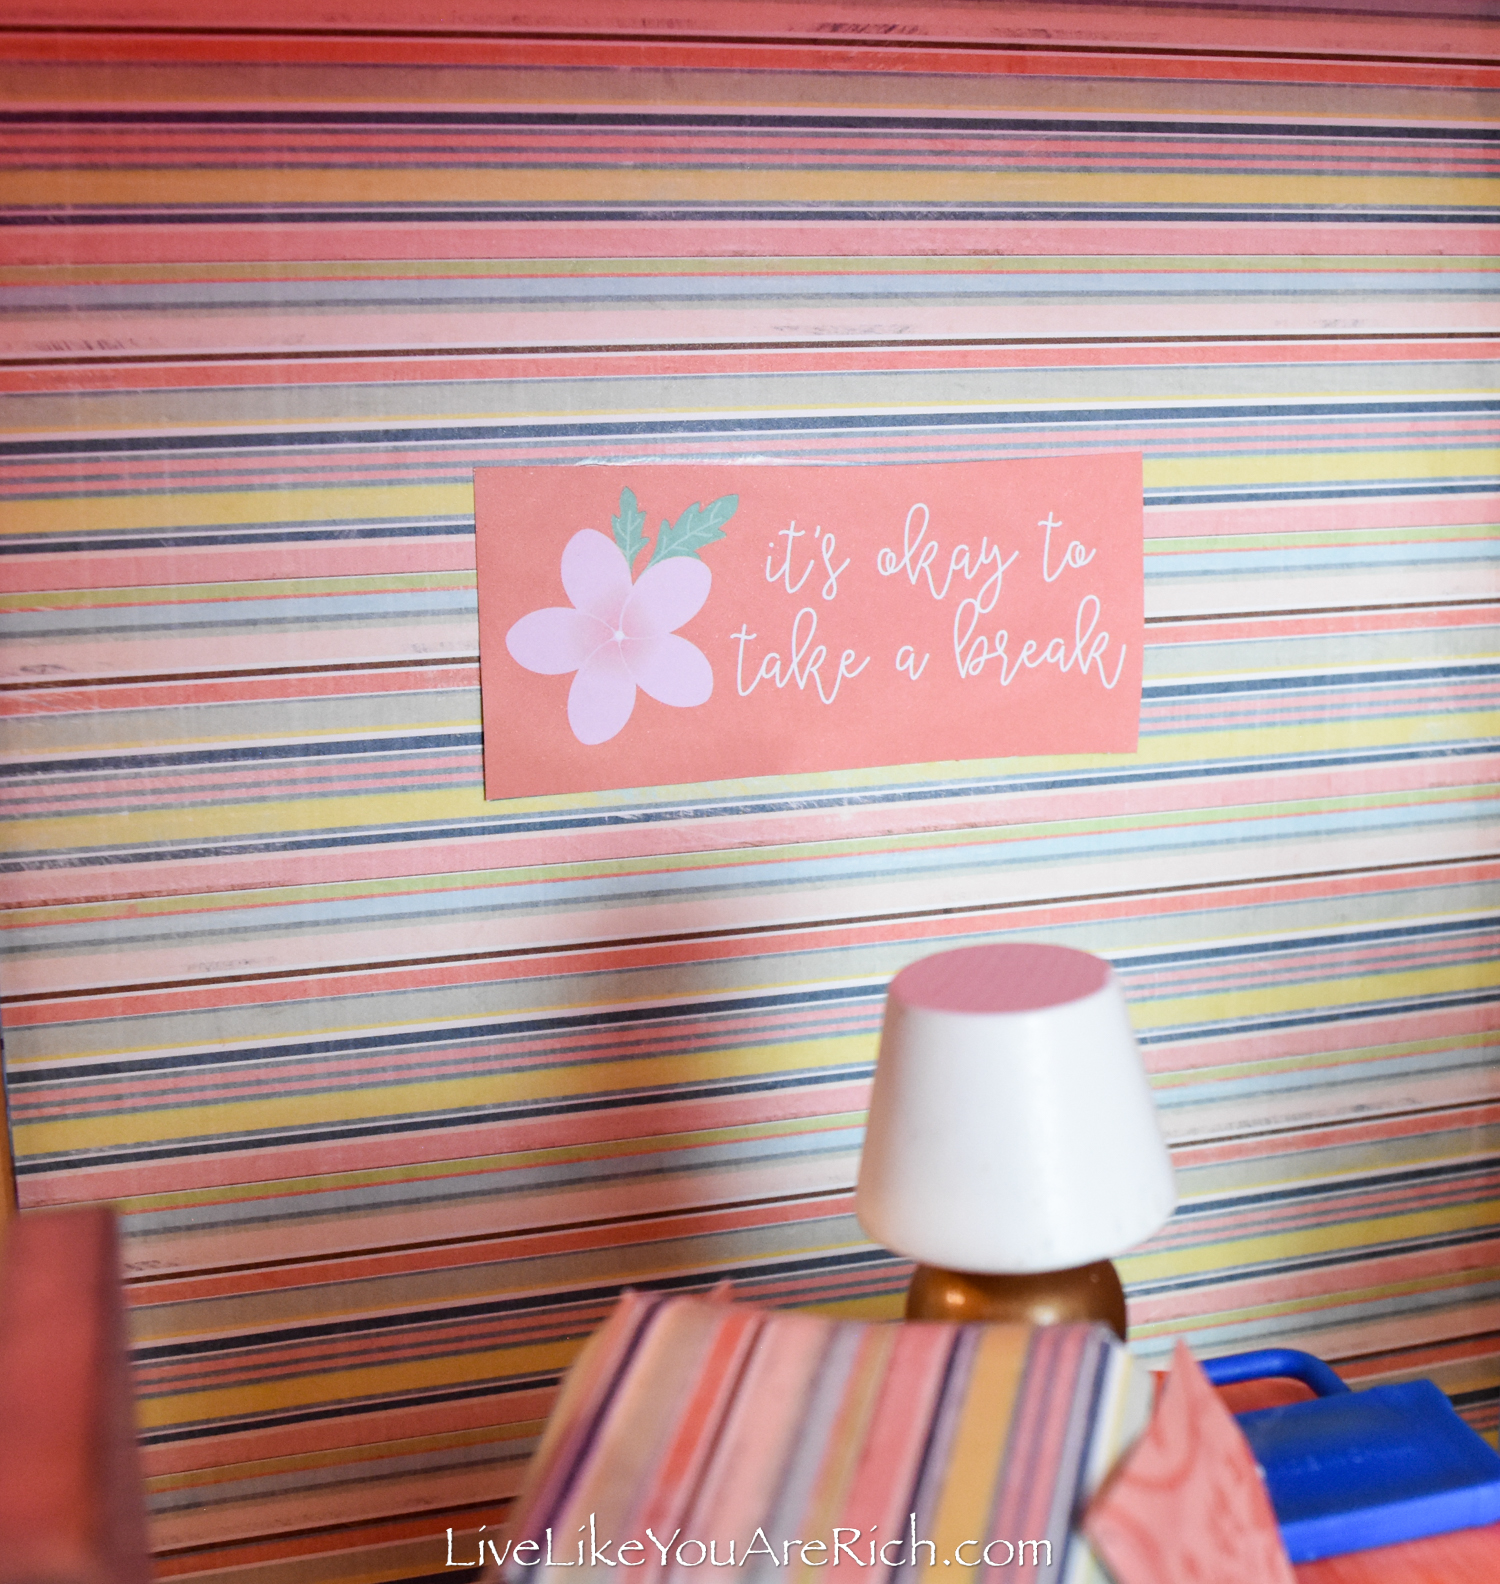
I used some canvas scrapbooking paper for the rug in the nursery and some stickers for the wall decor.
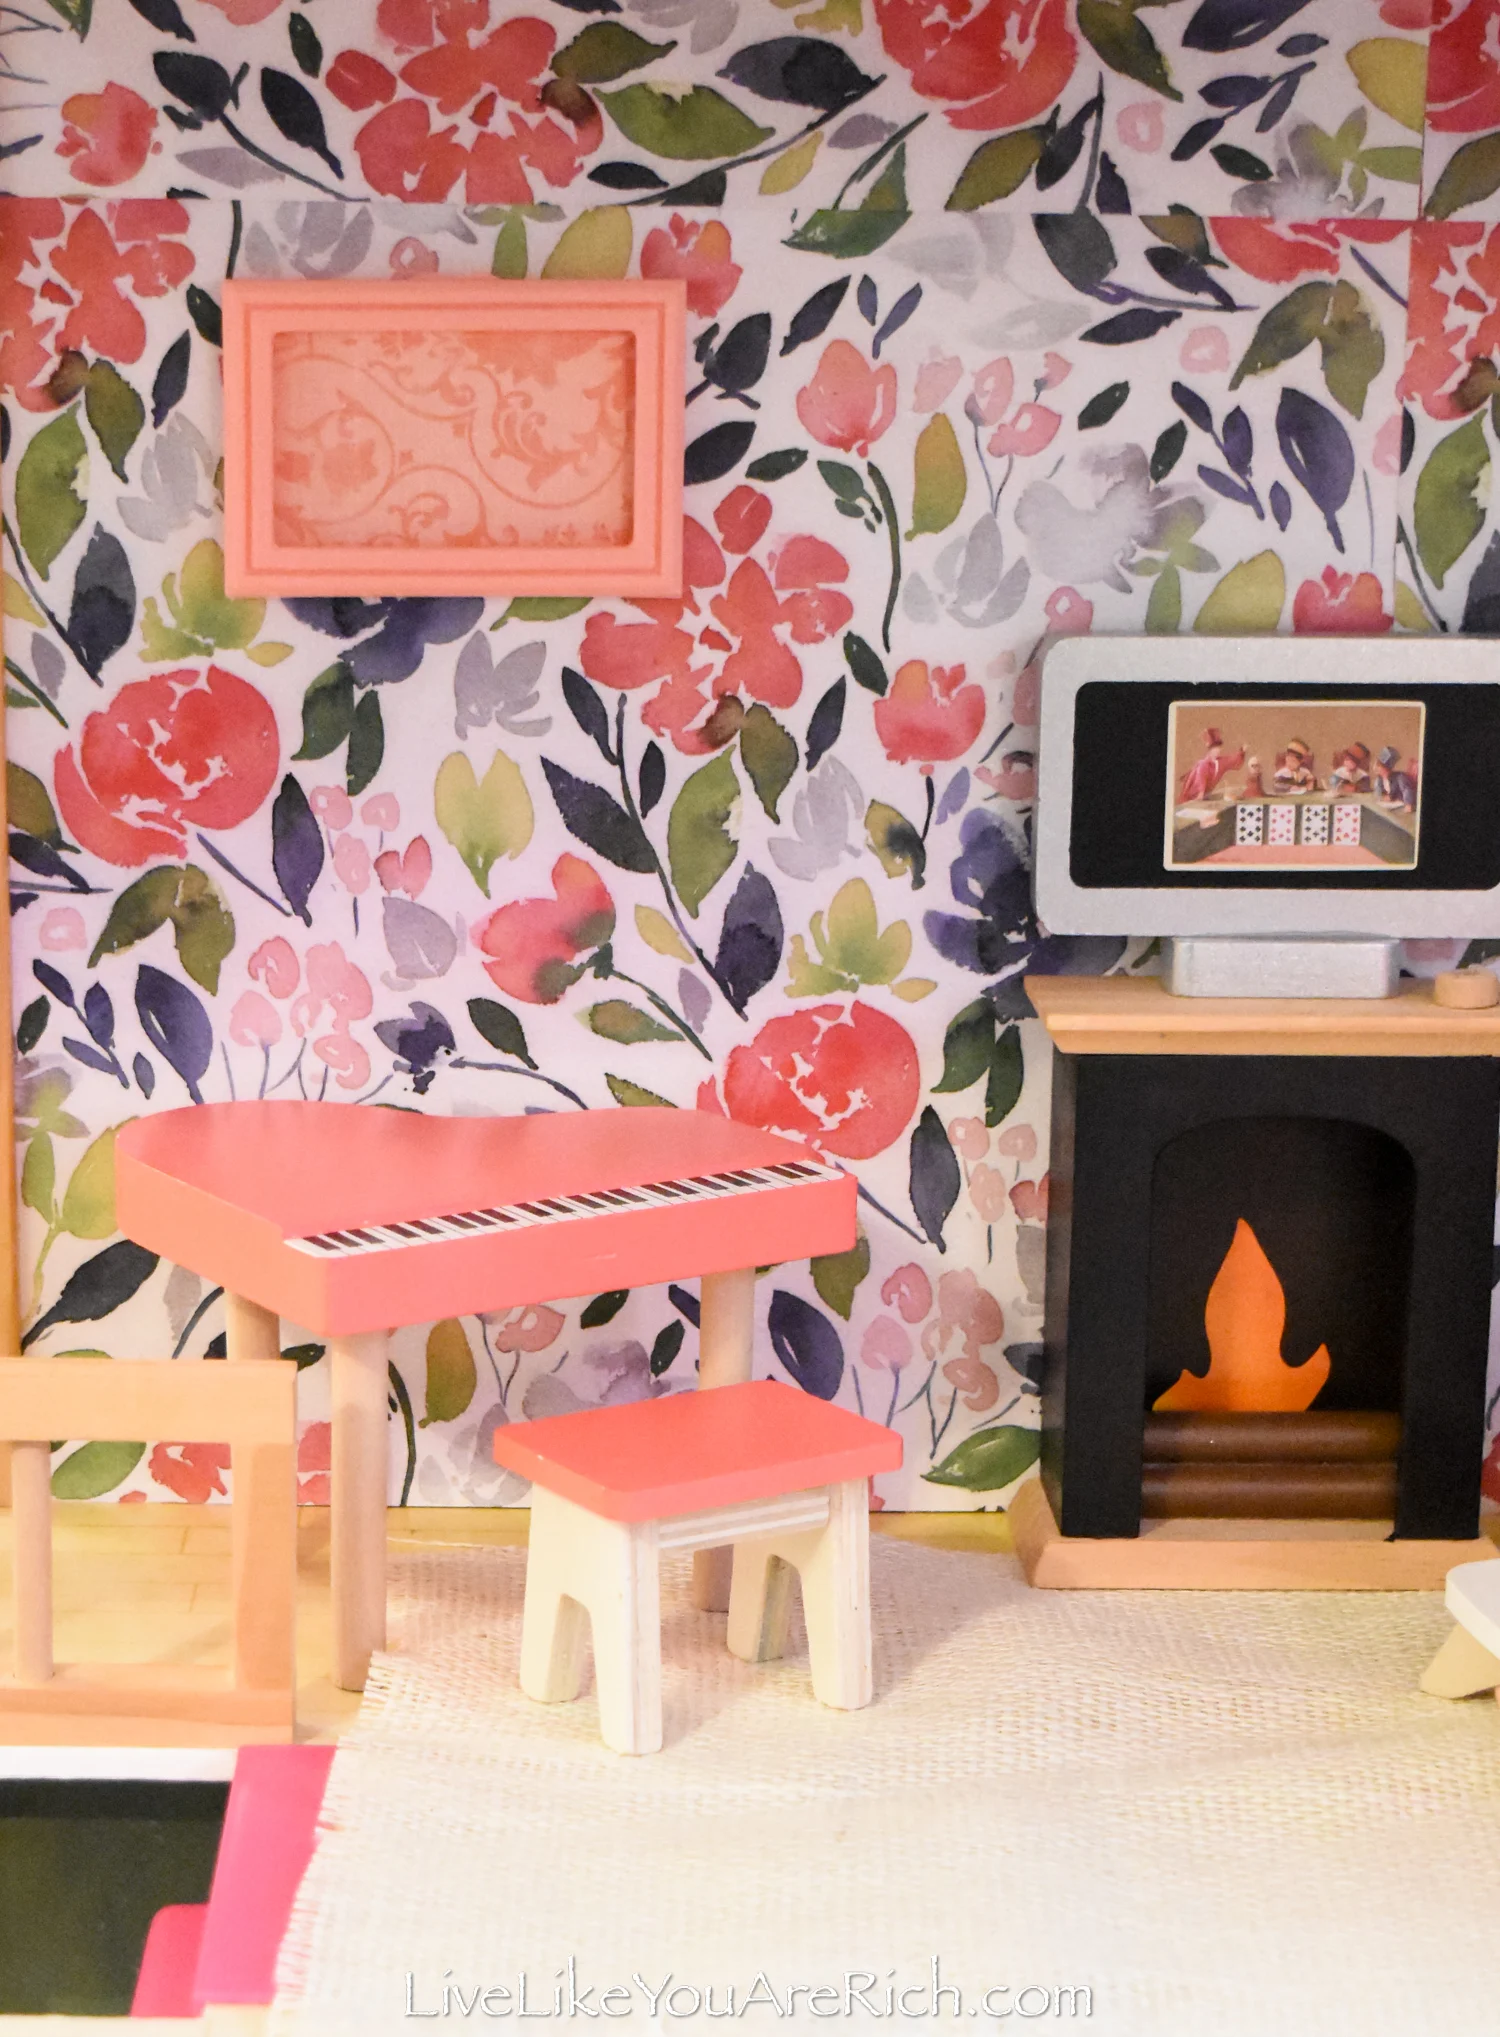
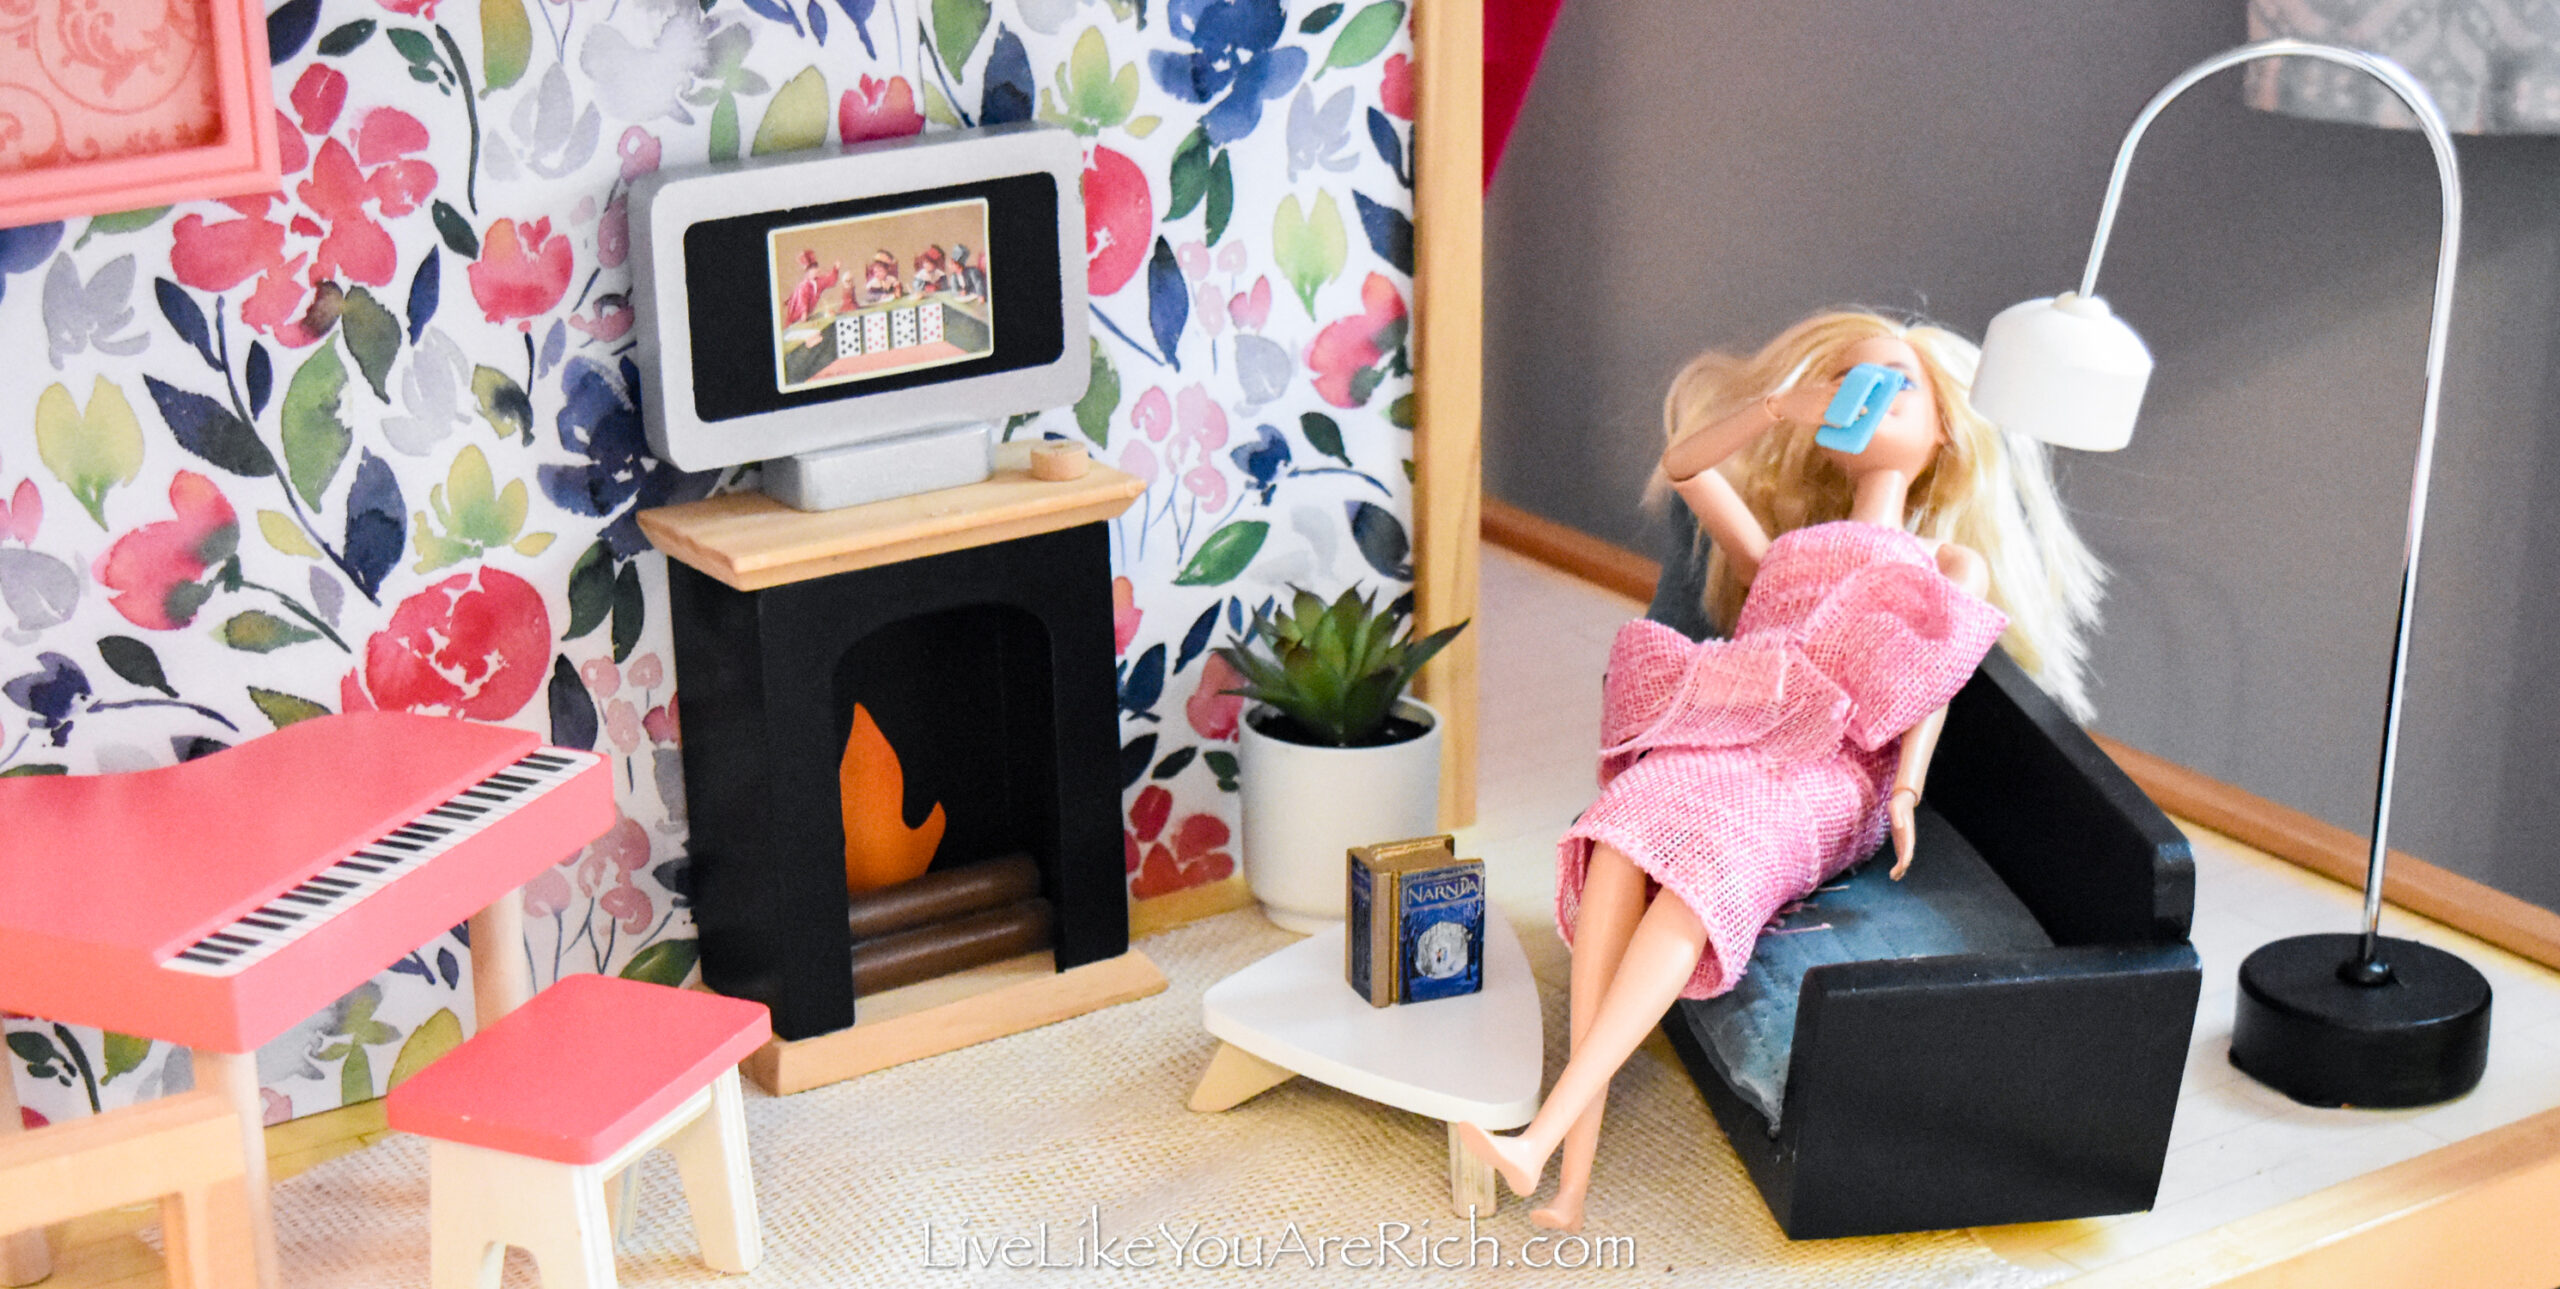
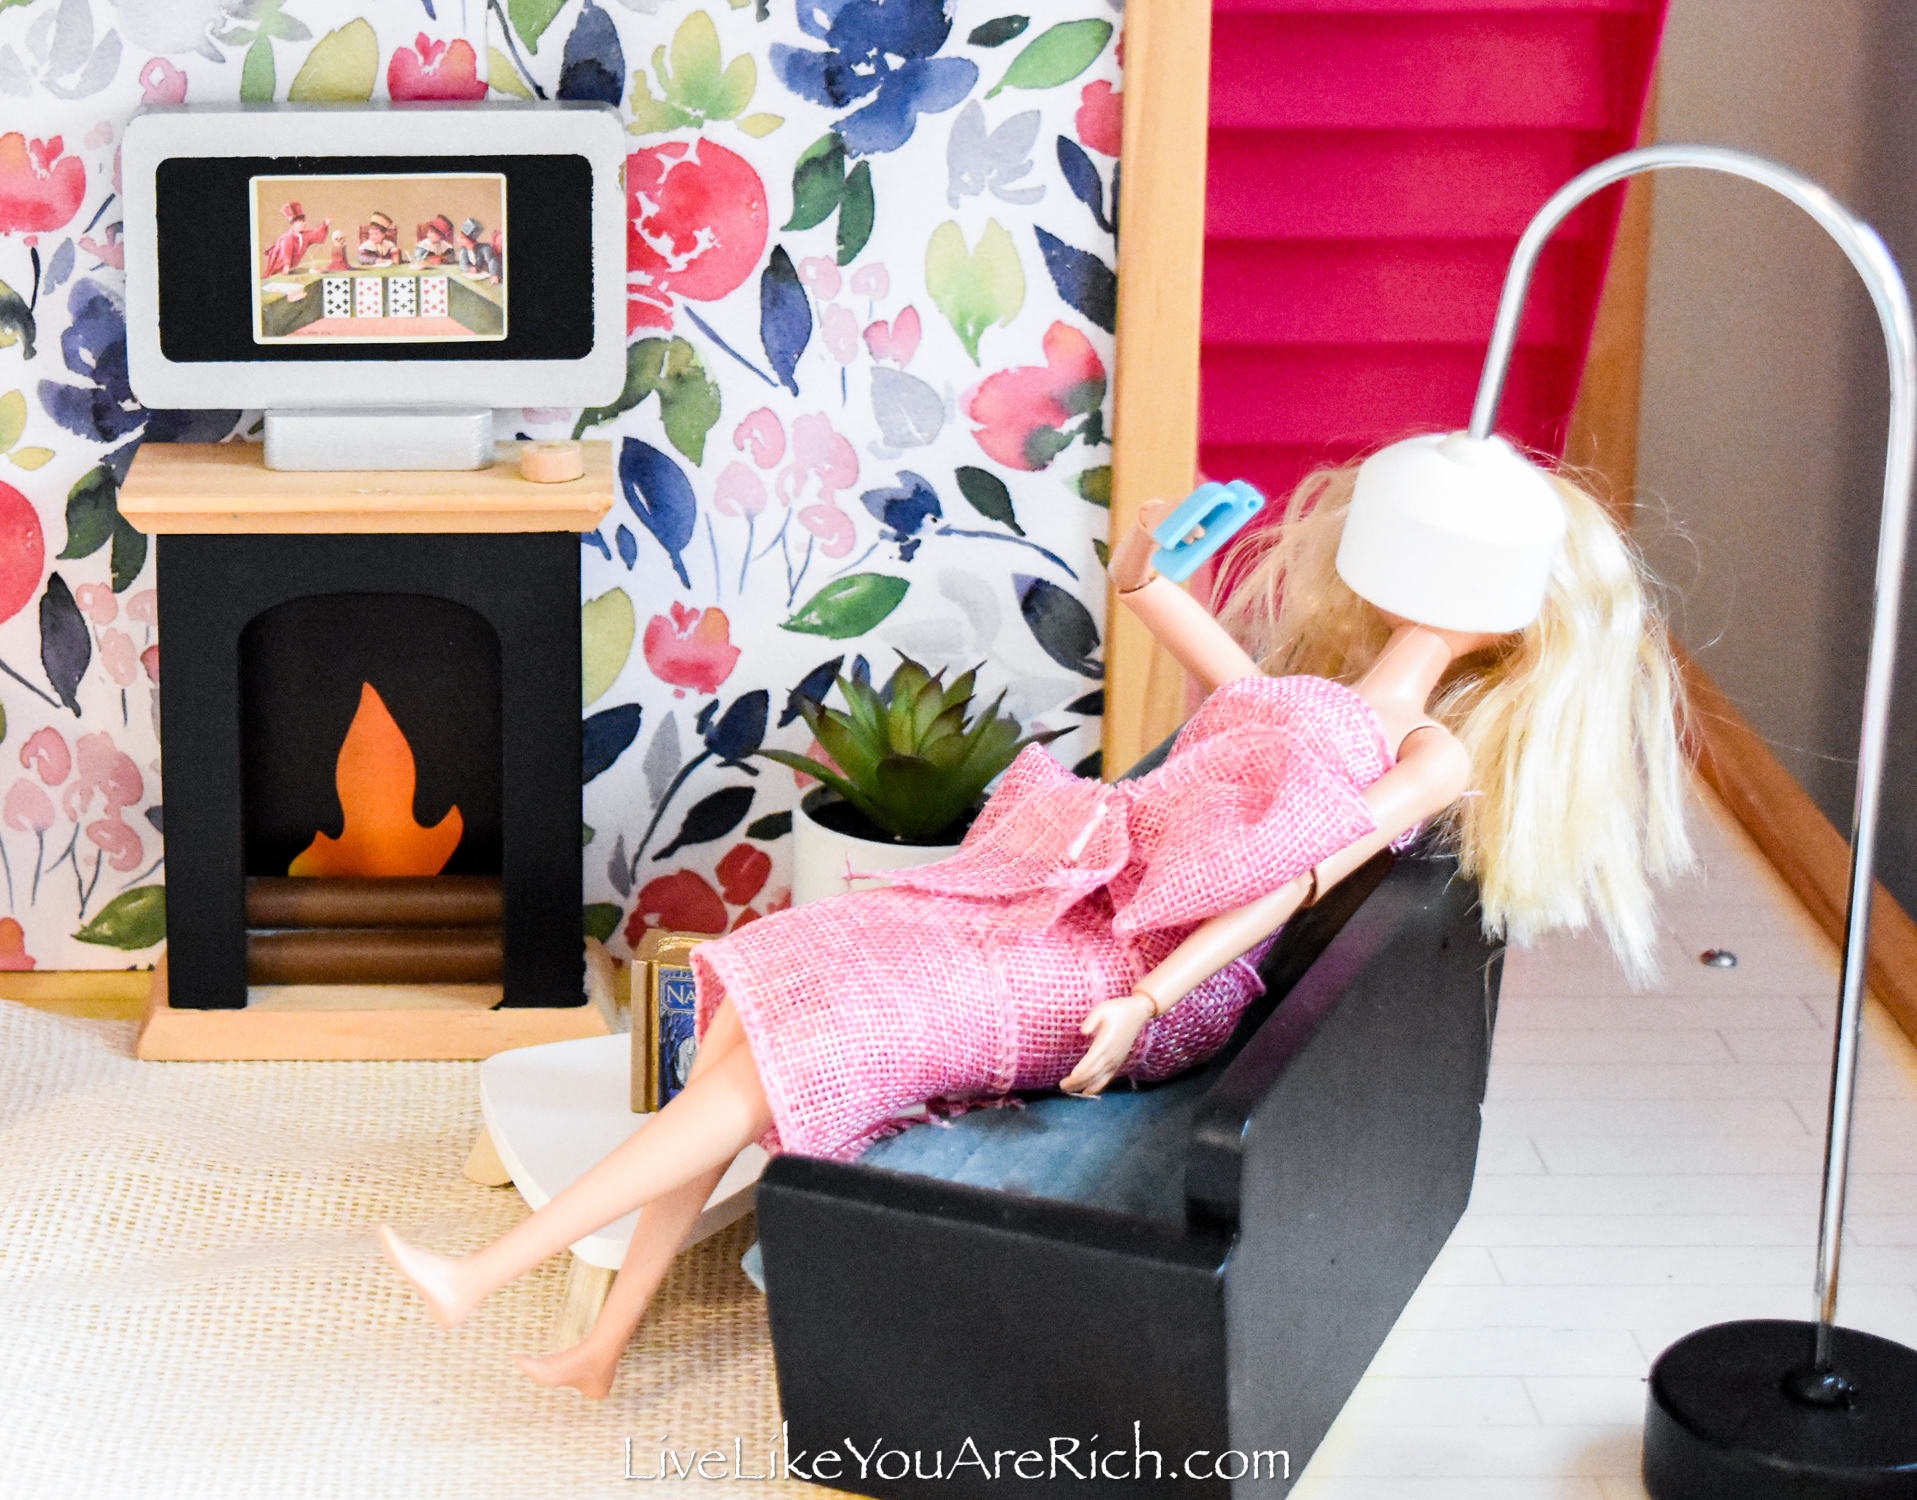
I added a piano from my other daughter’s dollhouse and put up a piece of artwork with hot glue on the wall in the living room.
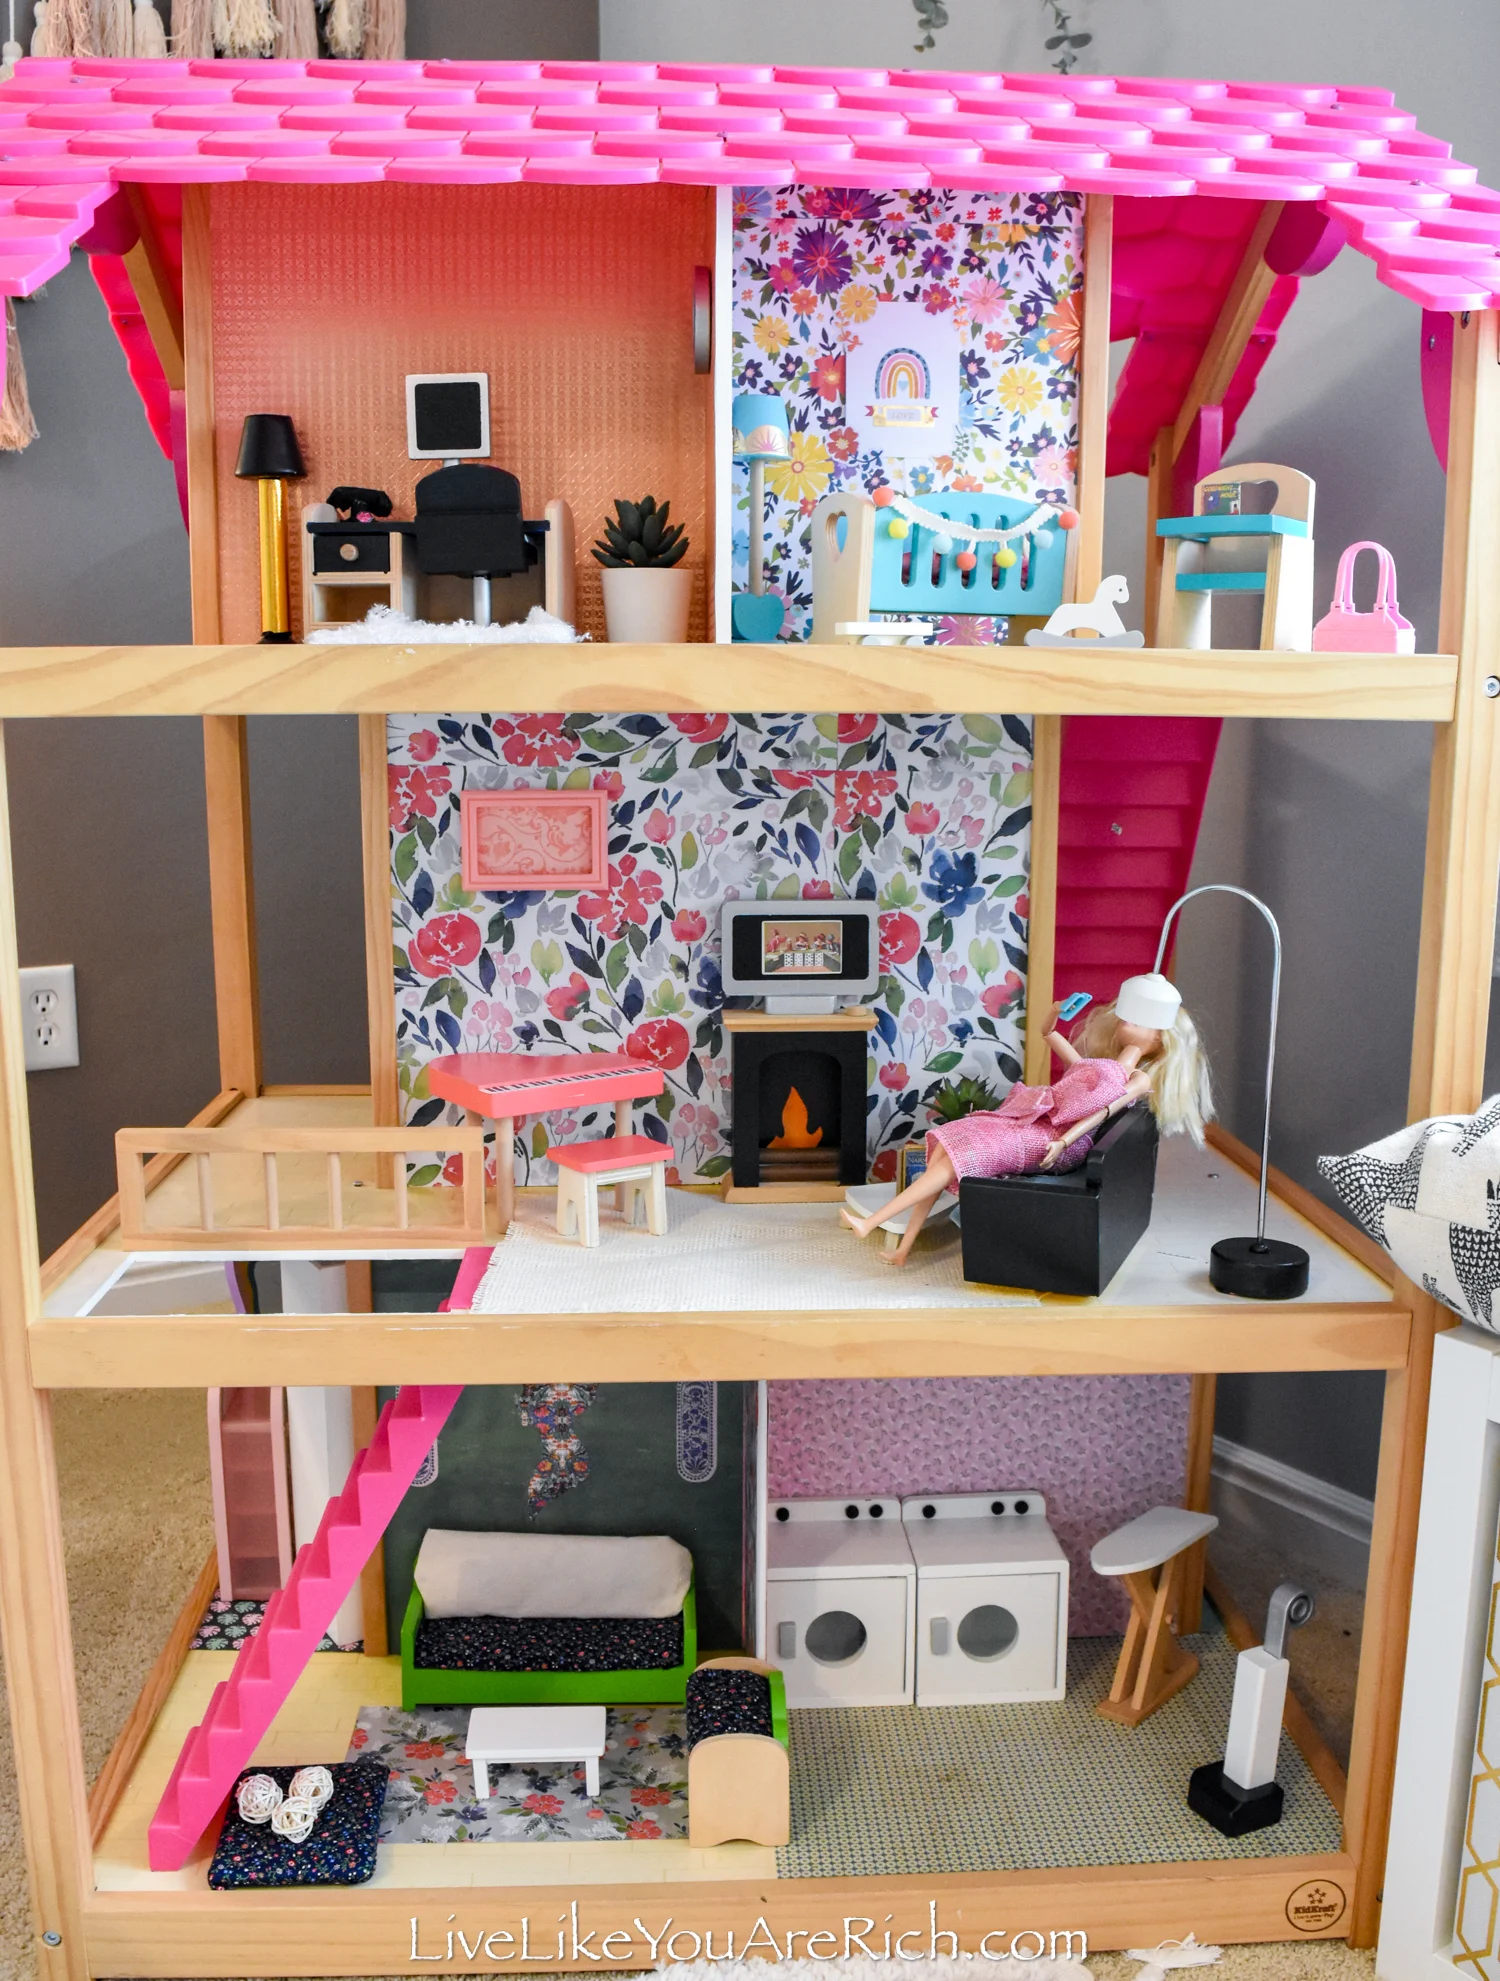
I used white burlap that I had as a rug in this room, added a sticker on the TV and set Barbie up looking at her phone.
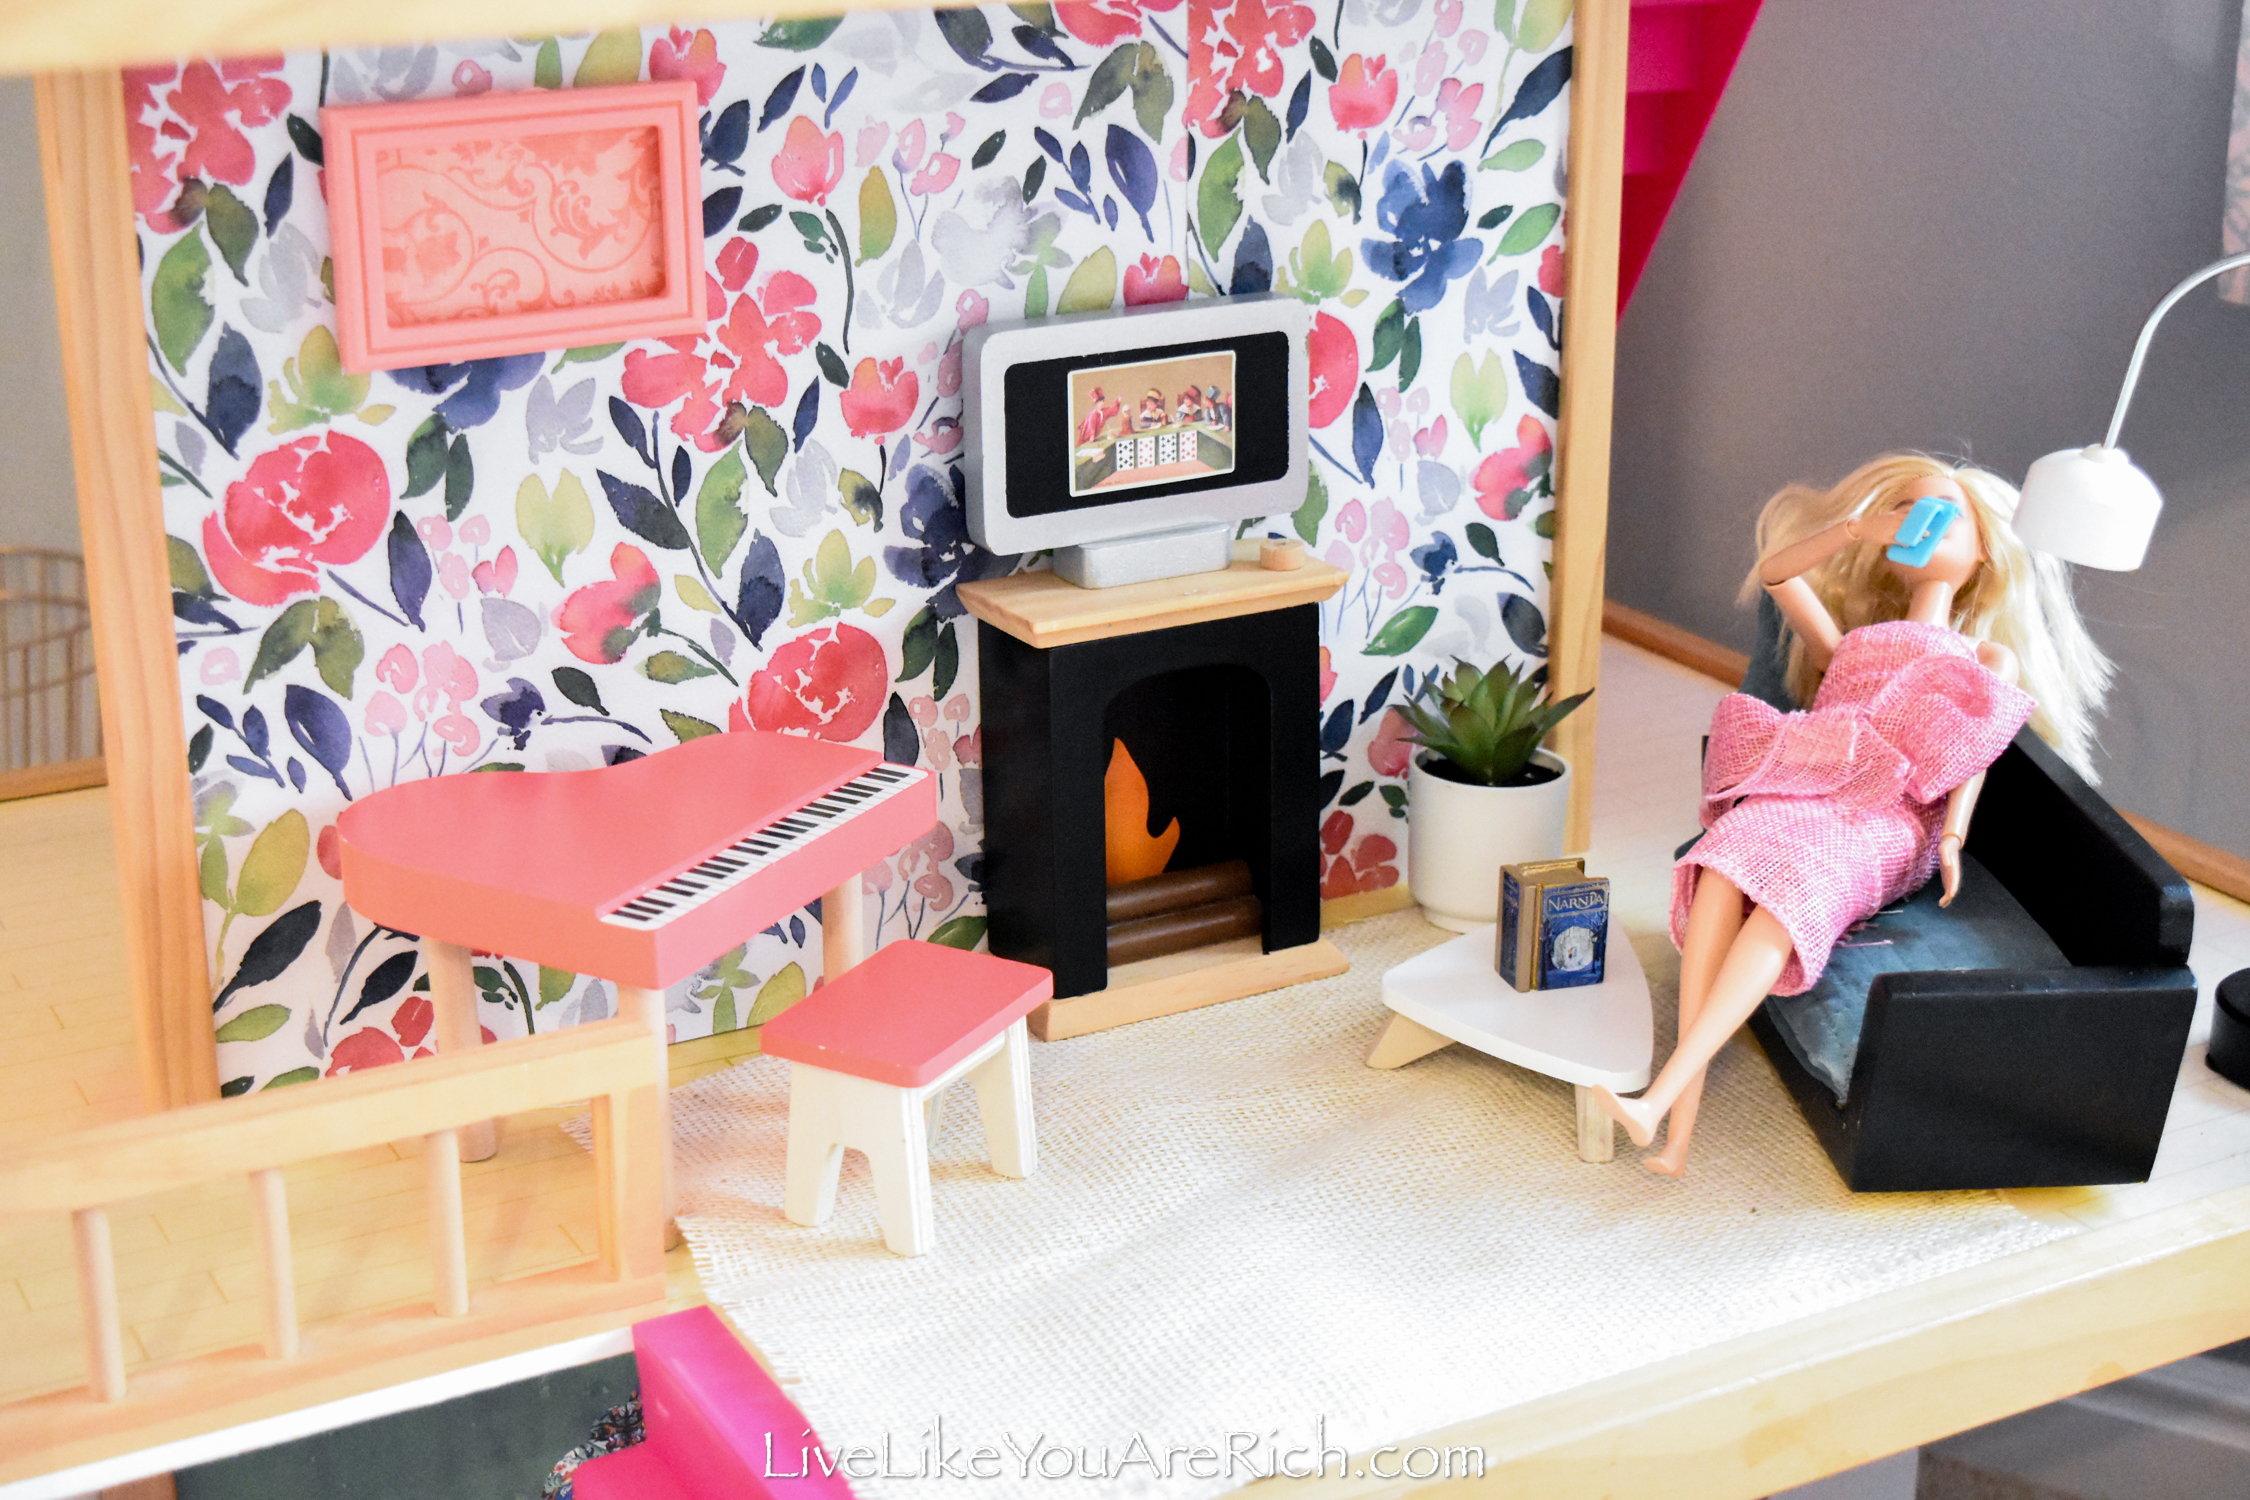
I put another mini plant in this room.
The coffee table also came from my daughter’s dollhouse.

The Narnia book was made for this Elf on the Shelf Balloon Basket set from last Christmas.
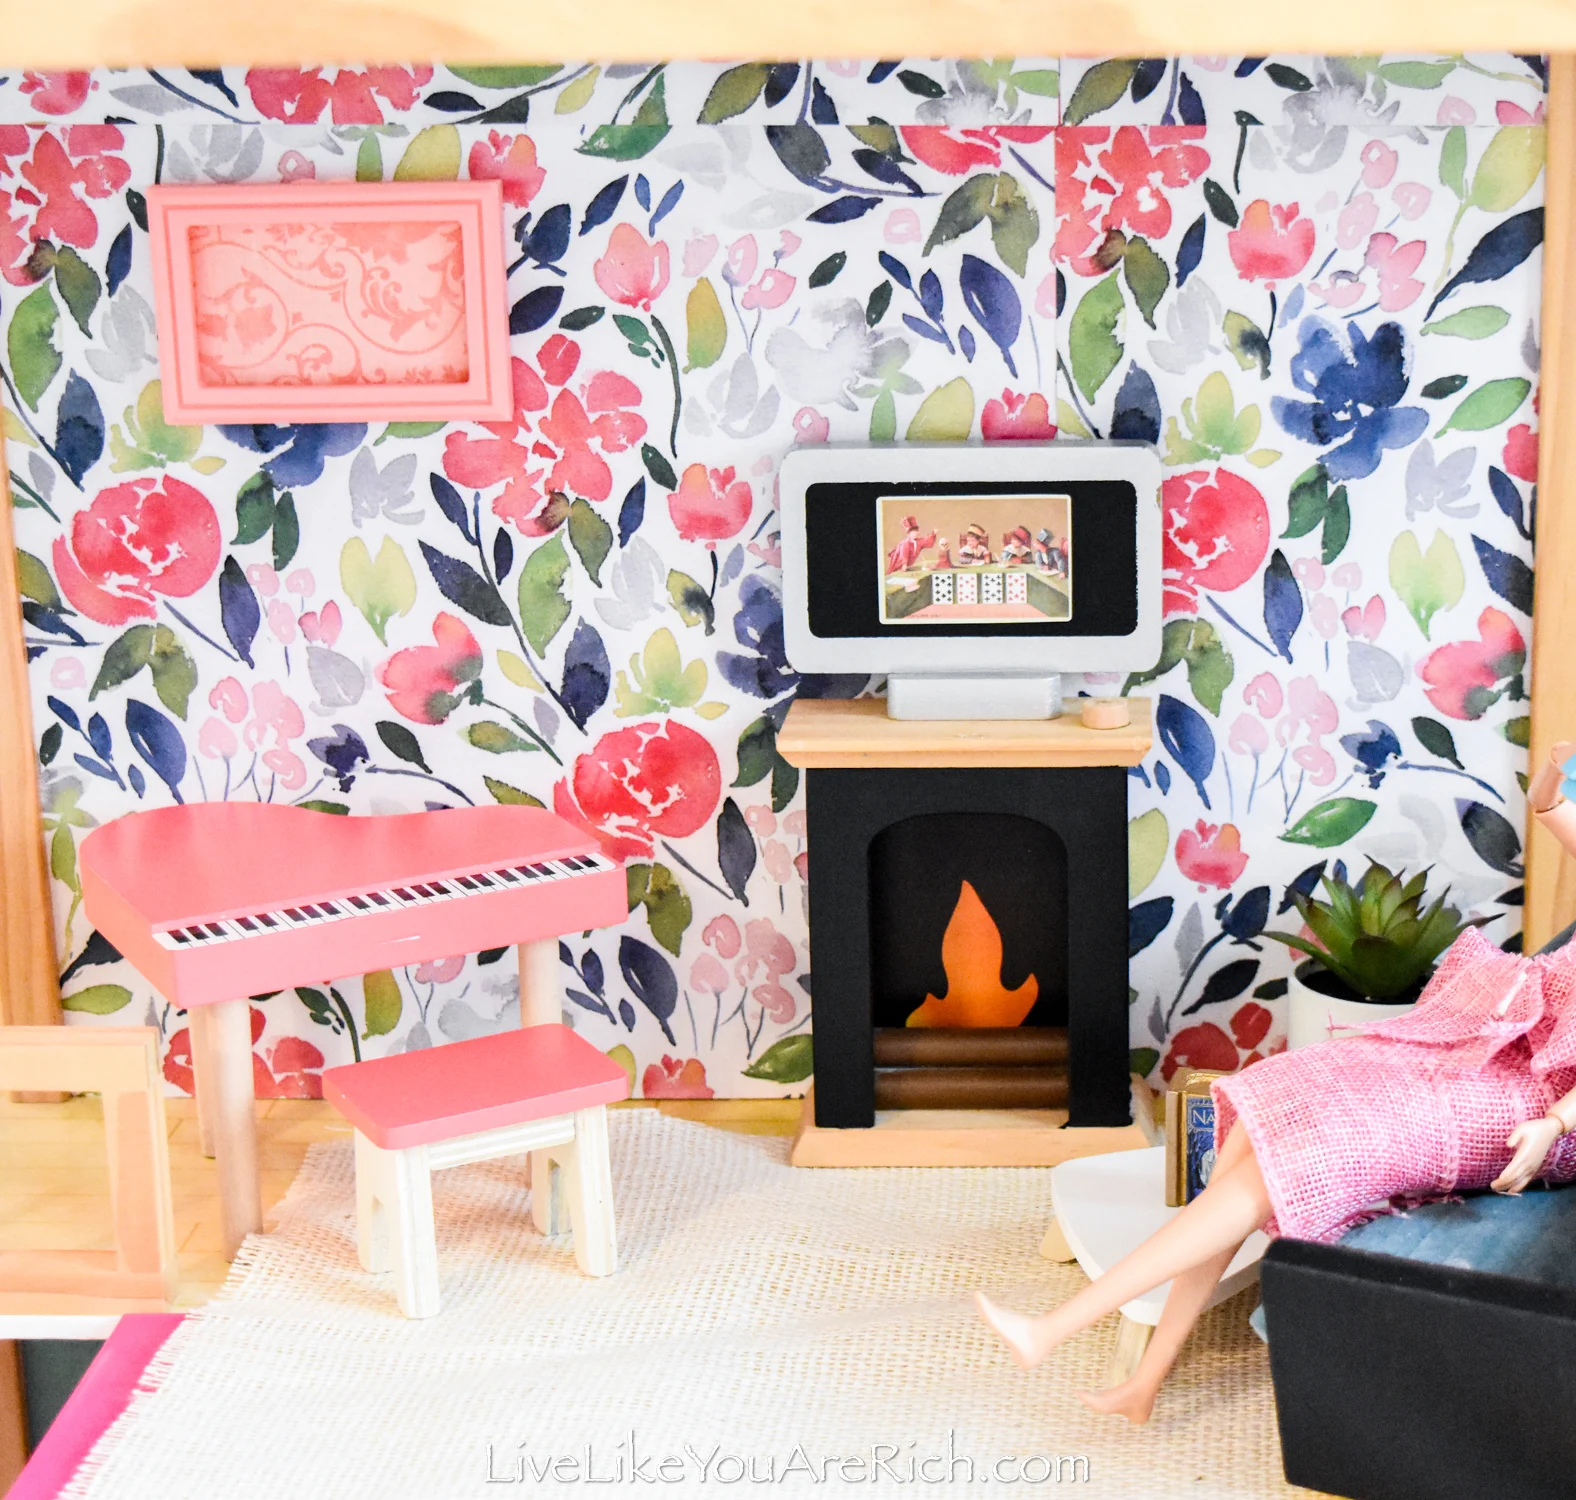
If you have this dollhouse you may experience that the floor lamp falls over all of the time. I just use a little hot glue to hold it in place.
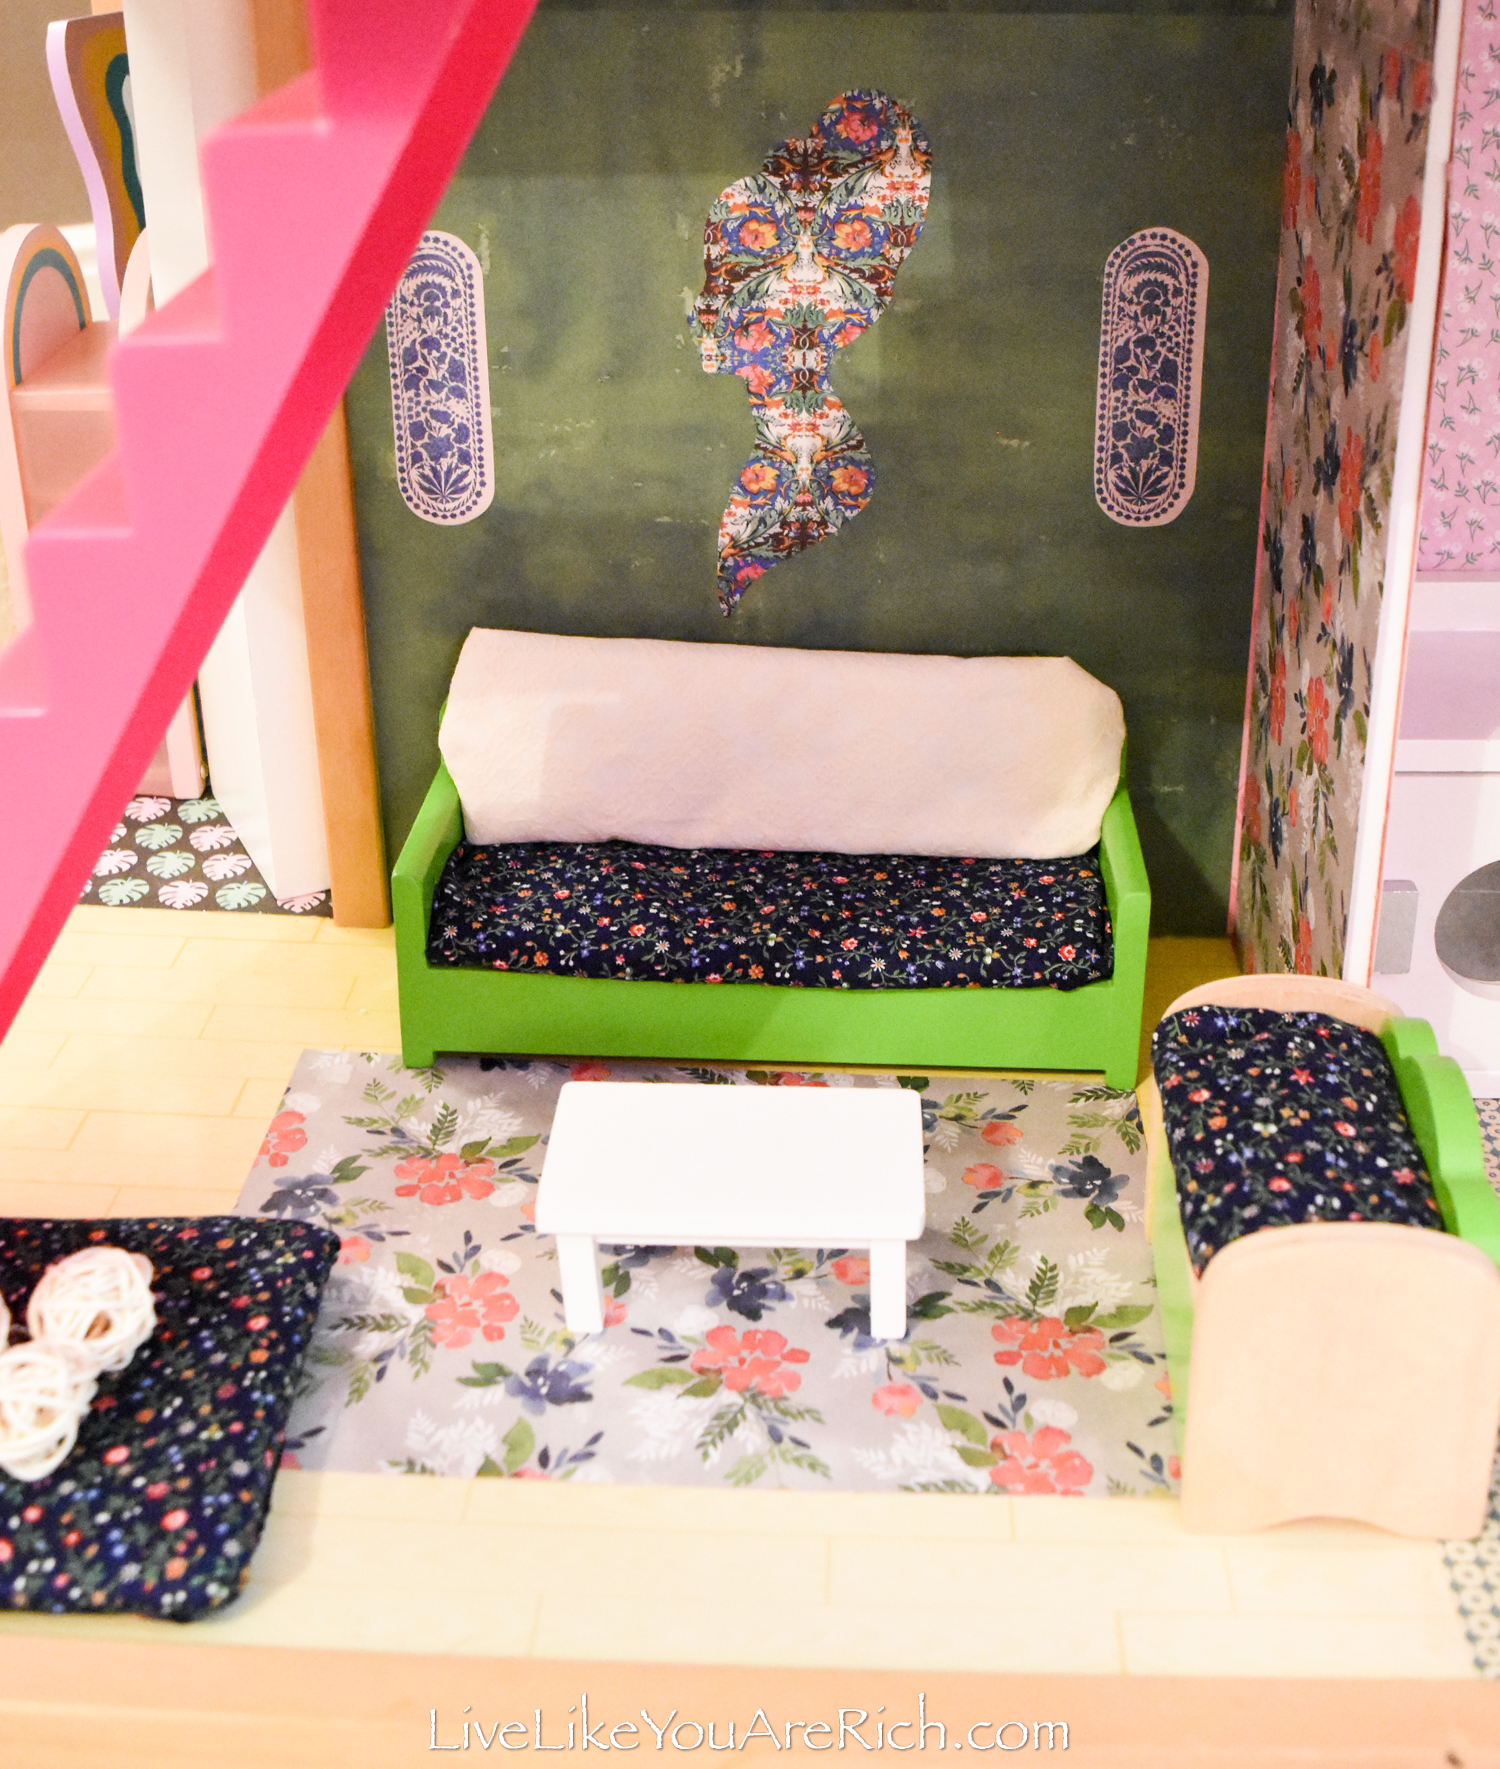
For the sitting room, I used green watercolor wall paper, scrapbooking paper for the rug and stickers for a design on the walls.
For the downstairs sitting room…
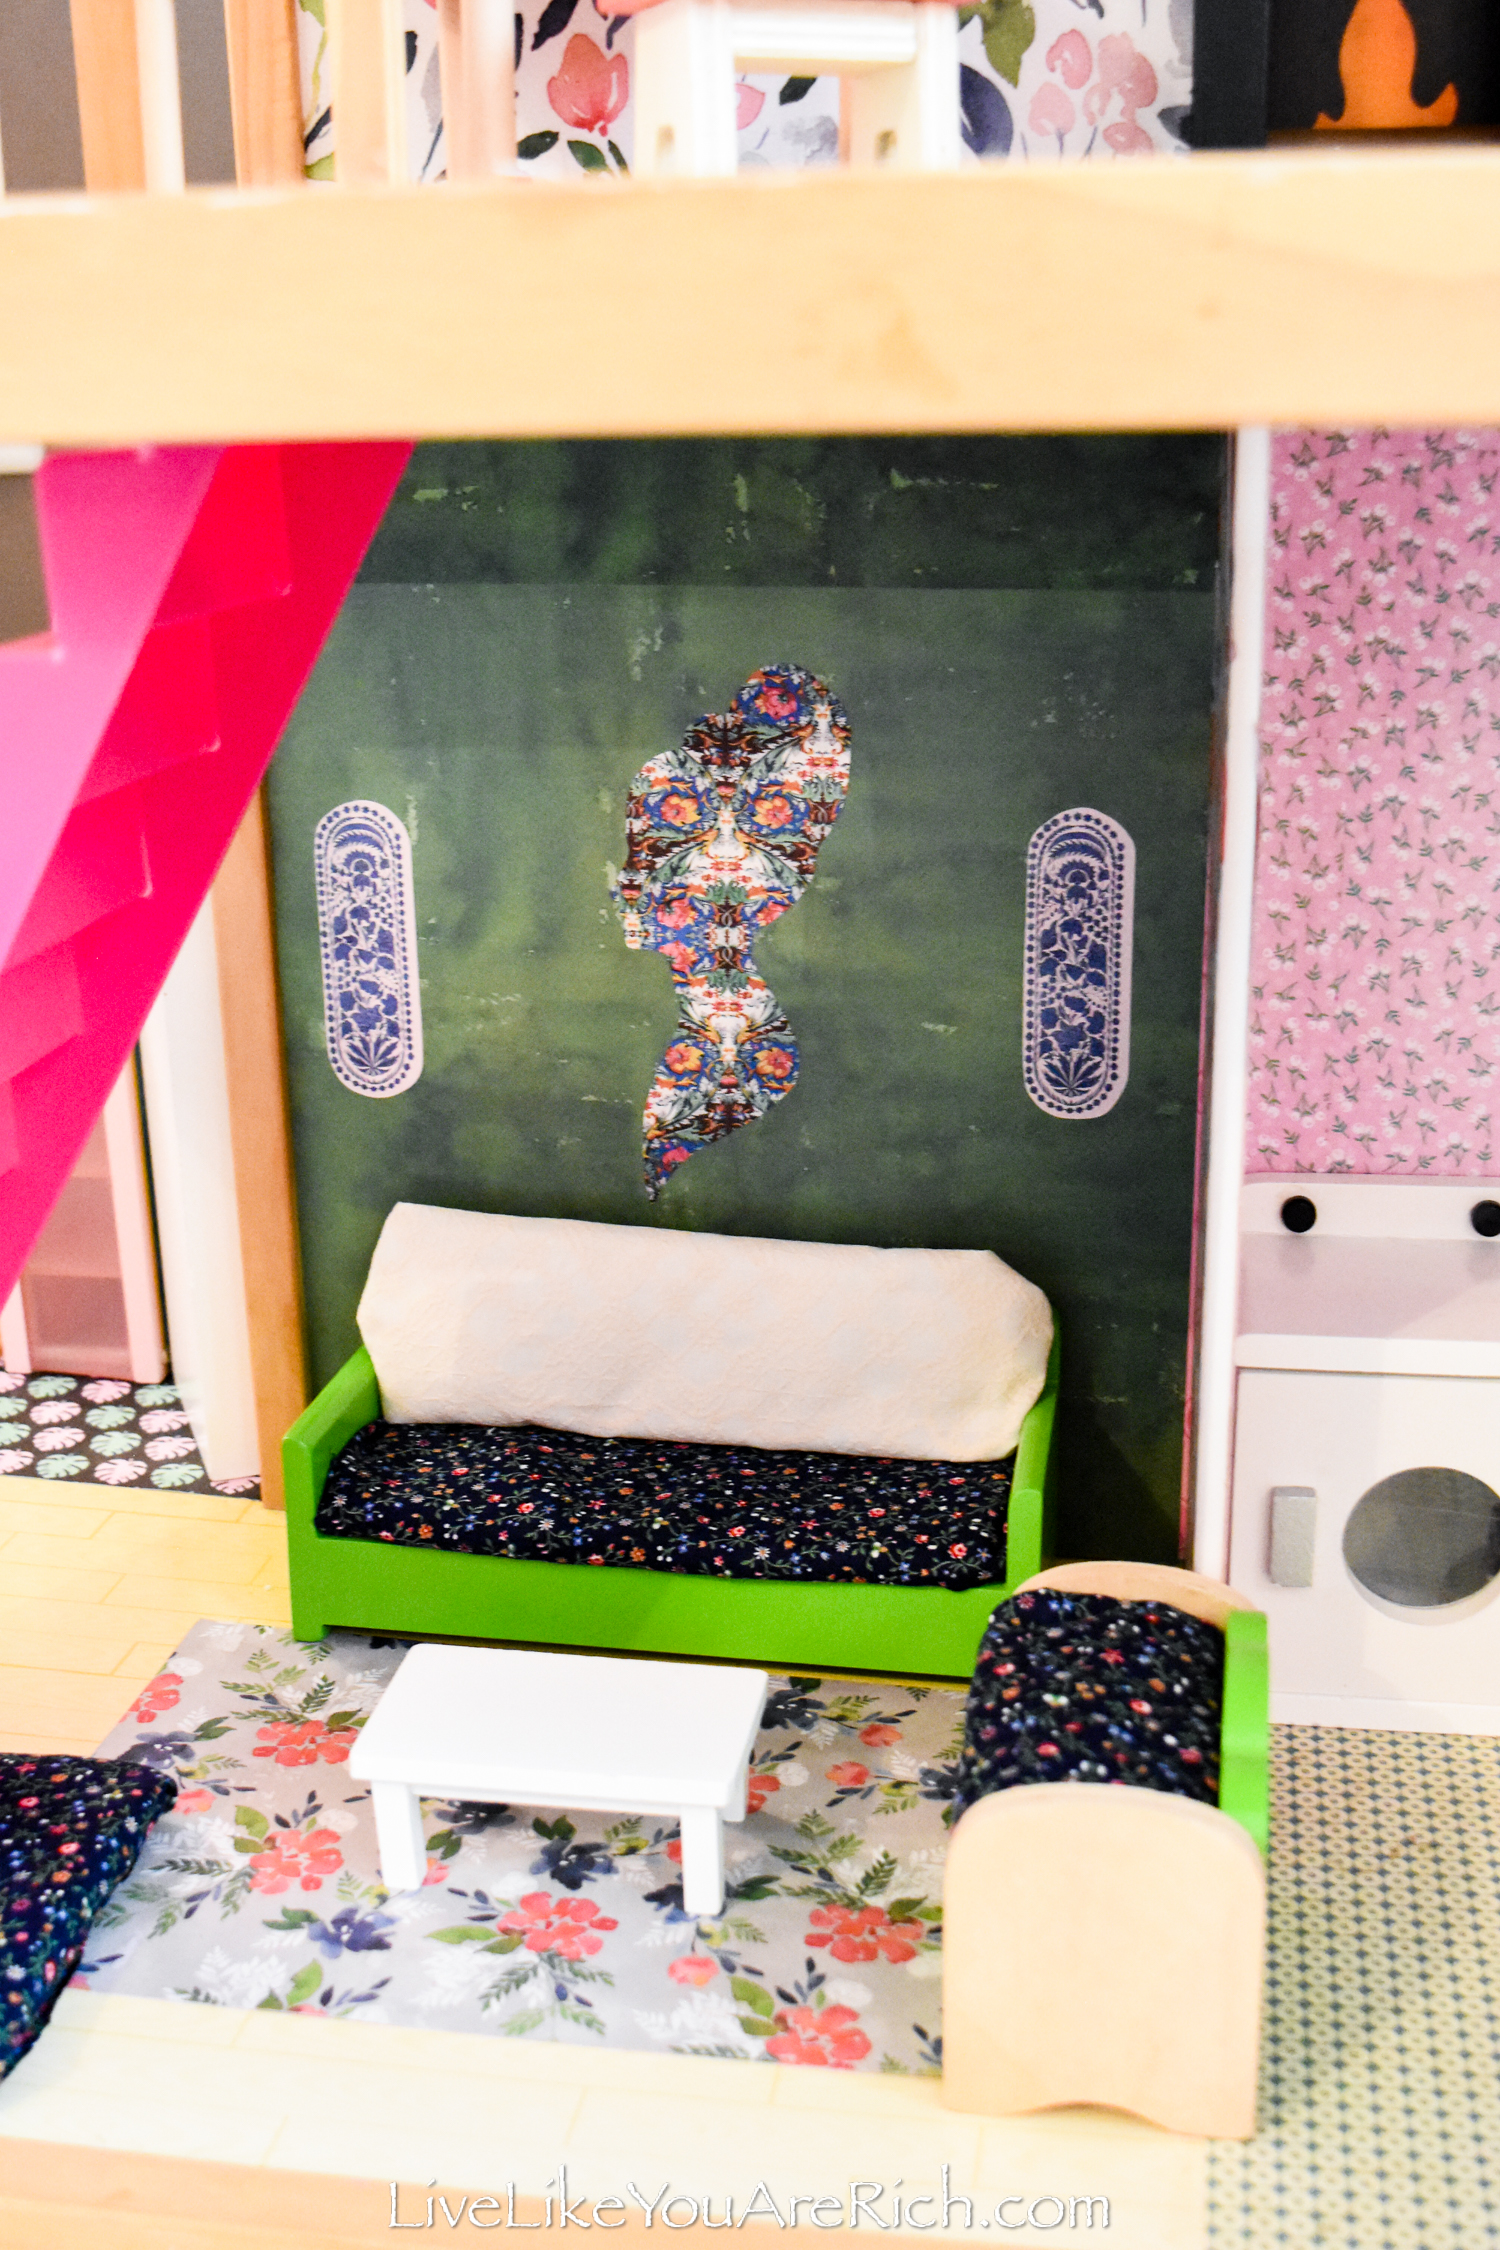

I upholstered the couch, love seat, and floor pillow.
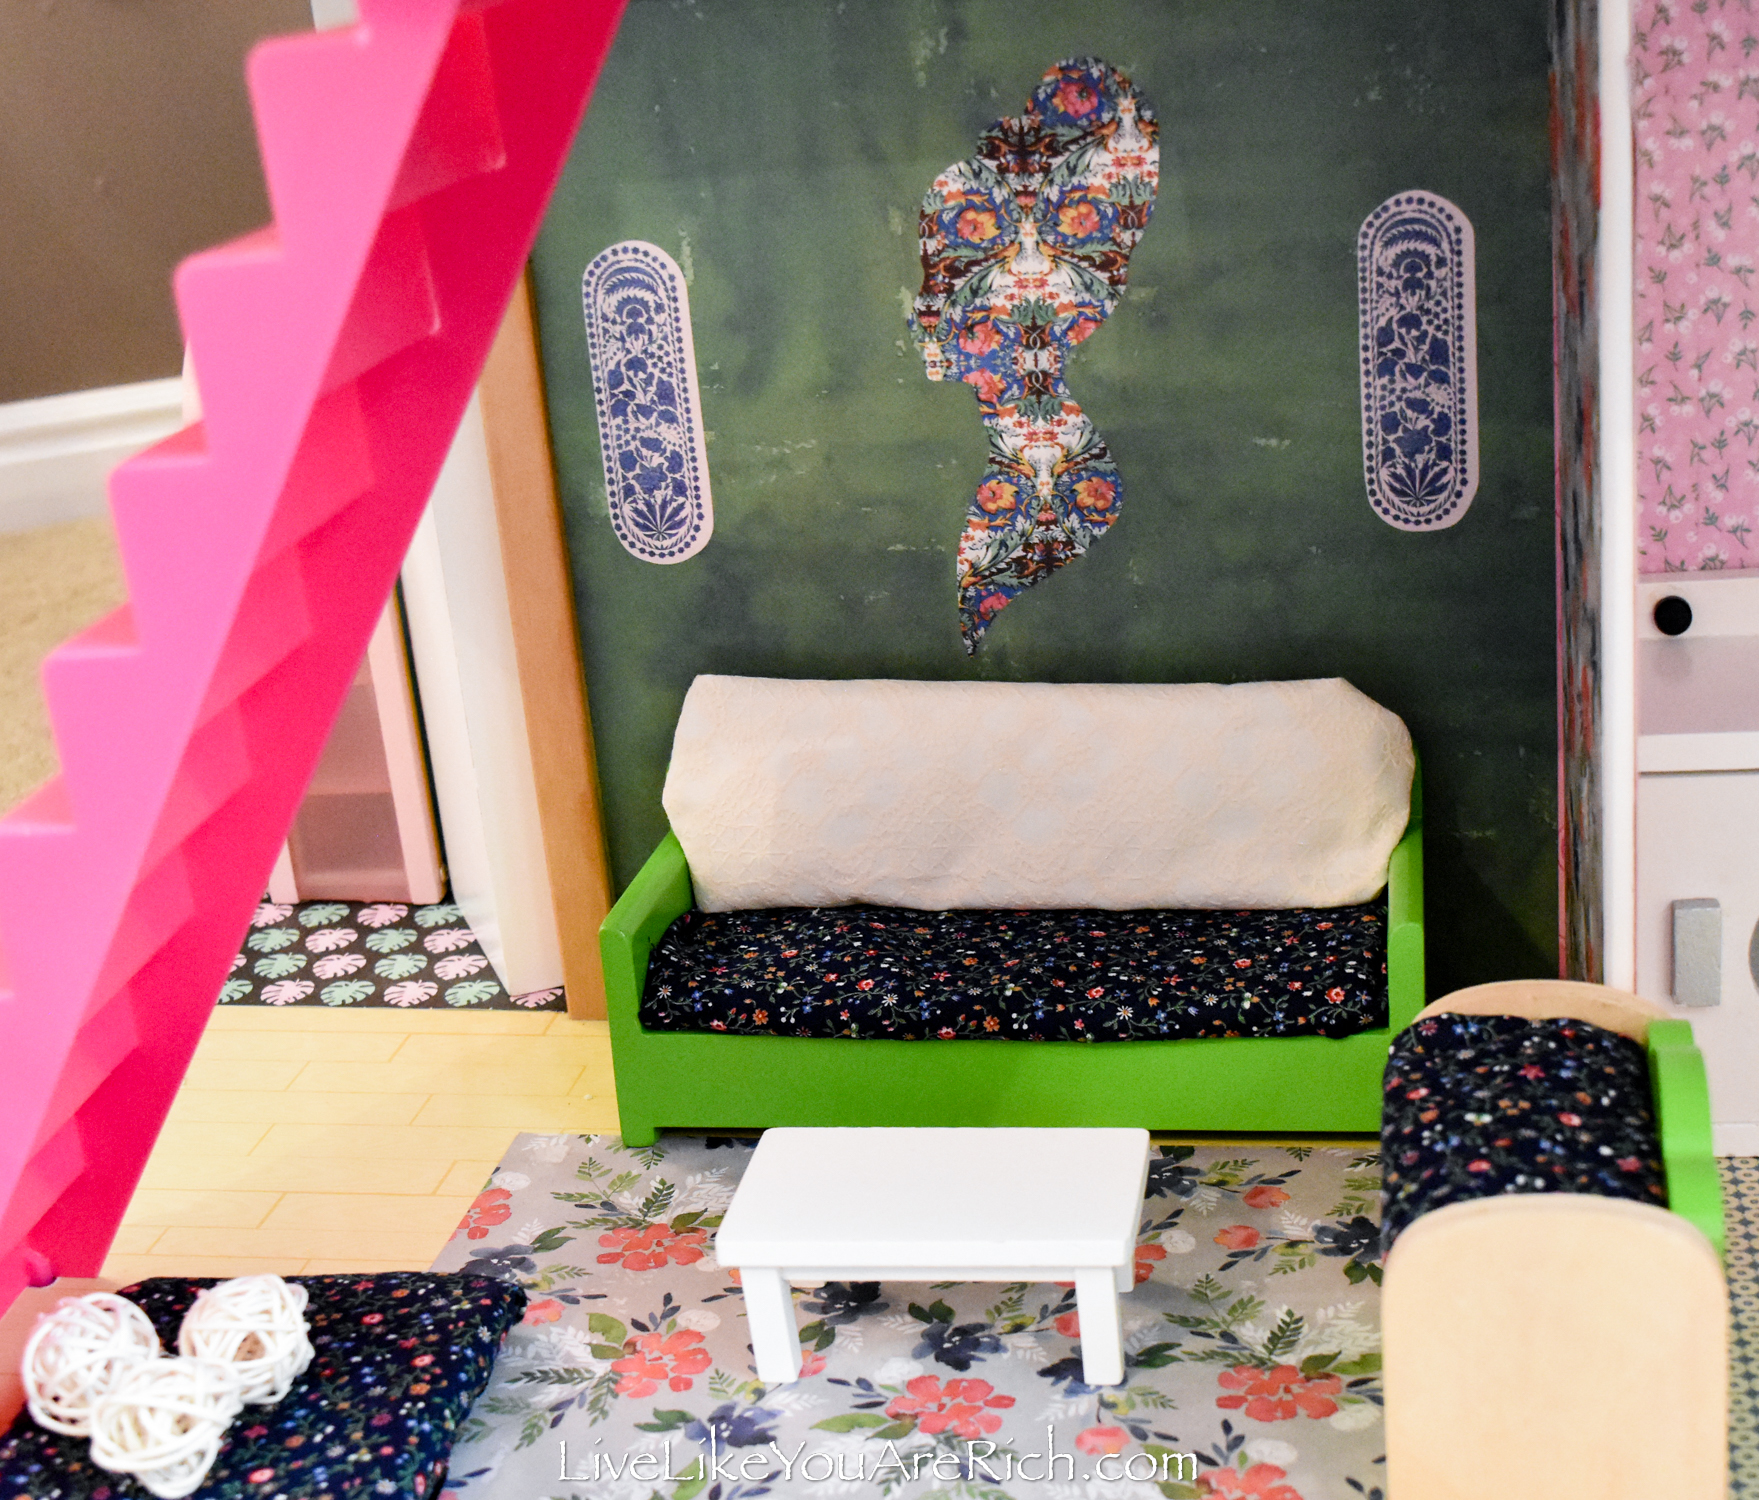

I used scrapbooking paper for the rug and added a coffee table and some mini decoration balls.
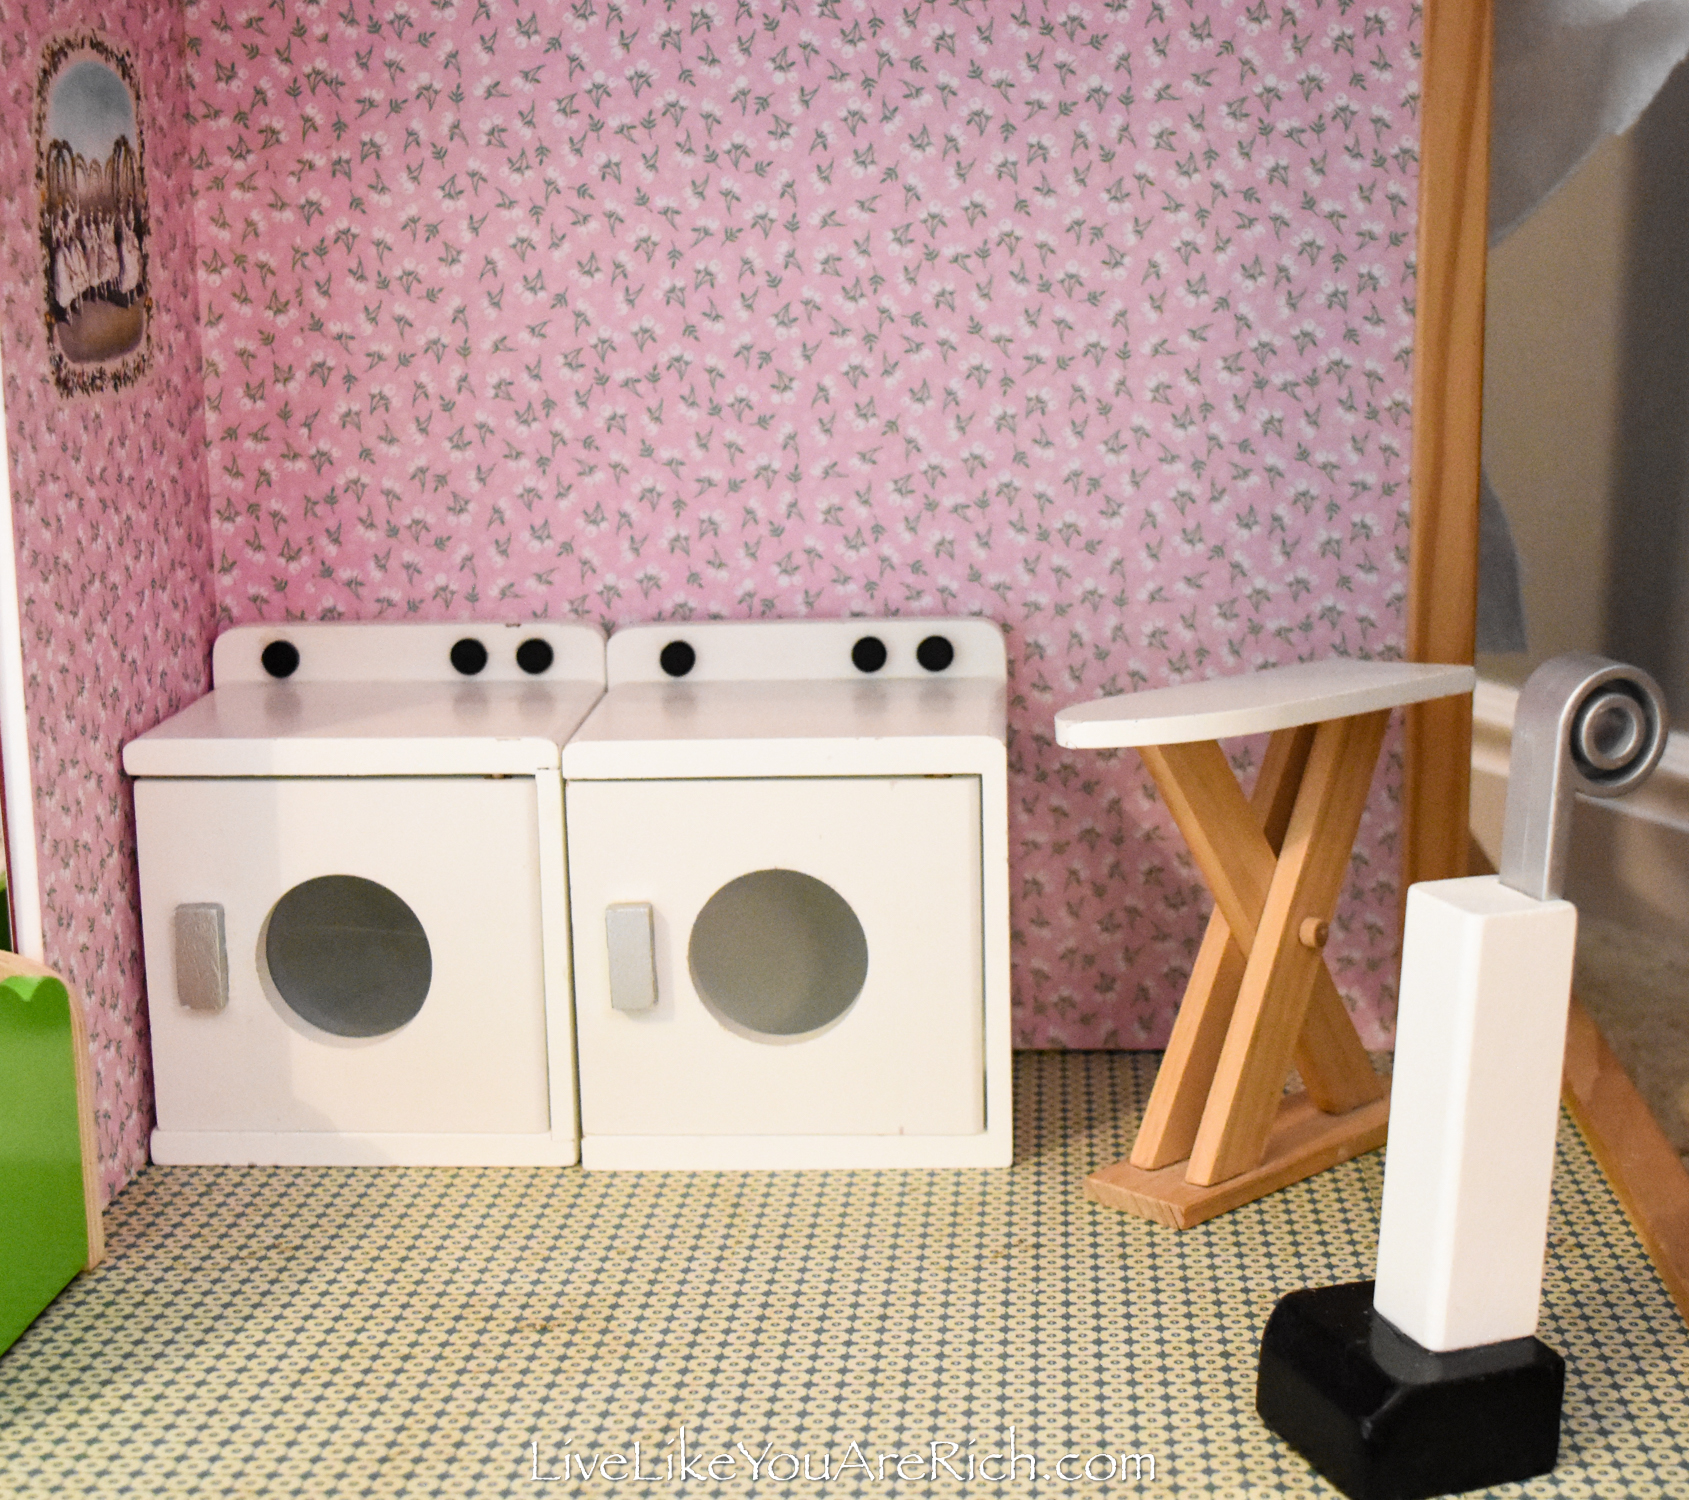
For the laundry room, we used scrapbooking paper for the wallpaper and tile.
I used a vintage sticker as artwork for the laundry room.

I do think I’ll eventually add a natural wood shelving unit above the washer and dryer with mini laundry accessories for this room. At the time we were working on it, I didn’t have the items or the time so I left the wall a bit blank.
I’ll try to update this post if I eventually add those items to the dollhouse laundry room.
That’s it.
It was super inexpensive to remodel this as we just used items I had already.
It did take a lot of time though. I’d estimate we spent 7-10 hours remodeling this dollhouse.
It was so worth it for how much fun my daughter and I had together remodeling it.
I hope this ‘Tips for Remodeling a Dollhouse’ was a helpful tutorial for you if you also decide to remodel a dollhouse.
Thanks.

For other ‘rich living’ and D.I.Y. decor tips please subscribe, like me on Facebook, and follow me on Pinterest and Instagram.
If you have any questions about this project, please let me know in the comments below.