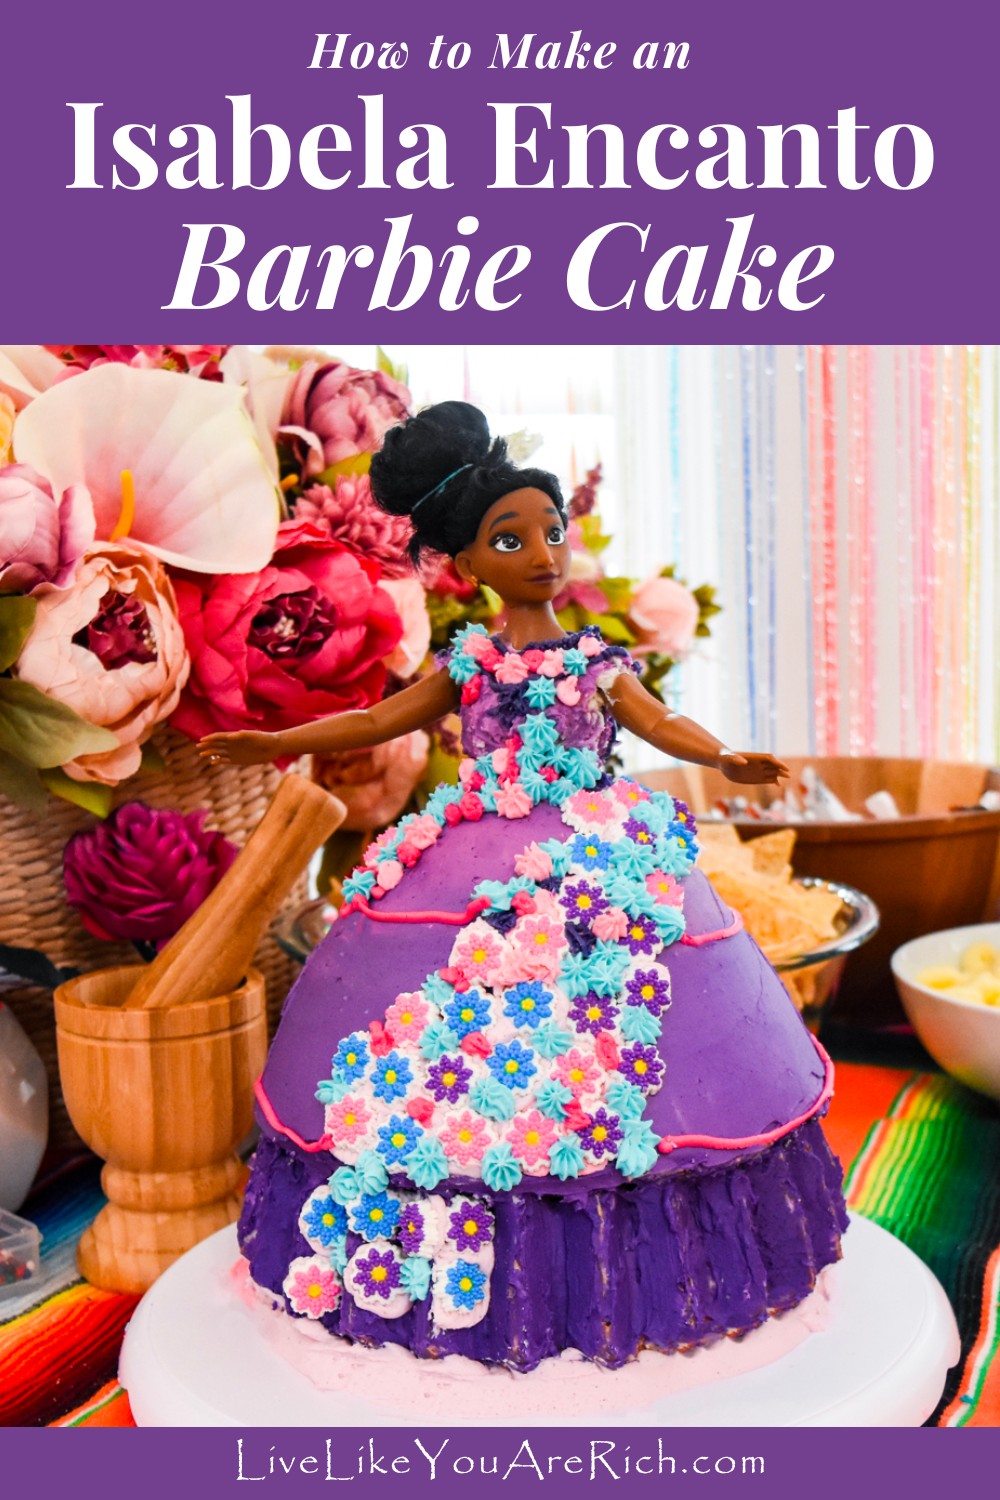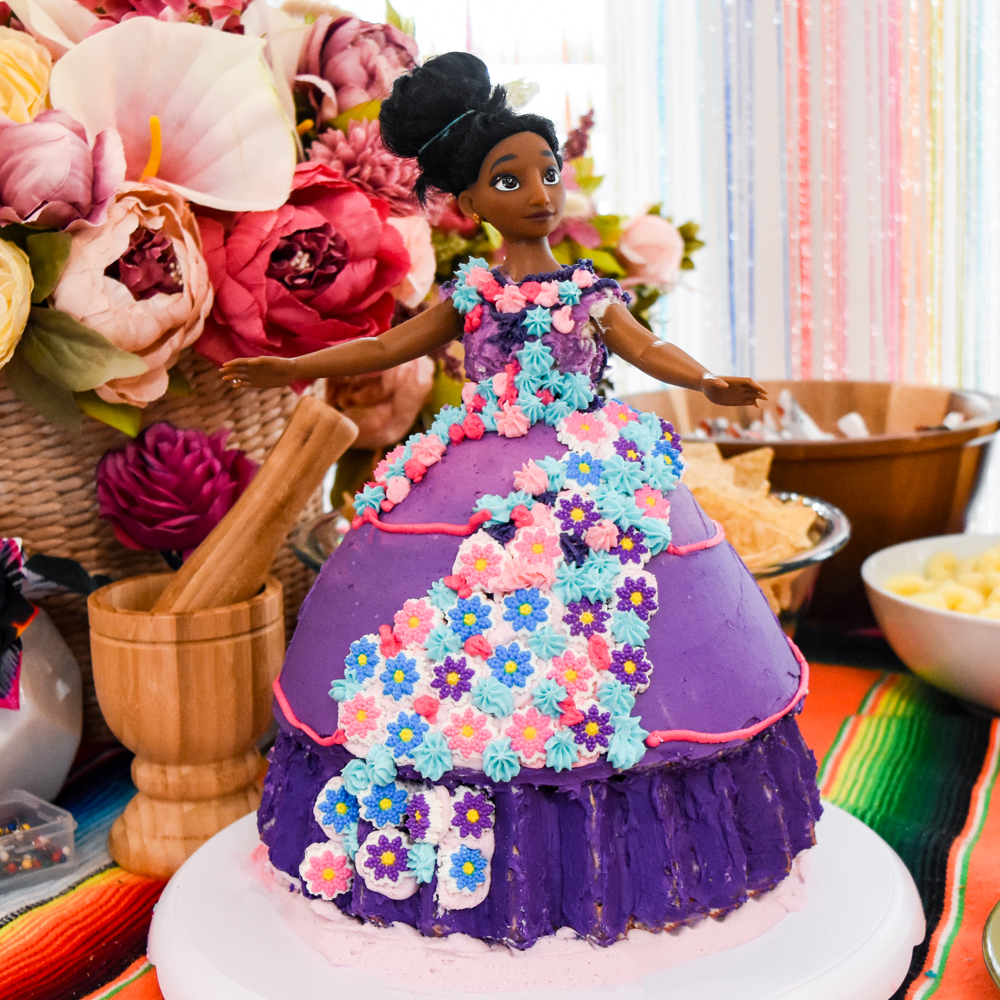

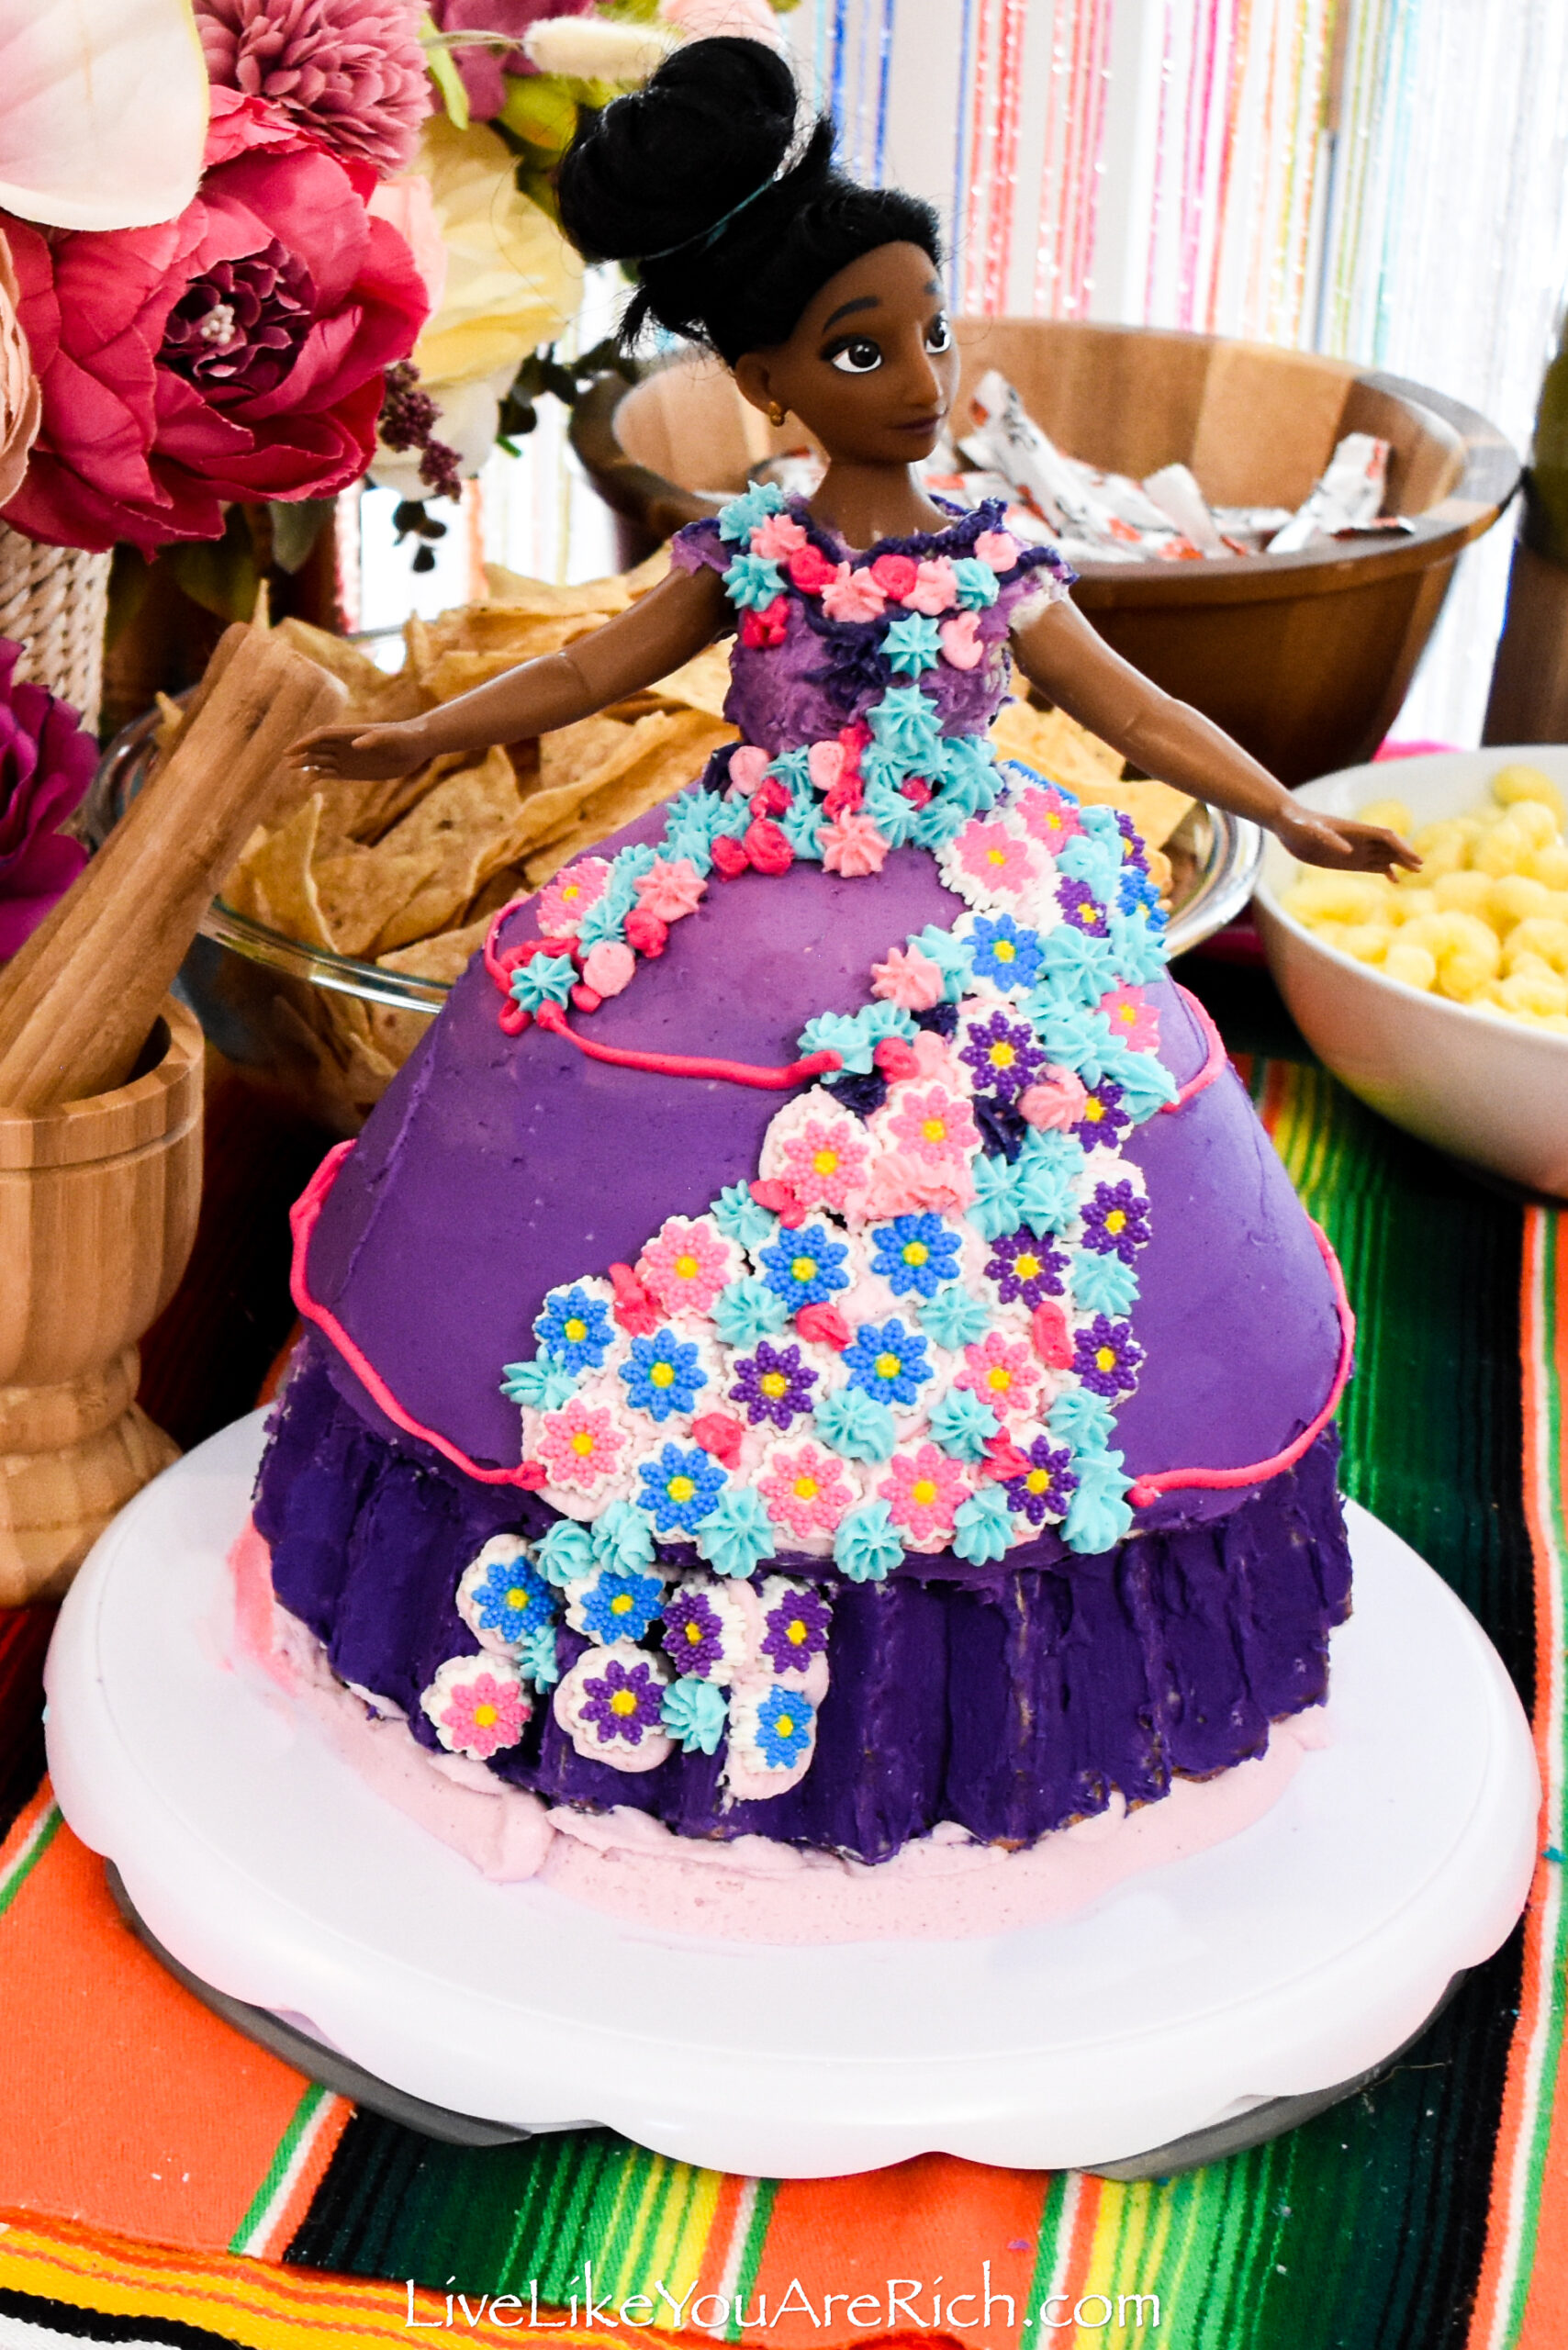
How to make an Isabela Encanto Barbie Cake…
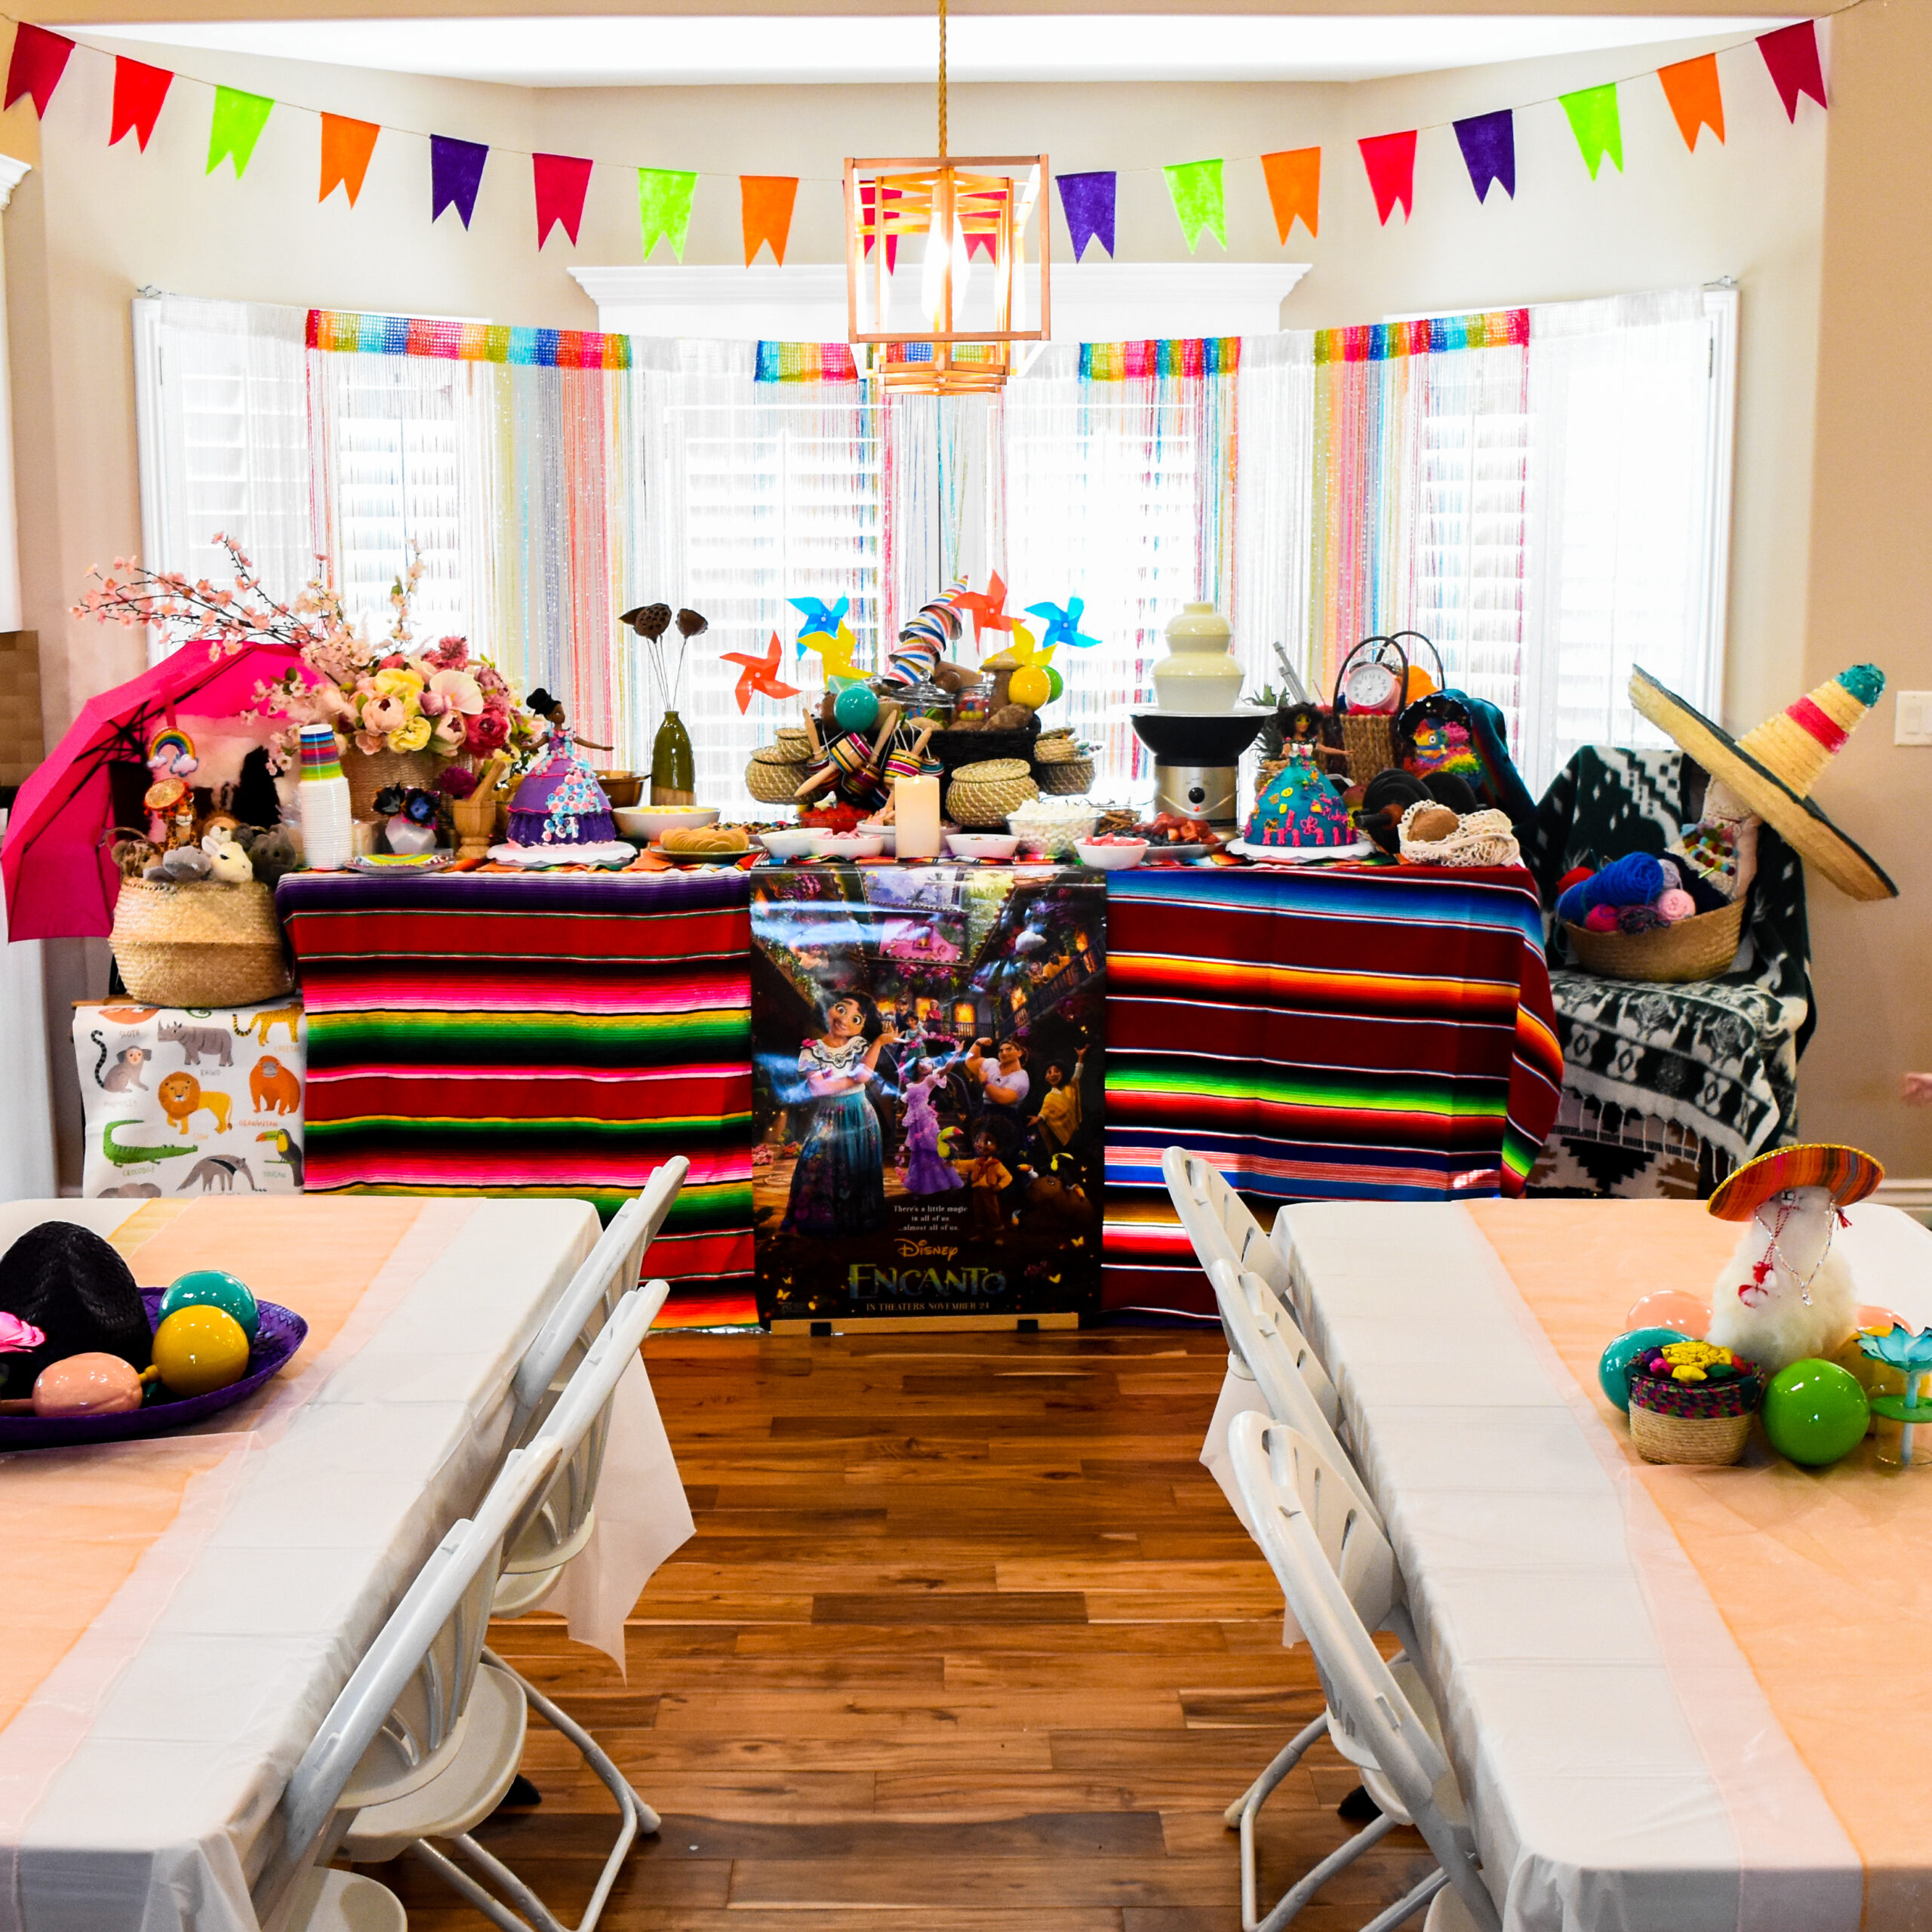
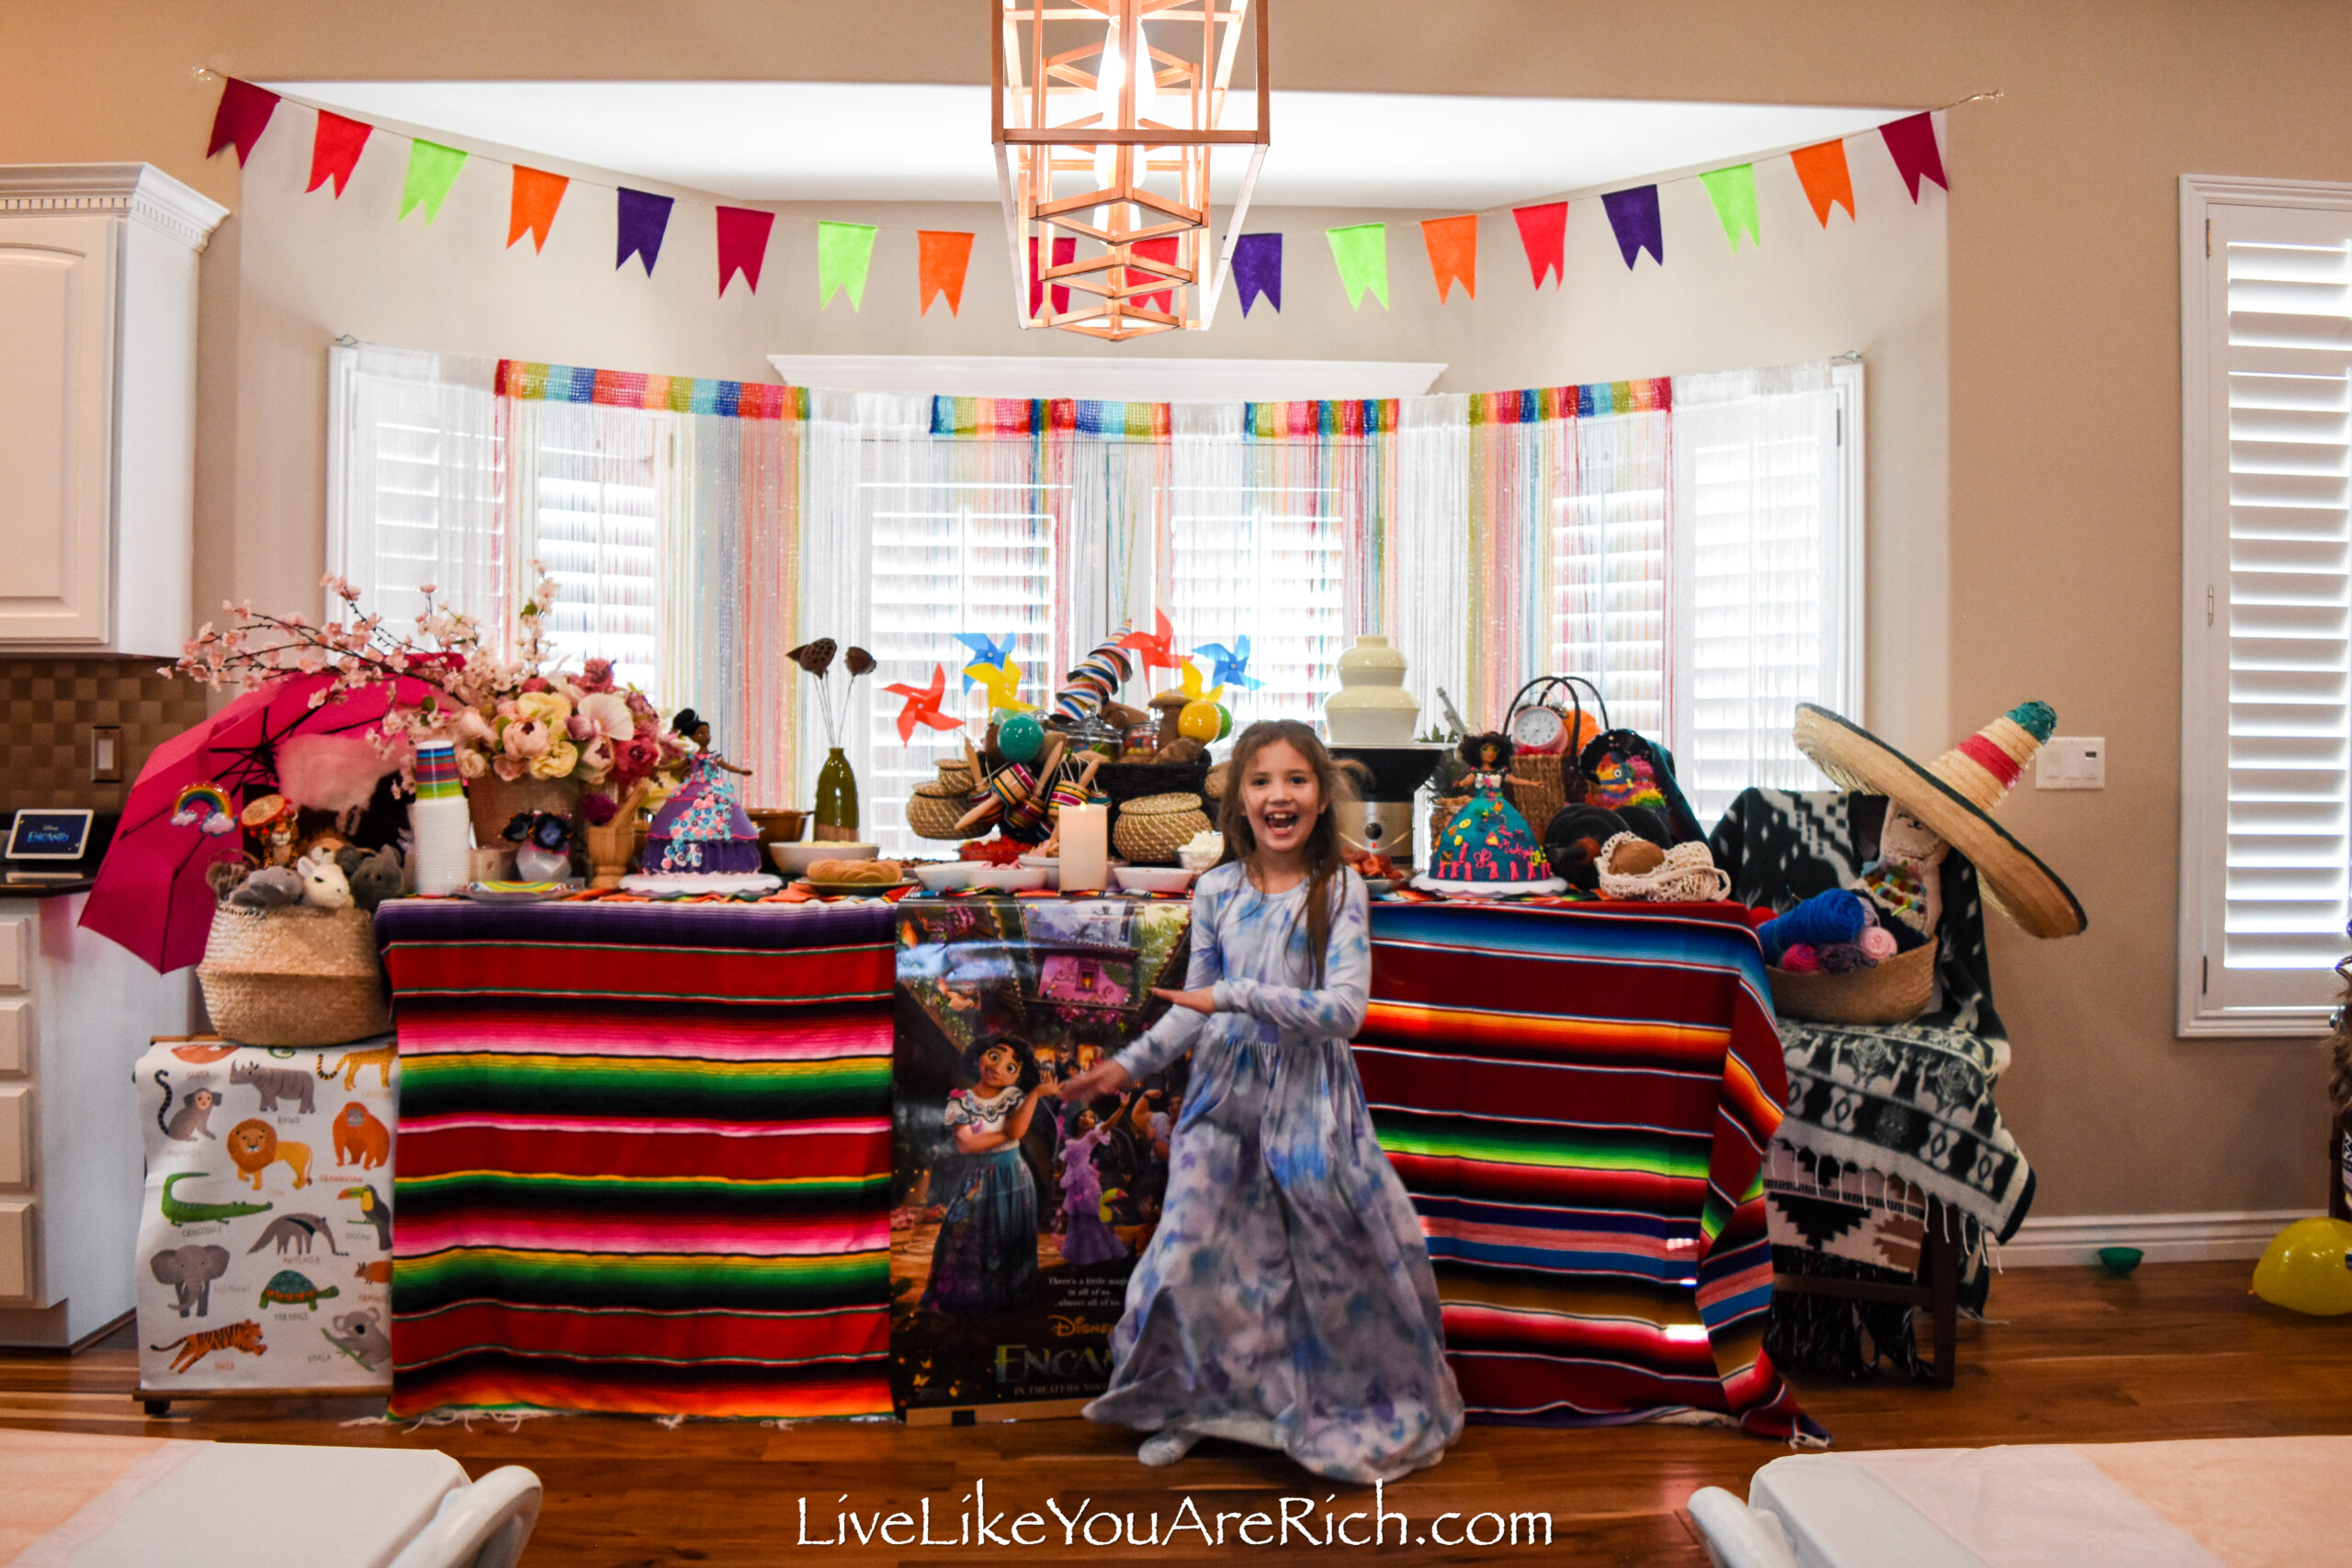
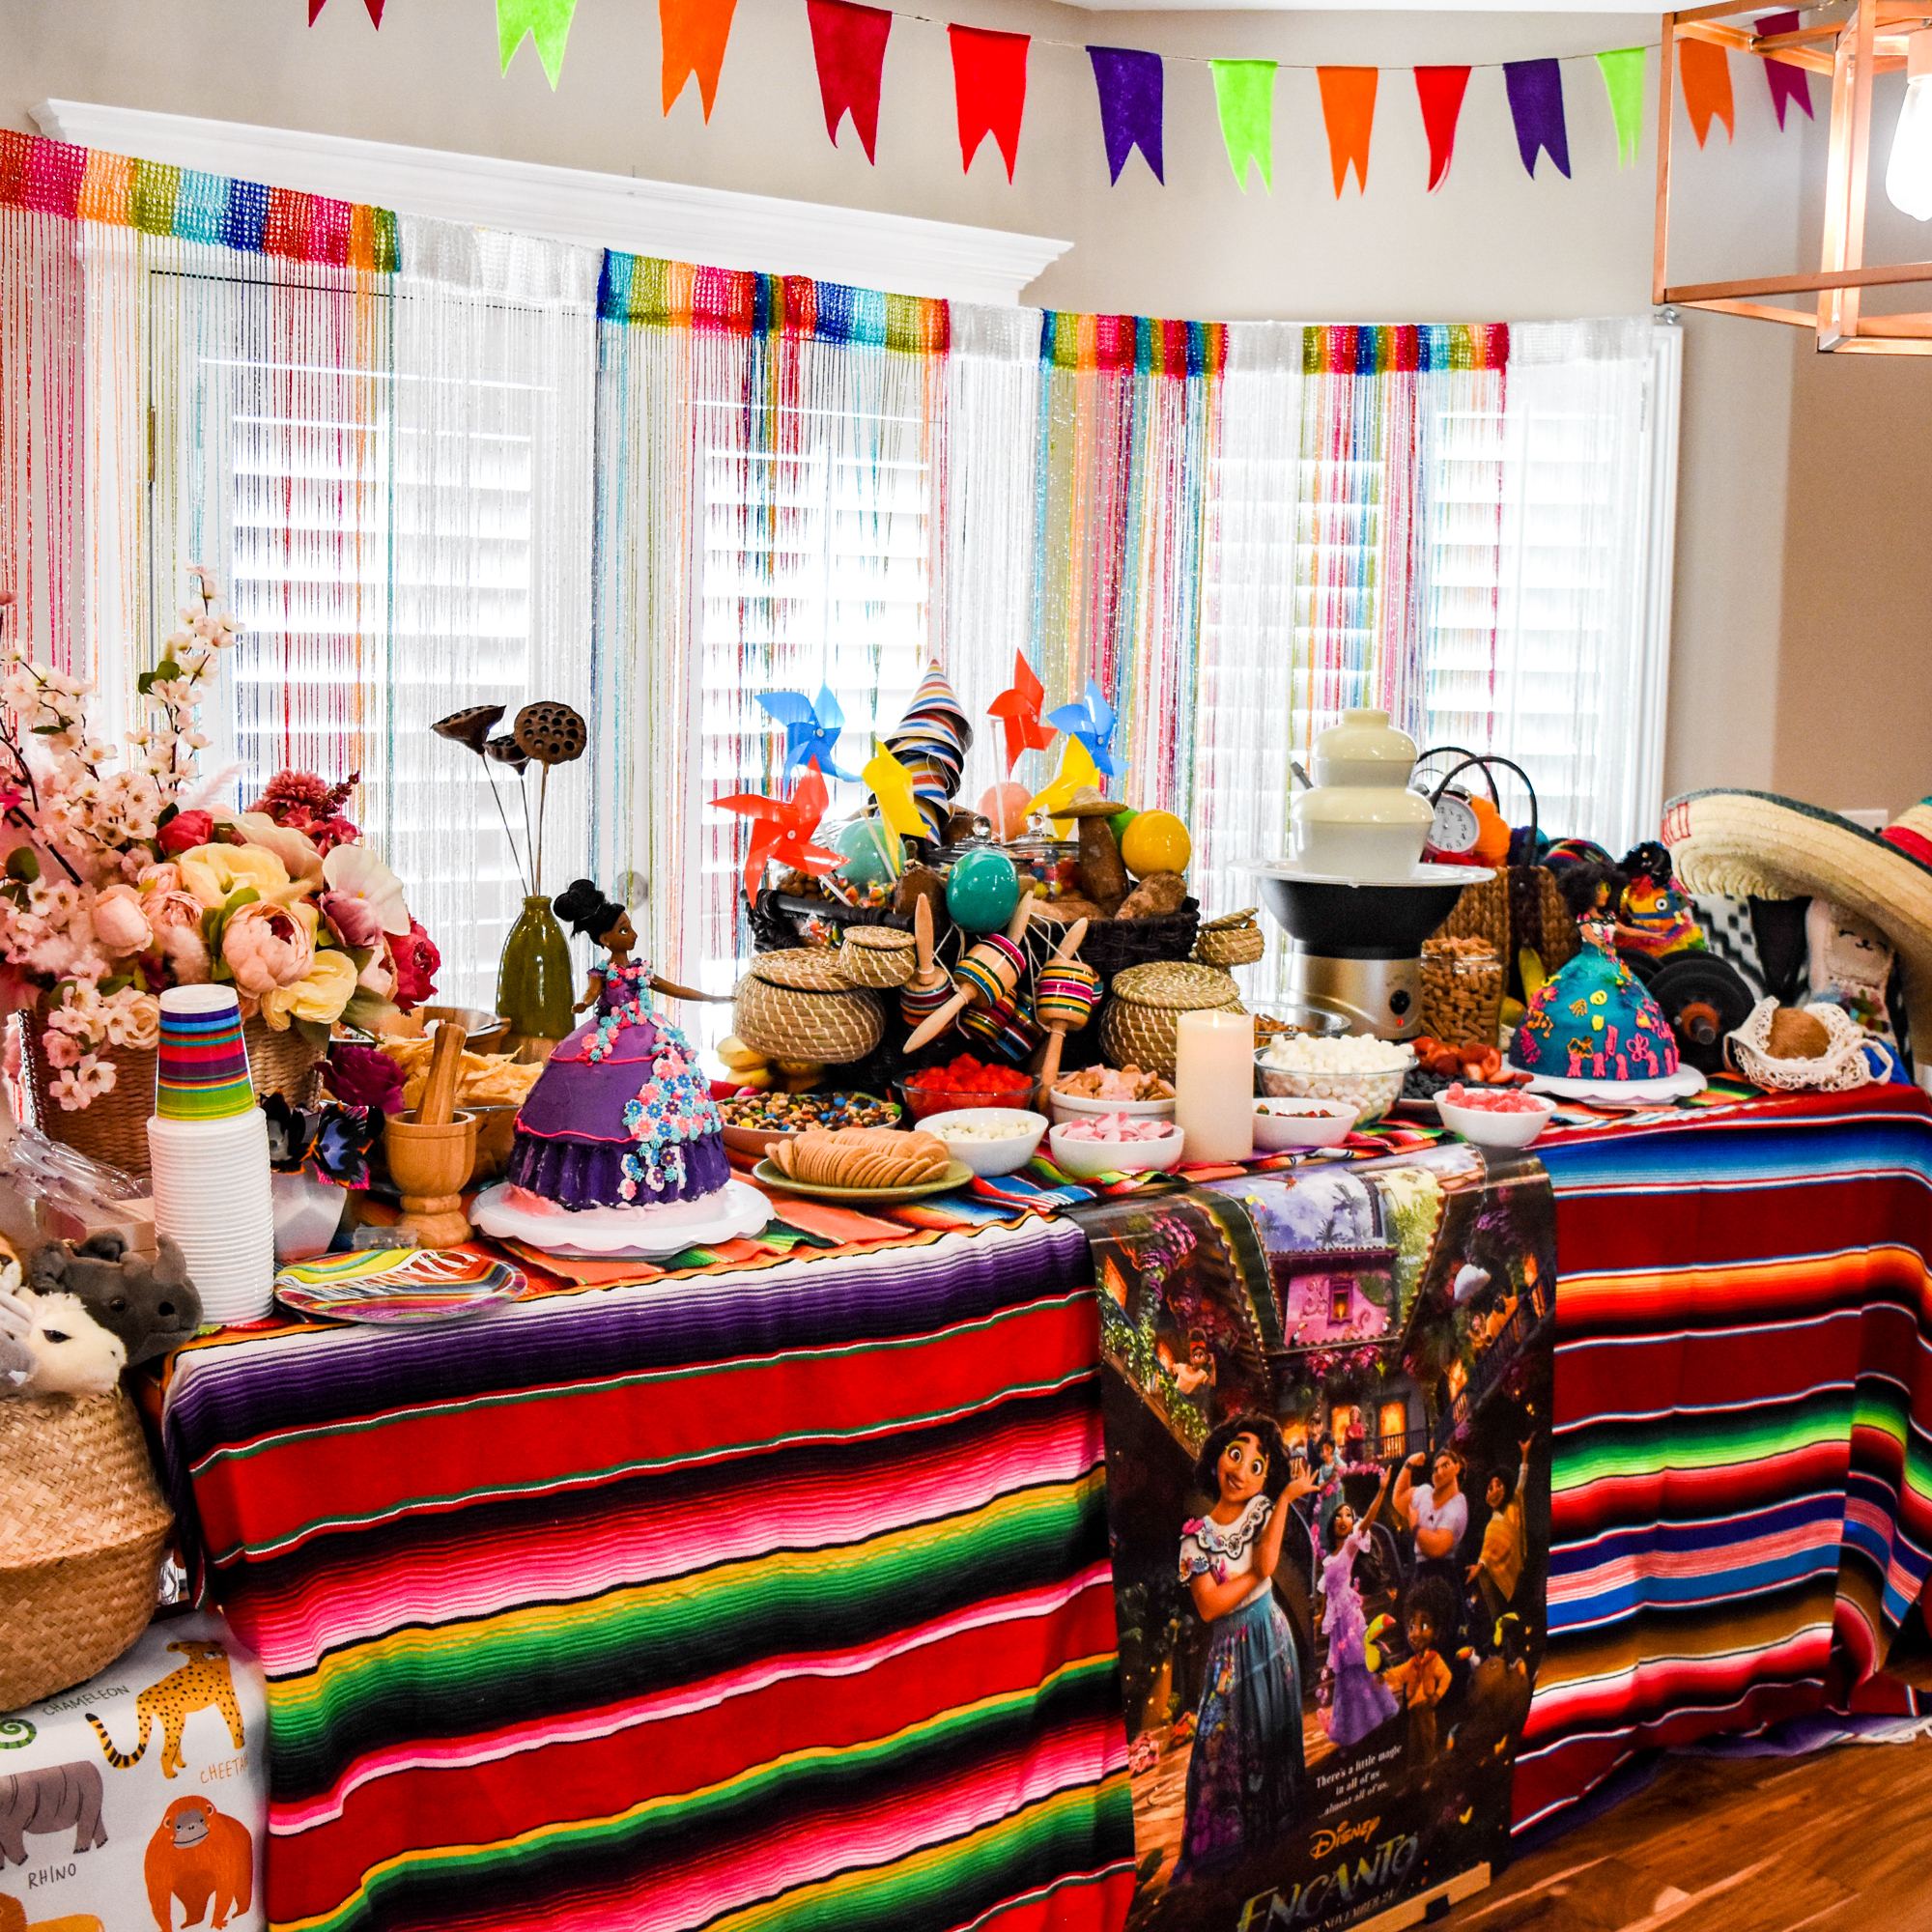
A while ago, I threw an Encanto birthday party for my daughter.
I posted a tutorial of how I made the Mirabel Barbie cake around that time and never did get around to posting about how I made this Isabela cake.
Today, I’m finally getting around to it. Both cakes are made using the Barbie cake mold.

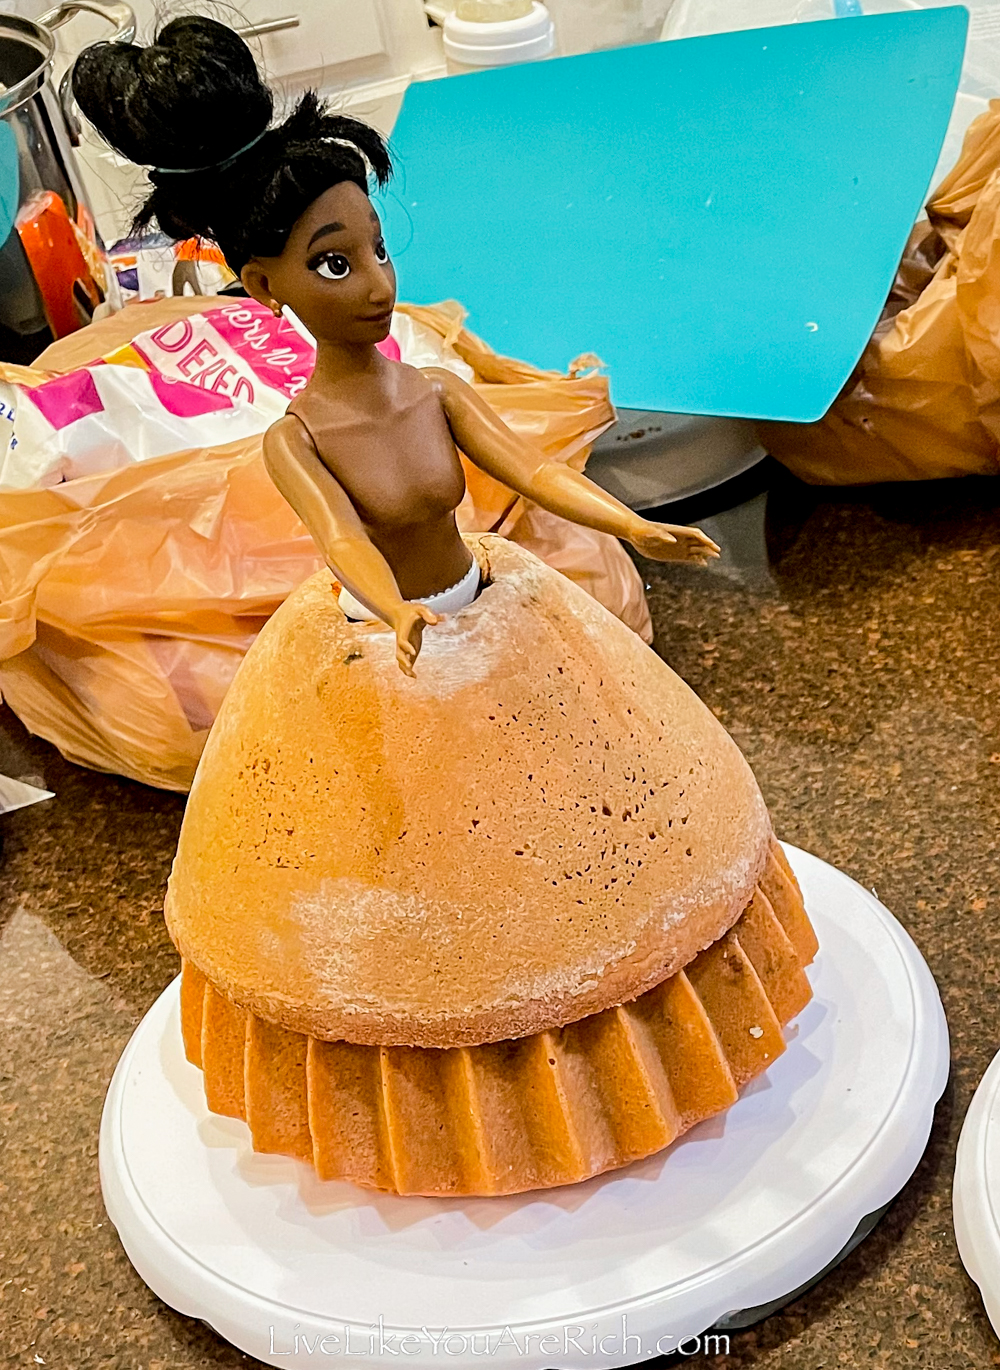
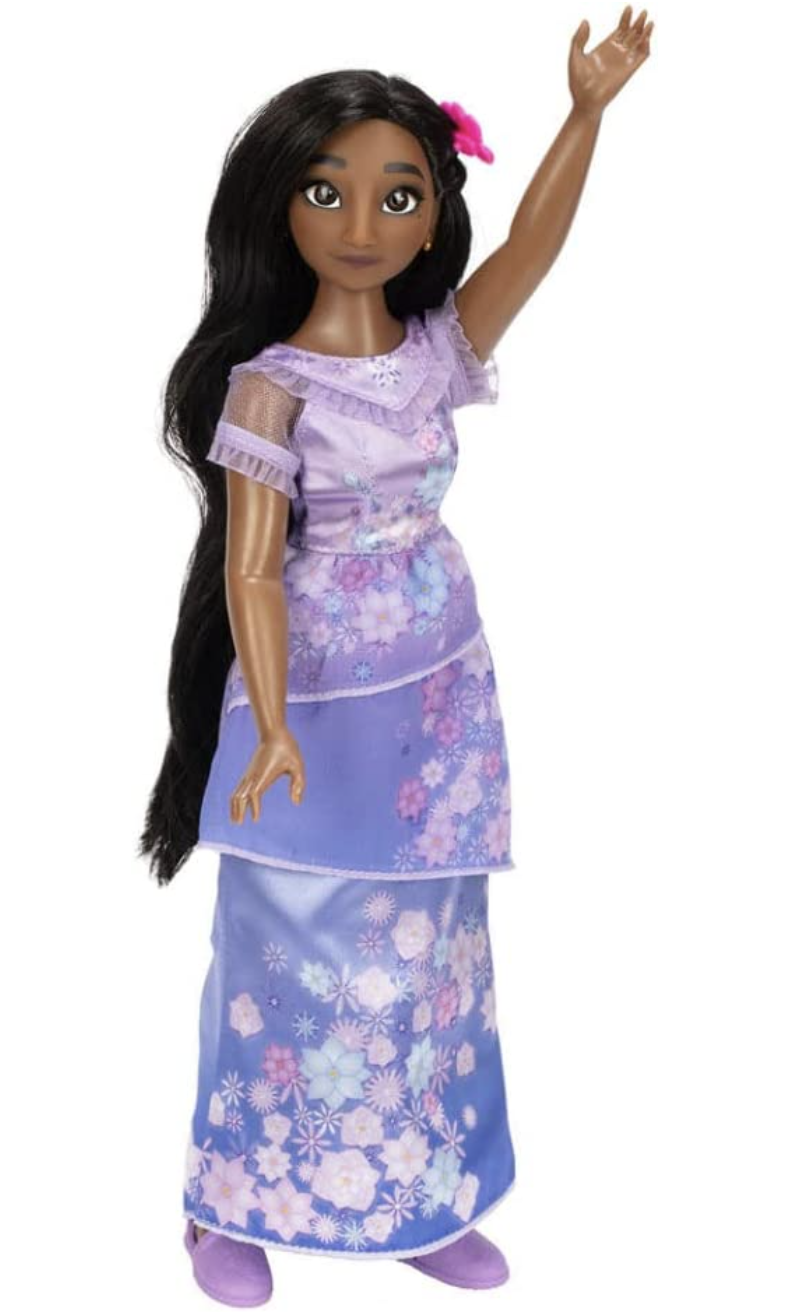
However, the official Disney Isabela doll is taller than the Mirabel doll so I needed to bake more than one cake mold and stack them in order to fit Isabela in a cake.
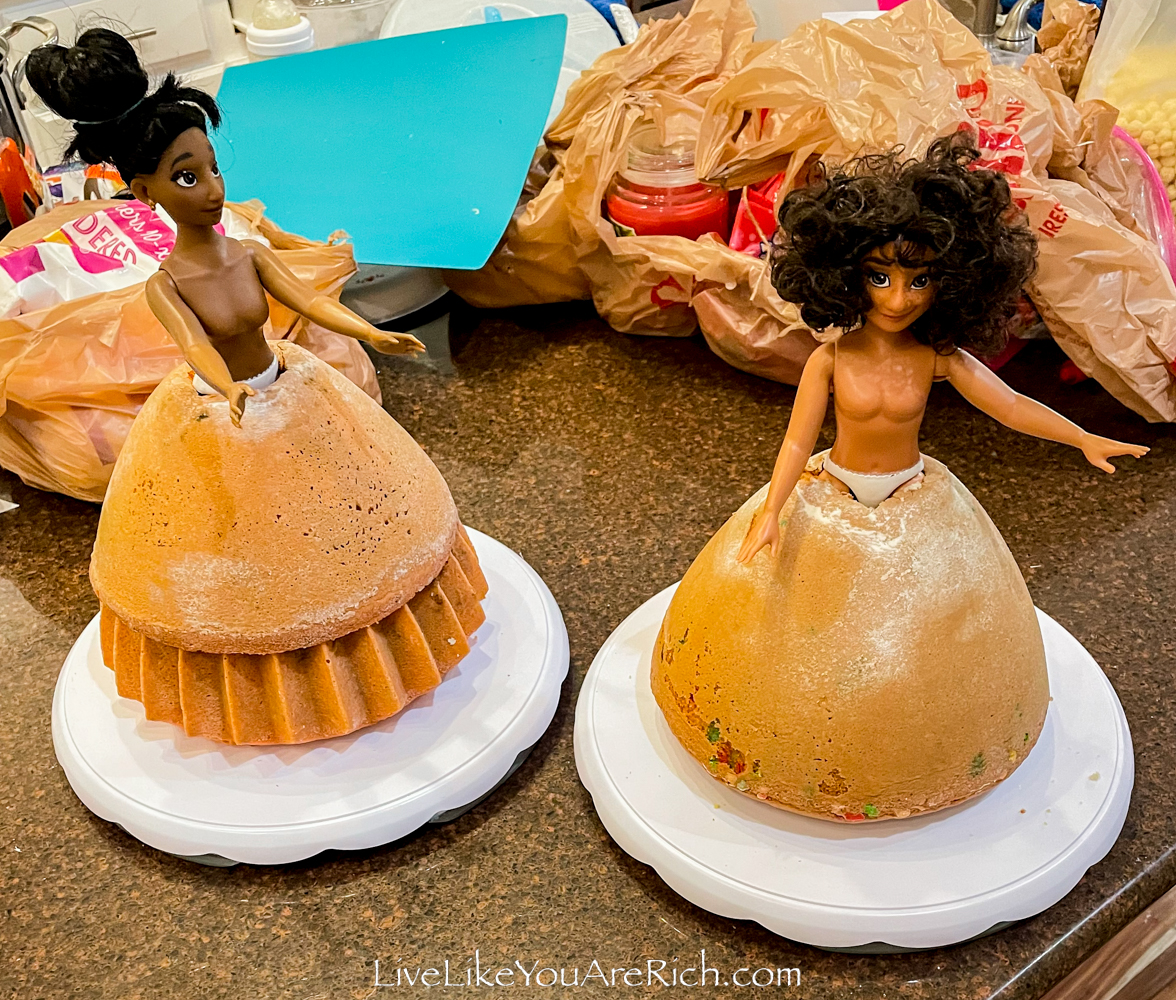
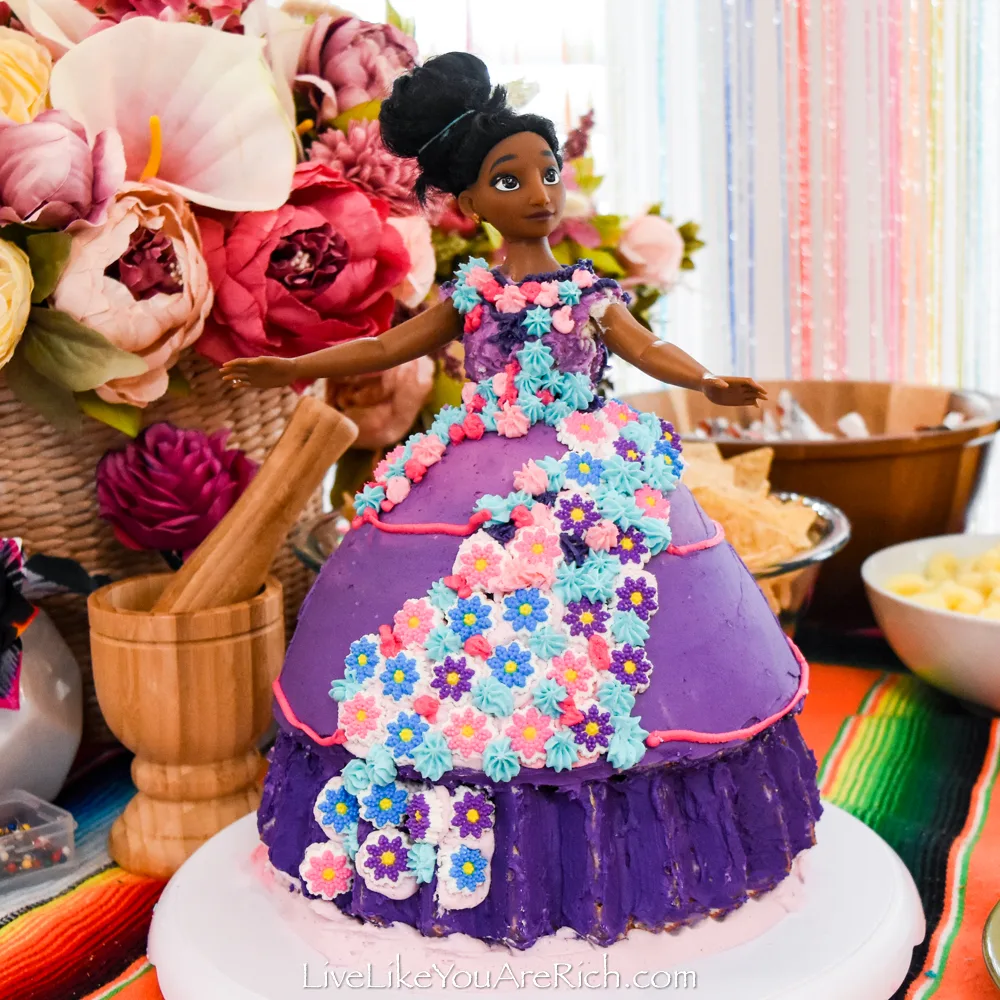
So, I used a bundt cake underneath the Barbie mold cake. It gave her more height and it looked like ruffles on the bottom of her dress.

The girls who came to the party LOVED these cakes and since they were pretty easy to do and they only cost a few dollars each—I had the dolls and cake pans, I loved them as well.

I’d highly recommend baking and decorating Barbie cakes for an Encanto party.
Supply List for an Isabela Encanto Barbie Cake
Barbie cake pan (Wilton Wonder Mold Doll Shaped Cake Pan Set)
French Wreath bundt pan or a bundt design that will look like a ruffle of a skirt
small flower piping tips. I only had the basic and the star tips so that is all I used.
3 cake mixes and ingredients to mix them (usually they require eggs, oil, and water). OR for a better cake base, you can try this amazing vanilla cake recipe and double it. Put ~2/3rds of the doubled recipe in the Barbie cake mold and ~1/3rd in the bundt cake form.
frosting recipe here + milk. I mixed up 1 batch of this Best vanilla bean frosting recipe and set ~3/4ths of it to the side. Then I mixed an additional 2 Tablespoons of milk into the recipe and then a little more to get a crumb coat consistency for the crumb coat. A tip is to add a little less milk than you think you need and then increase the milk in small increments until you get a thinner frosting but one that is thick enough to stay on a spatula when you hold it upside down.
Food coloring. For purple shades of food coloring. I used Wilton and Kroger brands. I also used pink and blue food coloring to get light and dark pink and a light blue shade as well.
edible icing flowers (I used Wilton icing flowers because that is what I could find at the store). I’d highly recommend using the prettier ones that I linked to on Amazon though.
bowls and spoons for mixing icing
Instructions on how to make an Isabela Encanto Barbie Cake
Continue reading and/or watch the video tutorial here.
1- Preheat oven to 350°F.
2- Clean, spray, and flour a Barbie doll mold pan and a French wreath bundt cake pan (or any bundt pan that may look like a ruffle at the bottom of a dress).


3- Mix 2 cake mixes (about 6 Cups of a mixed batter) and pour it into the Barbie cake pan. If you want a colorful cake, you can choose the color by starting with a white base and using food coloring to get to the color you desire. You can see on this just add magic cake how I baked different colored layers of cake.

4- Bake one cake at a time. The Barbie cake will need to be baked for about 70 minutes. Begin checking at 60 minutes and take out of the oven once a long thin skewer or toothpick pushed down far comes out clean.
5- Mix another cake mix and pour it into the bundt cake pan. Bake for instructed time on the box mix for a bundt pan or follow the baking instructions for whichever cake recipe you are following. Set cakes on a cooling rake (while in the pan) and wait until both cakes cool completely.
6- Mix the frosting recipe up. I mixed up 1 batch of this Best vanilla bean frosting recipe and set 3/4ths of it to the side. Then I mixed an additional 2 Tablespoons of milk into the recipe and then a little more to get a crumb coat consistency for the crumb coat. A tip is to add a little less milk than you think you need and then increase the milk in small increments until you get a thinner frosting but one that is thick enough to stay on a spatula when you hold it upside down.
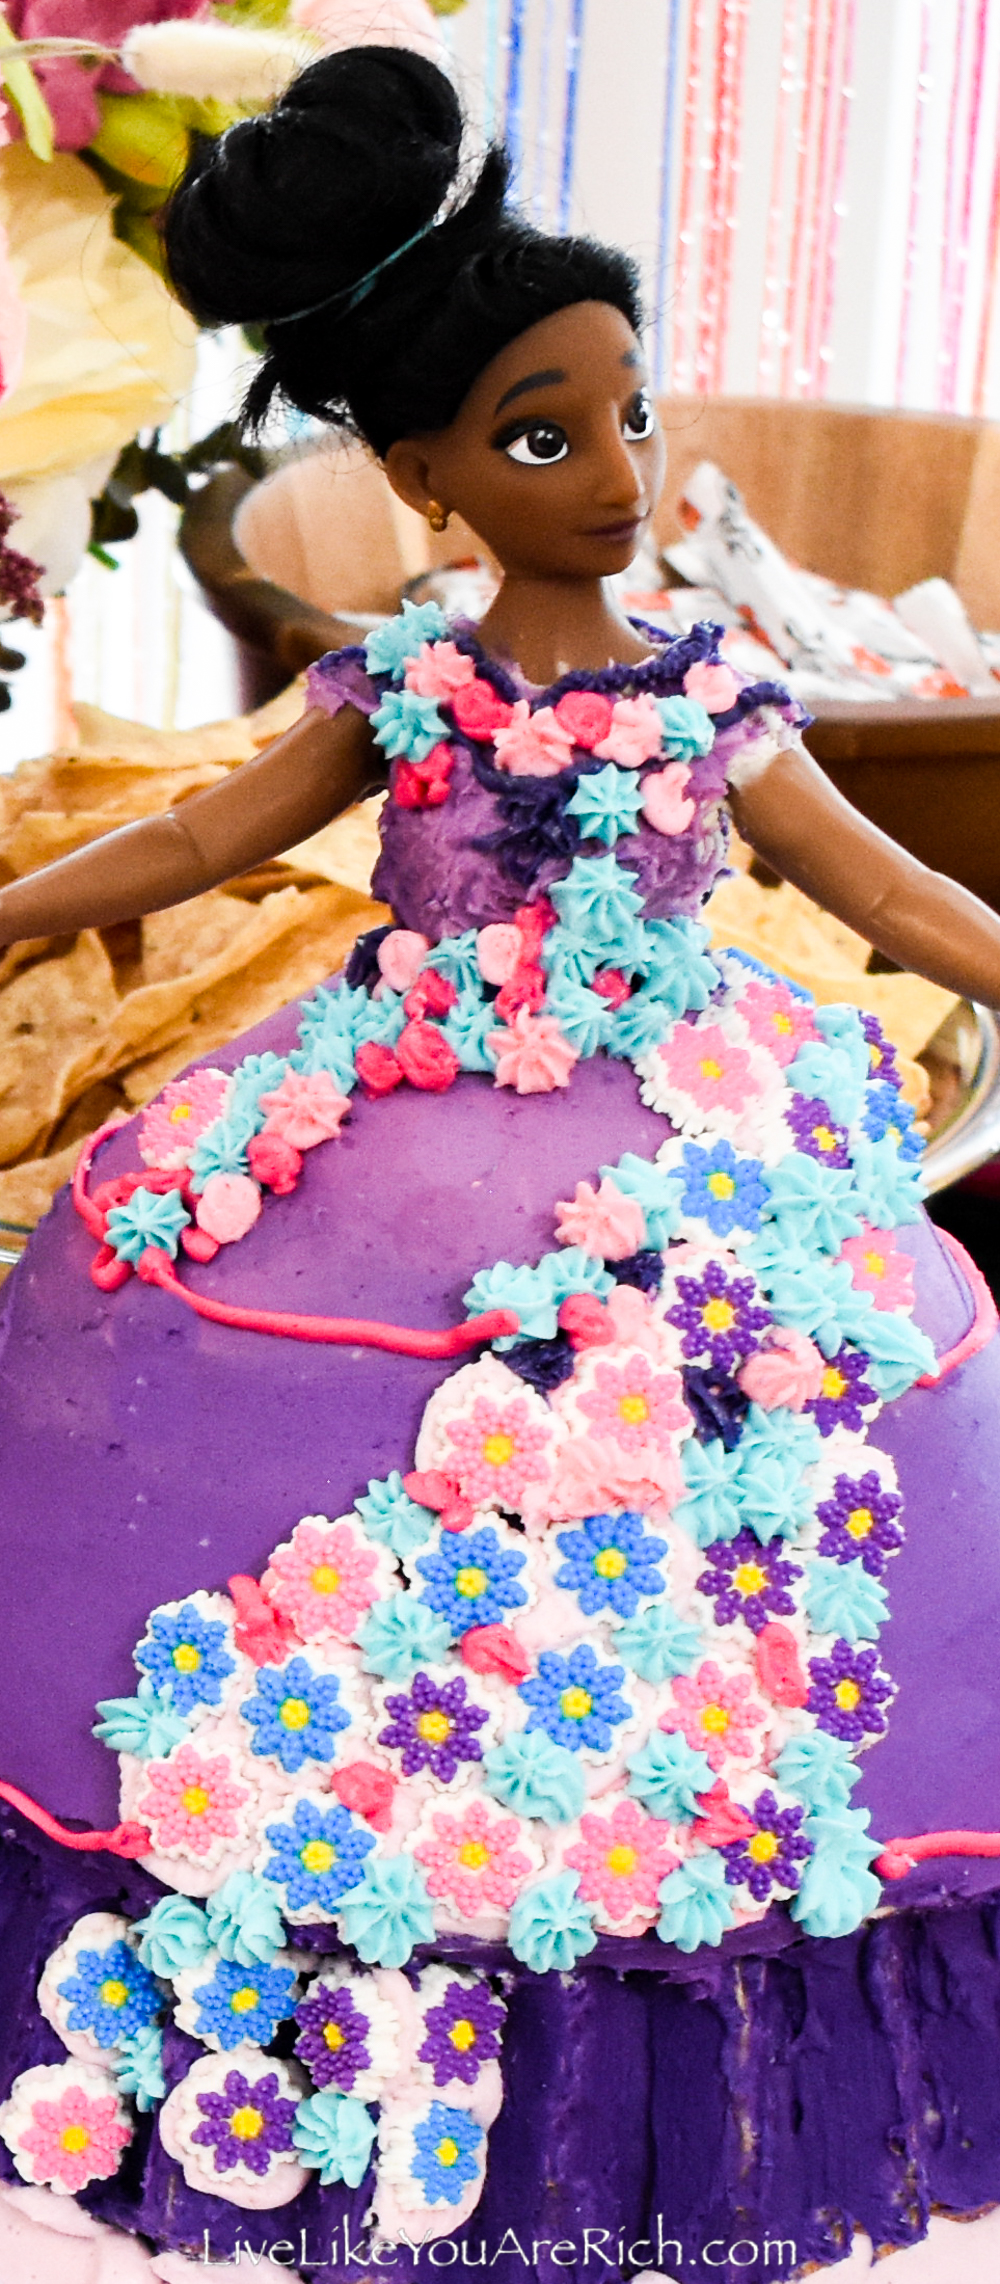
7- Put a little frosting onto the cake table to hold the cake in place. Optional-level off the bundt cake so it sits flat on the cake stand. I did not level it off and so I used icing to fill the gap around the edges (see #17). Turn the bundt cake onto the cake stand and then carefully stack the Barbie mold cake on top, then place the Isabela doll/barbie inside. Use a hairband to secure Isabela’s hair in a bun or top knot to keep it from getting icing on it.
8- Spread the crumb coat on Isabela’s body, upper arms, and the cake. Let the crumb coat set for about 15 minutes and then smooth out bumps and bubbles with an icing spatula or straight edge.
9- Place the cake in the fridge for at least a few hours for the crumb coat to harden. Cover the remainder of the unused icing so that it remains soft but do not refrigerate or it will harden. If you have crumb coat icing left over, you can mix that into the regular icing using a mixer on slow speed. Cover until ready to use.
10- When ready to use, mix up the different frosting colors. Color 1/2 of the frosting you have left into a light purple. (You will add purple and maybe dark blue to darken this as you ice the cake).
You will want to divide the rest of the frosting into three remaining colors: light pink (you’ll need a little more of this color than the other two), you’ll also want dark pink and light blue.
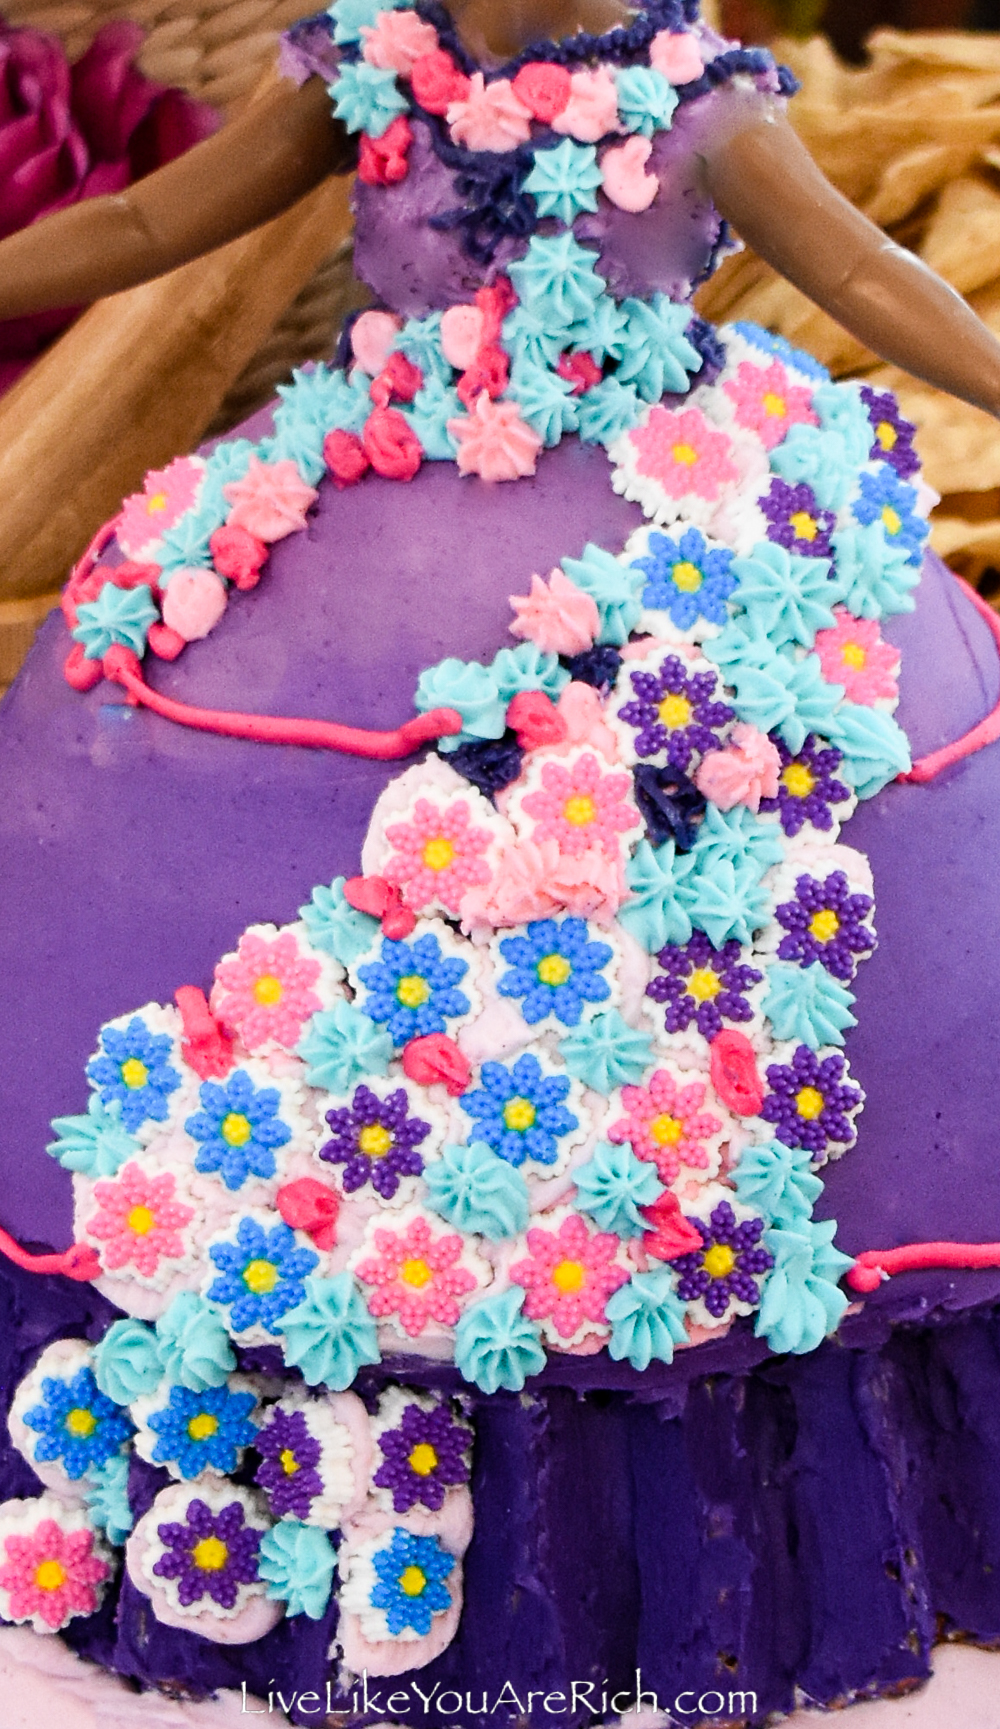
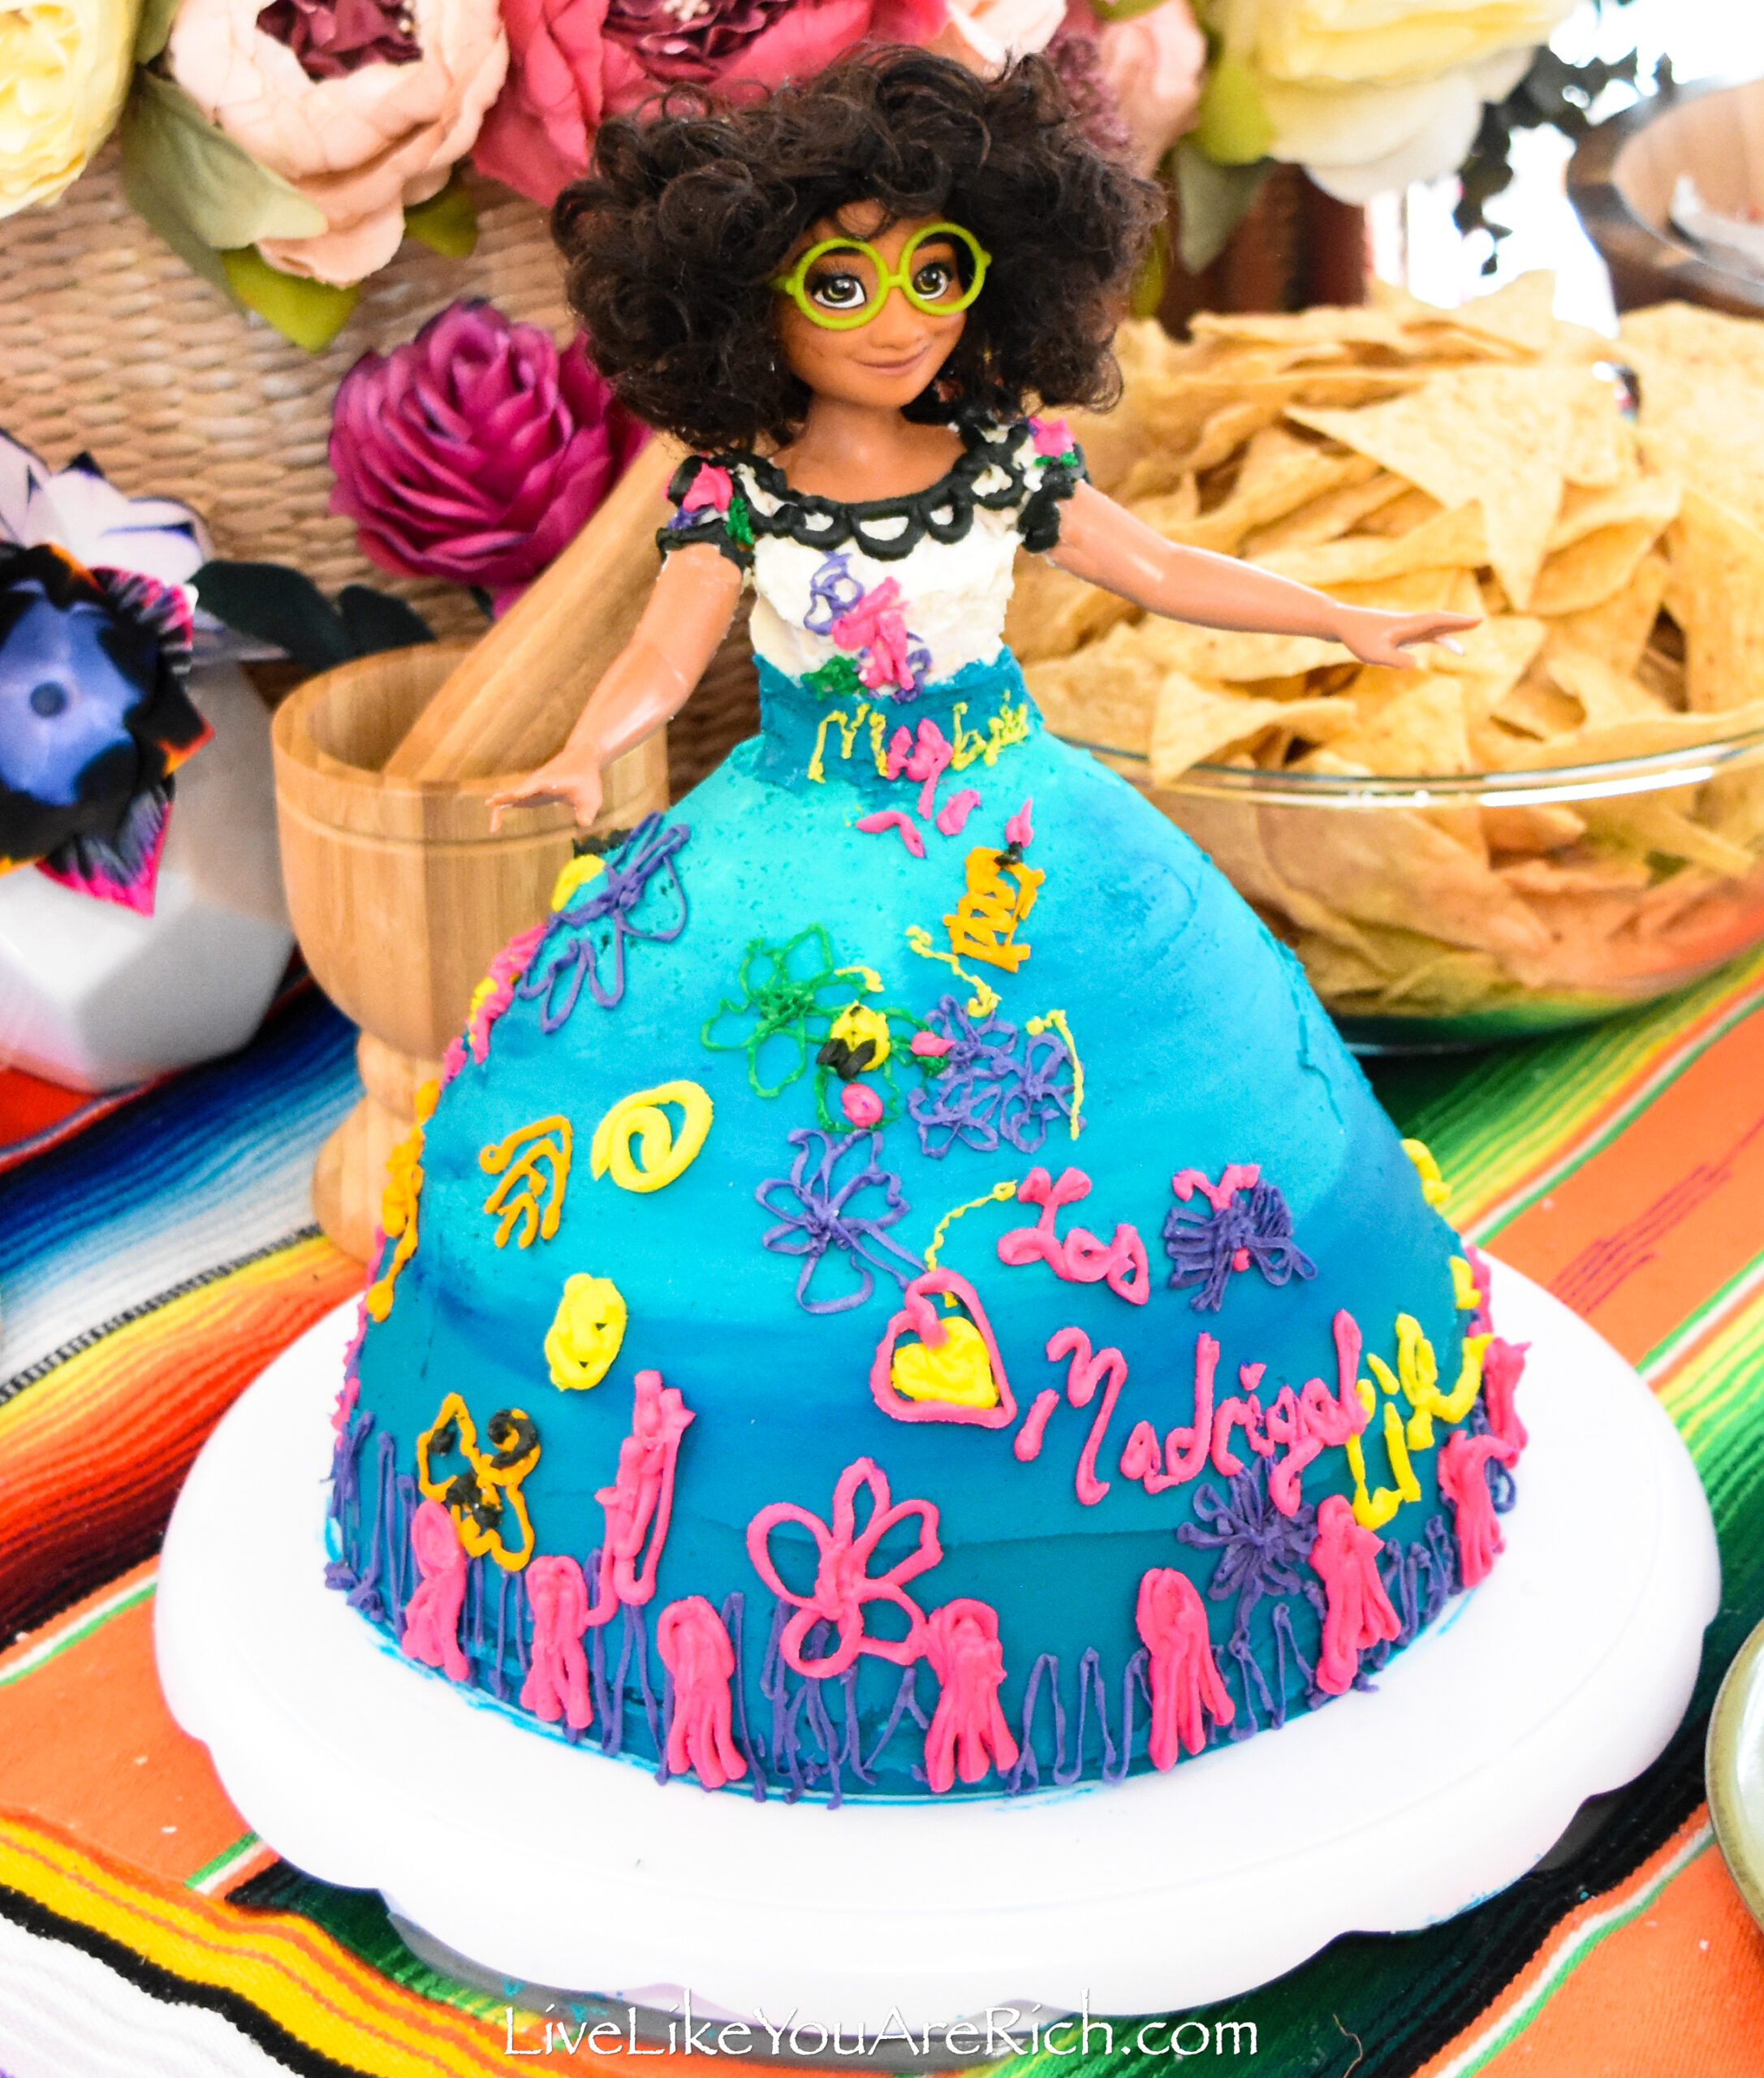
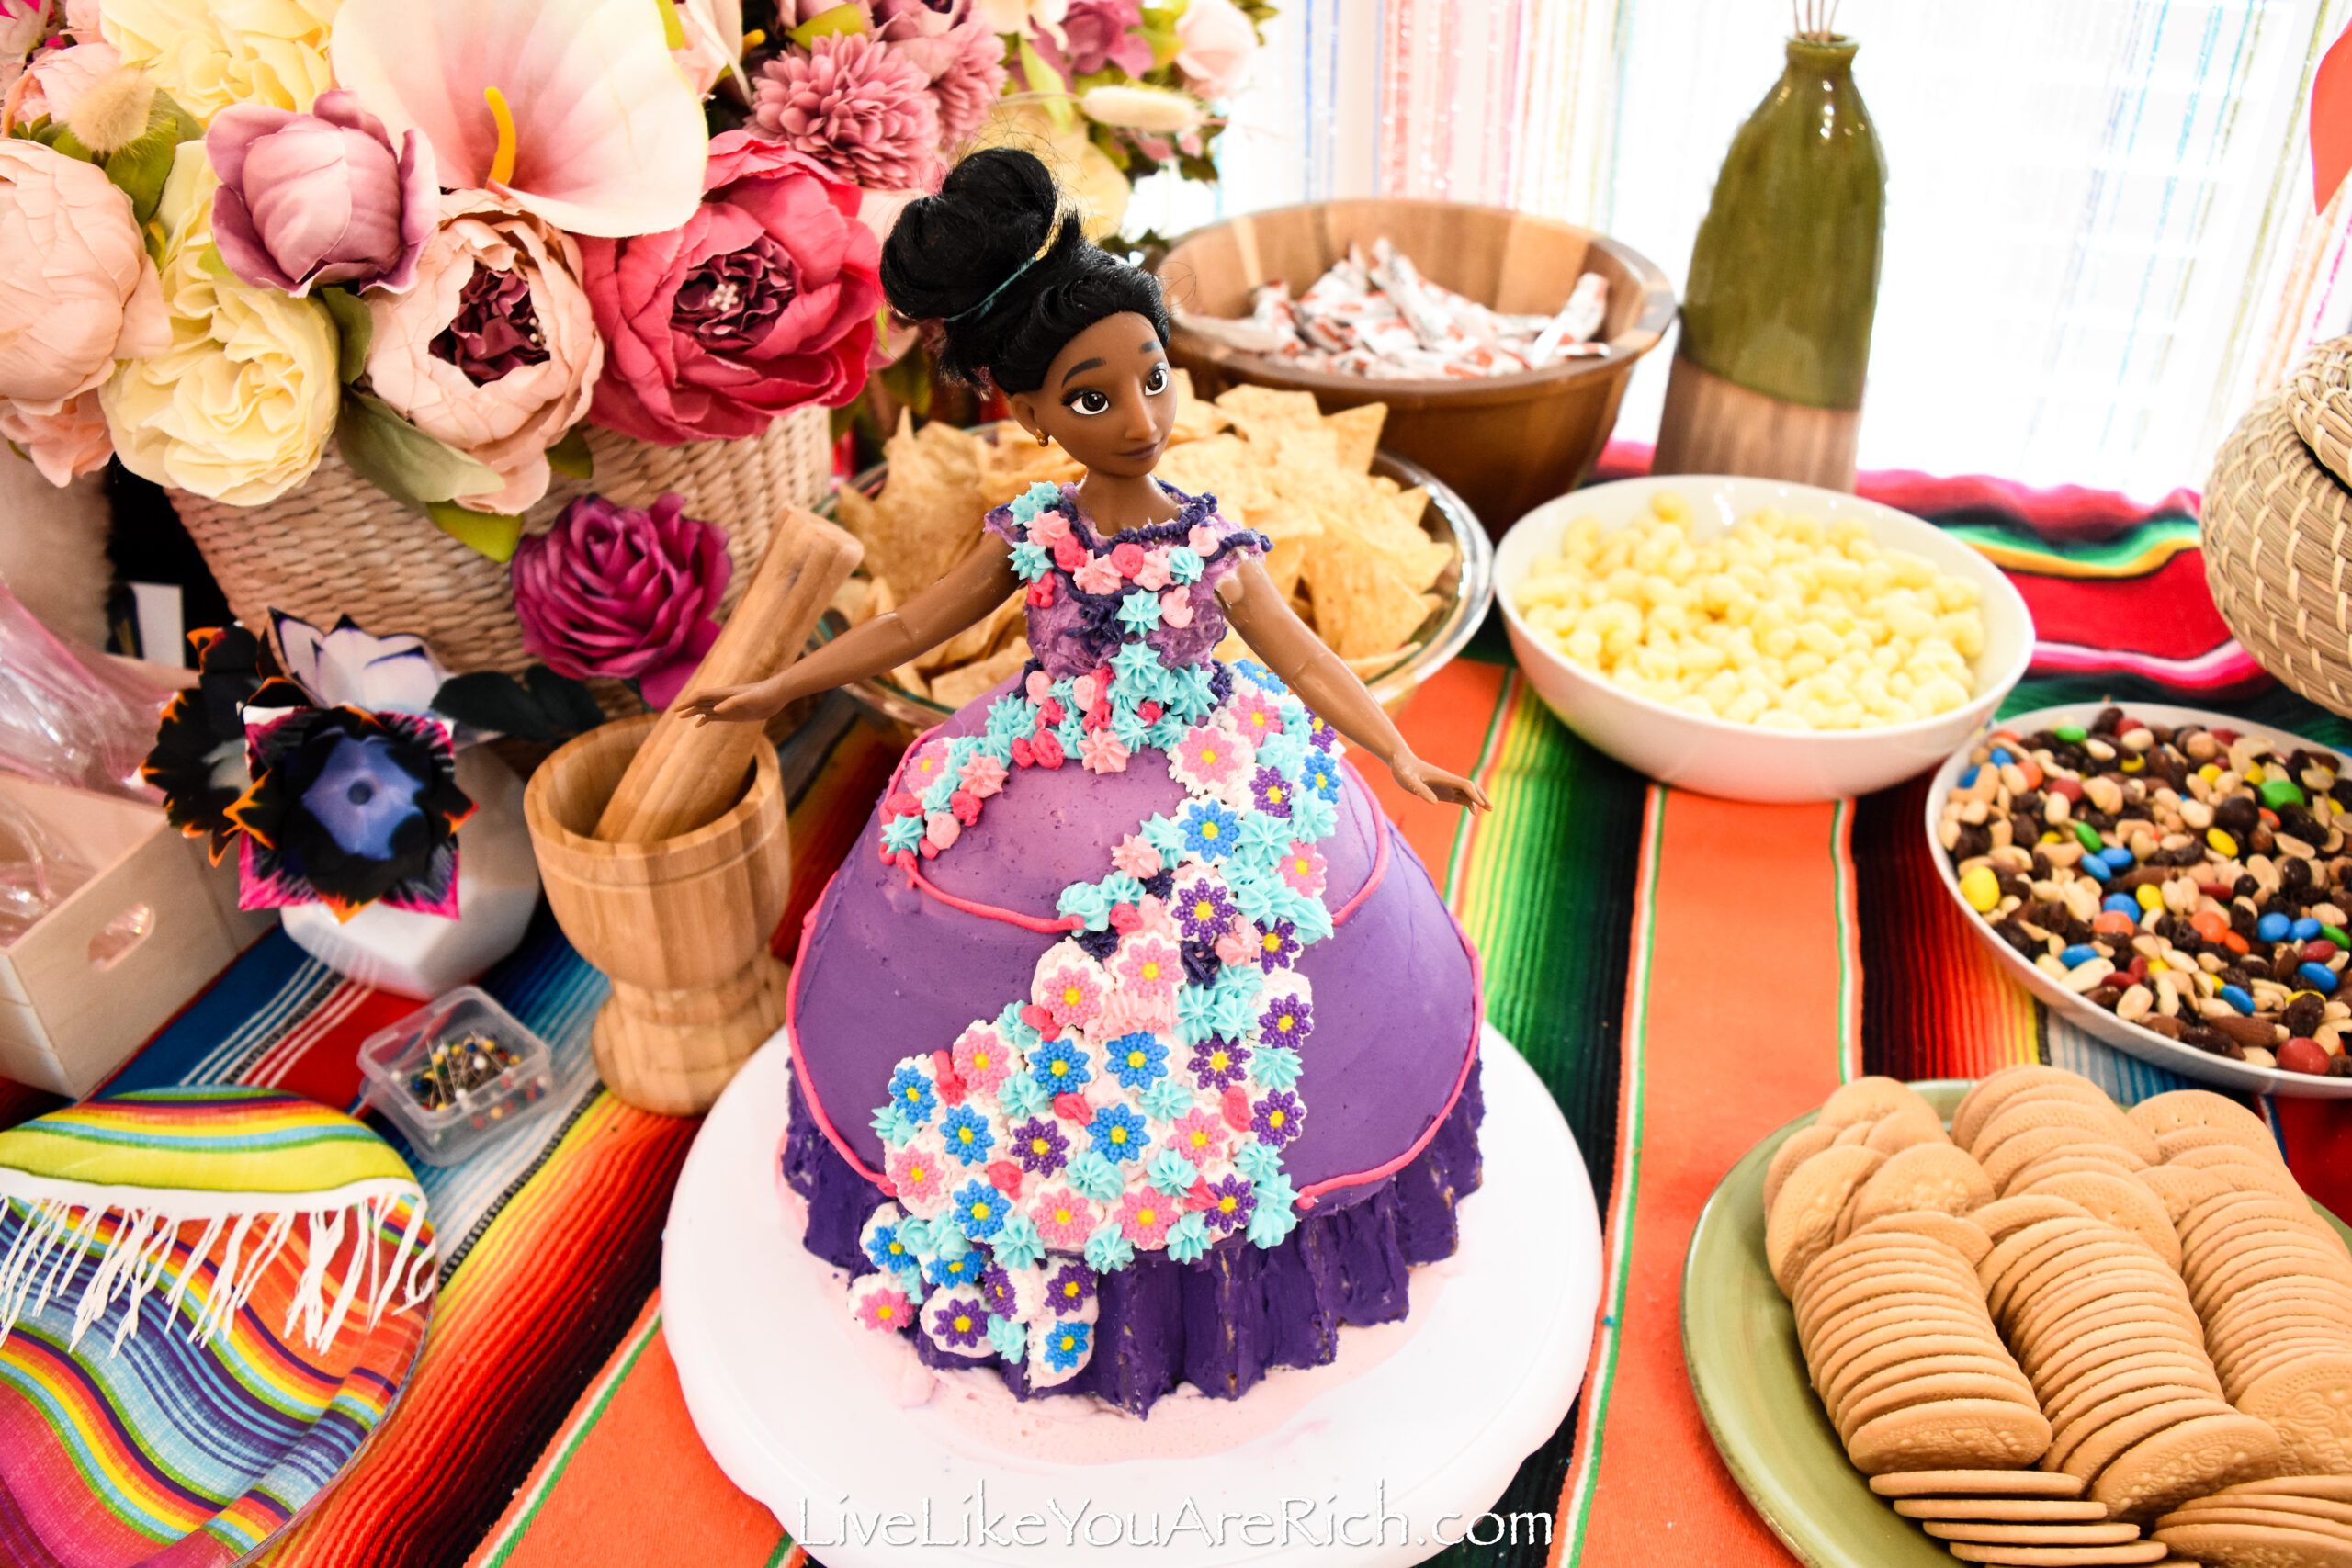
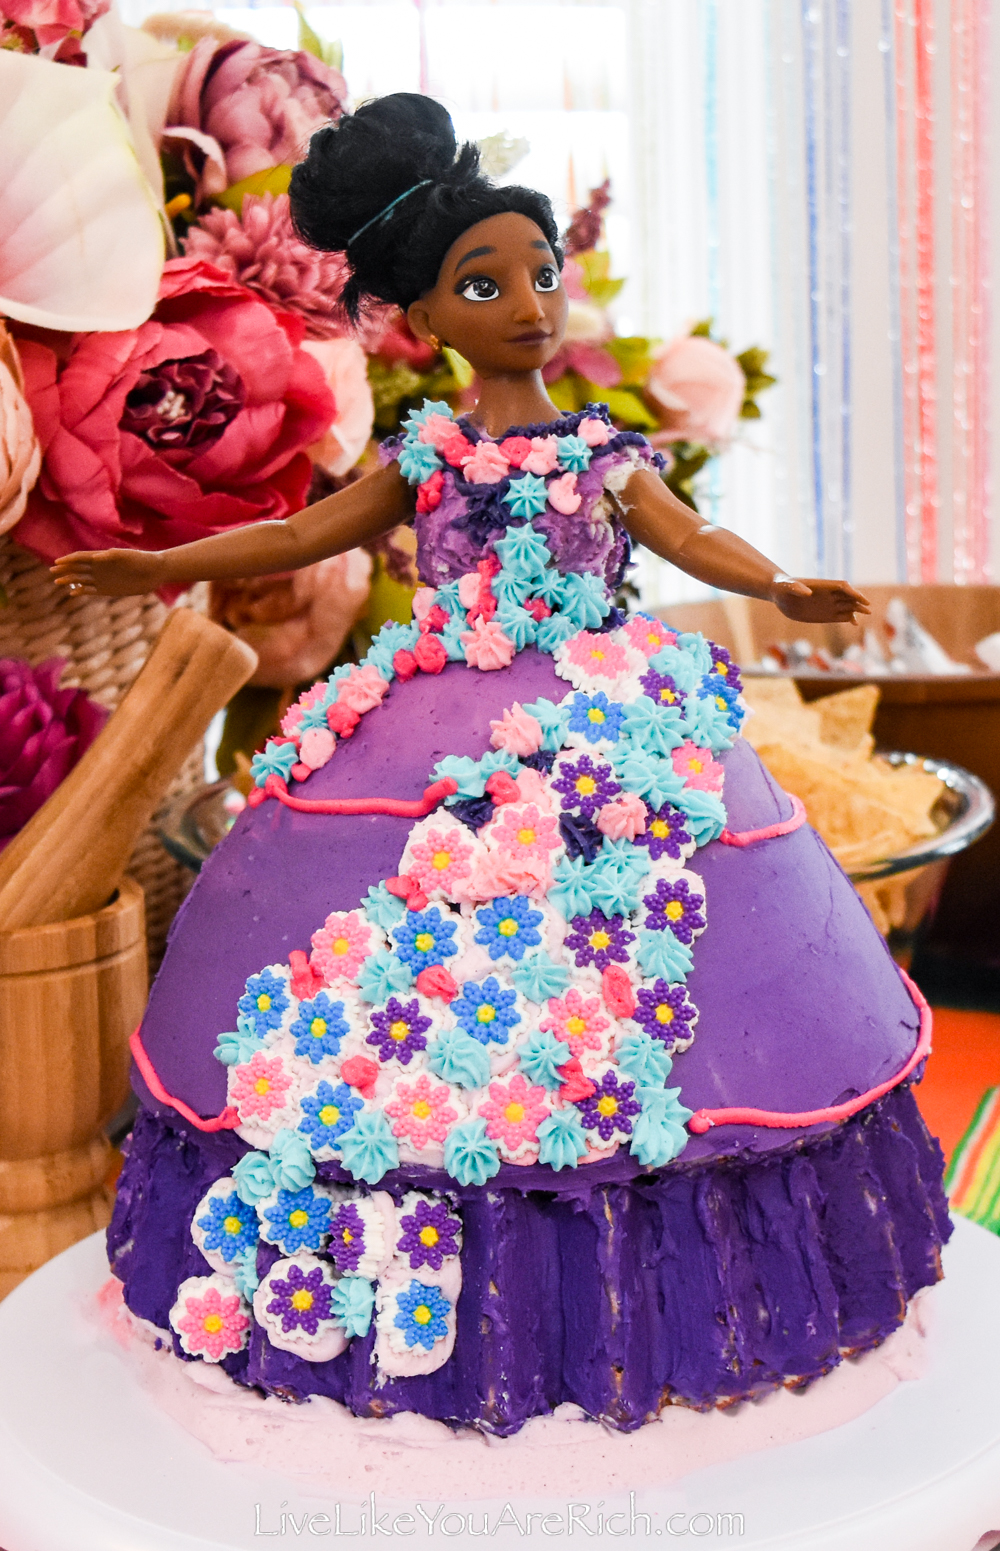
11- Using an icing spatula, ice the top of Isabela’s body and the top of her dress light purple. Then add more purple coloring to the icing to darken it and ice the middle part of her dress. Add more purple and blue coloring to the icing to darken it further, frost the bottom of her dress. Add more purple and blue to the icing (fourth time) to darken it and frost the ruffles (bundt can part of her dress).
Look at her dress as you color and frost to get the right coloring but don’t worry too much if the coloring isn’t perfect. As you can see the Disney recreation of her dress is a bit more blue than in the movie. Just get an ombre effect of whatever color you are using and it will be good enough!

12- Smooth and smooth the frosting on the dress until you have a nice smooth surface. Use an icing spatula or straight edge to do this. This will give it a nice ombre look and a great base to add the flowers to.
13- Add light pink as the base of the edible icing flowers and place icing flowers all around the edges of her dress following a similar pattern as you see in her dress.
Again, I wish I had ordered prettier-looking icing flowers but I decided to do an Isabela cake last minute and could only get the Wilton icing flowers locally at such short notice.
14- Using piping bags and a few icing tips (star tips and regular straight tips or what I had) add some light blue icing, dark and light pink to create small flowers in the midst of the premade icing flowers.
I wished I had bought prettier flower icing tips to do this.
15- Add some details to the bodice/top of her dress using the remainder of the darkest purple/blue you have.
16- Add a few horizontal lines in pink or whatever color you have left over to show the various layers of her dress.
17- I had extra pink frosting and the ruffle of her dress was hard to ice. So, I added the pink frosting to the bottom of her dress as a base. To avoid this from happening, you can cut the top of the bundt cake level and place it down flat on the cake stand if desired.

18- Clean up the cake turn stand and put the cake back in the fridge to set/cool.
19- Remove the cake at least an hour before you want to serve it.
If you want, you can place a candle(s) around her hip area angeled away from the doll to sing and blow out candles.
If desired you can remove the doll before cutting into the cake, or you can leave her in and cut from the edges towards the center and remove her if needed—both work. I just left the dolls in their cakes and cut slices of cake from the edges. I did this because the dolls were in their undies and the party was for young girls that probably would have laughed had I removed them.
Enjoy your Isabel Encanto Barbie Cake!
CHECK OUT MY OTHER ENCANTO POSTS:
Free Encanto Birthday Party Invitation
La Casita Encanto Party Banner
Disney Encanto’s Birthday Party
Encanto Personalized Gifts for Party Attendees—Free Downloads
Encanto Colombian Party Hats—Free Printable
What’s in Mirabel’s Basket Encanto
Encanto Birthday Party Activity Ideas


For other ‘rich living tips’ please subscribe, like me on Facebook, and follow me on Pinterest and Instagram.